Jump to content
  • Welcome to the eG Forums, a service of the eGullet Society for Culinary Arts & Letters. The Society is a 501(c)3 not-for-profit organization dedicated to the advancement of the culinary arts. These advertising-free forums are provided free of charge through donations from Society members. Anyone may read the forums, but to post you must create a free account.

ceramic chocolate bowl


Lior

Recommended Posts

Can't you just spin the bowl's top edge on a warmed cookie sheet?  I think that Lisa mentioned it up-thread.

Maybe modifying an old turntable with an LP sized metal platter would work.

I have been molding bowls for many years and almost always include at least one in all of my classes and trade show presentations. I use metal mixing bowls or plastic serving bowls that I find in houseware sections and party shops.

1. Pour tempered chocolate into the bottom of the bowl, swirling it around to cover all but the rim, adding more chocolate if necessary.

2. Holding the bowl in a slightly inverted position over the bowl of tempered chocolate, shake and twist it vigorously to coax the excess to drain back into it. Turn the bowl upright and slap the outside of the bowl to smooth the surface of the chocolate and settle the little that's left in the bottom.

3. For a clean edge, this step is important. Wrap the tip of your index finger in the corner of a slightly damped cloth (I use Handi-Wipes) and clean the excess chocolate off the rim, swiping around the whole rim to define the thickness of the chocolate and form a clean edge.

4. Refrigerate the bowl only until the chocolate is barely dry to the touch--about 5 to 10 minutes. Repeat Steps 1, 2 and 3 to add a second layer. This time the chocolate will swirl more sluggishly because it is being applied over a cool layer of chocolate.

5. Refrigerate until firmly set--about 20 minutes. To test it's readiness to release, touch the bottom of the bowl (where the chocolate is thicker than the sides) with the back of your fingers. It should feel cold. Often you can see a separation along the rim where the chocolate has contracted.

6. To release, hold the sides of the mold with both hands, with your thumbs bracing the bottom and your fingers curled over the edge. Invert it over the work surface, pressing the bottom gently with both thumbs, if necessary. If it doesn't release easily, don't force it. Refrigerate a few more minutes and try again.

Now the fun begins. I often decorate the sides with cut-out pieces of chocolate clay, chocolate leaves, or piped designs. An example of one of my bowls with a grape cluster border can be found in my book, The Art of Chocolate.

Good luck and have fun.

Link to comment
Share on other sites

gallery_34671_3115_17094.jpg

gallery_34671_3115_18276.jpg

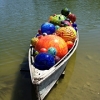
Here is my first experiment. I put rings of colour into the white chocolate, dragged a toothpick through it as the video showed, then pushed a 5 inch balloon into it. I turned the balloon upside down in a container until the chocolate dried. I put a second layer of white, again upside down in the container. Then I did a single dip in dark chocolate and placed it down on parchment. As you can see my first cutting attempt was pathetic - it got a bit better. I just used a paring knife - I warmed it initially, but it didn't really seem necessary.

I think I'd have my white chocolate a little warmer next time around and come up with a good way to drizzle a circle of colour into the chocolate. I suspect putting it into a piping cone would be the best way to go. The result would be more even I suspect.

I think I need to do a couple of dips in the dark chocolate to make that layer thicker. The outside looks a little ratty - but if the white chocolate were warmer, then those layers would be less lumpy.

Link to comment
Share on other sites

Those look amazing, Kerry! I'd hoped to try my hand at bowls, but I didn't have the right balloons. But I was able to make some tulips, and that was really fun. It was much harder than it looked on the video to get the petals the same length. And the white chocolate didn't really turn out as stripes. But for a first attempt, I'm pleased with the results! I started with some with just dark chocolate, and brushed them with some luster dust for shine.

I didn't have any bamboo skewers, so I rigged up a "clothesline."

gallery_7436_3666_363899.jpg

Bouquet of chocolate tulips.

gallery_7436_3666_149708.jpg

Closeup

gallery_7436_3666_366692.jpg

Edited by tammylc (log)

Tammy's Tastings

Creating unique food and drink experiences

eGullet Foodblogs #1 and #2
Dinner for 40

Link to comment
Share on other sites

Those look great Tammy. My one attempt at a tulip today made it straight into the garbage can - leaving a trail of white chocolate drizzles across the floor. It really requires a bigger bowl and holding the balloon just right I realized (too late into the process).

Link to comment
Share on other sites

Kerry! Wonderful!! They look good! Now to figure out on even coating and even rim height!! The colors make it look like a porcelain or ceramic bowl!! Amazing! I went backtosimple and dipped into milk chocolate and made a tulip bowl. It was good. I made a small design at the bottomof one by drawing on the balloon with milk choc mixed with a bitof gold powder. I have to order colors. I have tons of cocoa butter so I thought to order powder. At chefrubber they have different types-what do you recommend?

I also think warming the knifein not necessary. You can slice while the chocoalte is still not totally hardened.

Tammy- those tulips are really nice!! Congrats!!!!

I usually buy the 3 primary colours plus white, and a green - for some reason mixing my own green has been unsatisfactory. A non coloured luster dust allows you to make the shimmery colours from the colours you mix.

Link to comment
Share on other sites

Well while making the bowls I also made His pnut b cups. I used allmilk choco so the color differences are not as obvious but it worked perfectly:

gallery_53591_4944_20905.jpg

a peeled view:

gallery_53591_4944_11415.jpg

the bowl-nothin' special - a gentle decoration in the inside -but wanted to document anyway!!

gallery_53591_4944_117767.jpg

Kerry-thanks! So to sum up to make sure I get it right:

Regular powdered colors- red, blue, yellow, white, green and a neutral luster dust.

Thanks!!!!

Link to comment
Share on other sites

Kerry-thanks! So to sum up to make sure I get it right:

Regular powdered colors- red, blue, yellow, white, green and a neutral luster dust.

Thanks!!!!

Those are the ones I start with.

Link to comment
Share on other sites

The challenge now - and what I'd like you guys to keep an eye out for - because my search has been fruitless - are 5 inch pear shaped balloons. I think dipping them nice and deep so the chocolate comes up around the curve will give the best shaped bowl after the excess chocolate is trimmed.

Link to comment
Share on other sites

The challenge now - and what I'd like you guys to keep an eye out for - because my search has been fruitless - are 5 inch pear shaped balloons.  I think dipping them nice and deep so the chocolate comes up around the curve will give the best shaped bowl after the excess chocolate is trimmed.

I'd think water balloons would be your best bet for that size and shape.

"Life is a combination of magic and pasta." - Frederico Fellini

Link to comment
Share on other sites

The challenge now - and what I'd like you guys to keep an eye out for - because my search has been fruitless - are 5 inch pear shaped balloons.  I think dipping them nice and deep so the chocolate comes up around the curve will give the best shaped bowl after the excess chocolate is trimmed.

I'd think water balloons would be your best bet for that size and shape.

When I look in wikipedia it shows a picture of a pear shaped balloon - anyone know which brand of water balloons is that shape?

Link to comment
Share on other sites

great! Gonna do bowls at the conference?? :biggrin:  :cool:

Not offically, but I did throw the balloons in the bin (well one of the thousands of bins that I've packed up to take down there).

Link to comment
Share on other sites

great! Gonna do bowls at the conference?? :biggrin:  :cool:

Not offically, but I did throw the balloons in the bin (well one of the thousands of bins that I've packed up to take down there).

Just a note - Joseph Schmidt (bought by Hershey a few years ago) is closing it's doors here in the Bay Area after 29 years. Hershey will discontinue the brand at the end of June.

http://www.sfgate.com/cgi-bin/article.cgi?...L&type=business

That video clip is priceless!

"But you have no chocolate? My dear, how will you ever manage?"

-- Marquise d Sévigné

"If I knew you were comin' I'd've baked a cake, hired a band, goodness sake..."

Link to comment
Share on other sites

WOW! :wub: and WOW! again.

Chocolat is going to stop by our Moab house for a few minutes weekend after next. Do you suppose that she'll show me how to do that in ten minutes in the middle of our 'sell it to the walls' sale?

Ruth, they are beautiful!

Edited by Darienne (log)

Darienne


learn, learn, learn...


We live in hope. 

Link to comment
Share on other sites

×
×
  • Create New...