Jump to content
  • Welcome to the eG Forums, a service of the eGullet Society for Culinary Arts & Letters. The Society is a 501(c)3 not-for-profit organization dedicated to the advancement of the culinary arts. These advertising-free forums are provided free of charge through donations from Society members. Anyone may read the forums, but to post you must create a free account.

Recommended Posts

Posted

Any input is welcome- especially on coating the cake with the crumb. It's a pain and takes a long time. Maybe brushing with neutral glaze then just rolling it in it would work?

I cannot help with your question, but as soon as I saw the first pic, I wanted to comment on how even and beautiful that golden crumb coating looks. My two pence: you have put a lot of effort in perfecting this cake, wouldn't it be a shame to skimp on this final step? :)

Thanks, I like it too :)

You're right, but I was just thinking of something that would help the crumb stick better- for these ones I took it out the freezer, let the outside thaw for 10 minutes, slowly and painstakingly pat crumb up the sides over and over to get it even...

I'm just wondering if there's a simpler, faster way to get the same result.

Posted

I'm wondering if the gelatin in the cream layer inhibits the absorption of the cream into the cake layers. Surely the gelatin wouldn't have been traditional. Just a thought.

Posted

I'm wondering if the gelatin in the cream layer inhibits the absorption of the cream into the cake layers. Surely the gelatin wouldn't have been traditional. Just a thought.

It may do, but it doesn't seem to retain a sharp, distinct layer. That's what I'm aiming for.

The gelatin isn't traditional. I use it because it helps the cream hold together better without splitting, it gives a great texture, it helps the cake retain its form and means it's freeze-thaw stable (I assemble the cake, freeze it, then coat it while frozen so it holds it's shape and is much easier to work with).

All in all, as there are so many variations and recipes, I'm not worried about using traditional techniques. I just want to make a good looking and tasting medovik.

Posted

Since you're not worrying over being strictly traditional, you could probably get away with making the cream more like a heavy mousse or something. With the syrup soak, you don't need it to provide moisture to the biscuit and that should stand up to collapsing or being absorbed better than a cream. You'll still get the creaminess from the DDL.

It's kinda like wrestling a gorilla... you don't stop when you're tired, you stop when the gorilla is tired.

  • 2 weeks later...
Posted

So, after 3 trials I made the Medovik for the party.  It was a success, and thanks to everybody for their input, especially for the biscuit recipes.


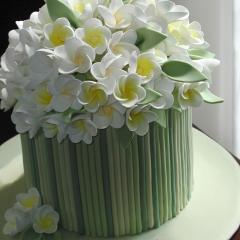
Here's the final version.  The decoration's simply tempered white chocolate with Medovik crumbs sieved over the surface before it set, then cut and rolled up to make petals.  I really should have taken more time over it, but I like the effect.  Unfortunately no photos of the interior, but I got what I wanted- using fewer layers of biscuit and a thicker layer of denser chantilly, the layers were clearly visible.


Finished 4.0 sharik.jpg

Finished 4.0 top.jpg


As soon as I've got time, I'll post the full recipe on recipegullet.  It's a really nice cake to make.

  • Like 2
Posted

Very nice! I look forward to seeing the recipe for the final version.

It's kinda like wrestling a gorilla... you don't stop when you're tired, you stop when the gorilla is tired.

  • 5 weeks later...
Posted

Check out what I found at the Punjab Market (which handles everything european) yesterday - 


attachicon.gifIMG_1163.jpg


Vacuum sealed layers of cake for various projects including dobas torte.  

I wonder how that affects the texture and aeration in sponge cakes...  A bakery I used to work in used pre-prepared frozen sheets of génoise and joconde, but I've never seen them vacuum packed before.


Have you tried these?

  • 2 weeks later...
Posted

Russian honey cake is one of my signature desserts, I have worked on perfecting the recipe for a while now. Too often I see the most common mistake people make - too much flour, the cake layers look like oversized graham crackers. I will post a recipe in detail as soon as I am done with my finals (graduating law school!). Little things make big difference in the outcome for this recipe, starting from using the right honey and sugar to precooking some of the flour in the recipe and letting the dough rest.  

  • 2 weeks later...
Posted

So, here is the recipe. Please, feel free to ask questions, if any.


3 large eggs

10 oz. sugar ( I love using Mexican Zulka cane sugar, it is more close to the sugar in Eastern Europe)

1/4 c. raw honey (my favorite is linden honey, can also use Eastern European buckwheat honey, it is much lighter and milder than American buckwheat honey)

4 oz. butter

1.5 tsp. baking soda

1 tsp. white vinegar

1/4 cup water

0.5 tsp. salt (I use fine sea salt)

10 oz. + more unbleached AP flour as needed.


Directions:


1. Combine sugar, honey, and water in a medium size saucepan. Cook stirring over low to medium low heat until it almost begins to boil. Add baking soda  and keep stirring. The mixture will foam up significantly, it will start getting darker in color. As soon as you see a bright, amber color, take the mixture of the heat and stir in diced cold butter, stir well until the butter is melted.


2. Whisk well the eggs, salt, and vinegar.


3. Combine the egg mixture and the honey mixture and place the bowl over the water bath. Water should not touch the bottom of the bowl.


4. Cook over stirring until the mixture starts increasing in volume noticeably. I always eyeball this moment, but it is not less than 20 minutes.


4. With the bowl still over the water bath, sift 10 oz. of flour and stir well. Keep stirring the mixture for about 5 more minutes.


5. Take the owl off the water bath, wipe the bottom, cover pretty tightly with aluminum foil and let sit on the counter until completely cold. I usually let it sit overnight. Don't worry, it won't go bad.


6. When the batter is cold, I sift 6 oz. of flour on the countertop and scrap the batter from the bowl onto the flour. This is a critical moment. You don't want to over work this, just barely mix in the flour.


7. Divide the dough (it will be pretty sticky) into 8 parts.


8. I usually take 8 pieces of aluminum foil, each piece of foil should be large enough to fit a 10-inch cake layer.


9. Sprinkle rather generously the aluminum foil with flour, flatten the dough into a rough circle with your hands, take some flour in your hands both sides of the dough, don't just sprinkle with flour.


10. Roll each piece into a round slightly larger than10 inch. Pierce with a fork over the entire surface.


11. I have a professional half-sheet pan, so I bake two layers at a time at 350 F. I cannot tell you the time, I have never measured it really. Take the layers out once you see a deep golden color. The layers will puff up significantly and will be very soft to the touch.


12. I bake all the layers and let them sit on the foil until cold, then carefully peel off the foil.


13. Once cold, I trim the layers by putting on top of each one of them the bottom of my cheesecake pan (Fat Daddio).


14. The pieces that I cut off, then go to the ungreased baking sheet. I put them in the warm oven to dry them out. I later grind them to sprinkle the sides of the cake.


I will write about the filling/frosting in another post.

  • Like 1
Posted

So, here is the recipe. Please, feel free to ask questions, if any.


3 large eggs

10 oz. sugar ( I love using Mexican Zulka cane sugar, it is more close to the sugar in Eastern Europe)

1/4 c. raw honey (my favorite is linden honey, can also use Eastern European buckwheat honey, it is much lighter and milder than American buckwheat honey)

4 oz. butter

1.5 tsp. baking soda

1 tsp. white vinegar

1/4 cup water

0.5 tsp. salt (I use fine sea salt)

10 oz. + more unbleached AP flour as needed.


Directions:


1. Combine sugar, honey, and water in a medium size saucepan. Cook stirring over low to medium low heat until it almost begins to boil. Add baking soda  and keep stirring. The mixture will foam up significantly, it will start getting darker in color. As soon as you see a bright, amber color, take the mixture of the heat and stir in diced cold butter, stir well until the butter is melted.


2. Whisk well the eggs, salt, and vinegar.


3. Combine the egg mixture and the honey mixture and place the bowl over the water bath. Water should not touch the bottom of the bowl.


4. Cook over stirring until the mixture starts increasing in volume noticeably. I always eyeball this moment, but it is not less than 20 minutes.


4. With the bowl still over the water bath, sift 10 oz. of flour and stir well. Keep stirring the mixture for about 5 more minutes.


5. Take the owl off the water bath, wipe the bottom, cover pretty tightly with aluminum foil and let sit on the counter until completely cold. I usually let it sit overnight. Don't worry, it won't go bad.


6. When the batter is cold, I sift 6 oz. of flour on the countertop and scrap the batter from the bowl onto the flour. This is a critical moment. You don't want to over work this, just barely mix in the flour.


7. Divide the dough (it will be pretty sticky) into 8 parts.


8. I usually take 8 pieces of aluminum foil, each piece of foil should be large enough to fit a 10-inch cake layer.


9. Sprinkle rather generously the aluminum foil with flour, flatten the dough into a rough circle with your hands, take some flour in your hands both sides of the dough, don't just sprinkle with flour.


10. Roll each piece into a round slightly larger than10 inch. Pierce with a fork over the entire surface.


11. I have a professional half-sheet pan, so I bake two layers at a time at 350 F. I cannot tell you the time, I have never measured it really. Take the layers out once you see a deep golden color. The layers will puff up significantly and will be very soft to the touch.


12. I bake all the layers and let them sit on the foil until cold, then carefully peel off the foil.


13. Once cold, I trim the layers by putting on top of each one of them the bottom of my cheesecake pan (Fat Daddio).


14. The pieces that I cut off, then go to the ungreased baking sheet. I put them in the warm oven to dry them out. I later grind them to sprinkle the sides of the cake.


I will write about the filling/frosting in another post.


That sounds interesting, I never thought to add vinegar to the dough.  Does this affect the flavor?


Also, how tall is the cake you make with this recipe?  I tried to keep mine fairly compact.  If you could post a photo of your finished medovik, that would be great.

Posted

Vinegar does affect the flavor, with the right amount of vinegar you will notice less baking soda and more caramel flavor in the cake. A honey cake made without baking soda just does not have the right flavor to me. I have eaten a lot of those growing up bad ones and good ones, the most common mistake is not adding vinegar or putting too much flour.


Can anybody tell me how to post a picture?

Posted

Here is the picture, it was not meant for publishing/posting, so the quality might not be great. I was feeling lazy that time, so I made only 6 layers instead of 8.

Medovik.jpg

  • 3 weeks later...
Posted

I'm working on this recipe right now and have a question LSM.  The instructions say to stir over water bath for no less than 20 minutes until you see it increase in volume noticeably.  Noticeably is too subjective for me without knowing why it should be rising.  is it rising because i'm stirring/whisking the batter or is it rising because of the vinegar and baking soda interacting?  


Also, you said you would post the filling...I'm ready :)

Posted (edited)

and now another question.  After letting the batter rest overnight you say to add 10 oz (170g) flour.  You then say the dough will be sticky - mine wasn't even slightly sticky.  It was a coherent mass of dough that was easily rolled with just the slightest dusting of flour.  Does this sound right?


Also you say they will puff up significantly - my puffed just slightly...say a 1/4" and just in bubbly spots not all over.

Edited by gfron1 (log)
Posted

gfron 1, the mixture rises due to soda's reaction with honey and vinegar. It will also darken slightly. Now to the second issue, the mixture that has been sitting overnight will be stiffer if it got caramelized more when you cooked it over the water bath. It is not supposed to be liquid, it will be a coherent mass of dough, it won't be liquid, it will hold its shape. But it will stick to the rolling pin and the table. The 6 oz. of flour that I wrote should be sifted on the table is an approximate amount really, try to use as little as possible. I usually dust the dough pieces rather heavily before rolling, then dust off extra flour when I am done rolling it out. The cake layers should puff up quite a bit, they double in height over the entire surface. Also, 10 oz. by weight is about 290 grams. I'd say that under no circumstances should you exceed 1 lb. of flour for the recipe, I think 12 oz.  is a safer bet you want the layers to be lighter and puffier. Flours are different in different parts of the world, so you should experiment to find what works. Also, consider the size of eggs. I'll try to make pictures next time I bake. If you can make at least step-by-step pictures of how you bake it, I would be glad to troubleshoot the issues with you a little more.

  • Like 2
×
×
  • Create New...