Search the Community
Showing results for 'wok'.
-
Couple of months ago, I needed to cook some bacon to be used in a number of dishes over the course of a week or so. I took 2 lbs, cut in 1/2 " wide strips, into my wok along with app. 1C water and set it to cooking. It rendered out the fat beautifully and yielded a full pint of grease.
-
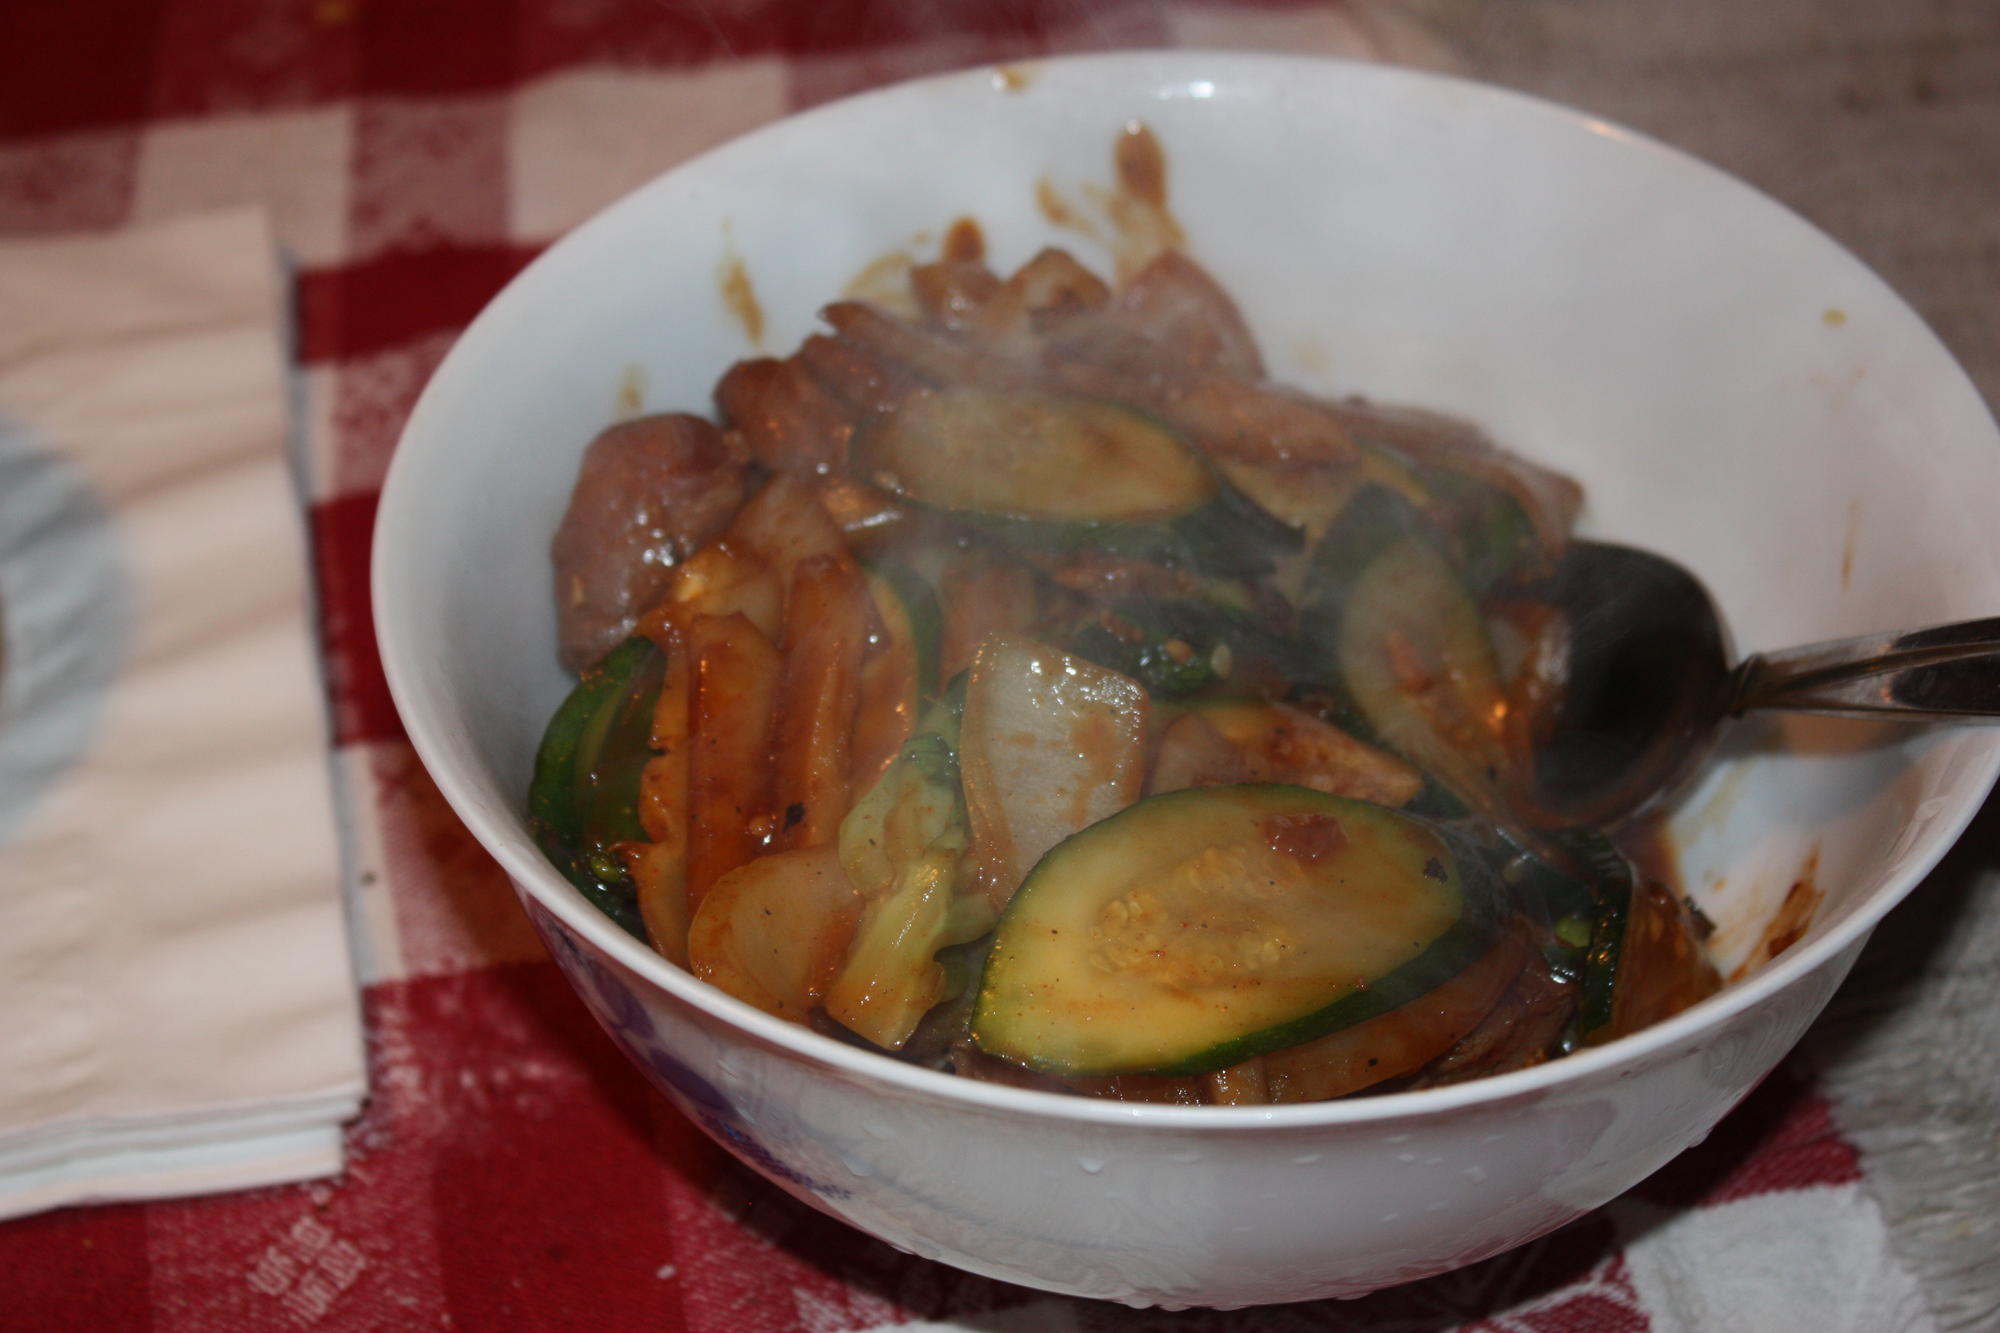
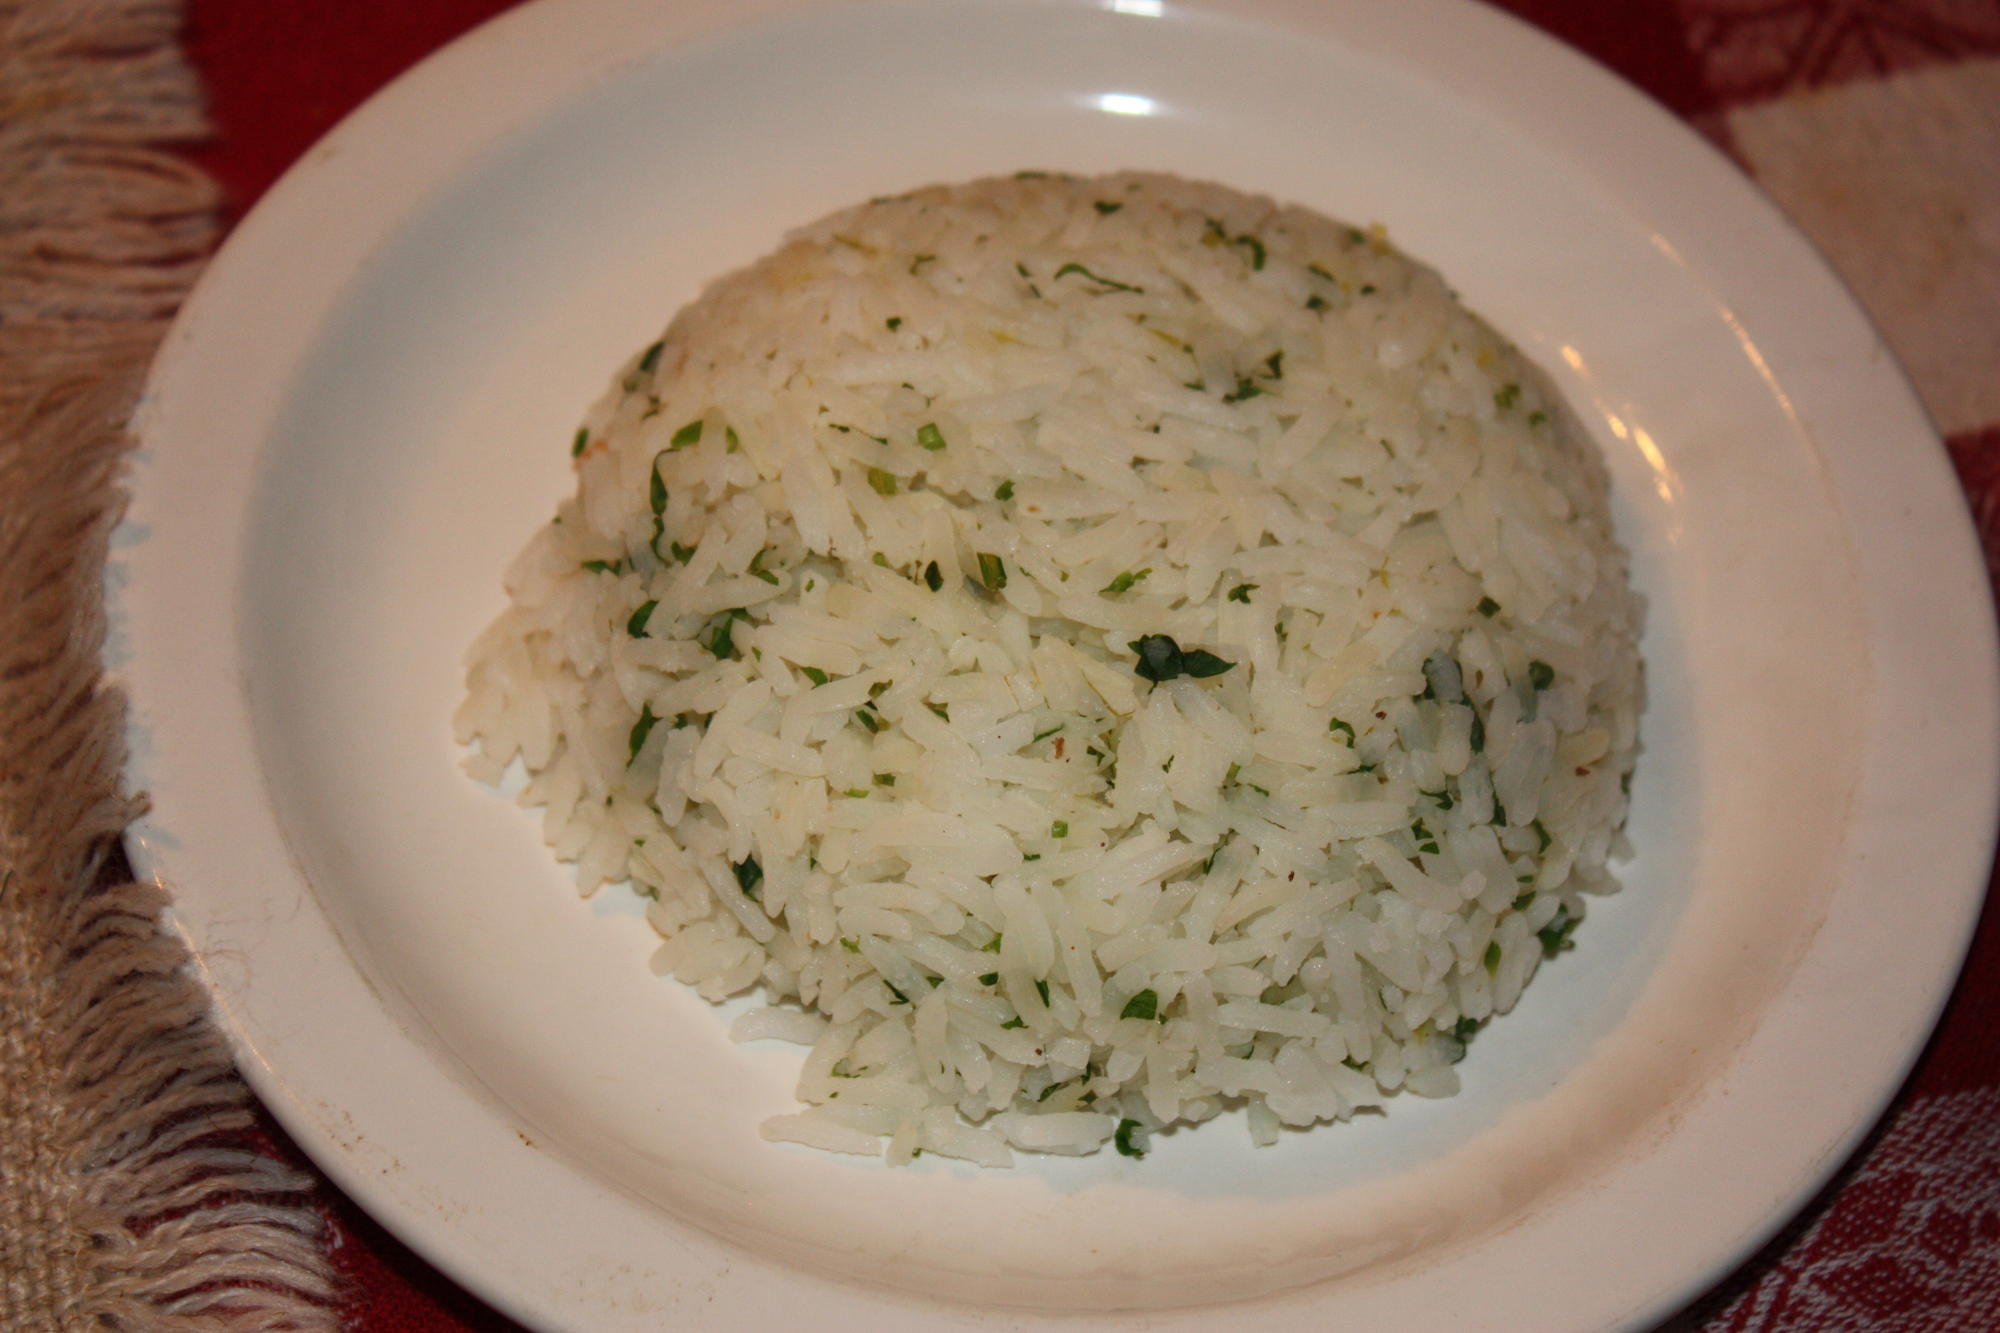
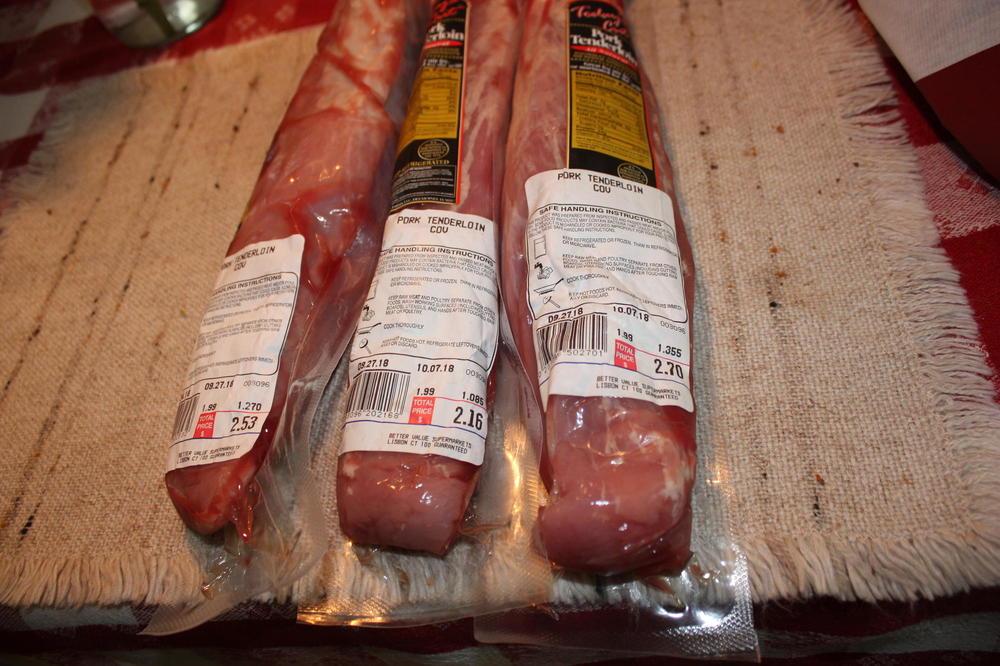
Pork tenderloins keep going on sale and I keep buying them and looking for different things to do with them. Last night, I cut half of one into sea scallop sized pieces and pounded them out into half inch thick cutlets, marinated them in a mixture of oyster sauce, dry sherry, gochujang, garlic (home grown), brown sugar and chopped green onions. Then I stir fried them in a wok with Shanghai baby bok choy, zucchini, sliced cauliflower stems, sugar snaps and sweet onions and served them with cilantro and lime jasmine rice. It was pretty good. Deb went in for seconds, always a good sign. HC

-
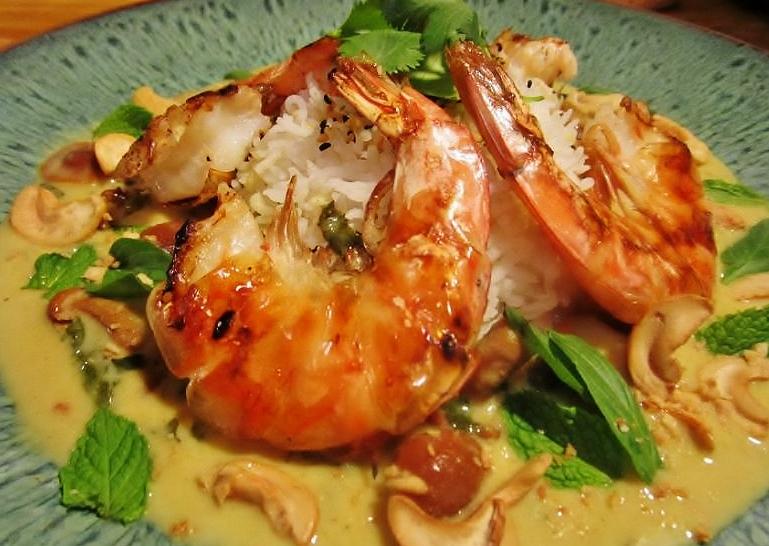
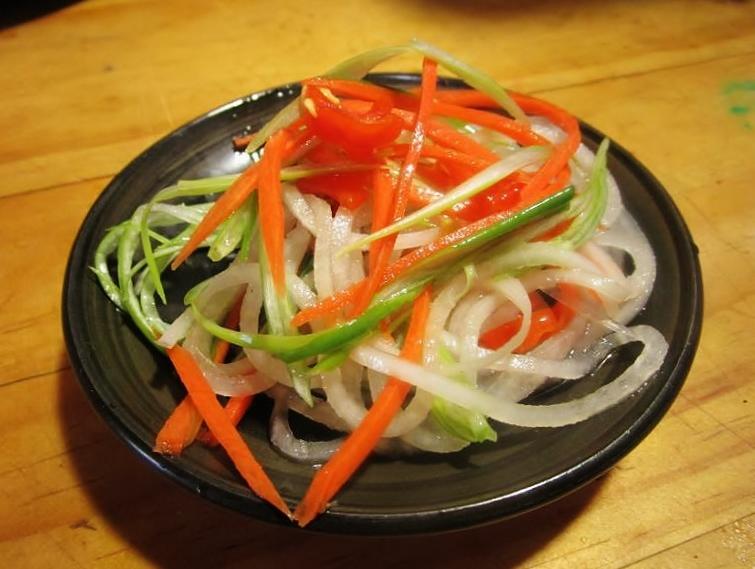
I remembered this Thai Green Curry with Prawns that I had posted over in the Dinner thread back in 2015. I was working on it for a class I taught at a local kitchenware store. It's a good recipe for those of us who are entering into the world of curry cookery. In this photo I grilled large prawns in the shell. I actually prefer head-on prawns. Sometimes I stir shelled prawns into the sauce. Lots of ingredients but a tasty green Thai-style curry. Pickled Vegetable Salad- ½ cup julienned carrot ½ cup julienned daikon radish 1/3 cup julienned green onion 2 tsp. sliced Thai pickled bird chilies ¼ cup rice vinegar 3/4 cup water 2 tsp. sugar 1 tsp. salt Place the carrot, daikon, green onion and Thai bird chilies in a bowl. Add the rice vinegar, water, sugar and salt and stir to combine the ingredients. Cover and chill the salad until ready to serve. Thai Green Curry- 1 tbsp. canola oil 1 tbsp. toasted sesame oil 1 tbsp. minced garlic 1 tbsp. minced ginger 1 can coconut milk 1/2 cup sliced mushrooms 3 tbsp. Thai green curry paste 3 tbsp. Thai yellow curry paste 2 tbsp. brown sugar 1 tbsp. fish sauce 1 tsp. dried red pepper flakes 2 tbsp. fresh lime juice 1 tbsp. lime zest 1/3 cup chopped cilantro 1/3 cup chopped basil 1/3 cup chopped mint Salt and fresh ground black pepper Heat the canola and sesame oils in a wok or saute pan over medium-high heat. Add the garlic and ginger and stir fry briefly to release the flavors but not letting the garlic brown. Add the coconut milk, mushrooms, green and yellow curry pastes, brown sugar, fish sauce and red pepper flakes. Reduce the heat to medium-low and stir the curry to combine the ingredients. Let the curry cook for about 30 minutes for the flavors to come together. If the curry is too thick add some water. If you want to thicken the curry, add a slurry of 1 tbsp. cornstarch stirred into 1/3 cup water. Once the rice is steamed, the prawns grilled and the naan bread ready, finish the curry sauce. Add the lime juice, lime zest and cilantro, basil and mint. Add more lime juice as needed and season with salt and pepper. Steamed Rice- Basmati Rice Black and white toasted sesame seeds I prefer long-grain Basmati rice for it’s earthy flavor. The grains cook really well and don’t stick together. The key to perfect steamed rice is to rinse it before steaming. Place the rice in a colander and immerse it in a bowl of cold water. Swirl the rice around with your hand. You’ll notice the water turns cloudy as the starch is washed off the rice. Drain the water and add fresh water, stirring and draining until the water is clear. It will take about 3-4 washes to drain off most of the starch. The general rule of thumb for steamed rice is a ratio of 1 cup rice to 1 ½ cups water. I use the “knuckle” technique. Put the washed and drained rice in a rice cooker. Fill water up to your next knuckle. In other words, if the rice reaches halfway to your first knuckle, add water to bring the line up to the knuckle. It works out to be about the 1 cup rice to 1 ½ cups water ratio. Add salt or other flavoring after the rice has finished cooking. The rice will keep warm In the steamer while you finish the Thai green curry sauce. Garnish the rice with black and white sesame seeds. Grilled Naan Bread- Frozen naan bread, thawed Olive oil Buy prepackaged Naan bread in the frozen section of Asian markets. It’s also available at some local grocery stores. Thaw the Naan bread. Prepare a grill pan over medium-high to high heat. Brush both sides of the Naan lightly with olive oil then place in the hot pan. Grill the Naan until it’s slightly charred and heated through. Cut in wedges and serve with the Thai Green Curry and Grilled Prawns. Grilled Prawns- 16 large tiger prawns, shell and tail on, deveined Toasted sesame oil Chopped fresh mint Chopped fresh Thai basil Chopped fresh cilantro Chopped dry-roasted cashews Fried Garlic As the green curry sauce simmers and the rice finishes steaming, grill the prawns. Toss prawns in sesame oil. Heat a grill pan over medium-high heat. When the pan is hot, add the prawns and grill until pink and grill marks appear, about 2-3 minutes. Turn the prawns and grill the other side about 2-3 minutes. To Serve- For individual servings, place some rice in a small glass dish and lightly pack the rice down. Flip the dish over into the center of a serving plate. Place 4 of the grilled prawns around the rice. Spoon the green curry sauce around the prawns. Garnish the top of the rice with black and white sesame seeds. Place some of the pickled vegetable salad on top of the rice. Garnish the dish with chopped mint, basil, cilantro, cashers and fried garlic.

-
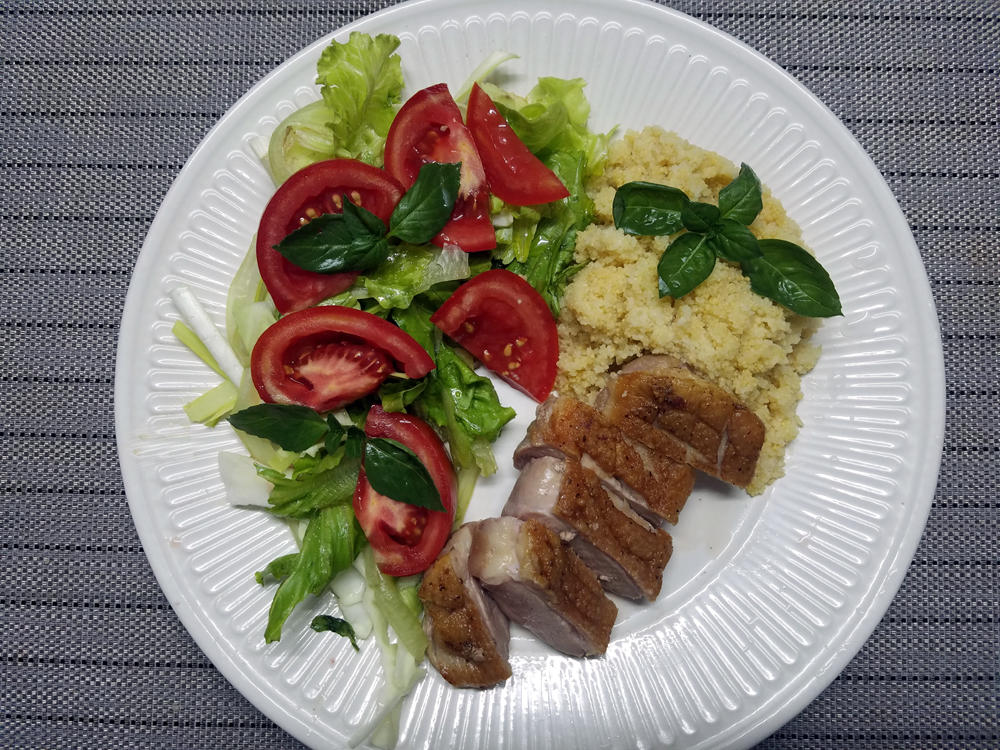
Pan-fried duck breast with salad of lettuce, cabbage, hothouse chives, tomatoes and basil. Couscous. The duck was slightly overcooked by my preference, but the skin was beautifully crisp. I blame using a new induction cooker for the first time. I can't do pink duck on my regular Chinese wok cooker. Way too hot, even at low.

-
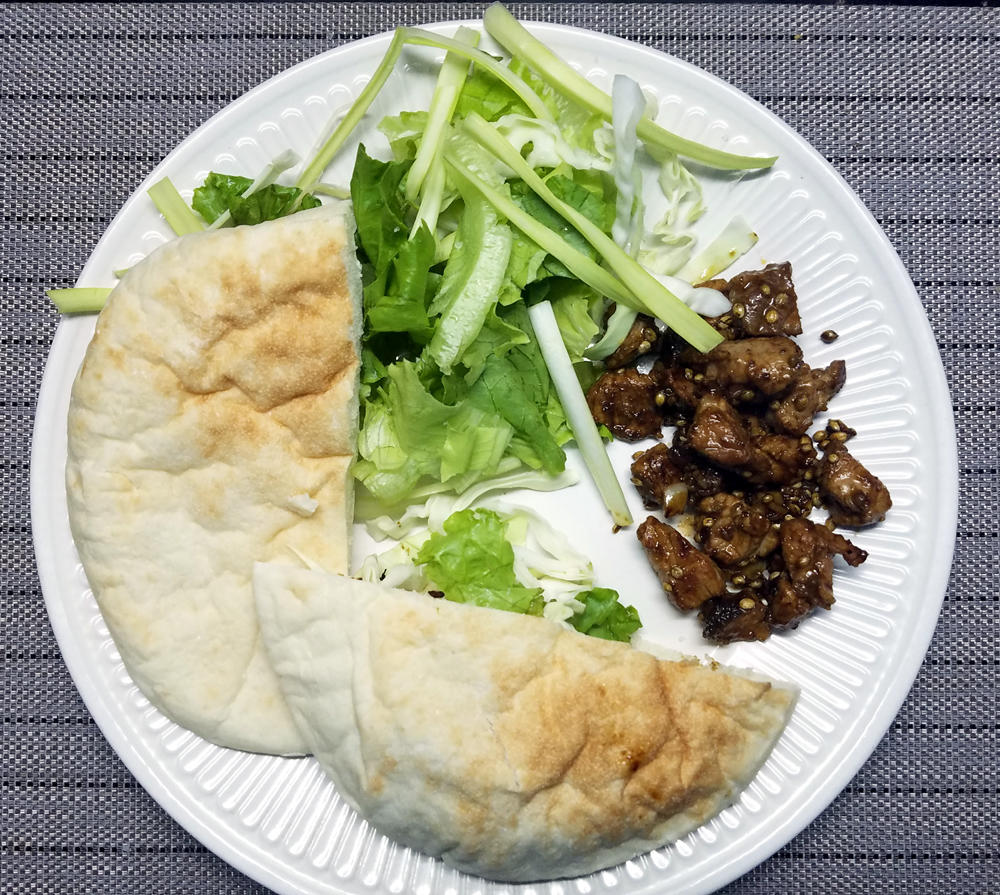
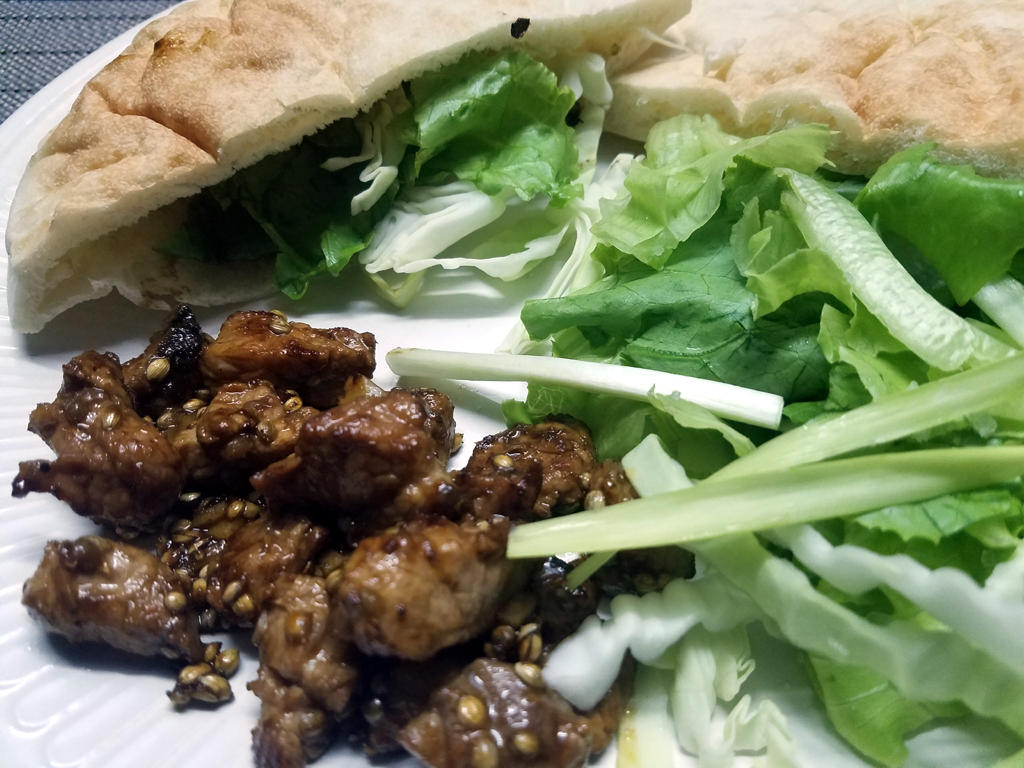
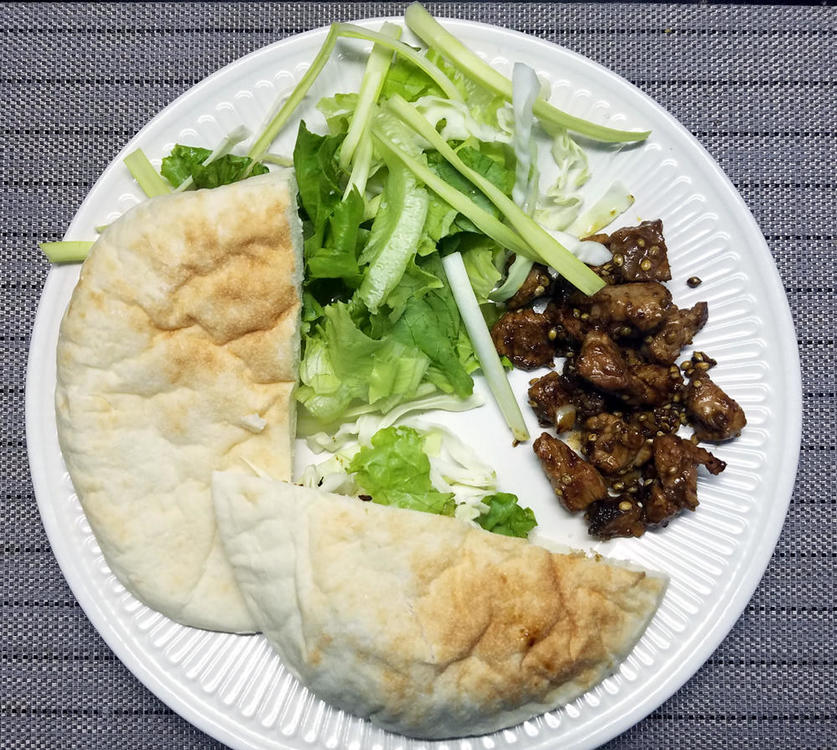
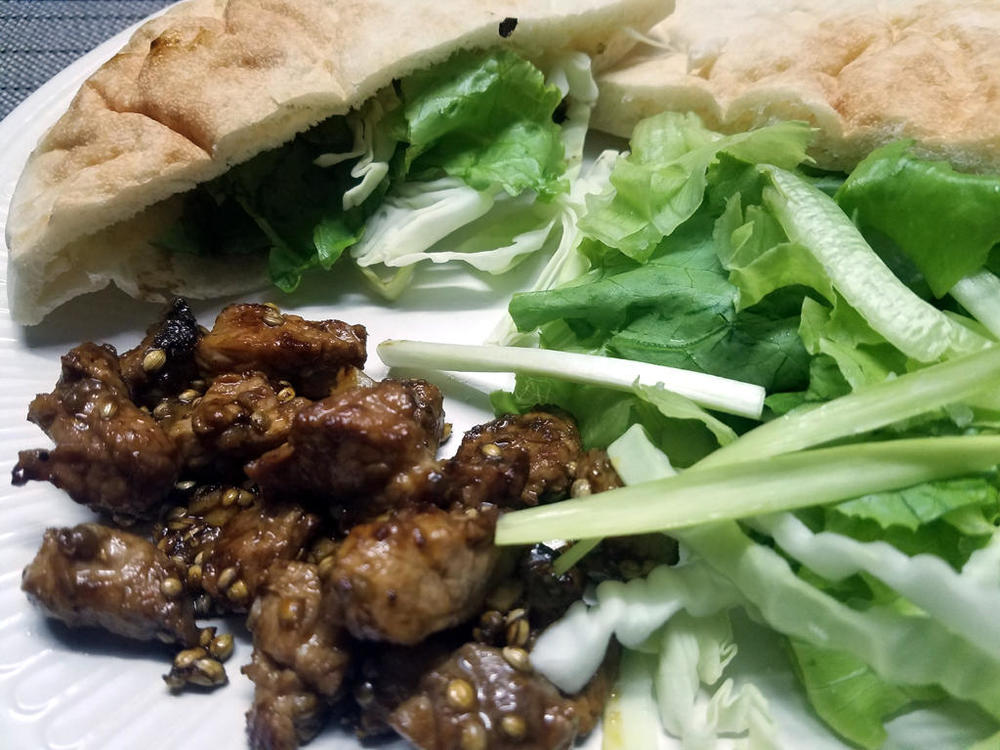
Marinaded cubes of pork with garlic, coriander seeds, olive oil, lemon juice. Dry-fried in wok and added Sriracha sauce (from Sriracha). Salad of lettuce, cabbage and hothouse chives in a lemon and rice vinegar dressing.. Served with smuggled - from - Vietnam - pitta - bread for self assembly. Well, there was only me. I don't fill the pitta until I'm ready to eat. The bread can get sodden while I'm eating the previous one. Seconds, as usual, were consumed.
-
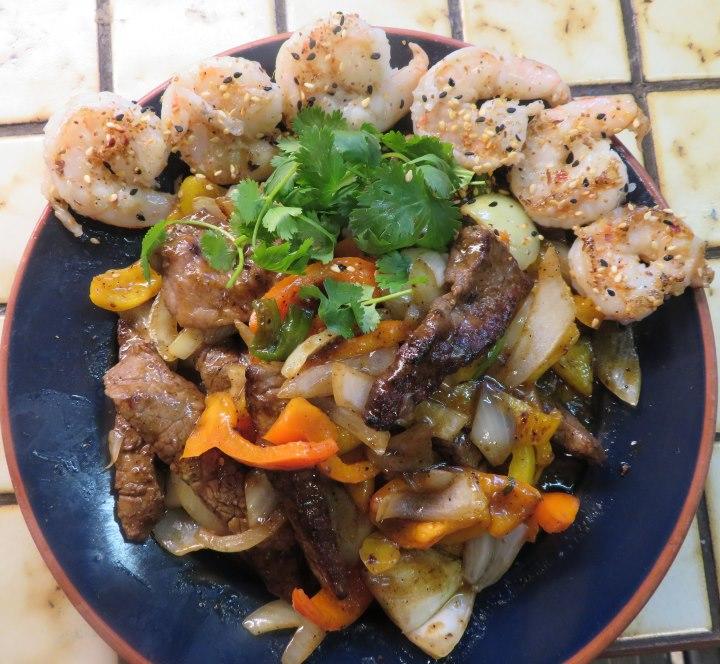
@Ann_T: Ah...mazing pizza! Tonight was a "cleaning out the bits and pieces in the fridge" kinda surf and turf: leftover piece of steak, a few shrimp, wayyy too many bell peppers, and avocado. Tossed everything together with fajita seasoning and an extra toss of cumin in the cast iron wok. Eaten with low-carb Protein-Up flatbread and guacamole.
-
Interesting question, that has no simple answer. The first time I tried it, the added moisture of the buttermilk, required longer frying to get crisp. By the time it was crisp, it was overcooked and tough. I now fry in smaller batches, in a wok with plenty of peanut oil and start the fry at a higher temp (380 F). It seems to work well and is tender. I will probably go back to not using the presoak, just to get a better feel of both results and choose the path from there. I was never unhappy with the result before trying the buttermilk presoak. HC
-
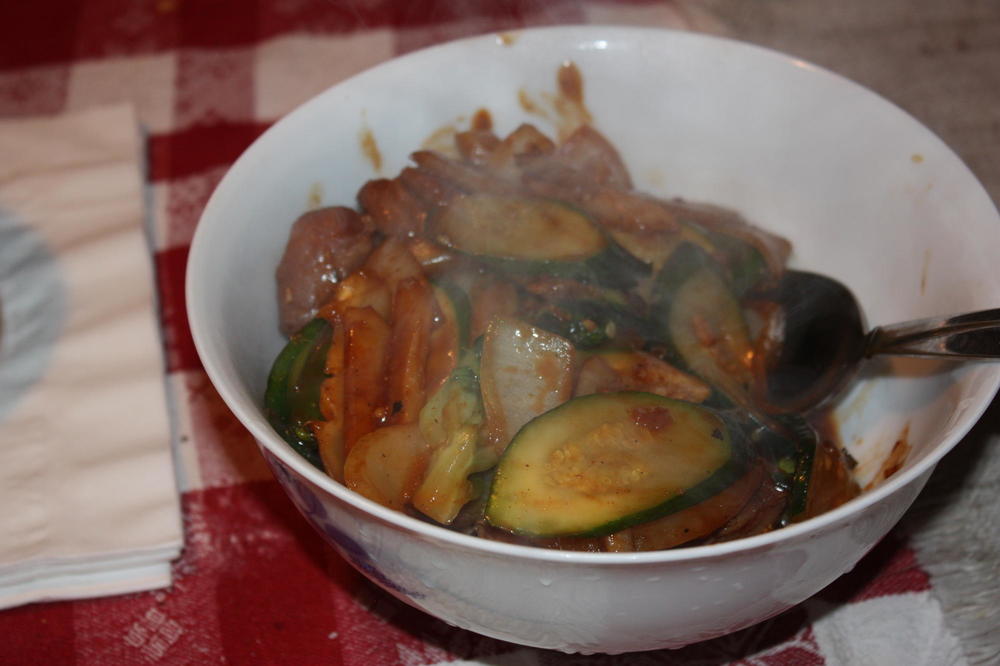
I should be picking zucchini from the garden in just a few days, so I had to send this imposter from Wally World on his way. He did exit with a modicum of dignity, however, sautéed in a hot wok with garlic and chopped green onions and plated with a dusting of freshly grated parmesan cheese. HC
-
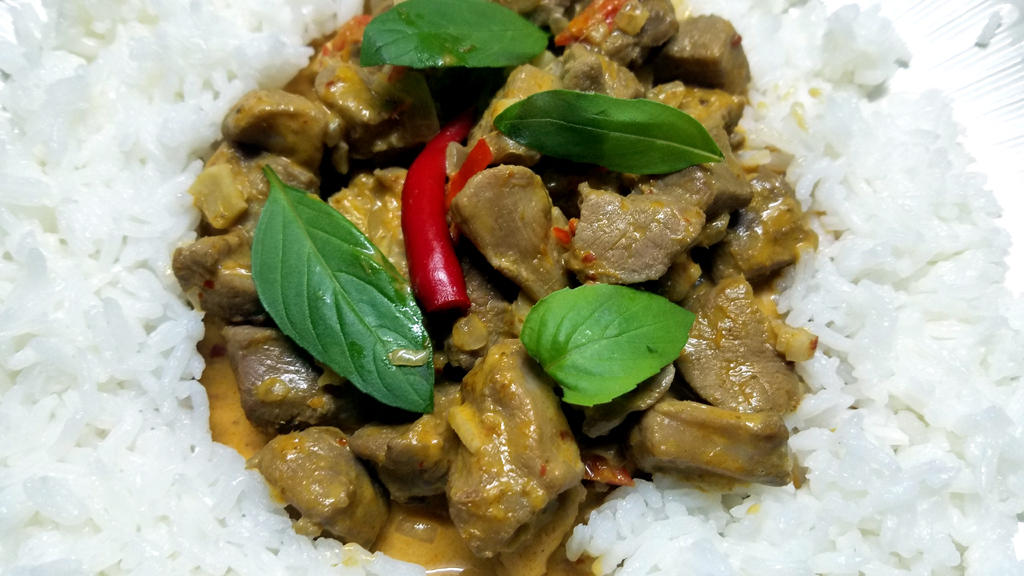
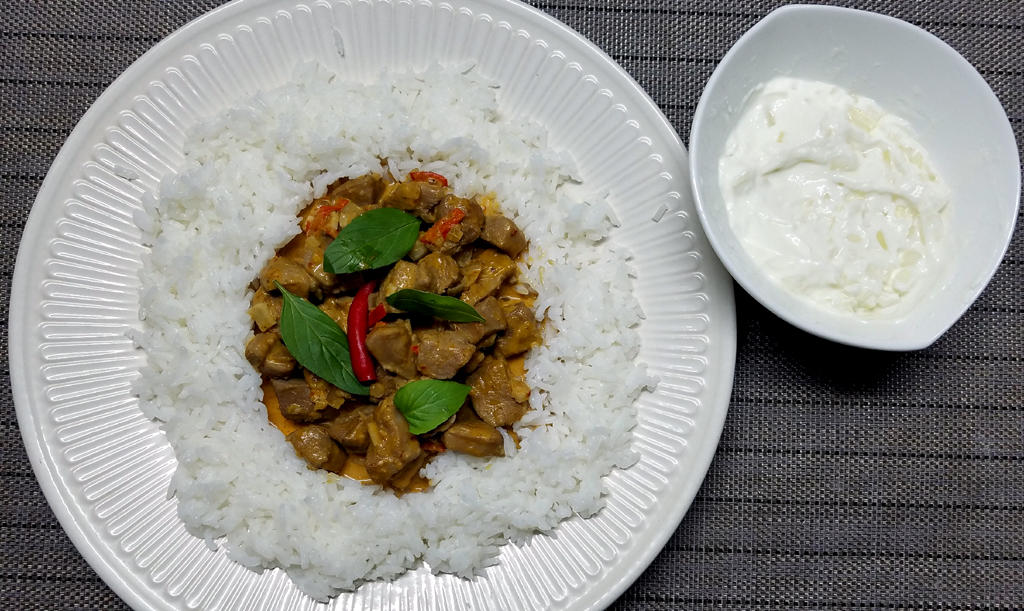
Thai red curry duck. Served with onion raita - yes, not Thai, but I had some home made yoghurt and why not? Served with wok-wilted spinach and rice.


-
Thanks for the tip. Maybe I should find some gloves to wear instead of just using a dish cloth then to protect hands from oil (even if I get a Pow Wok with a handle)? Edit: I think someone earlier mentioned Korin as a high quality wok maker and a reputable company which makes woks that would give me good wok hei, but I don't see the post anymore on here. Just wondering if you guys can confirm this wok would be a good choice for making restaurant-style Chinese food over a 65000 BTU burner (or something similar) to get good wok hei with the pow wok tossing cooking style for stir frying: http://www.korin.com/TK-301-07-36?sc=28&category=17780105 I was just concerned if it might be the wrong choice because it says it's "iron" instead of the usual silver colored carbon steel that these pow woks are usually made of. Not sure if that's a problem.
-
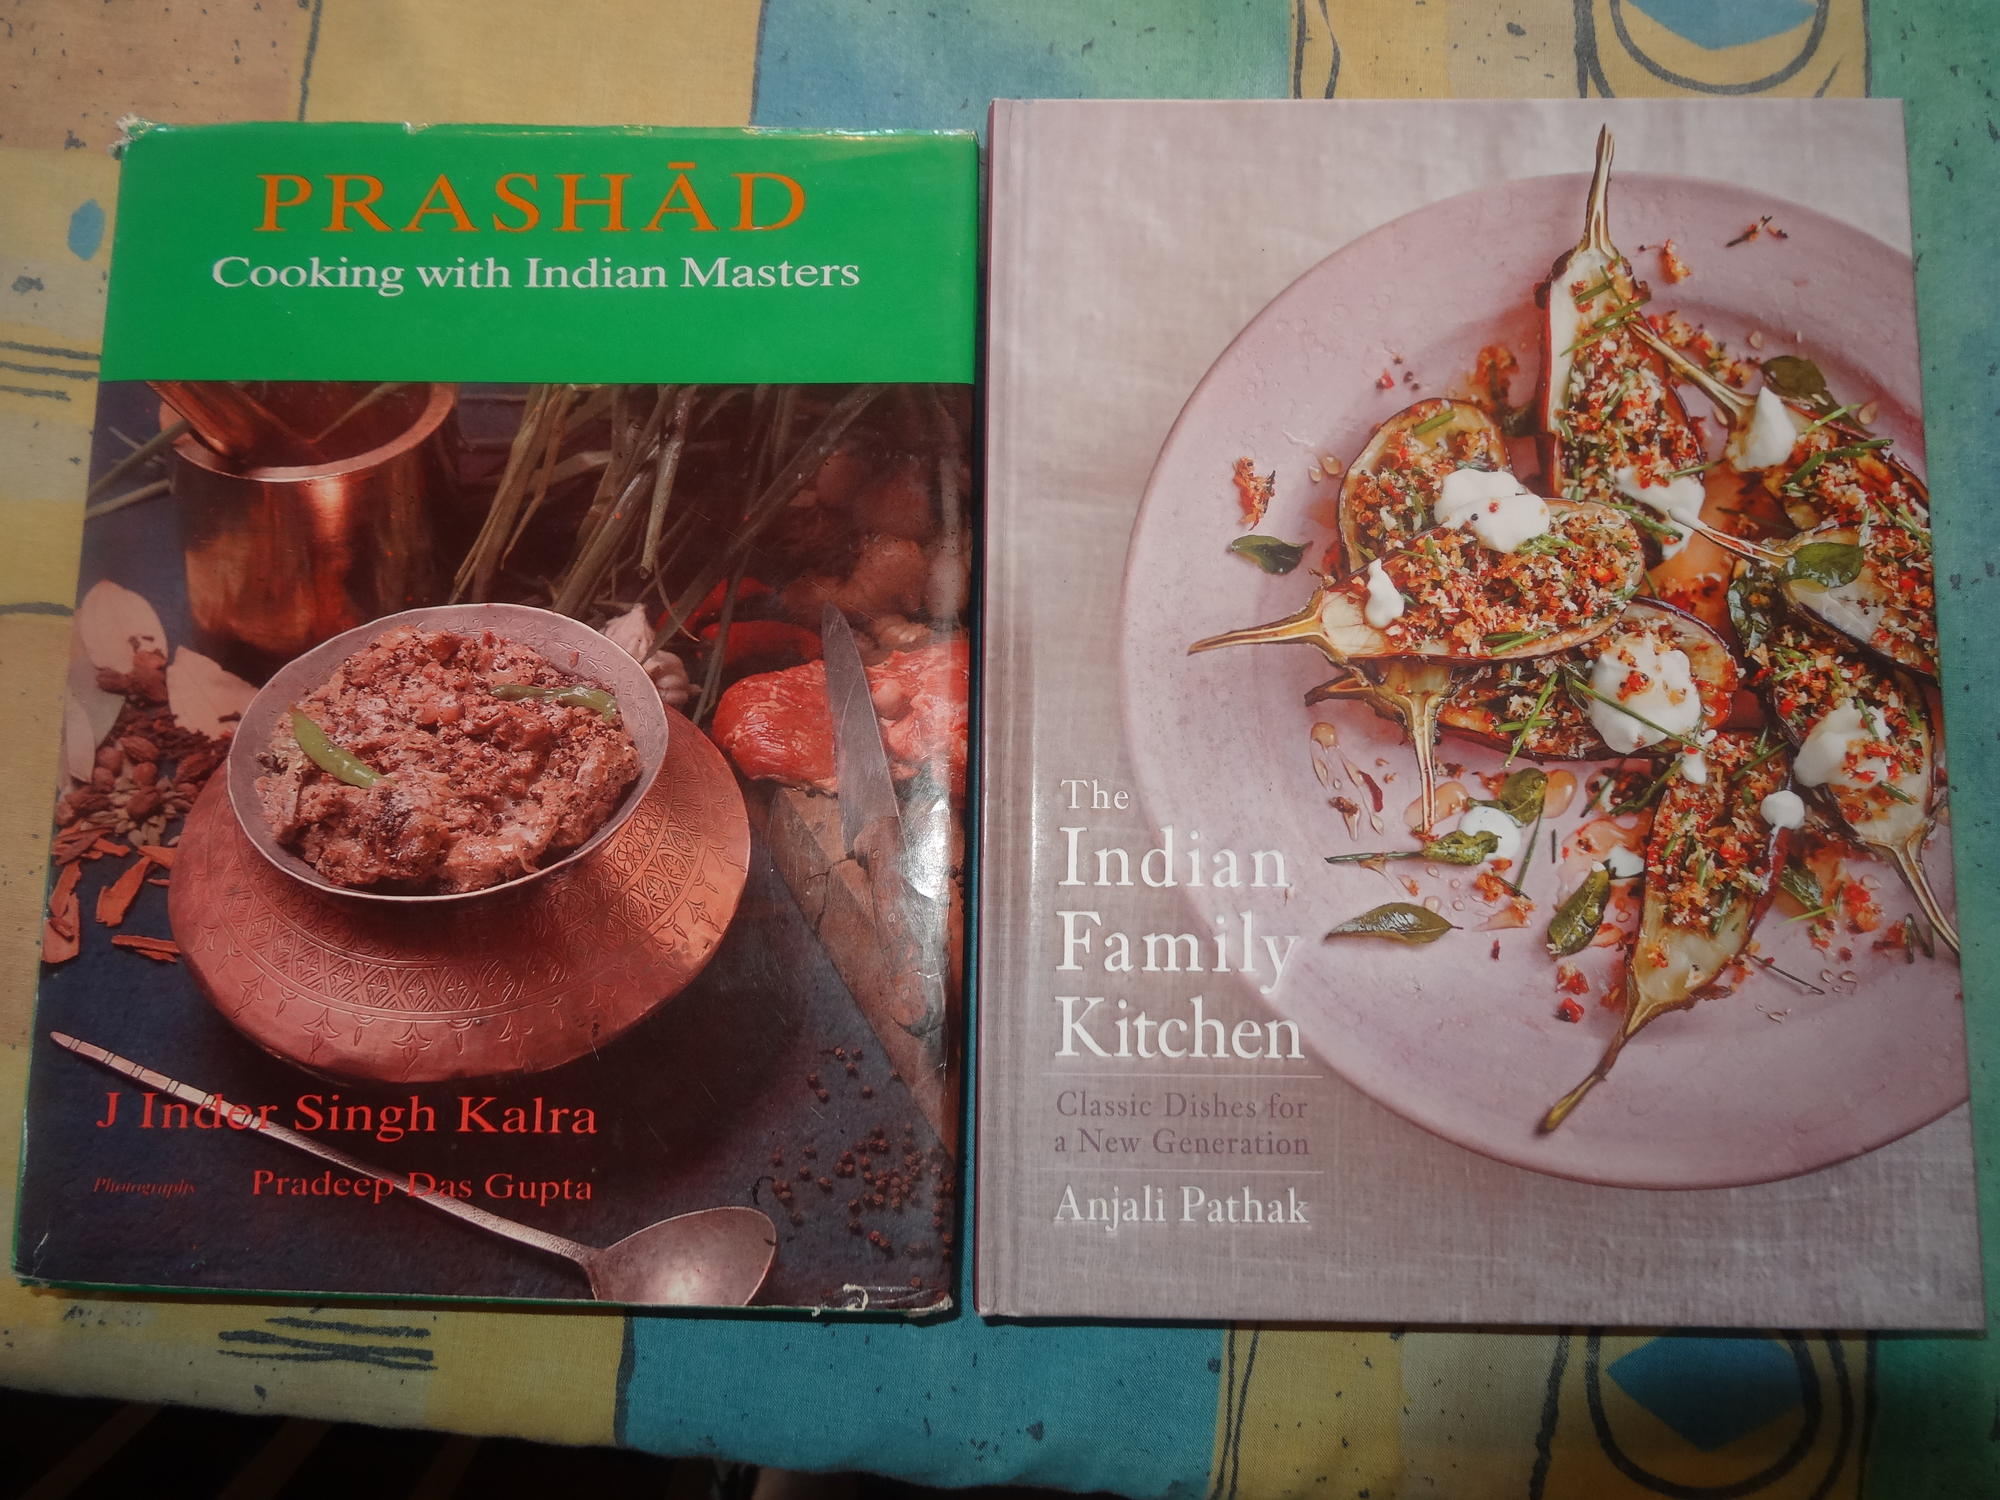
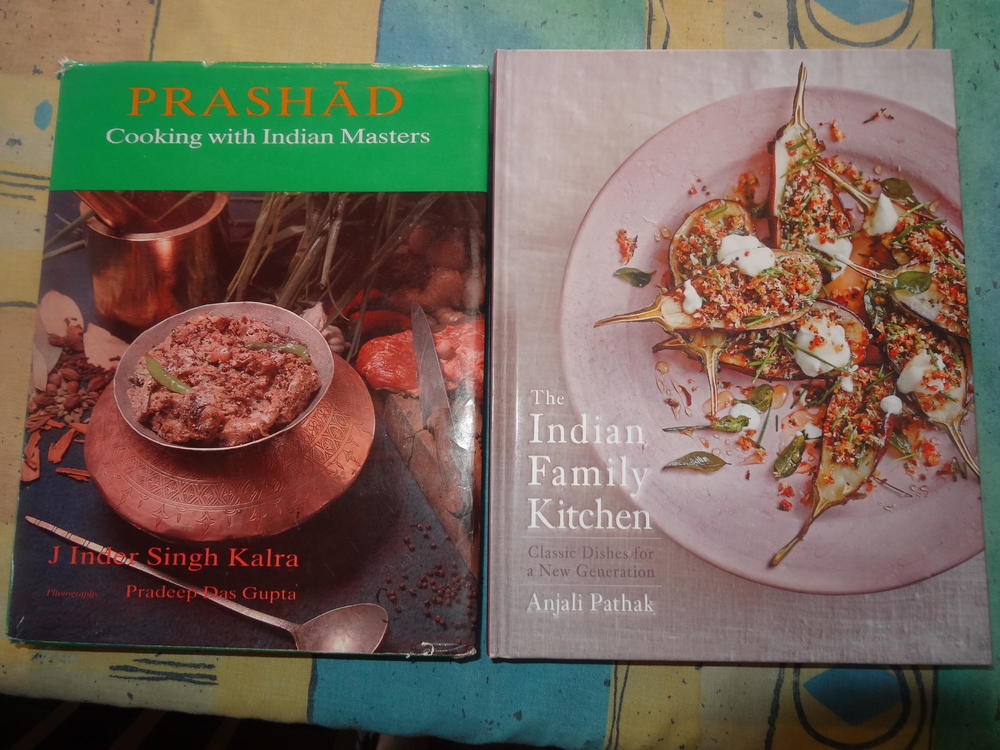
These are two contrasts. Prashad seems very 'authentic' to me. There is no index. The recipes are divided into categories such as "Handi" or casseroles; "Kadhai" or Wok (recipes using a wok); "West Coast Foods", etc. The recipes are very involved but absolutely amazing flavours. The Indian Family Kitchen is authored by the daughter of the Pathak family who are famous for their curry pastes. This is an excellent introductory book. The recipes are very good with not too many ingredients and simple preparations.,
-
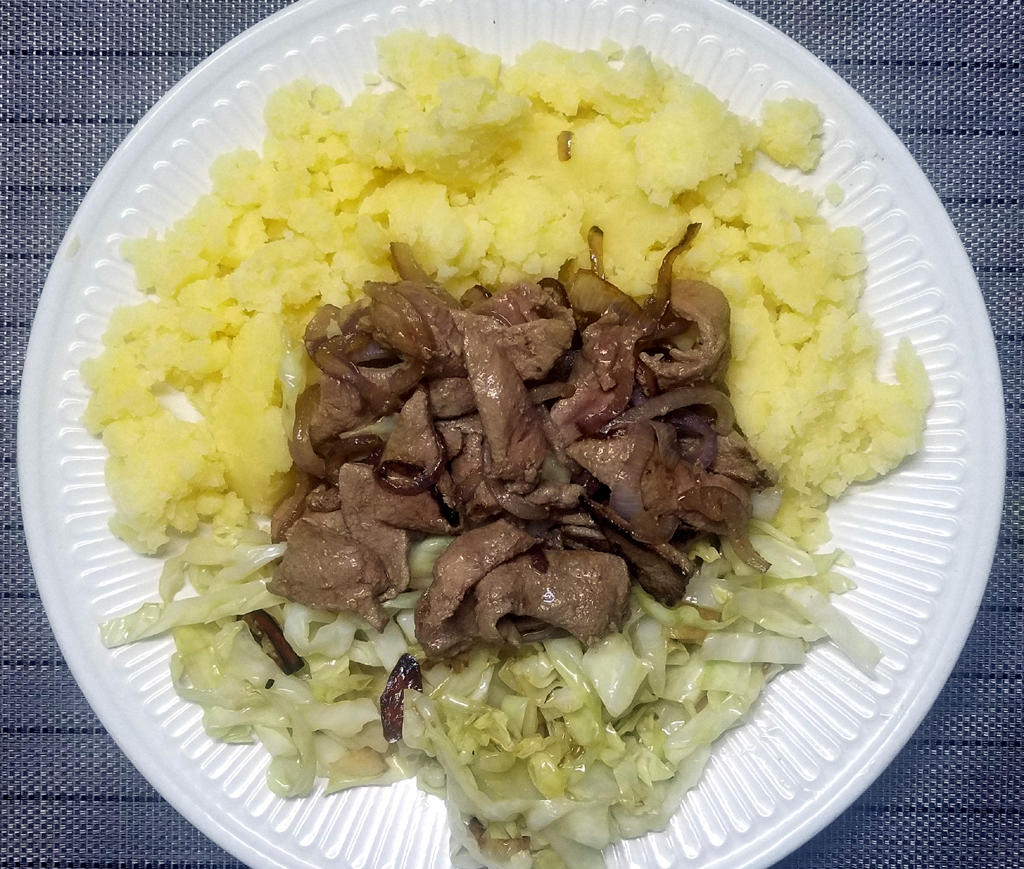
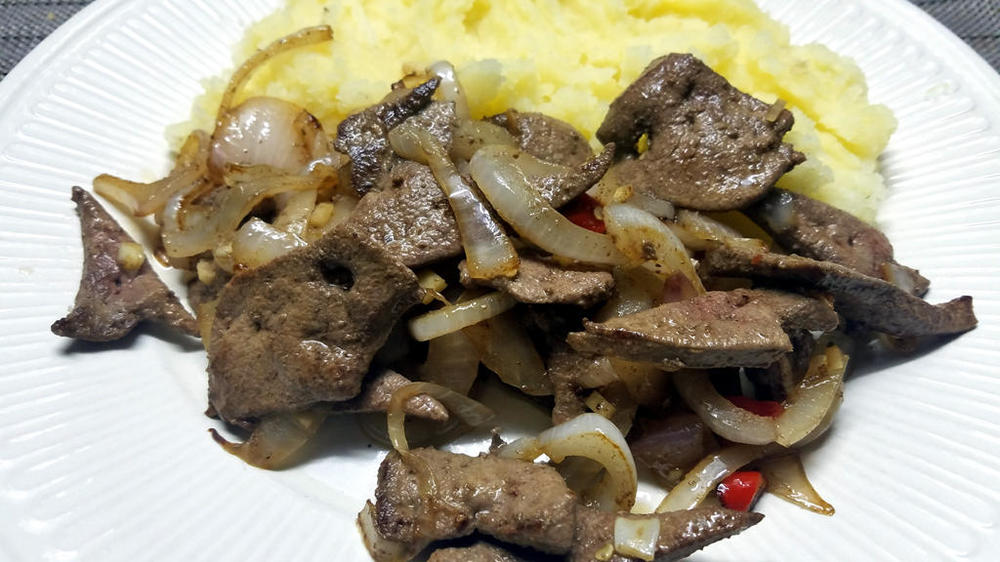
This didn't photograph well. My fault, not the food's Some people here are probably glad they can't see it so well. Pig liver and onions, Chinese style. With very non-Chinese buttery mash. There was a side of wok-wilted lettuce which I forgot to photograph. How offal!
-

A smallish thread about a smallish kitchen renovation
haresfur replied to a topic in Kitchen Consumer
Busy day today. There were some scheduling issues with people showing up unexpectedly. I think my partner who has been at a conference asked the sparkies to come out because our evaporative cooler wasn't working - a breaker up in the attic on the unit had flipped. The bench tops came early in the morning and were installed. Then some remaining electrical work and installing appliances. So almost everything major is done. Still to do: A little trim work that had to wait for the bench tops The exhaust fan needs to vent up through the ceiling. Plumber forgot that. Backsplash. The cabinet guy got a little testy with me because I forgot that we wanted holes for the knife rack, and made me do the measuring. Hope I got it right We will do the painting. We haven't even picked out flooring but are going with vinyl that will be installed on top of the old floor. We probably will have to plane a bit of the bottom of the door to make it fit. I need to install a pot rack that was over the cooktop, but will now be over the window. Then there's figuring out where everything is going to live. Bench tops were in by 9:00 AM. I tried to go to work for a few hours but it wasn't meant to be. I don't really like the microwave there but we will give it a try and see how it goes. Don't know if the induction plate will stay there. I wish they had mounted the oven a few cm higher. The cooktop and oven are made by Asko and they seem really well designed. I'm so excited to try the wok burner, and hope it has enough oomph. Dishwasher is a Bosch.


-
First time posting on these forums, I dunno if something like this would be what y'all would be interested in. I usually post on Reddit over on /r/cooking, but sometimes these sort of hardcore 'food nerd' sort of recipes don't get a whole lot of traction. Oyster sauce is a classic ingredient in Chinese (and Asian in general) cooking, but there seems to be a lot of FUD out there concerning how its made. The English internet is almost barren of proper recipes for oyster sauce, so I thought it might be helpful to fill in the gap a bit. Traditional oyster sauce is the by-product of making dried oysters. When making dried oysters, generally what you’ll do is blanch the oysters for 15-30 minutes first and then leave them out to sun-dry. The old oyster sauce origin story goes that a man in Macao named Lee Kum Sheung was making dried oysters, but forgot that he’d left the poaching liquid on the flame. He found it hours later reduced into a brown gloop… trying it, he found it was delicious, and so oyster sauce was born. And while these sort of stories are almost always apocryphal, that is the essence of oyster sauce. Yet over the years, the popularity of oyster sauce skyrocketed while the usage of dried oysters flagged. This has led to a conundrum: oyster sauce could be sold cheap when it was the previously unused byproduct of dried oysters. But it makes no sense with the roles reversed – dried oysters as a by-product of oyster sauce? For those unfamiliar with Southern Chinese cuisine, dried seafood (while awesome) can get fucking expensive, and dried oysters are no exception. So in modern times, producers tend to take one of two shortcuts. First, many don’t reduce the poaching liquid nearly as much, then add a mix of caramel (to color) and starch and celluse gum (to thicken). This is actually the method that produces good oyster sauce, and is what smaller manufacturers do here in Guangdong. The second shortcut? Simply using oyster extracts and combining it with a shit-ton of sugar and additives. This is what larger producers do, making for a product that barely has any oyster flavor. What we’ll do today though is keep things old school, as the traditional method is easiest to recreate at home. But word of warning: the yield isn’t very large (~1/2 cup or less) so it makes very little sense to make oyster sauce at home unless you’re sun-drying oysters anyhow. So I’ll also let you know how to sun-dry the oysters, and because you might be unfamiliar with the ingredient (awesome ingredient btw), I’ll also list out a recipe for a classic homestyle Cantonese dish – oyster braised pork ribs – to give an idea on how to use up dried oysters. I do have a video to go along with this, but let me know if linking YT vids is frowned upon here and I'd be happy to edit it out. Ingredients, Sun-dried oysters and Oyster Sauce: Shucked Pacific Oysters (生蚝), medium sized, 1.5-2kg. So we’re using oysters that we bought pre-shucked at our local market. If you’d like to wash and shuck enough oysters to get 1.5-2kg of them that’d obviously be best, but that feels (1) extraordinarily painful and (2) like it’d cost a fortune abroad. Water, 4.5L. For blanching the oysters in. Sugar, ½ tbsp. Added near the very end. AFAIK the super traditional version wouldn’t contain sugar, but modern recipes (ours included) are balanced around oyster sauce with some sweetness to it. Plus, it helps give a little thickness and color. Light Soy Sauce (生抽), 1 tsp. Optional. Some producers add soy sauce in with the oyster sauce, some don’t. I like adding a little bit, helps with the color. Bog-standard mass produced oyster sauce (蚝油), ½ tsp. Super optional. I like adding a touch in order to make use of their thickeners – it’s a lot easier to buy Lee Kum Kee oyster sauce at the supermarket than it is to buy cellulose gum. Helps everything come together a bit. This is really only my personal approach though, obviously. Process, Sun-dried Oysters and Oyster Sauce: If using pre-shucked oysters, give the oysters a quick rinse. Transfer the oysters in a ‘dangling’ motion over to a pot with a bit of tap water. Rinse the oysters for ~3 minutes. You don’t have to go too crazy here – we’ll be filtering the sauce later, and we do want that brininess. If you’re using clean fresh oysters, you can skip this step, simply toss the oysters together with their brine in a big bowl. Get a pot of water to a light simmer. Transfer the oysters over in a dangling motion. The ‘dangling’ motion is to minimize dragging over any sediment from the oysters. Poach the oysters for 30 minutes, stirring periodically. Make sure the water isn’t boiling. Rapidly boiling water has the potential to destroy the integrity of the oyster. Think something that’s roughly ‘poached egg’ heat. Fish out the oysters and place in a strainer to drain. If you have one of those cool bamboo strainers, that’s awesome as you can both strain and sun-dry in the same thing (plus, you get super authentic bonus points). I like straining it over the pot that I’ll eventually be cooking the oyster sauce in, so as to not waste any of the liquid. If not using a bamboo strainer, transfer over to a baking sheet. If it is sunny out: place the bamboo strainer in a location with lots of sunshine. Sun-dry for a day, flipping the oysters once around noontime. If you’re living in a city like us, it’s a good idea to hang the strainer in order to avoid bugs or cats getting to your oysters. Note that if it’s partly cloudy, the oysters might need two days to dry out completely – simply bring them inside and store in the fridge overnight. If it’s not sunny out: place the oysters on a baking sheet and toss in an oven. Put the oven on its lowest possible temperature (100C for us) and crack the door. ‘Bake’ for six hours, turning the oysters once halfway through.Sun drying is preferable because (1) it produces a better dried oyster in the end and (2) doesn’t waste energy like the oven method. But hey… sometimes you were planning on sun-drying and the weather’s just not cooperating. Better to waste a little energy than a lot of seafood, yeah? Lightly oil a stainless steel pot, and pass the leftover poaching liquid through a fine mesh strainer lined with a tofu or cheesecloth. So the vessel that we used here was a stainless steel wok (very convenient for this particular job), but anything stainless steel will work great. Why stainless steel? Not overly sure actually, my best hypothesis is that as it’s a stick surface some of the liquid will caramelize and brown as its reducing. Cast iron would also work. Just don’t use something like a non-stick or a claypot. Lightly simmer the liquid for 3-4 hours to let it reduce, scraping the sides down with a rubber spatula every 5-10 minutes. This reduction is undeniably annoying, so the million dollar question: why not just toss the thing at a heavy bowl and let it reduce much quicker? The answer is that you’ll lose way too much oystery goodness to the sides of the pot and your final yield will be much, much less. The more paranoid you are during this stage, the more oyster sauce you’ll get. That said, if your primary goal is making sun-dried oysters, you might be cool with a yield of a couple tablespoons. In that case, no need to be so paranoid. Once it’s bubbled down into a brown liquid with consistency that’s roughly akin to a very thin pan sauce, add in the sugar, the soy sauce (if using) and the oyster sauce (if using). Let it cook together for ~2 minutes. Once its come together, jar it up. You should be looking at roughly ~1/3 cup oyster sauce by the end. Store in the fridge. Again, I understand that this is not a very large yield from 1.5-2kg of oysters. The rule of thumb for traditional oyster sauce is that it yields 1g of oysters sauce from every 100g of oysters, so I was already relatively happy with the yield this approach gave. Your final product will be something with a very clear and obvious ocean-y taste. My recommended use for it – to get the most bang for your buck – is to use it in recipes in conjunction with the standard mass produced stuff. Adding a ½ tsp or a tsp per tablespoon to your store bought oysters sauce will give you the flavor of something that is roughly equivalent to a good quality Guangdong-locally-produced oyster sauce. And now… how to use those dried oysters: Ingredients, oyster braised pork ribs: This is a relatively simple homecooked dish that is very similar to a Cantonese banquet dish, oyster braised pork knuckle. We went with this one because it’s the sort of thing that’s easy enough to whip up on a week night. Pork ribs, cleaved across the bone into 1 inch pieces (排骨), 500g. Marinade for the pork ribs: ½ tbsp salt, 1 tbsp sugar, 2 tsp cornstarch (生粉), 1 tbsp rice wine (米酒), ½ tbsp light soy sauce (生抽), 1 tbsp oyster sauce (蚝油). Mix the cornstarch together with the rice wine and add it in as a slurry – this will coat the ribs much more evenly. Note that this is basically a bog-standard marinade, with two exceptions: first, the cornstarch ratio is a touch less, as this will be braised in the end; second, we’re adding some oyster sauce in in order to repeat that ‘oyster’ flavor a couple times in the dish. We’re using rice wine in this dish as it’s really nice with pork ribs, but you could use also use Shaoxing wine or even sake. Dried oysters (蚝豉), 50g reconstituted with one cup hot, boiled water. We’ll be reconstituting this with hot water – we did want this to be an easy-ish dish after all. You could alternatively use cool water and leave it to reconstitute for much longer (6+ hours in place of the 45 minutes we did here here). Garlic cloves, 3. Lightly smashed. Seasoning for the braise: 2 tsp light soy sauce (生抽), 1 tsp dark soy sauce (老抽), ½ tbsp sugar, 1 tbsp oyster sauce (蚝油). The mix of light and dark soy sauce is mostly for color. Rice wine (米酒), 1 tbsp to use when stir-frying and 3 tbsp to top off the braise. Again, feel free to use liaojiu/Shaoxing wine or sake (which is a type of rice wine) instead. Process, Oyster braised pork ribs: Give the dried oysters a quick rinse, then add the one cup of hot, boiled water. Let it reconstitute for at least 45 minutes. Again, you could alternatively use cool water, adding it in the morning and coming back to it for dinnertime. Rinse the pork ribs under running water for 10 minutes. Rinsing the pork ribs extracts the myoglobin, giving the pork a cleaner look and flavor. Feels like it makes it a touch more tender too, but I have nothing to back that claim up. Add the marinade ingredients to the pork and mix well. Marinate for at least 30 minutes. Remember to make a slurry with the cornstarch so that things don’t clump. Stir fry, then braise: As always, when stir-frying first longyau (huaguo in Mandarin): get your wok piping hot (around steak searing temperature), shut off the heat, add in your oil (here about 1 tbsp), then give it a swirl to get a nice non-stick surface. Heat on high now: Garlic cloves, in. Fry for ~15 seconds. Pork ribs, in. Fry for ~1 minute, stirring only periodically. We do want the pork to develop a bit of browning. ~1 tbsp of rice wine, in. Pour over your spatula and around the sides of the wok to let it sizzle and quickly reduce. Reconstituted oysters, in. Stir fry for ~15 seconds. Soaking liquid from the dried oysters, in. Pour in through a strainer so that it’s not grainy. Give everything a quick stir. Seasonings, in. Give it a quick stir. Heat off. Transfer over to a claypot or some other suitable braising vessel, making sure that you get all the liquid. Top off with the 3 tbsp of rice wine. Adjust the ribs to be relatively even. Some will be peaking out, that’s ok. Flame on low. Cover, cook for 20 minutes. Check on the pork ribs, making sure things aren’t bubbling too rapidly. Flip the ribs. Cook for 10 more minutes. Enjoy some braised pork ribs. The dried oysters are my favorite part of this dish. Note on economic considerations when making this outside of China: I know oysters are expensive in the USA. One of my frustrations in the US is that food is generally (A) absurdly cheap processed shit or (B) absurdly expensive hyper-premium fare. Oysters are a perfect case – you either pay a pretty penny and get some (admittedly) really nice oysters, or turn to the can. The way I would approach this is using frozen shucked oysters. I know those also aren’t cheap, from what I could find online they seem to run ~24 bucks per 16oz. That puts the cost of this recipe at ~72 dollars. Maybe I’m just poor, but that’s still… really expensive (by contrast, the cost of this recipe in China is CNY 135, or ~$20 US). Still, the way to think of this isn’t $72 for a third of a cup of oyster sauce. The way to think of this is $72 to get a bunch of dried oysters, which are a great ingredient and pretty expensive if you bought them straight up. Then you get a bit of traditional oyster sauce on the side, which you can mix in with your standard bottled oyster sauce as I recommended above.
-
I have now been using my Kenmore five burner induction cooktop for about three years, one of my best decisions. I am a keen cook (I even finagled my way into a professional course at La Varenne's cooking school in Paris many years ago). I did quite a bit of research before installing the cooktop, including buying two individual induction burners to try it out. Burton makes cheap ones that work perfectly well. I bought the Kenmore when I realised that it was exactly the same as the Kitchenaid. Buying a separate five burner cooktop is the way to go because the increased area gives you much more freedom to move pans around, plus I use the surface for prep and serving. A double oven on the wall is much much more convenient than a range (providing that you can find one that works properly, do not buy any US made double oven, Whirlpool makes most of them under different names and their design, service and warranties are disgraceful). Do not worry about flatness of pans, the magnetic field that does the heating (through hysteresis) does NOT need a close contact (in contrast to electric burners). Speed of heating is faster than gas and cooling down much faster. Safety is also a consideration, you can put your hand down next to a boiling pot of water and simmering much easier. Where woks are concerned: there are induction woks but they are prohibitively expensive. Many people swear by gas for Asian cooking but that is a mistake since you still don't get enough contact with the whole of the wok's surface to heat the pan to searing temperatures. After some research I found that an ELECTRIC wok is the solution. This may seem counter intuitive (since using a normal wok on top of an electric burner is a disaster) but the best electric woks have the heating element built into the wall of the hemispherical wok and temperatures can get up to 450 degrees. Breville make the best ones and on sale they are quite reasonably priced, I ended up buying two of them (and another one for my brother)
-
I liked induction at my old house (actually 2 induction and 2 radiant burners for flexibility). Planning a remodel here, where I have natural gas, which is actually more expensive (don't get me started on the politics of energy). I think for induction, having lots of power levels is really important. The high-end brands here didn't have fine enough adjustment imo, although there was one cheaper one that looked ok. In the end I decided to stick with gas so I could have a wok burner, although it appears some induction burners pump out enough heat.
-
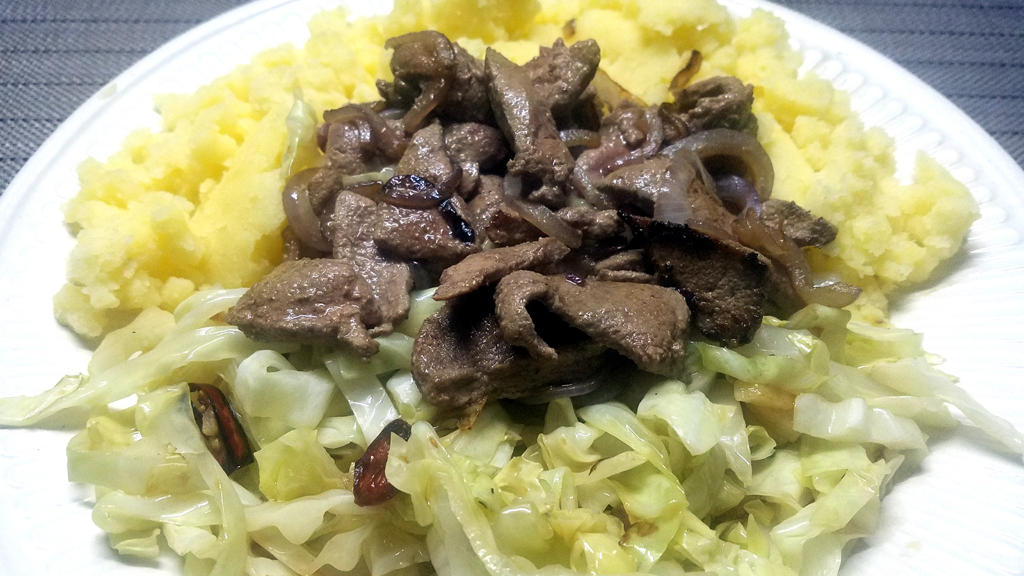
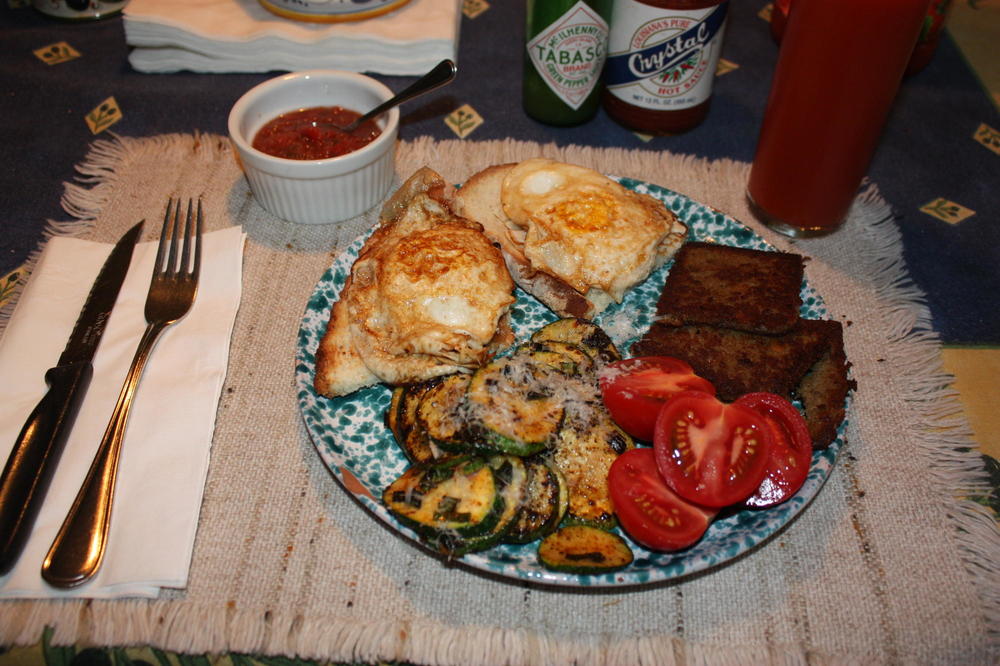
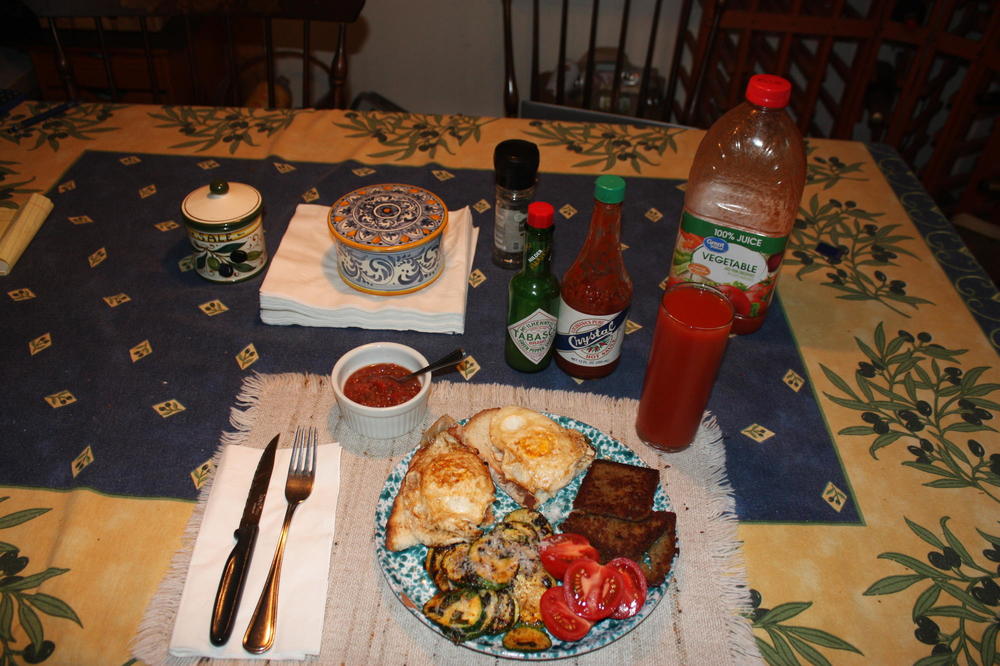
The cruellest ordeal I was put though during my primary and secondary education was the regular serving up of liver and onions at what we called "school dinner" which was lunch in the canteen. This dish consisted of liver of unknown origin, unseasoned and boiled to death then drowned in an onion "sauce" powerfully seasoned with charcoal. And that is me being polite. I didn't eat liver from the day I left school at 18 and headed to university until many, many years later after I arrived in China. One day, dining with friends and being somewhat distracted, I grabbed something nearby with my chopsticks and absent-mindedly put it into my mouth. It was delicious, so I had some more. Naturally, I enquired as to what this might be. Chinese liver and onions! Rather than boil it overnight as my school canteen apparently did, the onions were just nicely caramelised and the thinly sliced liver was melting in the mouth from a rapid, brief toss in the wok with green onions and red chillies. After that, I often ordered it in restaurants around town. Always delicious. Then, one day, I thought "What would happen if I tried to recreate my school child nightmare dish, but using Chinese techniques." Damn! I liked the results and have cooked and eaten it many times since, Including this evening. Pig liver thinly sliced. Red onion thinly sliced. Onions fried slowly in the wok until just beginning to caramelise. Liver added along with any blood. Fried at high heat for one minute and served with thinly sliced cabbage fried in bacon fat with chillies and buttery rough mash. Not the prettiest dish you'll have seen, but very tasty if I say so myself, which I do.


-
That's a good question yet I'm not much of an expert. When I do similar dishes I just add the squid at the very last minute but don't coat it in starch. And we're talking just a few seconds in a very hot pan/wok.
-
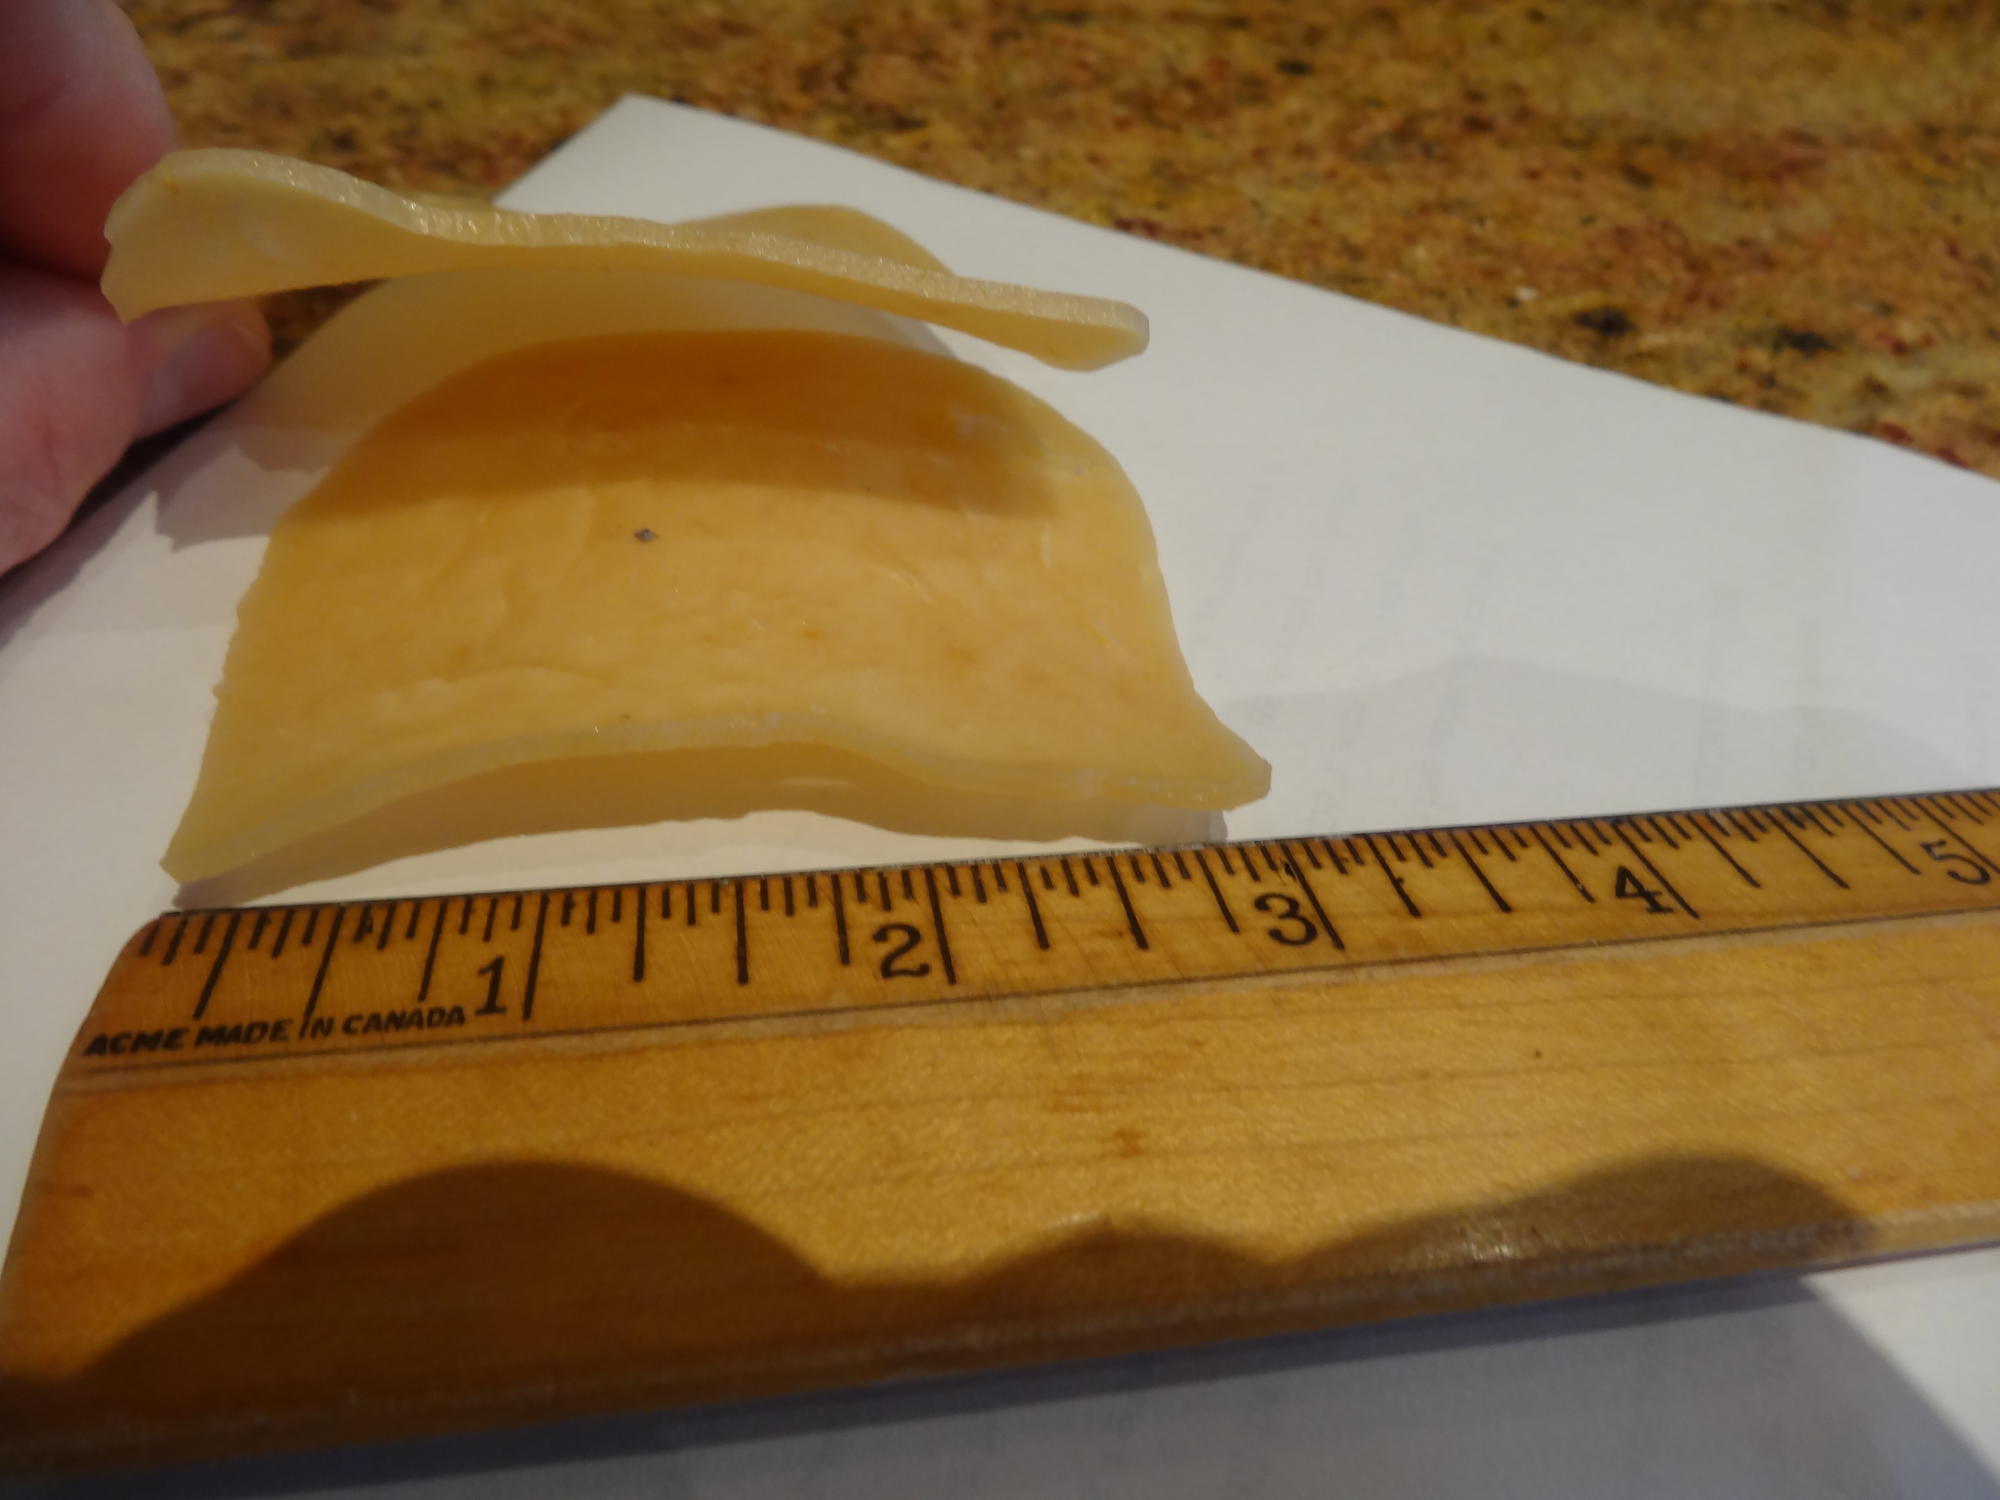
Thanks. The chips are commercial and I don't have the package but these are really 'shrimpy'. Not a lot of rice flour mixed in. I tried to find a picture of the packaging on line but to no avail. Here is a picture of them. They are about 3 inches by 2 1/2 inches and quite thick. The package is clear with yellow writing and an image on the front. The package is just a little bigger than the chips which are stacked up. I use my air fryer to cook them. No grease and a lot easier than doing themin a wok with oil. They only take a minute each once the machine is warmed up. They are about 4" x 4" once cooked. I cracked a few and served them with peanut sauce along with spring rolls for pre-dinner snacks and then put the rest on the plater.

-
I love those little butane single-burners. I had four that I used for catering and farmer's markets, and have kept two of them (the other two went to my daughter and my GF's daughter). They're great to have for when the power goes out, and I usually throw one into my vehicle before any long highway drives in winter, just in case. I also pull one out for wok cooking, every once in a while.
-
Yes, very true. I pimped my 2-hob "camp stove" for wokking with a variable pressure regulator/gauge that will also win this race at 180K Btu. Do not try this indoors without a suppression hood! Now we wait for the reductio ad absurdum of an aluminum smelting induction heater hacked for culinary use...
-
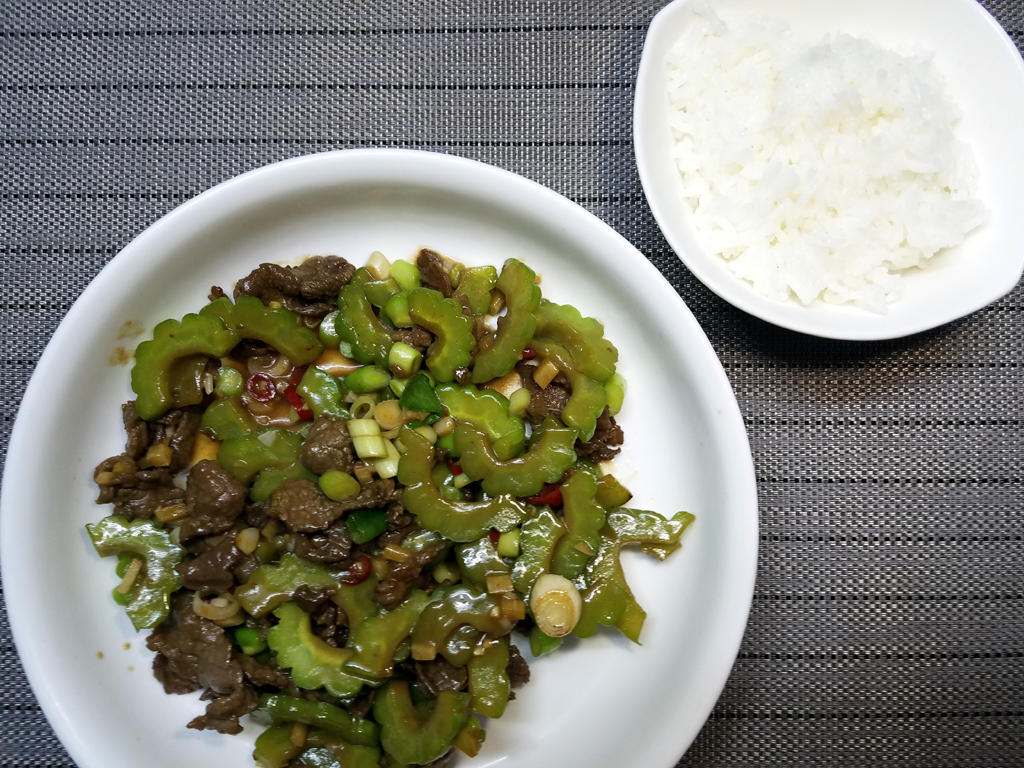
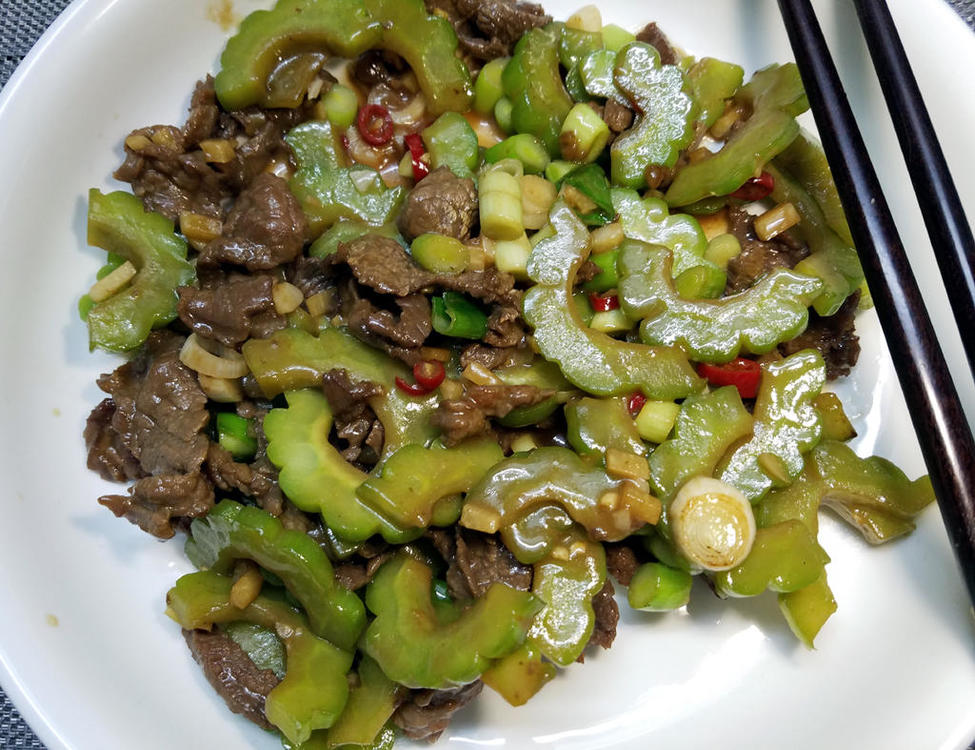
I've probably posted something similar before, but it's a favourite, so no apologies! Bitter melon and beef stir fry. With rice. Beef marinated in soy sauce and Shaoxing wine with potato starch, garlic and chilli. Wokked with the bitter melon and finally finished with scallions and sesame oil.

-

Info on How to Learn High-Heat Chinese Wok Cooking
jemartin replied to a topic in Cookbooks & References
I notice some chefs seem to like adding water to the hot pan, and the pan flames up. Does this improve wok hei or is it just for show? -
It's this one: https://www.amazon.com/Best-Nicole-Routhier/dp/1556704364 Many excellent recipes in this book ...just 126 pages. Here is the recipe for what she calls "Warm Rice Noodles with Stir-Fried Beef, Saigon Style" or "Bun Bo" 1 lb thin rice vermicelli noodles which you soak in warm water for 20 minutes then cook in boiling salted water for 2 to 3 minutes then drain and rinse in cold water. 3 stalks lemon grass, thinly sliced 1.5 lb lean beef for stir frying, cut against the grain into thin 2 x 2 inch slices 2 tablespoons Vietnamese or Thai fish sauce 6 cloves garlic, chopped 3 teaspoons curry powder black pepper 8 leaves of soft lettuce, thinly shredded 1/2 cup thinly shredded mint leaves 1 small cucumber, peeled, deseeded and finely shredded 1 cup fresh bean sprouts (I like to take the brown tails off) 3 tablespoons peanut oil 2 small onions, thinly sliced 2/3 cup unsalted pan toasted or dry roasted peanuts, chopped coriander leaves for garnish _______________ Nuoc Cham with carrot (make the whole recipe to ensure you have enough...if you are making the whole recipe above, she recommends making double this recipe for the sauce.) 2 small garlic cloves, crushed 1 small chile 2 tablespoons sugar 2 tablespoons fresh lime juice 1/4 cup rice vinegar 1/4 cup Vietnamese of Thai fish sauce 1/4 cup water Crush the garlic, chile and sugar in a mortar until a paste. Mix in all the other ingredients. For the carrot to go in the sauce: 1 small carrot, shredded finely 1 teaspoon sugar toss the carrot in the sugar and let sit for 30 minutes then mix into the above sauce. __________________ For the dish: Mix 1 teaspoon of the curry powder, the fish sauce, 1/2 the garlic and black pepper together with the beef and marinate for 30 minutes. In a large bowl combine the shredded lettuce, mint, cucumber and beans sprouts...toss to mix well. Divide this mixture evenly amongst four bowls the top with the cooked, drained noodles and refrigerate until you are ready to cook the beef and finish the dish. Heat the oil in a wok. Add the remaining garlic and stir fry until fragrant. Add the sliced onions, lemon grass and the remaining 2 teaspoons fo curry powder. Stir fry until the onions are translucent, about 2 minutes. Add the beef and stir fry over high heat until the beef is browned. Top each bowl with 1/4 of the beef stir fry mixture. Top with the peanuts and coriander leaves. Serve with the Nuoc Cham. This will make a lot of food. I made about a 1/4 recipe for two of us. It is also quite time consuming to make but really worthwhile. It is a great dish for entertaining because it can all be made ahead apart from the stir frying.
-

Info on How to Learn High-Heat Chinese Wok Cooking
Toliver replied to a topic in Cookbooks & References
You are also supposed to push the food up the sides of the wok where it's a (little) cooler so it doesn't overcook. Doing this also makes room in the hot part of the wok to make/thicken your sauce.