Todd in Chicago
-
Posts
148 -
Joined
-
Last visited
Content Type
Profiles
Forums
Store
Help Articles
Everything posted by Todd in Chicago
-
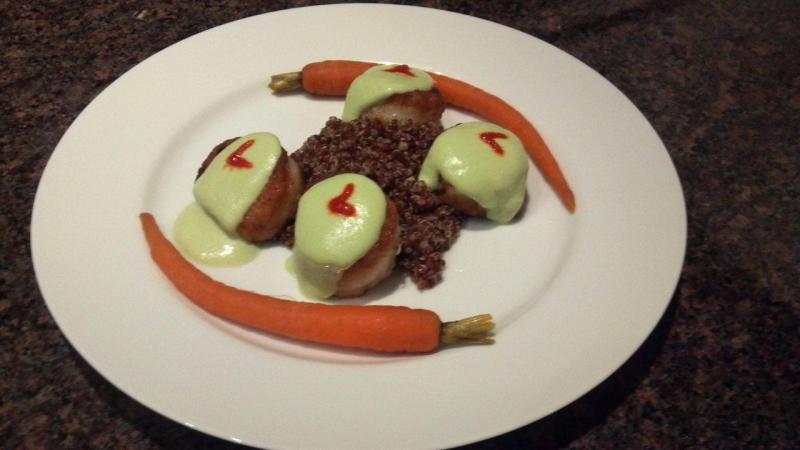
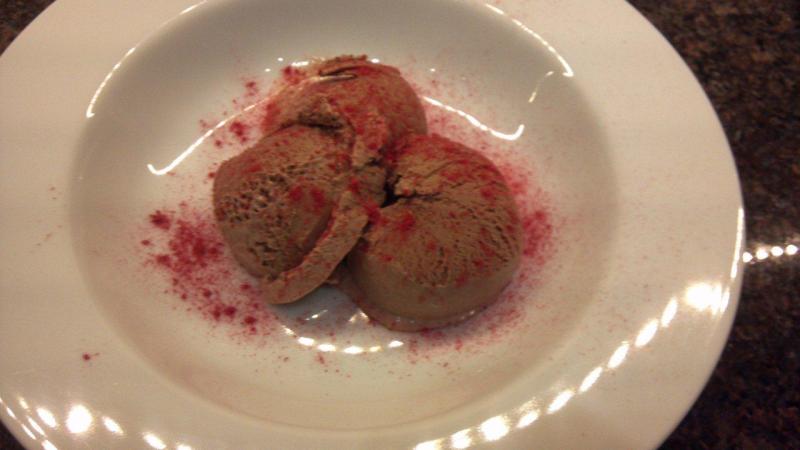
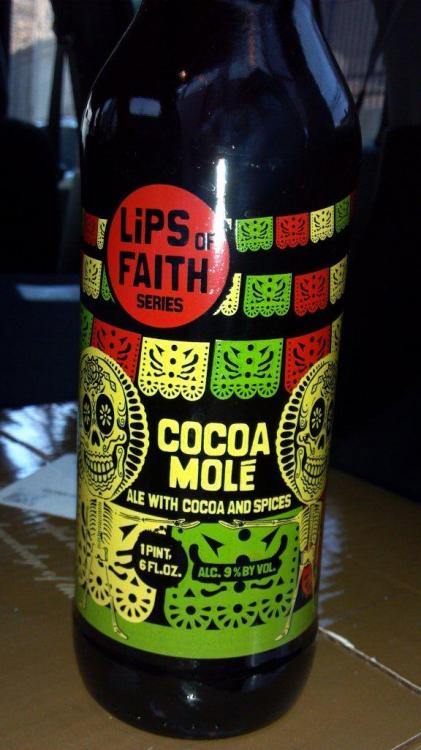
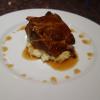
Greetings from Chicago! Tonight was seared diver scallops with Edamame puree and a spot of siracha, served on a mound of red quinoa. Carrots were sousvide with Vadouvan curry. Plating was amateurish and puree was "supposed" to be a more of a foam with my ISI (guess I need to use two carts?), oh well still learning. Taste was better than it looked fortunately. ;-) Dessert was chocolate gelato (store bought) with raspberry powder (dehydrated raspberries into the Vitamix!). Pre-cooking beverage was the Cocoa Mole beer. Not a bad night at all!! Todd in Chicago


-
Chris.... I'm having trouble locating your site to place my order. LOL...BEEEEAAAUTTIFUL!!! Cheers.... Todd in Chicago
-
I've made bacon from Michaels book also and my pork belly gave up less than 1/2 cup of liquid - not much at all. Todd in Chicago P.S. Bacon tasted great!
-
I did just check my bags in the freezer....not sure where I got the time/temp from, but did 12 hours @ 131F. My thought is to bring up to temp in a 130F bath, and then a quick sear either on the grill or a pan. We'll see how it comes out! Todd in Chicago
-
I was lucky enough to stumble across a bowl of these in my local butcher shop recently (5 of them) and bought all of them. They are already cooked SV and currently frozen and ready for a reheat/sear. I can't remember the time/temp at the moment, but I believe these were sub 130 F. I normally don't cook very many things less than 130, but I got the time/temp (I think from MC) from somewhere. Since I normally always use 130 F for a reheat, anytime I cook anything less than that I note it on the bag so that upon reheat, I will never go over the original temp. I'll see how they turn out, my wifes a stickler for tender been and is hooked on tenderloin and usually frowns on much else. I do love the hanger and a restaurant across the street (BLT) in Chicago has hanger steak on the menu. Cheers.... Todd in Chicago
-
Ooohhh....thanks Chris! Inspired! Todd in Chicago
-
LOL.... Mine is stored on top of my dryer in the laundry room! I cover it with a towel so no debris gets in when not in use. I LOVE this machine, but my better half would never have it on display...even if it is shiny....and beautiful...and perfect. LOL... Todd in Chicago
-
Adefiore..... Just measured....24 inches is an accurate measure, including the plastic piece that sticks out the back for the plug. I would say if you could spare a 1/2 inch or inch, the cord wouldn't be bent at a crazy 90 degree angle. Love this machine....it's a perfect match for my SVS. Cheers.... Todd in Chicago
-
I usually use a sharpie and mark whether or not the bagged item is cooked, product, and additions to the bag. Sometimes the date or origin. So bags might look like: cooked - Bari Chix breast - thyme/butter - 140 **Note - Bari is the name on an Italian butcher where the chicken was purchased. And I ofent improvise and make other small cryptic notes on the bag. ;-) Cheers... Todd in Chicago
-
Well done Duncan! To be honest, I'm a fairly impatient person also and almost ALWAYS empty my hottest tap water into my SVS to "assist" getting up to temp quicker. I'm assuming that is fairly common practice. Cheers... Todd in Chicago
-
Are cooking classes worth the price tag?
Todd in Chicago replied to a topic in Food Traditions & Culture
Folks.... I'm lucky enough to live in Chicago and have several choices. I recently found Kendall College which specialized in culinary degrees. They also offer "non-professional" courses as well and thus far I have taken a 6 hour "Sauces" class @ $120 and a 3 hour "Knife Skills" class @ $60. Both were well worth it. Below is my play-by-play of the "Sauces" class, and hopefully you can see why I think it was worth it. It may very well be worth someones while to seek out a similar institution in their area. Cheers... Todd in Chicago I had a great time today attending a 6 hour “Sauces” class at Kendall College in our neighborhood. Kendall College is known for their culinary program and offers full career training as well as these “Enthusiast” classes. I was very impressed with the quality of the entire process of the class - from Chef Brandy who was our teacher, the four (yes FOUR) additional assistants who made everything run smoothly, the facilities themselves (cool to work in a professional kitchen), the organization and quality of the content. Oh yeah, and the tastes and smells! I would rate this overall experience very high. I arrived about 5 minutes prior to the class and checked in at the lobby. Everyone meets in the lobby and then they take you up to the working floor when everyone has arrived. Before they take you up, they go over some of the ground rules; such as where the washing stations will be, restrooms, and things like if you use your phone or camera to take a picture, you are supposed to wash your hands at the washing station. They also passed out the recipes that were going to be covered in class. **Note….at this point I realized I was the only male in the class since my cooking buddy Rex decided to head to Mexico…<sigh>. Once in the kitchen, everyone was provided with a workspace and a place to put their jackets, etc. Each workspace was set up with a cutting board, a chefs knife, and a wooden spoon. Also, chef’s hats, an apron, and a side towel were provided. Once everyone put on their “Chef” gear and washed their hands, class started. We spent about 15 minutes introducing ourselves and covering the basics of sauces such as that there are 5 mother sauces: • Sauce Bechamel • Sauce Veloute • Sauce Tomat (AKA Tomato Sauce) • Sauce Espagnole (AKA Sauce Brune or Brown Sauce) • Hollandaise Sauce Most all other sauces are derivatives of the mother sauces or derivatives of derivatives of the mother sauces. And with that, we jumped right in. First up was to create our first mother sauce, Espagnole. Lucky for us, they already had the brown stock so we didn’t have to waste several hours making this. ;-) Chef Brandy split us up into teams and I was working with Joan (a personal chef who cooks meals for families, etc) and Tracy (just a gal from Lincoln Park who wanted to learn how to make sauces!). I think we made a great team. We chopped our veggies and got it started and made our roux, and then put in our stock. This would now need to simmer for 45 minutes. While our Espagnole was simmering, Chef Brandy taught us about vinaigrettes. A vinaigrette typically has 3 components, an oil, and acid, and seasonings. The usual ratio is 2-3 parts oil to 1 part acid. Different types of oils can be used (for example olive oil for Italian, Canola with Sesame or Mirin for Asian, etc) for different flavor profiles. The acid can also vary from vinegars to citrus. Most often a touch of Dijon mustard is also added as an emulsifier. Chef Brandy seemed to think that you can almost never miss by adding a touch of shallots and garlic as well. The teams were then provided access to many different oils, acids, Dijon, and seasoning (fresh herbs, etc) and each team was to create a vinaigrette which would then be tasted by Chef Brandy for critique. We chose a standard red wine vinaigrette with shallots, garlic, thyme, parsely, Dijon, olive oil and red wine vinegar. I thought it was just “ok” and for some reason didn’t blow my mind. The rest of our team thought it was the best of the class. By then our Espagnole sauce was about done simmering and we would move on to our next sauce. This sauce would be a derivative of the Espagnole sauce and is another classical French sauce – a demi glace. All of the sauces that we would make today would follow the traditional techniques, and actually the demi glace was an easy one. Simply mix 1 part Espagnole with 1 part brown stock and reduce by half – i.e.; more simmering. While our Espagnole and brown stock mixture was simmering and becoming a demi glace, we began our next project – a caramel sauce for Mexican chocolate soufflé. For this we had to create a double-boiler to melt the Mexican chocolate and the butter, and whip the egg whites with the mixer (this was one part of the class which was not perfect as we had some delays as the mixer was refusing to cooperate – eventually we got it work and everyone got there whites whipped). I also got the opportunity <sigh> to butter and sugar 8 ramekins. My teammates were making the caramel (very easy) and mixing the chocolate and butter. I also whipped our whites into shape and Tracy then folded in our whipped whites into the chocolate/egg mixture. I then filled the ramekins while our caramel sauce finished. By this time we were just heading into our lunch break, but one last thing to do. Create two last sauces! Turn our demi glace into a Madeira wine sauce! Ok…this is hardly a new task/sauce, but it really does make a difference – when the demi glace is complete, stir in 2 ozs of Madeira wine and reduce to sauce consistancy. Voila! Madeira wine sauce! The other sauce we made right before the lunch break was a classic (and another mother sauce) – Hollandaise! This actually is a bit tricky for one person and it is recommended that two people do this one. Although I’ve made it at home by myself, it is much easier with two people (or even easier using the blender method!). We mixed our egg yolks with freshly squeezed lemon juice, and over a double boiler added our melted butter. Everyone in the class had success with making the Hollandaise….yay! Chef Brandy and team checked all sauces at various steps in the process offering us valuable insights and tips not found in the printed recipes – they were fantastic! For this sauce I worked with only Joan as this was a two person sauce and Tracy paired up with someone else. Joan and I had great team work on this one and actually had enough time for her to do a batch and for me to do a batch. Time for lunch and to sample our work! Lunch consisted of Beef Tenderloin cooked by our great kitchen assistants, topped with our own Madeira sauce, a salad with our own vinaigrette, and grilled asparagus with our Hollandaise sauce! How fun…..and good! We had about 30 minutes or so for lunch and upon our return we had our chocolate soufflé’s with our caramel sauce. I was not as impressed with this one – maybe it wasn’t sweet enough for me. Time to start our after lunch session. The first sauce after lunch was a Gastrique! The recipe we were making was for an Orange Gastrique. This is done by adding sugar, water, orange zest, star anise, orange juice, AND of course, the ubiquitous brown stock. This gets boiled and reduced to a syrupy consistency. While this was reducing, off to our next recipe/task! This was a simple and fun one – we got to make compound butter. Everyone got slab of butter and access to fresh herbs and veggies. This was an individual task and everyone would end up getting their butters rolled tight and stuck in the icebox for them to bring home. I used Thyme, Shallots, and a bit of Garlic in mine. Smelled wonderful! Our next sauce would be another mother sauce – Sauce Bechamel. Lucky for us Chef Brandy had already started part of this which was to create an onion piquet (a half an onion with a bay leaf “nailed” to the cut side of it using cloves) and simmer it in whole milk for 20 mins. All we had to do was to make a light roux, add the warm milk and whip into velvetiness – and then for the coup de grace, we added cheddar cheese and cayenne. Of course, everyone’s béchamel based cheese sauce was critiqued by Chef Brandy and then all were emptied into a giant pan of pre-cooked macaroni. Those were then mixed well, covered with breadcrumbs, and yes, more melted butter and popped into the oven. At this point, our Gastriques were just about done and Chef Brandy seared up some duck breasts and sliced into thin slices and plated them for tasting. At the very end of our reduction of the gastrique, it was pressed through a chinois and then honey and butter were added. This was the most AWESOME sauce (I think) of the class. This was then drizzled over the duck breasts. OMG…..delish! And my teammates Tracy and Joan didn’t really want their samples – so I lucked out and got them. YUMMO! We then moved on to our last sauce and project of the day – Poached Sole with a Beurre Blanc sauce. We poached extremely thin sole fillets in a liquid of Clementine juice, white wine, butter and shallots. Chef Brandy showed us how to use parchment paper to make a “poaching lid” so that the fish would be cooked from not only below but from above as the steam built up under our parchment paper lid. The fish cooked very quickly and was removed. The poaching liquid was then pressed through a chinois and was put back into another pot and was reduced. We then used this to make the beurre blanc. Chef Brandy really indicated the importance of using cold butter when making the beurre blanc. Cold butter was added slowly to the reduce poaching liquid over gentle heat. The sauce was then ladled over the fillet of sole and the plates were garnished with Clementine supreme’s and mint chiffonade. This was very good…..how could it not be? Oops we forgot about the mac ‘n cheese! It was pulled out of the oven in the nick of time and everyone got to sample that as well. We thanked Chef Brandy and our 4 assistants and everyone agreed what a great time it was. Woohooo! What fun! Cheers.... Todd in Chicago -
Ummmm....not so cheap, but try some duck! We made duck breasts for a New Years Eve dinner party for 8, and they were great! Cheers.... Todd in Chicago
-
Hmmm...thanks- I'm finding this all so confusing, since it really is from the shoulder and considered chuck, so I was thinking it might require 24 hours. Isn't tenderloin a much softer piece of meat to begin with so that it doesn't require the longer cooking times? Looking further I've seen 12 hours at 131 degrees suggested for chuck tender steak (which is another name for mock tenders/shoulder tenders/petite fillet/fillet roast/kolichel). Anyone else have suggestions for this cut? Thanks! Todd- glad I followed your advice. We tend to like it more on the pink and not quite as red, so I upped it to 133 and cooked it for 3 1/2 hours. I just used a simple dry spice rub (mostly garlic and onion powder). Cooked it whole and then sliced it thin and it was some of the best sliced steak we've ever had. Based on the thickness (about an inch and a half) I probably could have done it only for 3 hours, but one of the things that's so great is the extra half hour or so doesn't matter, and it makes coordinating everything so much easier. Thanks again for your advice! Hey! Sorry for the delayed reply. Glad it worked out for you and welcome to the uberkewl world of SV! Hey, you also asked about the VP112. It's a pretty large and heavy machine, I would LOVE to be able to leave it out on the countertop, but my significant other would never let that happen. As it turns out, I keep it in the laundry room covered with a towel so no dust gets in. I do my bagging in the kitchen and my sealing in the laundry room. I don't think I would be all that happy with having to move the VP112 around....alot. It's probably between 40 and 50 pounds. Cheers....and have fun! Todd in Chicago
-
"Modernist Cuisine" by Myhrvold, Young & Bilet (Part 3)
Todd in Chicago replied to a topic in Cookbooks & References
Folks! I got a chance to see Chris Young speak about Modernist Cuisine at Chicago Ideas week. He was fantastic! And as luck would have it, got to have a small chat with him when I bumped into him a few blocks away. Very nice guy! Well as it turns out, Chicago Ideas week posted their videos online. I was lucky enough to be in the second row. Here is a link to Chris Young's speech: http://www.chicagoideas.com/videos/12 One thing that constantly amazes me is people that can speak to an audience well; a skill that Nathan and Chris both have! Cheers... Todd in Chicago -
Anyone use their SousVide a lot more than they thought they would? My SVS no longer travels from my countertop to the cabinet it was originally supposed to be stored in. It is now a permanent fixture on my countertop and probably gets used every other day. For better or worse, I use my SVS for probably about 80% of my cooking. I don't think I intended it to be that way, I think the quality of the end result + the convenience of "cook-chill-freeze-reheat" has simply been too much to deny. The SVS with the combination of a good vacuum sealer (I use the VacMaster VP112) has really changed much of my approach to most of my meals. Anyone else chime in on this? Todd in Chicago
-
I believe I cooked a mock tenderloin from Buther and Larder in Chicago - I just followed my normal for cooking tenderloin - 130 degrees F for 2 - 4 hours. Your mileage may vary. Todd in Chicago
-
Cookman... I believe that the 210 and 215 are bigger brothers of the 112. I have the 112 and you can make the vacuum pretty much as tight as you want. The only time I've had problems with bags floating are with vegetables (doesn't matter what sealer you use, possible to run into gas release problems), and when purposefully do not pull a heavy vacuum, such as when not wanting to "crush" fish. Cheers... Todd in Chicago
-
Jmolinari..... I would agree with you. I believe I liked the first issue better than the second, but the second was still very good. Maybe it was because the first issue was so "out of the box" and fresh, and the second one needed to be even more so.....but we were already expecting that. Cheers... Todd in Chicago
-
I've had my 112 for a while now and it's a quality machine. I also had to decide (could have bought either one), and what finally made it for me was the weight difference. I knew that mine would NOT be in my kitchen and would be stored somewhere else. The thought of trying to horse around with the 90 lb. 210 vs. the 50 lb. 112 was the difference for me. I thought that the 210 had options for a double sealer bar and hte 112 has doesn't. In the end I'm very happy with the 112 and belive I made the right decision (for my needs). Good luck and have fun! Todd in Chicago EDIT: P.S. I got my VP112 from Conrad over at Homestead Harvest as was recommended by this forum. I also purchased 1000 of the medium sized bags and 1000 of the larger sized bags. I think when buying them in bulk like that, with shipping and tax I belive they came out to about 8 or 10 cents a bag.
-
I also am a fan of "Cook much, chill, freeze, re-heat". What seems to work for me is to look in my FREEZER and say....hmmmm....tonight for dinner for my wife and I....I'll take out 1 pkg of a steak previously cooked at MY temperature, 1 pkg of steak cooked to my WIFES temperature, a pkg of carrots with butter and vadovaun curry, and a pkg of diced parsnips with salt, pepper and butter. All previously cooked to the desired temperature. Everything goes frozen into the SV at 130. Typically, once the temperature stabilizes, I'm able to start pulling things out in about 30 minutes - flash steaks on pan to sear, plate carrots and parsnips, add the steaks to the plates, and voila! A lazy cooks pretty decent dinner for a Tuesday night that is cooked ABSOLUTELY PERFECTLY! EDIT (this only works as long as nothing was cooked less than 130, which for me is most of the time). Even if the cook started cooking and then and went an screwed around on the Internet and posting to eGullet for an hour or so. I'm not sure we've ever had an undercooked or overcooked piece of food since I really started relying on my SV. Now that's pretty awesome! That's not to say I don't make special meals - I do. But the convenience of what I just mentioned above has significantly changed regular dinner preparation in this household! Right now if I had to guess, I'd say I have something like this in my freezer right now (all pre-cooked and ready to re-heat): 10 chicken thighs, 4 portions beef tenderloin, 8 chicken breasts, 1 pkg beets, 2 pkg parsnips, 2 pkg leeks, 2 portions beef tri-tip, 8 pork chops, and probably some other assorted stuff. Good times.... Cheers... Todd in Chicago
-
I think that's called being in the right place at the right time! That is actually my favorite knife, love that blade! I don't think there would be any way for me to resist those discounts....... ;-) Cheers.... Todd in Chicago P.S. This is the one I covet now! http://www.japanesechefsknife.com/SPECIALS.html#Hinoura That is one good looking Nakiri!
-
I have cooked quite a few pork chops from my local Italian butcher and always do them the same - pretty much as Doug recommends (I have a his book and is my "Go To" for quick temp/time guidance, thanks Doug!). I almost always get my chops at the 1.5 inch thick portions (rib chops), and cook them 4-5 hours @ 130. Take them out and toss 'em on the charcol grill set to "BLAZING" and get that quick sear, or use my Iwatani blow torch. Results are always good for me and for the people that try them - "These pork chops are so moist, how does that work??"..... ;-) With that being said, you may still end up sometimes with the little spots of blood, but I think everyone hear will let you know that 4-6 hours @ 130 is plenty to kill any possible nasties. Remembering of course that the whole "pork trichnosis" thing is not what it used to be. Experiment and find your favorite. Once again, I'm a bit of a lazy a**, so when I cook pork chops like this, I'll cook 6 or 8 at a time and freeze them. That way when I want a great chop, I'll get the sous vide up to temp, pull out the frozen chops and in about 30 mins @130 I'm ready to sear them for a EZ meal that is PERFECT. For me, that is one of the MOST BEAUTIFUL things - perfect food without even really trying. Call me a cheater if you will....but my guests and I are QUITE HAPPY and can live with that! LOL! Here is a quick video on YouTube of the porkchops that I'm talking about. Cheers and have a blast! Todd in Chicago
-
I would also love to hear the answer for this for the very same reasons. Cheers... Todd in Chicago
-
Folks.... I started out cooking sousvide because the science fascinates me. Then I became aware of the cool textures and "perfectness" of my food. But in the end, I realize I'm a lazy *ss cook! LOL... my contribution to "EZ Cooking". Cheers... Todd in Chicago
-
ScottyBoy.... That shore looks good! Is that chimichurri? How did you crust it? I've had SRF at a restaurant here in Chicago before (Bandera) and it was fabulous. Jealous... ;-) Todd in Chicago