Jump to content
  • Welcome to the eG Forums, a service of the eGullet Society for Culinary Arts & Letters. The Society is a 501(c)3 not-for-profit organization dedicated to the advancement of the culinary arts. These advertising-free forums are provided free of charge through donations from Society members. Anyone may read the forums, but to post you must create a free account.

Edit History

andiesenji

andiesenji

Several FaceBook friends asked me to publish my method of making kefir on my blog so I put together some information and photos.

There has been only minimal interest expressed here on eG but I thought I would also put the info out here for those who find culturing yogurt "too involved, with all the heating and cooling of the milk to certain temps."  

None of that is necessary with kefir - regular milk right out of the fridge can be added to the "grains" and it is incubated at regular room temp, it just should be kept in a place away from sunlight. 


When and where kefir was first “discovered” is really unknown.  What is known is that it has been made by nomads in central Asia for at least 2000 years. Travelers wrote about it, including Marco Polo as they encountered nomadic tribes while crossing the steppes on their way along the silk road and the spice routes to the east.

The nutritional benefits are many, even more than yogurt, although that is an excellent dairy food, the combination of bacterial cultures and yeast cultures in kefir “grains” consume the sugars in milk which cause problems for those who are lactose intolerant.  Allowing the culture to “work” for longer will reduce the lactose even more.  The “probiotics” help to restore the desirable intestinal flora in the gut following illness and treatment with antibiotics, which often disrupt this system.  It also helps with heartburn and “sour stomach” which plagues people with GERD.

Did you know that Kefir is very good in cooking and baking?  Did you know that you can use it instead of buttermilk in recipes – and that it gives a wonderful texture and flavor to quick breads and cakes.  You can sweeten it for a refreshing drink and for a sauce for fruit and other salads.  And you can strain it to make kefir “cheese” which works well in recipes that call for similar dairy foods.

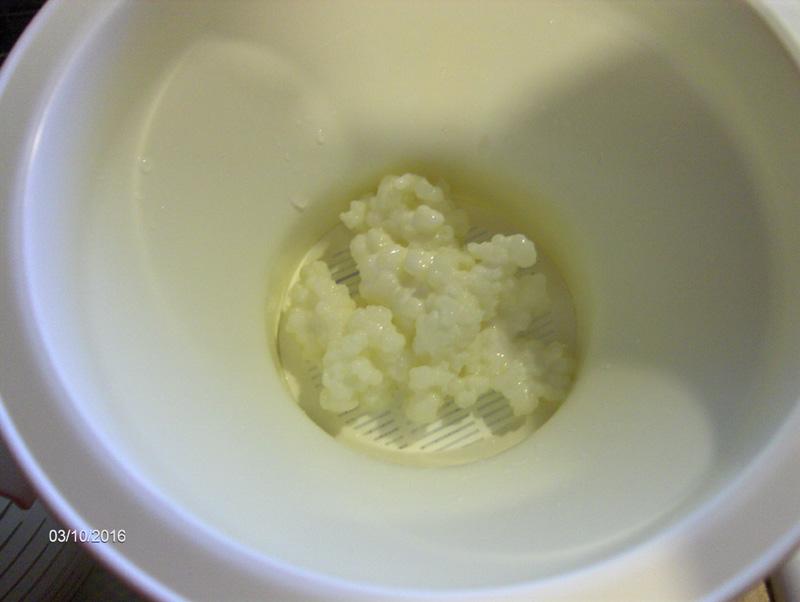
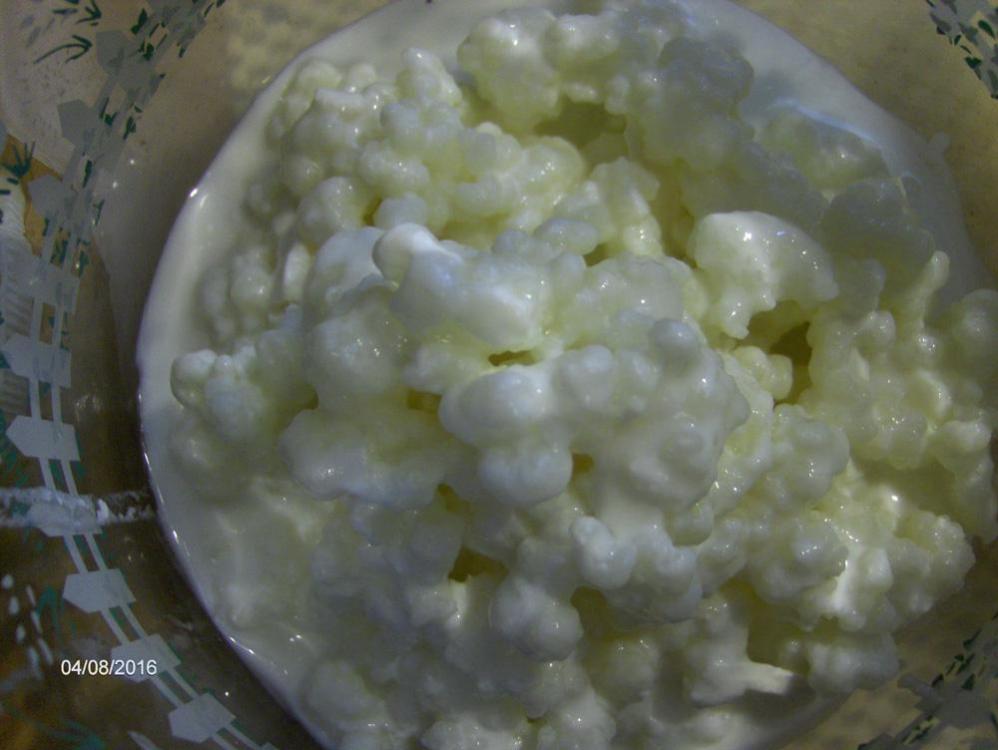
Kefir requires no special equipment, does not even require the milk to be heated or incubated at higher than room temperatures.  All you need to start is to order some KEFIR GRAINS.  This is what they will look like when you first get them. This is about three tablespoons full.  This is what they look like after removing them from the kefir and rinsing them with cold water.

#1 kefir grains rinsed.jpg#1 kefir grains rinsed

Kefir “grains” are the “mother” cultures which will turn milk into kefir at normal room temperature, usually taking 24 hours. These are a combination of microorganisms that clump together by the action of polysaccharides.  These include lactobacilli, leuconostocs, lactococci, yeasts and acetic acid producing bacteria.   It looks rather like gelatinous curds, sort of like semi-transparent, whitish, gummi candies shaped like globules.  Some people liken the appearance to small cauliflower pieces.  The grains are chewy, rubbery and don’t have much flavor.

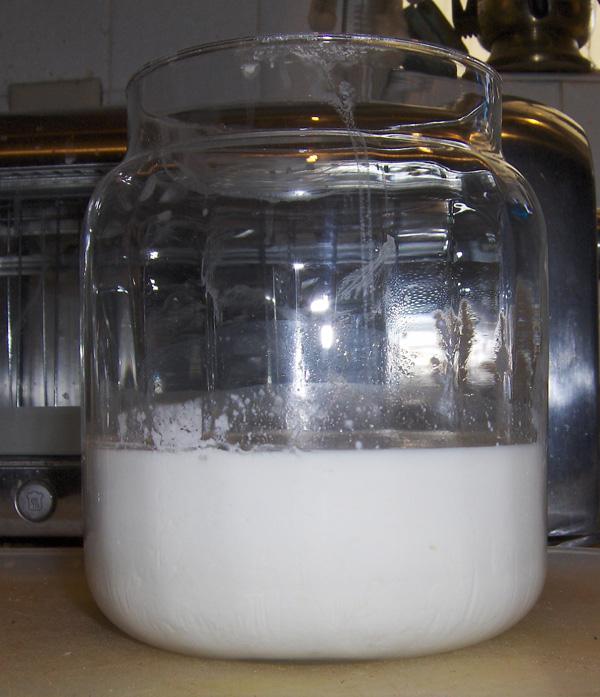
This is what they look like after adding a cup or so of milk.  They float at the surface.  In this photo the kefir grains have been placed in a half-gallon jar and 1 1/2 cups of regular milk has been added.

#2 After adding 1 1:2 cups of milk:.jpg#2 After adding 1 1:2 cups of milk:

I put the jar WITH THE LID LOOSE in a pantry which remains about the same temp all year – around 75° F.  The "working" culture should be kept in a dark place, away from sunlight.

Some people recommend covering the jar with cloth to allow it to “breathe” but I found that a loose PLASTIC lid works just fine and many of the glass jars sold as canisters have one piece plastic lids that are dishwasher safe and work just fine and are easier to sterilize than cloth.  NEVER LEAVE THE JAR WITH THE LID SCREWED ON TIGHT!  The kefir culture produces some gas and if there is not sufficient room in the container, it can cause it to break.

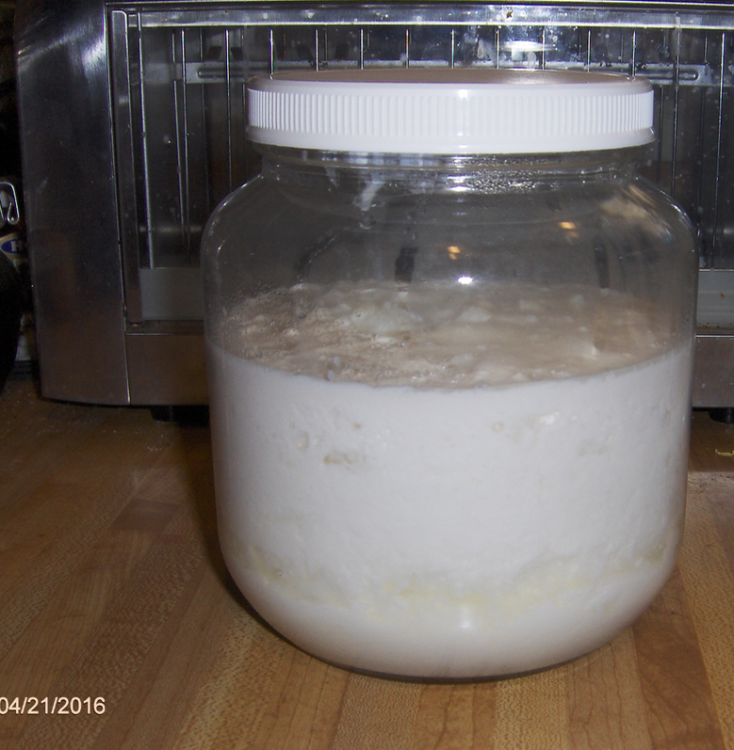
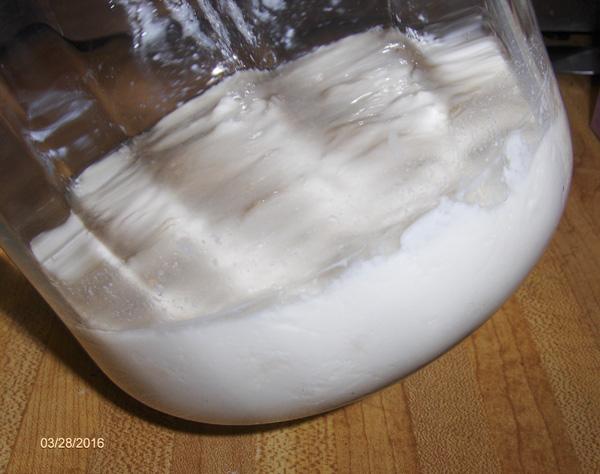
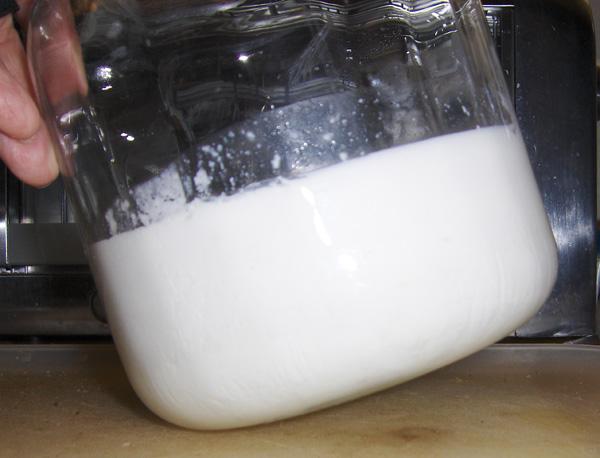
This photo also shows a break in the culture near the bottom of the jar, this is normal and is just a layer of liquid – whey – that has separated from the curd and it recombines as soon as the kefir is stirred.

Screen Shot 2016-04-21 at 2.07.15 PM.pngScreen Shot 2016-04-21 at 2.07.15 PM

The process works fine with pasteurized milk, homogenized mild, ultra-pasteurized milk etc.  If you want to use raw milk it MUST BE PASTEURIZED prior to culturing with the the kefir grains.

The milk can be cultured for up to 48 hours but 24 hours is best, before adding more milk.  If the ambient temps are above 95, it is best to keep the culture in a cool place and check it every 12 hours and if the kefir grains are prominent on the surface and it looks somewhat dry, add some more milk.

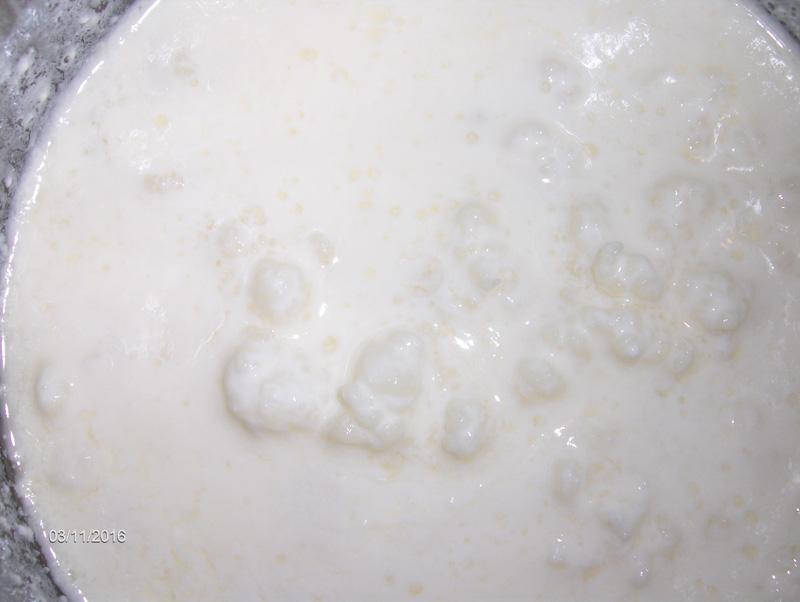
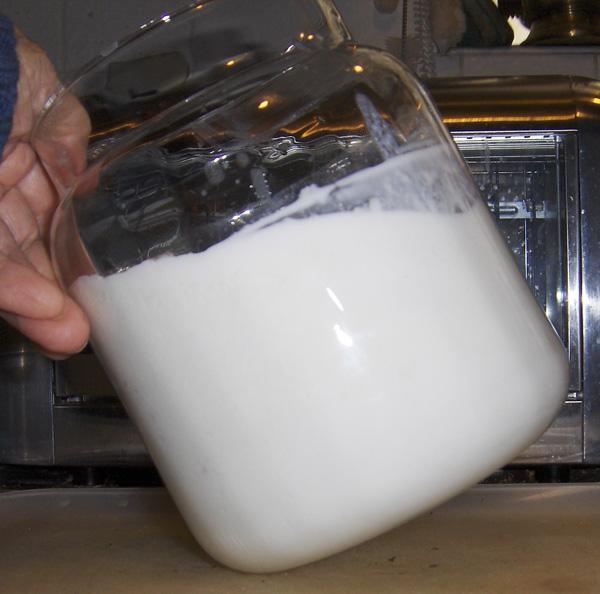
DAY TWO.  This is after 24 hours.  As you can see, the culture has set and it appears to have expanded a bit as the kefir grains have swollen and multiplied.

#3 After one day set with 1+ cups of milk.jpg#3 After one day set with 1+ cups of milk

I add another cup of milk, no need to stir, and return the jar, with its lid LOOSE to the pantry.

DAY THREE.  Another 24 hours has passed and the culture has again set and it is time to add another cup OR MORE of milk.  At this point the kefir grains have “grown” enough to culture a larger quantity of milk if you will be needing a greater volume soon.

#4 Second day + 2 cups milk.jpg#4 Second day + 2 cups milk

It should be set like this.  If there is some separation near the bottom with some visible liquid, just stir the kefir and then add the new milk.

#6 Third day, well set.jpg#6 Third day, well set

DAY FIVE.  I forgot to take photos on day four.  The volume is now more than a quart.

It is not quite set as firmly as previous days due to the volume.  Slightly less than one cup of milk will be added today.

#8 4th day set.jpg#8 4th day set

DAY SIX.   It is ready to be strained and the kefir grains transferred to a clean jar to begin the process all over again.I have stirred the kefir to liquify the firm culture and separate the grains to make it easier to drain.

#9 6th day + 5 cups milk.jpg#10 grains stirred into culture before draining

USE ONLY WHITE PLASTIC OR STAINLESS STEEL UTENSILS AND STRAINER.  Other metals react with the acid in the kefir and impart unpleasant flavors.  If you need to use cloth to strain it, make sure it is well rinsed with cold water prior to use. Wring it out but leave it damp to make straining easier.
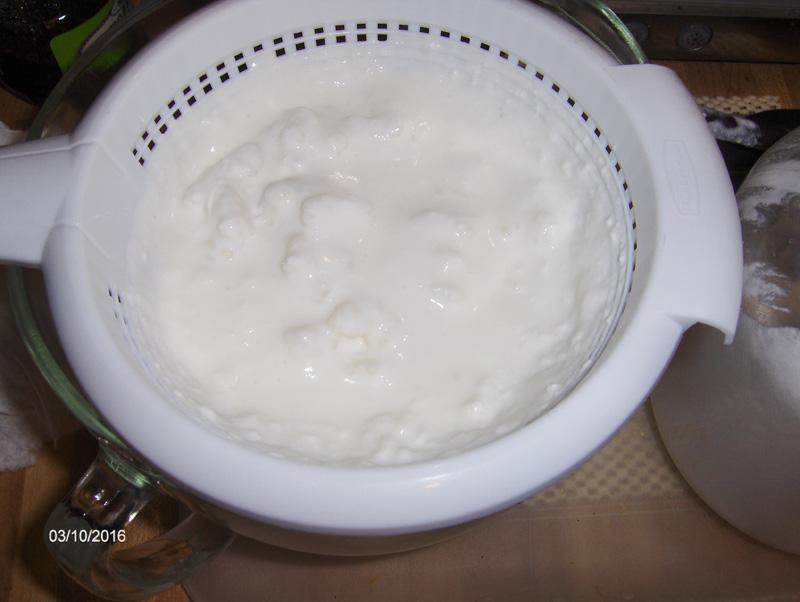
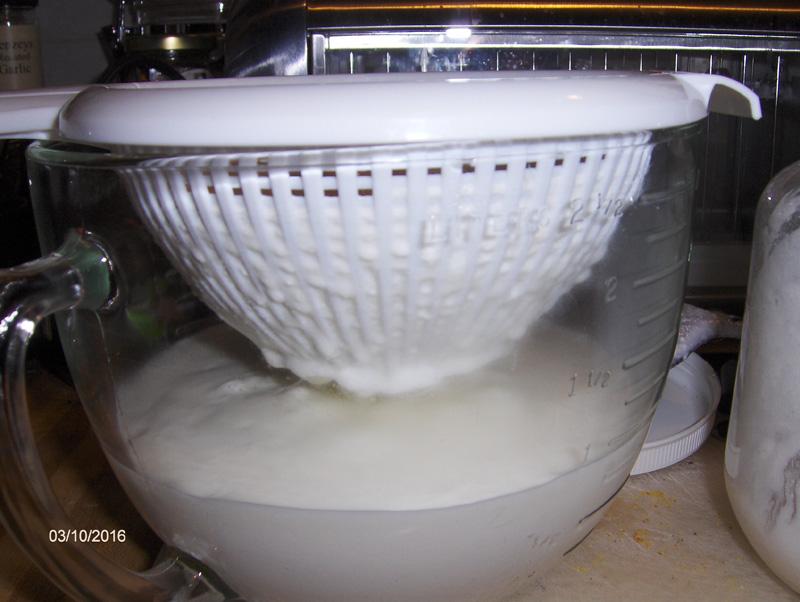
Draining kefir.jpg

Use white plastic strainer.jpg

kefir drained from grains.jpg

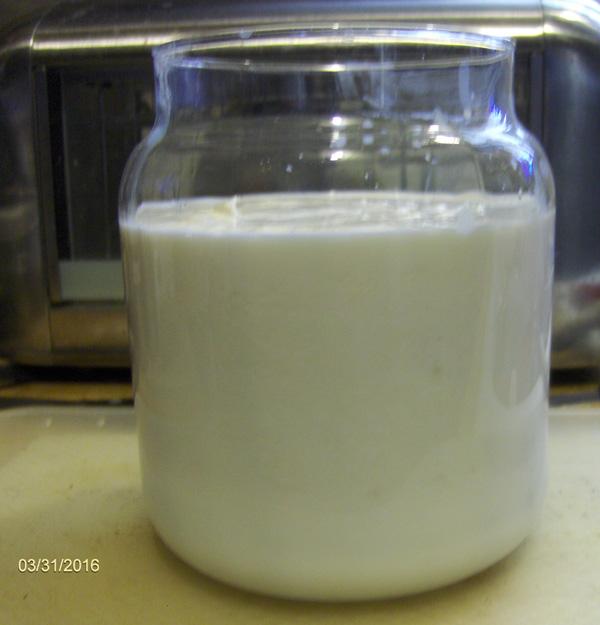
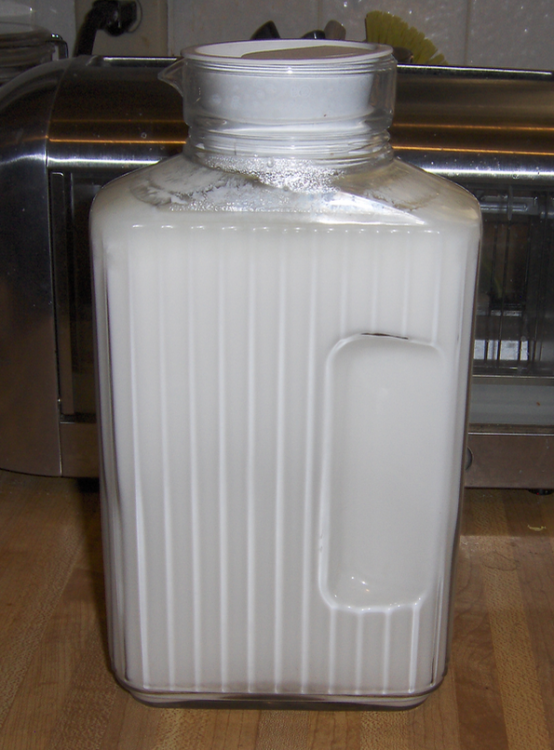
This is the finished kefir, ready to be stored in the fridge until needed.  It can be combined with fruit syrups, added to smoothies, and even mixed with cereal, cold or hot, for a nutritious breakfast or snack.  Any recipe that uses buttermilk or yogurt works with kefir.

Screen Shot 2016-04-21 at 2.06.51 PM.pngkefir finished grains removed

This is a 2.5 liter container so it will hold more than a single batch.  I have two of these so usually have one full and one partially filled.  I use a lot of kefir.

Some people advise straining the kefir grains out and starting a new jar every 24 hours but I have found that this is unnecessary and too time consuming and it discourages many first-time, novice people.  Using a larger container – in this case a two-quart glass jar – and just adding a cup of milk each day for FIVE days and then straining it on the SIXTH day, works well for most folks.  And the result is a sufficient amount that can be transferred to a glass container to store in the fridge.

And after 6 weeks of repeated culturing, we have a lot more kefir grains which can be divided into additional containers to make larger batches or stored in milk in the fridge, which slows down the activity but you still have to add some milk every three days or so, instead of daily.

Kefir grains, drained and rinsed after 6 weeks.jpg

Kefir grains, drained and rinsed after 6 weeks

And you can share your “extra” kefir grains with others.  Once you understand that the production of kefir is very simple and the savings when you make your own is significant, you will never go back to the store-bought stuff with the “preservatives” and “coloring agents” and “artificial flavors” that processors add to increase shelf life.

There are numerous online sources of information about Kefir and places where you can order the grains if you do not have a health food store in your city that sells it.

For further information, search the links below.

Cultured Food Life  has some excellent information.

Authority Nutrition explains some health benefits of kefir.

Health Food Lover  has some recipes.

Live Pure Health has more recipes.   And has a page on making Kefir Cheese.

And for an extensive HISTORICAL perspective and just about anything and everything you would like to learn about kefir, there is

DOM'S KEFIR GRAINS AND KEFIR SITE with numerous links to other pages and information about OTHER types of cultures such as water (sugar) kefir, etc.


andiesenji

andiesenji

Several FaceBook friends asked me to publish my method of making kefir on my blog so I put together some information and photos.

There has been only minimal interest expressed here on eG but I thought I would also put the info out here for those who find culturing yogurt "too involved, with all the heating and cooling of the milk to certain temps."  

None of that is necessary with kefir - regular milk right out of the fridge can be added to the "grains" and it is incubated at regular room temp, it just should be kept in a place away from sunlight. 


When and where kefir was first “discovered” is really unknown.  What is known is that it has been made by nomads in central Asia for at least 2000 years. Travelers wrote about it, including Marco Polo as they encountered nomadic tribes while crossing the steppes on their way along the silk road and the spice routes to the east.

The nutritional benefits are many, even more than yogurt, although that is an excellent dairy food, the combination of bacterial cultures and yeast cultures in kefir “grains” consume the sugars in milk which cause problems for those who are lactose intolerant.  Allowing the culture to “work” for longer will reduce the lactose even more.  The “probiotics” help to restore the desirable intestinal flora in the gut following illness and treatment with antibiotics, which often disrupt this system.  It also helps with heartburn and “sour stomach” which plagues people with GERD.

Did you know that Kefir is very good in cooking and baking?  Did you know that you can use it instead of buttermilk in recipes – and that it gives a wonderful texture and flavor to quick breads and cakes.  You can sweeten it for a refreshing drink and for a sauce for fruit and other salads.  And you can strain it to make kefir “cheese” which works well in recipes that call for similar dairy foods.

Kefir requires no special equipment, does not even require the milk to be heated or incubated at higher than room temperatures.  All you need to start is to order some KEFIR GRAINS.  This is what they will look like when you first get them. This is about three tablespoons full.  This is what they look like after removing them from the kefir and rinsing them with cold water.

#1 kefir grains rinsed.jpg#1 kefir grains rinsed

Kefir “grains” are the “mother” cultures which will turn milk into kefir at normal room temperature, usually taking 24 hours. These are a combination of microorganisms that clump together by the action of polysaccharides.  These include lactobacilli, leuconostocs, lactococci, yeasts and acetic acid producing bacteria.   It looks rather like gelatinous curds, sort of like semi-transparent, whitish, gummi candies shaped like globules.  Some people liken the appearance to small cauliflower pieces.  The grains are chewy, rubbery and don’t have much flavor.

This is what they look like after adding a cup or so of milk.  They float at the surface.  In this photo the kefir grains have been placed in a half-gallon jar and 1 1/2 cups of regular milk has been added.

#2 After adding 1 1:2 cups of milk:.jpg#2 After adding 1 1:2 cups of milk:

I put the jar WITH THE LID LOOSE in a pantry which remains about the same temp all year – around 75° F.  The "working" culture should be kept in a dark place, away from sunlight.

Some people recommend covering the jar with cloth to allow it to “breathe” but I found that a loose PLASTIC lid works just fine and many of the glass jars sold as canisters have one piece plastic lids that are dishwasher safe and work just fine and are easier to sterilize than cloth.  NEVER LEAVE THE JAR WITH THE LID SCREWED ON TIGHT!  The kefir culture produces some gas and if there is not sufficient room in the container, it can cause it to break.

This photo also shows a break in the culture near the bottom of the jar, this is normal and is just a layer of liquid – whey – that has separated from the curd and it recombines as soon as the kefir is stirred.

Screen Shot 2016-04-21 at 2.07.15 PM.pngScreen Shot 2016-04-21 at 2.07.15 PM

The process works fine with pasteurized milk, homogenized mild, ultra-pasteurized milk etc.  If you want to use raw milk it MUST BE PASTEURIZED prior to culturing with the the kefir grains.

The milk can be cultured for up to 48 hours but 24 hours is best, before adding more milk.  If the ambient temps are above 95, it is best to keep the culture in a cool place and check it every 12 hours and if the kefir grains are prominent on the surface and it looks somewhat dry, add some more milk.

DAY TWO.  This is after 24 hours.  As you can see, the culture has set and it appears to have expanded a bit as the kefir grains have swollen and multiplied.

#3 After one day set with 1+ cups of milk.jpg#3 After one day set with 1+ cups of milk

I add another cup of milk, no need to stir, and return the jar, with its lid LOOSE to the pantry.

DAY THREE.  Another 24 hours has passed and the culture has again set and it is time to add another cup OR MORE of milk.  At this point the kefir grains have “grown” enough to culture a larger quantity of milk if you will be needing a greater volume soon.

#4 Second day + 2 cups milk.jpg#4 Second day + 2 cups milk

It should be set like this.  If there is some separation near the bottom with some visible liquid, just stir the kefir and then add the new milk.

#6 Third day, well set.jpg#6 Third day, well set

DAY FIVE.  I forgot to take photos on day four.  The volume is now more than a quart.

It is not quite set as firmly as previous days due to the volume.  Slightly less than one cup of milk will be added today.

#8 4th day set.jpg#8 4th day set

DAY SIX.   It is ready to be strained and the kefir grains transferred to a clean jar to begin the process all over again.I have stirred the kefir to liquify the firm culture and separate the grains to make it easier to drain.

#9 6th day + 5 cups milk.jpg#10 grains stirred into culture before draining

USE ONLY WHITE PLASTIC OR STAINLESS STEEL UTENSILS AND STRAINER.  Other metals react with the acid in the kefir and impart unpleasant flavors.  If you need to use cloth to strain it, make sure it is well rinsed with cold water prior to use. Wring it out but leave it damp to make straining easier.

Draining kefir.jpg

Use white plastic strainer.jpg

kefir drained from grains.jpg

This is the finished kefir, ready to be stored in the fridge until needed.  It can be combined with fruit syrups, added to smoothies, and even mixed with cereal, cold or hot, for a nutritious breakfast or snack.  Any recipe that uses buttermilk or yogurt works with kefir.

Screen Shot 2016-04-21 at 2.06.51 PM.pngkefir finished grains removed

This is a 2.5 liter container so it will hold more than a single batch.  I have two of these so usually have one full and one partially filled.  I use a lot of kefir.

Some people advise straining the kefir grains out and starting a new jar every 24 hours but I have found that this is unnecessary and too time consuming and it discourages many first-time, novice people.  Using a larger container – in this case a two-quart glass jar – and just adding a cup of milk each day for FIVE days and then straining it on the SIXTH day, works well for most folks.  And the result is a sufficient amount that can be transferred to a glass container to store in the fridge.

And after 6 weeks of repeated culturing, we have a lot more kefir grains which can be divided into additional containers to make larger batches or stored in milk in the fridge, which slows down the activity but you still have to add some milk every three days or so, instead of daily.

Kefir grains, drained and rinsed after 6 weeks.jpg

Kefir grains, drained and rinsed after 6 weeks

And you can share your “extra” kefir grains with others.  Once you understand that the production of kefir is very simple and the savings when you make your own is significant, you will never go back to the store-bought stuff with the “preservatives” and “coloring agents” and “artificial flavors” that processors add to increase shelf life.

There are numerous online sources of information about Kefir and places where you can order the grains if you do not have a health food store in your city that sells it.

For further information, search the links below.

Cultured Food Life  has some excellent information.

Authority Nutrition explains some health benefits of kefir.

Health Food Lover  has some recipes.

Live Pure Health has more recipes.   And has a page on making Kefir Cheese.


andiesenji

andiesenji

Several FaceBook friends asked me to publish my method of making kefir on my blog so I put together some information and photos.

There has been only minimal interest expressed here on eG but I thought I would also put the info out here for those who find culturing yogurt "too involved, with all the heating and cooling of the milk to certain temps."  

None of that is necessary with kefir - regular milk right out of the fridge can be added to the "grains" and it is incubated at regular room temp, it just should be kept in a place away from sunlight. 


When and where kefir was first “discovered” is really unknown.  What is known is that it has been made by nomads in central Asia for at least 2000 years. Travelers wrote about it, including Marco Polo as they encountered nomadic tribes while crossing the steppes on their way along the silk road and the spice routes to the east.

The nutritional benefits are many, even more than yogurt, although that is an excellent dairy food, the combination of bacterial cultures and yeast cultures in kefir “grains” consume the sugars in milk which cause problems for those who are lactose intolerant.  Allowing the culture to “work” for longer will reduce the lactose even more.  The “probiotics” help to restore the desirable intestinal flora in the gut following illness and treatment with antibiotics, which often disrupt this system.  It also helps with heartburn and “sour stomach” which plagues people with GERD.

Did you know that Kefir is very good in cooking and baking?  Did you know that you can use it instead of buttermilk in recipes – and that it gives a wonderful texture and flavor to quick breads and cakes.  You can sweeten it for a refreshing drink and for a sauce for fruit and other salads.  And you can strain it to make kefir “cheese” which works well in recipes that call for similar dairy foods.

Kefir requires no special equipment, does not even require the milk to be heated or incubated at higher than room temperatures.  All you need to start is to order some KEFIR GRAINS.  This is what they will look like when you first get them. This is about three tablespoons full.  This is what they look like after removing them from the kefir and rinsing them with cold water.

#1 kefir grains rinsed.jpg#1 kefir grains rinsed

Kefir “grains” are the “mother” cultures which will turn milk into kefir at normal room temperature, usually taking 24 hours. These are a combination of microorganisms that clump together by the action of polysaccharides.  These include lactobacilli, leuconostocs, lactococci, yeasts and acetic acid producing bacteria.   It looks rather like gelatinous curds, sort of like semi-transparent, whitish, gummi candies shaped like globules.  Some people liken the appearance to small cauliflower pieces.  The grains are chewy, rubbery and don’t have much flavor.

This is what they look like after adding a cup or so of milk.  They float at the surface.  In this photo the kefir grains have been placed in a half-gallon jar and 1 1/2 cups of regular milk has been added.

#2 After adding 1 1:2 cups of milk:.jpg#2 After adding 1 1:2 cups of milk:

I put the jar WITH THE LID LOOSE in a pantry which remains about the same temp all year – around 75° F.  The "working" culture should be kept in a dark place, away from sunlight.

Some people recommend covering the jar with cloth to allow it to “breathe” but I found that a loose PLASTIC lid works just fine and many of the glass jars sold as canisters have one piece plastic lids that are dishwasher safe and work just fine and are easier to sterilize than cloth.  NEVER LEAVE THE JAR WITH THE LID SCREWED ON TIGHT!  The kefir culture produces some gas and if there is not sufficient room in the container, it can cause it to break.

This photo also shows a break in the culture near the bottom of the jar, this is normal and is just a layer of liquid – whey – that has separated from the curd and it recombines as soon as the kefir is stirred.

Screen Shot 2016-04-21 at 2.07.15 PM.pngScreen Shot 2016-04-21 at 2.07.15 PM

The process works fine with pasteurized milk, homogenized mild, ultra-pasteurized milk etc.  If you want to use raw milk it MUST BE PASTEURIZED prior to culturing with the the kefir grains.

The milk can be cultured for up to 48 hours but 24 hours is best, before adding more milk.  If the ambient temps are above 95, it is best to keep the culture in a cool place and check it every 12 hours and if the kefir grains are prominent on the surface and it looks somewhat dry, add some more milk.

DAY TWO.  This is after 24 hours.  As you can see, the culture has set and it appears to have expanded a bit as the kefir grains have swollen and multiplied.

#3 After one day set with 1+ cups of milk.jpg#3 After one day set with 1+ cups of milk

I add another cup of milk, no need to stir, and return the jar, with its lid LOOSE to the pantry.

DAY THREE.  Another 24 hours has passed and the culture has again set and it is time to add another cup OR MORE of milk.  At this point the kefir grains have “grown” enough to culture a larger quantity of milk if you will be needing a greater volume soon.

#4 Second day + 2 cups milk.jpg#4 Second day + 2 cups milk

It should be set like this.  If there is some separation near the bottom with some visible liquid, just stir the kefir and then add the new milk.

#6 Third day, well set.jpg#6 Third day, well set

DAY FIVE.  I forgot to take photos on day four.  The volume is now more than a quart.

It is not quite set as firmly as previous days due to the volume.  Slightly less than one cup of milk will be added today.

#8 4th day set.jpg#8 4th day set

DAY SIX.   It is ready to be strained and the kefir grains transferred to a clean jar to begin the process all over again.I have stirred the kefir to liquify the firm culture and separate the grains to make it easier to drain.

#9 6th day + 5 cups milk.jpg#10 grains stirred into culture before draining

USE ONLY WHITE PLASTIC OR STAINLESS STEEL UTENSILS AND STRAINER.  Other metals react with the acid in the kefir and impart unpleasant flavors.  If you need to use cloth to strain it, make sure it is well rinsed with cold water prior to use. Wring it out but leave it damp to make straining easier.

Draining kefir.jpg

Use white plastic strainer.jpg

kefir drained from grains.jpg

This is the finished kefir, ready to be stored in the fridge until needed.  It can be combined with fruit syrups, added to smoothies, and even mixed with cereal, cold or hot, for a nutritious breakfast or snack.  Any recipe that uses buttermilk or yogurt works with kefir.

Screen Shot 2016-04-21 at 2.06.51 PM.pngkefir finished grains removed

This is a 2.5 liter container so it will hold more than a single batch.  I have two of these so usually have one full and one partially filled.  I use a lot of kefir.

Some people advise straining the kefir grains out and starting a new jar every 24 hours but I have found that this is unnecessary and too time consuming and it discourages many first-time, novice people.  Using a larger container – in this case a two-quart glass jar – and just adding a cup of milk each day for FIVE days and then straining it on the SIXTH day, works well for most folks.  And the result is a sufficient amount that can be transferred to a glass container to store in the fridge.

And after 6 weeks of repeated culturing, we have a lot more kefir grains which can be divided into additional containers to make larger batches or stored in milk in the fridge, which slows down the activity but you still have to add some milk every three days or so, instead of daily.

Kefir grains, drained and rinsed after 6 weeks.jpg

Kefir grains, drained and rinsed after 6 weeks

And you can share your “extra” kefir grains with others.  Once you understand that the production of kefir is very simple and the savings when you make your own is significant, you will never go back to the store-bought stuff with the “preservatives” and “coloring agents” and “artificial flavors” that processors add to increase shelf life.

There are numerous online sources of information about Kefir and places where you can order the grains if you do not have a health food store in your city that sells it.

For further information, search the links below.

Cultured Food Life  has some excellent information.

Authority Nutrition explains some health benefits of kefir.

Health Food Lover  has some recipes.

Live Pure Health has more recipes.   And has a page on making Kefir Cheese.


#10 grains stirred into culture before draining.jpg

#7 4th day + 4 cup milk.jpg

#5 Third day + 3 cups milk.jpg

# 2++Kefir grains after 24 hrs culture.jpg

kefir finished grains removed.jpg

andiesenji

andiesenji

Several FaceBook friends asked me to publish my method of making kefir on my blog so I put together some information and photos.

There has been only minimal interest expressed here on eG but I thought I would also put the info out here for those who find culturing yogurt "too involved, with all the heating and cooling of the milk to certain temps."  

None of that is necessary with kefir - regular milk right out of the fridge can be added to the "grains" and it is incubated at regular room temp, it just should be kept in a place away from sunlight. 


When and where kefir was first “discovered” is really unknown.  What is known is that it has been made by nomads in central Asia for at least 2000 years. Travelers wrote about it, including Marco Polo as they encountered nomadic tribes while crossing the steppes on their way along the silk road and the spice routes to the east.

The nutritional benefits are many, even more than yogurt, although that is an excellent dairy food, the combination of bacterial cultures and yeast cultures in kefir “grains” consume the sugars in milk which cause problems for those who are lactose intolerant.  Allowing the culture to “work” for longer will reduce the lactose even more.  The “probiotics” help to restore the desirable intestinal flora in the gut following illness and treatment with antibiotics, which often disrupt this system.  It also helps with heartburn and “sour stomach” which plagues people with GERD.

Did you know that Kefir is very good in cooking and baking?  Did you know that you can use it instead of buttermilk in recipes – and that it gives a wonderful texture and flavor to quick breads and cakes.  You can sweeten it for a refreshing drink and for a sauce for fruit and other salads.  And you can strain it to make kefir “cheese” which works well in recipes that call for similar dairy foods.

Kefir requires no special equipment, does not even require the milk to be heated or incubated at higher than room temperatures.  All you need to start is to order some KEFIR GRAINS.  This is what they will look like when you first get them. This is about three tablespoons full.  This is what they look like after removing them from the kefir and rinsing them with cold water.

#1 kefir grains rinsed.jpg#1 kefir grains rinsed

Kefir “grains” are the “mother” cultures which will turn milk into kefir at normal room temperature, usually taking 24 hours. These are a combination of microorganisms that clump together by the action of polysaccharides.  These include lactobacilli, leuconostocs, lactococci, yeasts and acetic acid producing bacteria.   It looks rather like gelatinous curds, sort of like semi-transparent, whitish, gummi candies shaped like globules.  Some people liken the appearance to small cauliflower pieces.  The grains are chewy, rubbery and don’t have much flavor.

This is what they look like after adding a cup or so of milk.  They float at the surface.  In this photo the kefir grains have been placed in a half-gallon jar and 1 1/2 cups of regular milk has been added.

#2 After adding 1 1:2 cups of milk:.jpg#2 After adding 1 1:2 cups of milk:

I put the jar WITH THE LID LOOSE in a pantry which remains about the same temp all year – around 75° F.  The "working" culture should be kept in a dark place, away from sunlight.

Some people recommend covering the jar with cloth to allow it to “breathe” but I found that a loose PLASTIC lid works just fine and many of the glass jars sold as canisters have one piece plastic lids that are dishwasher safe and work just fine and are easier to sterilize than cloth.  NEVER LEAVE THE JAR WITH THE LID SCREWED ON TIGHT!  The kefir culture produces some gas and if there is not sufficient room in the container, it can cause it to break.

This photo also shows a break in the culture near the bottom of the jar, this is normal and is just a layer of liquid – whey – that has separated from the curd and it recombines as soon as the kefir is stirred.

Screen Shot 2016-04-21 at 2.07.15 PM.pngScreen Shot 2016-04-21 at 2.07.15 PM

The process works fine with pasteurized milk, homogenized mild, ultra-pasteurized milk etc.  If you want to use raw milk it MUST BE PASTEURIZED prior to culturing with the the kefir grains.

The milk can be cultured for up to 48 hours but 24 hours is best, before adding more milk.  If the ambient temps are above 95, it is best to keep the culture in a cool place and check it every 12 hours and if the kefir grains are prominent on the surface and it looks somewhat dry, add some more milk.

DAY TWO.  This is after 24 hours.  As you can see, the culture has set and it appears to have expanded a bit as the kefir grains have swollen and multiplied.

#3 After one day set with 1+ cups of milk.jpg#3 After one day set with 1+ cups of milk

I add another cup of milk, no need to stir, and return the jar, with its lid LOOSE to the pantry.

DAY THREE.  Another 24 hours has passed and the culture has again set and it is time to add another cup OR MORE of milk.  At this point the kefir grains have “grown” enough to culture a larger quantity of milk if you will be needing a greater volume soon.

#4 Second day + 2 cups milk.jpg#4 Second day + 2 cups milk

It should be set like this.  If there is some separation near the bottom with some visible liquid, just stir the kefir and then add the new milk.

#6 Third day, well set.jpg#6 Third day, well set

DAY FIVE.  I forgot to take photos on day four.  The volume is now more than a quart.

It is not quite set as firmly as previous days due to the volume.  Slightly less than one cup of milk will be added today.

#8 4th day set.jpg#8 4th day set

DAY SIX.   It is ready to be strained and the kefir grains transferred to a clean jar to begin the process all over again.I have stirred the kefir to liquify the firm culture and separate the grains to make it easier to drain.

#9 6th day + 5 cups milk.jpg#10 grains stirred into culture before draining

USE ONLY WHITE PLASTIC OR STAINLESS STEEL UTENSILS AND STRAINER.  Other metals react with the acid in the kefir and impart unpleasant flavors.  If you need to use cloth to strain it, make sure it is well rinsed with cold water prior to use. Wring it out but leave it damp to make straining easier.

Draining kefir.jpg

Use white plastic strainer.jpg

kefir drained from grains.jpg

This is the finished kefir, ready to be stored in the fridge until needed.  It can be combined with fruit syrups, added to smoothies, and even mixed with cereal, cold or hot, for a nutritious breakfast or snack.  Any recipe that uses buttermilk or yogurt works with kefir.

Screen Shot 2016-04-21 at 2.06.51 PM.pngkefir finished grains removed

This is a 2.5 liter container so it will hold more than a single batch.  I have two of these so usually have one full and one partially filled.  I use a lot of kefir.

Some people advise straining the kefir grains out and starting a new jar every 24 hours but I have found that this is unnecessary and too time consuming and it discourages many first-time, novice people.  Using a larger container – in this case a two-quart glass jar – and just adding a cup of milk each day for FIVE days and then straining it on the SIXTH day, works well for most folks.  And the result is a sufficient amount that can be transferred to a glass container to store in the fridge.

And after 6 weeks of repeated culturing, we have a lot more kefir grains which can be divided into additional containers to make larger batches or stored in milk in the fridge, which slows down the activity but you still have to add some milk every three days or so, instead of daily.

Kefir grains, drained and rinsed after 6 weeks.jpg

Kefir grains, drained and rinsed after 6 weeks

And you can share your “extra” kefir grains with others.  Once you understand that the production of kefir is very simple and the savings when you make your own is significant, you will never go back to the store-bought stuff with the “preservatives” and “coloring agents” and “artificial flavors” that processors add to increase shelf life.

There are numerous online sources of information about Kefir and places where you can order the grains if you do not have a health food store in your city that sells it.

For further information, search the links below.

Cultured Food Life  has some excellent information.

Authority Nutrition explains some health benefits of kefir.

Health Food Lover  has some recipes.

Live Pure Health has more recipes.   And has a page on making Kefir Cheese.


#10 grains stirred into culture before draining.jpg

#7 4th day + 4 cup milk.jpg

#5 Third day + 3 cups milk.jpg

# 2++Kefir grains after 24 hrs culture.jpg

kefir finished grains removed.jpg

×
×
  • Create New...