

jmacnaughtan
-
Posts
838 -
Joined
-
Last visited
Content Type
Profiles
Forums
Store
Help Articles
Posts posted by jmacnaughtan
-
-
Hi,
After the success of the Medovik, I'm working on a new project and I'd like some help with one of the components.
It's an entremet, with flavours based around coconut, pineapple, rum and vanilla. I want to add a layer of croustillant using white chocolate, pailleté feuilletine and desiccated coconut, but the only recipes I have include praliné paste, which is a flavour I'd rather not introduce.
The challenge is getting the consistency right- I need it to be firm enough to hold up inside the cake, but not so firm it causes a debacle when cutting it. I was thinking of adding neutral oil to soften it, but I have no idea of the ratio to use.
Has anyone done this before, or has experience softening chocolate?
Thanks,
James
-
For home baking you can do a straight substitution without any serious problems. If you need, for example, to emulsify the fat into the eggs, melt it and cool to room temperature, then follow the recipe. I wouldn't clarify it, a lot of the flavour is in the milk solids.
Butter makes things taste better.
-
 1
1
-
-
I wonder about that also. With regular commercial pectin, you have to use a lot of sugar so that is why some people started to avoid it. But low-sugar pectins are available. Maybe some people feel it's 'cheating' to achieve the right flavour and set by relying on a commercial product?
It's possible, but if commercial pectin is the same chemical that's naturally contained in fruit, I don't see how you'd be able to adjust the sugar content (for HM, not LM). Besides, I use commercial pectin fairly regularly and can get it to set with relatively little sugar- around a third of the weight of the fruit, if I remember correctly. There are no worries about preservation either if you sterilize the jars.
Plus, I really enjoy not needing to boil my jam to death.
-
1
-
-
Can anyone explain why people avoid commercial pectin? It's still made from citrus peel and apple cores (refuse from the juice industry), is convenient, effective and gives no taste issues. I don't understand why you wouldn't want to use it, unless you're going for an extremely soft-set jam.
It also means you can reduce the sugar and cooking time for the same set.
-
-
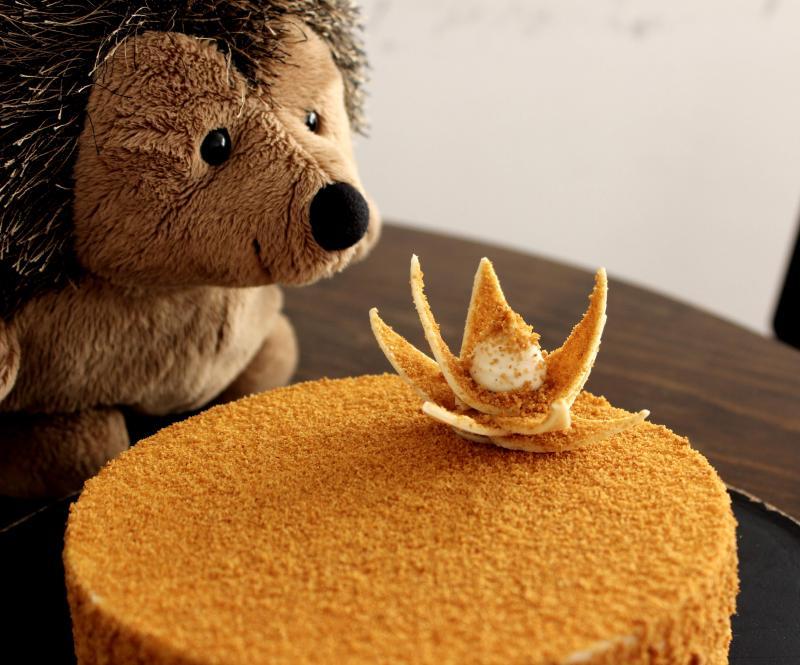
Medovik (Russian honey cake)
This is the result of much trial and error and discussion here. Thanks to everybody who contributed, especially to Gfron and Kerry Beal for the biscuit recipe, which is only slightly modified.
It's a long recipe, but not technically very difficult. It's easiest to break it up into two or three days- the first day for the biscuit and filling, the second for the assembly, the third for finishing and decoration.
If you don't want to use cake rings and freeze the cake, you don't have to. You could just build it like any other layer cake, but the presentation will suffer (unless you have some extremely good spatula skills).
If anybody has any questions, use the discussion linked to above. It's a really nice cake to make, and looks pretty too.
Behold, the Medovik.

Makes 1 x 16cm cake
Biscuit
Ingredients:
- 60g honey (as flavorful as possible)
- 4g bicarbonate of soda
- 100g butter
- 100g sugar
- 1 egg, beaten
- 265g plain flour, sieved
- In a saucepan, warm the honey and soda. Once the frothing dies down a little, add the butter until fully melted. Add the sugar and stir until dissolved.
- Transfer to a bowl (not a stand mixer, the quantities are too small) and whisk in the egg in two additions. Make sure the mixture is not too hot, or it will cook the egg.
- Add the flour in two or three additions. Mix until homogenous. The dough will be fairly stiff, somewhere in consistency between a pâte à choux and a pâte sucrée.
- Divide the mixture into ten, and heat the oven with two baking trays inside to 180°C.
- Place one ball of dough between two sheets of baking paper, cut to around 30x30cm. Using a rolling pin, roll it as thinly as possible, keeping a fairly regular shape. You can’t roll it too thin; you want to be able to see daylight through the dough and paper. Make sure it’s big enough to cut a 14cm circle out of.
- Keeping the dough between the paper, place it on a baking tray and place the second tray directly on top of it. Bake for around six minutes, until deep golden brown. Prepare another piece of dough.
- Once out of the oven, remove the top layer of paper immediately, replace it, flip it over and remove the second layer. Using a 14cm cake ring/pan, cut out a circle of dough. Work quickly, while the biscuit is still soft. Leave to cool, and reserve the trimmings.
- Bake and cut the rest of the dough pieces, reusing the paper. If you have a large oven, you can do several at once. You will end up with 10 perfectly flat, circular discs and a bowl of trimmings.
Crème fraîche Chantilly
Ingredients:
- 50g double cream
- 25g honey
- 1 vanilla pod
- 4g gelatin, bloomed
- 450g crème fraîche (at least 30% fat)
- The day before you need it, heat the cream with the honey and vanilla pod (scraped) until simmering. Take off the heat and stir in the gelatin.
- Add a tablespoon of crème fraîche, whisk to combine, and slowly incorporate the rest to prevent the temperature from dropping too quickly and pre-setting the gelatin.
- Store overnight in the fridge.
- The following day, transfer to a bowl large enough to whip it in, and place in an ice bath. Remove the vanilla pod.
- Whip until it starts to firm up and hold its shape- just past soft peaks.
- Reserve until you are ready to assemble.
Dulce de leche
Ingredients:
- 200g dulce de leche, preferably not too liquid (bought or homemade)
- Salt, to taste
- Pour/scoop the dulce de leche into a bowl.
- Season to taste (just enough to cut the sweetness) and mix well.
- Reserve until you are ready to assemble.
Honey soaking syrup (optional)
Ingredients:
- 100g water
- 100g honey
- Combine water and honey in a saucepan.
- Heat until fully dissolved. Do not bring to the boil.
- Transfer to a container and leave to cool to room temperature.
Neutral glaze (optional, smooth, slightly diluted apricot jam may be used as a replacement)
Ingredients:
- 50g sugar
- 50g water
- 4g pectin NH
- Combine the pectin with the sugar.
- Bring the water to a boil, pour in the sugar-pectin mix while whisking, and whisk well.
- Boil for 20 seconds, whisking continuously.
- Remove from the heat, transfer to a container and leave to cool.
Assembly
- Using a 14cm diameter x 4.5cm high cake ring, place it on a sheet of acetate or parchment paper. Place this on a chopping board or other flat surface that will fit in your freezer. I strongly recommend lining the ring with acetate, it will make unmolding a lot easier.
- Place a biscuit disc in the ring. Soak with syrup if using, be generous but don’t drown it.
- Add 1 ½ to 2 tablespoons of Chantilly, and spread evenly.
- Add another biscuit disc, pressed down onto the cream. Soak (if desired).
- Add a tablespoon of dulce de leche, and spread gently and evenly.
- Repeat until you reach the top of the ring. You probably won’t use all of the layers, normally 7 or 8 will fit comfortably.
- Ensure that the top layer is Chantilly. If you end up with a layer of dulce de leche and one or two millimeters of space, cover with Chantilly rather than another biscuit disc.
- Place another sheet of acetate or parchment paper over the top and press down. Aim for as few air bubbles as possible. Place another chopping board or flat object on top, and weigh it down with something heavy.
- Freeze for at least 3 or 4 hours.
- Prepare a 16cm diameter by 4.5cm high cake ring as in step 1. Whisk the remaining Chantilly until it loosens up, becoming a little more liquid.
- Fill the ring around 1/3 full with Chantilly.
- Unmold the frozen cake, remove the acetate, invert it and push it into the Chantilly so the naked biscuit is facing upwards. Keep it centered. Push down all the way, until the biscuit is flush with the top of the ring. The cream will come up the sides. If there is too much, scrape it off with a spatula, keeping the biscuit clean of any cream. If there is not enough, pipe some into the gaps and even out with a spatula.
- Cover the ring as in step 8 and freeze overnight.
Coating and decoration
- Biscuit trimmings
- White chocolate
- Take the biscuit trimmings and blitz them in a food processor until they resemble fine breadcrumbs. Set aside.
- Temper the white chocolate. Spread finely on a sheet of acetate.
- Working quickly before the chocolate sets, sieve a spoonful of crumbs over the chocolate.
- Once it is dry to the touch, cut into triangles around 5cm x 2cm and one small (2cm) circle, and roll up. Leave to set.
- Using the chocolate circle as a base, build a flower, gluing each “petal” with more tempered white chocolate. Once complete, pipe a small cone of Chantilly (if there is any left) into the center, and dust with more crumbs. Reserve in the fridge until necessary.
Finishing
- Once the cake is frozen solid, unmold and remove the acetate.
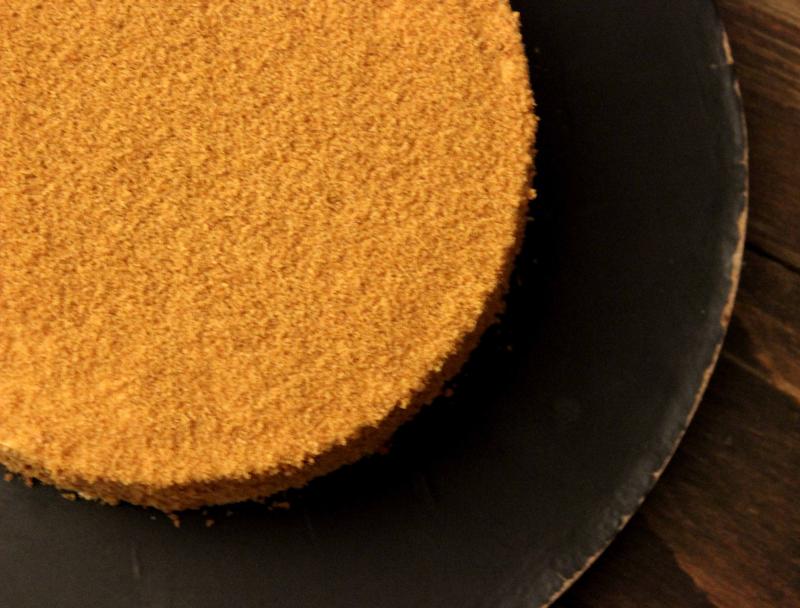
- Brush an even layer of neutral glaze or jam onto the sides of the cake. Work quickly, but ensure you do not miss any patches. If there are uncoated patches, the crumb will not adhere and there will be white patches on the finished cake.
- Pour the crumb into a wide dish. Roll the edges of the cake in it to coat evenly.
- Place the cake on a grill or board. Sieve a spoonful or two of crumb evenly over the top. Gently brush off any clumped crumbs on the sides with your fingertips or a brush. There should be no white patches on the cake. If there are, you can patch them up will a pinch of crumb.
- Transfer to a serving platter. Place the chocolate flower on the cake and leave to defrost- around 3 to 4 hours out of the fridge, double that in the fridge.
- Serve with Champagne or Russian tea.
-
3
-
 1
1
-
So, after 3 trials I made the Medovik for the party. It was a success, and thanks to everybody for their input, especially for the biscuit recipes.
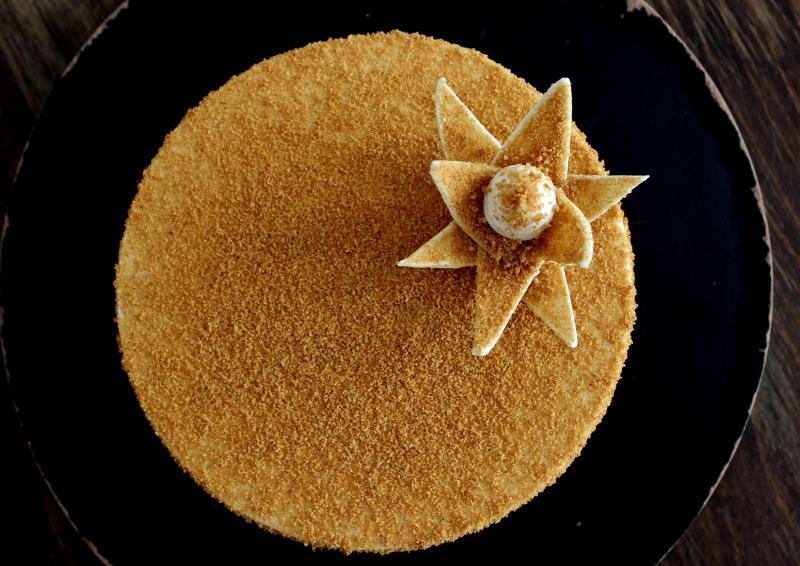
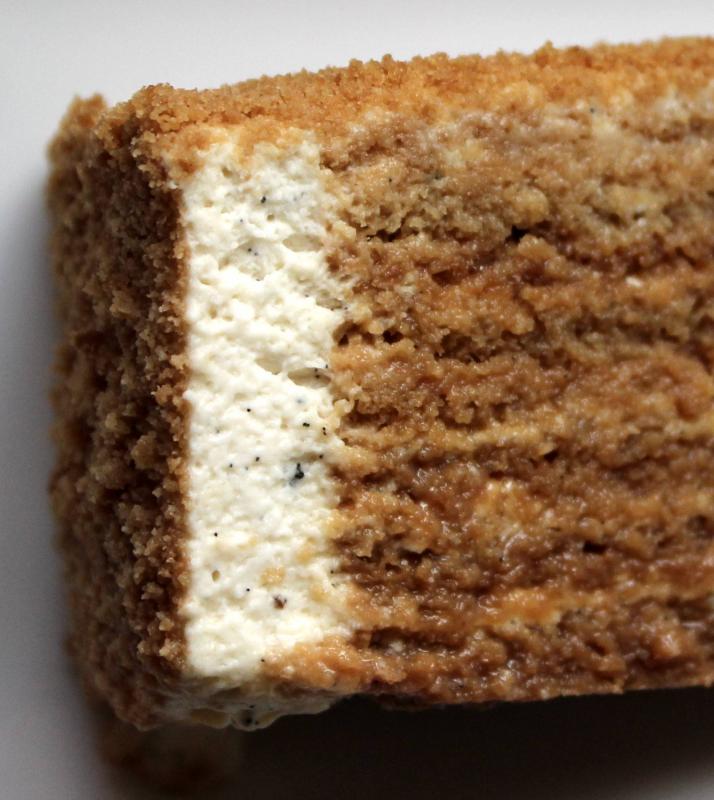
Here's the final version. The decoration's simply tempered white chocolate with Medovik crumbs sieved over the surface before it set, then cut and rolled up to make petals. I really should have taken more time over it, but I like the effect. Unfortunately no photos of the interior, but I got what I wanted- using fewer layers of biscuit and a thicker layer of denser chantilly, the layers were clearly visible.
As soon as I've got time, I'll post the full recipe on recipegullet. It's a really nice cake to make.
-
2
-
-
If trying to enrobe the filling seems too much of a risky learning experience to you, why not just make ganache truffles coated in cocoa powder or crushed nuts or smashed up praline, or toasted coconut, or decorative sugar sprinkles, or ice-cream-sundae jimmies, etc. You could do a very pretty variety of options without having to set a single cocoa butter crystal by expert temperature manipulation.
I agree. There's no need to coat your truffles in chocolate if you don't want to.
-
I haven't tried any of her recipes, but the techniques look sound (at random I checked out the carrot cake and chocolate cookies). They're not really my style of baking, but for beginners it looks good, and it's good that there are videos to go with it.
The site itself is an eyesore, unhelpfully organized and full of glaring adverts. If you're going to try the recipes, copy and paste them into a document, it'll make your baking much more pleasant

-
1
-
-
You might find it easier to heat the egg yolks to 40-50°C then incorporate the bloomed gelatin into them. It would lower the risk of the gelatin pre-setting or not mixing in properly.
-
If you add a touch of gelatin, it should hold up better in the freezer. Try around 0.5% by weight, then adjust if necessary.
Also, you may be overwhipping your cream. Try whipping it just to soft peaks.
-
The pithivier I baked yesterday was so delish. I used the recipe in Jacques Torres's book, Dessert Circus. My only problem is that the almond cream deflated. Any tips on how to prevent this? At any rate, it was still awesome!
Your desserts look great! For the almond cream, it may depend on your recipe. Are you doing the typical 1:1:1:1 almond:butter:sugar:egg ratio? One of the problems may be overbeating it. It doesn't have any flour to hold the shape, so it can collapse very easily.
For pithiviers and galettes des rois, I normally take the almond cream and mix it with an equal weight of pastry cream. It's much less dense and it stays moist and creamy.
Also, to avoid the pithivier puffing up like that, you can use a fork and dock it all over. I used to do that for the galettes, you seriously puncture each one then let it chill overnight and they tend to stay flat during baking.
-
Coconut really does go well with bananas.
Yes it does. I definitely wasn't knocking anything about that pie. It looks awesome (his work always does) and I have no doubt it tastes awesome as well. The fault in what I said belongs entirely to me, I'm kinda picky when it comes to coconut. I like the flavor but I'm not a big fan of the texture in creamy settings. Entirely my weirdness, not a commentary on whether or not it should be used.

Haha, thanks for the compliment. I know what you mean, there are things that I see other people doing and have to prevent myself from saying anything about.
I recommend trying caramelized coconut though, the texture is completely different. If you want, I'll PM you the recipe I use.
-
I'm wondering if the gelatin in the cream layer inhibits the absorption of the cream into the cake layers. Surely the gelatin wouldn't have been traditional. Just a thought.
It may do, but it doesn't seem to retain a sharp, distinct layer. That's what I'm aiming for.
The gelatin isn't traditional. I use it because it helps the cream hold together better without splitting, it gives a great texture, it helps the cake retain its form and means it's freeze-thaw stable (I assemble the cake, freeze it, then coat it while frozen so it holds it's shape and is much easier to work with).
All in all, as there are so many variations and recipes, I'm not worried about using traditional techniques. I just want to make a good looking and tasting medovik.
-
That looks great! Coconut makes many things delish too!!
I was thinking "that looks great but I don't want coconut on my banana cream pie". But that doesn't change the fact that it does indeed look and sound tasty... or the fact that it's not my banana cream pie.

Thanks. I had the caramelized coconut hanging around from a failed marshmallow experiment, and thought it would work. It makes a nice textural addition and the coconut flavor works well with the banana. All that it needed was a little rum
It also reminds me of the little coconut covered teacakes we used to have in the UK.
-
Any input is welcome- especially on coating the cake with the crumb. It's a pain and takes a long time. Maybe brushing with neutral glaze then just rolling it in it would work?
I cannot help with your question, but as soon as I saw the first pic, I wanted to comment on how even and beautiful that golden crumb coating looks. My two pence: you have put a lot of effort in perfecting this cake, wouldn't it be a shame to skimp on this final step?
Thanks, I like it too
You're right, but I was just thinking of something that would help the crumb stick better- for these ones I took it out the freezer, let the outside thaw for 10 minutes, slowly and painstakingly pat crumb up the sides over and over to get it even...
I'm just wondering if there's a simpler, faster way to get the same result.
-
Third attempt, getting a little closer to what I wanted.


This time:
- The layers were rolled much thinner. It turns out that it's pretty much impossible to roll them too thin between two layers of baking paper. I could see daylight through them. I ended up using eleven layers of biscuit in a 4.5cm high cake.
- The layers were soaked with a honey syrup. This meant (at last) that the cake actually had some honey flavour and was moist. Unfortunately, it also made sure that the cake was overly sweet, the cut was sloppy, and you could still see almost no white cream layers. My thoughts are to use fewer layers, maybe 8, with a thicker layer of cream, and add either some alcohol (vodka, to stay with the Russian theme) or acid to the syrup to balance it out (It was 110g honey-100g water).
- The cream was 250g crème fraîche, 100g double cream, 25g honey, 3g gelatin and a vanilla pod. It was too sweet- I'm thinking of using entirely crème fraîche next time, and cutting the honey by at least half
- The ddl was seasoned with a little salt. It was still overly sweet- I'll probably incorporate some butter and up the salt a little to balance it out.
Any input is welcome- especially on coating the cake with the crumb. It's a pain and takes a long time. Maybe brushing with neutral glaze then just rolling it in it would work?
-
Asked to bring a dessert, but the host doesn't like chocolate, coffee, or much else.
Banana cream pie it is

Pâte sucrée shell
Banana crémeux
Banana bread
Dulce de leche
Vanilla chantilly
Caramelized/raw coconut
You can find the recipe for the first two components here (just sub the squash for banana), and I took the banana bread from Lesley C here.
Hopefully it'll go down well.
-
4
-
-
An easy, lazy, tasty way of using any tomatoes hanging around, especially disappointing winter ones.
Ingredients:
- Tomatoes, around 3 decent sized ones per person
- Garlic cloves, smashed and peeled, from 0-5 (or more) per person
- Thyme leaves, fresh, frozen or dried, a couple of big pinches per person
- Lots of salt, lots of pepper
- Oil, a couple of big glugs of whatever you fancy. Olive is more traditional.
- Hot water
Quarter the tomatoes, removing stalks and stickers but leaving everything else. Put everything but the water in a roasting tin and combine with your hands to coat the tomatoes.
Bake in the oven at 140°C-200°C, depending on how much time you have.
Cook until the garlic is tender and your house smells nice. At 180°C it takes around 45-90 minutes.
Pour everything into a blender and blitz completely.
Add hot water until it's as thick/thin as you like.
Season, add a little more oil if you like.
Strain through a sieve or chinois.
Eat.
-
5
-
Wait until spring and use the very fresh young garlic, the sort with the edible skin. As garlic gets older, it gets more bitter and pungent.
-
Am I the only person that shudders at the idea of a mushroom panna cotta, or mushroom dessert in general? The idea of cold mushrooms and gelatin...
-
The hearts are 2, 4 and 8 servings. The cake is an inaya chocolate mousse with morello compotée and pistachio biscuit.
The red glaze?
18 grs of gold bloom gelatine (soaked)
250 grs of white chocolate (zephyr, satin or ivoire, or ...)
50 grs dark chocolate
10 grs liposoluble red colour (pcb)
200 grs condensed milk
150 grs water
250 grs sugar
350 grs glucose
Soak the gelatine - Boil the water sugar and glucose. - put the gelatine with the condensed milk and colour - Pour the liquid on top - then pour on the chocolates. Hand blend to emulsify. You can strain it. Cover directly on contact (use a plastic tall and narrow container safe for microwave) Let sit overnight if possible. Use at 35c (33-37c depending on the thickness you want and stuff. 90 s in microwave should get you close). You can replace the color by any other, or the chocolate by any other but stay always in these proportions.
Thanks for the recipe, I've been looking for a decent coloured glaze. When you boil the sugar and the water, do you take it up to a specific °C, or just to dissolve the sugar?
It looks great.
-
I'm probably going to be unpopular here, but if an ingredient doesn't constitute a major part of a dish or dessert, or a major flavour component (spices etc), I can't tell the difference between high-cost and low-cost. Organic, raw-milk butter is great on bread or at a push in croissants, but as part of a cake, mashed potatoes or whisked into a sauce? Forget about it.
I also can taste zero difference between factory-farmed meats used for long-cooked dishes and their organic counterparts. And when you're paying 20€/kg for something like organic oxtail, that's a kick in the teeth.
Likewise, I never use enough vinegar to taste the vinegar, so I couldn't care less if it's organic, and salt is salt- you're never using more than about 0,05% per recipe weight so any difference is negligible (except for finishing salts).
Where I am (Paris), the mass-produced ingredients are perfectly fine and I can't even really taste the difference between organic and mass-produced vegetables and fruit here. Certainly not enough to justify spending up to 100% more on them.
-
2
-
-
Thank you, everyone!
I have bought Patisserie Christophe Felder's book to get myself familiar with entremets (and the major parts of it such as mousses, chantilly cream, joconde, genoise etc) despide some negative comments on it. And I will give Heavenly Cakes a try as it has so many good responses.
Thank you, again!
Good choice, this is an excellent book. Also, I can't praise Philippe Conticini's Sensations highly enough. It's worth learning French for, there are so many great things in there, both classic and innovative.


Coconut croustillant
in Pastry & Baking
Posted
I see what you mean, but I really want the texture of the feuilletine in there- the most important are that and the coconut. I'm not really a fan of having a layer if tempered chocolate inside my cakes, but that's just my taste.
The ideal is to have something I can spread directly onto the cake layer (a coconut financier) that will keep the feuilletine crunchy (by encasing it in fat) and preventing the next layer (roasted pineapple compote) from seeping into it. All of the croustillant recipes I've seen incorporate the crunch elements into a mix of praliné paste and chocolate, and the praliné keeps it from setting hard.
I don't think adding oil would turn it into a ganache at all- there's no water added. I've tried using pure untempered chocolate for layers like this, and it doesn't work very well. Entremets are generally served at least slightly chilled, and the chocolate goes way too hard.