

alanamoana
-
Posts
2,739 -
Joined
-
Last visited
Content Type
Profiles
Forums
Store
Help Articles
Posts posted by alanamoana
-
-
-
-
They most likely use it to taste with. I have worked with several chefs that keep a large spoon in their back pocket for tasting. And yes they do wash them in between uses.
never used to taste with. only plastic spoons, thrown away after each use, are used in a kunz kitchen.
i would say the bowl of the spoon is deeper than other similar spoons. it is a nice shape for holding and then saucing plates. especially with the typical saucing style which has been popular for the past few years...the sort of paisley shape with the curving tail.
other than that, it is just a spoon with a famous chef's name attached to it. most kitchens don't have a spoon exactly that size, the larger more utilitarian stainless spoons are too awkward and restaurant sized serving/soup spoons are too small. just filling a niche.
-
I think it's going to be a good toy for sure. Given my piss poor dipping skills the next toy needs to be an enrober, but only if I can find one for a couple of hundred bucks.
I'll volunteer to be your enrober if you let me play with your guitar! Oh, I'm so jealous!
-
homemade ice cream is meant to be eaten within a couple of days. you can increase the shelf life by placing plastic wrap directly on the surface of the ice cream to prevent ice crystals from forming...but as john says, the texture does degrade after a while.
-
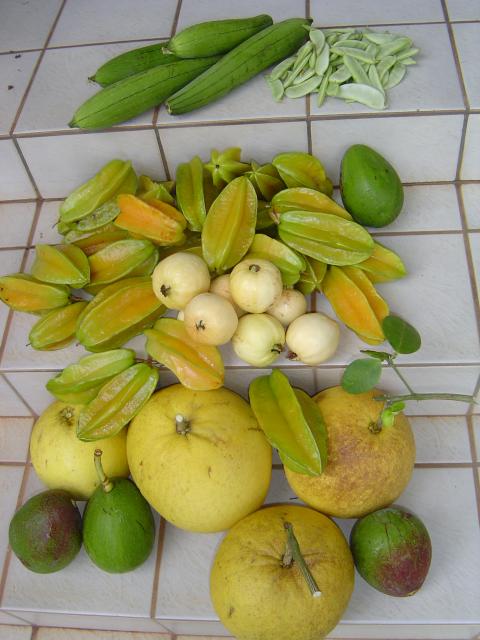
that's a picture of the fruit from my parents' yard in hawaii. we eat starfruit all the time...never thought about it being in a pie.
i probably wouldn't cook it though. it is very watery (mostly water) and i don't know how the texture would translate. i think it would be tasty on a custard base of some sort...
blind bake a pie crust (or use a crumb/nut crust), fill with pastry cream/pastry cream lightened with whipped cream or whatever and then top with tons of starfruit.
if you eat a lot of them, you'll notice the furry teeth thing that happens with spinach. i think they have a lot of iron in them.
-
check out this thread...very similar content and funny stuff
-
also tammy, there are praline products (barry/callebaut) that are great for texture and aren't as strong as pure toasted hazelnuts...basically granulated hazelnuts coated with caramelized sugar...tasty stuff!
-
d'oh! i'm glad you checked!
also glad the dry run went well.
congrats on the success!
-
definitely worth the money. i think we all had a good time too, those of us eGers who attended at the same time. networking is hard to quantify in terms of cost.
i will add though, that the french pastry school (who usually sponsors Wybauw) sends their pastry chefs around the country to teach classes...some of which are similar in content to the advanced chocolate class with wybauw.
i know that recently they had a class in los angeles for advanced plated desserts. you can check their website for more information, but it seems that all the classes are well prepared and informative. i can't say whether they are worth the same amount of money as the wybauw course, but all of the pastry chefs at the fps are highly regarded in the field and most of them are successful competition chefs as well.
see if they're teaching a chocolate class in your area as that will save you some money in transportation and lodging. it seems that classes like this are all the same price across the board (at notter school, french pastry school and other culinary schools). if you have a business, i'm sure it is a write-off as well. i was fortunate enough to have my current employer pay for the tuition so all i was responsible for was transportation and hotel. but i didn't know that when i signed up for the course, so i was willing to pay the whole amount myself and i would have been happy to have done so.
-
why are you unmolding the souffle? is this sort of a molten lava cake as opposed to a true souffle? i think half the drama of a souffle is the amount it rises above the ramekin...would this work for you or does it interfere with the way you're plating the dessert as a whole?
-
why don't you make a batch of pastillage, roll it out thin and make your "slab"/plaque out of this. then, you can pipe your royal icing directly onto the pastillage which can then be placed on the cake or wherever...then after the party, removed and saved?
that will save you the trouble of trying to remove royal icing from acetate. as it sounds like you're trying to make a larger piece, this might be sort of impossible to transfer from one thing to another.
if you don't like that idea, you can stretch some plastic wrap (instead of acetate) over the drawing which you've taped to some cardboard. after piping and drying the royal icing, you can take the plastic wrap off by flipping the whole piece over and gradually peeling the plastic wrap off the back of the royal icing. since the plastic is more flexible than the acetate, this might work better.
-
even with full fat yogurt, i drain the yogurt for a few hours to overnight through cheesecloth to get rid of excess moisture. i think this might be your problem.
you can always use middle eastern yogurt called: kefir or labne...this is tangy, delicious and already drained. sort of like an extra thick sour cream, but with cultures. delicious!
-
As smoke pours out of my oven from the butter seepage...what do people do to control this problem?
By the way, its looking good and will be out of the oven in 20 minutes!
Rob,
here's a list of things which might help next time...but there's always a lot of butter involved with puff...
1) make sure you did the right amount of turns with the dough so that the butter is properly incorporated into the layers...too few turns and the butter layers are too thick, thus melting more and causing seepage. too many turns and the butter disappears and you don't get flaky layers.
2) start off with a pretty high heat so that you can get maximum lift (up to 425F on a home oven). you need the heat to melt and immediately turn the moisture to steam to lift and separate the layers of the puff pastry
3) make sure the puff is rested and cold before baking
4) once you get color on the outside of whatever you're baking, turn the oven down to finish the baking so that you don't have raw layers of dough which would be undesirable.
5) make sure the dough is rolled out thin enough. most people don't roll puff thin enough and they end up with too much dough and then end up with raw unbaked layers.
not necessarily in the above order!
hope this helps.
-
only has one timer, but also works as thermometer, and has the count-up feature...for ten bucks, can't really beat it.
-
just as an aside, india tree is very expensive. you can find the stuff much cheaper elsewhere.
-
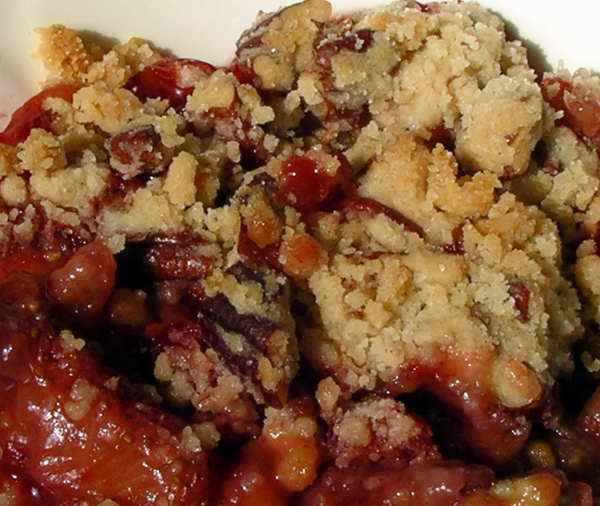
bruce, great departure from the eternal cucumbers! those strawberries look beautiful and your crisp looks delightfully rustic...served with ice cream or whipped cream, i hope?
-
i think your chain was being yanked.
but, there is a recipe for sawdust pie...among the ingredients are chopped pecans and graham cracker crumbs. maybe this is a variation?
-
could be coarse or what is sometimes called AA sugar (double A sugar) or crystal sugar.
-
just off the cuff, i'd say to use the "baking with julia" recipe as it is probably easy to understand is will be accompanied with photographs.
-
I'll second what chefpeon has said so far and add:
what kind of oven are you going to be baking your cake in? will you be able to fit this sixteen inch pan into your oven? if you decide to bake more than one layer at a time in separate pans, please don't over fill your oven. the mass of the batter and pans will change the heat distribution in your oven which will cause uneven baking.
-
Stuckey, take a look at some of the other threads on working with chocolate on eG. They are a wealth of information and will help you out.
With regard to keeping chocolate at working temperature, you can purchase an inexpensive heating pad (like for back pain) that you can put into a bowl which is larger than the bowl that you have your tempered chocolate in. Then place your tempered chocolate bowl on top. Control the amount of heat with the heating pad controls or insulate with a folded towel. This helps if you're dipping or doing other things with your chocolate. You'll still get overcrystallization after a time, but it helps keep the chocolate in temper for longer periods of time.
I think Kerry wants a pic of the front of the bag because she wants to see what formulation of Callebaut you are using. Different viscosities can make it more or less difficult to temper and this is indicated by a picture of little drops on the front of the package along with the number formula which is unique to Callebaut.
Good luck and have some patience!
-
use an immersion/burr/stick blender to combine the chocolate with the rest of the ingredients. strain and then bake as usual. you shouldn't have any problems. also, the type of chocolate you use might make a small difference. i'd use something that you'd eat out of hand rather than something from the 'baking' area of a grocery store.
-
i would also add...better to use 'kewpie' mayonnaise (japanese brand). also, maybe a touch of sesame seed oil.


Rhubarb - cooked
in Pastry & Baking
Posted
i think we need to ask "chufi" what her secret is...she loves rhubarb and it always looks beautiful when she eats it!
at any rate, this is what we always did when we used it at work:
1) clean rhubarb and cut into desired size pieces
2) bring simple syrup, with a vanilla bean and maybe an orange cut in half thrown in, up to a boil
3) turn off heat
4) throw rhubarb in and allow to steep just until barely tender (very quick if the rhubarb is cut small)
5) strain rhubarb out of syrup, reserving both
6) when both rhubarb and syrup are cool, put them back together and keep in fridge
7) use in recipe
We would use this for strawberry-rhubarb shortcakes and the like and would warm up the rhubarb to order. It wouldn't change color. You can also reduce the poaching liquid to add more color and flavor.