

eGCI Team
-
Posts
195 -
Joined
-
Last visited
Content Type
Profiles
Forums
Store
Help Articles
Everything posted by eGCI Team
-
Please post your questions here
-
Please post your questions here -->>Q&A What Are Cocktails? What, exactly, is a cocktail? There's much speculation about the origin of the term and the drink, but I'm not going to delve into that here (for a good discussion, see the book Straight Up or On the Rocks by William Grimes.) In the second section I will give a general description of what constitutes a cocktail and discuss the structure of various types, but that can wait. Whatever the definition, though, the cocktail was for most of its history a uniquely American phenomenon. It survived Prohibition (which actually served to stimulate the creativity of the drinkers of the day in constructing new cocktails) and the counterculture of the 60's. Now, with the recent resurgence of interest in cocktails, both old and new, many people are being introduced to them for the first time. It's not always a smooth introduction. The sheer number of drinks, the intriguing but not always descriptive names, and the variety of ingredients combine to make the world of cocktails mystifying and impenetrable to many. But that needn't be the case. Yes, it's true that there are way too many cocktails out there to sample in one healthy liver's lifetime, but take it from me, you can ignore most of them. There is no reason to drink or even taste a Sex on the Beach or a Slippery Nipple (a good rule of thumb: if the name is something that a 21-year-old girl thinks is racy, chances are it's not a very good drink). What follows will, I hope, give you a foundation to begin making your own cocktails and some information that will make ordering cocktails less confusing. I'll start with the major ingredients, then turn to some theory and recipes, with a section of the logistics of throwing a cocktail party added for good measure. INGREDIENTS Stocking a home bar can seem prohibitively expensive, but you don't have to buy all these ingredients at once, or even at all. If you want to experiment, then of course the wider the range of ingredients you have, the more possibilities for being creative you'll have. But you can start out mixing a pretty wide variety of drinks with only a few bottles, if you know what to look for. If you have a favorite spirit, by all means start out with that one. But don't limit yourself unnecessarily. For years I told myself and everyone who would listen that I hated rum, because of the bad, quasi-tropical overly sweet drinks I'd had in college. But when I finally decided to overcome that particular prejudice, I found that there are some really great rum drinks out there, all of which I would have missed had I stuck to my narrow view. Finally, any time you use an ingredient in a drink, you should know what it tastes like plain, even if you won't ordinarily be drinking it straight. I'm constantly amazed by the number of Martini or Manhattan drinkers who have no idea what vermouth tastes like straight, or Margarita drinkers who don't know the difference in taste between Cointreau and Grand Marnier. So every time you buy an ingredient for a drink, open it and taste it plain before you even think of reaching for the cocktail shaker. SPIRITS Looking at the spirits shelf in a liquor store can be dizzying. So many types, so many brands, so many prices -- how on earth can a novice be expected to make a decision? What follows will, I hope, answer some basic questions. One of the questions I hear most frequently is whether it's "worth it" to buy premium brands of spirits for cocktails, or if the lower priced brands work as well. My answer: it depends. It depends on the drink you plan to make, your personal preferences and your wallet. Some people will say that it's criminal to use the super premium liquors in cocktails; others will say that any cocktail deserves to be made with the very best. I fall somewhere in between those extremes. I think a well-made cocktail will always benefit from good liquor; the more predominant the spirit is in the drink, the more crucial it is to use a good quality liquor. But in the case of long-aged, carefully made liquors like single malt scotch, fine cognacs and brandies, and high-end rums and tequilas, the quality comes through as subtle nuances which are virtually always lost in mixed drinks. And I always fall back on this fact: I can only afford so many bottles of premium spirits, so if I'm going to splurge on them, I want to make sure I will fully appreciate what they have to offer. I can't possibly evaluate every brand of every liquor, but I will give you my personal opinions, including an indication of the minimum quality I recommend for various drinks. Do keep in mind that these are opinions though, and not definitive answers. I'm sure for every recommendation I make, there will be dozens of people who disagree. Oh well, you can't please all the people all the time, now can you? Gin and vodka, the "neutral grain spirits" These spirits are distilled to a very high proof (190 proof, or almost pure alcohol), and they retain virtually none of the character of their source (grain or potatoes, generally). They are distilled at least three times ("rectified"), rendering them virtually tasteless. Vodka is then bottled with enough distilled water to bring the proof down to about 80; gin is flavored during the second or third distillation. Because of their neutral character, gin and vodka are among the most commonly used spirits in cocktails. Gin In the United States, most of the gin you'll see is London Dry gin, and unless a drink recipe calls specifically for Dutch gin, it's the type you'll use in cocktails. Dutch or Geneva gin is sweeter and has more of a malt flavor than London Dry. After distillation, gin is first filtered, then (usually) redistilled with juniper berries and various other herbs and roots to add its characteristic flavor. Various brands of gin will have different flavors and aromas depending on the blend of aromatics used in their production. In very general terms, you can divide premium gins into two camps -- those with the juniper predominating, such as Boodles, Tanqueray, Beefeater, and Bombay; and those without much juniper, such as Bombay Sapphire and Tanqueray No. Ten. The last two gins are a good way for vodka drinkers to break into the world of gin, although for this gin lover, they don't provide much in the way of complexity. My everyday gin is Gordon's; although it's rather one-dimensional in a martini, it's perfectly acceptable for mixing. Seagram's is another acceptable mixing brand. For martinis and gimlets, I like any of the "juniper-y" gins mentioned above, especially Boodles. My new favorite premium gin is out of a small distillery in (of all places) Bend, Oregon, called Cascade Mountain, but I can't afford to buy it often. When I do, I reserve it for martinis. Gin is the spirit of choice in numerous classic cocktails, including the Martini, Gimlet, Bronx, and Aviation. Vodka By U.S. law, vodka must be made with no additives but water and must be basically tasteless and odorless. This is not to say that there are no differences among all the brands of vodkas out there, but with very few exceptions, the differences are slight (if you can find a bottle of Tito's Texas vodka, you'll discover one of the exceptions -- a viscous, relatively sweet vodka reminiscent of corn liquor). Because vodka is so close to flavorless, it's useful in cocktails where the other flavors need to shine or might clash with the juniper flavor of gin. These days, of course, vodka now outsells gin by far, and many of the newer trendy cocktails call for plain or flavored vodkas. The Lemon Drop and the Cosmopolitan are two of the many cocktails based on vodka. With very few exceptions, I'll always choose a gin drink over a vodka one, and if that makes me old-fashioned, so be it. Because of my preference, I find that Smirnoff or anything in the same general price range suits my needs for vodka. The vodka-lovers of my acquaintance opt for Ketel One, Absolut, Stolichnaya, and Belvedere, among the many premium brands available. If I were going to make vodka martinis, I would probably spring for one of these brands. Flavored vodkas are generally made by steeping fruit, citrus peel, or other flavoring agents in the vodka after distillation. You can also do this yourself very easily, by steeping citrus rind, for example, in vodka for a week or so. Infused vodkas can add a little complexity to drinks ordinarily made with plain vodka, especially if the flavoring agent is unusual. Whisk(e)y Whiskies are made from various grains -- mostly barley, rye, corn, wheat -- depending on the country of origin. They are distilled at lower proofs than the neutral grain spirits and are all aged to some degree. American whiskey is generally made from corn or rye, plus other cereal grains. Bourbon by law must contain at least 51 percent but no more than 80 percent corn and be aged in charred oak barrels for at least two years. Jim Beam and Maker's Mark are both bourbons. Tennessee whiskey (Jack Daniel's, George Dickel) is similar in production to bourbon, with the additional step of being filtered through charcoal made from maple trees. Rye whiskey (Old Overholt, Jim Beam Rye), not surprisingly, must come from a mash made from at least 51 percent rye. It tends to be less sweet and considerably less smoky than Bourbon or Tennessee whiskies. Blended American whiskies, such as Seagram's Seven or Kessler's, are similar in flavor profile to their bourbon and Tennessee cousins, but tend to be lighter. Canadian whiskey is made from a blend of grains, often primarily rye. But Canadian whiskey is lighter and somewhat sweeter than its American cousins. Seagram's V.O. and Canadian Club are two popular brands. Personally, I prefer rye to bourbon, and bourbon to Tennessee whiskey, and anything over Canadian. If you want rye in your Manhattan, try Jim Beam rye (good), Old Overholt (better) or Old Potrero (if you're feeling flush). I tend to fall back on Maker's Mark or Jim Beam when I buy bourbon, although Wild Turkey is something I'll splurge on if I'm entertaining bourbon drinkers. I don't buy Tennessee whiskey, but a friend of mine who loves both bourbon and Tennessee whiskey swears by George Dickel. The mash for Scotch whisky has to be made from at least 51 percent malted barley (malting is a process of germinating, then drying the grain. Scotch is made from barley that's dried over the smoke of peat fires, resulting in a distinctive, smoky flavor). Single malts are 100 percent malted barley; blended scotches can also contain other cereal grains. The distinctive smokiness of Scotch makes it a harder whisky to mix than American or Canadian. It’s most often served straight or on the rocks, although I've been known to enjoy the occasional Rob Roy (scotch with vermouth) or Rusty Nail (scotch with Drambuie). Good blended scotches include Dewar's (my preference for the cocktails mentioned above), Chivas, Johnnie Walker Red or Black, and Teacher's. I wouldn't dip much below the level of Grant's, even for mixing. I personally love single malt scotch -- the smokier the better -- but I wouldn't use it in cocktails (see the note in the introduction to this section). I save that for sipping. Irish whisky is sometimes made from malted barley, but it usually comes from a blend of lighter grains with the malted grain, resulting in a less smoky taste than Scotch. I like Jameson's, Power's, Bushmill's and Tullemore Dew. Brandy and other fruit based spirits Distilled from fruit, usually grapes, brandy is distilled at lower proof and aged in oak barrels for anywhere from three to 50 or more years. Cognac is brandy made in the Cognac region of France; likewise, Armagnac comes from the Armagnac region. It used to be that fine brandies came from France and cheap brandy came from California, but that is no longer the case, as some very nice brandies are now coming out of both California and Oregon. Like the expensive single malt scotch, fine aged brandies are rarely used in cocktails, but younger, less expensive brandy is an ingredient in such classic drinks as the Sidecar. Jules Domet and Canard are two reasonably priced French brandies that work well in mixed drinks. Korbel is acceptable in mixed drinks if you can't find anything else, but barely. Marc, grappa and pisco are distilled from the remains of the wine crush (stems, seeds and skins). Traditionally the "poor man's brandy," these liquors have become more popular (and more refined) and are now a sort of cult favorite. Pisco is, not surprisingly, the spirit on which the Pisco sour is based, but marc and grappa are most often enjoyed straight. Eau de Vie, in the broad sense, refers to any liquor distilled from any fruit. In its more common usage, though, it refers to higher proof, colorless liquor made from fruit other than grapes, and aged for a shorter period of time than brandy. Eaux de vie are typically more fiery than brandy, with the distinct aroma of the fruit from which they're distilled. Poire William and kirsch are popular eaux de vie. Although technically Calvados is an eau de vie, it's closer in style to a fine grape brandy. Several cocktails call for eaux de vie, but they are far less common an ingredient than sweeter, lower proof fruit cordials. Although brandy is not the most common base for cocktails, it does appear in several, notably the Sidecar. Rum Rum is distilled from sugar cane or molasses, and hails from sugar producing countries such as Cuba, Jamaica and Puerto Rico. The rate of fermentation as well as the length of time spent aging, affects the flavor of the rum, with the lightest rums having the shortest fermentation time. After the distillation process, a raw, clear, fiery spirit is the result -- embraced as cachaca in Brazil, it forms the base of the Caipirinha cocktail. In most cases, though, this raw spirit is aged, sometimes with flavoring and coloring agents, to become rum. White or silver rums are generally the lightest in taste, due both to the short fermentation period and to their being filtered before bottling. Medium rums are golden to amber in color, sometimes the result of aging in oak, sometimes the result of addition of caramel or a small amount of molasses. Light and medium rums are most commonly found in cocktails, although the very dark heavy rums like Myers's are an ingredient in some tropical drinks. For a good mixable light rum, you can't go wrong with Bacardi Light. If you can find it, white Rhum Barbancourt from Haiti is also good for cocktails. Mount Gay Eclipse or Bacardi Gold are good choices for medium body, golden rums. I like Myers's when I want a dark rum for drinks. As with cognac and fine brandies, the most expensive rums are aged for years and are best enjoyed sipped straight. After gin and vodka, white rum is probably found in more cocktails than any other spirit. The Daiquiri is probably the best known of these; others include the Mojito, the Bacardi cocktail, Mai-tai and the Zombie. Tequila Tequila is distilled in Mexico from the agave plant. By Mexican law, it must be distilled from at least 51 percent blue agave grown within a specifically delineated region in Mexico. Quality tequilas are 100 percent agave, and it's a good idea to stick to those when choosing a bottle for your bar. Like rums, tequilas come in a range of colors from silver to golden. White or silver tequilas are aged for less than 60 days. Golden tequilas are usually aged about the same and usually get their color from caramel. For aged tequilas, look for the designation Reposada, which requires aging of 60 days to a year in wood, or Anejo, which is aged at least a year but often for two or three. Mescal (mezcal) can mean two different things. Originally, mescal simply referred to any distillate of any agave plant; thus in that sense, tequila is a subset of mescal. Then there is the spirit now marketed as mescal, which comes from a different type of agave than does tequila. This mescal tends to have a smokier flavor than tequila, due to its production, which involves heating the agave (more precisely, the pina, or heart of the agave) over charcoal. There are almost as many premium tequilas out now as there are premium vodkas. Every brand has its fans, and I'm not about to step into that argument. I rarely drink tequila straight, so I don't bother with the expense of Chinaco and Patron, although they are very good indeed. I like Sauza Hornitas, El Tesoro Silver and Herradura for cocktails. Virtually anything that's labeled 100 percent agave should be fine for mixing. Tequila's claim to fame in the United States, drink-wise, is of course the Margarita, with the Tequila Sunrise a close second. Vermouth Vermouth is fortified wine flavored with a variety of herbs. There are dozens of vermouths on the market, although Americans tend to think only in terms of the dry (white) and sweet (red) vermouths used in Martinis and Manhattans. In some older cocktail and bar books, you may encounter the terms "French" and "Italian" vermouth. Because the dry, white vermouth was first produced by a French company, it not surprisingly came to be known as "French" while the sweet red vermouth, which originated in Italy, was called "Italian." Now, of course, both styles of vermouths are produced in both (and other) countries, and those designations have mostly died out. Of the common bar vermouths, Noilly Prat, Martini & Rossi, and Cinzano are good solid brands. I prefer Noilly for white and Cinzano for red, but all are acceptable. There are, however, numerous less known vermouths available with distinctive tastes, such as Dubonnet, Lillet, and Cinzano Bianco, which in other countries are commonly drunk on the rocks or with soda as an aperitif. For a change in your regular vermouth-spiked cocktail, try one of these, or the American vermouth called Vya. (Lillet Blonde, in particular, is one of my favorite additions to many cocktails.) Liqueurs and Cordials Flavored with fruit or (less often) herbs and lightly to heavily sweetened, liqueurs and cordials play a role in many a cocktail. They are generally much lower in proof than liquors. There are many more varieties than I have time for here, but several are so common in cocktails that they bear special mention. Campari. Bitter, sweet and herbal is the best way to describe this red Italian aperitif liqueur. Found in such classics as the Negroni and the Americano, Campari can add a delightful bitter edge to many fruit juice cocktails. It's also nice mixed with club soda over ice for a light afternoon drink. Triple Sec and Curacao. Triple Sec is probably the most widely used liqueur in cocktails. Strictly speaking, triple sec is a liqueur flavored with the peel of sweet oranges, while curacao uses both sweet and sour oranges. However, the two terms are used virtually interchangeably in cocktails. The proof varies widely, so it’s best to check so you know what you’re dealing with. An expensive and well known triple sec is Cointreau, which is good to have if you want to spend the money. Marie Brizzard makes an excellent triple sec as well. If you buy curacao, avoid the blue version unless you want to make blue drinks and stain your tongue. Avoid non-alcoholic triple sec, which is basically an artificially orange flavored sweetener. Grand Marnier and other brandy-based orange liqueurs are often substituted for triple sec. They are very good liqueurs, but they will add a distinct brandy flavor and will thus change the flavor of the drink, sometimes significantly. They also tend to be sweeter, so keep that in mind when substituting. Maraschino. Less well known but a great addition to the home bar is the Italian cherry liqueur called Maraschino. A couple of brands are available in the United States; I have only tried Luxardo but understand from those who know that it's the best. Maraschino is subtle, with a great cherry aroma and a hint of bitterness behind the sweetness. Other liqueurs that find their way into cocktails include: Amaretto: almond Anisette: licorice (other licorice/anise flavored liqueurs include Sambuca and Pernod) Baileys: Irish whisky-based cream liqueur Benedictine: herbal Chambord: raspberry Chartreuse: herbal Crème de cassis: currant Crème de cacao: chocolate Crème de menthe: mint Framboise: raspberry Galliano: herbal Kahlua: coffee (Tia Maria is another coffee liqueur) Sloe gin: sloe berries Schnapps. Most schnapps you will see in the United States belongs to a category of sweet, inexpensive, non-proprietary cordials. They come in a wide range of flavors, with peppermint, peach, cinnamon and root beer being the most common flavors; de Kuyper is probably the best known manufacturer. I'm sure I'll hear about this, but I see absolutely no reason to buy any of these (think sweet and artificial tasting). European schnapps, though, are apparently a different story. I've heard that they can be quite good, not as sweet yet intensely flavored. Bitters Bitters is a wide-ranging term that usually refers to concentrated, aromatic alcoholic concoctions such as Angostura or Peychaud. The term is also sometimes used for bitter aperitifs such as Fernet Branca or Campari, but the first usage is more common. Bitters add a complexity and depth to otherwise ordinary cocktails, and in Martinis and Manhattans, they can help to make up for less than stellar vermouth. The aforementioned brands, Angostura and Peychaud, are the two you're most likely to see on the shelf, with Angostura by far the most common. Orange bitters are worth investing in if you can find them. Fee Brothers is a good brand. NON-ALCOHOLIC COMPONENTS Simple syrup Because sugar is so hard to dissolve in cold drinks, simple syrup is my sweetener of choice for cocktails. It's easy to make. The most common formulation is two parts sugar to one part water, boiled until the sugar dissolves and a syrup results. This proportion is close enough to the saturation point of the water that you may find your bottle of simple syrup develops a few sugar crystals around the rim. I keep mine refrigerated, and it seems to last forever. If you don't have simple syrup on hand, superfine sugar is your best bet for dissolving. You can buy superfine sugar, or make it yourself by whizzing some regular sugar in a food processor for a minute or so. Avoid powdered sugar, which contains cornstarch; not only will it not dissolve, it will make your drink cloudy. Rose’s™ Lime Juice A sweetened lime cordial, Rose’s is the best known and, I think, best tasting of the type. Angostura also makes a version. Rose's is the traditional mixer for the Gimlet cocktail (although a fairly recent trend seems to substitute fresh lime and sugar for the Rose's), so if you plan to make Gimlets, you should have it. If not, you can probably live without it. Since the Gimlet is one of my all-time favorite cocktails, I cannot. Do note that Rose's Lime is not a substitute for fresh lime juice. I would not recommend it for Daiquiris or Margaritas. Grenadine Traditionally a syrup flavored with pomegranates, grenadine is used to sweeten and color cocktails. Try to find a brand that really does contain pomegranate, not just sweeteners and coloring agents. Citrus Juice Lime, lemon and orange juice are indispensable components of many a mixed drink. Always use fresh juice, and squeeze your juices as close to the time of use as is possible. When trying to gauge the amount of fruit necessary for a given number of drinks, remember that a large Persian lime produces about an ounce of juice, Mexican limes produce about half to three-quarters of an ounce and key limes slightly less. Meyer lemons will also produce about an ounce, with the more common Eureka lemons producing slightly more. An orange will give about 2 ounces of juice, depending on the variety and size, of course. Top left: juicer with reamer and base. Top right: Mexican juicer. Bottom: hand held reamer There are a number of devices for juicing citrus fruit, including the hand held reamer and the "Mexican" juicer. The reamer at the left, which sits over a base to collect the juice, is handy if you're juicing multiple fruits. The juice collects in its own cup, which often contains a strainer to remove any seeds. The hand held reamer works well for lemons and limes; it can be on the small side for oranges. The Mexican juicer comes in three sizes -- small for limes, medium for lemons, shown, and large for oranges. It not only does a great job of getting all the juice out of the fruit, but also extracts some of the oils from the rind. If you choose one of these, keep in mind that the small one is really designed for the smaller Mexican limes. Most American limes are too large for it and work better in the medium size. COCKTAIL BACKGROUND AND THEORY So, I promised in my introduction that I would talk a little about what, exactly, a cocktail is. Although the term is sometimes used as a synonym for mixed drink, I think of it as a specific subcategory of mixed drinks. Drawing on a number of cocktail books and my own personal idiosyncracies, I've come up with the following definition of the cocktail, which is not by any means the definitive one, but it's the one I'm using for the purposes of this class. Although I will talk a little about other types of mixed drinks, I'll concentrate on the drinks that fit my narrower definition. It's not that those other mixed drinks are unworthy of attention, but I can only cover so much territory here. So, where were we? A cocktail consists of at least one primary spirit, plus at least one modifying element, often more than one. It is chilled by being shaken or stirred with ice but served up (without ice). It is served in a cocktail glass, naturally. For the purposes of this discussion, I'm going to narrow my focus even further. First, I think that a cocktail should taste of alcohol. If I want, for example, an oatmeal cookie, I'll eat one -- I have no desire to drink a simulation of one. And setting out to make a cocktail that "doesn't taste like alcohol" is completely alien to my sensibilities. Also, I tend to think of a cocktail as an aperitif, drunk before dinner to stimulate the appetite. So although my cocktails may have a sweet element, overtly or purely sweet cocktails are not something I'm going to talk about. There is a whole category of "dessert drinks" out there, but it doesn't interest me in the least. I can't really continue without mentioning the recent trend of calling any drink that's poured into a cocktail glass a Martini of some sort. Now, I'm all for the creation of new drinks (if they're good, that is). But in my book, calling all these creations "Martinis" is not a welcome trend, for three reasons. First, there's already a term for those types of drinks: "cocktail." Second, it means that eventually, my ordering a Martini is not going to mean anything specific. It's not going to result in a true Martini being set down in front of me. And third, it shows a complete lack of imagination in naming new cocktails. Part of the fun of cocktails is the fanciful names. Instead of the Maiden's Prayer or the Monkey Gland, a Leap Year or a Satan's Whiskers, we now have the "Fill-in-the-blank" Martini. How pedestrian. And how very sad. End of rant. Back to cocktails. To make sense of all the hundreds of thousands of drinks out there, you have to have a starting point -- a way to categorize them. But, you ask, just how does one categorize cocktails? This is where I take a different path from most other cocktail makers. Generally speaking, bar and cocktail books categorize cocktails based on their base spirit. I divide them into groups based on their structures and flavor profiles. FLAVOR AND STRUCTURAL PROFILES To discover the flavor profile of a drink, look past the drink name, past even the base spirit. Concentrate on the other ingredients. Which tastes are provided by the "modifiers" in the drink? Sour flavors from lime or lemon juice? Bitter flavors from herbal liqueurs? Sweetness from simple syrup, triple sec or grenadine? Take, for example, the Daiquiri (and I'm referring to the traditional Daiquiri, not those sweet slushy fruit travesties). This drink consists of rum as the base spirit, simple syrup or sugar, and lime juice. This is a fairly simple profile -- sweetness from the syrup and a sour note from the lime. As it turns out, this profile – base + sweet + sour -- is a very common one. Take the brandy-based Sidecar. The Sidecar's ingredients -- brandy, triple sec and lemon juice -- play the same roles as the rum, syrup and lime of the Daiquiri. It's not just these two drinks that share that structure, either. It forms the foundation for a number of classic cocktails, as well as a majority of the newer cocktails worth imbibing. Among them are: Margarita (tequila, triple sec, lime juice) Gimlet (gin, lime cordial -- such as Rose's -- provides both the sweet and sour elements) Aviation (gin, maraschino liqueur, lemon juice) Caipirinha (cachaca -- a sort of unaged rim, simple syrup, lime) Cosmopolitan (vodka, triple sec, lime and cranberry juice) Lemon Drop (vodka, simple syrup, lemon juice) This flavor profile is popular for a reason. These drinks are, for the most part, very accessible to the novice at cocktails. They aren't terribly complex. There are no bitter or herbal elements for the palate to accommodate. Now, if you're interested in making a sweet/sour cocktail a little more complex, you can add a bitter element -- Campari or bitters are the most common. A dash of bitters, for example, makes a Lemon Drop a much more interesting drink. This sweet/sour structural profile, is, of course, not the only one for cocktails. Martinis and Manhattans, those bastions of the cocktail world, belong to a different category entirely: alcohol base + herbal/aromatic modifier (i.e., vermouth). So does the Rob Roy, which is essentially a Manhattan made with scotch. (Very close to this category is the rarer base + bitter modifier, into which the Pink Gin or Gin and Bitters falls.) I know what you're going to say now. "But a Martini doesn't taste like a Manhattan!" And of course you're right. Gin doesn't taste like rye. Because the cocktails in this particular category are dominated by the spirit they contain, this is really more of a structural category than a flavor category. But it's still a distinct and useful category. A third category, base + bitter + sweet, is the one into which the Old-Fashioned and Negroni (gin, sweet vermouth and Campari) fall. Any drinks that contain Campari or a significant dose of bitters will likely fall into this category. Liqueurs like Amer Picon, though harder to find than Campari, are also ingredients in bitter-sweet drinks. Finally, a less common category, but one that's ripe for experimentation, is base + sweet + sour + bitter. With all the tastes going on, it requires no small degree of mixing skill -- too much of any one of the ingredients can result in a total disaster. The Jasmine, a drink from Harrington and Moorhead's book that's become one of my favorites, fits into this category, consisting of gin, triple sec, lemon juice and a splash of Campari. My own After School Special (recipe below) also falls into this category. Those categories cover most of the cocktail recipes you'll find in most of the cocktail books out there (except for the purely sweet ones, which I've already said I'm ignoring for now). Once you know what the basic spirits taste like, and you isolate the predominant flavors of the other common ingredients in cocktails, you're well on your way to a) predicting in general terms how a recipe will taste and whether you might like it, and b) being able to experiment successfully on your own. Not too difficult, was it? Before we leave the topic, I want to say a few words about some other kinds of mixed drinks. Cocktails, wonderful as they may be, are not always the best choice for an alcoholic drink. They're strong, for one, and strongly flavored. Sometimes a better choice is a lighter drink, on ice, maybe with soda or tonic. Any drink book will provide plenty of recipes for such drinks, like the Americano (Campari, sweet vermouth and soda water) or the Gin Rickey (gin, lime juice, simple syrup and soda). You can still use the same principles to evaluate these drinks. The Americano, obviously, shares its profile with the Negroni mentioned above, and the Rickey is similar in flavor to the Gimlet. Many cocktails in the sweet-sour or bitter-sweet categories can be successfully turned into mixed drinks made on ice with a splash of soda. In fact, many cocktails -- especially those with fruit juices and cordials -- can be converted very successfully into lighter drinks simply by serving them over ice with a splash of club soda. NON-ALCOHOLIC DRINKS Chances are pretty good that among your acquaintances are a couple of people who for any number of reasons don't drink alcohol. Yet the so-called "mocktails," or non-alcoholic cocktails that many restaurants serve are nothing but pureed fruit juices or tonic water with lime. There's nothing really wrong with these, except that they're often boring and never very sophisticated. Because several of my close friends and relatives no longer drink alcohol, I wanted to develop some sophisticated alternatives for them. Instead of creating alcoholic drinks that didn't taste like alcohol, I wanted to create non-alcoholic drinks that would mimic the sophisticated, complex taste of the alcoholic drinks I was serving to my other guests. I began with a non-alcoholic version of the Margarita. First, I thought about what taste and textural components are contributed by the tequila. It contributes a feeling of heat and a relatively viscous mouthfeel, with a note of sweetness and sometimes smoke. After some experimentation, I decided that chipotle chiles (dried, smoked jalapenos) were what I was looking for. I steeped them in water, which I then used to make a simple syrup. With the syrup adding sweetness, I could dispense with the triple sec, but of course I still wanted a hint of orange. A couple of tries later, I hit on steeping dried orange rind with the chipotles. Lime, obviously, added the sour element, but the drink was still not quite right. First, even served over ice, it was too intense, so I added a little water. That helped, but somehow, even with the lime, I kept thinking that it needed more acid. All of a sudden I realized what it needed, which was grapefruit juice. Just a little pulled the drink together perfectly. Since then, I've experimented with other syrups, such as a jalapeno and mint syrup that makes a nice non-alcoholic version of the mojito. These exercises have proven to be fun and challenging, and I'm hoping to develop a few more (I'm currently working on a less sweet drink incorporating juniper and cucumber, but I'm not quite there yet). BALANCE I've talked about ingredients, flavor profiles and structure. In the last section, I'll provide some recipes for anyone who wants to start mixing cocktails. But before I do, I need to talk about balance. There are a lot of poorly mixed cocktails in the world, many (sad to say) mixed by so-called professional bartenders. Sometimes the problem is poor quality ingredients, but most often is a lack of attention to the balance of the drink. Specifically, the most common problem I encounter is drinks that are made too sweet. Maybe it's because in catering to a younger crowd with a less sophisticated palate, some bartenders feel it necessary to sweeten up all their drinks. I don't know the reason, but it's something to watch when you start to mix your own drinks. And while we're on the subject of poorly mixed drinks, over-pouring the alcohol will throw a cocktail off balance just as badly as over-sweetening. An inexperienced bartender may think that extra alcohol is always welcome in a drink, but in almost all cases, this is not true. TECHNIQUES Making cocktails is not difficult, but there are a few techniques that you'll need to understand before you begin mixing. While the Evolving Cocktails lesson covers equipment in detail, there are some essentials that I will address briefly in this section. Measuring You might think that professional bartenders don't measure ingredients when they mix drinks. Not true. They don't pour into a measuring cup, certainly, but they still measure -- by sight or by feel or by "count." You can teach yourself to do that if you wish. All it takes is a lot of practice and a careful eye. Start by measuring out water in half ounce increments and pouring it into your mixing glass or shaker. Do it often enough that you know by sight about how much space each measure takes up in the glass. Or practice pouring out of a liquor bottle at a steady rate. While you're pouring, count to yourself at a steady rate. Then start measuring how much liquid is in the glass after one "count," two "counts," etc. After enough practice of either of these methods, you'll begin to be able to measure without a measuring glass. To start, though, plan to use a measuring device -- a jigger, a shot glass or a measuring glass. Left-to-right: a "one-shot" measuring glass, a two-ended jigger, and a four-ounce measuring glass A two-ended jigger consists of two cups, one usually 1.5 ounces (the "jigger") and one that measures 1 ounce (the "pony"). Sometimes one of these will measure 1 ¼ ounces and the other ¾ ounces, so unless you know in advance you may wish to check your jigger. An easy way to do this is with a tablespoon, which equals half an ounce, or a two-tablespoon coffee measure, which equals one ounce. A shot glass or measuring glass is usually a little more versatile, with increments ranging from ½ ounce up. I really like the glass on the right, which goes up to four ounces -- it can be used for measuring the ingredients for one or two drinks at a time. Even though I can measure many drinks by count and sight now, I still use it when I'm making a particularly complex drink or when I'm experimenting. Shaking v. Stirring No discussion of classic mixed drinks is complete without a mention of the difference between shaking and stirring a drink. First of all, let's dispense with all the talk you may have heard about shaking a martini somehow "bruising" the gin. Ain't so. End of story. What shaking does do to a drink is three-fold. First, it chills a drink faster and to a lower temperature than does stirring the same drink. In Cocktail: The Drinks Bible for the 21st Century, the authors (Paul Harrington and Laura Moorhead) estimate that shaking a drink in a metal shaker will result in a drink that's approximately 20 to 25 degrees. The same drink stirred will end up in the 25- to 30-degree range. Second, as the drink chills, it also becomes more diluted as the ice melts into the drink. The higher agitation of the shaken drink means that more liquid comes into contact with more ice and results in more water in the drink. Third, shaking introduces millions of tiny air bubbles into the drink, making it appear cloudy and feel lighter and almost fizzy on the tongue. Traditionally, it's felt that a drink that's primarily spirit with little else, such as a Martini or Manhattan, should be clear and still and not overly diluted, so it should be stirred, even though that means it won't be as cold. Practically, drinks that include syrups, fruit juice or cordials will be more thoroughly combined when shaken, so that's the usual technique for those drinks. Of course some Martini drinkers prefer their drinks more diluted or like the lighter feeling of an aerated libation, and they're willing to trade a slight cloudiness for those qualities. You can see and taste the difference for yourself if you have a cocktail shaker. Simply place four or five ice cubes in the bottom of the shaker and pour in an ounce or two of gin, vodka, or white rum. Stir it vigorously with a long spoon for 15 seconds. Pour it out into a cocktail glass. Repeat with the ice cubes and gin, but this time, put the top on the shaker and shake vigorously for 10 to 15 seconds. Pour this one out. You should see a difference in the clarity of the two drinks (although as the second one sits, it will clear up). Taste them, paying attention to the way they feel on the tongue. You should notice that the second one is lighter, the first silky and a little heavier. Personally, I like the stirred version. I follow the traditional approach, stirring my Martinis and Manhattans and shaking most other drinks. I make up for the slightly higher temperature of a stirred drink by chilling my glassware in the freezer. But you should make up your own mind. Whatever you decide, there are three things you should avoid: First, you may see bartenders "stir" a drink by repeatedly plunging the spoon into the ice, chipping off small bits. Don't think that this is a desirable technique to emulate. It results in little ice chunks in the drink even when strained, which is not something that belongs in a drink served up. Second, I've seen bartenders shake a drink so hard and for so long that it comes out of the shaker practically foaming (sometimes actually foaming). That's too much fizziness for even the fruitiest of cocktails. Third, if you shake a drink using a Boston shaker (the type with a glass as the base with a metal cup to shake), use a strainer. Don't try to split the two halves slightly and strain through the opening. I can't count the ice bits that have ended up in drinks because of this sloppy shortcut taken by mediocre bartenders. Chilling The Glass Properly chilled cocktails are a joy. Warm or even cool cocktails are one of life's big disappointments. Chilling your glasses can help to prevent this. When you're making a drink that is served up (that is, shaken or stirred with ice, then strained into a glass and served without ice), it's especially important to thoroughly chill them. You can do this in a couple of ways: place them in the freezer for a short time or in the refrigerator for a longer time; place them bowl-down in the ice bucket for a few minutes; or fill with ice for a few minutes while you're making your drink. Any of these techniques will chill the glass, with the temperature of the glass rising slightly from the first (freezer) to the last (filling the glass with ice). THE LOGISTICS OF COCKTAIL PARTIES So, you've gotten the hang of mixing up a few cocktails, and you want to host a cocktail party. What's next? "Start out small" is the advice I always give my students. When you feel confident making cocktails for three or four people, increase your guest list to six or eight. Only when you feel at ease with that size group should you consider a larger party. Plan your first parties within a limited time frame. Let your guests know that your party lasts from 5:00 to 7:00, or 6:00 to 9:00. Don't try for the "open house," 4:00 to 10:00, anytime-you-want-to-show-up-is-fine kind of party. It's too draining. Making cocktails for a crowd It's one thing to mix a drinks for a few friends; it's something else entirely to provide drinks for a crowd of 10, 15 or 30 people. Even if you're comfortable with your mixing skills, drinks for a large crowd will take up most of your time at your party. If you like playing bartender, this can be perfectly acceptable. But if you're also trying to juggle serving food and want to be able to socialize at length with your guests, you may want to adopt another strategy. If you have friends who like mixing drinks, you can often enlist them to play bartender for an hour or so, giving yourself a break to attend to your guests, bring out food, or anything else you need to do. If you decide to mix drinks individually for your guests, you can make your life easier if you limit yourself to two cocktails. It's tough to pick two drinks that will satisfy everyone, so when I do this, I make sure to have other options for those who don't care for the choices. Champagne or wine are good in this situation. It's best to let your guests know the drink situation, or you may end up with guests who expect to get whatever they want, especially if they know you have other ingredients. A different option is to buy the ingredients for a few cocktails, plus some generic mixers like club soda and tonic water, and invite your guests to mix their own drinks. You can even give a few lessons and make it part of the evening's activities. The drawback to this set-up is that you have no control the amount your guests drink and risk a) running out of liquor and b) ending up with drunk guests. Another solution is to mix up batches of cocktails in pitchers so that you can take care of a large number of guests' drinks at once. This works well if you limit your selection to two or three cocktail choices. It works best with cocktails that are served over ice. Prepare the pitcher with just enough ice to chill the liquid, then pour the drinks into glasses filled with ice. Since the pitcher may not get emptied right away, this technique will ensure that your guests get cold drinks while keeping the drinks from becoming too diluted. Extending that idea even further, mixing a punch can work for very large crowds, with the main concern being how to keep the punch cold. I've had the best results chilling the punch and serving it over ice rather than adding the ice to the bowl. Party Pouring Math The average body processes one average alcoholic drink per hour, and you should keep this in mind while pouring cocktails for your guests. Of course some of your guests will drink faster (and some slower) but you really should attempt to keep them from gulping too many drinks too quickly. You can realistically plan on two drinks per drinking guest in the first hour of your party, after which most guests will slow down to one drink every 45 to 60 minutes. If cocktails are a prelude to dinner, it's best to limit the number of drinks to two, since you'll probably be serving wine or beer with dinner. A 750-milliliter bottle of a primary spirit will provide about 16 drinks calling for a jigger (1.5 ounces). If you're making drinks like Martinis and Manhattans that call for slightly more of the primary spirit, obviously you'll get fewer drinks out of each bottle. Bottles of ingredients like triple sec, which are used in smaller amounts, will naturally stretch for more drinks. Ice It might seem unnecessary to talk about ice, but a couple of points about ice bear mention. First, when planning a cocktail party, always buy at least twice as much ice as you think you'll need. There's nothing worse than running out of ice. Even if you have an ice maker, you probably won't be able to make anything close to enough ice for a crowd. Second, try to buy cubed ice instead of crushed ice -- it melts slower and lasts longer. And third, store the ice in the freezer, except for what you will use within 15 minutes (or even less). Slushy, watery ice makes inferior cocktails. Food Although a cocktail party is not a dinner party, you should provide something for your guests to eat. But you needn't go wild with the food. As the host of a party, you'll have a lot to do during the evening, so think hard about how much time you want to spend in the kitchen. You don't have to prepare an assortment of dozens of canapes, although if you like to do that sort of thing, it can be fun. If you don't, it's fine to buy prepared foods, provide bowls of nuts and crackers, and take any other shortcuts you can (except for buying Jeno's pizza rolls or those little quiches). While we're on the subject of food, here are a couple more points: First, remember that cocktail food should be finger food. You don't want your guests juggling plates, forks, napkins and drinks. If you are going to make food, think about miniature versions of foods -- tiny stuffed potatoes, bite-sized tostadas -- or canapes. And chicken wings always sound like a great idea, until you see your guests searching wildly for napkins and spilling their drinks while trying to get their hands cleaned off. Anything messy, or with a sauce, should be served with cocktail picks. Second, when planning your menu, go with rich foods high in fat. They go well with cocktails and they help to absorb the alcohol by coating the stomach. Avoid anything terribly spicy -- really hot foods are a tough match with many cocktails. Generally, the sweet-sour cocktails are the best match for spicy foods; a Daiquiri or Margarita can pair with jerk chicken skewers or spicy empanadas better than a Martini will. THE DRINKS THE CLASSICS Martini 2 ½ to 3 oz. gin ¼ to ½ oz dry vermouth Pour into a glass filled with ice. Stir and strain into a chilled cocktail glass. OR Pour into a shaker filled with ice. Shake gently and strain into a chilled cocktail glass. Garnish with a lemon twist or an olive. Variations: Vodka martini: Substitute vodka for the gin Perfect Martini: Use half dry and half sweet vermouth Dirty Martini: add a dash of olive brine Gibson: Garnish with a cocktail onion Manhattan 2 ½ oz. rye or bourbon whiskey ½ oz. sweet vermouth Dash bitters Stir or shake gently with ice. Strain into a chilled cocktail glass and garnish with a cheery or a twist. Variations: Substitute dry vermouth for the sweet or use half and half (a perfect Manhattan). Rob Roy: Substitute blended scotch for the rye Margarita 2 oz. tequila 1 oz. Cointreau, triple sec or curacao 1 ½ oz. fresh lime juice or half lime and half lemon juice Moisten the edge of a glass with lime juice or water and rim with salt. Pour ingredients over ice and shake. Strain into salt-rimmed cocktail glass or pour over new ice in a margarita or hurricane glass. Garnish with a lime wedge or wheel. Cosmopolitan 1 ½ oz. vodka ¾ oz. Cointreau, triple sec or curacao ½ oz. fresh lime juice Splash cranberry juice Shake ingredients over ice and strain into a chilled cocktail glass. Garnish with a lime wheel. Variations: Try flavored vodkas for this drink: Orange, currant or lemon Daiquiri 2 oz. white rum ¾ oz. lime juice ¼ oz. simple syrup Pour over ice and shake. Strain into a chilled cocktail glass. Variation: Add a splash of grenadine (and use Bacardi rum) for the Bacardi cocktail. Aviation 1 ½ oz. gin ½ oz. maraschino liqueur ¾ oz. lemon juice Shake ingredients over ice and strain into a chilled cocktail glass. Variation: use half vodka and half gin. SOME ORIGINALS Bitter Lemon Drop 2 oz. vodka (lemon vodka is good) 1 oz. lemon juice ¼ oz. simple syrup Three or four dashes bitters Shake ingredients over ice and strain into a cocktail glass. If you wish, rim the edge of the glass with sugar first. After School Special 2 oz Gin 1 oz Lillet Blond 1/4 oz Meyer or regular lemon juice Dash of orange bitters Shake ingredients over ice and strain into a chilled cocktail glass. Garnish with a twist of lemon or orange. Note: If you use regular lemon juice, you may wish to add a dash of simple syrup. A Drink I Haven't Named Yet 1 ½ oz. light rum 1 ½ oz. blood orange juice ½ oz. lime juice ½ oz. triple sec Shake ingredients over ice and strain into a chilled cocktail glass. Garnish with an orange wheel Note: This is also very good served over ice with a splash of soda. NON-ALCOHOLIC ORIGINALS The Faux Margarita 1 ¼ oz. chipotle orange syrup (recipe below) 2 oz. lime juice ¼ oz. grapefruit juice 1 oz. water Shake over ice and strain into chilled, salt-rimmed glass. Or pour over ice if desired. Chipotle orange syrup Bring 2 cups water to a boil. Reduce to a simmer and add 1 dried chipotle pepper and 2 strips dried orange peel (or fresh, if dried are not available). Cover and let simmer for 15 to 20 minutes (liquid should be slightly spicy but not overtly hot). Strain out the pepper and orange and add ¾ cup sugar. Bring back to a boil and stir until sugar dissolves. Remove from heat and let cool. Twisted Mojito 1 ½ oz. jalapeno mint syrup (recipe below) 2 oz. lime juice 3 oz. club soda or seltzer Shake the syrup and lime juice over ice. Pour into an ice-filled hurricane or tall glass and top with club soda. Jalapeno Mint Syrup Bring 2 cups water to a boil. Reduce to a simmer and add 2-3 sliced jalapeno peppers and leaves from one small bunch mint. Cover and let simmer for 15 to 20 minutes (liquid should be slightly spicy but not overtly hot). Strain out the peppers and mint and add 1 cup sugar. Bring back to a boil and stir until sugar dissolves. Remove from heat and let cool. Suggested Reading Cocktail: The Drinks Bible for the 21st Century, by Paul Harrington and Laura Moorhead. My favorite cocktail book by far, this is unfortunately out of print, but you may be able to find copies on Amazon or ebay. It gives recipes with background for numerous classic cocktails, and rates drinks on two scales: complexity of taste and mixing difficulty. The Craft of The Cocktail, by Dale DeGroff. Lots of good information appears here, including photos of garnishes and equipment. Lots of recipes, too, for both new and old drinks. If there's a flaw in my opinion, it's the name dropping, which I find tiresome but which is fairly easy to skip over since most of it occurs in sidebars. Straight Up or On the Rocks, by William Grimes. The history of the cocktail and drinking in America. It contains some recipes, but its strength is the information. Fascinating reading for any lover of the cocktail. The Art of the Cocktail Party, by Leslie Brenner. This book will lead you through the entire process of planning and hosting a cocktail party. Even though I don't always agree with Ms. Brenner, she does cover virtually every aspect of the party. The book contains recipes for cocktail food and drinks. Copyright 2003 by Janet A. Zimmerman Please post your questions here -->>Q&A
-
Please post your questions here
-
Please post your questions here -->> Q&A WELCOME to “How to Be A Better Food Writer,” aka “How to Break Into Food Writing.” I hope this lecture answers some of your questions and helps you as you embark on a food writing career. I‘ve spent a long time figuring out the best way to present this information. I contemplated giving an “advanced” lecture, whatever that means, but I kept remembering the classes that I’ve taught and the mistakes students made over and over again. So I decided to start with the basics. Groan, I know. But the truth is ninety-nine percent of out-of-work writers don’t follow the ground rules. Also I know that all of you aren’t at the same point in your careers, so a primer is in order. For those who have heard all of this before, it doesn’t hurt to hear it again. We can touch upon specific and advanced topics in our after-school time, which is from today until Saturday, August 30th. INTRODUCTION There’s an unfortunate inverse relationship between the number of assignments out there and the number of people who want to write them. Accept it because it’s never going to change. The only thing you can change is yourself, by learning as much as you can about the field, the craft of writing, and the business of getting work. My goal is to offer up pertinent information that can help give you the edge over other writers vying for the same assignments. People always ask me how they can become food writers. My answer: write. It’s that simple, yet I’m amused and amazed at how many people who want to be food writers never sit theirs asses in a chair and write. The desire to write is enough for them. Dilettantes abound, I guess. But I can’t stress this enough: If you want to be a writer, then write. Set aside time everyday and never let anything get in the way. Not you wife, lover, partner, day job, the lottery, paroxysms of despair or loneliness. Nothing. It’s the only way you’ll be able to see your strengths and weakness, and it’s the only way you’ll improve. And don’t think you corner the market on procrastination. I suffer from it everyday. In fact, my apartment is never cleaner than when I have a looming deadline. The solution: Get over it. See a shrink; join a group; make a commitment to your spouse, your dog, your high power—I don’t care who; or just sit down at your computer, take a breath, and start. And remember what Ann Lamott says in Bird By Bird, Everyone writes a shitty first draft. That’s what they’re for. Once you get it out of your system, you can move onto you less shitty second draft, and so on. THE RULES (or how to make an editor love you) The underpinnings of a successful food career are ridiculous simply, and they are the same things you’ve heard a million times. Yet they bear repeating. At every food conference, editors keep hammering home the same “rules," because most writers never bother to follow them. Below are the same points, which if you memorize them and make them part of your work ethic, you’ll be way ahead of plenty of wanabee writers. These are the points I followed, and they helped me to break in to the field very quickly. 1. Learn to write a grammatically correct sentence. Basic, sure. Almost insulting, I know. But I’ve sat with editors at lunch, and I can’t believe the horror stories I heard. These editors even showed me query letters that are so poorly written and weakly constructed that they end up in the wastebasket or, worse, pinned to a bulletin board so that staffers can crack up at the idiocy of the writers. If you don’t know how to write or are unsure of your skill, take a class. It will hold you in good stead. Editors love nothing more than to read a query letter that’s well thought out, well written, and makes its point clearly and effectively. The same goes for copy. When you send in an article, make sure it’s letter perfect. I thought I was a skilled writer, after all I spent fifteen years as an advertising copywriter and kept a journal for two decades. But when I sat down to write my first article, I froze. It was utterly painful, and I couldn’t remember ninth grade grammar for anything. Thankfully I found and paid for a freelance editor to check my work before I sent it in. I was shocked at how many mistakes I had made in grammar and structure. I worked with that editor on quite a few articles until I knew I could fly solo. Even now, I take classes in grammar, copyediting, editing, proofreading, etc. It all adds up. 2. Start at the bottom. This is almost an edict from on high. And it’s a good one to heed. If you’re new, you need to start somewhere. But that somewhere doesn’t have to be a local penny saver, thank you very much. Think creatively. Perhaps a local newspaper would be open to a new voice in their food pages, or a college publication could benefit from your point of view. (Taking a writing course at a local college allows you to write for the school newspaper. The clips you’ll get are more than worth the cost of tuition.) Or maybe a travel guide needs someone to write brief reviews of local restaurants. Hell, write about your favorite place and send it in to Zagat’s. It’s a start. Of course, if you enjoy breaking rules, you just might luck out. For my first article, I decided to hell with starting at the bottom. I was thirty-eight and I didn’t feel like banging out anonymous pieces for neighborhood rag sheets, so I started at the top. I queried only three newspapers: The New York Times, the Los Angeles Times, and the Chicago Sun-Times. New York and LA blew me off, but to my great surprise, the Sun-Times bit. Two months later my story filled almost the entire front page of the food section. From there I had a happy two-year run with the paper. 3. Know your market. At those same lunches, editors ranted about idiot writers who submitted queries that had absolutely nothing to do with their publications. Nothing pisses off editors more than this. I think an editor would rather have a doltish writer who nails the right kind of story for her magazine—after all, she can always work with him to jumpstart his writing—than a great writer who just doesn’t get it. (This doesn’t give you permission to go out there and be your doltish best. Writers who are sharp and can deliver the right story with the right slant are the ones who are asked back.) How do you study a market? Read the past twelve issues, as well as glancing at the tables of contents for the preceding two or three years. Yes, it’s a lot of work but imagine how embarrassed you’d be if you submitted to Saveur a kickass query about truffle foragers in the Périgord only to discover it did the same story two years ago. A move like that shows ignorance and/or laziness and kills any chance for future articles. Also, publication styles and points-of-view change. The best example of this is Gourmet. Editor-in-chief Ruth Reichl made sweeping changes—some good some bad—but the magazine today isn’t what it was five years ago. 4. Have patience. Okay, you’ve spent hours, sometimes even days, writing the perfect query, and you’ve e-mailed it to an editor. Chances are you’re going to want a response RIGHT NOW. Unfortunately, that editor receives tons of queries each month. Margo True, deputy editor of Saveur told me that she gets more than two hundred queries each month. (And about only ten are well written enough and follow the above guidelines to merit attention. Out of those ten only two or three make it into the magazine.) Every editor I’ve ever spoken to says to give them time and the benefit of the doubt. Calling or writing too soon or too much only assures you’ll be branded annoying. What’s a reasonable amount of time to contact the editor if you’ve heard nothing? About three to four weeks. A simple e-mail or phone call is in order. But make it short. When I first started out and editors didn’t know me, I wrote exactly out what I would say over the phone. No chitchat, just in and out. Remember you’re not trying to make a best friend; you’re trying to get your work published. 5. Develop a distinctive voice. This is easier said than done. In fact, I’ve never heard a sufficient definition, but, hell, I’ll give it a try. Voice is the unmistakable sound, rhythm, and point-of-view that unequivocally evokes the writer. You know it when you read it. As an exercise, read passages written by Jeffery Steingarten, Calvin Trillin, Tony Bourdain, M.F.K. Fischer, and Ruth Reichl. When you’re reading them you can hear the authors' voicees in your head. And more importantly, you can never confuse or interchange them. Bourdain is NOT Steingarten, who is NOT Trillin, who is NOT Reichl. But voice is not simply writing the way you speak. That’s transcription. That being said, I meet Jeffrey Steingarten, and he does speak the way he writes. Talk to Bourdain, and you instantly recognize his voice in his writing. Unfortunately, most of us aren’t inherently interesting enough or big enough personalities to pull it off, as these masters do. Most of us have to work at finding and developing our voice. But when you succeed, editors will use you again and again. Granted there are plenty more rules that a writer should follow, but they tend to be peccadilloes of an editor rather than hard-and-fast rules. The above guidelines are pretty much industry wide. Follow them, and you’ll increase your chances of getting your foot in the door. BREAKING IN New writers are always asking for tips on breaking into their favorite magazines. Sometimes, though, it has nothing to do with writing the world’s greatest query. Although talent is all important, as I said, developing relationships with editors can help you figure out what they’re looking for. 1. Group Grope. One of the best ways to meet the editor of your dreams is to attend conferences. I know of a lot of writers who think these gatherings are a bunch of boloney, but I’m living proof that they work. Last year I attended the Symposium for Professional Food Writers at the Greenbrier. Barbara Fairchild, editor-in-chief of Bon Appétit, was one of the speakers. After she spoke, I lunged for the microphone and asked how could I work for her and the magazine. She was very gracious and said to send in my clips. (Where have I heard that before?) Determined to get into the pages of the Bon Appétit, I approached Barbara afterwards. We chatted, and she asked would ever consider moving to LA. Hardly. I’m too earthquake-phobic. She offered to meet me for drinks the next time she was in New York. (Right, like that would ever happen.) When I got home, I sent off my clips and forgot all about it. Several weeks later she e-mailed me and asked me to meet drinks. To make a long story short, I got a call several weeks later from the managing editor asking if I would be interested in writing a piece. Since then, I’ve written three articles for them. Without having met Barbara, chances are I wouldn’t have gotten into the magazine. At the time I had a handful of clips, only one of which really showed off my ability as a writer. Moral of the story: Sometime the way into a publication is the backdoor. CAUTION: Never descend upon an editor, she won’t appreciate it. Be thoughtful and sensitive to her situation and realize that every other writer in the room will be gunning for her. Tact always wins out. Also DO NOT, I repeat DO NOT send anything to Barbara. She’s the editor-in-chief, and her time is taken up with chiefly duties. Call the magazine and ask to whom you should send your clips. Depending on your experience and interests, you’ll be instructed to send your work to the appropriate editor. Also don’t bother querying them. Their writer's guidelines clearly state to send only clips. Of course, if you meet any of the editors at a conference, all's fair in love and writing. 2. Flattery gets you everywhere. I read this tip in a book, and I’ve recommended it to my students ever since. Whenever you read a piece that you really like, think about writing a note to the author. Every writer likes knowing that his work affects readers. Think of the note as an introduction. It’s not tacky to mention that you’re a writer and hope to write for [insert name of publication here] someday. But easy does it; don’t be obsequious. The writer will sniff out your insincerity a mile away. eGullet is a great place to cozy up to a favorite writer. Several months ago I wrote to a Q&A subject to tell her I admire her writing. We e-mailed back and forth for a while, discussing the business, editors, agents, etc. Two weeks ago, I got an e-mail from her announcing her new position as an editor of the food pages of a prestigious newspaper. She then asked me to submit some queries to her. In short, develop a relationship with a writer, and you may make an ally and perhaps even a mentor. 3. Mix it up. Attend every food event in your area; it’s a great place to meet important people in the industry. For example, I belong to the Culinary Historians of New York. I enjoy the programs, and I’m always impressed with the culinary luminaries who attend. I went to a talk led by William Grimes. I started chatting up Anne, the woman next to me, and she in turn introduced me to her friend Stephen. Later a friend pulled me into a corner and asked if I knew who I was speaking to. I said no. She told me I was chatting with Anne Mendelson, author of Stand Facing the Stove, the biography of the creators of The Joy of Cooking. Her friend was Stephen Schmidt, food writer and author of tons of cookbooks. Moral: You never sit next to your friends at any food event. Remember you’re at work. 4. Think locally, write globally. If you live in east of nowhere and are particularly intrepid, take a look around. Is there some trend happening in your town in Iowa or Colorado or South Carolina that might seem like yesterday’s news to you but might prick up the ears of a New York City editor? The only time I’m envious of people living in rural areas is when it comes to food writing. Major publications, which are usually in big cities, are always on the prowl for stories like the local farmer in Virginia who makes incomparable raw-milk cheeses or the ninety-year-old ex-madam in Arkansas who makes the best lavender jelly. Here in New York, every square foot of sidewalk has been pounded by hundreds of writers looking for a story, and that’s frustrating. Find the right topic in your own backyard and you might see your name at the bottom of a front-of-the-book piece, those short (100 word) stories typically found right after the table of contents in a magazine. 5. Create your own Web site. Yes, this is a shameless plug for my site, Leite's Culinaria, but the truth is Web sites work. Before I had relationships with editors, I would query them via e-mail and include links to several articles on my site. Nine out of ten times, I got the assignment. Also, my column “Abstinence Makes the Taste Buds Grow Fonder,” which was written for my site, was chosen to appear in Best Food Writing 2001. Until I had enough clips from publications, I used the site as a way to show editors what I could do. In addition, it allows me to try out different kinds of writing, most notably my interview with Amanda Hesser. The piece has proven so popular that this week I secured an interview with Chris Kimball, founder and editor of Cook’s Illustrated. Behind those glasses and prim bowtie lies the heart of a ‘60s radical, and I look forward to finding out more. In addition, I’ve been wooed by many publishers who are interested in my interviewing their authors. In short, the site offers me entrée to authors and publishers who might never give me the time of day. On top of that, I get the chance to pick the brains of writers whom I admire, which only enriches me and my writing. And that’s cool. I know this barely scratches the surface, but I think it’s time to open up the floor to questions. Please ask anything about breaking into the field or being a better food writer, and I’ll do my best to help. I purposely didn’t answer the questions some of you have posed to me earlier because I thought it would be most useful if you ask them again here, where everyone can participate. I look forward to chatting. Best, David Please post your questions here -->> Q&A
-
Please post your questions here
-
<p ><b>Classic Consommé Names<o:p></o:p></b></p> <p ><span >Derived from Escoffier and from La Repertoire, and other sources, anglicised and simplified a little.</span></p> <p >Many of these can be simplified by still further, as the expensive and rare components (such as coxcombs and truffles) are there more for show than taste. Chopped parsley has mostly replaced chervil as a garnish</p> <p >“Thickened” means “Cook with 3 tablespoons of poached tapioca to the quart of consommé. Strain through muslin” This gives a gives a light thickening without flavouring, while remaining perfectly clear. Tapioca starch has a good mouth feel, and is often used in the food industry for this purpose. 2 tsp Tapioca flour (available in many Asian groceries) may be conveniently substituted, or for a more modern approach <span >ensure that </span> the consommé is rich enough not to need additional thickening.</p> <p >These names are wonderfully reminiscent of grand hotels, actresses, <span >demi-monde</span> and rich patrons of a bygone era.</p> <table class=MsoTableGrid border=1 cellspacing=0 cellpadding=0 style='border-collapse:collapse;border:none;mso-border-alt:solid windowtext .5pt; mso-yfti-tbllook:191;mso-padding-alt:0cm 5.4pt 0cm 5.4pt;mso-border-insideh: .5pt solid windowtext;mso-border-insidev:.5pt solid windowtext'> <tr style='mso-yfti-irow:0'> <td width=189 valign=top style='width:142.0pt;border:solid windowtext 1.0pt; mso-border-alt:solid windowtext .5pt;padding:0cm 5.4pt 0cm 5.4pt'> <p ><i>Name <o:p></o:p></i></p> </td> <td width=189 valign=top style='width:142.05pt;border:solid windowtext 1.0pt; border-left:none;mso-border-left-alt:solid windowtext .5pt;mso-border-alt: solid windowtext .5pt;padding:0cm 5.4pt 0cm 5.4pt'> <p ><i>Base (and flavourings to be added with the clarification)<o:p></o:p></i></p> </td> <td width=148 valign=top style='width:111.2pt;border:solid windowtext 1.0pt; border-left:none;mso-border-left-alt:solid windowtext .5pt;mso-border-alt: solid windowtext .5pt;padding:0cm 5.4pt 0cm 5.4pt'> <p ><i>Garnish<o:p></o:p></i></p> </td> </tr> <tr style='mso-yfti-irow:1'> <td width=189 valign=top style='width:142.0pt;border:solid windowtext 1.0pt; border-top:none;mso-border-top-alt:solid windowtext .5pt;mso-border-alt:solid windowtext .5pt; padding:0cm 5.4pt 0cm 5.4pt'> <p >Aileron</p> <p ><o:p> </o:p></p> </td> <td width=189 valign=top style='width:142.05pt;border-top:none;border-left: none;border-bottom:solid windowtext 1.0pt;border-right:solid windowtext 1.0pt; mso-border-top-alt:solid windowtext .5pt;mso-border-left-alt:solid windowtext .5pt; mso-border-alt:solid windowtext .5pt;padding:0cm 5.4pt 0cm 5.4pt'> <p >Chicken</p> </td> <td width=148 valign=top style='width:111.2pt;border-top:none;border-left: none;border-bottom:solid windowtext 1.0pt;border-right:solid windowtext 1.0pt; mso-border-top-alt:solid windowtext .5pt;mso-border-left-alt:solid windowtext .5pt; mso-border-alt:solid windowtext .5pt;padding:0cm 5.4pt 0cm 5.4pt'> <p >Chicken wings (boned, stuffed)</p> </td> </tr> <tr style='mso-yfti-irow:2'> <td width=189 valign=top style='width:142.0pt;border:solid windowtext 1.0pt; border-top:none;mso-border-top-alt:solid windowtext .5pt;mso-border-alt:solid windowtext .5pt; padding:0cm 5.4pt 0cm 5.4pt'> <p ><st1:place>Albion</st1:place><o:p></o:p></p> </td> <td width=189 valign=top style='width:142.05pt;border-top:none;border-left: none;border-bottom:solid windowtext 1.0pt;border-right:solid windowtext 1.0pt; mso-border-top-alt:solid windowtext .5pt;mso-border-left-alt:solid windowtext .5pt; mso-border-alt:solid windowtext .5pt;padding:0cm 5.4pt 0cm 5.4pt'> <p >Ordinary</p> </td> <td width=148 valign=top style='width:111.2pt;border-top:none;border-left: none;border-bottom:solid windowtext 1.0pt;border-right:solid windowtext 1.0pt; mso-border-top-alt:solid windowtext .5pt;mso-border-left-alt:solid windowtext .5pt; mso-border-alt:solid windowtext .5pt;padding:0cm 5.4pt 0cm 5.4pt'> <p ><span >Foie</span> Gras; Asparagus;</p> <p >Truffle; coxcombs</p> </td> </tr> <tr style='mso-yfti-irow:3'> <td width=189 valign=top style='width:142.0pt;border:solid windowtext 1.0pt; border-top:none;mso-border-top-alt:solid windowtext .5pt;mso-border-alt:solid windowtext .5pt; padding:0cm 5.4pt 0cm 5.4pt'> <p >Alexandra<o:p></o:p></p> <p ><o:p> </o:p></p> <p ><span style='mso-spacerun:yes'> </span><o:p></o:p></p> </td> <td width=189 valign=top style='width:142.05pt;border-top:none;border-left: none;border-bottom:solid windowtext 1.0pt;border-right:solid windowtext 1.0pt; mso-border-top-alt:solid windowtext .5pt;mso-border-left-alt:solid windowtext .5pt; mso-border-alt:solid windowtext .5pt;padding:0cm 5.4pt 0cm 5.4pt'> <p >Thickened </p> </td> <td width=148 valign=top style='width:111.2pt;border-top:none;border-left: none;border-bottom:solid windowtext 1.0pt;border-right:solid windowtext 1.0pt; mso-border-top-alt:solid windowtext .5pt;mso-border-left-alt:solid windowtext .5pt; mso-border-alt:solid windowtext .5pt;padding:0cm 5.4pt 0cm 5.4pt'> <p >Julienne of chicken;</p> <p >Chicken Quenelle;</p> <p >Shredded lettuce</p> </td> </tr> <tr style='mso-yfti-irow:4'> <td width=189 valign=top style='width:142.0pt;border:solid windowtext 1.0pt; border-top:none;mso-border-top-alt:solid windowtext .5pt;mso-border-alt:solid windowtext .5pt; padding:0cm 5.4pt 0cm 5.4pt'> <p >Allemande</p> <p ><o:p> </o:p></p> </td> <td width=189 valign=top style='width:142.05pt;border-top:none;border-left: none;border-bottom:solid windowtext 1.0pt;border-right:solid windowtext 1.0pt; mso-border-top-alt:solid windowtext .5pt;mso-border-left-alt:solid windowtext .5pt; mso-border-alt:solid windowtext .5pt;padding:0cm 5.4pt 0cm 5.4pt'> <p >Thickened, flavoured with <span >genievre</span> (Dutch gin)</p> </td> <td width=148 valign=top style='width:111.2pt;border-top:none;border-left: none;border-bottom:solid windowtext 1.0pt;border-right:solid windowtext 1.0pt; mso-border-top-alt:solid windowtext .5pt;mso-border-left-alt:solid windowtext .5pt; mso-border-alt:solid windowtext .5pt;padding:0cm 5.4pt 0cm 5.4pt'> <p >Red cabbage;</p> <p >Frankfurter slices</p> </td> </tr> <tr style='mso-yfti-irow:5'> <td width=189 valign=top style='width:142.0pt;border:solid windowtext 1.0pt; border-top:none;mso-border-top-alt:solid windowtext .5pt;mso-border-alt:solid windowtext .5pt; padding:0cm 5.4pt 0cm 5.4pt'> <p ><span >Alsacienne</span></p> <p ><o:p> </o:p></p> <p ><o:p> </o:p></p> </td> <td width=189 valign=top style='width:142.05pt;border-top:none;border-left: none;border-bottom:solid windowtext 1.0pt;border-right:solid windowtext 1.0pt; mso-border-top-alt:solid windowtext .5pt;mso-border-left-alt:solid windowtext .5pt; mso-border-alt:solid windowtext .5pt;padding:0cm 5.4pt 0cm 5.4pt'> <p >Onion</p> </td> <td width=148 valign=top style='width:111.2pt;border-top:none;border-left: none;border-bottom:solid windowtext 1.0pt;border-right:solid windowtext 1.0pt; mso-border-top-alt:solid windowtext .5pt;mso-border-left-alt:solid windowtext .5pt; mso-border-alt:solid windowtext .5pt;padding:0cm 5.4pt 0cm 5.4pt'> <p >Fine pasta;</p> <p >Profiteroles stuffed with <span >Foie</span> Gras</p> </td> </tr> <tr style='mso-yfti-irow:6'> <td width=189 valign=top style='width:142.0pt;border:solid windowtext 1.0pt; border-top:none;mso-border-top-alt:solid windowtext .5pt;mso-border-alt:solid windowtext .5pt; padding:0cm 5.4pt 0cm 5.4pt'> <p >Ambassador</p> <p ><o:p> </o:p></p> <p ><o:p> </o:p></p> </td> <td width=189 valign=top style='width:142.05pt;border-top:none;border-left: none;border-bottom:solid windowtext 1.0pt;border-right:solid windowtext 1.0pt; mso-border-top-alt:solid windowtext .5pt;mso-border-left-alt:solid windowtext .5pt; mso-border-alt:solid windowtext .5pt;padding:0cm 5.4pt 0cm 5.4pt'> <p >Chicken</p> </td> <td width=148 valign=top style='width:111.2pt;border-top:none;border-left: none;border-bottom:solid windowtext 1.0pt;border-right:solid windowtext 1.0pt; mso-border-top-alt:solid windowtext .5pt;mso-border-left-alt:solid windowtext .5pt; mso-border-alt:solid windowtext .5pt;padding:0cm 5.4pt 0cm 5.4pt'> <p >Royale dice;</p> <p >Chopped Truffle</p> <p >Mushrooms</p> <p >White of chicken in dice</p> </td> </tr> <tr style='mso-yfti-irow:7'> <td width=189 valign=top style='width:142.0pt;border:solid windowtext 1.0pt; border-top:none;mso-border-top-alt:solid windowtext .5pt;mso-border-alt:solid windowtext .5pt; padding:0cm 5.4pt 0cm 5.4pt'> <p ><span >Ambassadrice</span></p> <p ><o:p> </o:p></p> <p >Created by Escoffier for Rachel, wife of the French Ambassador</p> </td> <td width=189 valign=top style='width:142.05pt;border-top:none;border-left: none;border-bottom:solid windowtext 1.0pt;border-right:solid windowtext 1.0pt; mso-border-top-alt:solid windowtext .5pt;mso-border-left-alt:solid windowtext .5pt; mso-border-alt:solid windowtext .5pt;padding:0cm 5.4pt 0cm 5.4pt'> <p >Chicken</p> </td> <td width=148 valign=top style='width:111.2pt;border-top:none;border-left: none;border-bottom:solid windowtext 1.0pt;border-right:solid windowtext 1.0pt; mso-border-top-alt:solid windowtext .5pt;mso-border-left-alt:solid windowtext .5pt; mso-border-alt:solid windowtext .5pt;padding:0cm 5.4pt 0cm 5.4pt'> <p ><span >Royales</span> of </p> <p >truffles (black)</p> <p >Tomato dice (red)</p> <p >Peas (green)</p> <p >Julienne of chicken and mushrooms</p> </td> </tr> <tr style='mso-yfti-irow:8'> <td width=189 valign=top style='width:142.0pt;border:solid windowtext 1.0pt; border-top:none;mso-border-top-alt:solid windowtext .5pt;mso-border-alt:solid windowtext .5pt; padding:0cm 5.4pt 0cm 5.4pt'> <p ><span >Ancienne</span></p> <p ><o:p> </o:p></p> <p ><o:p> </o:p></p> </td> <td width=189 valign=top style='width:142.05pt;border-top:none;border-left: none;border-bottom:solid windowtext 1.0pt;border-right:solid windowtext 1.0pt; mso-border-top-alt:solid windowtext .5pt;mso-border-left-alt:solid windowtext .5pt; mso-border-alt:solid windowtext .5pt;padding:0cm 5.4pt 0cm 5.4pt'> <p >See Petite Marmite</p> </td> <td width=148 valign=top style='width:111.2pt;border-top:none;border-left: none;border-bottom:solid windowtext 1.0pt;border-right:solid windowtext 1.0pt; mso-border-top-alt:solid windowtext .5pt;mso-border-left-alt:solid windowtext .5pt; mso-border-alt:solid windowtext .5pt;padding:0cm 5.4pt 0cm 5.4pt'> <p >Toast spread with pureed vegetables (originally from the stockpot but nowadays separately prepared) and <span >graniteed</span></p> </td> </tr> <tr style='mso-yfti-irow:9'> <td width=189 valign=top style='width:142.0pt;border:solid windowtext 1.0pt; border-top:none;mso-border-top-alt:solid windowtext .5pt;mso-border-alt:solid windowtext .5pt; padding:0cm 5.4pt 0cm 5.4pt'> <p ><span >Anadalouse</span></p> </td> <td width=189 valign=top style='width:142.05pt;border-top:none;border-left: none;border-bottom:solid windowtext 1.0pt;border-right:solid windowtext 1.0pt; mso-border-top-alt:solid windowtext .5pt;mso-border-left-alt:solid windowtext .5pt; mso-border-alt:solid windowtext .5pt;padding:0cm 5.4pt 0cm 5.4pt'> <p >Tomato puree</p> </td> <td width=148 valign=top style='width:111.2pt;border-top:none;border-left: none;border-bottom:solid windowtext 1.0pt;border-right:solid windowtext 1.0pt; mso-border-top-alt:solid windowtext .5pt;mso-border-left-alt:solid windowtext .5pt; mso-border-alt:solid windowtext .5pt;padding:0cm 5.4pt 0cm 5.4pt'> <p >Dice of tomato <span >royale</span></p> <p >Dice of tomato</p> <p >Julienne of ham</p> <p >Boiled rice</p> <p >Egg threads</p> </td> </tr> <tr style='mso-yfti-irow:10'> <td width=189 valign=top style='width:142.0pt;border:solid windowtext 1.0pt; border-top:none;mso-border-top-alt:solid windowtext .5pt;mso-border-alt:solid windowtext .5pt; padding:0cm 5.4pt 0cm 5.4pt'> <p ><span >D’Arenberg</span></p> <p ><o:p> </o:p></p> <p ><o:p> </o:p></p> </td> <td width=189 valign=top style='width:142.05pt;border-top:none;border-left: none;border-bottom:solid windowtext 1.0pt;border-right:solid windowtext 1.0pt; mso-border-top-alt:solid windowtext .5pt;mso-border-left-alt:solid windowtext .5pt; mso-border-alt:solid windowtext .5pt;padding:0cm 5.4pt 0cm 5.4pt'> <p >Chicken</p> </td> <td width=148 valign=top style='width:111.2pt;border-top:none;border-left: none;border-bottom:solid windowtext 1.0pt;border-right:solid windowtext 1.0pt; mso-border-top-alt:solid windowtext .5pt;mso-border-left-alt:solid windowtext .5pt; mso-border-alt:solid windowtext .5pt;padding:0cm 5.4pt 0cm 5.4pt'> <p >Small round Chicken quenelle</p> <p >Roundels of Asparagus <span >royale</span></p> <p >Balls of carrot, turnips, truffles, peas</p> <p ><o:p> </o:p></p> </td> </tr> <tr style='mso-yfti-irow:11'> <td width=189 valign=top style='width:142.0pt;border:solid windowtext 1.0pt; border-top:none;mso-border-top-alt:solid windowtext .5pt;mso-border-alt:solid windowtext .5pt; padding:0cm 5.4pt 0cm 5.4pt'> <p ><span >Aurore</span></p> <p ><o:p> </o:p></p> <p ><o:p> </o:p></p> </td> <td width=189 valign=top style='width:142.05pt;border-top:none;border-left: none;border-bottom:solid windowtext 1.0pt;border-right:solid windowtext 1.0pt; mso-border-top-alt:solid windowtext .5pt;mso-border-left-alt:solid windowtext .5pt; mso-border-alt:solid windowtext .5pt;padding:0cm 5.4pt 0cm 5.4pt'> <p >Thickened, Coloured with Tomato puree</p> </td> <td width=148 valign=top style='width:111.2pt;border-top:none;border-left: none;border-bottom:solid windowtext 1.0pt;border-right:solid windowtext 1.0pt; mso-border-top-alt:solid windowtext .5pt;mso-border-left-alt:solid windowtext .5pt; mso-border-alt:solid windowtext .5pt;padding:0cm 5.4pt 0cm 5.4pt'> <p >Julienne of Chicken</p> </td> </tr> <tr style='mso-yfti-irow:12'> <td width=189 valign=top style='width:142.0pt;border:solid windowtext 1.0pt; border-top:none;mso-border-top-alt:solid windowtext .5pt;mso-border-alt:solid windowtext .5pt; padding:0cm 5.4pt 0cm 5.4pt'> <p >Beatrice</p> </td> <td width=189 valign=top style='width:142.05pt;border-top:none;border-left: none;border-bottom:solid windowtext 1.0pt;border-right:solid windowtext 1.0pt; mso-border-top-alt:solid windowtext .5pt;mso-border-left-alt:solid windowtext .5pt; mso-border-alt:solid windowtext .5pt;padding:0cm 5.4pt 0cm 5.4pt'> <p >Ordinary</p> </td> <td width=148 valign=top style='width:111.2pt;border-top:none;border-left: none;border-bottom:solid windowtext 1.0pt;border-right:solid windowtext 1.0pt; mso-border-top-alt:solid windowtext .5pt;mso-border-left-alt:solid windowtext .5pt; mso-border-alt:solid windowtext .5pt;padding:0cm 5.4pt 0cm 5.4pt'> <p >Semolina</p> <p >Roundels of chicken farce, blended with tomato, Royale</p> </td> </tr> <tr style='mso-yfti-irow:13'> <td width=189 valign=top style='width:142.0pt;border:solid windowtext 1.0pt; border-top:none;mso-border-top-alt:solid windowtext .5pt;mso-border-alt:solid windowtext .5pt; padding:0cm 5.4pt 0cm 5.4pt'> <p >Belle <span >Fermiere</span></p> <p ><o:p> </o:p></p> <p ><o:p> </o:p></p> </td> <td width=189 valign=top style='width:142.05pt;border-top:none;border-left: none;border-bottom:solid windowtext 1.0pt;border-right:solid windowtext 1.0pt; mso-border-top-alt:solid windowtext .5pt;mso-border-left-alt:solid windowtext .5pt; mso-border-alt:solid windowtext .5pt;padding:0cm 5.4pt 0cm 5.4pt'> <p >Ordinary</p> </td> <td width=148 valign=top style='width:111.2pt;border-top:none;border-left: none;border-bottom:solid windowtext 1.0pt;border-right:solid windowtext 1.0pt; mso-border-top-alt:solid windowtext .5pt;mso-border-left-alt:solid windowtext .5pt; mso-border-alt:solid windowtext .5pt;padding:0cm 5.4pt 0cm 5.4pt'> <p >Cabbage</p> <p >French beans</p> <p >Pasta</p> </td> </tr> <tr style='mso-yfti-irow:14'> <td width=189 valign=top style='width:142.0pt;border:solid windowtext 1.0pt; border-top:none;mso-border-top-alt:solid windowtext .5pt;mso-border-alt:solid windowtext .5pt; padding:0cm 5.4pt 0cm 5.4pt'> <p >Belle Gabrielle<o:p></o:p></p> <p ><o:p> </o:p></p> <p >Gabrielle <span >d'Estrée</span>, duchess of Beaufort was born in 1571, became the mistress of Henri IV of <st1:country-region><st1:place>France</st1:place></st1:country-region> and died at the age of 28.</p> <p >There is a famous painting of her pinching her sister’s nipple <o:p></o:p></p> </td> <td width=189 valign=top style='width:142.05pt;border-top:none;border-left: none;border-bottom:solid windowtext 1.0pt;border-right:solid windowtext 1.0pt; mso-border-top-alt:solid windowtext .5pt;mso-border-left-alt:solid windowtext .5pt; mso-border-alt:solid windowtext .5pt;padding:0cm 5.4pt 0cm 5.4pt'> <p >Thickened</p> </td> <td width=148 valign=top style='width:111.2pt;border-top:none;border-left: none;border-bottom:solid windowtext 1.0pt;border-right:solid windowtext 1.0pt; mso-border-top-alt:solid windowtext .5pt;mso-border-left-alt:solid windowtext .5pt; mso-border-alt:solid windowtext .5pt;padding:0cm 5.4pt 0cm 5.4pt'> <p >Rectangles of chicken mousseline, crayfish tails</p> </td> </tr> <tr style='mso-yfti-irow:15'> <td width=189 valign=top style='width:142.0pt;border:solid windowtext 1.0pt; border-top:none;mso-border-top-alt:solid windowtext .5pt;mso-border-alt:solid windowtext .5pt; padding:0cm 5.4pt 0cm 5.4pt'> <p ><span >Berchoux</span><o:p></o:p></p> <p ><o:p> </o:p></p> <p ><o:p> </o:p></p> </td> <td width=189 valign=top style='width:142.05pt;border-top:none;border-left: none;border-bottom:solid windowtext 1.0pt;border-right:solid windowtext 1.0pt; mso-border-top-alt:solid windowtext .5pt;mso-border-left-alt:solid windowtext .5pt; mso-border-alt:solid windowtext .5pt;padding:0cm 5.4pt 0cm 5.4pt'> <p >Game</p> </td> <td width=148 valign=top style='width:111.2pt;border-top:none;border-left: none;border-bottom:solid windowtext 1.0pt;border-right:solid windowtext 1.0pt; mso-border-top-alt:solid windowtext .5pt;mso-border-left-alt:solid windowtext .5pt; mso-border-alt:solid windowtext .5pt;padding:0cm 5.4pt 0cm 5.4pt'> <p >Chestnut <span >royale</span>, julienne of truffles and mushrooms</p> </td> </tr> <tr style='mso-yfti-irow:16'> <td width=189 valign=top style='width:142.0pt;border:solid windowtext 1.0pt; border-top:none;mso-border-top-alt:solid windowtext .5pt;mso-border-alt:solid windowtext .5pt; padding:0cm 5.4pt 0cm 5.4pt'> <p ><span >Bergere</span></p> </td> <td width=189 valign=top style='width:142.05pt;border-top:none;border-left: none;border-bottom:solid windowtext 1.0pt;border-right:solid windowtext 1.0pt; mso-border-top-alt:solid windowtext .5pt;mso-border-left-alt:solid windowtext .5pt; mso-border-alt:solid windowtext .5pt;padding:0cm 5.4pt 0cm 5.4pt'> <p >Oxtail, thickened</p> </td> <td width=148 valign=top style='width:111.2pt;border-top:none;border-left: none;border-bottom:solid windowtext 1.0pt;border-right:solid windowtext 1.0pt; mso-border-top-alt:solid windowtext .5pt;mso-border-left-alt:solid windowtext .5pt; mso-border-alt:solid windowtext .5pt;padding:0cm 5.4pt 0cm 5.4pt'> <p >Asparagus <span >tips,wild</span> mushrooms, tarragon leaves, chervil shreds</p> </td> </tr> <tr style='mso-yfti-irow:17'> <td width=189 valign=top style='width:142.0pt;border:solid windowtext 1.0pt; border-top:none;mso-border-top-alt:solid windowtext .5pt;mso-border-alt:solid windowtext .5pt; padding:0cm 5.4pt 0cm 5.4pt'> <p ><span >Berny</span></p> </td> <td width=189 valign=top style='width:142.05pt;border-top:none;border-left: none;border-bottom:solid windowtext 1.0pt;border-right:solid windowtext 1.0pt; mso-border-top-alt:solid windowtext .5pt;mso-border-left-alt:solid windowtext .5pt; mso-border-alt:solid windowtext .5pt;padding:0cm 5.4pt 0cm 5.4pt'> <p >Thickened</p> </td> <td width=148 valign=top style='width:111.2pt;border-top:none;border-left: none;border-bottom:solid windowtext 1.0pt;border-right:solid windowtext 1.0pt; mso-border-top-alt:solid windowtext .5pt;mso-border-left-alt:solid windowtext .5pt; mso-border-alt:solid windowtext .5pt;padding:0cm 5.4pt 0cm 5.4pt'> <p >Balls of <span >dauphinoise</span> potato, combined with chopped roasted almonds, truffles, chervil shreds</p> </td> </tr> <tr style='mso-yfti-irow:18'> <td width=189 valign=top style='width:142.0pt;border:solid windowtext 1.0pt; border-top:none;mso-border-top-alt:solid windowtext .5pt;mso-border-alt:solid windowtext .5pt; padding:0cm 5.4pt 0cm 5.4pt'> <p >Blanc-manger</p> </td> <td width=189 valign=top style='width:142.05pt;border-top:none;border-left: none;border-bottom:solid windowtext 1.0pt;border-right:solid windowtext 1.0pt; mso-border-top-alt:solid windowtext .5pt;mso-border-left-alt:solid windowtext .5pt; mso-border-alt:solid windowtext .5pt;padding:0cm 5.4pt 0cm 5.4pt'> <p >Chicken</p> </td> <td width=148 valign=top style='width:111.2pt;border-top:none;border-left: none;border-bottom:solid windowtext 1.0pt;border-right:solid windowtext 1.0pt; mso-border-top-alt:solid windowtext .5pt;mso-border-left-alt:solid windowtext .5pt; mso-border-alt:solid windowtext .5pt;padding:0cm 5.4pt 0cm 5.4pt'> <p >Green peas</p> <p >Chervil</p> <p >Small chicken tartlets served <span >seperately</span></p> </td> </tr> <tr style='mso-yfti-irow:19'> <td width=189 valign=top style='width:142.0pt;border:solid windowtext 1.0pt; border-top:none;mso-border-top-alt:solid windowtext .5pt;mso-border-alt:solid windowtext .5pt; padding:0cm 5.4pt 0cm 5.4pt'> <p ><span >Bohemienne</span></p> </td> <td width=189 valign=top style='width:142.05pt;border-top:none;border-left: none;border-bottom:solid windowtext 1.0pt;border-right:solid windowtext 1.0pt; mso-border-top-alt:solid windowtext .5pt;mso-border-left-alt:solid windowtext .5pt; mso-border-alt:solid windowtext .5pt;padding:0cm 5.4pt 0cm 5.4pt'> <p >Chicken, thickened</p> </td> <td width=148 valign=top style='width:111.2pt;border-top:none;border-left: none;border-bottom:solid windowtext 1.0pt;border-right:solid windowtext 1.0pt; mso-border-top-alt:solid windowtext .5pt;mso-border-left-alt:solid windowtext .5pt; mso-border-alt:solid windowtext .5pt;padding:0cm 5.4pt 0cm 5.4pt'> <p ><span >Foie</span> <span >gras</span> <span >royale</span></p> <p >Small profiterole (stuffed with <span >Foie</span> Gras) served separately</p> </td> </tr> <tr style='mso-yfti-irow:20'> <td width=189 valign=top style='width:142.0pt;border:solid windowtext 1.0pt; border-top:none;mso-border-top-alt:solid windowtext .5pt;mso-border-alt:solid windowtext .5pt; padding:0cm 5.4pt 0cm 5.4pt'> <p style='tab-stops:right 131.2pt'><span >Boieldieu</span></p> <p style='tab-stops:right 131.2pt'><o:p> </o:p></p> <p ><o:p> </o:p></p> <p style='tab-stops:right 131.2pt'><o:p> </o:p></p> </td> <td width=189 valign=top style='width:142.05pt;border-top:none;border-left: none;border-bottom:solid windowtext 1.0pt;border-right:solid windowtext 1.0pt; mso-border-top-alt:solid windowtext .5pt;mso-border-left-alt:solid windowtext .5pt; mso-border-alt:solid windowtext .5pt;padding:0cm 5.4pt 0cm 5.4pt'> <p >Chicken, thickened</p> </td> <td width=148 valign=top style='width:111.2pt;border-top:none;border-left: none;border-bottom:solid windowtext 1.0pt;border-right:solid windowtext 1.0pt; mso-border-top-alt:solid windowtext .5pt;mso-border-left-alt:solid windowtext .5pt; mso-border-alt:solid windowtext .5pt;padding:0cm 5.4pt 0cm 5.4pt'> <p >Three sorts of<span style='mso-spacerun:yes'> </span>quenelle:</p> <p ><span >Foie</span> Gras</p> <p >Chicken</p> <p >Truffle</p> </td> </tr> <tr style='mso-yfti-irow:21'> <td width=189 valign=top style='width:142.0pt;border:solid windowtext 1.0pt; border-top:none;mso-border-top-alt:solid windowtext .5pt;mso-border-alt:solid windowtext .5pt; padding:0cm 5.4pt 0cm 5.4pt'> <p ><span >Bortsch</span></p> </td> <td width=189 valign=top style='width:142.05pt;border-top:none;border-left: none;border-bottom:solid windowtext 1.0pt;border-right:solid windowtext 1.0pt; mso-border-top-alt:solid windowtext .5pt;mso-border-left-alt:solid windowtext .5pt; mso-border-alt:solid windowtext .5pt;padding:0cm 5.4pt 0cm 5.4pt'> <p >Beetroot</p> </td> <td width=148 valign=top style='width:111.2pt;border-top:none;border-left: none;border-bottom:solid windowtext 1.0pt;border-right:solid windowtext 1.0pt; mso-border-top-alt:solid windowtext .5pt;mso-border-left-alt:solid windowtext .5pt; mso-border-alt:solid windowtext .5pt;padding:0cm 5.4pt 0cm 5.4pt'> <p >Julienne of <span >leeks,carrot</span>, onion, <span >cabbage,celery</span>, beetroot softened in butter</p> <p >Cubes of beef, slices of duck breast</p> <p >Cocktail sausages or duck forcemeat patties</p> <p >Sour cream <span >seperately</span></p> <p ><o:p> </o:p></p> </td> </tr> <tr style='mso-yfti-irow:22'> <td width=189 valign=top style='width:142.0pt;border:solid windowtext 1.0pt; border-top:none;mso-border-top-alt:solid windowtext .5pt;mso-border-alt:solid windowtext .5pt; padding:0cm 5.4pt 0cm 5.4pt'> <p ><span >Bouquetiere</span></p> </td> <td width=189 valign=top style='width:142.05pt;border-top:none;border-left: none;border-bottom:solid windowtext 1.0pt;border-right:solid windowtext 1.0pt; mso-border-top-alt:solid windowtext .5pt;mso-border-left-alt:solid windowtext .5pt; mso-border-alt:solid windowtext .5pt;padding:0cm 5.4pt 0cm 5.4pt'> <p >Chickened, thickened</p> </td> <td width=148 valign=top style='width:111.2pt;border-top:none;border-left: none;border-bottom:solid windowtext 1.0pt;border-right:solid windowtext 1.0pt; mso-border-top-alt:solid windowtext .5pt;mso-border-left-alt:solid windowtext .5pt; mso-border-alt:solid windowtext .5pt;padding:0cm 5.4pt 0cm 5.4pt'> <p >French beans, asparagus tips, carrots, turnips shaped and pre-cooked – a garden bouquet</p> </td> </tr> <tr style='mso-yfti-irow:23'> <td width=189 valign=top style='width:142.0pt;border:solid windowtext 1.0pt; border-top:none;mso-border-top-alt:solid windowtext .5pt;mso-border-alt:solid windowtext .5pt; padding:0cm 5.4pt 0cm 5.4pt'> <p >Bourbon</p> </td> <td width=189 valign=top style='width:142.05pt;border-top:none;border-left: none;border-bottom:solid windowtext 1.0pt;border-right:solid windowtext 1.0pt; mso-border-top-alt:solid windowtext .5pt;mso-border-left-alt:solid windowtext .5pt; mso-border-alt:solid windowtext .5pt;padding:0cm 5.4pt 0cm 5.4pt'> <p >Thickened</p> </td> <td width=148 valign=top style='width:111.2pt;border-top:none;border-left: none;border-bottom:solid windowtext 1.0pt;border-right:solid windowtext 1.0pt; mso-border-top-alt:solid windowtext .5pt;mso-border-left-alt:solid windowtext .5pt; mso-border-alt:solid windowtext .5pt;padding:0cm 5.4pt 0cm 5.4pt'> <p >Sago, large quenelles cut into fleur-de-<span >lys</span>, truffles, chervil</p> </td> </tr> <tr style='mso-yfti-irow:24'> <td width=189 valign=top style='width:142.0pt;border:solid windowtext 1.0pt; border-top:none;mso-border-top-alt:solid windowtext .5pt;mso-border-alt:solid windowtext .5pt; padding:0cm 5.4pt 0cm 5.4pt'> <p ><span >Bourdaloue</span></p> </td> <td width=189 valign=top style='width:142.05pt;border-top:none;border-left: none;border-bottom:solid windowtext 1.0pt;border-right:solid windowtext 1.0pt; mso-border-top-alt:solid windowtext .5pt;mso-border-left-alt:solid windowtext .5pt; mso-border-alt:solid windowtext .5pt;padding:0cm 5.4pt 0cm 5.4pt'> <p ><o:p> </o:p></p> </td> <td width=148 valign=top style='width:111.2pt;border-top:none;border-left: none;border-bottom:solid windowtext 1.0pt;border-right:solid windowtext 1.0pt; mso-border-top-alt:solid windowtext .5pt;mso-border-left-alt:solid windowtext .5pt; mso-border-alt:solid windowtext .5pt;padding:0cm 5.4pt 0cm 5.4pt'> <p >Four different <span >royale</span> cut into shapes::</p> <p >Tomato (red dice)</p> <p >Plain (white lozenges)</p> <p >Asparagus (green leaves)</p> <p >Carrot (orange stars)</p> </td> </tr> <tr style='mso-yfti-irow:25'> <td width=189 valign=top style='width:142.0pt;border:solid windowtext 1.0pt; border-top:none;mso-border-top-alt:solid windowtext .5pt;mso-border-alt:solid windowtext .5pt; padding:0cm 5.4pt 0cm 5.4pt'> <p ><span >Bretonne</span></p> </td> <td width=189 valign=top style='width:142.05pt;border-top:none;border-left: none;border-bottom:solid windowtext 1.0pt;border-right:solid windowtext 1.0pt; mso-border-top-alt:solid windowtext .5pt;mso-border-left-alt:solid windowtext .5pt; mso-border-alt:solid windowtext .5pt;padding:0cm 5.4pt 0cm 5.4pt'> <p ><o:p> </o:p></p> </td> <td width=148 valign=top style='width:111.2pt;border-top:none;border-left: none;border-bottom:solid windowtext 1.0pt;border-right:solid windowtext 1.0pt; mso-border-top-alt:solid windowtext .5pt;mso-border-left-alt:solid windowtext .5pt; mso-border-alt:solid windowtext .5pt;padding:0cm 5.4pt 0cm 5.4pt'> <p >Julienne of leeks, celery, onion, mushroom</p> <p >Chervil or parsley shreds</p> </td> </tr> <tr style='mso-yfti-irow:26'> <td width=189 valign=top style='width:142.0pt;border:solid windowtext 1.0pt; border-top:none;mso-border-top-alt:solid windowtext .5pt;mso-border-alt:solid windowtext .5pt; padding:0cm 5.4pt 0cm 5.4pt'> <p ><span >Brieux</span></p> </td> <td width=189 valign=top style='width:142.05pt;border-top:none;border-left: none;border-bottom:solid windowtext 1.0pt;border-right:solid windowtext 1.0pt; mso-border-top-alt:solid windowtext .5pt;mso-border-left-alt:solid windowtext .5pt; mso-border-alt:solid windowtext .5pt;padding:0cm 5.4pt 0cm 5.4pt'> <p >Thickened</p> </td> <td width=148 valign=top style='width:111.2pt;border-top:none;border-left: none;border-bottom:solid windowtext 1.0pt;border-right:solid windowtext 1.0pt; mso-border-top-alt:solid windowtext .5pt;mso-border-left-alt:solid windowtext .5pt; mso-border-alt:solid windowtext .5pt;padding:0cm 5.4pt 0cm 5.4pt'> <p >Pistachio <span >royale</span> cut into stars</p> <p >Truffle dice</p> <p ><span >Japon</span> (Tapioca) pearls</p> </td> </tr> <tr style='mso-yfti-irow:27'> <td width=189 valign=top style='width:142.0pt;border:solid windowtext 1.0pt; border-top:none;mso-border-top-alt:solid windowtext .5pt;mso-border-alt:solid windowtext .5pt; padding:0cm 5.4pt 0cm 5.4pt'> <p ><span >Brittania</span></p> </td> <td width=189 valign=top style='width:142.05pt;border-top:none;border-left: none;border-bottom:solid windowtext 1.0pt;border-right:solid windowtext 1.0pt; mso-border-top-alt:solid windowtext .5pt;mso-border-left-alt:solid windowtext .5pt; mso-border-alt:solid windowtext .5pt;padding:0cm 5.4pt 0cm 5.4pt'> <p >Thickened</p> </td> <td width=148 valign=top style='width:111.2pt;border-top:none;border-left: none;border-bottom:solid windowtext 1.0pt;border-right:solid windowtext 1.0pt; mso-border-top-alt:solid windowtext .5pt;mso-border-left-alt:solid windowtext .5pt; mso-border-alt:solid windowtext .5pt;padding:0cm 5.4pt 0cm 5.4pt'> <p >Lobster <span >royale</span>, truffles</p> </td> </tr> <tr style='mso-yfti-irow:28'> <td width=189 valign=top style='width:142.0pt;border:solid windowtext 1.0pt; border-top:none;mso-border-top-alt:solid windowtext .5pt;mso-border-alt:solid windowtext .5pt; padding:0cm 5.4pt 0cm 5.4pt'> <p ><span >Brunoise</span></p> <p ><o:p> </o:p></p> <p ><span >Brunoise</span> always means small (1/16<sup>th</sup> inch) dice. Created by <span >Careme</span> and named after the <span >Bruncy</span> area noted for its spring vegetables</p> <p ><o:p> </o:p></p> </td> <td width=189 valign=top style='width:142.05pt;border-top:none;border-left: none;border-bottom:solid windowtext 1.0pt;border-right:solid windowtext 1.0pt; mso-border-top-alt:solid windowtext .5pt;mso-border-left-alt:solid windowtext .5pt; mso-border-alt:solid windowtext .5pt;padding:0cm 5.4pt 0cm 5.4pt'> <p ><o:p> </o:p></p> </td> <td width=148 valign=top style='width:111.2pt;border-top:none;border-left: none;border-bottom:solid windowtext 1.0pt;border-right:solid windowtext 1.0pt; mso-border-top-alt:solid windowtext .5pt;mso-border-left-alt:solid windowtext .5pt; mso-border-alt:solid windowtext .5pt;padding:0cm 5.4pt 0cm 5.4pt'> <p >Carrot, turnip, leek, celery, peas <span >brunoise</span> (small cubes)</p> <p >Chervil. </p> <p >Can add rice, barley, quenelle etc</p> </td> </tr> <tr style='mso-yfti-irow:29'> <td width=189 valign=top style='width:142.0pt;border:solid windowtext 1.0pt; border-top:none;mso-border-top-alt:solid windowtext .5pt;mso-border-alt:solid windowtext .5pt; padding:0cm 5.4pt 0cm 5.4pt'> <p ><span >Canaclaise</span></p> </td> <td width=189 valign=top style='width:142.05pt;border-top:none;border-left: none;border-bottom:solid windowtext 1.0pt;border-right:solid windowtext 1.0pt; mso-border-top-alt:solid windowtext .5pt;mso-border-left-alt:solid windowtext .5pt; mso-border-alt:solid windowtext .5pt;padding:0cm 5.4pt 0cm 5.4pt'> <p >Fish, thickened</p> </td> <td width=148 valign=top style='width:111.2pt;border-top:none;border-left: none;border-bottom:solid windowtext 1.0pt;border-right:solid windowtext 1.0pt; mso-border-top-alt:solid windowtext .5pt;mso-border-left-alt:solid windowtext .5pt; mso-border-alt:solid windowtext .5pt;padding:0cm 5.4pt 0cm 5.4pt'> <p >Oysters, </p> <p >julienne fillets of sole</p> <p >Whiting quenelle</p> </td> </tr> <tr style='mso-yfti-irow:30'> <td width=189 valign=top style='width:142.0pt;border:solid windowtext 1.0pt; border-top:none;mso-border-top-alt:solid windowtext .5pt;mso-border-alt:solid windowtext .5pt; padding:0cm 5.4pt 0cm 5.4pt'> <p >Carmelite</p> <p ><o:p> </o:p></p> <p ><o:p> </o:p></p> </td> <td width=189 valign=top style='width:142.05pt;border-top:none;border-left: none;border-bottom:solid windowtext 1.0pt;border-right:solid windowtext 1.0pt; mso-border-top-alt:solid windowtext .5pt;mso-border-left-alt:solid windowtext .5pt; mso-border-alt:solid windowtext .5pt;padding:0cm 5.4pt 0cm 5.4pt'> <p >Fish thickened with arrowroot</p> </td> <td width=148 valign=top style='width:111.2pt;border-top:none;border-left: none;border-bottom:solid windowtext 1.0pt;border-right:solid windowtext 1.0pt; mso-border-top-alt:solid windowtext .5pt;mso-border-left-alt:solid windowtext .5pt; mso-border-alt:solid windowtext .5pt;padding:0cm 5.4pt 0cm 5.4pt'> <p >Roundels of fish forcemeat</p> <p >Plain boiled rice</p> </td> </tr> <tr style='mso-yfti-irow:31'> <td width=189 valign=top style='width:142.0pt;border:solid windowtext 1.0pt; border-top:none;mso-border-top-alt:solid windowtext .5pt;mso-border-alt:solid windowtext .5pt; padding:0cm 5.4pt 0cm 5.4pt'> <p >Carmen</p> <p ><o:p> </o:p></p> <p ><o:p> </o:p></p> </td> <td width=189 valign=top style='width:142.05pt;border-top:none;border-left: none;border-bottom:solid windowtext 1.0pt;border-right:solid windowtext 1.0pt; mso-border-top-alt:solid windowtext .5pt;mso-border-left-alt:solid windowtext .5pt; mso-border-alt:solid windowtext .5pt;padding:0cm 5.4pt 0cm 5.4pt'> <p >Add tomato puree when clarifying</p> </td> <td width=148 valign=top style='width:111.2pt;border-top:none;border-left: none;border-bottom:solid windowtext 1.0pt;border-right:solid windowtext 1.0pt; mso-border-top-alt:solid windowtext .5pt;mso-border-left-alt:solid windowtext .5pt; mso-border-alt:solid windowtext .5pt;padding:0cm 5.4pt 0cm 5.4pt'> <p >Tomato dice</p> <p >Pepper dice</p> <p >1 <span >tbs</span> plain boiled rice</p> <p >Chervil</p> </td> </tr> <tr style='mso-yfti-irow:32'> <td width=189 valign=top style='width:142.0pt;border:solid windowtext 1.0pt; border-top:none;mso-border-top-alt:solid windowtext .5pt;mso-border-alt:solid windowtext .5pt; padding:0cm 5.4pt 0cm 5.4pt'> <p ><span >Castellane</span></p> </td> <td width=189 valign=top style='width:142.05pt;border-top:none;border-left: none;border-bottom:solid windowtext 1.0pt;border-right:solid windowtext 1.0pt; mso-border-top-alt:solid windowtext .5pt;mso-border-left-alt:solid windowtext .5pt; mso-border-alt:solid windowtext .5pt;padding:0cm 5.4pt 0cm 5.4pt'> <p >Game with woodcock</p> </td> <td width=148 valign=top style='width:111.2pt;border-top:none;border-left: none;border-bottom:solid windowtext 1.0pt;border-right:solid windowtext 1.0pt; mso-border-top-alt:solid windowtext .5pt;mso-border-left-alt:solid windowtext .5pt; mso-border-alt:solid windowtext .5pt;padding:0cm 5.4pt 0cm 5.4pt'> <p >Two <span >royales</span>:</p> <p >Woodcock</p> <p >Lentils with hard boiled egg yolks</p> <p >Julienne of woodcock</p> </td> </tr> <tr style='mso-yfti-irow:33'> <td width=189 valign=top style='width:142.0pt;border:solid windowtext 1.0pt; border-top:none;mso-border-top-alt:solid windowtext .5pt;mso-border-alt:solid windowtext .5pt; padding:0cm 5.4pt 0cm 5.4pt'> <p >Celestine</p> <p ><o:p> </o:p></p> <p ><o:p> </o:p></p> </td> <td width=189 valign=top style='width:142.05pt;border-top:none;border-left: none;border-bottom:solid windowtext 1.0pt;border-right:solid windowtext 1.0pt; mso-border-top-alt:solid windowtext .5pt;mso-border-left-alt:solid windowtext .5pt; mso-border-alt:solid windowtext .5pt;padding:0cm 5.4pt 0cm 5.4pt'> <p >Thickened</p> </td> <td width=148 valign=top style='width:111.2pt;border-top:none;border-left: none;border-bottom:solid windowtext 1.0pt;border-right:solid windowtext 1.0pt; mso-border-top-alt:solid windowtext .5pt;mso-border-left-alt:solid windowtext .5pt; mso-border-alt:solid windowtext .5pt;padding:0cm 5.4pt 0cm 5.4pt'> <p >Lozenges cut from a sandwich of pancakes and chicken <span >forecemeat</span>; truffles</p> </td> </tr> <tr style='mso-yfti-irow:34'> <td width=189 valign=top style='width:142.0pt;border:solid windowtext 1.0pt; border-top:none;mso-border-top-alt:solid windowtext .5pt;mso-border-alt:solid windowtext .5pt; padding:0cm 5.4pt 0cm 5.4pt'> <p >Chartreuse</p> <p ><o:p> </o:p></p> <p ><o:p> </o:p></p> <p >District of France</p> </td> <td width=189 valign=top style='width:142.05pt;border-top:none;border-left: none;border-bottom:solid windowtext 1.0pt;border-right:solid windowtext 1.0pt; mso-border-top-alt:solid windowtext .5pt;mso-border-left-alt:solid windowtext .5pt; mso-border-alt:solid windowtext .5pt;padding:0cm 5.4pt 0cm 5.4pt'> <p >Thickened</p> </td> <td width=148 valign=top style='width:111.2pt;border-top:none;border-left: none;border-bottom:solid windowtext 1.0pt;border-right:solid windowtext 1.0pt; mso-border-top-alt:solid windowtext .5pt;mso-border-left-alt:solid windowtext .5pt; mso-border-alt:solid windowtext .5pt;padding:0cm 5.4pt 0cm 5.4pt'> <p >Three different ravioli:</p> <p >Spinach, <span >foie</span> <span >gras</span>, and mushroom</p> <p >Chervil</p> </td> </tr> <tr style='mso-yfti-irow:35'> <td width=189 valign=top style='width:142.0pt;border:solid windowtext 1.0pt; border-top:none;mso-border-top-alt:solid windowtext .5pt;mso-border-alt:solid windowtext .5pt; padding:0cm 5.4pt 0cm 5.4pt'> <p >Chasseur</p> <p ><o:p> </o:p></p> </td> <td width=189 valign=top style='width:142.05pt;border-top:none;border-left: none;border-bottom:solid windowtext 1.0pt;border-right:solid windowtext 1.0pt; mso-border-top-alt:solid windowtext .5pt;mso-border-left-alt:solid windowtext .5pt; mso-border-alt:solid windowtext .5pt;padding:0cm 5.4pt 0cm 5.4pt'> <p >Game</p> </td> <td width=148 valign=top style='width:111.2pt;border-top:none;border-left: none;border-bottom:solid windowtext 1.0pt;border-right:solid windowtext 1.0pt; mso-border-top-alt:solid windowtext .5pt;mso-border-left-alt:solid windowtext .5pt; mso-border-alt:solid windowtext .5pt;padding:0cm 5.4pt 0cm 5.4pt'> <p >Julienne of mushroom and game quenelles</p> <p >Profiteroles stuffed with game forcemeat served separately</p> </td> </tr> <tr style='mso-yfti-irow:36'> <td width=189 valign=top style='width:142.0pt;border:solid windowtext 1.0pt; border-top:none;mso-border-top-alt:solid windowtext .5pt;mso-border-alt:solid windowtext .5pt; padding:0cm 5.4pt 0cm 5.4pt'> <p >Chatelaine</p> <p ><o:p> </o:p></p> <p ><o:p> </o:p></p> </td> <td width=189 valign=top style='width:142.05pt;border-top:none;border-left: none;border-bottom:solid windowtext 1.0pt;border-right:solid windowtext 1.0pt; mso-border-top-alt:solid windowtext .5pt;mso-border-left-alt:solid windowtext .5pt; mso-border-alt:solid windowtext .5pt;padding:0cm 5.4pt 0cm 5.4pt'> <p >Chicken <span style='mso-spacerun:yes'> </span>thickened</p> </td> <td width=148 valign=top style='width:111.2pt;border-top:none;border-left: none;border-bottom:solid windowtext 1.0pt;border-right:solid windowtext 1.0pt; mso-border-top-alt:solid windowtext .5pt;mso-border-left-alt:solid windowtext .5pt; mso-border-alt:solid windowtext .5pt;padding:0cm 5.4pt 0cm 5.4pt'> <p >Soubise (onion) and artichoke Royale diced;</p> <p >Chicken quenelles stuffed with chestnut puree</p> </td> </tr> <tr style='mso-yfti-irow:37'> <td width=189 valign=top style='width:142.0pt;border:solid windowtext 1.0pt; border-top:none;mso-border-top-alt:solid windowtext .5pt;mso-border-alt:solid windowtext .5pt; padding:0cm 5.4pt 0cm 5.4pt'> <p ><span >Cheveux</span> <span >d’Anges</span></p> <p ><o:p> </o:p></p> <p ><span style='mso-spacerun:yes'> </span>(Angel Hair) </p> </td> <td width=189 valign=top style='width:142.05pt;border-top:none;border-left: none;border-bottom:solid windowtext 1.0pt;border-right:solid windowtext 1.0pt; mso-border-top-alt:solid windowtext .5pt;mso-border-left-alt:solid windowtext .5pt; mso-border-alt:solid windowtext .5pt;padding:0cm 5.4pt 0cm 5.4pt'> <p >Chicken</p> </td> <td width=148 valign=top style='width:111.2pt;border-top:none;border-left: none;border-bottom:solid windowtext 1.0pt;border-right:solid windowtext 1.0pt; mso-border-top-alt:solid windowtext .5pt;mso-border-left-alt:solid windowtext .5pt; mso-border-alt:solid windowtext .5pt;padding:0cm 5.4pt 0cm 5.4pt'> <p >Angel hair pasta</p> </td> </tr> <tr style='mso-yfti-irow:38'> <td width=189 valign=top style='width:142.0pt;border:solid windowtext 1.0pt; border-top:none;mso-border-top-alt:solid windowtext .5pt;mso-border-alt:solid windowtext .5pt; padding:0cm 5.4pt 0cm 5.4pt'> <p ><span >Chevreuse</span></p> <p ><o:p> </o:p></p> <p ><o:p> </o:p></p> </td> <td width=189 valign=top style='width:142.05pt;border-top:none;border-left: none;border-bottom:solid windowtext 1.0pt;border-right:solid windowtext 1.0pt; mso-border-top-alt:solid windowtext .5pt;mso-border-left-alt:solid windowtext .5pt; mso-border-alt:solid windowtext .5pt;padding:0cm 5.4pt 0cm 5.4pt'> <p >Chicken</p> </td> <td width=148 valign=top style='width:111.2pt;border-top:none;border-left: none;border-bottom:solid windowtext 1.0pt;border-right:solid windowtext 1.0pt; mso-border-top-alt:solid windowtext .5pt;mso-border-left-alt:solid windowtext .5pt; mso-border-alt:solid windowtext .5pt;padding:0cm 5.4pt 0cm 5.4pt'> <p >Large chicken quenelle stuffed with asparagus puree; truffle julienne </p> </td> </tr> <tr style='mso-yfti-irow:39'> <td width=189 valign=top style='width:142.0pt;border:solid windowtext 1.0pt; border-top:none;mso-border-top-alt:solid windowtext .5pt;mso-border-alt:solid windowtext .5pt; padding:0cm 5.4pt 0cm 5.4pt'> <p >Colbert</p> <p ><o:p> </o:p></p> <p ><o:p> </o:p></p> </td> <td width=189 valign=top style='width:142.05pt;border-top:none;border-left: none;border-bottom:solid windowtext 1.0pt;border-right:solid windowtext 1.0pt; mso-border-top-alt:solid windowtext .5pt;mso-border-left-alt:solid windowtext .5pt; mso-border-alt:solid windowtext .5pt;padding:0cm 5.4pt 0cm 5.4pt'> <p >Plain</p> </td> <td width=148 valign=top style='width:111.2pt;border-top:none;border-left: none;border-bottom:solid windowtext 1.0pt;border-right:solid windowtext 1.0pt; mso-border-top-alt:solid windowtext .5pt;mso-border-left-alt:solid windowtext .5pt; mso-border-alt:solid windowtext .5pt;padding:0cm 5.4pt 0cm 5.4pt'> <p >Spring vegetables and small (<span >e.g.quail</span>) poached eggs</p> </td> </tr> <tr style='mso-yfti-irow:40'> <td width=189 valign=top style='width:142.0pt;border:solid windowtext 1.0pt; border-top:none;mso-border-top-alt:solid windowtext .5pt;mso-border-alt:solid windowtext .5pt; padding:0cm 5.4pt 0cm 5.4pt'> <p ><span >Colombine</span></p> <p ><o:p> </o:p></p> <p ><span >Columbar</span> is <span >latin</span> for pigeon</p> </td> <td width=189 valign=top style='width:142.05pt;border-top:none;border-left: none;border-bottom:solid windowtext 1.0pt;border-right:solid windowtext 1.0pt; mso-border-top-alt:solid windowtext .5pt;mso-border-left-alt:solid windowtext .5pt; mso-border-alt:solid windowtext .5pt;padding:0cm 5.4pt 0cm 5.4pt'> <p >Chicken</p> </td> <td width=148 valign=top style='width:111.2pt;border-top:none;border-left: none;border-bottom:solid windowtext 1.0pt;border-right:solid windowtext 1.0pt; mso-border-top-alt:solid windowtext .5pt;mso-border-left-alt:solid windowtext .5pt; mso-border-alt:solid windowtext .5pt;padding:0cm 5.4pt 0cm 5.4pt'> <p >Vegetables; julienne of pigeon breast; poached pigeon eggs</p> </td> </tr> <tr style='mso-yfti-irow:41'> <td width=189 valign=top style='width:142.0pt;border:solid windowtext 1.0pt; border-top:none;mso-border-top-alt:solid windowtext .5pt;mso-border-alt:solid windowtext .5pt; padding:0cm 5.4pt 0cm 5.4pt'> <p ><span >Comtesse</span></p> </td> <td width=189 valign=top style='width:142.05pt;border-top:none;border-left: none;border-bottom:solid windowtext 1.0pt;border-right:solid windowtext 1.0pt; mso-border-top-alt:solid windowtext .5pt;mso-border-left-alt:solid windowtext .5pt; mso-border-alt:solid windowtext .5pt;padding:0cm 5.4pt 0cm 5.4pt'> <p >Chicken, thickened</p> </td> <td width=148 valign=top style='width:111.2pt;border-top:none;border-left: none;border-bottom:solid windowtext 1.0pt;border-right:solid windowtext 1.0pt; mso-border-top-alt:solid windowtext .5pt;mso-border-left-alt:solid windowtext .5pt; mso-border-alt:solid windowtext .5pt;padding:0cm 5.4pt 0cm 5.4pt'> <p >Lozenges of asparagus Royale; roundels of stuffed lettuce; round quenelles with truffles</p> </td> </tr> <tr style='mso-yfti-irow:42'> <td width=189 valign=top style='width:142.0pt;border:solid windowtext 1.0pt; border-top:none;mso-border-top-alt:solid windowtext .5pt;mso-border-alt:solid windowtext .5pt; padding:0cm 5.4pt 0cm 5.4pt'> <p ><st1:City><st1:place><span >Crecy</span></st1:place></st1:City><span style='font-size:10.0pt;font-family:Arial'> <o:p></o:p></span></p> <p ><span style='font-size:10.0pt;font-family:Arial'><o:p> </o:p></span></p> <p ><st1:City><st1:place><span >Crecy</span></st1:place></st1:City> <span >alwys</span> means carrots in culinary French.<o:p></o:p></p> <p >Area of <st1:country-region><st1:place>France</st1:place></st1:country-region> noted for prolific growth of carrots. Scene of the Battle of <span >Crecy</span> 1364 when Edward III defeated Philippe de <span >Valois</span></p> </td> <td width=189 valign=top style='width:142.05pt;border-top:none;border-left: none;border-bottom:solid windowtext 1.0pt;border-right:solid windowtext 1.0pt; mso-border-top-alt:solid windowtext .5pt;mso-border-left-alt:solid windowtext .5pt; mso-border-alt:solid windowtext .5pt;padding:0cm 5.4pt 0cm 5.4pt'> <p >Chicken, thickened</p> </td> <td width=148 valign=top style='width:111.2pt;border-top:none;border-left: none;border-bottom:solid windowtext 1.0pt;border-right:solid windowtext 1.0pt; mso-border-top-alt:solid windowtext .5pt;mso-border-left-alt:solid windowtext .5pt; mso-border-alt:solid windowtext .5pt;padding:0cm 5.4pt 0cm 5.4pt'> <p >Carrot Royale; carrot <span >brunoise</span>; chervil or parsley</p> </td> </tr> <tr style='mso-yfti-irow:43'> <td width=189 valign=top style='width:142.0pt;border:solid windowtext 1.0pt; border-top:none;mso-border-top-alt:solid windowtext .5pt;mso-border-alt:solid windowtext .5pt; padding:0cm 5.4pt 0cm 5.4pt'> <p ><span >Croutes</span>-au-pot</p> <p ><o:p> </o:p></p> <p ><o:p> </o:p></p> </td> <td width=189 valign=top style='width:142.05pt;border-top:none;border-left: none;border-bottom:solid windowtext 1.0pt;border-right:solid windowtext 1.0pt; mso-border-top-alt:solid windowtext .5pt;mso-border-left-alt:solid windowtext .5pt; mso-border-alt:solid windowtext .5pt;padding:0cm 5.4pt 0cm 5.4pt'> <p >Petite Marmite</p> </td> <td width=148 valign=top style='width:111.2pt;border-top:none;border-left: none;border-bottom:solid windowtext 1.0pt;border-right:solid windowtext 1.0pt; mso-border-top-alt:solid windowtext .5pt;mso-border-left-alt:solid windowtext .5pt; mso-border-alt:solid windowtext .5pt;padding:0cm 5.4pt 0cm 5.4pt'> <p >Dice of vegetables; <span >croutes</span> separately</p> </td> </tr> <tr style='mso-yfti-irow:44'> <td width=189 valign=top style='width:142.0pt;border:solid windowtext 1.0pt; border-top:none;mso-border-top-alt:solid windowtext .5pt;mso-border-alt:solid windowtext .5pt; padding:0cm 5.4pt 0cm 5.4pt'> <p ><span >Cussy</span><span style='font-size: 10.0pt;font-family:Arial'> <o:p></o:p></span></p> <p ><span style='font-size:10.0pt;font-family:Arial'><o:p> </o:p></span></p> <p ><o:p> </o:p></p> </td>
-
Please post your questions here -->> Q&A On Consommé Classic consommés By Jack Lang (Jackal10) This course will explore one of the many ways to use the stock you have on hand from Stock Making or from any excellent home-made stock. Hot or cold, a consommé is a light and perfect start to a meal. A properly made consommé is one of the triumphs of classical cuisine and a good test of the skill level of a professional or amateur kitchen. It shows off your wonderful home-made stock to its best advantage. For every 1 quart (1500 ml) of stock (chicken or brown (beef) stock), you will need 6 oz (200 gm) of boneless and skinless chicken breast and one or two egg whites. (Fat is the enemy of clear consommé, so ensure the stock is well skimmed.) Ingredients for consommé Some people add vegetables and herbs to the clarification. However Escoffier thunders:“It will be seen that I do not refer to any vegetable for the clarification. If the [stock] is well carried out, it should be possible to dispense with all supplementary flavouring, and, the customary error of cooks being rather to overdo the quantity of vegetables – even to the extent of disguising the natural aroma of the consommé- I prefer to entirely abandon the idea of vegetable garnishes in clarifications, and thus avoid a common stumbling block”. Trim the chicken breast of any fat or sinew and place it, along with one egg white in a blender. Blend until smooth. A stick blender will also work well, especially when making a large quantity. Chicken and egg white ready to be pureed Add the stock and blend again. Put into a saucepan on low heat and simmer gently. Stock added and blended Consommé simmering and proteins beginning to coagulate After a while the proteins in the chicken and the egg white will start to coagulate, forming a raft, and trapping the remaining fat and the impurities. Raft has formed Leave it to simmer slowly for an hour. Dipping under raft to spoon up liquid and moisten raft (after about an hour). If it looks like it is drying out on top, carefully reach under the raft with a spoon and splash a bit of the liquid up and over it. Do not be tempted to stir – you don’t want to break up the raft. The slow bubbling will cycle the fluid though the raft, which will act as a natural filter. After an hour, carefully decant the liquid. Filter it through a sieve lined with a coffee filter or with a double layer of kitchen (paper) towel. Try not to break up the raft too much. However the raft is like a big sponge, so it may need to drain a bit. Check the seasoning. It will need salt, and maybe a splash of Madeira or sherry. It may also need diluting. Don’t make it too strong, - it’s a soup not a sauce. Escoffier again: “ …if too gelatinous it is positively disagreeable…” This stuff is clear! This consommé, hot, or cold and jellied, is ideal served as an amuse, without garnishes, in demitasses or shot glasses. The old tradition was that such a consommé (perhaps laced with a sweet wine like Madeira) was served for a late night supper, after the ball, for its easily digestible and restorative nature, hence its reputation as aphrodisiac. A spectacular party trick is to add spangles of pure gold leaf to the nearly jellied cold consommé. Gold is edible and a small amount of gold leaf is not that expensive. (Make sure you purchase edible gold leaf.) You need a single sheet, cut into small pieces, for each quart of light chicken consommé. Serve with a glass of good brandy or Madeira and you have "Consommé aux paillettes d'or". There are hundreds, if not thousands of named garnishes for consommés. Le Répertoire has over 10 pages of them. I will discuss just two - royales and quenelles. Other garnishing components are vegetables or meat cut into matchstick julienne,or small cubes (brunoise), or balls or other shapes cut with special cutters. Whatever they are, you want them to be small enough to fit into the spoon you will be offering with the consomme. Alternately, if you choose a garnish like quenelles, then they must be of a soft enough consistency to be cut with a spoon. Note: Le Répertoire is "Le Repertoire de La Cuisine" by Louis Saulnier, first published in 1914 and still in print today (ISBN 0812051084). It is a concise listing of every dish known to the classical cuisine—7000 recipes in 240 pages, and still a standard reference work. The list of consommé variations given here and at the end of this lesson, is partially adapted from this book. Royales Royales are fancy shapes cut from a solid, savoury custard. You can make the custard in many flavours and colours: tomato (red), carrot (orange), spinach or peas (green), or truffle (black). Chefs, when entertaining an ambassador or head-of-state, will often choose colours to match their national flags. Here we make chicken royales, but you can substitute 6-7oz (200 gm) of one of the pureed vegetables mentioned above. For a chicken royale (white) whiz 3 ozs (100 gm) cooked chicken breast with 1 1/2 tablespoons of a thick béchamel in a food processor or blender. (Béchamel is just a fancy name for white sauce.) We will cover béchamel in a later course so for now you can use your favourite recipe for a basic white sauce or, alternately, just increase the amount of cream (see below). You can also just add a teaspoon of cornflour (cornstarch). Cooked chicken ready to be pureed Whisk together ¼ cup (75 ml) of cream, one whole egg and the yolk of another egg (you can use the white in the clarification of the consommé). and strain through a sieve into a buttered ramekin. Stand the ramekin in a baking tin or roasting pan, and add boiling water to come half way up the sides of the ramekin (This is a bain-marie.) Custard in bain-marie Poach in the bain-marie in a low oven (225F/120C) for 45 mins. Allow to cool. The cooked custard Turn out carefully on to a cutting board. Cut off and discard the top skin and trim the custard to an even thickness. Using tiny pastry cutters or a sharp knife, cut into fancy shapes. Royales cut from cooked, cooled and trimmed custard Put the royales in the soup bowl and pour the hot consommé over. A nice presentation (and an old restaurant trick to make presentation and setup easier) is to put the garnishes into the bowls at each table setting and ladle the hot consommé over them at serving time. Consommé Royale Quenelles Another popular consommé garnish is quenelles: feather-light spoon-shaped dumplings. Here we will make chicken quenelle mousseline (that is with cream, rather than from a béchamel base). The same recipe can be used with any fish, meat or vegetable puree. A traditional version is made from pike, and may have been the origin of gefilte fish. Quenelles are really light, despite the cream, and great for people on carbohydrate-reduced diets. They make a classic restaurant or dinner- party dish, as all the preparation can be done in advance. The quenelles will keep for a day or two, covered and refrigerated. You can reheat them in the hot soup, or in hot salted water, or even (hush) in the microwave. Larger quenelles in sauce for a light lunch or unusual starter To make the quenelles, you will need 8 oz (250 gm) of raw, skinless, boneless chicken, the whites of two eggs (save the yolks), and 8 fl oz ( 250 ml) of heavy cream. Ingredients for quenelles Whiz the chicken and the egg white together in a food processor. Add quite a lot of salt (2 tsp). Pureed chicken and egg whites Fill a large bowl with crushed ice and set a smaller bowl on the ice. Strain the pureed mixture into the smaller bowl. Add the cream and beat together until you get a smooth paste. Cream added to puree. Note the outer bowl of ice. Seasoning the puree Check the seasonings: I’ve added a little white pepper, and a suspicion of nutmeg. Mould with two spoons into a non-stick (or well buttered) baking tray or shallow roasting pan. It is much easier if you keep the spoons warm and wet in a jug of hot water. Small quenelles (teaspoon size) are ideal for a consommé garnish, larger ones can be eaten as part of a light lunch or as an elegant starter. Placing shaped quenelles in pan You can also pipe this mixture, or form it using wet fingers. Fill the pans with nearly boiling water, covering the quenelle. Simmer gently on the side of the stove. They will only take a few minutes. When they float (maybe with some encouragement) they are done. Turn them over to ensure the top is poached as well, then lift our with a slotted spoon and drain. Poaching quenelles These can all be prepared well in advance. The finished dish: Consommé garnished with quenelles Now that you have the basics of consommé-making, I encourage you to experiment further. There are a host of consommé variations - here is a list of some of them. Please post your questions here -->> Q&A
-
Please post your questions here
-
Please post your questions on this thread
-
Please post your questions here -- >>> Q&A Roasting a Whole Pig in an Open Pit By: Michael Laverty (Really Nice!) This eGullet Culinary Institute lesson describes the process of roasting a whole pig in an open pit -- also known as a pig roast. This is open pit roasting as opposed to closed pit roasting (Hawaiian Luau Style) where the pig is surrounded by hot rocks and buried in the ground, or to cooking in a closed smoker. I saw my first pit-roasted pig at a wedding in Wenatchee, Washington in July 2000. Pit-roasting a pig is not as difficult as you might think if you break down the process into individual steps as shown below. 1. Identify what you know (these are the assumptions), and then list the things you don’t know (these are the risks). Deal with each risk on an individual basis. (I’ll offer a couple of suggestions for each). 2. Next, break down the scope of the process into individual steps. This is the game plan: a. Obtain the pig b. Write the mis en place list c. Dig the hole d. Store the pig in a HAACP safe environment e. Build the fire f. Prepare the pig for roasting g. Prepare the pit h. Roast the pig i. Carve the pig j. Eat Assumptions The first assumption is that you can procure a whole, fully-dressed pig. In some parts of the country this might be easier than in others. Figure on about 1.25 to 2 lbs per person of dressed pig. For the wedding we had a 160 lb pig to feed about 100 people and it cost about $225. This was supplemented with two ham legs and many other dishes. At another event, the pig weighed 60 lbs and fed about 30 people at a cost of $100. Another assumption is that you have a safe environment for storing the pig from the time you pick it up from the butcher to the time you begin cooking it. It doesn’t matter how good something tastes or what sensations a food item gives you, if it isn’t safe to eat, you’re going to be in serious trouble. Fortunately, the FDA provides some simple guidelines you can follow to help ensure safe storage. Taking a paragraph from my culinary school notes: More information is available here. I recommend that you view the details on the Web site provided above. The key things to know are: 1. Keep the pig at or below 40F while transporting the pig from the butcher to where you will be storing it. 2. Store the pig at or below 40F. 3. Don’t allow the pig to sit for a period of time after preparing it. If the pig is ready to go on the fire, but the fire isn’t ready, return the pig to a cool environment. (Keep the amount time it is in the danger zone (40F to 140F) to a minimum. 4. Cook the pig to its proper temperature (at least 160F). 5. Minimize the time it takes carving the pig. 6. Don’t leave the leftovers out; store them in the refrigerator or cooler right away. 7. Reheat the leftovers to 165F for at least 15 seconds. Enough of the sanitation lecture. Risks What risks are involved in taking on such a task? If you haven’t done this before, it can be daunting, even scary. Some things you might be thinking include: 1. If you screw up, it’s expensive. Trying a recipe with 150 lbs of pork is an altogether riskier endeavor than trying a new recipe using 1 lb of pork. 2. If you screw up, there’s going to be a whole lot of people disappointed. Read through this lesson a couple times before starting and know what to expect. Be flexible. This lesson can’t anticipate everything you might encounter. 3. How can you be sure that it will be cooked to the proper temperature? Use an instant read thermometer that can be calibrated to within 2 degrees of accuracy. 4. Will the weather interfere? It shouldn’t be a problem as the pig will be covered while it's cooking. Digging the hole, however, may be difficult if you decide to do this when the ground is frozen, extremely rocky or when the soil is saturated. If you’re still interested, let’s get started! 1. Obtain the Pig Ask your regular butcher, about a month before the event, for a dressed pig at the weight you want. If your butcher can’t provide you with a pig, perhaps he or she can give you the name of one who can. Make sure it can be delivered or that you can pick it up on time. One week before the event, contact the butcher again to confirm your order. You don’t want to be left empty-handed if your butcher is absent-minded (like my former butcher). 2. Write the Mis en Place List List the equipment you need, then begin to gather it so you have it all in place on the day of the roast. . a. People. You shouldn’t try this alone. Get all the help you can to dig the pit. For the preparation and cooking of the pig you’ll need at least two people. b. Shovels. One per person. c. Sheet metal covering (or roofing)... this is the same stuff used as roofing on a backyard shed. You’ll need a piece about 6 feet long by 4 feet wide. Don’t use plastic roofing material! d. Tape measure. e. Instant read thermometer, preferably one that can be calibrated to within 2 degrees of accuracy. f. Garden sprayer filled with water to put out flare-ups. Buy a new one; do not use one that has had chemicals in it. g. Four-3/4 inch pieces of rebar, about eight feet long. You can purchase these at any hardware store. h. Two cinder blocks. These keep the rebar off the ground and make it easier to flip the pig. i. Chicken wire fencing; about 15 feet, or enough to wrap the pig twice around. j. Saws. You will need a wood saw for the initial cutting and a hacksaw, with an extra blade or two, for more precise cutting. k. Wood for fuel. Expect to use between 1/4 to 1/2 cord of wood. We used apple wood because this pig roast was on an apple farm, but you can also use alder, cherry, hickory, mesquite, oak, or pecan. However, don’t use too much mesquite as this wood burns at a hotter temperature, and with good pit roasting, the motto is low and slow. Avoid evergreens such as, cedar, fir, pine, or spruce. These woods produce toxins in the smoke that can make you very ill. l. Container to hold a second fire. This can be 55 gallon drum cut in half, a kettle grill, or even another hole in the ground. m. Welder’s gloves. When you ‘carve,’ you"ll be pulling the meat from the pig with your hands. The meat is going to be very hot and you need to work quickly so your guests are served hot, succulent pork. Buy new welder's gloves just for this purpose. 3. Dig the Hole About two days ahead of time, you need to dig the hole. Get extra help as you’re going to dig a hole 18 inches deep, 3.5 feet wide, and 6 feet long. If you dig the hole too deep, you might not get enough heat; if you dig it too shallow, you might get too much heat. Make sure the walls of the pit are straight up and down. If the walls are at an angle too much heat and smoke will escape. Throw the excavated dirt well away from the hole; you don't want the rebar resting on dirt piles as this will alter 18-inch depth. 4. Store the Pig in a HAACP-Safe Environment The pictures that follow are from the wedding in Wenatchee, Washington. A friend of mine was getting married at his parents’ house and the roasted pig was the main course. The pig had been stored in the garage, surrounded by ice, since delivery the day before. It was kept as cold as possible, and except for a last minute sniff at 7 A.M. when we were moving the pig, the storage conditions were GRAS (generally regarded as safe). We used a forklift to move the 160-pound pig the 200 or so yards from the garage to the fire. 5. Build the Fire This picture was taken at 5 A.M. on the day of the wedding. We were told to build a huge, hot fire, so we started with a whole cord of wood which measured 4 feet, by 4 feet, by 8 feet. It turns out we only needed about 1/3 of that. Here my friend’s dad is throwing another log on the fire. You don’t need a fire this big. Give yourself a very wide area free of buildings or any sort of combustible material. In hot, dry months make sure you’re well away from surrounding trees or grass. 6. Prepare the Pig for Roasting Preparation includes using a wood saw to cut through the backbone, jawbone, and groin. You want the pig as flat as possible to ensure even cooking. You need to create "handles" for manipulating the pig while it is roasting. For the wedding feast, we drove four 3/4-inch thick rebar rods through it. For a pig of this size, you need 3/4 inch thick rebar. If you use 1/2-inch the pig will sag, if you use 1-inch it will be too rigid and carcass will fall apart when you try to lift it. 7. Prepare the Pit Meanwhile, have someone prepare the fire pit after the fire has settled down. You want about a 1-inch layer of coals on the floor of the pit. Never let the coals flare up during cooking, so don’t leave it unattended. On this occasion, we had built the fire too hot and had to remove most of the coals from the pit. These extra coals were placed in a small metal drum that acted as the container for the second fire. Prepare the Pig for Roasting Continued Wrap the pig with chicken wire to help keep it together while it is roasted and turned. Near the end of the cooking time, the meat will be tender enough to fall off the bone. The chicken wire helps keep it in place. Pierce the skin so the fat can drip out of the meat. There's enough fat in the pig to keep it from drying out. If you don't do this, the meat will be very greasy. We added neither spices nor marinades but you can insert garlic cloves in the slits you made to drain the fat, or you can smear a molasses, brown sugar, and spice mixture over the exterior. Note the two rebar rods, inserted perpendicular to the ones inserted in a previous photo. This arrangement of rods allows you to turn the pig any way you want. 8. Roast the Pig Bring the pig to the roasting pit. (For the wedding, we also roasted a couple of ham legs.) Now all that’s left is to cover the pig and begin the low, slow cooking process. Notice the cinder blocks used to hold the rebar off the ground. These makes it easier to flip the pig every hour or so. This is also why a depth of 18 inches is important. The cinder blocks elevate the pig even further away from the coals. So you’re actually 25 to 27 inches above the bottom of the pit. Cover the pit with metal roofing material. The following picture was taken at about 8:30am. At 8:31 the beer came out. Notice in the picture above that the metal roofing doesn’t cover the sides. We dug the hole a bit too wide. This allowed heat to escape, and because it was a bit windy that day, air got in and generated some flare-ups that had to be extinguished. In the picture below, you see how to flip the pig over. You want to do this about every hour. Add coals when necessary. Because our fire started very hot, we didn’t add anything until about two hours into cooking. Knowing when to add coals isn’t determined by measuring temperature; it’s determined by the sight and sound of fat dripping into the coals. Listen for a slow, steady sizzling rhythm and look for the smoke where the fat is dripping. You need to know that the fire is burning evenly, so that the pig cooks evenly. In other words, you need to manage the coals. By coals I mean, pre-burned wood. This is where the secondary fire comes in. Keep a fire going off to the side. When you need some more heat, pull the coals from the secondary fire and place them where needed beneath the pig. It helps to have one person lift the corner of the metal covering with a shovel, and another person to shovel the coals into the pit. You’ll know where additional heat is needed; the areas where you don't see the fat dripping. Also, as the fuel is burned up, add coals to different parts of the pit on an as-needed basis. Towards the end of the cooking time (about 7 hours), start checking the internal temperature. Check the temperate in various parts of the pig and when you get a consistent 155F, remove the pig from the fire to a prepared carving surface. The carry over cooking will bring it to 160 to 165F. A 160 lb pig takes about 7 hours to cook; a 60 lb pig takes about 4 hours. One photo I don’t have is spraying the little flare ups that occur. Keep the garden sprayer near by and don’t be afraid to use it. Move the coals around if one area of coals sounds like it’s getting more fat dripping on it than the other areas. 9. Carve the Pig Once fully cooked, the meat just falls off the bone. In this instance, the smoke ring was about 1/2 inch thick. There were no leftovers. Notice the gentleman on the left is wearing the thick welder’s rubber gloves. You don’t need a knife to ‘carve’ a roasted pig. But know that the meat inside is going to be very hot and the gloves are necessary. 10. Scenery This is the view we had overlooking the valley. All-in-all it was one of the most memorable days of my cooking experience! Copyright 2003 Michael Laverty. All rights reserved. Please post your questions here -->> Q&A
-
>> Please post your questions here >> Vegetarian Cookery for Omnivores and Vegetarians: Eating Well Without the Meat Introduction Vegetarians have a bad reputation. Their dietary choices are widely viewed as an unnecessary frivolity at best and a domineering control mechanism at worst. Restaurateurs often dread developing vegetarian options for their menus, and home cooks shy away from having their vegetarian friends over to share a meal. Several eGullet members have adopted signature files that show their impatience with vegetarians. My personal experience reflects that vegetarians are passionate about food and eating. They're accustomed to practices such as learning the sources of the food they eat, reading labels and keeping themselves educated about food. They love to learn about cooking vegetables, grains and other tricky foods properly, and they love to share the results with their friends and families. Chefs in restaurants with vegetarian-friendly menus have learned ways of producing fine vegetarian cuisine using techniques such as infusion and juicing in sauces and smoking or grilling vegetarian foods to add flavor. Their efforts are rewarded through loyal followings among vegetarians, and their restaurants benefit from lowered food costs on vegetarian menu items. The ethical debates about vegetarianism are irrelevant to the importance of vegetarian cuisine. I'm not interested in telling other people what they should or shouldn't eat, comparing oppressions, or designating some people as superior to others based on something as silly as what they do or don't consume. I am very interested in preparing and eating good food; the ethical debates are best left to more political venues than a food discussion website. This course is designed as a practical guide to vegetarian cuisine with some ideas for preparing appropriate foods. It doesn't matter if you are a vegetarian, considering becoming a vegetarian, a friend or family member of a vegetarian, a serious home cook, or a professional cook. Awareness of vegetarian cuisine can enrich your culinary life, and understanding its principles will make you a better host, guest, diner and cook. At the end of this lesson, you may not want to be a vegetarian if you are currently an omnivore, but you'll be prepared to accommodate one and may learn some new ways with vegetarian foods. If you are a vegetarian, you may gain some new techniques and ideas to use for producing delicious food. Ultimately, what's most important is the food. What is vegetarianism? There are many types of vegetarians, each with a unique set of dietary preferences. The simplest way to ascertain a vegetarian's diet is to confirm it by asking. There are some generally-accepted labels for various diets: Vegetarian, Ovo-Lacto Vegetarian, Ovo Vegetarian, Lacto Vegetarian: These titles generally refer to people who eat no meat, fowl, or fish. "Vegetarians" are usually the same as "ovo-lacto vegetarians;" both populations eat dairy products and eggs but no meat, fowl or fish. Ovo vegetarians and lacto vegetarians eat eggs but not dairy, or dairy but not eggs, respectively. The barriers around lacto-ovo vegetarianism have a few gray areas; for example, some lacto-ovo vegetarians refuse to consume cheese that was made with animal rennet. For purposes of this lesson, "vegetarian" means "lacto-ovo vegetarian." Vegan: This word refers to a person who eats no meat, fowl, fish, dairy or egg foods. Many vegans refuse to be associated with anything that could be derived from an animal-related process; for example, vegans often eschew honey, avoid leather goods, and reject down-filled linens. Vegans may also refuse to consume dates (which are fertilized by a certain type of wasp), white sugar (which may be purified with bone charcoal) and other foods that appear to be animal-free. Fruitarian, Raw Food, Macrobiotic: These diets are outside the mainstream of vegetarianism and veganism. Fruitarians consume fruits, nuts, and some nut oils, but no vegetables, grains, meat, fowl, fish, dairy or egg; theoretically, this diet prevents plants from dying to feed the fruitarian. Raw food adherents are usually vegans who do not cook their food by applying heat. They prepare grains and beans by lengthy soaking and washing, and they subsist mostly on raw fruits, vegetables and nuts. Macrobiotics are usually vegans who make an effort to eat in tune with the seasons; they generally stick to foods that are produced locally. Pesco-Vegetarians, Semi-Vegetarians: These labels apply to persons who eat dairy foods, eggs, and occasionally other animal foods. Pesco-vegetarians consume fish but no meat or fowl. "Semi-vegetarian" is difficult to define; some semi-vegetarians eat meat or fowl on rare occasions, while others maintain a mostly-vegetarian diet but tuck into meat or fowl once every week or two. Meatless: Some people eschew meat, fowl, and fish as foods, but may still consume animal foods like gelatin or chicken stock. Sometimes people on such a diet describe themselves as "meatless." I don't regard "meatless" as the same as "vegetarian" for the purposes of this lesson. For the purposes of this class, we will discuss mostly lacto-ovo vegetarian cuisine. Most of the recipes in this class are easily adapted to the vegan diet. Why do People Insist on This Wacky Diet? Why Did I, and Why Did I Stop? The reasons why people choose vegetarian diets are as varied as vegetarians themselves. Some people are vegetarians for religious reasons; either their religion requires vegetarianism, or their personal circumstances make it difficult for them to source meat, fowl or fish that suits their religious dietary requirements. (Religious Jewish people whose work causes them to travel frequently will sometimes adopt a vegetarian diet out of necessity, for example.) Others are concerned about animal rights and animal suffering; many vegans particularly fall into this category, and they may refuse to wear leather or fur or otherwise use items that rely on animal products. Some vegetarians choose their diets out of health concerns, believing a vegetarian diet to be lower in cholesterol and fat and higher in fiber than omnivorous diets. Still others simply dislike meat, fowl and fish, or feel they are too expensive compared to beans and grains. My own reasons for being a lacto-ovo vegetarian shifted over the years I eschewed meat, fowl and fish. I started as a vegetarian because I was concerned about animal rights issues (I read Diet for a New Planet by John Robbins and was moved by the plight of animals who become our food). I was also interested in eating what I regarded as a pure diet, free of animal hormones. I believed that animals were a poor use of environmental resources; one pound of beef requires huge quantities of potable water and grain that could be used to feed humans. I was concerned that eating animals was hypocritical; I knew there was no way I could kill an animal, and I didn't want to eat meat only because I was able to separate myself from its reality. I had a boyfriend who was a vegetarian, and through him I saw that it was possible to both eat out and cook at home and enjoy a satisfactory variety of food. Later, I became less concerned with animal rights, and my approach to environmental issues became less focused on diet. I continued my vegetarian diet out of health concerns and out of habit. I'd describe my vegetarianism to others as second nature: "If you know you don't like tomatoes, when you go into a restaurant and look at a menu you just mentally skip over anything that contains tomatoes. Meat is the same way for me, I just don't notice if I'm missing out on something by not eating it." I started eating fish about two years ago. I was trying to lose weight while continuing to frequent restaurants and the vegetarian offerings at most restaurants rely heavily on calorie-rich dairy foods like cheese. I also had started to wonder what I was missing by not eating meat or fowl as my interest in food began to border on obsession. I made the decisions to start eating meat again and to enroll in culinary school over a very short time span in early 2002. I still maintain a household free of meat and fowl foods, although I prepare fish often at home. I never regarded the vegetarian diet as one defined by restriction. I think this view of vegetarian cuisine is an artificial construct. Being a vegetarian, for me, was far more about what I could eat than about what I didn't. My vegetarianism led me to explore international foods and try unfamiliar ingredients; my palate expanded rapidly and I learned to love many flavors that I might not have considered had I not changed my diet. What is Vegetarian Cuisine? The only defining factor of vegetarian cuisine is that it is devoid of meat, fowl or fish. Vegetarian cuisine is global, sophisticated cuisine. Vegetarian cuisine is also an ordinary omelet, pasta with tomato sauce, or a baked potato. Some international cuisines are particularly vegetarian-friendly, especially Indian and Thai cuisines. Most recipes that do not center on meat and meat flavors can be converted to vegetarian recipes, but there are some things to look out for: Stocks. Vegetarians and vegans will only consume vegetable-based stocks. Chicken stock is not a vegetarian food. Fats. Vegetarians do not consume animal fats such as duck fat or lard. Butter is acceptable to vegetarians but not to vegans. Common flavorings. Most major flavorings are vegetarian, but some contain fish or fowl byproducts. Worcestershire sauce contains anchovy, for example. (Vegetarian versions of Worcestershire sauce are available at natural foods stores.) Common additives. Strict vegetarians and vegans avoid additives like animal-based rennet (derived from animal byproducts; a coagulant often found in cheeses) and carmine (derived from insect chitin; a red food coloring found in some fruit juices). Most natural foods stores carry cheeses made with a vegetable-based rennet, along with carmine-free juices. It can be difficult to ascertain which cheeses contain animal-based rennet through reading labels; if you are feeding cheese to a strict vegetarian, ask a knowledgeable cheese retailer for advice on rennet-free cheese. Some cheeses are labeled as containing vegetable-based rennet, particularly organic cheeses and cheeses sold in natural foods stores. You could make your life insane by following these strictures to the letter if you are not a vegetarian but are trying hard to impress one. Your best bet is always to ask the person you're cooking for what you should avoid. If you are thinking of becoming a vegetarian and want to be careful about what you're eating, there are, referenced at the end of this presentation, Web sites and books with more comprehensive information about animal byproducts in seemingly vegetarian foods. Accommodating a Vegetarian: Why and How Perhaps you're a gleeful omnivore. You love your steaks and chops, you can't pass up foie gras or veal and you couldn't care less what happens to the animals who become your dinner. You're just happy with a hamburger or a slice of pepperoni pizza, or a roasted chicken or some fried fish. Then you make friends with a vegetarian, and before you know it you've invited your new friend over to dinner. Now what are you going to do? You shouldn't hesitate to invite your friend over if you're the sort of person who likes to cook for friends. Most vegetarians will gleefully eat whatever you put in front of them so long as it contains no meat or fowl. Many satisfying meals can be assembled without meat. You can accommodate your omnivorous friends with the same vegetarian food, or design menus from which animal proteins can easily be omitted. For example, I've served the raisin couscous and chickpeas with cinnamon and caramelized onions I'll cover later to guests topped with cumin-rubbed salmon; those who didn't eat fish simply received a larger portion of the couscous and beans. This way everybody was able to eat what he or she wanted to and still enjoy one another's' company. It's hard to believe, but vegetarians do not make their dietary choices for the purpose of annoying those around them. Vegetarianism is as respectable a dietary decision as any other, and it's a personal choice in most cases. Stocking a Vegetarian Pantry Without the animal proteins of meat, fowl and fish, most vegetarians rely on vegetable proteins like soy foods, whole grains and beans to round out their diets. To that end, the vegetarian pantry is an important part of maintaining a vegetarian kitchen. In my house, we keep a collection of canisters and quart-sized Ball jars for holding whole grains, beans, flours and sugars. These canisters and jars can easily be refilled from the bulk bins at the natural foods co-op where I do most of our food shopping, and they are easily washed and reused once they're emptied. In addition to these containers, we keep a collection of reusable plastic containers that hold cooked beans and grains, which we store in the chest freezer. Maintaining these stores allows us to create vegetarian meals without much advance planning, seasoning and augmenting these basic foods with fresh vegetables and fruits to compose complete meals. Which items should you stock in your vegetarian pantry? Shoot for an assortment of the foods you like to eat best. Most of these foods keep for a long time, although the longer you keep a product like brown rice or beans the longer you will have to cook the product to soften it and make it digestible. Purchase these foods from sources where the turnover is fairly rapid. Bulk foods sections of natural foods markets and ethnic markets are especially good places for buying whole grains and beans; they're inexpensive and turn over rapidly. If you're not sure how much you'll eat of a new vegetarian food, buy a smaller quantity. You can always get more if you get hooked on it, and by purchasing from bulk foods sections you shouldn't have to commit to too much of anything. Here's some of what I keep in my pantry, which reflects the way I like to eat. Your pantry should reflect your personal tastes, not mine. Canned foods Tomatoes: peeled diced, whole, roasted Beans: backup supplies of chickpeas, kidney beans, pintos Artichoke hearts Hearts of palm Peanut butter Grains Rice: Basmati, short- and long-grain brown, jasmine, arborio/carnaroli Pasta: Wholegrain spaghetti, semolina penne Corn: White unbleached grits, ordinary yellow cornmeal, coarse polenta Flours: Unbleached white, whole wheat, cake flour Other: Bulgur wheat, Kasha (buckwheat groats), lentils Dried foods Raisins Assorted berries, cherries, apricots Tomatoes Assorted mushrooms Assorted nuts Homemade breadcrumbs Seasonings Sea salt Pepper in a grinder Garlic, fresh Tamari or soy sauce Vinegars: rice wine, red wine, white wine, apple cider, balsamic Assorted extra virgin olive oils Peanut oil Sesame oil Chile-infused oil In the Freezer Cooked chickpeas, kidney beans, pintos, cannellini Vegetarian stock Tofu Soy foods (veggie burgers) In the Refrigerator Milk Butter Parmegiano-reggiano Eggs Default Fruits and Vegetables Carrots Celery Onions, white and red Lemons Salad vegetables Potatoes Notes on Vegetarian Foods Most vegetarian dishes are familiar to omnivorous cooks. There are some foods, especially vegetarian proteins, which may be less familiar to the omnivorous. To that end, here are some notes on preparing a few common vegetarian foods: Tofu. You may have had tofu at an Asian restaurant and wondered if you could get such chewy, flavorful tofu at home. Perhaps you bought a package of extra-firm water packed tofu from the refrigerator at your supermarket or co-op, and brought it home and sliced it and tossed it into a stir-fry at the last minute. When you sat down to dine, you realized that you had soggy, mushy white stuff that broke apart into disappointing curds distributed throughout the dish. While I like the custardy, ethereal nature of regular tofu (and occasionally eat it with nothing more than a sprinkle of soy sauce), I usually prefer cooking with the chewier sort. Regular tofu must be dried as much as possible if it is to develop texture. Tofu that has been dried is able to absorb more flavors than regular tofu, and it has a pleasant chewiness that works well in all sorts of dishes. There are three ways to do this: press it, fry it or freeze it. To press tofu, slice it, squeeze all the liquid out of the slices, and weight it down on paper or cloth towels in a refrigerator. Change the towels daily. It takes about 3-4 days for it to get really dry and chewy, assuming it was squeezed out thoroughly before starting on the towels. Deep-fat frying tofu is the quickest method and a tasty one, but it can also be messy and introduce excessive fat into a dish. Most Asian restaurants fry tofu. Finally, you can dry tofu by freezing it as soon as you buy it; and defrost it as needed for recipes. I prefer freezing, as it's ultimately the simplest method. I have found the aseptically packaged sort of tofu sold in the Asian foods sections of regular supermarkets does not freeze as well as fresh tofu; it separates into disappointing shreds upon defrosting. I usually purchase the extra-firm tofu packed in water from the refrigerator case of my local market. Drain the water, squeeze as much water as possible out of the brick of tofu, slice if desired and freeze. (I normally slice and package the tofu slices into individually-portioned resealable bags for use on sandwiches.) When ready to use, defrost in the refrigerator overnight, on the counter for a few hours, or in a microwave for a couple of minutes. Squeeze out as much water as possible before use. You can purchase previously fried tofu at Asian markets. There are also baked, flavored tofus available for purchase in natural foods markets. These products can simplify stir-fries and sandwiches, but they're just as easily made at home. Beans. These protein-packed foods are favorites in many corners of the world, and they're a centerpiece of the vegetarian table. Bean dishes can run the gamut from creamy and mellow to crisp and spicy. They're satisfying without being heavy. Properly cooking beans and eating them frequently can lessen the likelihood of digestive issues (such as excessive gas) when they are consumed. Beans are a cornerstone of ethnic cuisines from the middle-eastern chickpea to the Cuban black bean to the Indian lentil dal. Learning to cook them is an essential key to learning how to cook for vegetarians. I consume a lot of chickpeas, cannellini, pintos and kidney beans at home. These beans form the basis of my style of vegetarian cookery. Chickpeas are especially versatile and are equally at home in a spicy curry, mashed into a rich hummus, or tossed with brown and wild rices for a fall salad. Cannellini, white Italian kidney beans, are delicious mashed into a dip with high-quality olive oil or cooked with vegetables and topped with fried sage or thin ribbons of mint. Pintos are easily mashed and served in tortillas for a quick dinner. They are excellent when combined with kidney beans as the basis for a vegetarian chili. I also like to cook kidney beans with chile peppers and serve them atop a large salad with tortilla chips on the side as a cool summer dinner. Leftovers of any of these beans get pitched into a plastic container with some spicy vinaigrette stored in the refrigerator. These marinated beans are great spooned into pita breads with mustard, lettuce and red onion for lunch, or served atop a salad with goat cheese toasts on the side. Canned beans are readily available and reasonably inexpensive convenience protein foods for vegetarians and omnivores alike. However, many canned beans are mushy; some also suffer from excessive salt. The best canned beans have a slightly crisp aspect to them. I have found several of the organic brands on the market to be of better quality than the mainstream and store brands, and am especially fond of Westbrae beans. Just the same, I only rely on canned beans as a backup for dried beans. Dried beans are even less expensive than canned beans, and they are easy to prepare although they do require advance planning. By cooking dried beans, you can exercise total control over the degree to which they are cooked, their salt level, and ultimately their quality. Many beans are available in dried form that are difficult to source in cans. Dried beans are not difficult to prepare and, if you have a freezer, can be just as convenient as the canned variety. Purchase dried beans from natural or ethnic markets where there is likely to be a high turnover; supermarket dried beans may have been on the shelf for years without selling, and older beans require lengthier cooking and may taste stale. Dried chickpeas fresh from the market. The first time you purchase dried beans from a source, I recommend you purchase only a small quantity and prepare them at home shortly after purchase. This way you can see whether or not the beans are relatively fresh. Once I purchased some dried beans from a bin that had an insect infestation; had I not started soaking these beans immediately upon returning home, the infestation could have affected foods in my dry storage area. I no longer purchase beans from that particular source. Empty the dried beans into a colander or bowl-shaped sieve, rinse them, and sort through them. Rinsing and sorting through dried chickpeas. Discard beans that are damaged and any stray pebbles or other materials that may be mixed in with the beans. Some people find it easier to sort beans on a white plate, where the contrast between the plate and the beans makes it easier to find imperfections. Soak the dried, rinsed beans overnight in a large container holding enough water to cover them by at least three inches. Rinsed, picked-over beans, settling in for an overnight soak. They will swell and soften through soaking, and the beans will appear much larger after they are completely soaked. The next morning, the beans have plumped up nicely. I poured off a little bit of scum that was floating at the top so you could see how the beans look in the picture; a little bit of scum is normal after soaking. Discard the soaking water and rinse the beans. Drain and put in a deep pot. Add enough fresh, cold water to cover the beans by three inches and place the pot on a stove. Soaked beans, covered with fresh water and ready to be cooked. Bring the beans to a simmer over medium heat. Foam will often rise in the pot; use a ladle or skimmer to skim off and discard this foam. This was only the beginning of the foam that appeared as I cooked the beans. Most of the foam appears early on as you're cooking the beans, just as they're coming to a boil. Simmer the beans gently until they are tender enough for your liking; do not boil the beans over high heat, as the agitation may cause the skins to separate from the beans. (Some skins will inevitably separate from a few of the beans; I normally skim these skins off and discard them.) The amount of time required varies depending on the type of bean, the conditions under which it was stored, and how fresh the dried beans are. Most beans cook in one to two hours. I stir the beans periodically as they cook; I can feel with the spoon how the texture of the beans change as they cook, and as they feel softer when stirred I start tasting them. I cook most beans until they have lost some but not all of their crispness. I believe the best way to check bean doneness is to taste the beans. Just spoon out a few, let them cool a few seconds, and sample away. When I started cooking dried beans I cooked my beans until they were completely soft, because I was accustomed to the softer texture of canned beans. You can always return previously cooked beans to the pot for more cooking when you're ready to use them, especially if you will be mashing them into a soup or spread. Drain and discard the cooking liquid. The finished product: plenty of tender, tasty beans. Allow to cool before refrigerating or freezing beans. There are also quick-soaking methods for those times when you're less organized or more time-compressed about cooking your dried beans. Rinse and sort dried beans and place in a deep pot. Cover with at least three inches of water. Cover the pot and bring the water to a boil. Shut off the heat and let rest for one hour. Drain and cook as usual, using fresh water. Do not combine different types of dried beans as different beans require different cooking times; recipes that require multiple types of beans should be followed using beans cooked separately. Do not salt the beans while they cook, as this may toughen them. Quicker-cooking beans, such as lentils, do not require soaking before preparation. You can prepare large quantities of dried beans, portion them and freeze them for future use. By doing this with your favorite beans, you can enjoy the same convenience as canned beans with the benefit of controlling the degree to which your beans have been cooked. I normally keep several types of cooked dried beans in the freezer for easy use in recipes; just defrost and use. Lentils are similar to beans, but they cook quickly and require no soaking time. All lentils should be rinsed and picked over to remove foreign objects before cooking. Most lentils cook in about 30 minutes from their dried state, making them the convenience foods of dried beans. Select Vegetarian Recipes The following are some vegetarian recipes you can prepare for your friends and family. These dishes can be paired with meat, fowl, or fish dishes for omnivores. Most can be easily adapted to vegan diets. Some of these dishes are interpretations of ethnic dishes. While I cannot vouch for their authenticity, I guarantee they are delicious. Tofu Satays with Peanut Sauce and Thai-Style Cucumber Salad Tofu: 1 1-lb. package extra-firm tofu, prefrozen and thawed, squeezed dry 1/2 c coconut milk 2 large shallots 2 tbsp brown sugar 2 tbsp soy sauce 2 cloves garlic 1 tsp coriander 1/2 tsp cumin Salt and pepper Everything you need to make a great tofu dish. The package of tofu you see here was pitched into the freezer without draining or squeezing before use. It's better to get all of the water out before freezing as described above, if possible. Peanut Sauce: 1/2 cup vegetarian broth, preferably homemade 1/4 cup peanut butter 2 tsp honey Juice of one lime 1 tbsp soy sauce 1/2 tsp red thai curry paste Thai basil Ingredients for peanut sauce. The bowl contains some homemade vegetable stock. Salad: 1 large or 2 small cucumbers ½ small red onion Minced jalapeno pepper, to taste 1 tbsp rice wine vinegar 1 tsp sugar Salt Bamboo or metal skewers; if using bamboo pre-soak the skewers in water for at least 1 hour. Cut the tofu into large chunks and thread the chunks onto the skewers. Cut the shallots and garlic into large chunks and place in a small food processor. Process until minced. Add the rest of the satay ingredients minus the coconut milk. Process until the mixture forms a smooth paste. With the processor running, add the coconut milk in a steady stream. Process until uniform. Place the skewers into a shallow dish and pour the marinade over, turning the skewers to coat. Let the tofu soak for at least 30 minutes, turning occasionally. When soaking the tofu in the marinade, make sure all of the tofu gets wet. Turn and baste periodically. The more marinade you can get soaked into the tofu, the better it will taste. Preheat a hot grill or a broiler. Cook the skewers until tofu is browned around the edges, 4-5 minutes per side. Serve with peanut sauce and cucumber salad. Peanut Sauce Combine peanut butter, lime juice, soy sauce, and honey. Heat broth in a saucepan over medium-high heat. Whisk in peanut butter mixture until uniform and smooth. Place in serving dish and garnish with julienned basil. Serve warm. Cucumber salad Peel cucumber. Cut in half and scrape out seeds. Slice thinly, using a mandoline or a knife. Cut red onion into thin ribbons. Toss cucumber with red onion. Mince jalapeno and add to salad. Combine with salt and sugar and toss. Add vinegar and toss. Let chill for 30 minutes before serving. The satays, peanut sauce and cucumber salad make an excellent starter or hors d'oeuvre for parties. Chickpeas with Cinnamon and Caramelized Onions This dish is based on a similar dish with lentils on the menu at Mama Ayesha's in the Adams-Morgan neighborhood of Washington, DC. 1 tbsp butter or olive oil 1 cup thinly sliced onions 2 cups chickpeas, cooked ½ cup vegetable broth 1 teaspoon ground cinnamon, the highest quality you can find Salt and pepper The chickpeas are flavored with very few ingredients, but the resulting dish is surprisingly elegant. Warm half of fat in a small saucepan over medium heat. Add onions and reduce heat to medium-low. Season with salt and pepper. Cook slowly until caramelized, stirring occasionally, 20 to 30 minutes. In a separate pan, warm remaining fat over medium heat. Stir in remaining ingredients and raise heat. Add more salt and pepper and simmer for 10 minutes. Serve over raisin-almond couscous, topped with caramelized onions. A good accompaniment for this dish is some cooked haricots verts topped with lemon zest. The chickpeas and the couscous, with haricots verts topped with lemon zest. Raisin-Almond Couscous ½ cup raisins ½ cup boiling water 1 cup whole wheat couscous 1 cup vegetable stock 1 tbsp butter or olive oil Salt and pepper ¼ cup slivered almonds Everything you need for the raisin-almond couscous. Couscous is extremely fast-cooking; the whole-wheat version is worth seeking out. Place raisins in a small bowl. Pour boiling water over raisins and let rest until water is cool. Drain raisins, reserving water. Combine water and stock and measure; add additional stock or water to ensure there is 1 ½ cups of liquid. Place in small pot with butter and bring to a boil. Add couscous, raisins and salt and pepper; stir. Bring to a boil again, lower heat and cover. Simmer until all liquid is absorbed by the couscous, about 2 minutes. Remove from heat and allow to stand 5 minutes. Heat a small dry saute pan over medium heat. When hot, add almonds and cook, tossing occasionally, until lightly browned and fragrant. Stir into couscous and serve. Tomato and Zucchini Tart For this dish, I have given basic directions for making a savory tart shell. This shell can be made a day in advance; the dough can also be made well in advance if needed. If you don't want to take the time to make your own pastry shell you can use purchased pie or quiche shells for this dish; just make sure they contain no lard. The look of this tart really pops if your tomatoes and zucchini are the same size. Roma tomatoes tend to be fairly uniform and are slim enough to go with zucchini that aren't enormous (I think slimmer zucchini are tastier). I chose heirloom tomatoes from my area farm market for flavor, which made for a less attractive but more delicious tart. This is one of my favorite dishes that I learned while studying for my culinary degree at L'academie de Cuisine in Gaithersburg, MD. Tart shell (pate brisee): 8oz flour ½ tsp salt 4oz butter, cold 7-8 tbsp ice water Tart filling: ½ cup high-quality extra virgin olive oil 2 cloves garlic Sea salt and white pepper ¾ cup gruyere ½ bunch basil Tomatoes, number depends on size; I used 4 medium tomatoes Zucchini, number depends on size; I used 3 medium zucchini A finished tart shell, alongside the remaining ingredients for the tomato-zucchini tart. I sliced some zucchini rounds extra-thin to use for the center of the tart. To make the tart shell, Measure flour and salt into mixer fitted with paddle attachment. Cut the butter into ¾ inch cubes and add to flour. Cut butter into flour using the mixer on low speed until dough resembles sand. Spoon in water one tablespoon at a time with mixer running, scraping sides periodically, until dough is barely combined. If you are making this dough in humid weather you may need less than 7 tablespoons of water; in extremely dry weather you may need 8 or more. Stop mixer and pull dough onto a floured surface and into a ball. Flatten into a disk, wrap with plastic wrap, and chill 30 minutes (or more). Grease and flour a 2-piece tart pan. Roll out dough on a well-floured surface until it is large enough to overlap pan diameter by ¾". Fold dough into quarters and carefully lift and move over tart pan. Unfold over pan and carefully press dough into pan. Prick finished shell with a fork and weight with pie weights or a parchment paper circle filled with dried beans. Bake in a 350 degree oven until barely brown around upper edges; remove weights or parchment and beans and continue to bake until the shell is barely cooked through on the bottom. To finish tart, mince garlic, julienne basil and shred cheese. Slice tomatoes and zucchini thinly; try to keep the slices as uniform as possible. Combine oil, garlic, and seasonings. Line tart shell with half of cheese. Add half of basil. Brush vegetables with seasoned oil and layer in tart. Here you can see the prebaked tart shell has already been brushed with seasoned oil and sprinkled with cheese and basil. Start layering the oil-brushed vegetables carefully. You can do equal numbers of zucchini and tomato slices, or you can use different proportions of sliced vegetables. I used two slices of zucchini for each tomato slice. Brush top of vegetables with more oil. Sprinkle with remaining basil, season, and add remaining cheese. Bake tart at 350 degrees until zucchini is soft, 8-10 minutes. I served this tart with a salad and some cold chickpeas tossed with vinaigrette and some diced vegetables. A summery vegetarian meal, clockwise from front: tomato-zucchini tart, chickpeas in vinaigrette, a salad and salad dressing. The tart is quite versatile; serve a thin wedge alongside a small salad as a starter, bring it along on a picnic, eat it hot or cold. It's good no matter how you serve it. An Indian Menu, from Suvir Saran I asked Suvir Saran, moderator of the India and Indian Cuisine board on eGullet, to contribute some Indian recipes to this course. Indian cuisine is heavily influenced by the vegetarian diets of a large percentage of the Indian population, and Indian restaurants are popular destinations for vegetarians living in the US and the UK. Here are the three recipes he gave me, which can be served separately or together. The components of a great Indian meal: rice pilaf with peas and potatoes, a multi-lentil dal, and cucumber raita Rice Pilaf With Peas, Potatoes And Whole Garam Masala Tahiree Suvir's Notes: I inherited this dish from my father’s side of the family who came from the state of Uttar Pradesh in the north of India. (Garam masala of this blend is a typically north Indian spicing.) Panditji used to make it for our family when we needed a break from rich foods: it is both refreshingly clean tasting and savory because there is very little oil in it and the spices nonetheless add great flavor. Growing up, we ate this with a simple onion and tomato raita, lots of papadum and a green chutney with mango. Now I put out some yogurt and tomato chutney with the rice and that’s it. It can also be served alongside most other dishes and will enrich most any menu. I also make this with cauliflower in place of potato, or even with both – use the smallest head of cauliflower you can find and cut it into medium florets. 2 cups basmati rice 4 1/2 cups cold water 3 tablespoons canola oil 1 inch cinnamon stick 3 whole, dried red chilies 4 green cardamom pods 1 teaspoon cumin seeds 8 whole cloves 10 black peppercorns 2 medium red, boiling potatoes (about 3/4 pound), peeled and cut into 1/2-inch squares 3/4 teaspoon turmeric 1 fresh, hot green chili, stemmed and cut into half lengthwise (optional) 10-ounce package frozen peas 1/4 teaspoon cayenne pepper 3/4 teaspoon garam masala 1 1/2 teaspoons salt 1/4 cup chopped fresh cilantro Preheat the oven to 350 degrees. Combine the rice and water in a bowl and soak for 20 minutes. Drain the rice and reserve the water separately. Combine the oil, cinnamon, red chilies, cardamom, cumin, cloves and peppercorns in a large, oven-proof casserole over medium-high heat. Cook, stirring, until the cinnamon unfurls, 1 to 2 minutes. Frying the spices for the rice in oil. This technique is used for all three Indian recipes. Add the potatoes and cook, stirring, until the edges are translucent, 3 to 4 minutes. Add the turmeric and green chili and cook, stirring, 30 seconds. Add the peas and cayenne and cook, stirring, for another minute. Add the drained rice and cook, stirring, about 1 minute. Adding the rice in with the other ingredients. It's important to stir so the peas and the rice are distributed. Add the garam masala, salt and reserved soaking water and bring to a boil. Give the rice a stir. Then turn the heat down and simmer vigorously, covered, until the water is entirely absorbed and the rice cooked through, about 10 minutes. 5 minutes into the cooking, uncover and stir gently (so as not to break the rice) to distribute the potatoes and peas evenly throughout. Put the casserole in the oven and bake 10 minutes. Then remove from the oven and let rest 5 minutes at room temperature. Sprinkle with cilantro and serve hot. Mixed Dals With Tomato, Garam Masala And Curry Leaves Panchkuti Dal Suvir's Notes: In India, we would cook this dal for a special party or fancy weekend dinner. I like to think that the idea of combining five different dals in one recipe may come from a tradition that women follow in India of wearing a grouping of five jewels – emeralds, rubies, sapphires, diamonds and jade. You can substitute dals in this recipe, choosing only two or three out of the five (just be sure to end up with a total of 2 1/2 cups) or use one dal alone but the combination of different dals gives this dish a particularly rich and deep flavor. And the use of two tempering oils weaves in a complex layering of spice. Rochelle's Notes: I was unable to source curry leaves and asafetida, so I prepared the dal without them. I used yellow split peas and tiny orange lentils instead of the full assortment of lentils. The resulting dish is aromatic and scrumptious. 1/2 cup pink, split lentils (dhuli masoor dal), picked over, washed and drained 3/4 cup yellow split peas (channa dal), picked over, washed and drained 1/2 cup yellow mung beans (moong dal), picked over, washed and drained 1/2 cup yellow lentils (toor dal), picked over, washed and drained 1/4 cup hulled black gram beans (urad dal), picked over, washed and drained 8 cups water Salt 1/2 medium red onion, finely chopped 1/2 tablespoon garlic paste (2 to 3 cloves, mashed) 2 fresh hot green chilies, minced 1 tablespoon garam masala 1/2 tablespoon ground cumin 1/2 tablespoon ground coriander 1 teaspoon turmeric 1 teaspoon cayenne pepper 1 1/2 cups chopped fresh or canned tomato 1 tablespoon fresh lemon juice 1/2 bunch fresh cilantro leaves (about 1 cup firmly packed leaves), chopped TEMPERING OILS 4 tablespoons canola oil 6 fresh or 10 frozen curry leaves, torn into pieces 1/2 tablespoon garlic paste (2 to 3 garlic cloves, mashed) 1 1/2 medium red onions, finely chopped 1 inch cinnamon stick 1 teaspoon whole cumin seeds 1 teaspoon black mustard seeds 3 whole cloves 1/8 teaspoon asafetida (optional) Put all of the lentils in a large saucepan with the water and 2 teaspoons salt. Bring to a boil and skim well. Add the onion, the garlic paste and the chopped green chilies. Turn the heat down and simmer, partially covered, until the dal are tender, about 25 minutes. Add the garam masala, cumin, coriander, turmeric and cayenne and give the dal a stir. Simmer, partially covered, 5 more minutes. Add the tomatoes and simmer 15 more minutes. Stir in the lemon juice, half of the fresh cilantro and taste for salt. For the tempering oils, combine 3 tablespoons of the oil, the curry leaves and the garlic paste in a small saucepan or kadai over medium-high heat until you smell the garlic, about 30 seconds. Add the onion and cook until it turns translucent, 1 to 2 more minutes. Scrape this into the dal. Heat the remaining tablespoon oil with the cinnamon stick in the same saucepan or kadai over medium-high heat. Cook, stirring, until it unfurls, 1 to 2 minutes. Add the whole cumin and mustard seeds, the cloves and the asafetida and cook, stirring, until the mustard seeds crackle, about 1 minute. Dump this mixture immediately into the dal and stir. Let stand a few minutes to infuse the dal with the perfumed oil. Spoon into a serving bowl and sprinkle with the rest of the cilantro. Serve hot. Cucumber Raita Kheere Ka Raita Suvir's Notes: This is the most common raita in India and one that is probably familiar to most Americans. Cucumbers are particularly cooling to the palate in the heat of the summer. As a child, I remember feeling comforted if I could at least find a cucumber raita on a restaurant menu – the others all looked too exotic! My version of this well known salad is a pachadi, that is, a southern Indian style raita tempered with a spiced oil. To simplify, omit the tempering oil, and add some crushed black peppercorn, pinch of cayenne and a pinch of garam masala. Rochelle's Notes: The simplified version of this dish described above is delicious, especially if made with a high-quality whole-milk yogurt. 2 1/4 cups plain yogurt 1 large cucumber, peeled and shredded 2 fresh, hot green chilies, seeded and finely chopped TEMPERING OIL 2 teaspoons canola oil 1 teaspoon black mustard seeds 1 teaspoon hulled, black gram beans (urad dal) 12 fresh or 16 frozen curry leaves 1/2 teaspoon asafetida 1/4 teaspoon salt, or to taste Whisk the yogurt in a bowl until smooth and lightened. Add the shredded cucumber and the green chilies and stir. In a small frying pan or kadai, combine the oil, mustard seeds, dal, curry leaves and asafetida over medium-high heat and cook, stirring, until the dal turns a golden brown color, 1 to 2 minutes. Pour over the yogurt and mix well. Chill well and stir in the salt just before serving. Resources The Web is full of resources for vegetarians and those who feed them. One of the best resources is VegWeb (www.vegweb.com), whose archive of vegetarian and vegan recipes heavily influenced my menu planning. The Vegetarian Resource Group offers many informative articles on their website (www.vrg.org). VegSource (www.vegsource.com) also provides an impressive index of recipes. There are several vegetarian magazines on the market. These magazines tend to be heavy on natural health and environmental subjects as well as offering recipes and other food-related articles, and they are generally not chef-driven. Vegetarian Times (www.vegetariantimes.com) is probably the best-known of these publications. Veggie Life is also available on many newsstands, and Natural Health covers many vegetarian subjects within its pages. I have found these publications to be long on healthy food ideas and short on tasty food ideas, but they are worth scanning for the occasional menu concept (especially for newer vegetarians). Books are probably the best resource for vegetarians and those who feed them. The single best book on the market is Deborah Madison's Vegetarian Cooking for Everyone, which is a treasure trove of advice on preparing whole grains, vegetables, and other vegetarian foods in delicious and authentic form. I am also fond of Madhur Jaffrey's World Vegetarian, a book which gleans some of the best vegetarian dishes from global cuisines. The Moosewood Collective, worker-owners at the Moosewood Restaurant in Ithaca, NY, publishes some of the most-recognized and best-selling vegetarian cookbooks. Mollie Katzen's Moosewood Cookbook, a germinal volume originally published in 1977, was not published by the collective but was responsible for raising the awareness of vegetarian cuisine in the US. This was the first vegetarian cookbook I owned, and I cooked my way through most of it in the early years of my vegetarianism. It is a good resource for starting vegetarians. I have had limited success with subsequent Moosewood cookbooks, but they have many fans in the vegetarian population and are worth investigating. +++ Rochelle Reid Myers is a graduate of L'academie de Cuisine in Gaithersburg, MD. While a student at L'academie, she learned French techniques with fruits and vegetables, and she gained an appreciation for the importance of seasoning and cooking with fat. She was a lacto-ovo vegetarian for nearly a decade and currently maintains a meat- and fowl-free kitchen. She resides in Takoma Park, Maryland, where she purchases most of her food from a vegetarian co-op and a local farmer's market. >> Please post your questions here >>
-
Please post questions here that relate to Rochelle Reid Myers's presentation, "Vegetarian Cooking for Everyone."
-
James Villas: Extracts from Between Bites James Villas’ memoir recounts his experiences of life, love, and libations beginning with 1961 cross-Atlantic trip to France and spanning over the next 40 years. The author offers vignettes of his intimate relationships with the famous personalities who have impacted his admittedly unconventional views of the evolution of cuisine. With his southern storyteller’s warmth and humor, he chronicles his own hedonistic adventures, including these three extracts. "Between Bites - Memoirs of a Hungry Hedonist" was published by Wiley in May, 2003. Editor's note: "Craig" mentioned in the extract below, is the late Craig Claiborne, Food Columnist for the New York Times and author of numerous books. He was a good friend of the author and they used to cook together in the Hamptons. "Don" is Don Erickson, who was the executive editor at Esquire. He mentored James as a young food writer. "Pierre" is Pierre Franey, a French chef who became famous as the chef of Le Pavillon restaurant in New York City from 1945 to 1960. While I'm the first to credit Craig as being one of the most brilliant, exacting, and dedicated journalists I've ever known, it's also true that this legend who taught America so much about cooking was himself not a very accomplished cook and would never have attained such heights of success had Pierre (and other professional chefs) not been at the stove. Not that Craig couldn't turn out a perfect breakfast omelette or, so long as he followed a recipe to the letter and was given plenty of time, produce delicious moules marinieres, a correct osso buco, and genuine chili con carne. What he lacked was Pierre's natural instincts for the mechanics of cooking, the ability to conceptualize a dish and bring about its execution deftly, comfortably, and with a sense of total control. From vast exposure to good food, Craig generally knew whether a dish was right or wrong-and he could explain in detail the reasons why-but when it came to actually reproducing a brandade de morue, chicken Pojarski, or even Brunswick stew, the amount of time he would spend analyzing the recipe, his nervous assemblage of components' and his awkward cooking gestures betrayed an insecurity in the kitchen that could have translated into serious problems without the help of the experts who usually surrounded him. Nor was Craig's interpretation of certain dishes always as valid as implied in some of the recipes he published, as when he once decided to reproduce authentic North Carolina chopped pork barbecue after a trip to Goldsboro and stubbornly insisted on using two loins instead of fatty shoulders and on cooking the meat in the oven. "But Craig, you can't use loin," I protested when he called to tell me his plans for a dish I was weaned on. "The flavor and texture will be all wrong, and the meat's got to be slowly roasted somewhere over hickory or oak coals and mopped with sauce-even if it's an ordinary kettle grill. " No amount of argument could convince him. Shoulder had too much fat for health-conscious readers, he insisted, and there'd be too much waste. He wasn't about to dig a pit outdoors, nobody wanted to go to all the trouble. of searching for wood chips, and besides, he had figured out exactly how he could barbecue lean pork loins in the oven for five hours at 250° degrees, then simulate a smoky flavor by placing the roast for a while on a charcoal grill. Suffice it that, in utter frustration and near anger, I finally capitulated and left him to pursue his fantasy. In late afternoon on the day of the big feast, scheduled at 8:00 P.M. and attended mainly by non-Southerners, he called to say that the barbecue looked and smelled "fantastic" and asked if I'd mind driving over with my hatchet so he could chop it properly. When I arrived at the back door, Craig, smiling proudly, offered a piece of meat he'd pulled off for me to taste. "That's delicious roast pork, some of the best I've eaten," I declared truthfully, "but it's not Carolina barbecue." "Oh, you're just a prejudiced Tarheel from the western part of the state," he mumbled, slightly wounded by my candid verdict. "My version is like the eastern -style barbecue they do in Goldsboro." Since the damage has been done, I determined not to pursue the matter, nor to ask why traditional Brunswick stew and hush puppies were not on his menu along with what turned out to be a credible barbecue sauce, delectable cole slaw and potato salad, and exemplary pecan pie. Then came the ultimate shock after all the excited guests were seated. To wash down all this earthy Southern food was not standard iced tea, or beer, or even water, but. . . French champagne! I truly thought this man from Mississippi had lost his mind. Still, I held my tongue as Craig and the others relished the food and bubbly with imperceptive glee, just as I bit the bullet of professional friendship when Craig ended the feature he soon published with a little more than poetic license: "It so happens that James Villas, food editor of Town & Country, is a good friend and neighbor, a native North Carolinian, and, if you will pardon the expression, a barbecue freak. I invited him over for a sample, and he pronounced my barbecue the best home-cooked version he had ever sampled. That is high praise." To point out a few of Craig's salient limitations might seem scabby and disrespectful, the only justification being that his flawed example taught me that an eminent food journalist need no more necessarily be a master chef than an acclaimed connoisseur of Bach is expected to perform the composer’s preludes and fugues with immaculate precision. Even after some formal training, I knew at an early stage in my career that I would never become—nor aspire to be—a gifted chef, a realization that might well have affected my ambitions and abilities as a food writer had I not witnessed how Craig Claiborne dealt so naturally and sensibly with the issue. My Authentic Carolina Chopped Pork Barbeque (Serves at least 8) The Barbecue One small bag hickory-chips (available at nurseries and hardware stores) One 10-pound bag charcoal briquets One 6- to 7-pound boneless pork shoulder (butt or picnic cut), securely tied with butcher's string The Sauce 1 quart cider vinegar 1/4 cup Worcestershire sauce 1 cup catsup 2 tablespoons prepared mustard 3 tablespoons light brown sugar 2 tablespoons salt Freshly ground pepper to taste 1 tablespoon hot red pepper flakes Soak 6 handfuls of hickory chips in water for 30 minutes. Open one bottom and one top vent on a kettle grill. Place a small drip pan in the bottom of the grill, stack charcoal briquets evenly around the pan, and ignite. When the coals are gray on one side (after about 30 minutes), turn them over and sprinkle 2 handfuls of soaked chips evenly over the hot coals. Situate the pork shoulder skin-side up in the center of the grill about 6 inches directly over the drip pan (not over the hot coals), lower the lid, and cook slowly for 4 hours, replenishing the coals and soaked chips as they burn up but never allowing coals to get too hot. Turn the pork, lower the lid, and cook 2 hours longer. Meanwhile, prepare the sauce by combining all the ingredients in a large, nonreactive saucepan. Stir well, bring to the simmer, and cook for 5 minutes. Remove from the heat and let stand for 2 hours. Transfer the pork to a working surface, make deep gashes in the meat with a sharp knife, and baste liberally with the sauce. Replenish the coals and chips as needed (maintaining a low heat). Replace the pork skin-side-down on the grill, and cook for 3 hours longer, basting with the sauce from time to time. Transfer the pork to a chopping board and remove the string. Remove and discard most (but not all) of the skin and excess fat and chop the meat coarsely with an impeccably clean hatchet, Chinese cleaver, or large, heavy chef's knife. Add just enough sauce to moisten the meat further, toss till well blended, and either serve the barbecue immediately with the remaining sauce on the side or refrigerate and reheat in the top of a double boiler over simmering water when ready to serve. (The barbecue freezes well up to 3 months.) Serve the barbecue (plain or on a hamburger roll) with Brunswick stew, cole slaw, and hush puppies. When it came to his writers, Don took everything personally, even to the point of criticizing work of mine he happened to notice in other magazines. "Your Jovan piece is a knock-out, and it's good to see you so deft in conveying character," he once began a letter on a profile I'd done on a famous Chicago restaurateur. "I have to be honest and say that you've written the best words of your descriptive career for someone else and not for me. They are, of course, 'cushioned tirades.' I wonder if you know how good that is. But you don't get away unscathed. Your editor should have seen that 'individual (kitchen) duties strictly defined' and 'working as a team' are not, as you would have it, two different things necessarily. And I think' nefarious' is the wrong word for the place you've put it." Such frank, unsolicited memos from Don arriving out of the blue became routine, pithy commentaries that he simply felt compelled to write and that, perhaps more than anything else, taught me what a truly dedicated editor and friend are all about. Although Don was as obsessed as Alexandre Dumaine with classic French cuisine and revered every recipe Julia Child ever composed or demonstrated on TV, this hardly meant that he was not interested in and receptive to any gastronomic topic that might make a substantial impact in the magazine. As a result, over the next few years I produced a slew of articles that were as disparate in subject as they were often controversial in nature. Under Don's weighty influence and guidance, I wrote about making my own wine, working undercover at a fancy French restaurant, the joys of eating raw meat, menu ripoffs in restaurants, college cafeteria slop, the horrors of yogurt, Carolina pig versus Texas beef barbecue, how stupid government regulations were destroying great country hams, and the evils of the martini. "Fried chicken!" I remember hearing someone yell in the distance. Looking across all the roaring traffic to the other side of a busy midtown street in Manhattan, I spotted Don rushing somewhere with Nora Ephron, his hands cupped at his mouth. "Fried chicken!" he repeated loudly. "Do fried chicken! We'll talk later." And that's how I was assigned an article that almost brought on a second Civil War and, thanks to Don, was so unorthodox in style that it was eventually anthologized in a number of college textbooks. Obviously, the subject of fried chicken had been mulling in his brain for weeks. I’m bored to death with dull, formulaic food writing," he exploded when we sat down to discuss what he wanted. "Let's really break some balls in this piece, take a definitive stand, and present it in a way that keeps the reader guessing what in hell is going on." This, he explained, would mean first setting myself up daringly as the world authority on fried chicken, followed immediately by the in-depth, perfect recipe itself, followed by an intricate analysis of the recipe details, followed finally by a scathing attack on what's wrong with all other fried chicken. In other words, everything in reverse. This also meant demonstrating for Don himself the entire cooking procedure, from actually cutting up the chicken to seasoning and battering to frying and draining on paper bags-all before I committed one word to the page. And to pass this initial test, which would prove to him without any doubt that I really knew what I was writing about, nothing would do but for me to show up in his small, nondescript apartment in Greenwich Village at the crack of dawn with three whole chickens, the right heavy cast-iron skillet, the right styles of shortening and flour, the right seasonings and buttermilk, and of course, the exact right paper bags for shaking and draining the chicken. Suffice it that by eight o'clock A.M. in that tiny, unventilated kitchen, I had cooked up some twenty-four pieces of golden, moist, crisp-skinned chicken, three of which Don devoured with approval for breakfast before heading for the office. As for myself, I couldn't face eating fried chicken again for months. The Quintessential Southern Fried Chicken (Shortened Version) (Serves 4) One 3-pound fryer chicken, preferably freshly killed 3 teaspoons salt Freshly ground pepper to taste 3 cups buttermilk 1/2 lemon, seeds removed 3 cups (1 1/2 pounds) Crisco shortening 1 1/2 cups all-purpose flour 1/4 cup bacon grease Cut the chicken into 8 serving pieces, rinse the pieces under cold running water, dry thoroughly with paper towels, and season with 1 teaspoon of the salt plus pepper. Pour the buttermilk into a large bowl and squeeze the lemon into it. Add the chicken pieces to the bowl to soak, cover with plastic wrap, and refrigerate for at least 2 hours. Remove the chicken from the refrigerator and allow to return to room temperature. While melting the shortening over high heat to measure 1/2 inch in a large cast-iron skillet (add more shortening if necessary), combine the flour, remaining salt, and more pepper in a heavy brown paper bag. Remove the dark pieces of chicken from the milk, drain each momentarily over the bowl, drop into the bag, and shake vigorously to coat. Add the bacon grease to the skillet and when small bubbles appear on the surface, reduce the heat slightly. Remove the chicken pieces from the bag one by one, shaking off excess flour, and using tongs, lower them gently into the hot fat. Arrange the pieces of dark chicken in the skillet so they cook evenly, reduce the heat to moderate, and cook for exactly 17 minutes. Reduce the heat slightly, turn the pieces with the tongs, and fry for 17 minutes longer. Quickly repeat all procedures with the white pieces of chicken, adjusting the heat as necessary and frying exactly 15 minutes on each side. Drain the chicken on a second brown paper bag for at least 5 minutes, transfer to a serving platter without reheating in the oven, and serve hot or at room temperature. By ten o'clock, the Long Island sun is blazing. Our buckets overflowing with exquisite berries, Mother and I return to the rough country road to pay the farmer for our bounty, then drive to my home on the south fork so she can begin immediately to make the preserves that will last us through the year and help fill all her holiday gift packages. For years at home in North Carolina, Mother was never at a loss for relatives to participate in this annual summer ritual. But time passes, people disappear for one reason or another, and today there's only Mother and me left to carry on a tradition that is as sacred to her as making fruitcakes for Christmas. Of course every June when she comes to visit me on Long Island, she complains about her stiff knees and. weak hands and threatens not to go strawberry picking. Then, after she rages about the poor quality and outrageous prices of market berries, prompting me to suggest that we just ride over and check the northfork field, she inevitably forgets her ailments and off we go. "I need a drink," she announces in the kitchen, reaching for the Bloody Mary mix while I begin rinsing some ten quarts of strawberries and placing them on paper towels spread out over every inch of counter space. "Now, sort them carefully, honey, and make sure the ones for preserves are firm and the same size," she instructs as if I hadn't been through the procedure a hundred times over the years. She then opens a new package of pectin, measures cups of sugar, and takes a big slug of her restorative libation. Cooking strawberries for preserves is a very serious and private affair for Mother, and nobody, not even my neighbor Craig Claiborne when he was alive, would ever risk distracting her. Once the hulled berries are in a big kettle and the first measurement of sugar is added, I step away as she brings the mixture very slowly to a boil and begins stirring attentively with a large wooden spoon. More sugar, a little lemon juice, a slight heat adjustment, then further careful stirring as she quietly watches the berries gradually yield their juices, blend with the melted sugar, and almost magically turn a deep, glistening red. Her concentration is intense. "Quick, help me move this pot off the heat," she suddenly directs, lifting one side of the large vessel up before I can grab the other side. "I thought you said you had no strength left in your hands," I jest. "Hush. I don't have time to think about that now," she huffs, stirring pectin into the mixture. "Have you got those bowls ready?" Together we slowly pour the hot berries into two large mixing bowls, after which Mother begins the tedious but important task of skimming foam off the tops so that the preserves will not be cloudy. "Here," she says, handing me the spoon, "stir them steadily till they cool slightly and begin to thicken. I'm dead." She wipes her hands on her apron and reaches for her drink. Quite often, the cooled strawberries must stand overnight so that they will jell and plump enough to remain in suspension when preserved. After we've had lunch and taken well-deserved naps, however, Mother determines by early evening that the texture and consistency of the berries are already ideal, rousing her to begin sterilizing half-pint canning jars and lids in a steaming water bath while I melt paraffin in a saucepan. At one point, she drops a lid on the floor and asks me to pick it up, complaining about how she can't bend down that far. "Sometime I'd like to drop a hundred dollar bill on the ground and watch you scramble for that!" I jeer. "Smart aleck," she mumbles, popping me on the rear. As I ladle luxurious preserves into the jars, Mother, with her experienced and expert touch, pours hot paraffin over the tops, slowly tilts each jar back and forth till the waxy substance begins to set and seal every edge, and caps each with a lid and ring band as a precaution against any improbable but always possible seepage. We then take each jar and apply a label that reads "From Martha's Kitchen." "Pretty, aren't they?" Mother comments quietly, standing back with her tired hands on her hips and surveying the twenty-odd jars lined up across the counter. "But Lord, that's a lot of work and . . . well, honey, I really do think my strawberry-picking days are over." Playfully I put my arm around her broad waist, tell her not to be so ridiculous, and suggest that she go change clothes so I can take her for a good dinner. Outside, the warm setting summer sun now filters gently through the towering oak trees, and as I gaze wistfully at this season's fresh, brilliantly red preserves that will bring such happiness to so many, I'm once again seized by all sorts of confused childhood, adolescent, and even recent nostalgia pertaining to the lady known to family as Martha Pearl, to friends simply as Martha, and to me as Mother, Missy, Big Mama, and, when she gets particularly overbearing, Brunhilde. Although this piece refers to strawberries, you can use the same technique to make peach preserves, which are now in season Peach Preserves Frankly stated, most people familiar with Mother’s pickle and preserves agree that there are no peach preserves on earth that can touch the ones she makes with Southern Elbertas each and every summer. They are undoubtedly my favorite of all her preserves, and there’s never a time when my basemetn shelves in East Hampton are not loaded with jars aging up to nine months. As I have learned by making the preserves repeatedly with her, the secret is impeccably fresh, firm, sweet peaches that are allowed to cook very slowly in syrup that must be watched carefully for just the right thickness. Martha Pearl Says: To test the thickness of the syrup in these preserves, I spoon about a tablespoon of the hot liquid onto a saucer and place it in the freezer for about 5 minutes. If the syrup is not ready, it will be thin and runny. Ingredients: 3 pounds fresh, firm peaches, peeled pitted and sliced ¼” thick 6 cups sugar Procedure: In a large pot, combine the peaches and sugar, cover, and let stand overnight to allow the peaches to leach out and moisten the sugar. The next day, bring the mixture slowly to a boil, stirring frequently, then reduce the heat slightly and cook till the fruit is clear and the syrup is thick, about 40 minutes. Spoon the peaches into hot, sterilized jars, seal, and store in a cool area. Refrigerate after opening. Post your questions here -- >> Q&A
-
Please post questions to James Villas here.
-
Hal MacGee wrote somewhere that the brain gets fatigued easily with a taste sensation and "switches off" to some extent, reducing the intensity of the flavour. If true, is this something one should vector into a menu design?
-
Menu Planning By Janet A. Zimmerman (JAZ) Introduction "Planning a menu" can mean several different things, depending on whom you're talking to. Some cooks think of menu planning as something that only occurs on special occasions, while others plan menus for several days or even weeks before shopping for the ingredients. Factors to consider in menu planning can range from whether the meal is nutritionally balanced to how a meal looks and tastes to how easy it is to serve to a crowd. The first consideration, nutritional content and balance, is not something I'll address here. Later on I'll discuss the logistics of various types of meal service and menus, but for the most part, this class will concentrate on the gustatory elements of menu planning: how to design a meal that tastes good from beginning to end. For me, menu planning starts with analyzing individual recipes or dishes in terms of flavor profiles and textural elements. Trying to combine dishes into a complete menu without understanding what each contributes to the whole is likely to result in a haphazard collection of food, rather than a progression of complementary dishes. And although there are plenty of times when my "menu planning" consists of opening the refrigerator and pulling out whatever lies within, I try not to inflict that process on my dinner guests. Taste and texture Some of the elements of taste to think about are 1. how strong the flavors are, and how complex; 2. whether one taste dominates or several blend together; 3. and which of the basic tastes (sweet, salty, sour, bitter and umami if you’re inclined to treat that as a separate taste) are present. This last part is crucial, because the basic tastes interact and influence your palate in very definite ways. Overt sweetness tends to dull the palate; acid tends to "wake it up." A little salt can whet the appetite, but too much is deadening. Likewise with bitter tastes -- a little bitterness can be a great palate cleanser, but too much can overwhelm it. Aside from the basic tastes, you should keep in mind that very strong flavors -- garlic, some herbs and spices, very ripe cheeses -- can also overwhelm the palate, which can mean that too much of them too early in the menu will lessen your ability to appreciate what comes after. Textural elements include 1. how rich the dish is; 2. the acid content (which plays a crucial role in the mouthfeel of the dish); 3. whether the dish is crunchy, smooth, chewy or crisp (to name just a few of the possible textures); 4. and a whole host of sensations known as "chemo-sensory irritations" -- the burn of chiles, the heat of mustard or horseradish, the bite of mint and the tingle of carbonation (in drinks). Probably the most important textural element is the balance of fat and acid, not necessarily within each dish, but within a menu. Fats and oils are wonderful ingredients -- they carry flavor, provide a nice "mouthfeel" and give one a sense of satiety. But too much of this very good thing can be cloying and seem to coat your mouth most unpleasantly. Too much acid alone is likewise just nasty. But a touch of acid to cut through the fat (or a bit of fat to round out the acid) provides a balance that works. It's one of the reasons that a simple salad with a tangy vinaigrette is so often served (at least in France) between a heavy meat course and a rich cheese course. Another element to consider when planning a menu is the complexity of each of the dishes. If you have a very complex main dish – either one with several elements or one with multiple layers of flavor, you might want to consider serving simpler starters or side dishes. For example, if I’m making chicken breasts with a reduction of vermouth and orange juice and finished with cherry tomatoes and capers, I probably don’t want to serve it with a gratin of potatoes and cheese or a complicated risotto. If I really want to make the risotto or the gratin, I’ll be better off going with a simpler roasted chicken. Something you've probably noticed is that many of the "main" ingredients we work with as cooks are relatively neutral in taste and malleable in terms of possible textural elements. That is, chicken, beef, tofu, pasta or potatoes can be prepared in very different manners, which will give them different flavor profiles and different textures. Crispy fried chicken will thus suggest different accompaniments than will, say, Thai chicken curry or rolled, stuffed chicken breasts. Once you've analyzed your individual dishes for these components, you can begin to combine them into a menu. Balance, continuity and contrast From a gustatory standpoint, a well-designed menu does two things: • It stimulates the palate but doesn't confuse it. • It provides a sense of continuity but keeps one's interest with contrasting elements. Continuity is something that often seems to get lost in many American menus. We draw upon so many different ethnic cuisines that it can be difficult to stick to one (witness the disaster called fusion food). Consider the following menu: First course: Thai-influenced chicken soup, made with coconut milk and garnished with peanuts Second course: Salad of sliced tomatoes and fresh mozzarella topped with basil. Third course: Lamb skewers with mint yogurt sauce It's not that any of these dishes were bad on their own. But going from Thailand to Italy to the Middle East is a dizzying journey in the space of one dinner. Unless you have a very good reason, stick with one general cuisine type throughout the dinner. Also for continuity’s sake, it's best to stay with what's seasonal. This doesn't mean that I won’t use tomatoes in the winter, but it does mean that I try to stick with dishes that "feel like" summer, or winter (or whatever season) or are at least neutral on that front. Following a spiced pumpkin soup with pasta primavera, for example, is disconcerting to the diner. Before I started to pay much attention to this sort of thing, I served the following menu to some friends. I had fallen into a trap: I really, really wanted to try out a new idea for a salad; but at the same time I'd had a request from one of the guests to make one of my "signature" dishes, beef braised with onions and porter; and I tried to do both. So to start, I had an Italian salad with several types of peppers (including some with a little heat), cherry tomatoes, onion, and olives, garnished with basil. I then followed it with the beef, which I served with mashed root vegetables. Thus, with one menu, I broke both of the continuity rules. The salad was summery and Mediterranean, while the beef dish (Belgian, incidentally) had a much more fall or winter feeling to it, as did the root vegetable mash. No one complained, but it struck me quite forcefully during the dinner that I'd made a big mistake. It wouldn't have been tough to remedy. I could have kept the salad but switched to a more Mediterranean preparation for the beef -- braised in wine with tomatoes and onions, perhaps. Or, as I've since done, I could have begun with a cabbage salad with carrot and apple, dressed with a warm caraway-studded vinaigrette and garnished with toasted pecans and crumpled crisp bacon. Finally, think about the level of (for lack of a better word) sophistication of the dish. If you start out with foie gras on savory french toast or caviar and creme fraiche on new potatoes, it's probably better to stick with something on that level, rather than following with a country stew. Such a stark change can be an unwelcome break in the continuity of your meal. And it's just as true in reverse -- if you start out with a more rustic dish, you don't want to follow it up with a lobster thermidor (if people actually make that anymore). The good news is that it's pretty easy to give minor tweaks to many dishes to move them up and down the sophistication scale. Okay, so you want some elements of continuity in any menu. But, naturally, a menu that has no contrasting elements will fail just as miserably as one with no continuity. Of course you can provide contrast with flavor combinations. And textural components that involve the way food breaks against the teeth -- whether it's crunchy or smooth, crispy or chewy -- should provide plenty of contrast. No one wants a meal that's uniformly smooth and creamy, or so unrelentingly crunchy that it seems more like a dental exercise than a dinner. But I think that the most crucial type of contrast in a menu is the balance between rich, creamy, fatty foods and acidic or bitter components. Let me illustrate the point with this menu: First course: Cream of portobello mushroom soup garnished with a chevre/creme fraiche mixture Second: A caesar-type salad (no egg in the dressing, but very thick) with parmesan and croutons Third: "Pan roasted" chicken breasts with sauteed mixed mushrooms folded into a sherry cream sauce, served with polenta enriched with cheese and butter Dessert: an apple and cherry galette topped with cinnamon ice cream The main flaw with this menu is the sheer volume of rich dairy products. Too much, and too much the same: cream, cream and cheese in the first course; cheese in the second; cream and cheese again in the third and ice cream in the dessert. Not only is the menu incredibly filling, there's no break for the palate: it starts out with major rich and creamy elements and every course repeats them. Overall, even though the dishes themselves may taste fine, the menu is just like a hike across a not terribly scenic plateau: no ups and downs and no relief in sight. Can it be fixed? It can certainly be improved with some modifications. If you really want the soup, fine, but maybe garnish it with herbs to refresh or some crisped prosciutto (which, yes, is rich, but not creamy, and which would at least add some texture). Then go on with a salad dressed with a tangy vinaigrette. Some bitter greens or maybe toasted walnuts would also help to refresh the palate after the soup. For the next course, well, if you were set on the mushrooms, then roast them and use them as a base for the chicken breasts (I'd ditch the cheese and cream in the polenta too). A pan sauce with a little sweetness and acid could make the dish much more interesting, and if you felt the need for some fat, you could still enrich it with a little butter without repeating the creamy mouthfeel of the soup. Progression of dishes In most cuisine traditions, menus progress from subtler to more intense flavors, from light to heavy mouthfeel, and (often) from cold to hot dishes. The traditional French haute cuisine menu progression from fish to poultry to red meat may be cliché now, but there are valid reasons for it. As I mentioned previously, too many aggressive flavors can overwhelm the palate, lessening the impact of what comes after. Rich, heavy dishes early in the menu can satiate the diner too soon. Also, think about this: you want your guests to stay interested in your dinner all the way to the end. If you start out with a showstopper, chances are that your next course will disappoint. Which is not to say that your hors d'oeuvre or first course can't be exquisite; it certainly can be. But it should function as does a good opening chapter in a novel: it draws you in, but leaves you wanting more. Dinner styles Before planning your menu, you'll need to decide the format of your dinner: buffet, family style, serial courses, or some combination of the three. A buffet is, from a service standpoint, the easiest of the three to pull off for a large crowd. From a practical point of view, a buffet works well for a group with differing dietary needs. If your guests include some vegetarians, a cardiac patient, and an Atkins practitioner, a buffet with some dishes that each of them can eat could be your answer. The larger the group of guests, the harder it can be to plan a sequential dinner where the guests can all eat each of the courses. The drawback to a buffet is that since your guests will be eating the various dishes all more or less at the same time, the progression of courses is all but non-existent. Thus you're going to want to prepare a menu of dishes that taste good together, or at the very least, don't clash with one another. A family style dinner shares some of the elements of a buffet dinner in that your guests can take what they want and skip what they don't. They won't necessarily eat everything together, but the sequence of dishes is not guaranteed. A modified family style dinner can start out with a plated first course (soup, for instance, or a composed salad) and continue with the main course served family style. Such a dinner requires a bit more time for service than does a buffet, but not too much. It gives you some control over the sequence of dishes, but not absolute control. A dinner with serial courses (usually plated) is the most labor intensive, from the standpoint of service. It also allows (or requires, depending on your viewpoint) you to plan the sequence of dishes with a great deal of control. It will put your guests in the position of not being able to skip any of the dishes without being obvious, so it can lead to some awkwardness if they have any dietary restrictions. It also limits the time you will be able to spend with your guests, unless you have help serving. If you want to serve a serial multi-course dinner, think hard about the amount of last-minute preparation that each dish will require, and plan accordingly. Get as much done in advance as is humanly possible and write out a detailed timetable for the rest. To keep the pacing of your dinner smooth, it's great if at least one of the courses can be prepared entirely in advance. The practical side of menu planning So much for theory. Now, how do you take all that information and actually come up with a menu? You can start from any of several points: a type of cuisine (Italian, Thai, Mexican), a particular ingredient or ingredients, a particular recipe. Unless you're planning a tasting menu, it's probably easiest to begin with the idea for the main course and work from there, but you can begin with any of the courses. Whatever the dish you begin with, think about the season, the ethnicity of the dish, the flavor profile and the textural elements, and then think about what other dishes will complement it. I think the best way to explain this is to give an example, so here are a couple of menus I prepared along with the planning processes by which I arrived at them. Menu #1 (plated, sequential) First: Sliced jicama, red and green peppers, and blanched carrots tossed with a lime and jalapeno dressing Second: Rock shrimp quesadillas with guacamole Third: Pan grilled salmon with a cumin-coriander rub, topped with an orange and chipotle salsa. Served with rice. For this dinner, I started out with two ideas. I wanted a Southwestern/Mexican menu, and there'd been some great salmon in my local market. Salmon, unlike some other fish, can stand up to some strong flavors, so I started thinking about a spice rub and some type of chile peppers. The orange and chipotle salsa, which also contains lime juice, red onion and cilantro, is something I'd made before and I thought it'd go well with the fish. Since the dish would be pretty complex, I decided on plain rice to accompany it. I thought about starting with the quesadillas and then serving the vegetables, but the flavors in the dressing -- lime, chiles, garlic -- seemed too similar to the flavors in the salsa. And even though salmon is fairly rich, it still would have been an overload of acid. So I began with the vegetables and kept the quesadillas pretty mild, flavor-wise. The richness of the cheese and guacamole provided a nice contrast to the sharp flavors and acid of both the dressing in the preceding course and the salsa in the last course. Menu #2 (modified family style) First: Trio of salads: Roasted eggplant and zucchini salad, Moroccan garbanzo bean salad, Tabbouleh Second: Lamb curry served over couscous For this menu, I began with the dietary concerns of my guests (one trying to watch calories, the other trying to increase his consumption of whole grains and vegetables). For some reason, grains and vegetables suggested Middle Eastern or Mediterranean food to me, and I started playing around with some ideas for salads. I couldn't make up my mind about which of several to serve, so I finally decided to serve them all, as one course. The curry was made with yogurt, so it was relatively low in calories, yet it provided a creamy texture which, together with the richness of the lamb, balanced the acidity of the salads. As you can see, neither one of these menus was particularly complex. Your menus don't have to be either. Start out small -- two or three courses. Plan family style or modified family style dinners if you find that easier. Remember, you don't have to plan eight- or ten-course tasting menus to rival the French Laundry's. But just putting a little thought into the dishes you prepare, their flavorings and accompaniments, and the order in which you serve them can turn a haphazard meal into a well designed dinner. Suggested reading for more information: Culinary Artistry by Andrew Dornenburg and Karen Page Ethnic Cuisine by Elizabeth Rozin Copyright 2003 by Janet A. Zimmerman Post your questions here -->> Q&A
-
Please post questions relevant to Menu Planning here.
-
Knife Maintenance and Sharpening
eGCI Team replied to a topic in The eGullet Culinary Institute (eGCI)
Section Six: Maintenance Why Edges Wear The ability of a knife to hold an edge is affected by several factors. Many are properties of the steel, others are job-specific. Wear resistance – the ability to resist abrasion – comes primarily from the amount, type and distribution of carbides in the steel. Strength is resistance to low-impulse deformation. In other words, bending. Strength is directly related to the hardness of the steel. Toughness is resistance to high-impulse deformation – impacts, chipping and cracking. As a general rule, strength and toughness are inversely related. A hard, unbendable steel can be brittle. It will not withstand chopping through bone as well as a tough, slightly softer steel. A tough steel might roll its edge if it encounters significant lateral stress or is forced through very hard materials – stresses that a strong steel would easily resist. The most extreme examples of both would be the extremely hard, yet shatter-prone ceramic knives from Kyocera compared to very tough, soft stainless Chinese cleavers. Edge holding is a function of wear resistance, strength, toughness and the tasks the knife is used for. Toughness is required to resist chipping when you are cutting through materials where you might encounter bone or other hard bits and pieces. Strength is required to resist rolling and impaction if, for example, someone in your kitchen (despite repeated warnings) uses a glass cutting board. Wear resistance becomes important for edge holding when you’re cutting through abrasive materials. So the way your knife holds an edge depends on the steel and what you use the knife for. The most common culprits that put wear resistance, strength and toughness to the test are: Wear. Duh. As a knife blade encounters abrasive materials, the edge wears away. Unless you cut only soft foods, your edge will always wear somewhat, though the most wear in the kitchen will come from sharpening your knives. Significant wear could take years. Indenting and rolling. As pressure is put on the edge of the blade (and remember, the edge’s job is to concentrate tremendous amounts of pressure), the edge can indent, impact or roll over to one side or the other. The harder the steel, the less likely it will be to indent or roll. This is actually fairly common in the kitchen, which is why you need to steel frequently (more on this below). Chipping. The edge can chip or crack under impact, especially when encountering hard materials like bone. Micro-chipping can be an important factor in edge degradation, although kitchen knives are fairly tough. Corrosion. The wet, acidic environment of the kitchen can give knives a real beating. Micro-rusting and the attack of acidic foods can lead to edge loss at the very apex of the edge in short order. Technique. As chef Thomas Haslinger points out, “Having sharpened my own knives and other chefs’ knives, I can say that an often overlooked factor in cutting edge performance is how each individual holds and uses his knives. A person that ‘feels’ the cut will always have a knife that outperforms an individual who just cuts and slams the edge into the cutting board” Steeling your Knife Steeling regularly is the most critical maintenance you can perform on your knife. Whenever you use your knife, especially soft kitchen knives, the edge can turn out a bit. Turn the knife with the edge pointing to the ceiling under strong light. You shouldn’t be able to see it. The edge itself should be invisible. If, however, you see glints of light, those are spots where the edge has rolled. The edge is still reasonably sharp, it’s just not pointing straight down anymore. The steel realigns the edge of the knife, forcing the rolled spots back into line, making it useable again. We will get into the various types of steels in just a moment, but be aware that the grooved steels that come with knife sets do in fact remove metal. A grooved steel acts as a file when used with a heavy hand, knocking microscopic chips out of your edge. At the very least, it is much coarser than the fine abrasive you used to achieve your edge. Steeling heavily with a grooved steel is taking several steps backward. A grooved steel should be used with caution and a very light touch. The standard image we all have of steeling a knife involves a chef with his knife in one hand and steel in the other, blade flashing and ringing. If you’re particularly adept at this type of swordsmanship, have at it. It impresses the tourists. A more effective method is to stand the steel straight up and down with the handle up and the tip resting on a folded towel to keep it from slipping. Why? Geometry. Place the knife edge against the steel with the blade perpendicular to the steel – 90 degrees, right? Rotate your wrist so that you reduce the angle by half – 45 degrees. Reduce that by half – 22.5 degrees, and you are exactly where you need to be to steel your knife (if you have a 20 degree edge). You generally want to steel at a very slightly steeper angle than the edge bevel itself. The most effective way to steel your knife. Note that I should be standing squarely in front of the steel. I had to lean a little to get the knife to show up well in the shot. You can also use the Paper Airplane Trick to make a guide to prop against your steel so you know you are hitting the proper angle. When you’re steeling, lock your wrist and stroke the knife from heel to tip by unhinging at the shoulder – it’s your pivot point – and slowly dropping your forearm. The key is to maintain a consistent angle all the way through the stroke. By locking your wrist and elbow, you will keep your angle stable from top to bottom. Go slowly and follow all the way through the tip. You don’t have to press very hard to realign the edge. Steeling requires barely more pressure than the weight of the knife itself. Alternate from side to side, keeping the same alignment and angle on both sides. It really only takes four or five strokes per side to get your knife ready for more work. When should you steel? Every time you use your knife. Oddly enough, steeling before you use the knife is much more effective than steeling afterward. A steeled edge can be very sharp, but it is not as durable as a freshly honed edge. If you don’t use a steeled edge right away it can actually relax back into its blunted state. The same is true of a blunted edge. If you really degrade the edge of your knife in a heavy cutting session, let it sit overnight before sharpening. It will be in much better shape than it was the day before. You should also steel before sharpening so any rolled or impacted edges are pushed back into alignment. That way you don’t cut off the rolled edge and lose more metal than you really need to. You also can steel after sharpening to add a final bit of polish (especially on a medium to medium fine edge) and tooth alignment. A steel actually “smears” the edge, teasing out a little more thinness. You’ll have a keener edge, but it will be weaker than the freshly sharpened edge. Types of Steels Knife steels come in a variety of sizes, shapes and flavors. There are round steels, oval steels, grooved steels, smooth steels, diamond steels and ceramic “steels.” If you purchased a set of knives, it probably came with a round, grooved steel. Be very careful with this beast. Kitchen knives are reasonably tough and resist chipping fairly well, but a grooved steel can really put that to the test. The grooves in the steel create tiny points of contact with the edge. A smaller contact area makes for greater pressure on the edge. Used lightly, a grooved steel can realign the edge of your knife, though it does it fairly aggressively. Used with too heavy a hand, however, a grooved steel will act as a file and take microscopic chips out of your edge. Your edge will feel sharp because it is now, in effect, serrated, but it won’t last very long. Coarse diamond steels fall into the same category, though they’ll generally leave a finer edge than grooved steels. They should still be used with caution and a very light hand. L to R: Grooved steel, smooth steel and 700 grit ceramic rod. Smooth steels are several steps above either grooved or diamond steels. A smooth steel will gently push the metal of the edge back into alignment. It will take longer than with a grooved or diamond steel, but you don’t run the risk of damaging your edge. A smooth steel is very easy to use and fairly forgiving of sloppy angles. A step above even smooth steels are fine grit ceramic and very fine diamond steels. According to Cliff Stamp, “A smooth steel just pushes the edge back into alignment, leaving the weakened metal there, which will actually relax back into being deformed in its own time without any use. The ceramic will remove some of the weakened steel while also aligning the edge. The edge will be more stable and stay sharp for much longer. There is more metal removed with the ceramic and diamond rods, but you are looking at between 100 to 1000 sharpenings to remove one millimeter of metal from the edge of the knife depending on the edge angle and the grit of the ceramic or diamond hone – this is years of constant use. In general, the lifetime of most knives tends to be dominated by the occasional accidental damage that forces heavy honing.” Section Seven: Overview of Sharpening Systems Like everything else in the kitchen, sharpening is just a matter of understanding a little science and practicing a lot. And sometimes it means buying more stuff, but that’s half the fun, isn’t it? Benchstones and Waterstones If you’d like to try freehand sharpening, get the biggest stones you can. A good rule of thumb is to use a stone that is at least as long as the longest knife you intend to sharpen. The minimum size to avoid major frustration is 6” x 2”. As we discussed in the Grit section, you’ll need at least one coarse to medium stone and one fine stone. If you’d like to try Japanese waterstones, Lee Valley Tools has a good selection of inexpensive stones. Some even come in kits to get you started quickly. Freehand sharpening is a technique best learned face-to-face. If you have learned to freehand, you have mastered one of the most difficult, yet most rewarding, sharpening methods available. There is real satisfaction in attaining the skill to sharpen a knife to hair-flinging sharpness using nothing more than a stone and your own knowledge. Guide Systems There are a variety of guide systems available. These systems clamp on to the back of the knife and keep your angle steady throughout the sharpening stroke. The guide is used with a benchstone or waterstone and uses the same motion you’d use for freehand sharpening. The advantage to the guide systems is that you not only keep your angle steady, but you also build the proper stroke into muscle memory. Using a guide for a while will improve your freehand sharpening. Because the guide takes up space, you lose a couple of useable inches of space on your stone. This is not really a problem if you have a sharpening stone 8” or longer. Another disadvantage to guides is that you’re never sure exactly what angle you are grinding into your edge. Most of the time, knowing the exact angle isn’t a big deal, but if you are trying to achieve exact, repeatable bevels, you’ll have to use the Magic Marker Trick and perhaps the calculations provided by Leonard Lee. The most popular guides come from Razor Edge Systems. These are fairly easy to use but require a lot of dexterity to clamp properly. Razor Edge also produces an instructional video on the use of its guides and sharpening stones. According to Steve Bottorff, the best guide available is the now-discontinued Buck Honemaster. If you can find one at a garage sale or on eBay, go for it. Rod and Clamp Systems These are very popular systems and there are several available. The best are made by Lansky, DMT and Gatco. The knife is held in a clamp. The stone is attached to a rod. By putting the rod through one of the pre-set holes in the clamp, you can control the sharpening angle. Double beveling is very easy with these systems. Lansky sharpening set. Steve Bottorff has tried just about every sharpening system available. Here’s his take on the Lansky, Gatco and DMT systems. “The Lansky has an aluminum guide that goes from 13 to 25 degrees in 4 steps; each angle is 3 to 5 degrees lower than indicated. The GATCO guide is aluminum and reinforced plastic and goes from 17 to 34 degrees in 6 steps, each step is about 6 degrees greater than indicated. I prefer the GATCO to the Lansky because of the GATCO's larger stones and selection of angles. The DMT Aligner guide is all plastic, and goes from 12 to 35 degrees in 7 steps, which are not marked. With DMT hones, which I do not have, the Aligner would be the pick of the litter for this size of system.” The downside to the Lansky and Gatco systems is the need to reclamp the knife every couple of inches so you don’t change the bevel angle as you progress from heel to tip. It is also fairly easy to round the tips of your knives on these systems. The Lansky in action. The king of the rod and clamp systems is the EdgePro Apex. Ben Dale, the owner of EdgePro, has created an excellent, easy to use system that can handle any kind of knife you care to throw at it. He is also a great person to deal with and is more than willing to spend time on the phone with you answering any question you might have. EdgePro Apex sharpening setup. The Apex is rugged and uses relatively large 1 x 6 inch aluminum oxide waterstones. The angle guide is continuously adjustable for any angle, with marks at 10, 15, 18, 21 and 25 degrees. The blade table can harbor runoff grit and metal shavings, scratching the blade unless you tape it with painters tape. I don’t bother. My knives are tools. I don’t mind if they’re a little ugly. The only downside to the EdgePro Apex is its cost. This is a fully professional sharpening system, but at $125 before stone upgrades it is a little outside the realm of what the average home sharpener is willing to spend. I have one, and you’ll have to pry it out of my cold dead hands to take it away. EdgePro in action. Note that the blade is not clamped, making it easier to maintain a consistent angle from heel to tip. EdgePro offers a video that demonstrates the proper use of the system. The quality is little better than a home movie, but the information really helps. V-Systems and Crock Sticks V-type sharpeners have two ceramic sticks set into a plastic base at a preset angle. The knife is held perpendicular to the ground and stroked down the side of the sharpening stone. Because you are holding the knife in a natural position, these systems are fairly easy to use. Rather than review all of the crock stick setups out there, let me save you some time. Spend the $40 and get the Spyderco Sharpmaker 204. If you get one on eBay, make sure you’re getting the 204 rather than the older 203. The 203 doesn’t have the 15 degree back bevel slots. Spyderco Sharpmaker 204. And my cat, Chester. These can be found in many sporting goods stores, knife stores and on the Internet at Knifecenter.com, Knifeoutlet.com and many others. I’d buy it from Michael Dye at New Graham. He’s a great guy and has excellent prices and customer service. The Spyderco is a nifty system because the angles are preset for performance edges. You don’t have to guess, just hold the knife straight up and down and stroke it down the stones. There are two angles, 30 and 40, corresponding to 15 degrees per side and 20 degrees per side. It’s pretty much foolproof. This is about the easiest system to use. And, unlike just about anything else out there, you can sharpen serrated knives. It comes with an excellent manual and a video to help get you started. Sharpmaker in action. Just stroke straight up and down. The downside to the Sharpmaker is that if you swipe the knife off the stones while using the corners you can round the tip. This is easily remedied by taking your time and sharpening in two stages, one for 90 percent of the edge and a second stage concentrating on the tip only. Even though I have the EdgePro I still use my Sharpmaker regularly. It is faster to set up for quick touchups. Pull-Through Systems There are a number of gadgets with hones (usually tungsten carbide bits or wheels) that meet to form a V. You draw the knife through the slot and Presto! instant edge. Ha. Most of these things are garbage, not even fit to sharpen your lawnmower blades. Repeated use of one of these “sharpeners” will chip the edge of your kitchen knives. No relief is ground into the blade, so it will gradually become harder and harder to sharpen. To show that there are exceptions to every rule, the Henckels Twinsharp with its ceramic wheels doesn’t do too much damage and can be used for quick touchups though judging which set of wheels within the slot you are using can be a little tricky. The Chef’s Choice Model 450 uses diamond stones at the same angles (22.5 and 25 degrees) as the final two stages of their electric sharpeners. If you own a Chef’s Choice 110 electric sharpener, this pull-through gadget is handy for touchups between sharpenings. According to Steve Bottorff, there is even one gem among all of the gadget dross. “There is one class act in every category, and the Meyerco Sharpen-It is it for slot gadgets. Designed by Blackie Collins to be so simple that it could be used on horseback, the Sharpen-It features tungsten carbide wheels for the first stage and fine ceramic wheels for the second. The ceramic is so hard and fine-grained that it is more like using a steel. With this combination, the Sharpen-It performs well at both sharpening and honing. Unlike other slot devices, the Sharpen-It adds a third wheel to each set, giving two slots, and shapes them so that they sharpen one side of the blade at a time. This setup allows you to vary the bevel angle somewhat. Drawing the knife through at an angle decreases the bevel angle and gives a more razor-like edge. Since it is assembled with tamper-proof screws, I could not measure the bevel angles, but this information is less important because you won't have to use it with another sharpener to get complete results. Also unlike others, the Sharpen-It can be used equally well left-handed. It is so compact when closed that it can be carried in the watch pocket of your jeans. The unit well built and sturdy, and features a tapered hone for serrated blades. A less expensive model is available without the tapered hone.” Electric Sharpeners Please promise me that you will never use the knife sharpener on the back of your electric can opener. Please? Electric sharpeners grind very aggressively and can remove a lot of metal in a hurry. You can turn your chef’s knife into a filet knife with just a little inattention. Using a bad electric knife sharpener is just about the worst thing you can do to your knives. Poor electric sharpeners have given the entire genre a bad name. The better machines are multi-stage and use a slower grinding method. Just as with the pull-through sharpeners, there is a gem among the electrics. Both Steve Bottorff and Cooks Illustrated rated the Chef’s Choice model 110 as the best electric sharpener available. It puts a very nice edge on knives, sets a back bevel for performance and doesn’t remove metal at an alarming rate. It does have a tendency to scratch the blade, however. The $85 Chef’s Choice Model 110 uses 3 sets of diamond hones. Each sharpens at a different angle. The first stage is very aggressive and puts an approximately 15 degree back bevel on the knife. It is only used once to pre-shape the bevel. From then on you use the second and third stages (sharpening and honing) only. The final honing is at a very sturdy 25 degrees, which will give very long edge life. If you must have an electric sharpener, this is the one to get. Heck, for $85 I might pick one up myself. The Chef’s Choice 110 has a big brother, the EdgeSelect 120 model, an upgraded version of the 110. The EdgeSelect 120 features a polymer strop as its final stage, producing a razor sharp edge. Professional Knife Sharpening If you’ve read this far, you are a sharpening professional If you want to send your knives out to be sharpened, that’s fine, but remember, finding a good sharpener is like finding someone to cut your hair. It’s somewhat hit or miss. Just because they have a sign on the door and a grinder in the back doesn’t mean that you’ll get exactly what you were expecting. Now that you have a little more knowledge at your disposal, you can at least make an informed judgment about what you want from your professional sharpener. Can he sharpen to specific angles? Does he charge extra for a back bevel? Is he willing to grind a 15/20 double bevel that you can touch up yourself? What grit does he finish the edge with? You are now an educated consumer. Fat Guy has a place he recommends. I don’t have any experience with them, but I’ll take his word for it. Section Eight: Conclusions and Resources There you have it. The veil has been parted and you’ve seen that the man behind the curtain really doesn’t have anything special going for him. This is stuff that anyone can do with a little knowledge and a little practice. Sharpening your own knives can be extremely rewarding. You can establish a Zen-like communion with your knives. Just remember the basics – burr, angle, abrasive, consistency and strategy. Do not ever let anyone tell you that sharpening is too hard or too complicated to do yourself. Most recipes could be seen exactly the same way. They’re complicated. They require knowledge and technique. They’re a little scary. So what? You’d be insulted if someone told you that a particular dish was beyond your abilities. At the very least you’d be righteously indignant. You should feel the same way the next time someone suggests that you send your knives to a “professional.” And just like cooking, you become better and better by doing. Your first attempt might not be perfect. But it will be your achievement. No one else’s. And it just gets better after that. Resources and Links Obviously, even as verbose as this tutorial is, I’ve missed a few things. Hopefully we can cover any glaring absences in the Q&A session. But if you read this tutorial, print it out and have it on hand the next time you decide to sharpen your knives, I have no doubt that you can create an excellent edge, better than anything you’ve been able to achieve before. Because of me? No. Because of all of the people I’ve stolen from :P. Some of those people who answered questions, provided assistance and generally kept me from making a fool of myself: Joe Talmadge, author of the Bladeforums Sharpening FAQ and Steel FAQ. Much of what I know or have learned about sharpening is influenced by or just plain stolen from Joe’s work. So if there are any truly egregious errors, it’s his fault. Joe was very generous with his time answering some of the questions I had in writing this tutorial. Ben Dale, owner of EdgePro Systems. Cliff Stamp, graduate student in physics in the field of collision induced absorption at the Memorial University of Newfoundland. He is a dedicated knife nut and knife tester. Some of his findings are controversial in the knife world, but Cliff knows his stuff. Thomas Haslinger, Canadian chef and knife maker. He makes gorgeous chef’s knives. Sal Glesser, president of Spyderco. Murray Carter, ABS Mastersmith. Upon completing his apprenticeship under the tutelage of a 16th generation Yoshimoto bladesmith, Murray was asked to take the position of number seventeen in the Sakemoto family tradition of Yoshimoto Bladesmithing. He is the only Caucasian to ever have had the honor and privilege of this position. He makes some of the best Japanese kitchen knives available. The members of Bladeforums.com. Seventeen thousand of the most knowledgeable and contentious knife nuts on the planet. If it’s pointy, they’ll argue about it. Just about any question you might ever have about knives or sharpening can be answered by searching Bladeforums. Additional Reading The Razor Edge Book of Sharpening, John Juranitch. A little outdated and somewhat of a commercial for Razor Edge products, this is nonetheless a good primer on sharpening. Sharpening Made Easy, Steve Bottorff. This slim book is a good starting point if you’re just getting into sharpening. Give it as a gift (along with this tutorial) to the sharpening-challenged. The Complete Guide to Sharpening, Leonard Lee. Deals mainly with sharpening woodworking tools, but has a great discussion on the principles and mechanics of sharpening. Also has very good information on using power grinders and sanders to sharpen, if you’re the handy type. Sharpening with Waterstones, Ian Kirby. Mostly for woodworkers, but more information on waterstones than many other sources. The Professional Chef’s Knife Kit, Culinary Institute of America. Weak on sharpening, but a great resource for kitchen knife information and basic knife cuts. Where to Buy It Here’s where you can pick up all the cool stuff mentioned in the tutorial. Lee Valley Tools. Abrasives, waterstones, strops, honing compounds and some of the coolest woodworking and gardening tools in the known universe. EdgePro. EdgePro Apex and Professional sharpening systems, replacement stones and fine grit ceramic rods. New Graham Knives. Spyderco Sharpmaker 204. Razor Edge Systems. Guides, stones, Razor Edge Book of Sharpening, sharpening video, Edge Tester and Mousetrap Steel (an amazing tool for restaurant-volume knife maintenance). Japanese Knife. High end Japanese knives. If you want to spend a couple of grand on a gyotou or yanagi-ba, this is your place. Also has waterstones. Hand American. Smooth steels, strops, honing compounds, etc. Knifecenter. Discounted kitchen cutlery, Lansky and Gatco sharpening systems, DMT diamond stones. One Stop Knife Shop. Kitchen knives and sharpening equipment. Helps support Bladeforums. Kellam Knives and BladeArt. Two of the very few places you can get Murray Carter’s knives in the Western hemisphere. Instructor: Chad Ward Chad Ward is a freelance writer and marketing strategist based in Wichita, KS. His articles have been featured in magazines ranging from Flatpicking Guitar to Manufacturing Engineering. He is also a knife collector and dedicated home cook. Copyright 2003 Chad Ward. All rights reserved. Post your questions here -->>Q&A
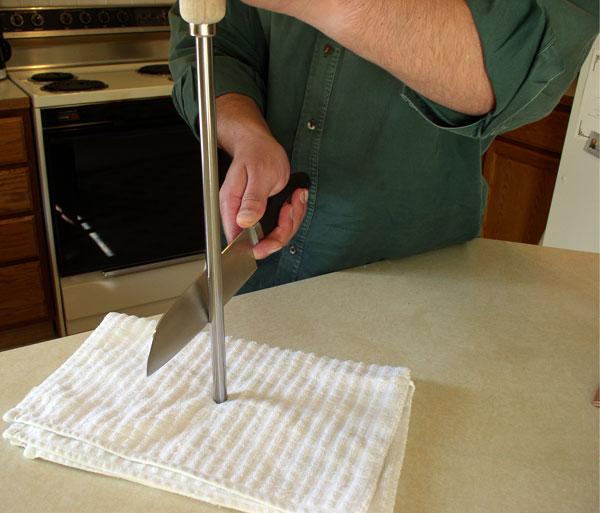
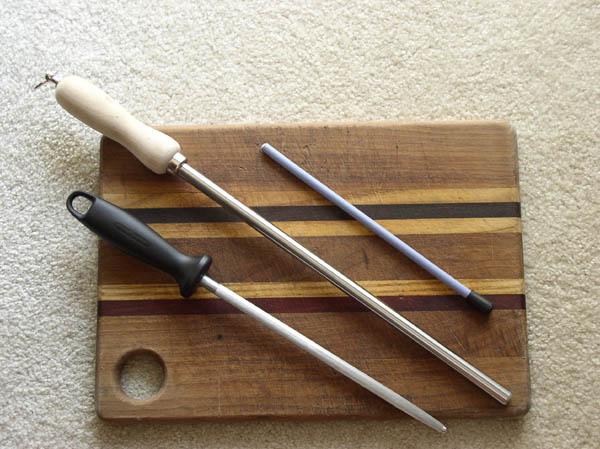
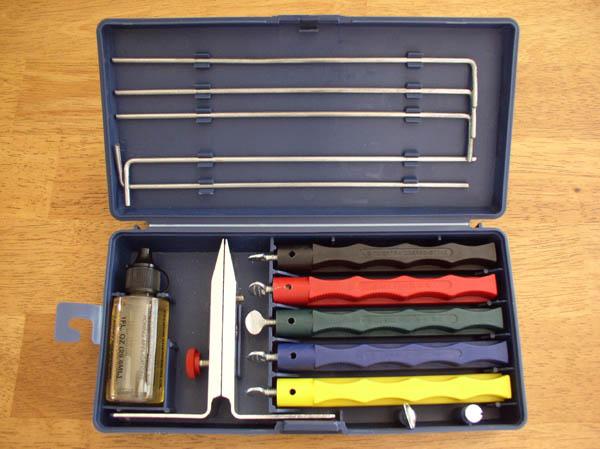
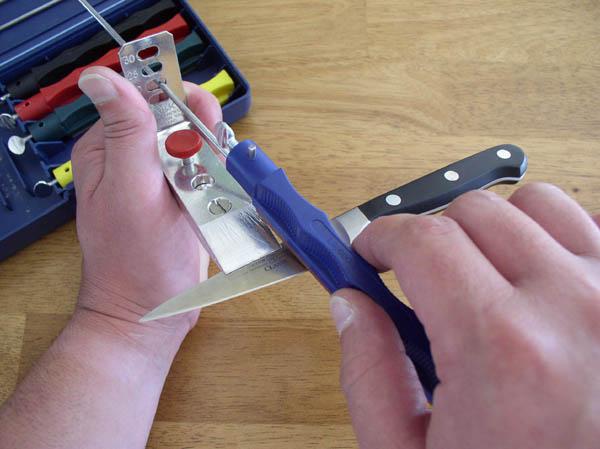

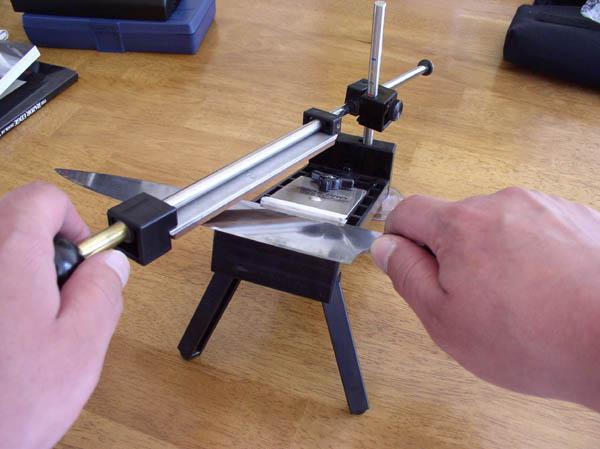


-
Knife Maintenance and Sharpening By Chad Ward (Chad) Warning: Remember that handling, using and sharpening knives is inherently dangerous. Neither eGullet nor the author can be responsible for your safety. That’s your job. Knife safety, especially during sharpening, is a matter of common sense. Keep your fingers, toes and everything else out of the path of the blade – even if it were to slip. If you go slowly, pay attention and stay focused, you’ll be fine. Table of Contents Introduction Section One: The Sad Truth about Kitchen Knives Section Two: Steel Section Three: Edge Basics Section Four: Sharpening Basics Section Five: Sharpening Step by Step Section Six: Maintenance Section Seven: Overview of Sharpening Systems Section Eight: Conclusions and Resources Introduction “Knife sharpening is hard.” “Sharpening is too difficult and time consuming to do at home.” “Send your knives to a professional sharpener once a year and you will be fine.” “You have to spend hours hunched over a heavy hone slathered with oil.” This well-intentioned advice is parroted in cooking schools, Food Network television programs, professional manuals and cookbooks. And it is just plain wrong. Okay, maybe not so much wrong as misleading. Knife sharpening is not difficult. It is not shrouded in mystery. With a little knowledge, a little geometry, a couple of tricks and some inexpensive tools, knife sharpening can be fairly easy and extremely rewarding. At the very least it’s a great skill for the toolbox. You’ll come away from this clinic with a better understanding of edges, steel and how to maintain your knives yourself. Or, if you decide to send them out, you’ll know how to make sure you’re getting what you want – and what you pay for. Section One: The Sad Truth About Kitchen Knives To a chef, there is nothing more important than his knife. It is not only an extension of his hands, it is an extension of his very personality. The knife is a chef’s paintbrush. So why are most kitchen knives so bad? The knives found in most commercial and home kitchens are designed for the lowest common denominator. The manufacturers of these knives make a series of compromises calculated to keep the largest number of people happily using their knives for the longest period of time. Like supermarket tomatoes bred for sturdiness and uniformity rather than flavor, these compromises seriously degrade the performance of your knives. The first compromise begins with the steel. Steel is the heart of the knife. Most manufacturers (Henckels, Wusthof, Forschner, et al.) have proprietary steel blends and are very close-mouthed about the actual formulation of their steels. According to industry insiders, these steel blends are closely related to or equivalent to a steel known as 440a. By and large 440a steel is formulated for stain and wear resistance rather than holding a high performance edge. In the kitchen, that’s not a bad tradeoff. But this compromise in edge performance is compounded by a heat treatment that leaves the steel much softer than it could be. In general, the harder the steel, the keener the edge it will take. However, a hard steel makes it more difficult to get that edge in the first place. So manufacturers leave the steel a little soft, theoretically making sharpening at home easier. If you’ve ever spent an hour or two trying to get a super fine edge on a cheap kitchen knife, you’ll know that there is a big gap between theory and practice. Upper-end kitchen knives like Henckels, Sabatier, Wusthof, et al., are a little better, but are still softer than they need to be at 52 to 56 on the Rockwell C scale (the Rockwell scale is a scale used to measure the relative hardness of different solids). By contrast, Japanese knives tend to be around 61-62 on the Rockwell scale. Custom knife maker Phil Wilson hardens his S90V (a stainless supersteel) chef’s and filet knives to 62-63 Rockwell. The next compromise is in the factory edge angles. Most kitchen knives come with an edge that is at least 25 degrees per side, frequently even greater. If you add the two sides together you get a 50 degree included angle. And that’s the best case scenario. Take a look at a protractor if you happen to have one lying around. Fifty degrees is extremely thick. An angle that obtuse is more appropriate for an axe than a chef’s knife. Again, the theory is that the thick angles will allow the edge to resist damage from impaction, rolling and wear better than a thin edge. But, as the song says, it ain’t necessarily so. Finally, there is just plain cruelty and misuse. While I’m certain none of you would ever use the sharpener on the back of an electric can opener, or use a glass cutting board, or store your knives loose in a drawer or put them in the dishwasher, it does happen. And when you add soft steel and thick angles to the general abuse that knives see in the kitchen, you end up with tools that are more adapted for bludgeoning oxen than fine dicing a soft tomato. Take heart. The news isn’t all bad. We can fix these problems. Geometry is far more important than steel. With some basic knowledge and the willingness to invest a little time, you can realistically expect a dramatic increase in knife performance. First, do no harm: General knife care - Use wooden or composite plastic cutting boards only. Glass, ceramic, marble and steel will cause the edge to roll or chip. Bad. Don’t do it. - Don’t drop your knives in the sink. Not only is it a hazard to the person washing dishes, but you can also blunt the tip or edge. - Don’t put your knives in the dishwasher. The heat may damage wooden handles and the edges may bang against other cutlery or plates. - Keep your knives clean and dry. Sanitize if necessary. - Do not store your knives loose in a drawer. Use a block, magnetic strip, slotted hanger or edge guards. The magnetic strip is not recommended if you have children or inquisitive pets. - Finally, your knife is not a can opener, a screwdriver, a pry bar, box cutter or hammer. There’s a special place in Hell reserved for people who abuse their knives this way. If your knives won’t fit in a block, simple plastic blade guards are a good solution Second: Modify for performance This is the easy part. Establishing and maintaining high performance edges is what this tutorial is all about. It can be as simple as steeling with the proper technique or as complex as creating specific edge bevel and edge aggression strategies for each knife in your collection. It’s all up to you. While you can’t change the steel your knife is made from, you can certainly keep your knives at peak performance – and without too much difficulty. We’ll discuss high performance edges and sharpening strategies a little later in the tutorial. Third: Modify for comfort This is something very few chefs (and even relatively few knife makers) take into consideration. Ask any chef to show you his knife-hand calluses. He’ll have a thick one at the base of his first finger from the “pinch grip” used in most kitchens. He or she may also have another on the side of the second finger where the finger rubs against the bolster or dropped portion of the blade that extends below the handle. He will also have aching hands and possible repetitive stress injuries. In the interest of economy, most knife manufacturers leave the spines of their knives squared off. The edges of the spine can sometimes be sharper than the knife itself. That edge cutting into your finger can lead to blisters, calluses, reduced circulation, numbness and injury. If you ever handle a chef’s knife made by Canadian knife maker George Tichbourne you’ll know that it doesn’t have to be that way. Tichbourne worked with several professional chefs when designing his kitchen knife series. One of the key features is a smoothly rounded spine. It doesn’t abrade your finger, cut off the circulation, make your hands numb or create any of the other discomforts associated with standard kitchen knives. You can do the same in less than half an hour. Lock your knife, edge down, into a padded vise. The padding doesn’t have to be anything elaborate. Two pieces of flat rubber or leather will keep the jaws from scratching the blade. You’ll need a sheet of fine (600 grit) wet/dry sandpaper available at any auto supply store or an abrasive cloth, sometimes called a crocus cloth. Using a gentle shoeshine motion, lightly round the edges of the spine. You don’t have to buff hard or remove a lot of metal. All you need to do is break the sharp edge at the base of the spine. How far you take it is up to you. This simple modification will make a world of difference in the comfort of your knives. Section Two: Steel An Overview of Steel By definition, steel is a combination of iron and less than 2 percent carbon. For centuries, carbon was the only alloying element. The problem in the early days of steel making was getting rid of unwanted elements, not adding new ones. However, there are a variety of alloying elements that are added to modern steels to impart various characteristics. Iron alone is relatively soft. It does not hold an edge well, wears quickly and has little resistance to bending. Add a little bit of carbon and the story changes dramatically. The carbon combines with the iron to form hard carbide platelets cemented together in a matrix of iron. The combination is resistant to wear and bending and will take a keen edge. Smaller carbides and a tighter grain structure allow for a stronger, sharper edge. Other carbide formers, like vanadium, can refine the grain of the steel further. Knives with a high vanadium content can take a very keen edge, but are harder to sharpen. Carbon - Present in all steels, it is the most vital hardening element. Greater than 0.5 percent carbon content qualifies a steel as a “high carbon” steel. Chromium - Added for wear resistance and corrosion resistance. A steel with at least 13 percent chromium is considered “stainless.” Chromium is a carbide former, so it also increases wear resistance. Manganese - A carbide former. Manganese aids grain structure, increases hardenability, and wear resistance. Manganese is present in most cutlery steels. Molybdenum - Another carbide former. Increases hardness, prevents brittleness, makes the steel easier to machine. Nickel - Adds toughness and possibly aids in corrosion resistance. Phosphorus - Essentially a contaminant. Silicon - Increases hardness and strength. Sulfur - Increases machinability but decreases toughness. Tungsten - Increases heat, wear and shock resistance. Tungsten is the strongest carbide former behind vanadium. Vanadium - Another carbide former. Contributes to wear resistance and hardenability. Vanadium refines the grain of the steel, which contributes to toughness and allows the blade to take a very sharp edge. Most kitchen knives fall into the category of “high carbon stainless.” These knives generally contain between 0.5 and 0.8 percent carbon, 13 to 18 percent chromium and a little manganese, molybdenum, silicon, phosphorus and sulphur. This makes for a steel that is easy to produce, is very stain resistant and reasonably wear resistant. Knives from Global and Mac’s Superior line have some vanadium added for improved wear resistance and a finer grain, which allows the knife to be sharpened to an incredible edge. Carbon Steel versus Stainless Steel The great debate rages on. Carbon steel advocates claim that their knives take a keener edge, hold it longer and are easier to resharpen than stainless steel knives. Stainless steel users claim that carbon steel knives are unsanitary, leave an off taste in foods and that stainless knives hold an edge longer than their carbon counterparts. Who’s right? Depends on your definitions and your environment. It’s not as simple as carbon versus stainless. Carbon steels range from simple iron/carbon combinations to high-alloy tool steels that will cut through concrete without losing their edge. Stainless steels vary from very soft, extremely stain resistant dive knives to super stainless alloys, like Crucible Particle Metals’ S30V, a steel purpose-designed for the custom cutlery industry. In the far less demanding realm of the kitchen, however, the carbon steel devotees are right. At least until they actually have to use their knives. Then it’s a different story. Carbon steel kitchen knives generally are a little harder and stronger than stainless steel kitchen knives. They are easy to sharpen and take a screaming edge. And while the patina that develops on a carbon knife can be unsightly (unless you like that sort of thing), it isn’t unsanitary. But in the wet, acidic environment of the kitchen, stainless rules. For all their faults, compromises and shortcomings, stainless steel kitchen knives work better and will hold their edges longer than carbon steel knives. Doesn’t make sense, does it? The culprit is corrosion – the effect of acid and micro-rusting. Even on what appears to be a mirror-bright, razor sharp edge, microscopic particles of rust and corrosion will form, attacking the edge and reducing its performance. Unless carbon steel knives are rinsed and dried frequently, their edges will degrade rapidly in kitchen use. The stainless edge will easily outlast them. According to chef and knife maker Thomas Haslinger, “Acids of fruit and vegetables are fairly aggressive and will dull a carbon blade more quickly than stainless. The acid actually eats the edge.” Section Three: Edge Basics Most kitchen knives are flat ground, meaning that the blade tapers directly from the spine to the edge. Hollow ground, convex ground and saber ground blades are rarely found in the kitchen. I mention them only to confuse you. Edges come in a variety of flavors. The most common are the V-edge, double beveled edge, chisel ground edge and the convex edge. V-edges and double beveled edges are variations on a theme. The edge found on your kitchen knives is most likely a V-edge, meaning, oddly enough, that the edge bevels form a V, two surfaces intersecting at a line of (ideally) zero width. A double bevel takes this idea a little further by adding a second, more acute, angle behind the edge bevel. This secondary bevel is sometimes called a back bevel or relief angle. It’s purpose is to thin the metal behind the edge. The thinner the edge, the greater the cutting ability. However, an edge that is too thin is susceptible to damage. So you add a smaller, more obtuse primary bevel to the very edge to give it the strength to avoid damage from impaction, chipping or rolling. Chisel ground edges are primarily found on Japanese knives, especially sushi knives. The edge is ground only on one side. The other is side is flat. Hence they come in right and left handed versions. Chisel ground edges can be extremely thin and sharp. If the edge bevel is ground at 25 degrees and the other side is 0 degrees, you have an included angle of 25 degrees – considerably more acute than the average Western knife. Sometimes known as hamaguri-ba, the convex edge arcs in a rounded curve down to the edge. Thus the final edge is the intersection of two arcs, creating a very sharp edge with more metal behind it than the standard V-edge. Convex edges are generally formed on a slack belt grinder, so they are difficult for the home sharpener to achieve. This can be remedied with the mousepad trick found later in the tutorial. See the Convex Grind FAQ for sharpening methods and a comparison of the convex edge with other edge types. A double bevel. The wide area is a 10 degree back bevel; the narrow section is the 15 degree primary edge face. The back bevel also solves one of the great problems with V-edges, the fact that the metal behind the edge gets progressively thicker as the knife is sharpened over time. The knife doesn’t cut as well and becomes harder and harder to sharpen. The answer is to grind the shoulders off the edge at an acute angle, i.e. add a back bevel, then reestablish the primary bevel. If you sharpen your knife without grinding a relief angle, your edge will thicken over time. Micro-serrations: True or False? Knife geeks frequently talk about “micro-serrations,” microscopic teeth on the edge of the knife. Is this really true? In a word, yes. Sharpening by its very nature creates a scratch pattern on the edge of the knife. The coarser the stone, the coarser and deeper the scratch pattern will be and the larger the micro-serrations. Conversely, the finer the stone, the finer and more polished the edge will be with less prominent micro-serrations. The real question is, which one is better? This is one of the great debates in the knife world – the razor sharp polished edge versus a toothier edge. John Juranitch in his book “The Razor Edge Book of Sharpening” is emphatic that a polished edge is the answer, that micro-serrations are indicative of a dull knife. His experience comes from sharpening knives for the meat processing industry. Meat cutters go through knives faster than tissues in flu season, so Juranitch’s conclusions are hard to dispute. However, Joe Talmadge, author of the Bladeforums “Sharpening FAQ;” Cliff Stamp, physicist and knife nut; Leonard Lee, president of Lee Valley Tools and author of “The Complete Guide to Sharpening;” and many others have come to the opposite conclusion: that micro-serrations, in the right context, can be a very good thing. What is the right context? Later on we’ll examine the difference between push cutting and slicing, their applications in the kitchen and the value of various levels of polish on your knife edges. Which leads us directly to: The Meaning of Sharpness What do we mean when we say that we want our knives to be sharp? Seems like a silly question. We all know what sharp is. Or do we? Sharpness is not just a function of creating a super-thin edge that will readily sever free-hanging nose hairs; it’s also a function of shape and intended purpose. You could grind your chef’s knife to razor thinness, but the edge would crumble the first time you hit a bone or tried to hammer your way through a winter squash. Your knife would be sharp but useless. Similarly, a razor sharp but wedge-thick edge is great on a splitting axe but not much good for carpaccio. We have to take into consideration the shape of the blade, the angle of the edge bevel and especially the material being cut when we consider how we judge the sharpness of our kitchen knives. So the real question is not “how sharp should my knife be,” but rather “how do I get maximum performance from my knife under a given set of conditions.” A sharp knife can be defined as one that has a keen edge that can hold up in repeated usage while producing the results we’re looking for in the kitchen. The Myth of Thick Edges The theory is that thick edges (larger angles) last longer than thin edges, and the majority of the knife buying public wants the edge to last as long as possible. But it doesn’t work out that way in practice. Thinner edges actually outlast thicker edges almost all the time. The thinner edge starts out performing better than the thicker edge. So even if it does degrade it has a lot of ground to lose before it falls to the performance level of the thick edge. Thinner edges cut more easily, putting less stress on the edge. If a thin edge takes three slices to get through a big slab of raw meat, a thicker edge might take six or seven. Or three with a lot more force. The thicker edge is doing twice as much work, degrading twice as quickly. Thinner edges are easier to control. Lateral stresses are a significant source of edge degradation. The more smoothly, accurately and easily you are able to cut, the less lateral stress you put on the edge. Thin is good. A very thin, high performance 10/15 double bevel. The knife is an 8” custom chef’s knife in ATS-34 steel from Steve Mullin. The High Performance Edge We want our kitchen knives to cut as easily as possible while maintaining integrity and staying sharp. For maximum performance, you want the edge as thin as possible. To borrow an image from Joe Talmadge, imagine a woman stepping on your foot. If she’s wearing tennis shoes, it will hurt a lot less than if she’s wearing stiletto heels. The same amount of force applied to a much smaller area penetrates better. A knife edge a thousandth of an inch thick with one pound of pressure behind it concentrates 1,000 pounds of pressure per square inch at the edge. While an actual kitchen knife’s edge will be a little thicker than a thousandth of an inch, the thinner your knife’s edge, the more efficiently it will cut. To thin a knife’s edge, you lower the edge angle. The problem is that a thin edge is much more susceptible to damage. As the edge becomes thinner, there is less metal to support it. It can roll, indent and chip, causing the edge to degrade quickly. So the goal is to thin the edge as much as possible, but not so much that it is regularly damaged during hard use. One way to do this is to keep thinning your edge until it reaches an unacceptable level of fragility then back off a couple of degrees. This is easier than it sounds, but not really necessary. We’ll discuss suitable edge angles in just a moment. One factor that strongly plays into how thin you can take a knife’s edge is the quality of the steel. That’s one of the primary advantages to the new breed of incredibly hard stainless super steels. You can sharpen them to very acute angles without risk of significant damage. As an aside, I’ve taken a chef’s knife made from ATS-34 down to less than 8 degrees per side before it required an unacceptable level of maintenance. As we’ve discovered, the average kitchen knife is made from pretty mediocre steel. But it can still be much thinner than the factory edge. As a matter of fact you can sharpen your Henckels and Wusthofs to angles that would give the good folks in Solingen the heebie-jeebies without worrying too much. Section Four: Sharpening Basics Before we get into sharpening systems and the actual mechanics of sharpening, it helps to understand some of the basic principles. These are the burr, the sharpening angles, the abrasive, consistency and sharpening strategy. They apply no matter what sharpening method you choose. The Burr First and most foremost is the burr. The burr is your friend. A burr, or wire edge, is a rough, almost microscopic, raised lip of metal that forms when one edge meets the other. It is the only way to be absolutely certain that you have fully ground an edge. Essentially you grind one side until it meets the other and pushes up a small curl of metal. If you stop sharpening before the burr is formed, your knife will not be as sharp as it could be. Sometimes you can’t see a burr, but you can always feel it. You check for a burr on the side opposite the edge you have been grinding. Hold the knife blade horizontally and place your fingers or thumb at a 45-degree angle to the edge and pull gently down and away. DO NOT PULL TOWARD THE TIP OR HILT; YOU MAY LOP OFF A FINGER. PULL AWAY FROM THE EDGE. Remember, check the side opposite the one you've been sharpening. You're checking for a very light lip caused by the edge rolling over to the other side. Check at various points along the edge. The burr tends to form quickly at the base of the blade but takes a little longer at the tip. You must feel a burr running all the way from heel to tip to know that you have fully ground that side of the knife. Hand position for checking a burr. The Angles As we’ve discussed, the 50-degree-plus included angle that comes standard on most kitchen knives is way too obtuse. Leonard Lee suggests anywhere from 5 to 20 degrees per side (10 to 40 degrees total) for general kitchen work. Five degrees per side is incredibly thin and would require a very hard, high quality steel to keep that edge in regular use. For the vast majority of kitchen knives, 15 to 20 degrees per side will provide a significant increase in performance without requiring undue maintenance. Meat cleavers should be a little thicker, say 20 to 25 degrees per side, while dedicated slicers can be taken down to 10 to 15 degrees per side. The best compromise in the kitchen has proven to be a 15/20 double bevel. That is a 15 degree back bevel with a 20 degree primary edge face. A 15/20 double bevel illustrated. This is an excellent performer in the kitchen. Abrasives You sharpen your knives by scraping away metal. That’s really all there is too it. But there is a huge array of abrasives available. Traditionalists will demand an Arkansas stone. These stones were originally mined from a novaculite deposit in Arkansas. They were graded, from softest to hardest, as Washita, Soft Arkansas, Hard Arkansas and Black Hard Arkansas. However, the best parts of the deposit were mined long ago, leading to spotty quality in the natural stones. They have since been replaced by ground novaculite reconstituted into benchstones. These can be found under the Arkansas Perfect name. Synthetic aluminum oxide stones are very, very hard and don’t wear like natural stones. They clean up easily with a scouring pad and are more consistent in their grading systems. Spyderco and Lansky both manufacture synthetic stones in a variety of grits (see discussion of grits below). Japanese waterstones are considered by many to be the ultimate sharpening tools. Although natural waterstones are extremely expensive and hard to find, reconstituted stones are readily available. These reconstituted Japanese stones are held together by a resin bond, cut very quickly (and wear more quickly as well) and are available in extremely fine grits that will put a high polish on an edge. Synthetic waterstones, as used by EdgePro systems, are formulated from aluminum oxide specifically for knife sharpening. Like Japanese waterstones, they need to be wet in order to cut effectively. Diamond “stones” have man-made diamond particles imbedded in or coated on a base metal. They cut very aggressively and should be used with caution. They were formerly available only in very coarse grits, but that is changing rapidly. According to Leonard Lee, monocrystalline diamonds are preferable to polycrystalline diamonds in a diamond stone. They are nearly twice as expensive, but last much longer. EZE-Lap, Lansky and DMT make excellent diamond stones. There are two other issues related to abrasives that must be considered: grits and lubrication. You Want Grits with That? All of these abrasives come in a variety of grits from very coarse to ultra-fine. Grit refers to the size of the individual particles of abrasive in the sharpening stone. A stone with a finer grit has smaller particles, and produces an more polished edge with less prominent micro-serrations. A stone with a coarser grit has larger particles, produces an edge with more prominent micro-serrations, and tends to abrade metal away more quickly. There are several different grit rating systems, and unfortunately it is very difficult to correlate these different systems. For example, Japanese waterstones are graded differently than diamond stones and both have different numbering systems than the codes found on powered grindstones. Steve Bottorff, author of “Sharpening Made Easy” has taken a stab at it here if you’re interested. What we do know is that you’ll need a coarse to medium stone for shaping the edge and removing the shoulders of over-thick edges. You’ll also need a fine stone for sharpening the final edge. The combination stones found in most hardware stores just won’t do the trick. The coarse side isn’t coarse enough and the fine side isn’t fine enough. Any of the sharpening systems mentioned later will come with appropriate stones. In very general and imprecise terms, stones rated lower than 300 grit are coarse, 300-400 are medium, 600+ are fine and 1200 and up are extra fine. Japanese waterstones have their own grit rating system. They cut so quickly that anything below 800x can be considered coarse, although they’ll leave a much more polished edge than a corresponding Western stone. 1000x and 1200x can be considered medium and medium-fine and make an excellent general purpose stones. Waterstones can go up to 8000x, but that’s really overkill for kitchen purposes. The stones that come with Spyderco’s Sharpmaker are listed as fine (the white stones) and medium (the grey stones). The grey has been compared to an approximately 800x waterstone, the white to a 1200x waterstone in effect. The synthetic waterstones from EdgePro systems also have an idiosyncratic rating system. The coarse stone is listed as 100, the medium as 180, the fine 220, extra fine 320, ultra fine is 600. However a conversation with Ben Dale, owner of EdgePro, revealed that the extra fine stone is equivalent to a 1200x Japanese waterstone and the ultra fine equivalent to a 2000x Japanese stone. The basic system comes with a medium and fine stone, which should be sufficient for most needs, though the coarse stone comes in handy for quickly reshaping bevels. Oil or Water? Everyone knows you need to lubricate your sharpening stone with water or oil, right? So the question is which one is better. Neither. The purpose of a sharpening stone is to grind the edge and remove metal. Oil reduces friction and makes the process much slower. Supposedly oil helps float away metal particles that would otherwise clog the pores of the stone. You can do the same thing by wiping the stone with a damp cloth when you’re done. Steve Bottorff reports that you can clean your Arkansas stones with paint thinner. Synthetic stones clean up with a scouring pad and abrasive cleanser. According to Joe Talmadge, if you have already used oil on your Arkansas stone, you’ll probably need to keep using oil. But if you have a new Arkansas stone, a diamond stone or a synthetic stone, go ahead and use it without oil or water. It will work much better. John Juranitch reports that in his company’s work with meat processing plants they discovered that the metal filings suspended in the oil on a stone actually chip and abrade the edge. Although these chips were only visible through a microscope, the meatpackers readily noticed the difference between the knives sharpened on a dry stone and those sharpened on oiled stones. Waterstones are another matter entirely. Both Japanese and synthetic waterstones require water in order to cut effectively. Japanese waterstones can be damaged if used dry and must be soaked thoroughly before use. Waterstones wear very quickly, revealing new layers of cutting abrasive as the swarf builds up and is washed away. That’s why they are so effective. There is always a new layer of sharp abrasive cutting away at the metal of your edge. By the way, “swarf” is one of those cool terms you get to toss around when you discuss sharpening. Swarf is the slurry of metal filings and stone grit that builds up as you sharpen. Throw that into your next cocktail party conversation and just watch the expressions of awe appear as people realize that you are a sharpening God. Consistency You must be able to maintain a consistent angle while you are sharpening. This can be tough to do, which is why there are so many gimmicks and sharpening systems on the market. They don’t provide any magic. All they do is help you keep your edge at the same angle throughout the sharpening session. Maintaining consistency is a primary reason freehand sharpening with benchstones or waterstones is a little tricky. It takes a lot of experience and practice to keep the edge at a constant angle stroke after stroke using only your hands and eyes. Sharpening Strategy: Coarse versus Polished Edges Related to the grit discussion above, the finer the stone you use to sharpen your knife, the more polished your edge will be. And while it can be a lot of fun to create a scary sharp edge that will cut the tops off of arm hair without touching the skin, it’s really not necessary or ideal for kitchen use. As a matter of fact, leaving the edge of your knife just a little coarse can be a very good thing. This is where we must compare push cutting to slicing. Push cutting involves parting fibers and requires a polished edge. Shaving, for example, is push cutting. So is peeling an apple or julienning a carrot. You are pressing your thin, finely polished edge through the fibers of the food, pushing them to either side. Slicing, on the other hand, involves severing fibers and requires a toothier edge. Crusty bread, a soft tomato, roast chicken – anything with an outer layer that is tougher than the squishier inside demands an edge that can bite into the skin without crushing the interior. A highly polished edge will simply skate over the surface of a ripe plum until you put enough pressure on it to push through the skin. But the fruit underneath will give way before that happens. Not pretty. Now you must decide. Do you do more push cutting or more slicing? Do you have knives that you use more often for dicing, peeling and julienning? Do you have a knife that is dedicated to slicing? A good basic strategy is to start with a standard 20 degree bevel (a 15/20 double bevel if you’re feeling adventurous) with a moderately polished edge on all your knives. This alone will be a vast improvement over what you might be used to. Then branch out. If you have a knife that is only used for vegetables, a santoku for example, you can take it to a very fine, highly polished edge. A dedicated slicer can be finished on a medium-fine grit stone, leaving the edge slightly coarse. Your chef’s knife can be somewhere in between. There is one caveat. The thinner the edge, the finer it will need to be to avoid excessive damage. A coarse edge wears more quickly and requires more maintenance. This is usually not an issue unless you like your edges very thin. Then a polished edge will last longer. Of course if you have a very thin edge it will probably push cut through materials that a thicker edge might have to slice through, so you’re not losing any slicing performance. If you’re really nuts you can create a dual edge on your knives. This would be a slightly coarse section at the back of the blade near the choil or bolster. The rest of the blade would be finished on a fine or extra fine stone. That gives you a toothy section for cutting through tough materials as you begin your stroke and a finer edge for push cutting through the rest. Yes, this is only for the seriously deranged. Section Five: Sharpening Step by Step Hey, 5,000 words into this and we’re actually getting to the “how-to” part. Okay, here’s where we put all of this together. Haul out your sharpening rig and let’s grind some metal. Don’t have one yet? Check out the Sharpening Systems section below to see what suits you best. Got one now? Good. Remember the basics: burr, angle, abrasive, consistency and strategy. Let’s assume, for the sake of discussion, that you’ve decided to put a 15/20 double bevel on your chef’s knife. Because it’s a general purpose knife, it doesn’t need to have a mirror polished edge. As a matter of fact, a good medium-fine edge is what you’re aiming for. This is your angle and strategy. Because this is the first time you’ve really tried to change the horrid factory edge, you’ll need to begin with a fast cutting, coarse abrasive. Benchstone, waterstone, Sharpmaker grey stone – doesn’t matter. Start with the coarsest thing you’ve got. Determine how you’re going to establish consistency. With a Sharpmaker you simply stroke straight up and down. The EdgePro or Lansky rod-type systems have angle guides built in. Freehand sharpening requires a little more skill and patience, but if you use a guide system like the Razor Edge or simply place your thumb on the spine in the same spot every time, you can create a consistent angle. Advanced Section: So, let’s get started: 1) Establish your 15 degree angle. If you’re using a Sharpmaker, put the stones in the 15 degree slots. With a Lansky, Gatco or EdgePro system, slide the rod into the 15 degree setting. With edge guides, clamp the guide at the 3/8” height. Freehanding, raise the spine to 3/8 inch measured 1.5 inches back from the edge. Now you’re ready to create a burr. Be patient, this might take a while. To grind off the shoulders of the previous edge we’re going to be removing a lot of metal. That’s why we need the coarse stone. At this point it doesn’t really matter what kind of stroke you use. You can go heel to tip or just grind in circles. It doesn’t make any difference. To keep the aesthetics of the knife, you’ll want the bevels relatively even on each side. If you just grind one side until you get a burr, the other side will require much less grinding. Thus the bevels will be mismatched. To keep them matched, grind one side for about five minutes or so then switch to the other side, maintaining your approximately 15 degree angle. Feel the knife every so often to see if you can feel a burr. Keep grinding and switching sides until you detect a burr beginning to form. Remember, the burr forms on the side opposite from the side you are grinding. If you don’t remember how to check for a burr, see the picture earlier in the tutorial. As soon as you detect a burr, keep grinding on the current side until the burr runs the entire length of the opposite edge. If you use the Magic Marker Trick described below, you can save a little time on this step. 2) Repeat on the opposite side until you feel a burr along the full edge of the first side. 3) Optional: If you want to dress up the scratch pattern, switch to your fine stone and give the edge several passes on each side (at the same angle) to polish them out a little. 4) Establish your 20 degree angle. If you’re using a Sharpmaker, switch to the 20 degree slots. With a Lansky, Gatco or EdgePro system, simply change the rod to the 20 degree setting. With edge guides unclamp the guide and slide it forward about an 1/8 to 1/4 inch. Freehanding, raise the spine another 1/8 inch. If you switched to your fine stone, switch back to your coarse stone or the next one up, usually a medium stone. 5) Create a burr again at the new sharpening angle, going back to side one. This time you’re grinding the edges to meet at a 20 degree angle. This will happen very quickly because you’ve already removed most of the metal you need to. The 20 primary edge face will be very narrow compared to the 15 degree back bevel, somewhere around 1/32 to 1/64 of an inch. 6) Switch sides and repeat until you have a burr running the full length of the first side. 7) You’re almost home. Now that you’ve got your burr you need to grind it off completely so that the true edge remains. Now technique matters. No more grinding in circles. Stroke gently from heel to tip, alternating sides with each stroke. Keep the sharpening stone perpendicular to the blade as usual, beginning the stroke at the heel and ending at the tip. Or if you are sharpening on a benchstone, stroke tip to heel, if you’re more comfortable that way. Lighten up on the pressure as you go. There is no hard and fast rule, but five to 10 strokes per side should do it. If your checking reveals that the burr is simply flopping from side to side, lighten up the pressure even more. 😎 Change from the coarse or medium stone to the fine stone and continue. Keep stroking side to side until all the scratches from the coarse stone are gone. Continue lightening up on the pressure as you proceed. You are trying to grind the burr off. If you press too hard you’ll simply form another one. 9) Finish with a few very light strokes on the fine stone. Now, to make sure that the burr is completely gone, place the knife on the stone as though you were going to take one last stroke, but this time increase the angle just a hair. On a Sharpmaker, tilt the knife very, very slightly in toward the center to increase the angle. Now guide the knife down the stone using no more pressure than the weight of the knife itself. Switch sides and repeat for one stroke. You can do this for one more stroke per side if you can still feel any vestige of a burr. If you have a smooth steel or very fine grit ceramic rod you can substitute a couple of strokes per side at a slightly greater than 20 degree angle for this last step (see discussion on steels and steeling below). Your edge should be frighteningly sharp at this point. If it’s not, you might not have fully ground off the burr. The edge could simply be turned to one side. Try the fine stone and light pressure again. It could also be that rather than grinding off the burr it was simply turned straight down. This will give you an edge that will send shivers down your spine but it will break off in the first use. A light touch at the end of the sharpening process is the key. If you want your knife too look as good as it performs, progress through the coarse, medium and fine stones at each angle setting while you’re raising your burr. This will remove any deep scratches and give the edge a more refined look. This edge is not only very sharp, but is relatively strong. With regular steeling it will last for many months, even under hard use. When steeling ceases to have the desired effect it’s time to sharpen again. However, now that you’ve ground the back bevel you really only need to sharpen the 20 degree primary edge. If your knife is very dull go back to step four on the coarse stones. If it is only a little dull you can begin with the fine stones. The burr will be very easy to raise in subsequent sharpening sessions. Tips and Tricks There are a couple of tricks that can make the sharpening process even easier. I’ve saved them until the end just to be cruel. The Magic Marker Trick One of the easiest ways to ensure that you are matching an existing bevel is to coat the edge with magic marker. As the magic marker is abraded away by the sharpening stone. you will be able to see where the metal is being removed and whether you have matched the angle properly. Once you have coated both bevels with marker, take a swipe or two down your stone. If the marker is wiped off over the width of the bevel you have matched the angle properly. If your angle is too high, only the marker near the very edge will be removed. If your angle is too low only the marker near the shoulder, above the edge, will be removed. Recoating the edge as you sharpen is a good way to ensure that you’re holding the correct angle throughout the process. No matter what type of sharpening system you use, the magic marker trick will save you a lot of time and frustration, especially in matching an unknown angle on one of the guide or rod-style systems. The magic marker trick also comes in handy when you are establishing a back bevel. If you coat the edge before working at the 15 degree setting you can grind the back bevel until the marker is ground almost to the edge, leaving 1/32 to 1/64 inch. That’s about how wide the primary edge face will be. Rather than grinding all the way to the edge until you get a burr, you can now switch to the 20 degree setting, knowing that the last little bit of edge will become the primary edge face. You still have to raise a burr at 20 degrees, but the marker trick can save you a little time. The Paper Airplane Trick Take a piece of paper with square edges. Fold the bottom left corner over until it meets the right edge. Smooth it down. You’ve just turned a 90 degree angle into a 45 degree angle. Fold the creased edge over to the far right edge like you’re making a paper airplane. You’ve just folded it in half again, and you have a 22.5 degree angle. Sound familiar? Twenty-two and a half degrees is pretty dang close to 20 degrees. As close as you can generally hold a specific angle by hand. This folded piece of paper can serve as a guide for steeling your knife, setting an angle on a benchstone or just checking that you’re keeping your angle steady as you sharpen. The paper edge guide is especially handy when you are learning to steel your knives properly. It helps build the right angle into muscle memory so you can do it without the guide when you have a little more experience. Fold the paper again and you have an 11.25 degree guide for steeling those super thin slicing knives that you’ve sharpened to 10 degrees per side. The Mousepad Trick Do you have an old mouse pad? Is there an auto supply store nearby? You can make a superb sharpening system for about $5. Go to your nearest auto supply store and get some 600 grit sandpaper. Mylar-backed wet/dry sandpaper works best. This is the stuff used to sand automotive paint between coats. Get the self-stick kind. If they have higher grits, get a couple of sheets of those, too, 1200 grit is generally the next step up. Go nuts. It’s cheap. Stick the sandpaper to the mouse pad and trim the edges. This is your new sharpening system. If you have both 600 and 1200 grit, apply one to each side of the mousepad. Make sure you have a work surface you don’t mind scratching up. If you have a double-sided mousepad sharpener, you don’t want to work on your kitchen counter or dining room table. Your spouse will kill you. This system requires a stropping motion when sharpening, using an edge-trailing stroke. That means that unlike other sharpening methods you don’t lead with the edge, you lead with the spine. Image an old barbershop with the barber stropping his razor, stroking away from the edge. That’s the idea. To establish your angle, lay the knife flat on the pad, edge toward you. Lift the spine slightly while pulling lightly toward you. Continue lifting until the edge bites into the sandpaper. That’s your stropping angle. Press down lightly and stroke the knife away from you, spine first, moving from heel to tip. When you reach the end STOP and lift the knife straight up off the sandpaper. Don’t roll it off or lift the spine further or you’ll mess up the edge you’re creating. Turn the knife over and stroke back the other way with the edge away from you, pulling the spine toward you at the same angle as the previous stroke. The really cool thing is that the mouse pad is soft enough that it conforms to the angle of the knife edge. As long as you’re pretty close you’ll be fine. This will give you an amazing edge in a fairly short amount of time. If you want to polish it up, use the higher grit sandpaper on the other side of the mouse pad. Because the mousepad is soft, it deforms lightly around the edge of the knife and gives you a slightly convex bevel. As we’ve discussed, a convex edge has many advantages but can be difficult to achieve without a belt sander. This is one way to create or maintain a convex edge without serious power tools. This is the same technique as stropping (below) but with a different abrasive. Stropping Stropping is a handy way to finish off a burr or put a final mirror polish on your edge. While you can strop on anything from the back of a legal pad to an old belt, places like Lee Valley Tools and HandAmerican sell hard backed strops. The strop is usually charged with an abrasive, like green chromium oxide paste, so it actually does remove very fine particles of metal. Like the mousepad trick above, stropping is an edge trailing stroke. Lay your knife flat on the strop with the spine facing away from you. Slowly pull the knife toward you while lifting the spine. When the edge just begins to bite into the leather you have found your angle. Keep that angle as you stroke the spine away from you, pulling the edge along behind. When you get to the end of the stroke STOP. Lift the blade straight up off the strop. Do not lift the edge higher or roll the knife over while it is still on the strop. You can wreck your edge that way. Now lay the knife flat again, spine toward you, and gently push the edge toward the end of the strop while lifting the spine. When the edge begins to bite you’ve found your angle for the return stroke. This second step isn’t really necessary if you’ve kept your angles consistent during sharpening, but it never hurts to make sure you are holding the right angle. The return stroke is the same motion as the first stroke, simply in reverse. The edge is facing away from you and you pull the spine toward you. Stropping will create an extremely sharp, highly polished edge optimized for push cutting. To some extent, stropping can make up for less than perfect sharpening technique, especially since it’s a little more forgiving. Handling Serrated Knives Serrated knives and bread knives are a special case. Serrated knives will stay sharp longer than plain edged knives, mainly because the insides of the serrations generally don’t contact hard surfaces. That’s what the teeth are for. The teeth not only have a cutting function, but are also sacrificial lambs, offered up to steakhouse swordsman and children everywhere who feel that if they’re not grinding into the ceramic of the plate, they’re not cutting. There are four ways to sharpen serrated knives: 1) Pretend the serrations don’t exist and sharpen on a stone, sharpening system or electric sharpener as you would a plain edged knife. This will eventually remove the serrations. 2) Sharpen the flat, non-serrated back of the blade. This will sharpen the knife, but also will eventually remove the serrations, though not as quickly as the first method. 3) Sharpen the serrations individually with a tapered diamond or ceramic file. 4) Sharpen on a crock stick setup, going very slowly so the ceramic rod glides in and out of the serrations. This last method actually works fairly well, especially with the Spyderco Sharpmaker. It’s triangular rods fit into serrations much easier than the standard round crock sticks. If you want to keep your serrated knives as sharp as they can be, the Sharpmaker system is the way to go, though the Lansky rod-guided system also has an accessory hone for sharpening serrated edges. Chisel Ground Edges Sharpening chisel-ground or single-bevel knives is not tricky. You simply match the bevel angle and sharpen as usual – but only on the beveled side. When you raise a burr, grind it off by laying the flat side of the knife perfectly flat against your stone and swipe the burr off. It only takes a couple of passes. You can do the same thing with a strop. The back side of the knife must be perfectly flat or you’ll round your edge. All you want to do is grind off the burr. The back side of a sashimi knife is sometimes lightly hollow ground to make this step easier. You can actually lay the knife flat and sharpen with your usual stroke, edge first across the stone. How to Tell if Your Knife is Sharp How do you know when you have achieved the ultimate high performance edge? Depends on what you want to do with it. Remember that we defined sharp not only as two edge faces intersecting at a line of minimum width, but also as a function of blade shape, angle and the material to be cut. We want a keen edge that can hold up in repeated usage while producing the results we’re looking for in the kitchen. You can tell when you’ve set your knife’s edge bevels correctly by placing the knife at a 30-45 degree angle on your thumbnail and pulling across the edge. A properly set edge will bite in and not slip off your nail. Of course, you could hurt yourself doing this, too. Or, at the very least, wreck your nail polish. Any slick, slightly rounded surface will do. Take, for example, a plastic pen, stand it at a 30-45 degree angle on a countertop and lay the knife edge straight up and down on the plastic. Pull the edge from heel to tip. If it bites in, you’ve set your edge correctly. If it slides off, you have some more work to do. The sharper the blade, the smaller you can make the angle before it slips. Another test is to take a Q-tip and push the fuzzy head over the edge. Any nicks or burrs will pull the cotton fibers loose from the head. The Q-tip will also reveal any rough spots in the edge. A well-sharpened edge will feel smooth. This test is more effective for polished edges. Razor Edge Systems makes an Edge Tester for this very purpose. It is widely used in the meat cutting industry to check edges to see if they need sharpening (or if the meat cutter is just goofing off). Another check is the “Samurai Hair Test.” Lay the knife nearly flat against the hair on the back of your head and pull gently down. Very gently. An aggressive, keen edge will readily grab the hair. A dull edge will simply slide off. Don’t shave the back of your head. Just pull gently down to see if the edge catches and tugs. I don’t want any irate calls from your barber or hairstylist. The classic test of sharpening is shaving the hair of your arms. This has several problems, not the least of which is that the hair might not grow back or could come in coarser and darker than the surrounding hair. And if you have a lot of knives to test you’ll end up looking like you have mange. The real problem with shaving, though, is that shaving is push cutting. A highly polished edge will readily push cut, but, as we’ve discovered, you don’t always want a highly polished edge. A slightly coarse edge that tugs the hair but doesn’t shave will actually slice better than the polished edge. Thus, shaving isn’t the best test for many knives. There are other opinions on shaving as a test. Cliff Stamp said, “Coarse edges can easily shave, Joe Talmadge was one of the first guys to comment on this. A lot of people think they can't and thus sharpen them pretty sloppily. The more coarse an edge you form, the sloppier you can get and still have decent cutting ability. However you can get better cutting ability but keeping the edge crisp and aligned. This edge will then have a much higher level of push cutting ability, overall durability and edge retention, as well as a slightly higher level of slicing aggression. I have seen edges formed from a 100 grit AO belt that would still shave. This is more coarse than a x-coarse DMT hone.” Slicing newsprint is a pretty good test. Both highly polished edges and toothier edges (as long as they’re not overly coarse) will readily slice a piece of newspaper held lightly between your fingers. The best test, though, is actually using the knife for its intended purpose. If you have a slicing knife, try a soft tomato or plum. A keen, toothy edge can bite into the tomato with little or no pressure, just a light draw across the skin. If you have polished your santoku to a mirror-like edge, try dicing a few carrots or potatoes. The reduced effort will be immediately noticeable. And greatly appreciated if you have 50 pounds of beets to get through before service. A thin, slightly coarse slicing knife will cut a soft tomato with a light pull and nearly no pressure on the blade.
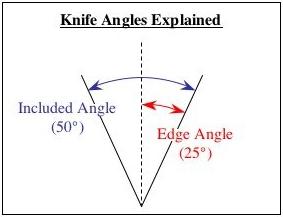

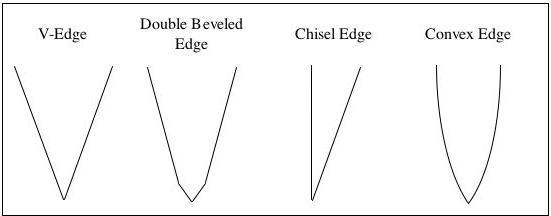
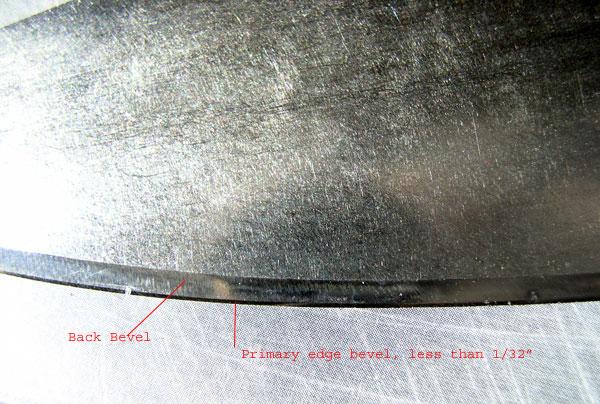
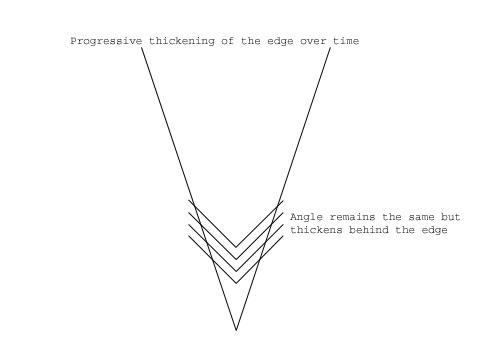
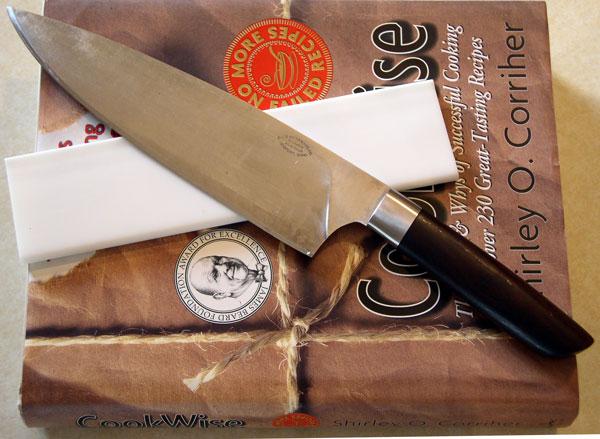
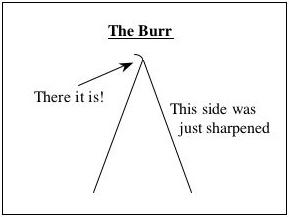
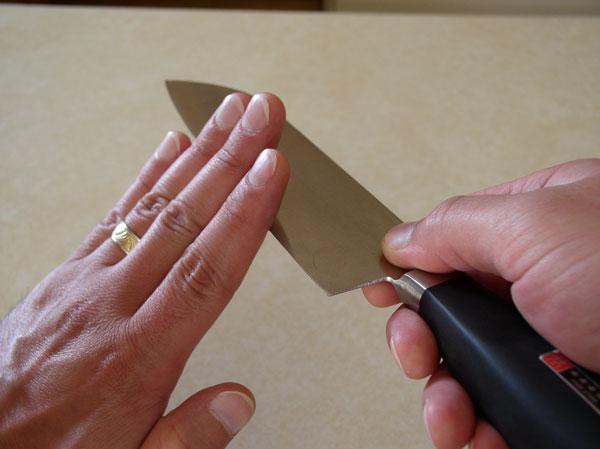


- 1 reply
-
- 1
-

-
Please post questions relevant to Knife Maintenance and Sharpening here.
-
Basic Knife Skills by Marsha Lynch (zilla369) Basic knife skills are an important component of any culinarian’s repertoire - whether you plan to earn a living in the kitchen, or simply please yourself, your friends, and your family. Learning to wield a knife correctly will speed up your prep time, and food products fashioned in uniform shapes and sizes will help guarantee even cooking throughout a dish. In addition, the mastery of certain classic knife cuts and methodology will vastly improve the look of your food, garnishes and plate presentations. Overview of the lesson What I’d like to accomplish here is to impart a basic knowledge of knife safety, knife construction, the most commonly used kitchen knives, a few classic knife cuts, and a couple of specialty cuts. I’m only going to address vegetable cuts; some butchery will be covered in upcoming lessons. The next eGCI segment (led by Chad) will feature a discussion of the metals used in knife composition, knife maintenance, and sharpening techniques. Equipment You won’t need any truly special equipment for this lesson. The bare minimum requirements are: A sturdy cutting board A (sharp!) chef’s knife A (sharp!) paring knife A vegetable peeler Hopefully, you also own a steel (a tool to hone your knife edge between sharpenings and intermittently during use). If you have a tourne or bird’s beak knife, that’s great – but not absolutely necessary. Shopping List Here’s a list of what you might like to have on hand if you want to try all the techniques I’m going to present: A bag of baking potatoes A bunch of carrots A few large, firm onions A few handfuls of leafy herbs or vegetables (large-leaf basil or spinach would be ideal, but cabbage will suffice) A couple of bell peppers A mango or two A couple of large citrus fruits – grapefruits or oranges Several large, firm white button or crimini mushrooms. I bought all the produce I needed for this lesson for about $10 US at my local grocery store. Knife Safety The safe use of knives is imperative for obvious reasons. There are only a few rules to remember, but they are crucial: 1. A sharp knife is a safe knife. Using a dull knife is an invitation to disaster. If you try to force a dull knife through the surface of a food product, it’s more likely to slip and cause an injury. Also: if you do happen to cut yourself, a sharp knife will result in an easier wound to attend to. 2. Never, ever grab a falling knife. The best way to avoid having to think about this rule is to make sure your knife is always completely on your work surface, without the handle sticking out into traffic areas. Inevitably, however, it will happen from time to time that you or someone else will bump a knife handle, resulting in a falling knife. We all have a natural instinct to grab for anything that’s falling. You must overcome this inclination. Remember: a falling knife has no handle. Just get your hands and feet out of the way. 3. Use the right knife for the right job. Many knife injuries occur when laziness induces us to use the knife at hand rather than the correct knife for a job. Place your knife inventory where it is easily accessible so you won’t be tempted to make this mistake. 4. Always cut away from - never towards – yourself. Sometimes this is a hard rule to follow. Again, don’t be lazy! If the angle is wrong, turn the product around. Or turn your cutting board around. By the way - if your cutting board doesn’t have rubber feet, you should place it atop a damp kitchen towel to make sure it doesn’t move while you’re cutting. 5. When you have a knife in hand, keep your eyes on the blade. I was taught this rule early on in culinary school. I have to admit that every single time I have cut myself, I was looking away from what I was doing. This rule stands whether you are cutting something or carrying a knife. The simple fact is: you’re unlikely to cut yourself if you’re watching the blade, especially the tip. 6. Carry a knife properly. If you’re carrying a knife through the kitchen, especially a busy commercial kitchen, there are often people hurrying everywhere. You must get used to the idea that the only way to walk with a knife in hand is to carry it pointed straight down, with the blade turned towards your thigh. Keep your arm rigid. You don’t want some busboy or family member going to the emergency room with a puncture wound from your knife. 7. Never, ever put a knife in a sink full of water. In addition to soaking probably being bad for your knife handle, putting a knife in a sink full of (likely soapy) water is just asking for trouble. Wash your sharp knives by hand (not in a dishwasher!) and put them away immediately. 8. Always cut on a cutting board. Don’t cut on metal, glass or marble. This will ultimately damage a knife’s edge. The Parts of a Knife Knives are constructed in many different ways. The features of a classic chef’s knife are identified in the two diagrams below. In the very best knives, the tang will run the full length of the handle as pictured above. This lends balance and durability to the knife’s construction. Another sign of quality is a bolster that is an integrated part of the blade, rather than a separate “collar”. For personal use, I tend to favor the heavy, exquisitely balanced, German knives. The weight of these knives does a lot of your work for you. In addition, the tang and rivets of a classic chef’s knife can serve as a handy reference for classic knife cuts. Types of Knives There are literally hundreds of knife designs. I’m going to identify just a few of the ones I use the most to perform classic knife cuts and common kitchen tasks. Left: steel. Top to bottom: A) 10” chef’s knife, B) 9” chef’s knife, C) 8” chef’s knife, D) Santoku Oriental chef’s knife All the knives in the photo above are chef’s knives, and the top three are sometimes also referred to as French or cook’s knives. If you’re planning on spending a substantial amount money on one good knife, spend it on your chef’s knife. This is the implement you will use 90% of the time to shape product in the kitchen. I use my 8” chef’s knife the most often, but you should take your time deciding what length of blade to purchase according to the size of your hands and your particular needs. A, C and D in the photo above are from Wusthof’s “Culinar” series. I really love the look and feel of these knives, but their one drawback is that they don’t have the visible tang and rivets that are useful for knife cut reference. Note that the Santoku knife has a “dimpled” blade, which allows food product to separate from the blade with ease, rather than sticking to it, as damp product is sometimes inclined to do. Top to bottom: E) Serrated slicer or “bread” knife, F) boning knife, G) paring knife, H) and I) bird’s beak or “tourner” knife E is a serrated slicing knife, very useful for cutting crusty breads without smashing the slices. F is a flexible boning knife designed to flex as it follows the contours of bones during meat fabrication (boning knives are also available with a rigid blade for heavy-duty jobs). G is a general use paring knife, and H and I are bird’s beak (or tourner) knives, useful for cutting curved surfaces or tourneeing vegetables. Knife Grips and Fulcrum Placement The proper way to hold a chef’s knife is to grasp the blade firmly between the pad of your thumb and the knuckle of your index finger just in front of the bolster, curling your remaining fingers around the bottom of the handle. If you hold your knife correctly, you will eventually develop a nice callous at the base of your index finger, near the palm. Resist the temptation to extend your index finger along the spine of your knife, because that method results in a lack of control of the angle you are working with. Front view of the correct grip for a chef’s knife Rear view There are two different methods to choose from when cutting product with your chef’s knife. One is to use your wrist as the fulcrum of the stroke, moving the tip up and down in an arc: Wrist-fulcrum method The other method is to keep the tip of your knife on the cutting surface, moving the rear of your knife up and down. This is the method I prefer, since it allows for a smoother range of movement and more control: Tip-fulcrum method No matter which method you adopt, it’s crucial to be aware of the position of your “guide” hand. Always keep your thumb tucked behind the gently curled fingers of your guide hand. This will prevent countless injuries, and also facilitate the use of your knuckles to guide the edge of your knife to its proper position for the next cut: Proper position for guide hand Some Classic Knife Cuts I’m using potatoes to demonstrate the majority of the knife cuts in this section, since they’re relatively inexpensive and easy to practice with. However, you’ll probably figure out that some of the daintier cuts would actually be impractical to fashion a potato into, since only a few minutes of cooking would reduce them to mush. As you grow more proficient, you’ll probably find yourself using denser vegetables, such as carrots or turnips, for tiny cuts such as fine julienne and brunoise. If you practice a lot, be prepared ahead of time with your favorite mashed potato or potato soup recipe to utilize the results of your labor (and your trimmings). Before you begin this section, peel several potatoes and submerge them in cold water to keep them crisp and white. Straighten the edge of your knife by using your steel. By the way, a steel does not sharpen your knife edge, it simply brings it back into alignment in between sharpenings and uses. The next eGCI lesson will address knife sharpening and maintenance. Using the steel A large dice is a cube measuring ¾” on a side. First, cut one side of the potato off to provide a flat, stable surface for the next cut: Cutting a flat surface for stability It’s important to be aware of the angle of your knife blade in relation to the cutting surface – this should be a completely perpendicular, 90-degree angle. The best way to ensure the proper angle is to cut with your head directly over the cutting surface and product. So it’s best to use a high table or counter to cut on – otherwise you are in for an aching back after as little as a few minutes. Now, set the potato on the newly created flat side, and begin cutting “planks” ¾” wide: Cutting the “planks” Next, lay the planks over and cut them into “logs”: Cutting “logs” for large dice Finally, trim one end of the log and cut as many ¾” large dice as you can. As you become more proficient, you will be able to cut several stacked planks into logs at a time, and several logs side-by-side at once into dice. Dicing logs Large dice This same method (flatten a side, cut planks, cut logs) will work for most of the potato cuts in this section. For instance, a medium dice is a simply a perfect ½” cube. Same method, smaller cubes. A paysanne is a decorative cut that’s related to the medium dice, but sliced into 1/8” thick squares (1/2” x ½” x 1/8”). Paysanne are most often used as a garnish: Cutting paysanne A classic batonnet is a stick-shaped cut (resembling a french-fry) that measures ¼” x ¼: x 2-to-2 1/2” inches. Cut ¼” square logs as outlined earlier and trim to the correct length. One easy way to tell if your batonnet are of classic dimensions is to compare them to the rivets on a standard chef’s knife: Standard chef’s knives often have ¼” rivets – a perfect reference forbatonnet cuts The opposite edge of successive rivets on a standard chef’s knife makes a good reference for batonnet length A small dice is simply a ¼” cube, made from the beginnings of batonnet: Cutting small dice from ¼” square logs The dimensions of a true julienne are 1/8” x 1/8” x 2-2 ½”. A julienne of potato is sometimes referred to as an alumette. I find that when the cuts get this small and smaller, for some reason it is easier to trim planks to the correct length before cutting logs: 1/8” planks, ready to be cut into julienne Once again, your knife handle provides a handy reference for the length of a classic julienne – and the tang of your knife provides a reference for the correct width: Julienne can be fashioned into classic brunoise by simply dicing julienne logs into 1/8” cubes. You won’t be using brunoise of potato very often, though; brunoise is more likely to be made of carrot or pepper, and used as a garnish: Dicing julienne logs into brunoise Fine julienne is the same length as julienne, but the width and depth are 1/16” x 1/16”: Fine julienne 1/16” cubes are known as fine brunoise: Cutting fine julienne into Fine Brunoise A mince is a tiny, but less fussy cut of vegetable, with no specific dimensions except that it should be quite small, usually in order to promote quick infusion of flavor to a dish. To accomplish a quick mince, cut your product into manageably small slices or segments, then rock the edge of the knife back and forth over the cutting surface while pressing down on the spine of the knife with the palm of your guide hand. Arch your palm to keep fingertips out of the way of the blade: Mincing a shallot Minced shallot Tips for Cutting Certain Fruits and Vegetables Now we’ll move on to less strictly classic techniques and address the easy ways to break down certain fruits and vegetables. Dicing an Onion The first hurdle I had to overcome in learning to dice an onion was to learn an efficient method of peeling it. Attempting to peel a whole onion can be an exercise in frustration. First, make a flat surface to set the onion on by slicing off a small portion of the stem end: Now, balancing the onion on the flat surface just created, cut it in half through the root end. Do not trim the root end off either half of the onion. Next, peel the skin from each half of the onion, using a paring knife: Peeling the skin from half an onion Once your onion is peeled, place it cut-side down, and make vertical cuts of the desired thickness from root to stem end. Do not cut all the way through the root end. Making the vertical slices Now, make horizontal slices, once again being careful not to cut through the root end. You may need to hold the sides of the onion together with the fingers of your guide hand, so be cautious – it’s easy to nick yourself during this step: Making the horizontal cuts Finally, slice down across the cut grid to produce your dice: Completing the dice The diced onion Chiffonade A chiffonade is a fine slice or shred of leafy vegetables or herbs. To chiffonade, simply stack a few leaves, roll them into a cigar shape, and slice. Remember to remove any tough, woody stems that you want to exclude from your preparation: Rolling the leaves Slicing the rolled leaves The completed chiffonade Filleting a Pepper To remove the ribs from a bell pepper without creating unnecessary waste, simply cut the top and bottom from the pepper (reserving them for dice or garnish) and remove the seeds. Slice the body of the pepper open and lay it flat. Then, just run your knife along the inside of the pepper, removing the pale ribs, and slice as desired. Remember – always cut away from yourself: Removing the ribs from a bell pepper Dicing a Mango A mango is problematic to break down because the peeled flesh is very moist and slippery, and it is bisected by a large, flat pit. Slice the (unpeeled) fruit from each side of the pit: Removing the side of the mango Using a paring knife, carefully make a crosshatch of the desired size, without cutting through the peel: Cutting the crosshatch Finally, invert the peel by pressing on it with your fingers. You can then run the blade of your knife under the cubes next to the inside of the peel: Dice of mango, ready to be cut off the peel Rondelle and Diagonals of Carrot A rondelle is a coin-shaped slice of a cylindrical vegetable. A diagonal can be formed by simply turning your knife at an angle to the axis of the carrot. Keep in mind that many cylindrical fruits, vegetables and breads can be cut into diagonal slices (squash, cucumber, baguettes) to produce this attractive shape. I peeled these carrots before slicing. Sometimes, with a particularly tender carrot (or due to enthusiastic peeling), a vegetable peeler creates flat planes which yield rondelles or diagonals that have many flat sides, creating a geometrical or octagonal shape. If you feel this is unattractive, you can remove the ridges by “sanding” the peeled carrot with a clean, dry green plastic dish scrubby prior to slicing. Rondelles and diagonals of carrot. Note the flat sides created by the vegetable peeler. Portioning Citrus Fruits Citrus fruits are used in countless recipes, but the traditional “score the rind and peel” method produces sections that are still covered by the thin but bitter skin and may contain seeds. To produce attractive, skinless citrus sections, remove the rind and pith from the outside of the entire fruit with your knife with a curving stroke: Removing the rind and very thick pith from a pink grapefruit Slice off the ends, freeing the sections from all but the side panels of skin in between them. Then make a “v” cut on either side of the section, between the flesh and the skin: Cutting between the section and the skin Finally, slide the loosened section out. These skinless sections look great in salads: Removing the skinless section Specialty Cuts A classic tourne is a football-shaped, blunt-ended cut with seven equal sides. Creating perfect tourne (especially ones with an odd number of equilateral sides!) takes a lot of practice, but they make an attractive plate presentation, especially for dense root vegetables such as turnips and carrots. Practicing with a potato is a good idea, however, because the softer texture of a potato is more forgiving when you first start out. I usually peel and quarter a medium-sized potato, and cut off the tapered end of the quarter to create another flat end for stability of grip: Preparing to carve a tourne In these photos, I’m using a “bird’s beak” or tourner knife. I prefer the curved blade for this cut, but you can also use a standard paring knife. There are two schools of thought on how to proceed from this point. I find it easier to carve the product into a basic football shape first, then set about creating the seven sides. Others insist it is easier to create the seven sides and then even them up. You’ll soon find out which method is easier for you through trial and error. Another tip: hold the product with the surface you are carving in profile, rather than pointed up towards your face. That way you have the background of your cutting surface to serve as contrast to the vegetable – this will make it easier to see what you’re doing. Be cautious – this is one of the only knife cuts where it is necessary to cut with the blade of your knife towards you, rather than away. Carving the tourne When the sides are even, finish by cutting off the tapered end of your “football”. A classic tourne should be able to balance on end. Why? Who knows? Tourne of potato A fluted mushroom is one of the hardest cuts to master, and will take a lot of practice. You’ll want to use relatively large, firm white button or crimini mushrooms. The first step is to gently peel the outer skin from the mushroom cap to create a soft surface for carving: Peeling the mushroom The knife grip for fluting is unusual and feels awkward at first. Support the handle of your knife with your ring and pinky fingers. Place the pads of your index and middle fingers on the top of the blade near the handle for control. Place the pad of your thumb (carefully!) over the tip to prevent it from scoring the mushroom – you’ll be using the center of the knife-edge to cut, not the tip: Knife grip for fluting Grasp the mushroom by the stem with your guide hand. Starting in the middle of the top of the cap, gently carve a trench. The part of your blade closer to the handle will make one side of the cut, and the part of your blade closer to the tip will form the other side. Drop the handle of your knife and your wrist to follow the curve of the mushroom down the side: Fluting the mushroom Now, lay the next cut right alongside the first one. I flute by turning the mushroom in a counter-clockwise direction, but many other people do it the opposite way. You’ll probably find that one direction is easier than the other for you. A really well done fluted mushroom should have the cuts meet at the apex of the cap in an attractive swirl. If (like me) you find that this doesn’t happen as often as you like, you can “cheat” by pressing the tip of your knife gently into the center to form a star: Pressing a star shape into the fluted mushroom Finally, cut the stem off to creative an attractive garnish. You can wipe the cap with a little lemon juice to keep it from turning brown too quickly: Fluted mushrooms As you practice and gain confidence in basic knife skills, I think you’ll discover that a dimension of pleasure will be added to your cooking experience, whether it’s for a fancy dinner party or just preparing meals for yourself and your family. Be sure to check out the next segment of eGCI to learn how to sharpen and maintain your knives! Post your questions here -->>Q&A

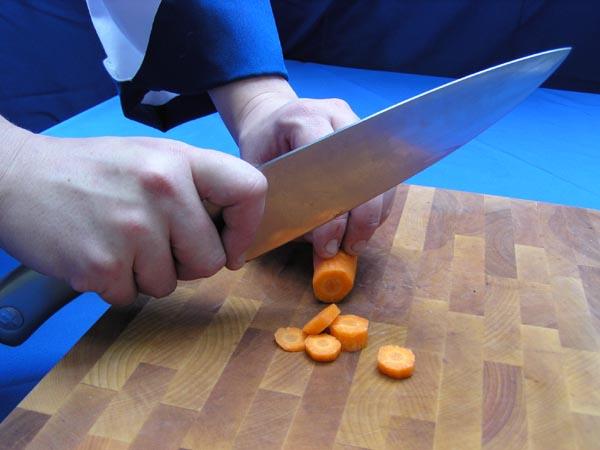
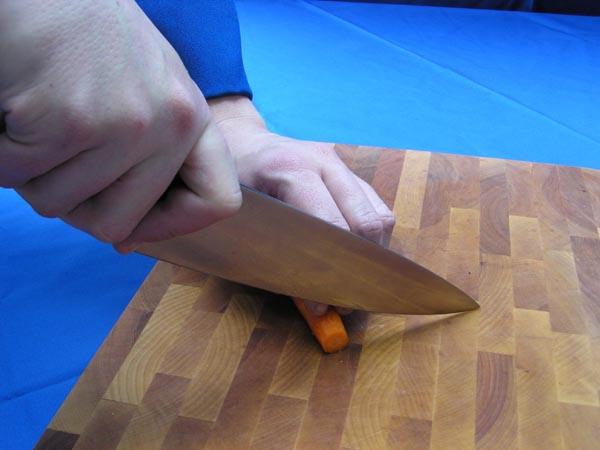
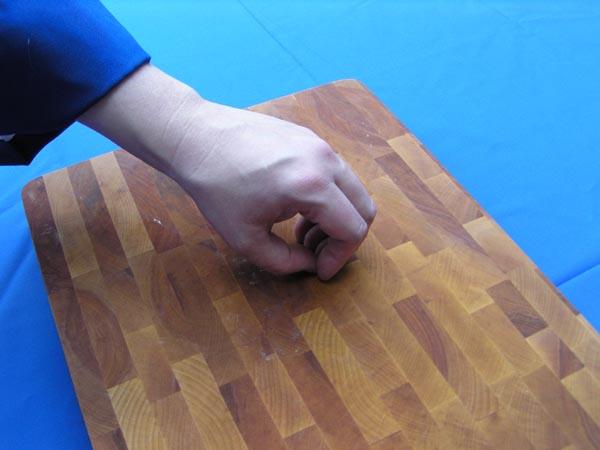
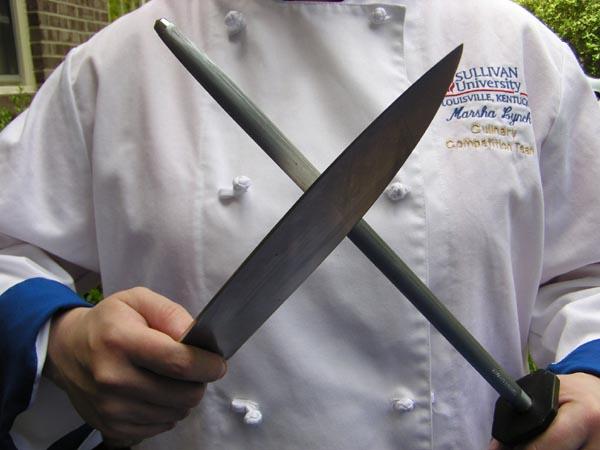
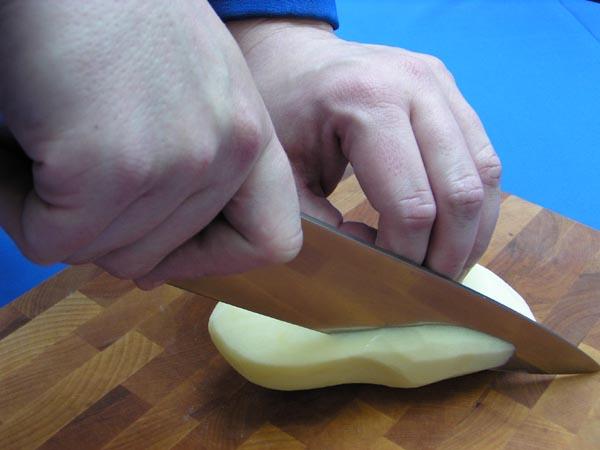

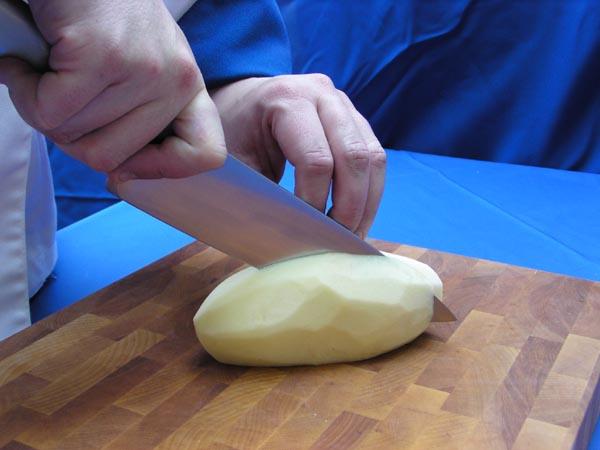
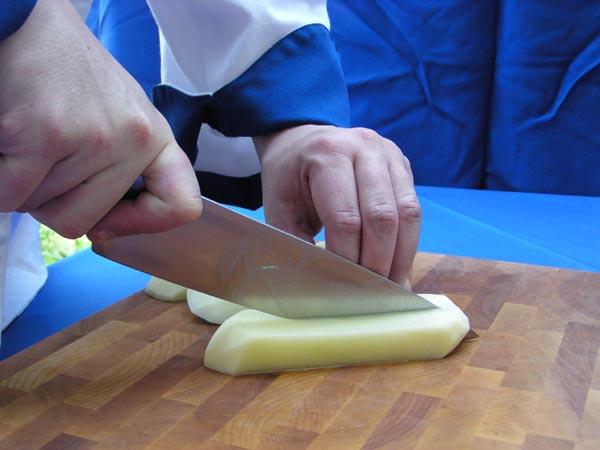
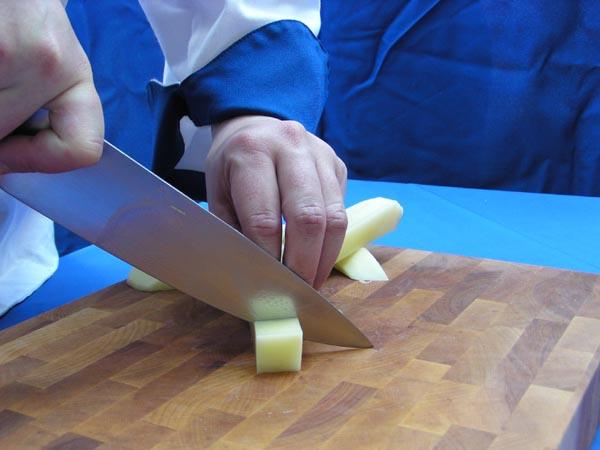
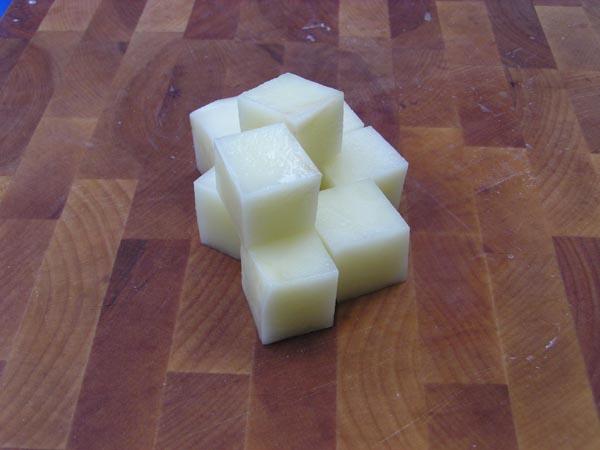
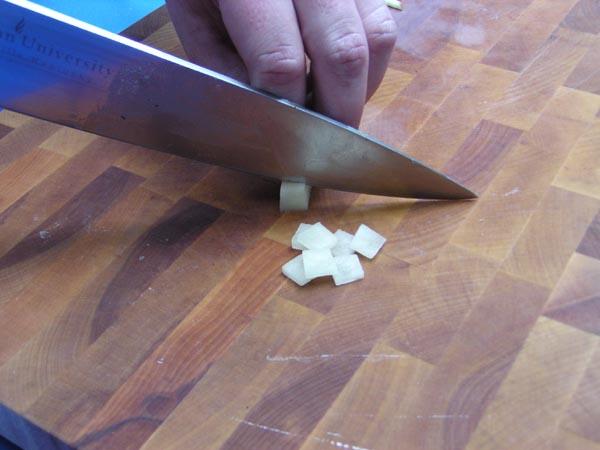
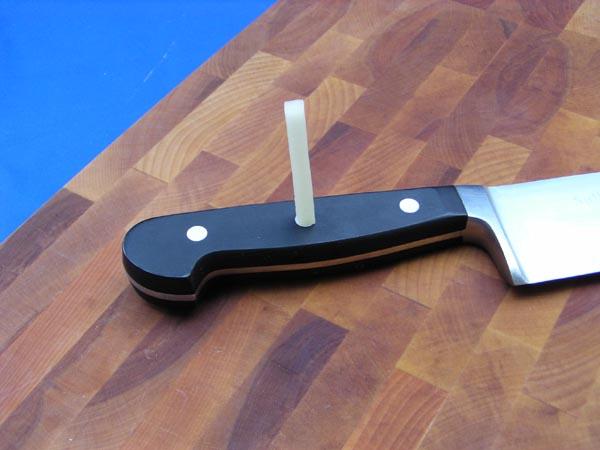
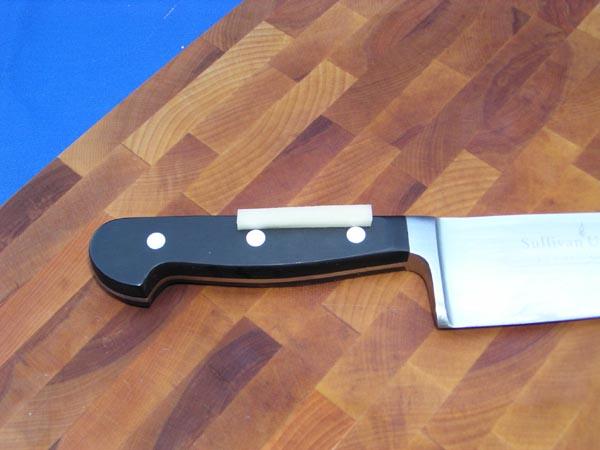
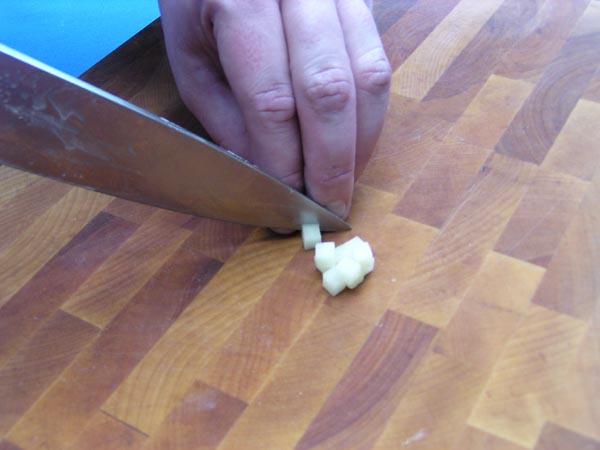

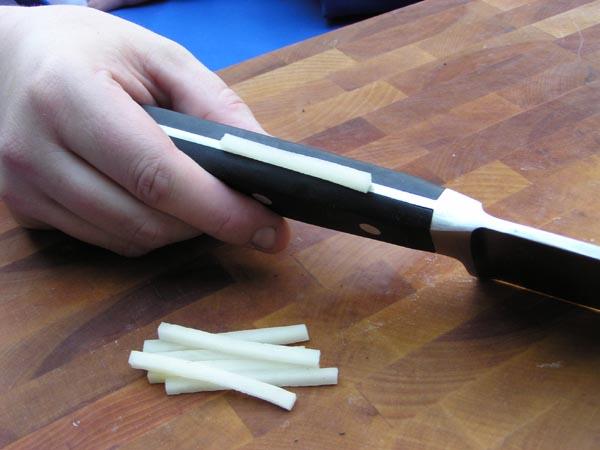
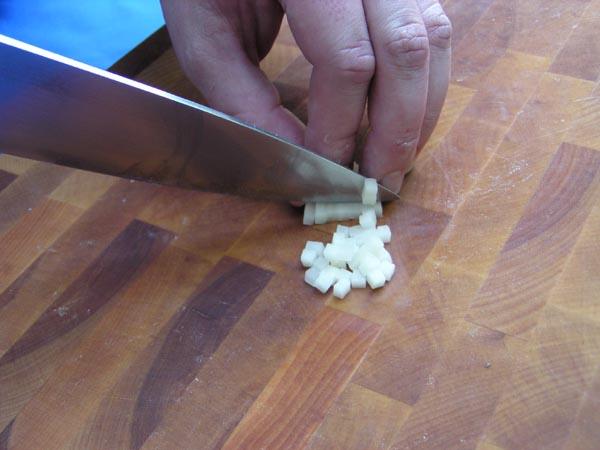
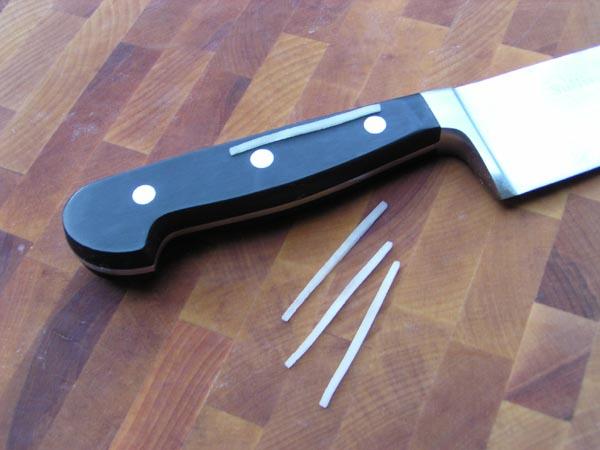
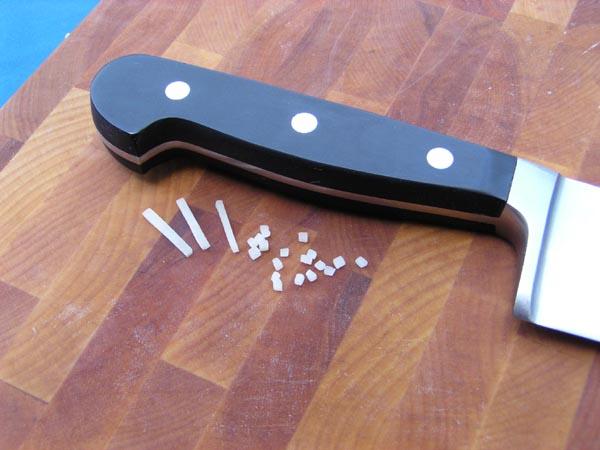
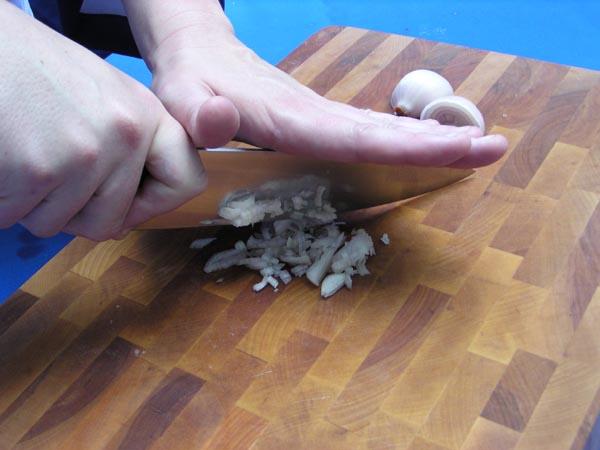
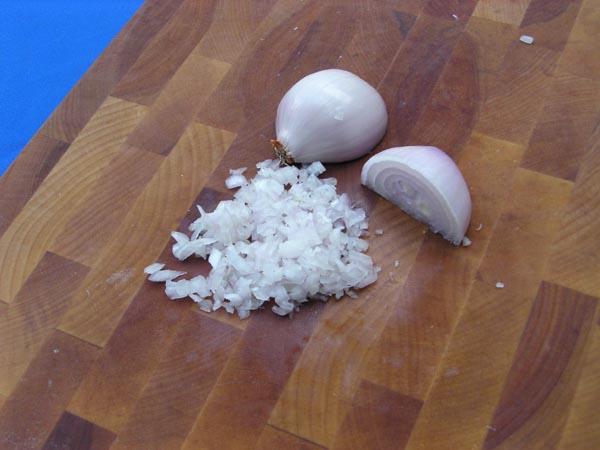
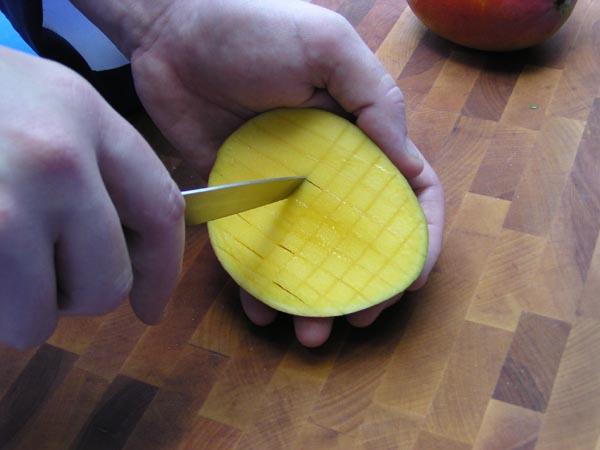
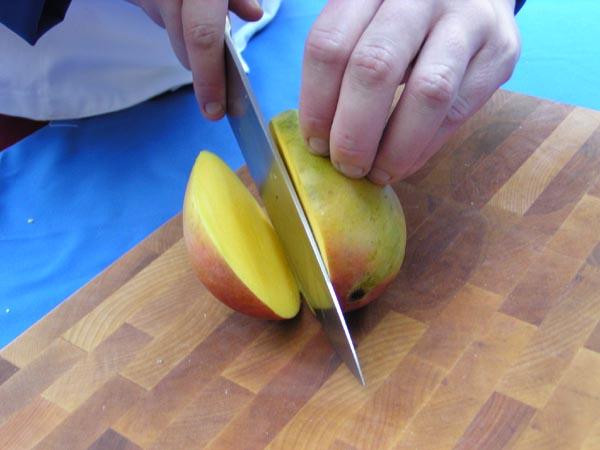

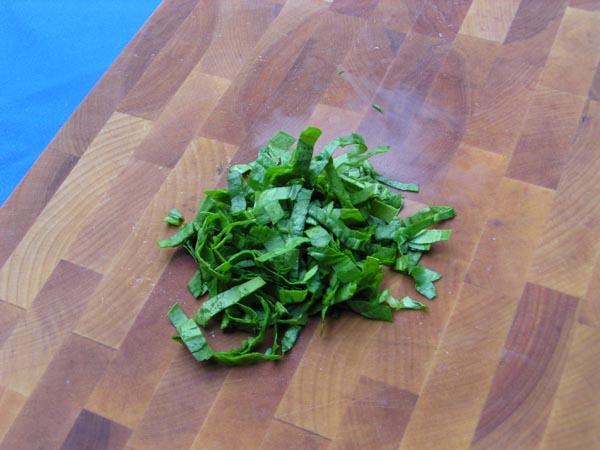
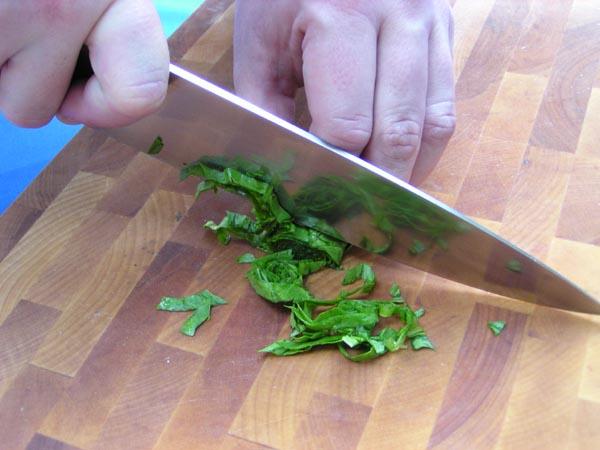
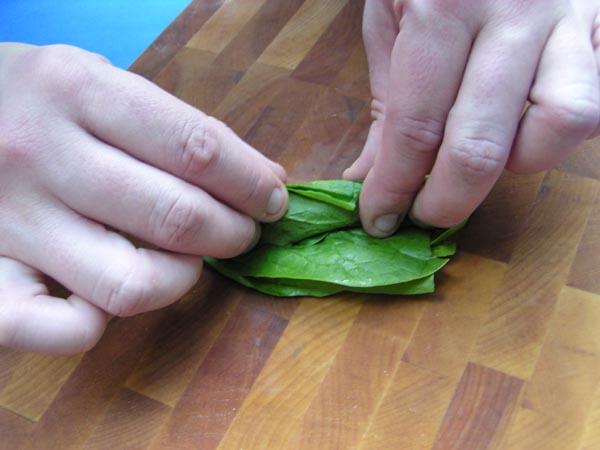
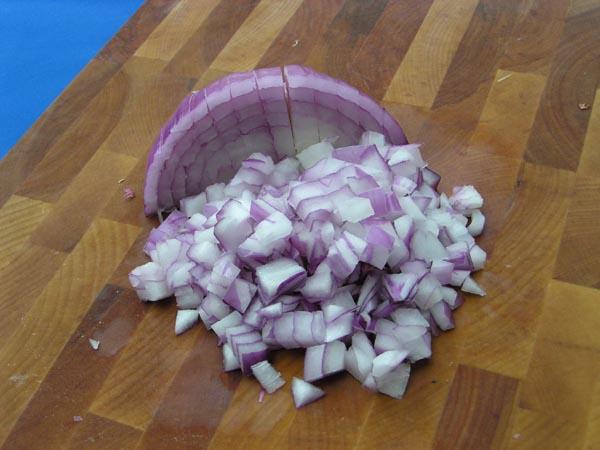
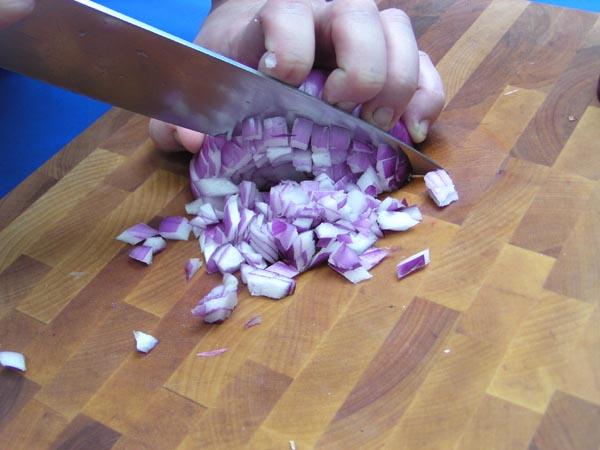

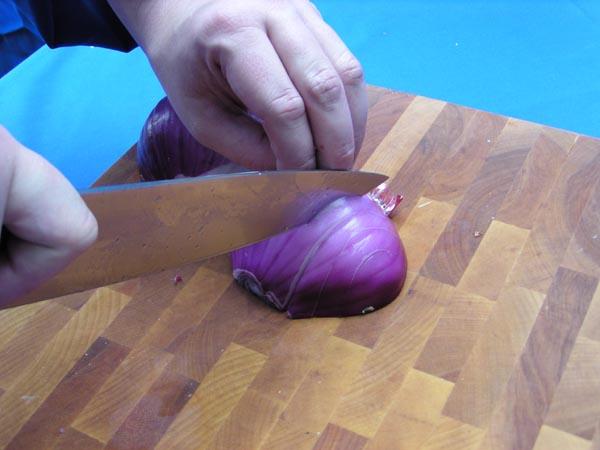
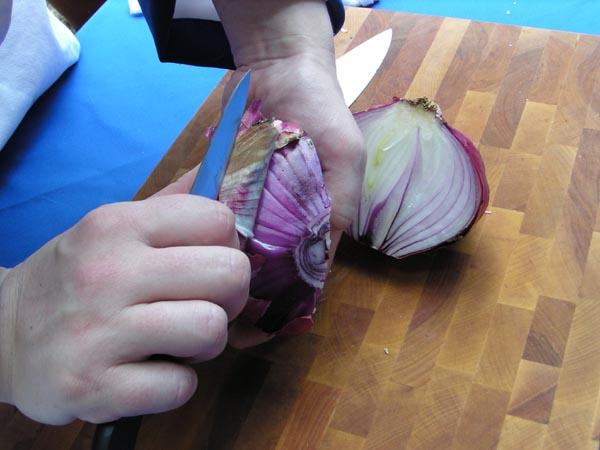
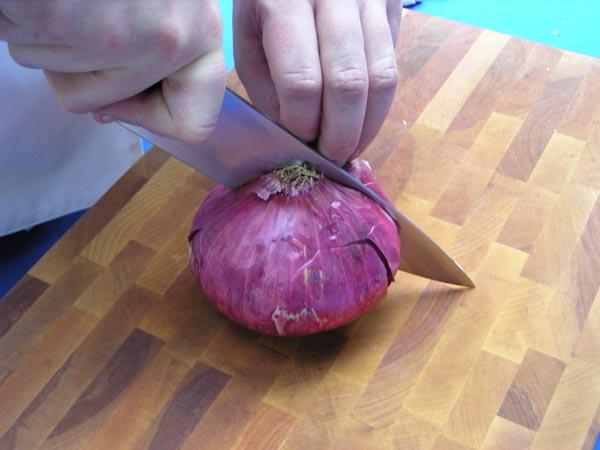
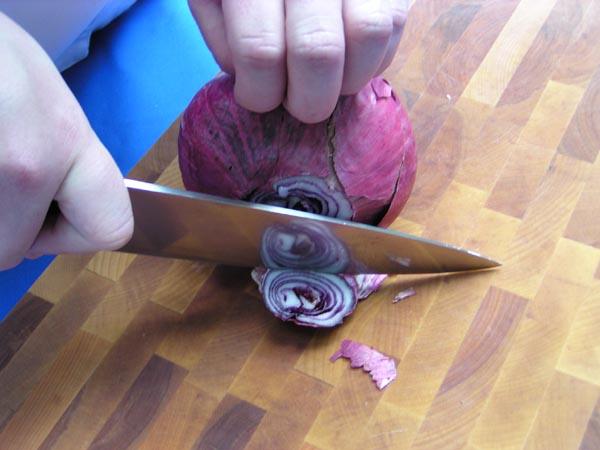
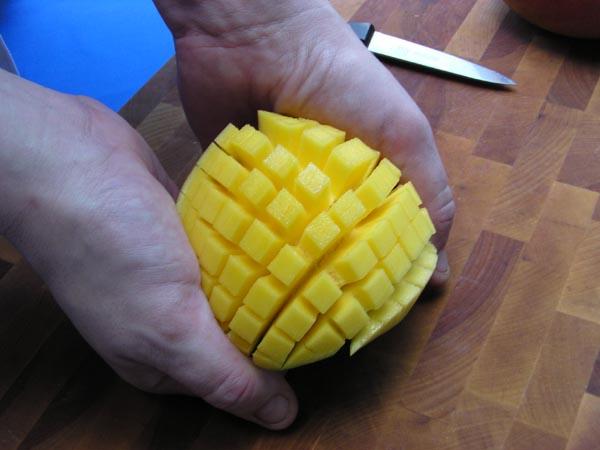
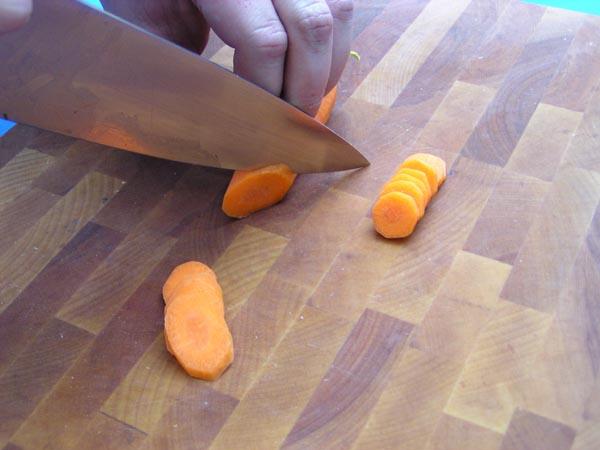
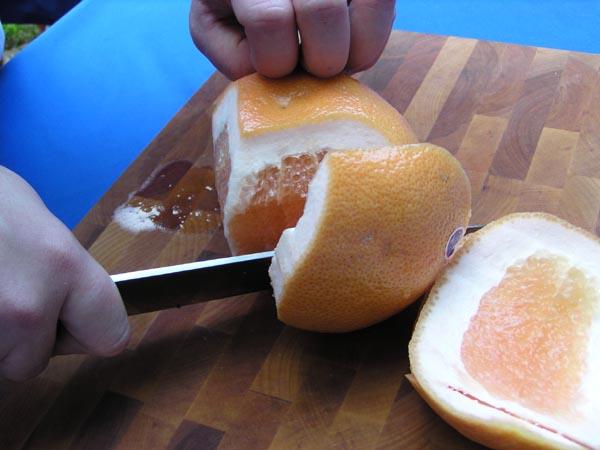

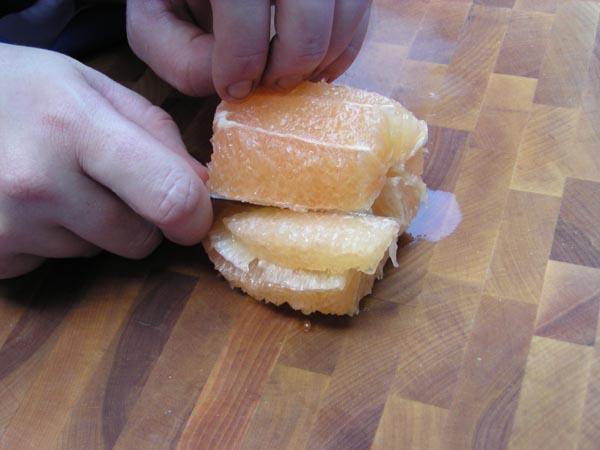
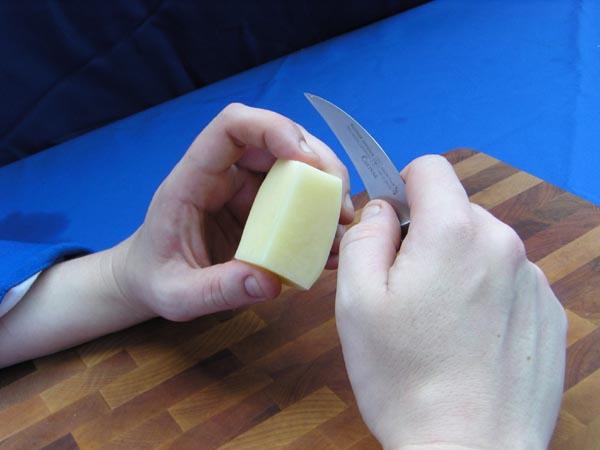
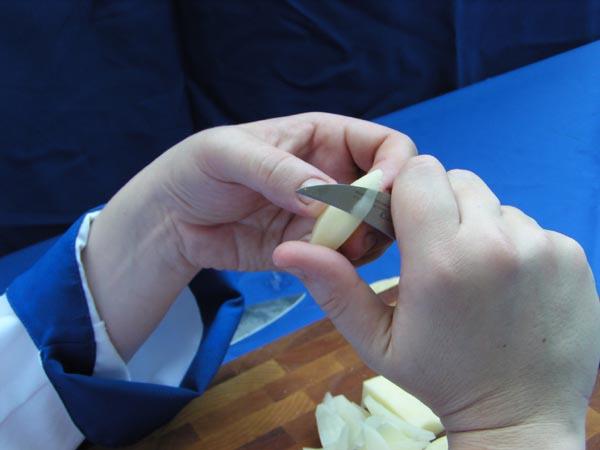
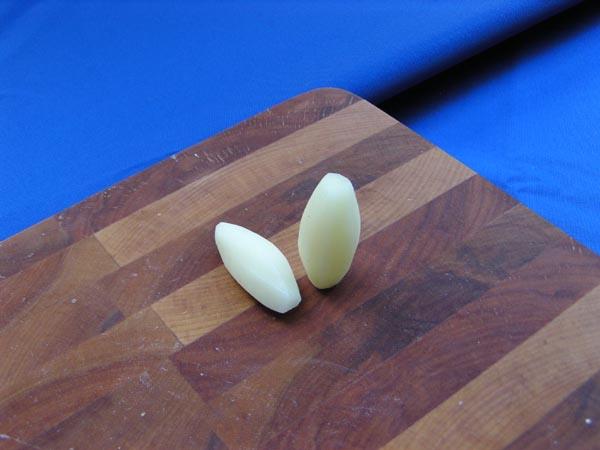
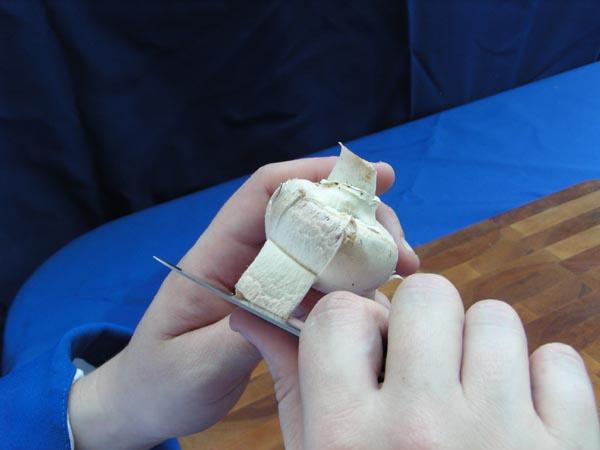
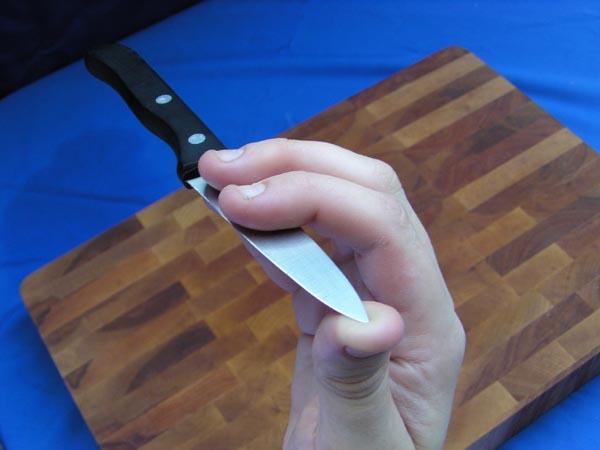
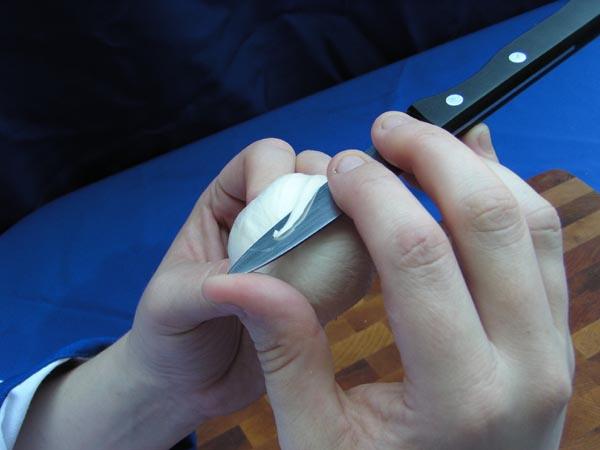
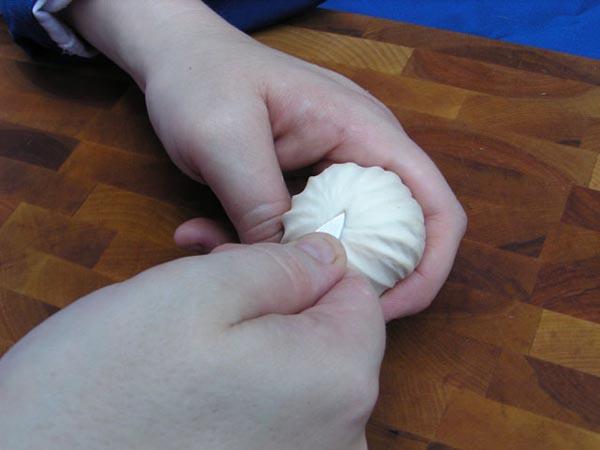

-
- 1
-
-
Please post questions relevant to Basic Knife Skills here.
-
Please post relevant questions here.
-
Understanding Stovetop Cookware By Samuel Lloyd Kinsey (slkinsey) In various discussions about cookware over the years, I have found that many people care passionately about their cookware -- be it All-Clad, heirloom cast iron, heavy copper, or Calphalon -- but don’t really understand their cookware. This article, I hope, can be a first step towards transforming you into the equipment geek I know is lurking inside. Or at least helping you make some informed choices the next time you decide to buy a new pan. As you may imagine, this course requires no ingredients and no equipment - only some patience and a few minutes of reading time Whenever considering a new piece of cookware there are 5 basic questions you should ask yourself. 1. What kind of cooking task do you want to do? As it so happens, there are different pan designs for just about every cooking task one is likely to encounter. For example, if you want to make sauces, you would be well-advised to acquire a saucepan. An understanding of what you want to do can inform your decisions on many different levels. For example, if what you really need is a 3 quart pan for boiling water, there is no reason to spend big money on a fancy pan. 2. What is the basic pan shape? Are you buying a sauté pan? a saucepan? a stock pot? Different pan designs lend themselves to different cooking tasks, and also to different uses and deployments of materials. 3. What materials are used? Cookware materials can be differentiated by two considerations: reactivity and thermal properties. Reactivity is fairly simple. Some materials are more reactive than others, which means that they tend to react chemically with foods and produce undesirable results. Thermal properties, into which we will delve in greater detail below, include things like: How fast does it heat up? How even is the heat? How much heat does it hold? And things like that. 4. How are the materials deployed? This comes down to basic design philosophy: Is it a disk-bottom design or is it straight gauge? Is it fully clad, interior lined or all one metal? 5. How much of the various materials are used? This seems like an easy thing to understand, but it is frequently overlooked. For example, a pan with a 2 mm thick aluminum base will perform differently from one with a 7 mm thick aluminum base, just as a 2 mm thick copper pan will perform differently from a 2.5 mm thick copper pan. The real trick, though, is understanding the difference between 2 mm of copper and 4 mm of aluminum. What Kind Of Cooking Task Do You Want To Do This seems like a relatively simple question, but it is an important one. When you are thinking of getting a new piece of cookware, don’t think “I want a new skillet.” Rather ask yourself, “what do I want to do that I cannot do with the cookware I already own? Why? What is it about my cookware that does not allow me to do what I want?” Sometimes it may be something as simple as wanting a skillet that doesn’t have hot spots. Other times it may be more complex... Maybe you want a small pan for making delicate sauces like Hollandaise and mounting reductions with butter. Then, you have to ask yourself what it is, exactly, that might make a pan good at performing these tasks. In this instance, you would want a pan that had absolutely even heat, that responded immediately when you adjusted the flame up or down, that was able to maintain its temperature when cold ingredients were added, that conducted heat into the sauce from all sides so everything was exactly the same temperature, that had a relatively large surface-area-to volume ratio for efficient reduction and that was nice and wide at the top so it was easy to get in there with a whisk. In short, you might want a stainless-lined heavy copper sauce pan, or for a little less money, a stainless lined heavy aluminum pan, or for a little less money, a stainless pan with a copper bottom. A big part of this article will be working to build a basis for understanding why, exactly you would want a sauce pan and what, exactly, would be gained and/or lost moving from a stainless lined copper pan to a stainless lined aluminum pan to a stainless pan with a disk bottom. What Is The Basic Pan Shape? This section will provide concise descriptions of the various pans used in the kitchen. Sauté Pan (Sauteuse; also Curved Sauté Pan and Slant-Sided Sauté Pan): This pan has a large cooking surface and short straight sides that are approximately one quarter the diameter of the pan. The large cooking surface provides ample contact with the heat and the straight sides help contain ingredients as they are flipped around inside the pan to brown them evenly on all sides. A long, high handle helps the cook agitate the pan for even more movement. This is what it is to sauté. The French verb “sauter” means “to jump” -- so foods that are “sauté” are “jumped around in the pan.” A lid allows the addition of liquids to sautéed items for a quick braising. The Curved Sauté Pan and Slant-Sided Sauté Pan are similar, with the refinements implied by their names. Cast Iron Skillet: This traditional pan is similar in configuration to the Sauté Pan, having a large cooking surface and short straight sides. But this is where any similarity ends. Cast Iron Skillets have short handles perpendicular to the base of the pan, and the sides are even lower -- from 20% of the pan’s diameter all the way down to 14%. As a result, they are not particularly well suited to sautéing as the ingredients would tend to jump right out of the pan. Where Cast Iron Skillets excel is in providing constant high heat for things like browning large cuts of meat, shallow-frying chicken and, of course, making cornbread. Seasoning can make these pans relatively stick-resistant for cooking eggs and other such notoriously sticky foods, but the straight sides make it difficult to get a spatula in there (a better alternative is probably a nonstick pan or a purpose-designed “French steel” pan). One word about seasoning and high heat cooking: if the pan gets too hot, it will burn the seasoning and damage it. For this reason, it is useful to keep an unseasoned cast iron skillet around for extra-high-heat cooking. A common variant of the Cast Iron Skillet, and a good candidate for an unseasoned cast iron pan, is the Cast Iron Grill Pan. This is a Cast Iron Skillet with ribs extending upwards from the bottom to mimic a grill. Another common variant is the Cast Iron Chicken Fryer, which has taller sides -- around one third the diameter of the pan. Whether this is actually a good design for frying chicken is a matter of some debate. Fry Pan: This pan is similar to the Sauté Pan with its large cooking surface and short sides. However, the fry pan has even shorter sides and they are sloped outwards to allow maximum dispersal of steam so food items fry “dry” for an optimally crisp surface. These pans are designed to quickly fry ingredients in a small amount of fat -- specifically, ingredients that are “flat” and therefore (or for other reasons) do not need to be, or should not be, sautéed. Rondeau (Braiser, Casserole, Low Casserole): This is a low, wide, double-handled pan. The sides are right around one-third as tall as the diameter of the pan. This can be a very versatile pan for tasks as diverse as browning bones to poaching delicate meats and fishes. The lack of a long handle means it won’t take up much stovetop real estate, and it goes easily from stovetop to oven. The two major variants (not that all manufacturers stick to the same nomenclature) are the Casserole and the Low Casserole, which have sides that tend to be higher or lower than those of a Rondeau. A Casserole is essentially a large saucepan with two loop handles instead of one long handle, while a Low Casserole is essentially a sauté pan with two loop handles instead of one long handle. Another variant on this theme is the high end Paella Pan, such as those manufactured by Sitram and Paderno, which has deep curved sides and a thick conductive base. Enameled Cast Iron Casserole (Cocotte, French Oven, Dutch Oven): This is a specific kind of Casserole that deserves special mention due to its design. The enamel lining makes the pan nonreactive, while the extra heavy, thick layer of cast iron provides even heat for long, low braising and simmering. These come in both round and oval shapes, the latter being especially useful for braising large pieces of meat on the bone. An interesting traditional variant is the Doufeu, which has ribs or nodules on the interior surface of its lid. The lid is deeply indented so that it may be filled with ice water, which encourages internal vapors to condense on the ribs or nodules and drip back into the braise. A truly traditional Dutch Oven is raw cast iron, rather than enameled, and occasionally footed for use over coals. Stock Pot: This is a pot designed for making stocks. The shape is tall and narrow to limit evaporation, with sides approximately equal to the diameter of the base. This design allows stocks to be simmered a long time for maximum flavor extraction and minimal loss of liquid. Stock pots at around 12 - 18 quarts make excellent vessels for boiling pasta with the addition of a Pasta Strainer Insert. Saucepan (Low Saucepan): This is a pan for making sauces and reductions. The sides are traditionally half as tall as the diameter of the pan, which provides a large surface area for fast evaporation. The low sides provide easy access to a whisk for making roux and mounting sauces. Also useful in the larger sizes as a general purpose pan for blanching/steaming vegetables, reheating liquids, etc. Tall Saucepan (High-Sided Saucepan, Saucepot, Saucepan): Otherwise similar to the Low Saucepan, but the sides are taller in proportion to the diameter of the pan -- around 75%. As a result, the Tall Saucepan does not encourage fast evaporation like its shorter brother. Rather, this pan is best suited for warming/reheating sauces, soups, stews and other liquids in situations where additional reduction is not desired. Due to its proportionally greater volume, the Tall Saucepan is more useful than its shorter brother as a general-purpose pan for blanching/steaming vegetables, reheating liquids, etc. Sauteuse Evasée (Slant-Sided Saucepan, Windsor Saucepan, Sauteuse Conique, Conical Sauteuse, Fait Tout, Chef’s Pan, Reduction Pan): This is a saucepan that has been optimized for reductions. The sides are angled out from the base to provide 25% more surface area for evaporation. In addition, the sides are even lower than those on a Low Saucepan -- usually one-third as tall as the diameter of the pan. Due to its geometry, which is neither particularly high nor particularly low, the Sauteuse Evasée may be used for sautéing in the larger sizes, and the smaller sizes can be very useful in place of a Low Saucepan. Such versatility has conferred upon this pan the name “Fait Tout,” which means “does everything.” (Note: Le Creuset makes a non-traditional “Windsor” that has slanted sides, but is relatively tall and narrow. This pan does not have the same performance characteristics as the traditional designs.) Curved Sauteuse Evasée (Curved Sauteuse, Saucière, Sauteuse Bombée, Saucier, Chef’s Pan): As the name suggests, this pan is otherwise similar to the Sauteuse Evasée, only with curved rather than straight sides. In smaller sizes, the curved sides provide easy access to every corner of the pan with a whisk or spoon for sauce making. In larger sizes, the curved sides facilitate one-handed tossing of the food when sautéing. What Materials Are Used? As previously discussed, cookware materials differ in two important qualities: reactivity and thermal properties. Reactivity Materials that are highly reactive tend to have chemical reactions with other substances around them. A good example would be iron, which tends to react with oxygen to form iron oxide or, as we commonly know it, rust. This is significant to cooking because there are certain ingredients and certain ways of cooking in which it is disadvantageous to have a reactive cooking surface because the ingredients will react with the cooking vessel and produce undesirable colors and/or flavors. Highly reactive cookware materials include iron, copper, aluminum and carbon steel. Nonreactive cookware materials include stainless steel and enamel. A special case is anodized aluminum, which is aluminum that has been treated with an electrolytic process to create a harder surface that is still somewhat reactive, but significantly less so than untreated aluminum. Similarly, a process called annealing is used to turn reactive carbon steel into harder, less reactive black steel and blue steel. As it so happens, materials that are highly reactive also tend to have highly desirable thermal properties (and vice-versa), as we will see below. Thermal Properties Thermal properties refers to those aspects of a material that have to do with heat. So, before we begin, perhaps we should have an understanding of what heat and temperature are. In all substances above absolute zero there exists a certain amount of movement in the atoms or molecules that make up that substance. This is a kind of kinetic energy, which is a fancy physics term used to refer to the mechanical energy a body has by virtue of its motion. Temperature is a measure of that kinetic energy. The greater the kinetic energy -- i.e., the faster the particles are moving -- the higher the temperature reading will be on the thermometer. Heat is a little more difficult to nail down. In the scientific sense, it is a measure of the amount of energy transferred from one object to another because of the temperature difference between those two objects. In other words, if you put a cold object down on top of a hot object, the energy that is transferred from the hot object to the cold object would be measured as heat. Heat is not, strictly speaking, a word that describes the energy contained inside an object -- it is only a word that describes the energy exchanged between the two objects. The energy an object possesses due to its temperature -- let's say the sum total of all the atomic vibrations in an object -- is properly called Internal Thermal Energy. All that said, laypeople commonly understand “heat” to include both “heat as transferred energy” and “heat as internal thermal energy,” and that is the usage I will employ in this article. So, how does heat make it from the burner at the bottom of your pan through to the other side and into the food? The answer is: Conduction. As Harold McGee says: Ideally we would like to have a pan that provides even heat, that is able to hold a lot of heat and that responds promptly to changes in the heat source. These three things all depend on two properties of the materials used in the pan: thermal conductivity and heat capacity. Thermal Conductivity is a physical property that describes how fast a given material can move heat around. Materials with good thermal conductivity are able to transfer heat from one part of the pan to another very quickly and efficiently, which provides even heat. The graphics below illustrate how thermal conductivity affects evenness of heat. This illustration shows how heat, applied to a single point, is conducted through an infinitely thick piece of metal in an arbitrary unit of time (say, one second or one minute). As we can see, when we look at the highly conductive material, the material within the area we are considering is all about the same temperature. On the other hand, the less conductive material is nice and warm close to the heat source but is rather cool out towards the edge of the radius. This is because the highly conductive material was able to take the heat from the single heat source and distribute it throughout the area very quickly. The less conductive material just can’t move the heat as fast, and so was not able to move much heat to the outer areas during the space of our arbitrary unit of time. Let’s take a look at how this would work in a pan: This illustration shows how the same single source of heat is conducted through a piece of cookware. Note that the highly conductive cooking surface is more or less all the same temperature, whereas the less conductive cooking surface is warmer in the middle and cooler towards the outside. That warm part in the middle is the dreaded hot spot -- the same thing that creates a burnt ring on the bottom of the pan when you cook a long-simmered tomato sauce. But, you may well ask, what if we just leave the less conductive pan on the heat for a longer period of time? Wouldn’t the edges eventually warm up? Good question. Let’s take a look: This illustration shows how much heat the less conductive material can distribute through an infinitely thick piece of metal when you leave it on the heat longer than the arbitrary unit of time we specified above (say, 3 seconds or 3 minutes). As we can see, heat is conducted a much greater distance from the heat source, which we would expect given the greater interval of time. If we look at the original radius of the area we examined at first, we can see that the temperature at the edge of that area is just about the same as it was in our original unit of time for the highly conductive material. Great, you say, all we have to do is heat the less conductive material a little longer and it’s the same thing. Not so fast. Let’s have a look at how it would work in a pan: This illustration shows how the same single source of heat is conducted through two pieces of cookware made of the less conductive material when it is left on the heat longer than our original arbitrary unit of time. As we can see, the cooking surface with the same thickness we used in the earlier example is hotter overall, but the center of the pan is still significantly hotter than the edges of the pan -- a hot spot. The thicker cooking surface, on the other hand, has a fairly uniform distribution of heat at the top where the food would be making contact. In fact, the distribution of heat and temperature at the top appears to be quite similar to what we were getting from the highly conductive material in our original arbitrary unit of time. So, what does this all tell us? It tells us that the thickness of cookware materials is important, and that less conductive materials can potentially provide even heat just as well as more conductive materials but the less conductive materials must be thicker and it will take more time for the pan to come up to temperature. The issue of time is an important one, and brings us to the second effect of thermal conductivity: responsiveness. Responsiveness refers to a material’s ability to respond to changes in the heat source. I think we have all experienced the phenomenon of turning the heat off under a cast iron skillet only to have the meat continue to sizzle and cook as though nothing had happened. This is because cast iron does not have good thermal conductivity and a cast iron pan is not able to respond to the decrease in the heat source by cooling off quickly. When considering responsiveness, it is useful to imagine the cookware as a bucket of heat with faucets dumping heat into and draining heat out of the bucket. In this illustration, thermal conductivity is illustrated by the size of the faucets. The highly conductive material is able to move heat from the heat source into the cookware rapidly because it has a large faucet dumping a lot of heat into the heat bucket. The less conductive material doesn’t move heat from the heat source into the cookware nearly as efficiently, so the size of the faucet is smaller. Looking at the illustration, it becomes apparent that the highly conductive bucket will fill up with heat faster than the less conductive bucket. Another way of stating this is that the highly conductive material is able to respond more quickly to an increase in the heat source by filling up with heat and getting hotter -- it is more responsive. The faucets on the bottom of the heat buckets demonstrate that the same principle works in the opposite direction. The highly conductive material can also quickly drain heat out of the bottom of the heat bucket -- by conducting the heat into the food, into the air, into water, etc. -- and respond to changes in the heat source by cooling off quickly. The less conductive material, with its smaller faucet, is once again not able to respond as rapidly. The graphic below gives the thermal conductivity for several common metals used in cookware (as well as a couple of others you will recognize, just for the sake of comparison). From a purely technical standpoint, the thermal conductivity of a material changes depending on the temperature of the material, so these numbers are not strictly true for all temperatures. That said, the relationship between the various materials remains roughly the same no matter what the temperature, so these numbers are a good indication of the relative conductivity of these materials. As we can see, copper has by far the best thermal conductivity, with stainless steel having very poor thermal conductivity. This is why copper provides such even heat, while stainless steel is notorious for hot spots. You may refer to this chart for data on the thermal conductivity of other elements. Of note is the fact that all the materials used for cookware have pretty good thermal conductivity overall. Copper has the second best thermal conductivity of all elements, and even iron -- which we normally think of as being fairly sluggish in this regard -- has better thermal conductivity than 80 other elements! The foregoing information leads us to an interesting conclusion: that more conductive materials are able to conduct heat more efficiently into food compared to less conductive materials. This supposition is borne out in the following experiment: Start with two pans of approximately the same size/thickness, one of cast iron and the other of copper. Place both in a high oven and preheat for an hour (this will ensure that both pans have accumulated approximately the same amount of heat). Now, open the oven door, take two approximately equal steaks (or chops or similarly massive cuts of meat) and drop one into each of the two pans. Wait five minutes, remove the steaks and examine the browned side. You should notice that the steak in the copper pan is more browned than the steak in the cast iron pan. Cut into each steak and you should find that the steak in the copper pan is more cooked through than the steak in the cast iron pan. This is because the copper pan, due to having better thermal conductivity, was able to conduct more of its accumulated heat into the steak than the cast iron pan. This all assumes, however, that the cast iron pan and the heavy copper pan were holding the same amount of heat in the first place, which is the reason it was important to choose pans of approximately the same size and thickness… which leads us to the second important thermal property: Heat Capacity Thus far we have mostly been talking about heat in its pure scientific sense: as it relates to the transfer of thermal energy. Now, we will turn out attention to the second meaning of heat, as it relates to internal thermal energy. Every object -- for our purposes, every chunk of metal -- can not only be described as being at a certain temperature, but also as holding a certain amount of heat. For example, if we have a one pound piece of iron and a five pound piece of iron, both at 200 degrees C, it doesn’t take too much thinking to wrap our minds around the idea that the 5 pound piece of iron is holding more heat than the smaller piece. This is easily understood by nothing more than the fact that it had to sit on the stove a lot longer before it came up to temperature. A more scientific experiment would be to drop each piece of iron into equal sized containers of water and measure how much the temperature of the water goes up in each container. If you do this experiment, you will find that the water in the container with the large piece of iron is significantly warmer than the water in the container with the smaller piece. This is because the large piece of iron stores more heat than the small piece, even at the same temperature. As it turns out, various materials differ in their ability to store heat. In other words, some materials can hold more heat at a given temperature than others. For example, a one pound chunk of aluminum holds a lot more heat than a one pound chunk of copper at the same temperature. The scientific term that quantifies a material’s heat storage capabilities is called Specific Heat. Specific heat is the amount of heat it takes to raise one unit of a substance by one degree. The most common way specific heat is expressed is the amount of heat, measured in Joules it takes to raise one gram of a substance by one degree Kelvin, or: Joules per gram per degree Kelvin (J/g K). That said, you may also see specific heat expressed as British thermal units per pound per degree Fahrenheit (Btu/lb F) or calories per gram per degree Celsius (cal/g C) and so forth depending on the measurement system used. We’ll stick with good old J/g K for this article. Confused yet? It gets even more complicated. We also need to settle on a reference standard. Specific heat is not an absolute measurement like a meter or a kilogram. A meter is an absolute quantity -- something that is a meter long is a meter long and something that is two meters long is twice the length of a meter. Temperature systems, on the other hand, work differently. Take the Celsius scale, for example... the values of 1 and 100 are arbitrarily set at the freezing and boiling points of water. Why? Why are there 100 units between the freezing and boiling points of water? Is 20C twice as hot as 10C? How? Well, as it so happens, water has an unusual ability to hold a lot of heat, so scientists have arbitrarily designated the specific heat of water as 1. Thus, all specific heat measurements are given relative to the specific heat of good old H2O. The illustration below lists the specific heat values for the most commonly used cookware materials. As we can see, aluminum has a very high specific heat indeed – over double that of iron. This would lead us to conclude that a one pound chunk of aluminum holds more heat than a one pound chunk of iron at the same temperature. But wait... cast iron is supposed to hold the most heat, right? Yes and no. It is true that the chunk of aluminum holds more than the chunk of iron, but we haven’t accounted for the density of the materials. The illustration below shows the density of the same materials. OK... now we can see that iron is a lot more dense than aluminum. A one pound piece of aluminum would be almost three times the size of a one pound piece of iron. Since cookware is described in terms of its thickness (i.e., the volume of the materials rather than the weight) it is more useful for us to understand the heat carrying capabilities of a given volume of metal rather than a given mass of metal. To obtain these figures, we can simply multiply the specific heat by the density to arrive at specific heat per cubic centimeter. Now the picture looks completely different, doesn’t it? Aluminum is way down there on the bottom, iron and copper are in the middle, and steel is up at the top. These are much more useful numbers that more accurately reflect the way materials are deployed in cookware. A understanding of these numbers can take us a long way towards understanding the difference between a 3 mm thick aluminum bottom and a 7 mm thick aluminum bottom -- also between a 3 mm thick aluminum bottom and a 2 mm thick copper bottom. This is because we can use these numbers to understand the Heat Capacity of various cookware. Heat Capacity is the term we will use to describe the total heat holding capabilities of an entire piece of cookware. For example, if we have an 11 inch sauté pan with a 7 mm thick aluminum bottom, we can calculate the heat capacity of that base. If I plug in a radius of 14 centimeters (half of the 11 inch diameter) and a height of .7 centimeters into this handy online calculator we get a volume of 431 cubic centimeters. Multiplying that by the specific heat per cc number from above, we get an overall heat capacity of 1043. Now let us compare this aluminum bottom to a copper bottom at 2.5 mm. The volume of the copper bottom is much smaller -- only 154 cubic centimeters. Using the number for copper from above, we arrive at an overall heat capacity of 531, or around half that of the aluminum bottom. This may seem fairly esoteric, but in fact we have just used materials data to compare a 67 dollar Sitram Profisserie sauté pan with a 7 mm aluminum base to a 140 dollar Sitram Catering sauté pan with a 2.5 mm copper base. What does this tell you? It tells you that you’re better off buying the cheaper pan if you want a sauté pan with a high heat capacity so you can dump a whole bunch of stuff into it all at the same time. A good way to conceptualize heat capacity is to return to our “heat bucket” illustration from above. The illustration above shows the difference between two otherwise similar cooking vessels made with different amounts of the same material. Because they are made from the same material, the thermal conductivity (as illustrated by the size of the faucets) is the same. As we can see, the pan made with more material has a larger heat bucket and is able to hold more heat at a given temperature -- it has a larger heat capacity. All that said, we come to the final piece of the puzzle: integrating heat capacity and thermal conductivity. As we look at the illustration above we can’t help but notice that the heat faucets are the same size, meaning that the thermal conductivity was the same for the two cooking vessels being compared. This means that the vessel with the smaller heat capacity will come up to temperature -- "fill up with heat” -- more rapidly than the vessel with the larger heat capacity. But, as we can recall from the illustration up in the thermal conductivity discussion, the size of the faucet is not always the same. Some materials have better thermal conductivity than others. The illustration above demonstrates the interaction of thermal conductivity and heat capacity. Here we have three cooking vessels with different thermal conductivities and heat capacities: low/high, high/high and low/low. With a little thinking, we can understand that the low/high pan will take longer to heat up and will be less responsive than the high/high pan. However, if we take the low/high pan and use a smaller amount of the low conductivity material, we reduce the thermal capacity and make it into a low/low pan. Now, if we compare the high/high pan and the low/low pan, we can understand that they will fill up with heat right around the same time. The faucet is smaller for the low/low pan, but it also has a much smaller bucket to fill up. The high/high pan and the low/low pan are equally responsive. But, there may be a price to pay... The only way to reduce the thermal capacity of the low conductivity pan is to use less of the low conductivity material. How is this done? It is done by making the pan thinner. This is important because, as demonstrated way back in the section on thermal conductivity, when the low conductivity materials become thinner there is a cost to be paid in evenness of heat. The low/low pan may be as responsive as the high/high pan, but it may also have hot spots. These are the tradeoffs that one must deal with when designing cookware. It is always a constant compromise to design a pan that has a large enough thermal capacity so it won’t lose all its heat when food is added to the pan, is thick enough to provide even heat and yet is also responsive to changes in the heat source. One last bit of science... There is a quality that nicely quantifies the relationship between a material’s thermal conductivity and its specific heat. This is called Thermal Diffusivity and it reflects what actually happens when heat is applied to a material. To arrive at this number we divide thermal conductivity by density multiplied by specific heat. Looking at this illustration, it would seem that copper is the best material among those commonly used for cookware. And, indeed it is the case that copper is theoretically the best performer in most cooking applications. However, copper is expensive and heavy, and there are many cases where other materials may be just as good or even better. We’ll come back to this later. How are the Materials Deployed There are several overall design philosophies that can be implemented in cookware. Take a saucepan, for example. A saucepan may be made of thin stainless steel, it may be stainless steel with a conductive base of either aluminum or copper, it may be raw aluminum, it may be aluminum with an interior lining of stainless steel, it may be fully clad aluminum with stainless steel on the inside and the outside, it may be heavy copper with an interior lining of stainless steel, or it may have another design. Below we will take a look at the various designs that are commonly used for stovetop cookware. Aluminum - As we know, aluminum has good thermal conductivity, and aluminum pans provide even heat when the cookware is sufficiently thick. Thickness of materials is also important for heat retention because aluminum has relatively low specific heat per cubic centimeter. - Highly reactive with both acidic and alkaline foods, which can cause off flavors and colors. - Often warps as a result of high heat cooking. - Soft and prone to scratching. - Light. - Inexpensive. - Common uses: Almost every pan in the kitchen is manufactured in raw aluminum. Due to its reactivity, it is best used in cooking tasks where the food is neither too acidic nor alkaline and will spend a relatively brief time in the pan. - Representative manufacturers: Wear-Ever Anodized Aluminum - This is aluminum that has been treated by an electrolytic process which makes the outer surface both harder and less reactive. Otherwise similar to raw aluminum. - Can be incredibly difficult to keep clean. - Moderately expensive. - Things to consider: certain cookware manufacturers claim that an anodized aluminum cooking surface is “stick resistant.” However, owners commonly report that this does not reflect their experience, and anodized aluminum pans that are not kept scrupulously clean are often quite sticky. - Common uses: Almost every pan in the kitchen is manufactured in raw aluminum. Since anodized aluminum is less reactive than raw aluminum, one need not be so concerned about minimizing opportunities for chemical interaction between the food and the pan. Nevertheless, prolonged contact with acidic or alkaline foods can still result in off flavors and colors. This design does not have any particular advantages for heating large volumes of thin liquids in stock pots, rondeaux, casseroles, etc. - Representative manufacturers: Calphalon (Commercial and Professional lines), Circulon Aluminum with an Interior Lining of Stainless Steel - All the thermal benefits of aluminum, but with a nonreactive cooking surface provided by a thin layer of stainless steel. - The aluminum layer may be raw aluminum or anodized aluminum. - Unlike aluminum alone, lined aluminum is not likely to warp. - Data: All-Clad’s interior lined cookware has an aluminum layer of 3.94 mm - Very expensive. - Common uses: Almost every pan in the kitchen is manufactured in this design. This design does not have any particular advantages for heating large volumes of thin liquids in stock pots, rondeaux, casseroles, etc. - Representative manufacturers: All-Clad (MasterChef and LTD lines) Aluminum with an Interior and Exterior Lining of Stainless Steel - This design, with an interior thermal layer completely surrounded by other metals on the inside and the outside is often called “fully clad.” - Otherwise similar to Aluminum with an Interior Lining of Stainless Steel, with the addition of an exterior layer of stainless steel. - Due to manufacturing considerations, the aluminum layer in fully clad cookware is often significantly thinner than the aluminum layer on comparable interior-lined cookware. This can negatively impact both evenness of heat and heat capacity. - May be cleaned in the dishwasher. - Things to consider: Some manufacturers claim to employ special “multi-layer” interiors that are better than pure aluminum layers. Don’t be fooled by this marketing ploy. The interiors of these pans are 99% the same as those employed in the other fully clad designs. - Data: All-Clad’s interior/exterior lined cookware has an aluminum layer of 2.03 mm. Demeyere employs an aluminum layer of 2.3 mm on woks, 3.0 mm to 3.3 mm on “conical sauteuses and simmering pots” and approximately 3.9 mm on fry pans. - Very expensive. - Common uses: Almost every pan in the kitchen is manufactured in this design. This design does not have any particular advantages for heating large volumes of thin liquids in stock pots, rondeaux, casseroles, etc. - Representative manufacturers: All-Clad (Stainless line), Calphalon (Tri-Ply Stainless), Demeyere (“conical sauteuses,” simmering pots,” fry pans and woks). Aluminum with an Interior Lining of Stainless Steel and an Exterior Lining of Copper - Otherwise similar to Aluminum with an Interior Lining and an Exterior Lining of Stainless Steel, with a copper exterior instead of a stainless steel exterior. - Very expensive. - Things to Consider: Regardless of what manufacturers may claim, the copper exterior does not confer any of the thermal advantages associated with copper, because it is too thin to make any impact on the thermal properties of the pan. It does, however, confer many of the maintenance issues associated with copper (see below). - Representative Manufacturers: All-Clad (Cop-R-Chef line), Calphalon (Tri-Ply Copper line). Copper with an Interior Lining of Stainless Steel - Copper has the best overall thermal properties for most cooking tasks. It has excellent thermal conductivity and a high specific heat per cubic centimeter. This means that it provides extremely even heat, is very responsive and holds a lot of heat without needing to be all that thick. However, the thermal conductivity is so fast that copper pans not retain heat well once off the heat -- this is the converse of responsiveness. - Very heavy, especially in the larger sizes. - Copper tarnishes. This does not effect performance, but can be aesthetically unpleasing to some. Brushed exterior copper can be easily and effectively cleaned with Barkeeper’s Friend and a Scotch Brite pad. Mirror-finished exteriors must be cleaned with polish or (less effectively) with vinegar and salt. - Extremely expensive. - Things to consider: Although manufacturers of stainless lined copper sometimes claim that their product is better than the competition, in fact Falk Culinair developed the process by which stainless steel and copper are bonded together to make this cookware. All cookware employing this design is made from the exact same materials, regardless of price. - Data: Most of the stainless-lined copper cookware sold in America is 2.3 mm of copper bonded to .2 mm of stainless steel -- 2.5 mm of copper/stainless steel “bimetal.” Mauviel makes three lines: two “Cuprinox” lines at 2.5 mm and 2.0 mm and the “Table Service” line at 1.6 mm. This last line is meant for table presentation and not for real cooking. Make sure you know what thickness you are buying! - Common uses: Almost every pan in the kitchen is manufactured in this design. Especially useful for cooking tasks that require the ultimate in heat control (e.g., making delicate temperature-sensitive sauces) or those where it is particularly beneficial to take advantage of copper’s ability to conduct a lot of heat all the way up the sides of the cooking vessel (e.g., reductions). This design does not have any particular advantages for heating large volumes of thin liquids in stock pots, rondeaux, casseroles, etc. - Representative manufacturers: Bourgeat, Falk Culinair, Mauviel. Copper with an Interior Lining of Tin - Otherwise similar to Copper With an Interior Lining of Stainless Steel, but employing tin instead of stainless steel on the interior. - Tin is less durable than stainless steel. After a while, the tin lining will wear out and the interior will have to be re-tinned. May not be used at high heat, as this will cause the tin lining to blister and melt. - Tin has significantly better thermal conductivity ( 0.666 W/cm K) than stainless steel. As a result, some people feel that tin-lined copper offers the ultimate in temperature control for sauce making. - Very expensive (less expensive than stainless-lined copper). - Common uses: Almost every pan in the kitchen is manufactured in this design. From a practical standpoint, probably useful to most home cooks as a dedicated pan for sauces only. I do not recommend it for home cooks. - Representative manufacturers: Mauviel Copper with an Interior and Exterior Lining of Stainless Steel - Otherwise similar to Copper with an Interior Lining of Stainless Steel, but the copper is fully clad in stainless steel. - Due to manufacturing considerations, the copper layer in fully clad cookware is often significantly thinner than the copper layer on comparable interior-lined cookware. This can negatively impact both evenness of heat and heat capacity. However, this design should confer more thermal benefits than Aluminum with an Interior and Exterior Lining of Stainless Steel. - May be cleaned in the dishwasher. - Extremely expensive. - Things to consider: Although these pans would seem to confer many of the benefits of heavy copper with none of the maintenance concerns, the cost of this cookware is so high that one is often paying substantially more for cookware with less copper than the already expensive big boys in Copper with an Interior Lining of Stainless Steel. That is a high price to pay for the privilege of throwing a pan in the dishwasher. - Data: Best estimates put the copper interior at somewhat less than 2.0 mm thickness. - Common uses: Many of the common kitchen pans are manufactured in this design. This design does not have any particular advantages for heating large volumes of thin liquids in stock pots, rondeaux, casseroles, etc. - Representative manufacturers: All-Clad (Copper Core line). Cast Iron - Cast iron has fairly low thermal conductivity and a high specific heat per cubic centimeter. This means that cast iron pans are slow to heat up/cool down, have excellent heat retaining properties and need to be quite thick to avoid hot spots. In practice, cast iron is never thick enough to provide absolutely even heat. As a result, most good cast iron pans are quite massive and the general practice is to preheat for a long time on one heat setting until the heat equalizes and the entire cooking vessel is approximately the same temperature. At this point, the pan will hold its heat and remain at more or less the same temperature throughout for long/low cooking or short/high cooking. - Cast iron is highly reactive and prolonged contact with acidic foods can create off flavors. This can be somewhat mitigated by seasoning the cast iron, which is a process whereby successive layers of cooked-on fat are built up over the porous iron surface. This limits the reactivity somewhat and provides a fairly non-stick “natural” surface. Regardless, cast iron is not recommended for cooking tasks involving acidic foods and long cooking. - Very inexpensive. - Common uses: Skillets, chicken fryers, grill pans, Dutch ovens. - Representative manufacturers: Lodge is the only company still producing cast iron cookware, but “antique” examples by Griswold and Wagner (among others) may be found for sale. Enameled Cast Iron - Similar to cast iron in thermal properties, but with a coating of nonreactive enamel inside and out. Because it is nonreactive, enameled cast iron is perfect for cooking tasks that take advantage of cast iron’s heat retaining ability for long, low cooking. - Enamel is an insulator and has very poor thermal conductivity. As a result, these pans are not good for quick browning. Because enamel and iron have such different thermal properties, enameled cast iron must not be heated too high nor cooled down too quickly or the enamel may chip and crack. - Very heavy. - Moderately priced to moderately expensive. - Common uses: Enameled cast iron casseroles, sauce pans, fry pans. - Representative manufacturers: Chasseur, Descoware, Le Creuset, Staub. Carbon Steel - Carbon steel has a slightly higher specific heat per cubic centimeter than Iron and the thermal conductivity is even lower. At this point, there is little to be gained by going for maximum thickness, because it would take forever to heat up. As a result, carbon steel cookware is usually manufactured in a medium gauge of approximately 2.0 mm. - Similar to cast iron, the heat does even out somewhat once the carbon steel pan has been sufficiently preheated. Nevertheless, the heat will never really be even all that even, and carbon steel pans are best used for quick cooking tasks where evenness of heat is not a primary concern. - Like cast iron, carbon steel is highly reactive and needs to be seasoned. Unlike cast iron, however, carbon steel is soft and significantly less porous. As a result, carbon steel may be seasoned sufficiently in 15 minutes and old seasoning is easily removed with a scouring pad if the cook wishes to re-season the pan. - Carbon steel cookware is not cast, it is formed from sheets of carbon steel and pressed into shape. This allows manufacturers to produce a wide variety of specially designed pans for specific cooking tasks (omelet pans, crepe pans, chestnut pans, etc.). Since carbon steel is cheap, a cook can easily and affordably accumulate a number of purpose-designed pans. - Light. - Very inexpensive. - Common uses: Fry pans, sauté pans, crepe pans, omelet pans, woks. - Representative manufacturers: These pans are not particularly associated with any manufacturers, and they are all more or less the same. Black Steel/Blue Steel - This is carbon steel that has been treated by a process of annealing, which makes the surface harder and less reactive. It also imparts a distinctive black or gunmetal blue color to the carbon steel. - Because the surface is harder, black/blue steel seasons more like cast iron in terms of its durability and persistence. Because the surface is less reactive, one need not be so concerned about minimizing opportunities for chemical interaction between the food and the pan. - Very inexpensive. - Common uses: Fry pans, sauté pans, crepe pans, omelet pans, woks. - Representative manufacturers: These pans are not particularly associated with any manufacturers, and they are all more or less the same. Enameled Carbon Steel - Thin carbon steel with a coating of enamel inside and out to render the pan nonreactive. - Extremely prone to buckle and warp, which often causes the enamel to chip. Relatively poor thermal conductivity and heat retention result in hot spots and inferior browning capabilities. - Light. - Extremely inexpensive. - Common uses: Sauce pans, steamers, coffee pots. Cookware of this design is only useful for boiling water. - Representative manufacturers: These pans are not particularly associated with any manufacturers, and they are all more or less the same. Stainless Steel - Stainless steel holds the honor of having the worst overall thermal characteristics of all the metals used for cookware. It has the highest specific heat per cubic centimeter and the lowest thermal conductivity -- not a good combination. - Needless to say, evenness of heat is out of the question and stainless steel cookware must be thin or it will never become hot. Hot spots are inevitable. - Extremely durable and strong. Warping is only a problem at the very lightest gauges. - Fairly inexpensive. - Things to consider: Don’t be fooled by “copper bottoms” that aren’t clearly a disk of some kind. This thin metal layer on the bottom quarter of the pan confers none of the thermal advantages of copper. - Common uses: Almost every pan in the kitchen is manufactured in this design. However, it is only truly useful for boiling water. - Representative manufacturers: These pans are not particularly associated with any manufacturers, and they are all more or less the same. Thus far, all the cookware designs we have discussed have been “straight gauge,” which means that they have the same thermal properties in all parts. Now we will profile two popular “hybrid” cookware designs that have different thermal properties on the bottom and the sides. Specifically, these cookware designs have materials with good thermal properties on the bottom, and materials with not-so-good thermal properties on the sides. Stainless Steel Body with an Aluminum Base - This design begins with durable, nonreactive stainless steel and adds the thermal benefits -- evenness of heat, high specific heat per cubic centimeter, responsiveness -- of aluminum to the bottom of the pan. - Because the aluminum base only covers the bottom, virtually no heat is conducted from the base up into the heavy stainless steel sides of the pan. - Moderately expensive to expensive. - Things to consider: 1) Due to the way this cookware is manufactured, the aluminum disk can never quite cover the entire base of the pan. The percentage of the base covered by the aluminum disk varies from manufacturer to manufacturer and is one indication of quality. 2) Cooks are sometimes apprehensive that foods will scorch and burn on the parts of the pan that are not covered with aluminum -- namely the sides and the portions of the base not covered by the aluminum disk -- because these are essentially plain stainless steel. This is only possibly a concern in conditions where the flame heating the pan is larger than the pan itself, and significant heat from the heat source is in direct contact with those portions of the pan. Such conditions are rare in the home kitchen, and can largely be mitigated by adjusting the flame appropriately and not using pans of this design that are too small in diameter for the stove on which they will be used. 3) Some manufacturers claim to employ special “multi-layer” bases that are better than pure aluminum bases. Don’t be fooled by this marketing ploy. The bases on these pans are 99% the same as those employed in the other aluminum disk bottom designs. - Data: Both Paderno Grant Gourmet and Sitram Profisserie employ an aluminum base that is 7 mm thick. Demeyere Apollo employs a 5 mm thick aluminum base in its disk bottom pans. - Common uses: Many of the common kitchen pans are manufactured in this design. Particularly well suited to tasks where the important area for the transfer of heat from the pan to the food is the bottom of the pan: sauté pans, tall sauce pans, rondeaux, stock pots. - Representative manufacturers: Demeyere (Apollo line for casseroles, sauté pans, saucepans and stock pots), Paderno (Grand Gourmet line), Sitram (Profisserie line). Stainless Steel Body with a Copper Base - This design begins with durable, nonreactive stainless steel and adds the thermal benefits -- evenness of heat, high specific heat per cubic centimeter, responsiveness -- of copper to the bottom of the pan. - Otherwise similar to Stainless Steel Body with an Aluminum Base. - Moderately expensive to expensive. - Things to consider: Demeyere Sirocco has two interesting innovations in its implementation of the copper base design. 1) The copper base is completely enclosed in stainless steel, allowing these pans to be cleaned in the dishwasher. 2) The copper base extends the full diameter of the pan, so that the maximum possible cooking surface area is in contact with copper. However, it is not the case that Demeyere’s implementation covers 30% more of the base than the traditional implementation, as they claim. Rather, the copper disk continues to extend beyond the point where the stainless steel on the bottom of the pan begins to curve upwards to form the sides. Since the copper base does not actually contact the stainless steel beyond the point where it curves up, no heat is conducted into these parts of the pan – exactly the same as it is with the traditional implementation. This is well illustrated by this graphic from Demeyere’s web site. Again, be wary of marketing hype and take any claims of “special multi-layer conductive materials” with a big grain of salt. - Data: Demeyere Sirocco employs a 2.0 copper base for casseroles, sauté pans, saucepans and stock pots, while Sitram Catering has a 2.5 mm copper base for most pans and a 2.0 mm copper base for pans with the smallest diameters. - Representative manufacturers: Demeyere (Sirocco line for casseroles, sauté pans, saucepans and stock pots), Sitram (Catering line). How Much Of The Various Materials Are Used Based on the foregoing, we now have basis for understanding the effects of various materials used in various amounts. We can understand that, for instance, a 4 mm thick aluminum sauté pan with an interior lining of stainless steel will provide better evenness of heat than a 2 mm thick aluminum sauté pan that is fully clad in stainless steel. Likewise, we can understand that a stainless sauté pan with a 7 mm aluminum base will hold more heat than an otherwise similar pan with a 5 mm aluminum base or a 2.5 mm copper base. We can also understand that the pan with the copper bottom will be much more responsive to changes in the heat setting on the stove while still having even heat. So, now it is up to you to ask yourself some questions. You want a sauté pan. Fine. Do you really care whether the heat goes all the way up the sides? Probably not. OK, then. It probably doesn’t make sense to spend all the money on straight gauge cookware. Alright, we’re going with a disk-bottom design. So... do we care whether the heat goes all the way to the very edge of the base? Not really. After all, we are going to be tossing the food around quite a bit as we sauté. Doesn’t make sense to spend big bucks on Demeyere Sirocco, then. The next choice is whether we want a copper base or an aluminum base. Since the kind of sautéing we do tends to be all on high heat, having lightning-quick thermal conductivity doesn’t matter all that much to us. We’ll go with aluminum then. Now that we have decided to go with an aluminum disk bottom sauté pan, all that remains is to determine the thickness of the aluminum base. This will largely be determined by economics. Since we understand that more aluminum means more heat capacity and more evenness of heat, we’ll get the sauté pan with the thickest aluminum base we can afford. Other considerations may be price, weight, aesthetics, brand loyalty, versatility/suitability for other cooking tasks -- any number of things. And, of course, these answers may not be your answers. What is important is that we will be making an informed choice. Please join me in the Q&A with your questions and comments. Post your questions here -->>Q&A Copyright 2003 Samuel Lloyd Kinsey. All Rights Reserved. Any unauthorized duplication or use is strictly prohibited.
-
- 3
-
-
Please post questions relevant to Unit 4 here.