

eGCI Team
-
Posts
195 -
Joined
-
Last visited
Content Type
Profiles
Forums
Store
Help Articles
Everything posted by eGCI Team
-
Ask your questions about the Science of the Kitchen on this thread.
-
<!DOCTYPE HTML PUBLIC "-//W3C//DTD HTML 4.01 TRANSITIONAL//EN"> <html> <head> <title></title> </head> <body> <FONT=verdana> <P><B><u>SCIENCE OF THE KITCHEN</B></u> <P>by Jack Lang <P><B>CONTENTS</B> <UL CLASS='bbc'> <LI><A HREF="#intro">INTRODUCTION</A></LI> <LI><A HREF="#why">WHY COOK</A></LI> <LI><A HREF="#what">WHAT HAPPENS WHEN WE COOK MEAT</A></LI> <UL CLASS='bbc'> <LI><A HREF="#experiment">An Experiment</A></LI> <LI><A HREF="#structure">The Structure of Meat</A></LI> <LI><A HREF="#heat">The Effect of Heat</A></LI> <LI><A HREF="#myo">Myglobin<A></LI> <LI><A HREF="#cond">Conductivity of Meat</A></LI> <LI><A HREF="#joint">To Cook A Joint</A></LI> <LI><A HREF="#wet">Wet Heat</A></LI> <LI><A HREF="#stock">Making Stock</A></LI> </UL> <LI><A HREF="#without">COOKING WITHOUT HEAT</A></LI> <UL CLASS='bbc'> <LI><A HREF="#acid">The Effects of Acid</A></LI> <LI><A HREF="#hang">Hanging</A></LI> <LI><A HREF="#brine">Brining & Marinades</A></LI> </UL> <LI><A HREF="#summary">SUMMARY TABLE OF TEMPERATURES</A></LI> <LI><A HREF="#ref">REFERENCES</A></LI> </UL> </UL> <P> <A NAME="intro"><B>INTRODUCTION</B></A> <P>The Science of The Kitchen module of the eGCI will be formed of a number of courses to be published over the coming semesters and will give a brief overview of some of the science behind food preparation. Areas to be covered include: the effects of heat on muscle, protein, carbohydrates and fat; sources and transmission of heat; browning; fermentation and preservation.</p><br/> <P>Understanding the processes behind the transformations that food undergoes as it cooks may give insights in how to cook, and in the hands of inspired chefs lead to new dishes, or better ways of cooking old ones. Some have dignified this with the title "Molecular Gastronomy." </p><br/> <P>This is very much a high-level view, and much of the detail is glossed over or left to the <A HREF="#ref">references</A>. No specific technical knowledge or mathematics is assumed. Although the science is, by its nature universally true, the material here is aimed at the home cook and restaurant chef as well as the cookery (culinary) student rather than at industrial scale processes.</p><br/> <P><A NAME="why"><B>WHY COOK?</B> </A> <P>Why cook at all? Why not just eat food raw, as some advocate? One reason is that it tastes good. Few can resist the smell of fresh toast or frying bacon in the morning. It tastes and smells good because that is our body's way of saying it is good to eat, suitable for our digestive systems and (probably) won't poison us. In ancient times, getting this right was important for survival. </p><br/> <P>Our digestive systems have evolved to only deal with certain foods. We don't chew the cud like cows and other ruminants and can't usefully digest cellulose, so eating grass is not particularly nutritious. Ancient humans appear to mostly have eaten fruit and seeds with the occasional bounty of whatever else they could find or catch such as eggs, but basically we are originally carrion eaters. </p><br/> <P>This leads to the second reason to cook; it makes food more digestible, allows us to eat a wider range of food, and releases nutrition locked up in the raw material that we otherwise could not digest. Our success as a species owes a lot to being able to utilize a wide range of foods because we discovered cooking.</p><br/> <P>The third reason is food safety. Cooking processes kill or denature bugs, some poisons and other nasties that come with the raw food. Although less important today (most of the food we buy in supermarkets in the civilized world is safe to eat raw), bugs are everywhere in our environment. There are still reports of salmonella endemic in chickens, and occasional reports of trichinosis, tapeworms and other parasites in pig meat. </p><br/> <P>Reflecting the increased safety of our food supplies, today's cooking is much lighter than that of our forebears. A rare steak is, as we shall see, essentially uncooked in the centre, and certainly not cooked enough to kill spore-forming bacteria such as those that cause botulism or certain parasites.</p><br/> <P><A NAME="what"><B>WHAT HAPPENS WHEN WE COOK MEAT</B></A> <P>We start by looking at cooking meat. You may choose not to eat meat, but it has always been an important component of the human diet and certain nutrients are only naturally available from it.</p><br/> <P>Meat (and the edible portion of fish) is mostly muscle. A joint of meat is a section of a large muscle or muscles, together with associated fat, bones, and other structures such as nerves and veins.</p><br/> <P><A NAME="experiment"><B>An Experiment</B></A> <P>You can do this at home as well, although it's a terrible thing to do to a decent bit of steak. You can always add the leftovers to the stock pot. You do have a stock pot, don't you?</p><br/> <P>Take a nice piece of steak. This is filet, but any will do.</p><br/> <P><BR><TABLE ALIGN=center border=0> <TR><TD WIDTH=426><IMG SRC="http://images.egullet.com/u7620/i4163.jpg" WIDTH=426 HEIGHT=320</TD></TR></TABLE></p><br/> <P>Divide it in half. We will use one half in a moment. Divide the other half into eight or nine cubes, about 1cm/½ inch per side.</p><br/> <P><BR><TABLE ALIGN=center border=0> <TR><TD WIDTH=426><IMG SRC="http://images.egullet.com/u7620/i4164.jpg" WIDTH=426 HEIGHT=320</TD></TR></TABLE></p><br/> <P>We are going to cook each of these cubes at a different temperature, in 5C/10F steps from 45C/110F to 75C/170F. The easiest way to do this is in pan of water, since we can control the temperature more easily and get more even heating. Use a remote reading digital thermometer. A digital thermometer is the one gadget above all that will do the most to transform your cooking.</p><br/> <P>Heat the water to the desired temperature. Put in the meat. Leave it until the temperature of the meat has stabilized at the desired temperature. </p><br/> <P>Here is a cube of meat in a pan of water. </p><br/> <P><BR><TABLE ALIGN=center border=0> <TR><TD WIDTH=426><IMG SRC="http://images.egullet.com/u7620/i4165.jpg" WIDTH=426 HEIGHT=320</TD></TR></TABLE></p><br/> <P>Here are the results:</p><br/> <TABLE ALIGN=CENTER BORDER=1> <TR><TD><B>C</B></TD><TD><B>F</B></TD><TD><B>FEEL</B></TD><TD><B>JUICE WHEN CUT?</B></TD><TD><B>COLOR</B></TD><TD><B>COMMENTS</B></TD></TR> <TR><TD>45</TD><TD>110</TD><TD>Soft</TD><TD>No</TD><TD>Dark red/blue</TD><TD>Still raw</TD></TR> <TR><TD>50</TD><TD>120</TD><TD>Soft but firmer</TD><TD>No</TD><TD>Dark red/blue</TD><TD>Blue</TD></TR> <TR><TD>55</TD><TD>130</TD><TD>Yielding</TD><TD>Some</TD><TD>Red </TD><TD>Rare</TD></TR> <TR><TD>60</TD><TD>140</TD><TD>Yielding</TD><TD>Yes</TD><TD>Light red</TD><TD>Medium-rare</TD></TR> <TR><TD>65</TD><TD>150</TD><TD>Firmer</TD><TD>Yes</TD><TD>Some red juice</TD><TD>Medium</TD><TR> <TR><TD>70</TD><TD>160</TD><TD>Firm</TD><TD>No</TD><TD>Mostly Grey</TD><TD>Well done</TD></TR> <TR><TD>75</TD><TD>170</TD><TD>Firm</TD><TD>Dry</TD><TD>Grey</TD><TD>Unappetising</TD></TR></TABLE> <P><BR><TABLE ALIGN=center border=0> <TR><TD WIDTH=426><IMG SRC="http://images.egullet.com/u7620/i4166.jpg" WIDTH=426 HEIGHT=320</TD></TR></TABLE></p><br/> <P>What is going on here? How is a juicy steak transformed into a rubbery tough grey lump?</p><br/> <P><A NAME="structure"><B>The Structure of Meat</B></A></p><br/> <P>Muscle is a wonderful piece of natural engineering. It is both strong and flexible at the same time. It consists of bundles of active fibers held together and anchored with a natural glue, mostly collagen, and lubricated with pads of fat that also act as natural dampers. </p><br/> <P><BR><TABLE ALIGN=center border=1> <TR><TD WIDTH=423><IMG SRC="http://images.egullet.com/u7620/i4191.jpg" WIDTH=423 HEIGHT=426</TD></TR></TABLE></p><br/> <P>The fibrous nature gives meat it texture. Meat is usually carved across the fibers, chopping them into short lengths, since this makes the meat easier to chew and digest. (Fish muscle has much shorter lengths of fiber, divided by flexible sheets, and so is more delicate and cooks at a lower temperature (45C/130F)). </p><br/> <P><A NAME="heat"><B>The Effect of Heat</B></A></p><br/> <P>Heat basically screws up the elegant structure, bursts the cell walls, and disrupts the delicate chemistry. The mobile and flexible strands of protein shrink and tangle, squeezing out the lubricating (and tasty) fluid. As the temperature increases these tangles get tighter and firmer. Your steak gets smaller and tougher. The lubricating and flavorful juices separate from the tough dry meat. These juices in the old days were called the "osmazone" which the famous eighteenth century gourmet, Brillat Savarin described as "The soul of the meat." </p><br/> <P><A NAME="myo"><B>Myoglobin</B></A></p><br/> <P>The color changes because the red pigment, mostly myoglobin, is turned to its grey form. Myoglobin is the muscle's equivalent of hemoglobin, the oxygen carrying molecule in the blood. Myoglobin carries the oxygen to power the muscle's complex chemical engine. Muscles that work more often, like leg muscles in chicken, tend to have more myoglobin, and so are darker. Fish have two sorts of muscle: the large white (or pink if the fish easts shellfish) muscle, which is the massive engine that used only occasionally to attack or get out of trouble, and the small dark muscles used most of the time to swim slowly around.</p><br/> <P>Like hemoglobin in blood myoglobin can exist in several forms with different colors. </p><br/> <P>The central atom that binds to the oxygen is iron so the color of the molecule follows the color of iron compounds. The oxygenated form, oxymyoglobin, is bright red. The de-oxygenated form is dark purple/blue. The oxidized form, metmyglobin is brown, like rust. The changes between these forms are reversible. Some chemicals bind more tightly to the iron and so cannot be reversed. </p><br/> <P>The most common is nitric oxide, to give the pink form nitro-myoglobin, which is the color of cured meats such as ham or bacon. The saltpetre used in curing (and in making gunpowder) is potassium nitrate, KN03. Other chemicals, such as sulfur, can bind irreversibly to myoglobin to create other colors, such as green, but these are not usual in cooking, except as indications of contamination or bacterial action. A more complete list is given in the table.</p><br/> <TABLE BORDER=1 ALIGN=CENTER> <TR><TD>Bonds</TD><TD>Compound</TD><TD>Color</TD><TD>Name</TD></TR> <TR><TD>Fe++</TD><TD>Ferrous (covalent)</TD><TD> </TD><TD> </TD></TR> <TR><TD> </TD><TD>:H2O</TD><TD>Purple</TD><TD>Reduced myoglobin</TD></TR> <TR><TD> </TD><TD>:O2</TD><TD>Red</TD><TD>Oxymyoglobin</TD></TR> <TR><TD> </TD><TD>:NO</TD><TD>Cured pink</TD><TD>Nitro-myoglobin</TD> <TR><TD> </TD><TD>:CO</TD><TD>Red</TD><TD>Carboxymyoglobin</TD></TR> <TR><TD>Fe+++</TD><TD>Ferric (ionic)</TD><TD> </TD><TD> </TD></TR> <TR><TD> </TD><TD>-CN</TD><TD>Red</TD><TD>Cyanmetmyoglobin</TD></TR> <TR><TD> </TD><TD>-OH</TD><TD>Brown</TD><TD>Metmyoglobin</TD></TR> <TR><TD> </TD><TD>-SH</TD><TD>Green</TD><TD>Sulfmyoglobin</TD></TR> <TR><TD> </TD><TD>-H2O2</TD><TD>Green</TD><TD>Choleglobin</TD></TR></TABLE> <P>Because we associate freshness with bright red meat, the meat packaging trade uses all sorts of tricks, such as feeding the animals with vitamin E, and using oxygen permeable films to keep the meat looking red. Properly hung meat should be the dark purple/brown of reduced myoglobin, since the biological processes in maturing will have used up the oxygen.</p><br/> <P>Heat breaks up (denatures) the complex myoglobin molecule to create the greyish denatured hemochrome. This occurs at a slightly higher temperature than that at which the proteins denature, roughly 65C/150F, so a grey steak is an overdone steak.</p><br/> <P>Meat conducts heat very poorly. We can use the myoglobin color change as a rough thermometer to watch what happens as we cook a steak on a hot pan.</p><br/> <P><BR><TABLE ALIGN=center border=0> <TR><TD WIDTH=426><IMG SRC="http://images.egullet.com/u7620/i4192.jpg" WIDTH=426 HEIGHT=320</TD></TR></TABLE> </p><br/> <P><BR><TABLE ALIGN=center border=0> <TR><TD WIDTH=426><IMG SRC="http://images.egullet.com/u7620/i4187.jpg" WIDTH=426 HEIGHT=211</TD></TR></TABLE></p><br/> <P>You will see as it cooks that it shrinks the piece of meat gets smaller and tougher. Even after 20 minutes, the heat has only penetrated an inch or so. The heat also melts the fat interspersed with the muscle which runs into the pan, along with the meat juices and is lost.</p><br/> <P><BR><TABLE ALIGN=center border=0> <TR><TD WIDTH=426><IMG SRC="http://images.egullet.com/u7620/i4194.jpg" WIDTH=426 HEIGHT=320</TD></TR></TABLE></p><br/> <P>Steak after 25 minutes…burnt on one side, but still raw on the other.</p><br/> <P><A NAME="cond"><B>Conductivity of Meat</B></A></p><br/> <P>Solid meat is not a very good conductor of heat. The actual conductivity is quite complicated. For example, it is different along the grain or across it. It also changes with temperature; frozen meat conducts less well than unfrozen meat. Meat conducts better as the fat melts, and as the proteins denature, and as the water moves more freely. The length of time a piece of meat takes to cook (or freeze) is governed by the maximum depth, rather than the weight. A rough rule of thumb is about 20 minutes for each inch of depth. Thin pieces cook faster than thick joints; meat for quick stir frying needs to be cut wafer thin.</p><br/> <P>If the object is to raise the internal temperature of the meat to 60C/140F, then why put it in a 200C/400F oven, overcook the outside, undercook the inside and hope they even out during the resting period? They won't. The heat changes are irreversible. All that happens is the inside cooks a bit more from the retained heat and some of the juices squeezed out from the middle migrate a bit to the outside. </p><br/> <P>A much better idea is to put the meat in a much lower oven, say 65C/150F, for a long enough time for the entire joint to come up to temperature&emdash;about 5 hours. This also has the beneficial effect of letting the collagen denature to gelatin, as we shall see later. The meat will be uniformly tender, juicy and delicious. People will marvel. There is no danger of overcooking, so timing is not critical.</p><br/> <P>This is well above the temperature where harmful bacteria can thrive, despite what the "Food Police" say, who just look at absolute temperature. Recent work has shown the length of time at any particular temperature is important, and lower temperatures for longer times are also safe. Unfortunately this has not yet been incorporated into the regulations, so meat at public functions is often still served overcooked by law. If you need to hold meat for extended time (more than two hours) between cooking and serving you are advised to hold it at at least 60C/140F.</p><br/> <P>The oven needs to be at about 65C/150F, slightly above the desired temperature. This is because of the second law of thermodynamics: heat flows from a hotter body to a cooler body. As Flanders and Swan remind us, this means we are all going to cool down, and so there will be no more heat and perfect peace…</p><br/> <P>The second law says that the flow of heat into the meat will be proportional to the temperature difference between the outside and the inside of the meat. For meat, the thermal conductivity, k, is about k = 0.08 + 0.0052w, where w is the water content, and the units are watts per square meter per degree. Mathematically:</p><br/> <UL> <LI>Q= k*A*(?T)/x <LI>Where Q is the rate of heat transfer in watts (Joules per sec.) <LI>K is the thermal conductivity as above <LI>A the surface area in square meters <LI>X the depth in meters <LI>DT the temperature difference casuding the heat flow </UL> <P>However, the heat flowing in will increase the temperature of the inside. One Joule raises 1cc of water by 1 degree centigrade. Since the inside is hotter, the temperature difference is less and so less heat will flow in. Mathematically this means that the temperature will rise in an inverse exponential, asymptotically to the temperature of the oven. The graph shows an example</p><br/> <P>For a typical small joint, say 2 inches thick we can model the temperature rise at the center for various temperature ovens:</p><br/> <P><BR><TABLE ALIGN=center border=0> <TR><TD WIDTH=426><IMG SRC="http://images.egullet.com/u7620/i4138.jpg" WIDTH=426 HEIGHT=320</TD></TR></TABLE></p><br/> <P>You can see from the graph the inside is cooked rare (60C/140F)</p><br/> <UL> <UL> <LI>After about 45 minutes in a hot 200C/ 400F oven, leave it another 15 minutes and it will be 75C/170C, gray, dry and tough. Worse, when the inside is cooked, the outside half inch will be at 100C/210F or very overdone. <LI>After about 110 minutes at 100C/210F, the outside will be at 83C/180F. At this temperature the center will be overdone after another hour, so timing is less critical. <LI>After 5 hours at 65C/150F, the outside will be at 64C/ 148F, a little more cooked, but not significantly so. Leaving it there another hour or even several will have little effect – the curve is almost flat at that point. </UL> </UL> <P>Authorities differ on the thermal conductivity of bone. McGee states that bone conducts more than the meat, Wolke says it less then the meat. The measurements I have been able to find also vary widely, with values for k from half to double those of the meat. In the context of roasting or freezing a joint, I'd say that bone, with its cellular structure, would conduct less well than meat. If it conducts poorly, it may also explain why the meat next to the bone is meant to be better. If the joint is roasted conventionally the poor conduction of say the bones of a rib joint will tend to protect the meat next to it from the heat, overcooking and drying.</p><br/> <P> <A NAME="joint"><B>To Cook A Joint</B></A></p><br/> <P>To cook a joint, first brown the outside either in a hot pan, with a blowtorch or for 10 minutes in a scorching hot oven. Maillard reactions are the chemical processes involved in browning and developing the typical flavours of roast meat and will be covered in detail in a later course. This browning is entirely for taste. It has been shown, contrary to popular belief, that it does nothing to seal in the juices. If you don't overcook it, you won't get any significant juices – they will still be in the meat adding their flavor and juiciness, not squeezed out when the proteins abused from overcooking curl and contract.</p><br/> <P>You can alternatively brown the meat after it has been cooked, and for some varieties such as pork or the skin of birds, this crisps the outside. However, for beef or lamb, I prefer to do it beforehand. It avoids any danger of overcooking and I can do it at leisure rather than at panic time.</p><br/> <P><BR><TABLE ALIGN=center border=0> <TR><TD WIDTH=426><IMG SRC="http://images.egullet.com/u7620/i4167.jpg" WIDTH=426 HEIGHT=320</TD></TR></TABLE></p><br/> <P>Leg of lamb cooked at 65C/150F for 7 hours Gigot a sept heure. Internal temperature 60C/ F.</p><br/> <P><BR><TABLE ALIGN=center border=0> <TR><TD WIDTH=426><IMG SRC="http://images.egullet.com/u7620/i4168.jpg" WIDTH=426 HEIGHT=320</TD></TR></TABLE></p><br/> <P>Beef done the same way. (Prime Scottish Rib, boned)</p><br/> <P><BR><TABLE ALIGN=center border=0> <TR><TD WIDTH=426><IMG SRC="http://images.egullet.com/u7620/i4178.jpg" WIDTH=426 HEIGHT=320</TD></TR></TABLE></p><br/> <P>Brown on all sides. This is for flavor– it does NOT seal the meat. Note thermometer probe sticking out of the side. The browned onions are for the benefit of the gravy.</p><br/> <P><BR><TABLE ALIGN=center border=0> <TR><TD WIDTH=426><IMG SRC="http://images.egullet.com/u7620/i4179.jpg" WIDTH=426 HEIGHT=320</TD></TR></TABLE></p><br/> <P>After 6 hours in a 65C/150F oven. Final temperature is 55C/130 F – rare.</p><br/> <P><BR><TABLE ALIGN=center border=0> <TR><TD WIDTH=426><IMG SRC="http://images.egullet.com/u7620/i4180.jpg" WIDTH=426 HEIGHT=320</TD></TR></TABLE></p><br/> <P>Since the meat has lost very little juice, there are almost no pan deposits, or pink juice when you cut the meat.</p><br/> <P>Perfect Roast Beef for Sunday lunch. Good all the way to the edge. Succulent, and moist.</p><br/> <P><BR><TABLE ALIGN=center border=0> <TR><TD WIDTH=426><IMG SRC="http://images.egullet.com/u7620/i4139.jpg" WIDTH=426 HEIGHT=320</TD></TR></TABLE></p><br/> <P>If some of your family demands it well done, either cook off their pieces separately in a hot pan, or cook a separate piece for them to a higher temperature, say 70C/160F. It will be tougher and drier, but to each their own.</p><br/> <P><A NAME="wet"><B>Wet Heat</B></A></p><br/> <P>Stewing, boiling, or braising uses wet heat, and another mechanism comes into play. The glue that holds the muscle together dissolves slowly. This glue is made up of different proteins, primarily collagen. Collagen consists of three strands of molecules wound around each other. The older the animal, the greater the amount of collagen. Likewise, the more active the muscle, the greater the amount of collagen. </p><br/> <P>With long, slow cooking, those strands will unwind and turn to soft, succulent gelatin, providing the juiciness to tough cuts of stewing beef like oxtail and shin This however is a comparatively slow process. If you cook it long enough for all of the collagen to turn to gelatin, and hot enough for the contraction of the meat to squeeze out the liquid, you have just the cooked meat fibers. If they have been overcooked, you are left with irretrievably dry and stringy meat. Even if it is swimming in liquid, you can't get that juiciness back into the fibers that the curled up proteins have squeezed out.</p><br/> <P><BR><TABLE ALIGN=center border=0> <TR><TD WIDTH=426><IMG SRC="http://images.egullet.com/u7620/i4162.jpg" WIDTH=426 HEIGHT=320</TD></TR></TABLE></p><br/> <P>A cube boiled for 30 minutes at 75C. The collagen is beginning to dissolve. </p><br/> <P>Collagen starts to turn into gelatin and dissolve at around 60C/140F. This process (and also the fat melting) takes energy. Experienced BBQ cooks know that during the long slow smoking of brisket there is a "temperature stall" at around 72C/165F, where the internal temperature, instead of continuing to climb, stays steady for a long time before increasing again. That is the period the collagen is converting to gelatin. Once the temperature starts to climb again the conversion is complete, and the meat is tender. Any more cooking tends to dry the meat without improving tenderness.</p><br/> <P>Heston Blumenthal says that softening the collagen also improves even normally tender cuts of meat, such as the roast beef above. He suggests holding the temperature of the beef for up to 10 hours at 55C/130F (longer will start to generate 'off' flavors) to make beef that is "unbelievably tender." </p><br/> <P>Wet cooking is appropriate for the tougher (but flavorful) pieces of meat that have a lot of connective tissue. The long, slow moist cooking melts the toughness into smooth unctuousness. The tougher pieces of meat can stand the long cooking and will become tender as the collagen dissolves. Even so, although they are fairly tolerant, overheat them and they too will fall apart into dry, tough shreds. These joints have much more flavour than the softer joints</p><br/> <P><A NAME="stock"><B>Making Stock</B></A></p><br/> <P>For stock making, we want to extract the maximum goodness from the meat. We want the contracting proteins to squeeze out the interstitial liquid into the stock and the collagen to turn to gelatin and dissolve. The gelatin dissolved in the liquid gives the stock body and mouth feel, so stocks need to be cooked hot&emdash;boiled. However, vigorous boiling will emulsify the fat into the stock, which creates a cloudy stock. Besides, fast boiling is only a few degrees above a gentle simmer. Thus the traditional advice to make good stock is to do so at a gentle simmer for a long time. </p><br/> <P>An alternative approach is to use a pressure cooker. A pressure cooker allows the temperature of the stock to be raised before it boils, and the pressure reduces the turbulence. It also seals in all the flavor. So for the ultimate stock, cook in a pressure cooker, at maximum pressure for an hour or so, adjusting the heat input so that steam barely escapes from the valve. Use tough, cheap cuts of meat but leave the bones out. Be sure to let the pressure come down on its own after removing from the heat (as opposed to any of the quicker methods such as holding the closed pot under cold tap water, or releasing the pressure valve)otherwise the contents will boil aggressively when the lid is opened, making the stock cloudy.</p><br/> <P>Collagen is also the main component of tendons and is also the glue that holds bones together, so, given long enough wet heat, they start to dissolve as well. Cook a stock for too long, and the calcium from the bones also begins to dissolve, giving a "bone taint."</p><br/> <P>Thus for cooking meat (and other muscle):</p><br/> <OL> <LI> Light dry cook to 55C-65C (130F-150F) (45C/110F for fish) to just set the proteins <LI>Long slow cook to dissolve the collagen, <LI>Long hot wet cook to make stock. </OL> <P>An example recipe indicating long, slow wet cooking is Steak and Kidney Pudding. Pudding, not pie. Pie is just a stew with a pastry lid. In Steak and Kidney Pudding, the meat is sealed in a suet crust and boiled for six or more hours to melting, tasty, meaty loveliness. To quote Dr Marigold (one of Charles Dickens' more obscure characters), describing his pudding; "A beefsteak-pudding, with two kidneys, a dozen oysters and a couple of mushrooms thrown in. It's a pudding to put a man in a good humour with everything, except the two bottom buttons of his waistcoat."</p><br/> <P><B>DR MARIGOLD'S PUDDING</B></p><br/> <P>Serves 12. Good, cheap eating.</p><br/> <P>For the pastry:</p><br/> <br>1lb/500g flour <br>8oz/250g shredded beef suet <br>1 tsp black treacle/molasses (gives the pastry a golden color and taste) <br>Salt <br>Cold water to mix <P><BR><TABLE ALIGN=center border=0> <TR><TD WIDTH=426><IMG SRC="http://images.egullet.com/u7620/i4171.jpg" WIDTH=426 HEIGHT=320</TD></TR></TABLE></p><br/> <P>Line a large (2pt) pudding basin ( or heat-resistant bowl). Reserve 1/3rd of the pastry for a lid.</p><br/> <P><BR><TABLE ALIGN=center border=0> <TR><TD WIDTH=426><IMG SRC="http://images.egullet.com/u7620/i4172.jpg" WIDTH=426 HEIGHT=320</TD></TR></TABLE></p><br/> <br>2.5lbs/1Kg stewing beef cubed. Skirt steak is good. <br>1lb/500g chopped beef or veal kidney <P><BR><TABLE ALIGN=center border=0> <TR><TD WIDTH=426><IMG SRC="http://images.egullet.com/u7620/i4173.jpg" WIDTH=426 HEIGHT=320</TD></TR></TABLE></p><br/> <br>A dozen oysters, or a can or two of smoked oysters <br>A couple of large Mushrooms cut up, or even better, dried morels <br>2 onions, chopped and softened <br>2 Tbs flour <br>Salt and pepper; <br>1 Tbs Worcesteshire sauce <P>Easy on the seasonings. Since everything is sealed in, the flavors intensify.</p><br/> <P>You can, I suppose, omit the kidneys and the oysters, but it will not be as rich. You can use anchovies instead of oysters, but watch the salt level.</p><br/> <P>Mix well and pack into the lined basin/bowl. Fill with a little stock or water, but there won't be much room for liquid.</p><br/> <P><BR><TABLE ALIGN=center border=0> <TR><TD WIDTH=426><IMG SRC="http://images.egullet.com/u7620/i4174.jpg" WIDTH=426 HEIGHT=320</TD></TR></TABLE></p><br/> <P>Cover with the reserved pastry</p><br/> <P><BR><TABLE ALIGN=center border=0> <TR><TD WIDTH=426><IMG SRC="http://images.egullet.com/u7620/i4175.jpg" WIDTH=426 HEIGHT=320</TD></TR></TABLE></p><br/> <P>Tie a piece of greasproof paper over, leaving a fold for expansion. Hint: easiest if you secure it with a large elastic band before tying with string. Don't forget to leave a loop of string over the top, tied on both sides as a handle to help get it out of the hot pan after cooking.</p><br/> <P>Put in a pan of water. Add a cut lemon to the water to protect the pan. Simmer (or rather not quite simmer) for 6 to 12 hours. </p><br/> <P><BR><TABLE ALIGN=center border=0> <TR><TD WIDTH=426><IMG SRC="http://images.egullet.com/u7620/i4176.jpg" WIDTH=426 HEIGHT=320</TD></TR></TABLE></p><br/> <P>Once simmering, it may be easier to put the whole pan in a low oven (90C/200F) for most of the cooking. Check the water level occasionally and if needed top it up to stop it boiling dry.</p><br/> <P>Turn out into a deep dish, as there will be lots of gravy. Unfortunately I did not manage to snap this step before the hungry guests got at it. Serve with brussel sprouts, and mashed potatoes.</p><br/> <P><BR><TABLE ALIGN=center border=0> <TR><TD WIDTH=426><IMG SRC="http://images.egullet.com/u7620/i4177.jpg" WIDTH=426 HEIGHT=320</TD></TR></TABLE></p><br/> <P>The meat is deeply flavored and spoon-tender. The kidneys and oysters have combined to form the most wonderful sauce.</p><br/> <P><A NAME="without"><B>COOKING WITHOUT HEAT</B></A></p><br/> <P>There are other methods to make meat tender enough to eat besides cooking it. The most obvious way is mechanical: mince it up into small pieces, or slice it very very thin across the grain so that the muscle fibers are chopped up and can be easily chewed. Thinly sliced raw meat examples are carpaccio and delicacies like Parma ham. </p><br/> <P>The extreme example is Steak Tartar, said to be named after the practice of the fierce Mongolian and Tartar warriors who softened their steaks before eating them raw by putting them under their saddles before riding off on raiding or war parties. These days you don't need a horse to prepare steak tartare. The steak is chopped fine (but not into a puree). Its interesting to note that tartar sauce was originally a sauce for steak tartare. </p><br/> <P>A less extreme example is hamburger (and sausages) where the fine mincing makes otherwise tough cuts tender enough to eat with only short cooking times. Of course, flame browning the outside but otherwise not cooking your hamburger over 55C/140F, but holding it at this temperature for several hours, will immensely improve it.</p><br/> <P><A NAME="acid"><B>The Effect of Acid</B></A></p><br/> <P>Protein is also degraded by acid. Ceviche (fish "cooked" in lemon or lime juice) is an example. Meat proteins can also be digested by various enzymes: papain, from unripe papayas, Bromelin from pineapples, ficin from figs. The effect has been known for thousands of years. Primitive tribes wrapped their meat in papaya leaves. These enzymes are destroyed by heating above 70C/180F so have to be from fresh fruit and are not present in pastaurised or tinnned juice. You can buy them as "tenderizing salt" where the extracted enzyme is mixed with salt. In use they must be injected or otherwise put into the meat. Just soaking tends to only tenderize the surface.</p><br/> <P>It's easy to try: soak a steak in some fresh pineapple juice. Pierce the steak with a fork in lots of places to let the juice get inside. </p><br/> <P>Here is the steak and the pineapple</p><br/> <P><BR><TABLE ALIGN=center border=0> <TR><TD WIDTH=426><IMG SRC="http://images.egullet.com/u7620/i4474.jpg" WIDTH=426 HEIGHT=320</TD></TR></TABLE></p><br/> <P>I pureed about an inch of pineapple, and soaked half the steak in the puree</p><br/> <P><BR><TABLE ALIGN=center border=0> <TR><TD WIDTH=426><IMG SRC="http://images.egullet.com/u7620/i4475.jpg" WIDTH=426 HEIGHT=320</TD></TR></TABLE></p><br/> <P>After about three hours. The half on the left was not soaked:</p><br/> <P><BR><TABLE ALIGN=center border=0> <TR><TD WIDTH=426><IMG SRC="http://images.egullet.com/u7620/i4476.jpg" WIDTH=426 HEIGHT=320</TD></TR></TABLE></p><br/> <P>The enzyme in the fresh pineapple puree has eaten the steak. The steak fell apart as I tried to lift it, like tearing damp blotting paper.</p><br/> <P>Personally I don't like the effect; I think it turns the meat pasty and mushy, with odd hard bits of tendons that have not been softened. Apparently pineapple softens lentils as well. Pineapple jelly is difficult to make with fresh pineapple and gelatin as the bromelin denatures the gelatin. If you want to make pineapple jelly you must use agar, or cook the pineapple to destroy the enzyme.</p><br/> <P><A NAME="hang"><B>Hanging</B></A></p><br/> <P>Enzymatic tenderizing also occurs when meat is hung. The enzymes (and the lactic acid) naturally present in the meat slowly break down the long muscle fibers, making the meat more tender. The process is called proteolysis, which means breaking down (fragmentation) of the protein strands. The enzymes which carry out the process are thus called proteoses, meaning that they fragment the protein strands. </p><br/> <P>Many complex processes including initial relaxation of rigor mortis happen while the meat is aged, but the primary two are the enzymatic breakdown and dehydration. Freshly killed beef is not very nice, and doesn't even taste much of beef, but rather metallic. Aging increases the beefy and "gamey" flavors as a byproduct of the natural breakdown of the meat, friendly microbial and bacterial action and Maillard reaction processes on the surface of the meat. The dehydration (beef is 70% water, and loses some 20% during aging) concentrates the flavor.</p><br/> <P>Traditionally beef was dry-aged. The entire carcass was hung in a refrigerated room just above freezing at a temperature of between 32-34F/0C-2C, 80-85% relative humidity, and with an air velocity or 0.5-2.5m/s (about 3 miles an hour) for between 21 and 28 days. The low temperature discourages growth of spoilage organisms and the high relative humidity stops the meat from drying out too much. There is typically a 15-20% weight loss. The air movement stops water condensing on the meat. A dark crust forms on the outside of the meat which must be cut off and discarded. The wastage, the loss in weight and the time involved means that dry aged beef is a more expensive product.</p><br/> <P>You can reproduce these conditions at home by keeping a large piece of meat in the refrigerator, uncovered, on a wire rack with a drip tray underneath it with water in it. However, a professional meat storage room is a better place to do this and your friendly local butcher may be persuaded (at your risk, and if you pay in advance) to hang your beef for you for that extra week or two.</p><br/> <P>When aging beef there is always the danger of spoilage, which increases the longer the beef is aged. Discard it if there is any hint of an unwholesome smell, or sliminess. </p><br/> <P>The change in the meat is most noticeable in the first 14 days, and then the effect decreases, with little change after 21 days and none in tenderness after 28. Some advocate hanging for much longer, such as 90 days. Others feel that in this length of time the meat generates "off" flavors, and there is a significant risk of spoilage.</p><br/> <P>In order to overcome the problem of spoilage and length of time taken, the meat industry has developed various other aging techniques. These include accelerated aging where the beef holding temperature is higher, but bathed in ultraviolet light to retard the microbial growth. Anther technique, now used almost universally, is wet aging; the beef is cut into joints, sealed wet in aseptic cryovac bags and held at 32-34F/0-2C. Although the enzymatic processes are the same, there is no dehydration and consequent weight loss, nor Maillard conversion of the surface, so that the taste is different. However, there is much less risk of spoilage with wet aging so less waste and easier handling. </p><br/> <P><A NAME="brine"><B>Brining & Marinades</B></A></p><br/> <P>Brining is soaking the meat in brine, typically 1 cup each of salt and sugar to a gallon or water before cooking. It can immensely improve bland meats like turkey or pork.</p><br/> <P>It works because the fluid inside a meat cell is saltier than the outside, so by osmosis additional water is sucked in, along with some of the sugar and any flavoring you have added. Of course, if you overcook the meat and squeeze all the water out, your good work will be undone.</p><br/> <P>Penetration of the meat happens quite slowly, typically 1cm/hour. An advantage is that when submersed in the brine or marinade, which is usually quite acidic, nasty bugs are kept away from the surface, and the meat can be stored for a long time in a conventional fridge.</p><br/> <P>The illustration shows the diffusion of a marinade into a meatball, imaged using MRI scanning, courtesy of the <A HREF="http://www.hsmlc.cam.ac.uk">Herschel Smith Laboratory for Medicinal Chemistry</a> University of Cambridge. </p><br/> <P><BR><TABLE ALIGN=center border=0> <TR><TD WIDTH=242><IMG SRC="http://images.egullet.com/u7620/i4185.jpg" WIDTH=242 HEIGHT=480</TD></TR></TABLE></p><br/> <P><A NAME="summary"><B>SUMMARY TABLE OF TEMPERATURES FOR MEAT</B></A></p><br/> <TABLE BORDER=1 ALIGN=CENTER> <TR><TD><B>C</B></TD><TD><B>F</B></TD> <TD> <B>RESULT</B></TD></TR> <TR><TD>45</TD><TD>110</TD><TD>Still raw</TD></TR> <TR><TD>50</TD><TD>120</TD><TD>"Blue"</TD></TR> <TR><TD>55 </TD><TD>130</TD><TD>Rare</TD></TR> <TR><TD>60</TD><TD>140</TD><TD>Medium-rare</TD></TR> <TR><TD>65</TD><TD>150</TD><TD>Medium</TD></TR> <TR><TD>70</TD><TD>160</TD><TD>Well done</TD></TR> <TR><TD>75</TD><TD>170</TD><TD>Unappetising</TD></TR> </TABLE> <P><A NAME="ref"><B>REFERENCES</B></A></p><br/> <P><B>Books</B></p> <ul class='bbc'> <li>Harold McGee:<A HREF="http://www.amazon.com/exec/obidos/ASIN/0684843285/egulletcom-20"> On Food and Cooking</a></li> <li>Harold McGee: <A HREF="http://www.amazon.com/exec/obidos/ASIN//0020098014/egulletcom-20">The Curious Cook: More Kitchen Science and Lore</a></li> <li>Jeffrey Steingarten: <A HREF="http://www.amazon.com/exec/obidos/ASIN//0375727124/egulletcom-20">It Must've Been Something I Ate </a></li> <li>Jeffrey Steingarten:<A HREF="http://www.amazon.com/exec/obidos/ASIN/0375702024/egulletcom-20">The Man Who Ate Everything </a></li> <li>Robert L. Wolke:<A HREF="http://www.amazon.com/exec/obidos/ASIN/0393011836/egulletcom-20">What Einstein Told His Cook: Kitchen Science Explained </a></li> <li>Shirley Corriher:<A HREF="http://www.amazon.com/exec/obidos/ASIN/0688102298/egulletcom-20"> The Secrets of Cooking Revealed </a> </li> <li>Peter Barham:<A HREF="http://www.amazon.com/exec/obidos/ASIN/3540674667/egulletcom-20"> The Science of Cooking </a></li> </ul> <P><B>Online</B> </p> <ul class='bbc'> <li>Heston Blumnthal in<A HREF="http://search.guardian.co.uk/search97cgi/s97networkr_cgi?QueryText=%28+%28heston+blumenthal%29+AND+%28VdkPublicationDate+%3E%3D+01%2DSep%2D1998%29%29&ResultColSize=&ResultTemplate=ArchiveFull%2Ehts&Collection=&SortSpec=score+Desc&Query=heston+blumenthal&ResultStart=1&ResultCount=10&ResultMaxDocs=1000&Dtv=&remote_address=193%2E122%2E208%2E99&Action=FilterSearch&Filter=FltArchive%2Ehts">The Guardian</a></li> <li>Pierre Gagnaire's cooperation with <A HREF="http://www.pierre-gagnaire.com/anglais/cdmodernite.htm">Herve This</a></li> <li>Herve This<A HREF="http://www.college-de-france.fr/chaires/chaire10/page_herve/recherche_herve.htm"> Homepage (in French)</a></li> </ul> <P>Ask your questions about this course <A HREF="http://forums.egullet.org/index.php?showtopic=40549">here</a>.</p><br/> <P><B>Course Editors:</B> Carolyn Tillie & Andy Lynes</p><br/> <P><B>HTML Formatting:</B> Andy Lynes (updated by Chris Hennes, 10/11/2010)</p><br/> </body> </html>
-
Stuffed Pastas - Part 3: Pansotti, Tortelloni and Raviolo These next three recipes are a little more involved - but not much. One of the original purposes of raviolis was as a way of dealing with left-overs. A pot roast from the day before? Mix it with a little of the braising liquid, a handfull of cheese, and use it as stuffing - hence the pansotti. The second - chicken and pancetta tortelloni - came from me trying to figure out a different way to serve roast chicken. People kept wanting the white breast meat, so I started using the thighs for tortelloni, and serving them on the side. The last, a raviolo of artichoke confit, is a bit nobby (technical translation roughly "la-di-da") - but it doesn't have to be. Like the potbelly ravioli recipe in the last section, it's really just a way presenting things a little differently. Anyway it's just dinner, not doing your taxes. Pansotti of Braised Short Ribs These are a rough kind of pasta – but always fun to eat. If you want, you can make a sauce out of the braising liquid, but I prefer to keep them simple. Although I’m making the short ribs especially for the recipe, if you have any left-over braised meat – lamb, brisket, trotter, shank - it works just as well. For the Filling 2 short ribs approx 650g/ 1-1/2lb 3 tablespoons olive oil salt and pepper 1 large onion, medium dice 1 large carrot, medium dice 2 ribs celery, medium dice 3 cloves garlic, sliced 2 glasses red wine 1 cup chicken stock 1 can tomatoes (preferably San Marzano), broken up 1 sprig thyme 1 sprig rosemary 2 bay leaves 1 handfull parmagiano 1 egg yolk For the Pansotti 1/2 recipe Fresh Pasta 90g/6 tablespoons unsalted butter flat leaf parsley, chopped fine, for sprinkling parmagiano for sprinkling Pre-heat the oven to 140C/275F. In a medium casserole or dutch oven, heat the oil until almost smoking. Season the short ribs, and place then in the hot fat – turning them every couple of minutes – until well-browned on each side about 8-10 minutes total. Remove from the pot, and set aside. Add the veg (except for the herbs), add a little salt, and scrape up the brown bits on the bottom of the pan. After 7-10 minutes, when the veg is browning, add the wine, and deglaze again, scraping up the bits from the bottom of the pot. When the wine has practically evaporated, return the ribs, the herbs, the chicken stock, the tomatoes. The ribs should be roughly 2/3’s covered – add a little water if you need to. Bring to a boil, cover with a lid, and then place in the oven for around 3- 1/2 – 4 hours, or until very tender. Every 40 minutes or so, turn the ribs over, and baste. Remove from oven, and let cool. When cool, you can spoon off the extra fat (alternatively place in the fridge for a couple of hours, or overnight, which will make defatting easier). Pull the meat off the bones, and place in the bowl of a food processor. Add a few tablespoons of braising mix (tomatoes, onion, jus, etc), and pulse a few times. Taste for seasoning. If it’s a little dry, keep adding, until it’s the texture you want. Don’t puree, you want a little texture. Add the cheese, and the egg yolk, and pulse to combine. Then cover, and place in the fridge for 30 minutes. Roll out the pasta to the appropriate thickness (last setting Imperia, Kitchen Aid, or No.8 on the Atlas), and lay the sheets in front of you. Cut them into large squares, and then each square into two large triangles. Place a teaspoon of filling on each triangle, and fold the long edge in two, covering the filling, and making a smaller triangle. I smear - or brush - a drop of water around the filling to help it to seal. Press down well to get rid of as much air as possible. As you finish each pansotti, place it on a floured tray. Proceed to the next, until all the filling or pasta is used up. Place a large pot of water on to boil. Poach the pastas for 3-5 mins, depending on how dry they are. In a saucepan, melt the butter. Drain the pasta, place on a hot platter, pour over the butter, sprinkle with parsley, some parmagiano, and serve. Pansotti of Braised Short Rib Large Tortelloni with Chicken and Pancetta These are simple to make, great to have on their own, or as a way to deal with a dinner party – something different. Remove the legs and thighs of the chicken, debone (c’mon, it takes 5 minutes - or you can buy them deboned), and make a filling. Then, for the dinner, roast the crowns of chicken (the breasts on the bone), and serve as you would usually, with the tortelloni as a side dish. Remember, as with all the shapes, it’s just origami. You can add ingredients – mozarella, sundried tomatoes, prosciutto, ricotta, parmesan, pecorino, russian borscht, latvian squirrel, etc. It’s up to you and your imagination. If you’re going with chicken however, always use the highest quality organic bird available to you. For the Filling 250g/9oz boneless skinless chicken legs/thighs – cut into 1” pieces 100-125g/4oz pancetta, cut in small cubes, excess fat removed (or smoked bacon) half a med onion, small dice 2-3 tablespoons of extra virgin olive oil 1 glass of dry white wine sprig of thyme handfull of parmagiano egg yolk For the Pasta 1 recipe of Fresh Pasta parmagiano to sprinkle semolina for dusting 90g/6 tablespoons good unsalted butter Heat the oil in a sauté pan, on a medium heat, add the pancetta, and stir until fat starts to render, 3-4 minutes. Add the chicken and onion, and thyme sprig, turn up the heat a little, and sauté until the chicken is cooked through – 7-10 minutes. Season with salt and pepper. Deglaze the pan with the glass of wine, and scrape up all the brown bits on the bottom of the pan. Bubble until practically evaporated, and then remove from heat, and allow to mostly cool. Remove sprig of thyme. Place mixture in the bowl of a food processor, and add a handfull of grated parmagiano. Pulse a few times, scrape down the sides, and pulse a few more times. You want to leave some texture. Adjust seasoning, add the egg yolk, and blitz until all the ingredients are combined. Turn out into a bowl, cover, and place in the fridge for twenty minutes. Roll out the pasta to the appropriate setting for your machine, and using a three and a half or four inch circular cutter, cut the sheets of pasta into disks. Place a teaspoon of filling on each disk, and flatten it slightly. Dipping your finger in a glass of water, moisten around the edes, and fold the disk in two. Then, take the two corners along the long edge, and connect. Proceed to next, until pasta or filling is used up. Note: Cutting disks like this tends to leave you with lots of scraps – so feel free to collect them as you go, and run them through the machine to make more tortelloni. Poach for 3-5 minutes, depending on dryness. Serve on their own with butter and sage, or with a little chicken jus or velouté, or as a contorni to roast chicken breast. Raviolo If you look at many of the pre-nouvelle cuisine cookbooks, you find the most amazing garnishes: individual timbales and stuffed artichoke hearts, or ballotines – all of which are just different ways of presenting or containing ingredients – a puree, a confit, something braised etc. It seems to me that one of the modern methods of replacing this older fashion is the raviolo. Especially in some of the modern French/English cooking (Ramsey, White, Nico, etc) using a raviolo is a simple way of framing different presentations. Also, it’s not that much work for a high return – as you only need one per person – unlike tortelli, or ravioli. So, if you would usually serve roast chicken with mushrooms, why not make a duxelle of mushrooms instead and use it to stuff a raviolo. Or a pan seared duck breast with a savoy cabbage and pancetta raviolo. Or langoustine with a raviolo of oxtail. Or braised belly of pork with a raviolo of choucroute. Or roast pigeon with a raviolo of foie gras and ham hock? My point is, when you take the pasta away from its traditional uses, it becomes a method of containing – and of separating - tastes. All you have to do is use your imagination. I've used a 10cm (4") fluted cutter - but you can use practically any size, or shape. See? Simple. Raviolo of Artichoke Confit and Roast Garlic Here’s a classic combination: Artichoke and Sea Bass. The French often use a barigoule recipe – which for my tastes is a bit subtle. A bit quiet. I’ve done something a little louder. Although I’ve used the sea bass, you could certainly serve this with roast chicken, or saddle of lamb, or on it's own as a vegetarian starter (omit the chicken stock). Recipe makes 4 For the Filling 2 large or 3 medium artichokes (globe, or other variety) 4 good sprigs of thyme 3 sprigs of flat leaf parsley 5 cloves of garlic, unpeeled 2 lemons 1 mounded teaspoon of maldon or kosher sea salt black pepper Roughly 1 cup/250ml extra virgin olive oil 1/2 cup chicken stock For the Raviolo 1/2 Basic Pasta Recipe. semolina for dusting a 10cm/4" fluted pastry cutter an 8cm/3" circular cutter Pre-heat the oven to 375F/180C. Place all of the ingredients except the lemons in an oven proof pot with a tight lid. Cut each lemon in two, and squeeze the juice from one and a half of them into the pot. First, using a sharp chef’s knife, cut the top two thirds off the top of the artichoke, leaving the base and heart. Then, with a good paring knife, carefully trim away the stem, and all the green and fibrous leaves, until you are left with the pale flesh of the heart. Don’t worry about the choke. I’ve found that it’s much easier to remove afterwards. Also, watch your fingers! As you finish each heart, rub it with the cut side of a lemon, and place it in the pot with the rest of the ingredients. Make sure you spoon the mixture over the hearts. Place on the stove top on a high heat, and bring to a boil. Then put the lid on, and place pot in the oven for 30-40 minutes, or until the artichoke hearts can be pierced easily. Remove from the oven, and let cool. When cool, remove the chokes, using a spoon (they should come away easily). Chop up the hearts into small/medium dice (I like to keep some texture). Take three or four of the roast garlic cloves and squeeze them out onto a plate, making a paste. Stir this into the artichoke mixture. Roll out the pasta to the setting appropriate for your machine. Cut each sheet into 15cm/6inch lengths – you’ll need about 8 of them. Place the smaller cutter on one of the lengths, and put about 2 tablespoons of mixture in the bottom, flattening it out. Moisten the surrounding pasta slightly with a bit of water (just lightly) and place another length of pasta on top. Gently use the small cutter (blunt side) to press the pasta down around the filling, being careful not to tear the pasta. Then use the larger fluted cutter to make the final shape around the mound of filling. Remove the excess pasta, and place the raviolo on a semolina floured plate. Then proceed to the next one. And poach for 3-5 minutes (don’t let the water boil), drain, and use in the recipe of your choice! Crispy Sea Bass, with buttery leeks, and raviolo of artichoke confit. Troubleshooting/FAQ Making the Dough - Using the ‘well method’ (“W-M”), the eggs keep spilling over the side causing a mess. If you’re stirring the egg with your right hand, use your left to reinforce the walls of the well. As you incorporate more flour, the egg mixture will become more of a paste, and less likely to make a Steve McQueen attempt at escape. - I find it hard to incorporate all of the flour (when using the W-M), and I seem to waste a lot. That’s just a matter of experience. The more you do it, the better and more efficient you’ll become. If you’re worried about waste, it’s most efficient to use a food processor, which will incorporate all of the flour to all of the egg. - The dough seems really dry and stiff. Keep kneading. This will develop the gluten, and relax the dough. - No. The dough seems really stiff. Yep. Keep kneading. - I don’t feel you're responding to my whole ‘really stiff’ concerns and I have to hurt you. . . Well, why didn’t you say so? What size eggs are you using – are they standard large? If they’re medium, you might need to adapt by adding an extra yolk or two. Also, what’s the weather like? The humidity of the day has a big effect on the finished product. I don’t think I’ve ever made exactly the same dough twice. If you’ve incorporated all the ingredients, and the dough doesn’t seem to be going your way, you can try adding a few drops of water, and incorporate it in, but this will make the outside pretty sticky before you can work it into the inside (meaning you’ll have to add more flour, making it stiff again). Sometimes it’s just worth starting over. Add a couple of extra yolks to the mix, or another splash of olive oil. But don’t give up! - Even though the pasta is relatively dry when I wrap it up and put it in the fridge, it’s always a little sticky when I start to roll it out. Yes – the ‘grains’ of flour expand, the gluten develops (all sorts of scientific things going on which I don’t pretend to understand). Just give it a good sprinkle of semolina, fold it in two or three, and run it through the machine on the widest setting. As long as it’s sticky, keep repeating the above until the dough feels malleable (but not too dry!). I sometimes do this up to 10 times (folded in three each time, that makes 59,049 layers!). This also makes for a smoother end product. - The dough cracks along the edges when I run it through the machine. This tends to happen in the early stages. Fold it in two, and run it through the widest setting a couple of more times. This will help relax the dough, and make it less ‘brittle.’ - At the thinnest settings, my dough keeps tearing when it comes out of the rollers. 2 possibilities. Either the dough is too damp, and it’s catching on the rollers – in which case, sprinkle it with a dusting of semolina, fold it in two or three, and go back a few notches on the machine (like snakes and ladders). Or, sometimes small bits of dough, or grains of flour get caught on the underside of the rollers. This causes the sheet to tear as it comes through. You can usually feel it with your fingers, and clean it out. Making the Pastas - The filling is quite ‘wet.’ If you feel it’s too wet, you can dry it by adding bread crumbs (which will moderate the moisture, but also dilute the intensity of flavour), or grated parmagiano (which will add salt as well, and can dominate, so you have to be careful). In extreme cases, if you’re worried, you can put the filling in a cheese-cloth lined chinois for an hour or so. - The filling is quite ‘dry.’ You can add an egg, or just the egg yolk, both of which will also help the filling bind when it cooks; or if it’s a vegetable (fava/broad beans, potato, spinach etc) , you can add a tablespoon or two of the blanching liquid. - As I fold the tortellini/cappelletti etc, the pasta is cracking/tearing! You need to work a little faster. As the pasta dries out, once rolled, it becomes less flexible. - The pasta won’t seal when I press it together! I usually keep a small glass of water by my side, which I dip my finger in and run it along the edge of the pasta to be folded, before pressing it together. This dampens the dough enough to create a ‘seal.’ - Even though the filling is verging on salty/vibrant before I use it, after I cook the pasta, it tastes a bit bland. I’ve noticed – with dry pasta too, btw – that if the boiling water isn’t properly salted, the pasta will ‘leach’ salt from the sauce, or filling. This is probably just psychological, but it does ruin all the hard work you put in. Further Reading These have been a big influence. There's no one who makes me face my preconceptions about pasta more than Giuliano Bugialli. Bugialli on Pasta is an amazingly thorough book, though it doesn't have as many classic or obvious dishes as you would expect, he goes extraordinarily deep on others. Regional Italian Cooking by Ada Boni - This has been reprinted several times, and published in various forms. I have a fantastic version from the 70's/80's with great bleached photos (plate of pasta with white truffles, and farmhands working the field in the background...). Again, it's not the recipes, so much as the mindset and thought that goes into some of these dishes that I find amazing. Also, recipes that you'll find no where else (pasta dough with chicken liver and sausage worked into the dough anyone?). I found the first two River Café cookbooks by Rose Grey and Ruth Rodgers very easy to get into, and always struck me as dealing with the essential truths of Northern Italian cuisine. Ask your questions about this course here.
-
Stuffed Pastas - Part Two: Tortelli, Ravioli & Cappelletti by Moby Pomerance Tortelli di Fava (Tortelli of broad beans, pecorino) This recipe is based on the wonderful Italian delicacy of taking the first Spring fava or broad beans, and eating them with a good pecorino, a little oil, maybe a squeeze of lemon. If you can’t find young favas, feel free to use regular ones – just blanch them slightly longer until soft, and then pop them out of their skins. There’s something odd about favas (or broad beans as we call them in the UK). During my “death before eating anything green” phase (founding member, political movement, aged 6), I wouldn't have touched them. Maybe that’s what I’m reacting to now – I can’t get enough. This recipe has converted several people into fava bean fanatics. Sometimes I make twice as much filling, and just leave the rest in the fridge (before I add the egg). It always disappears. People just eat it with a spoon. Favas, good oil, pecorino, and lemon juice. It’s Spring time. The Filling 2 - 2 1/2 cups fava or broad beans, podded juice of 1 lemon 3/4 cup/ 1 handful grated pecorino romano 1-2 tablespoons your best olive oil 1 egg yolk salt and pepper mounded tablespoon of ricotta (optional) The Tortelli (as above) 90g/6 tablespoons good unsalted butter 1 recipe pasta dough extra parmagiano or pecorino for grating small bunch fresh sage semolina for sprinkling In a large pot of salted boiling water, blanch the fava beans for 2-4 minutes, depending on the size and age, until soft enough to pierce without much resistance. Reserving half a cup of the blanching water, drain, and run under cold water, or place in bowl of ice-water until cool. Then, one at a time, pop them out of their skins, and set on a paper towel to dry. Place these in a food processor with the oil, 1-2 tablespoons of the blanching water, and the juice from half a lemon. Blitz, until it starts to become smooth. You might need to scrape down the sides. Add the cheese (and ricotta, if using), and blitz again until smooth. It should have the texture, roughly, of hummus. Taste for seasoning, and adjust. You might want another squeeze of lemon or more cheese if you feel the mixture is a little wet. Add the egg yolk, and whiz until combined. Transfer to a bowl, and place in the fridge for 20 minutes while you roll out the dough, then proceed as with the tortelli recipe in part one of this course. Serve with butter, sage, and sprinkle with parmagiano or additional pecorino. Potbelly Ravioli of potato, arugula (rocket), lemon, pecorino This is a great style of pasta to serve as a starter, or first course. They’re ridiculously big, but people enjoy them. And you only need one or two per person. Also, they’re a good way to get the kids involved, as there’s nothing really delicate in their construction. And, as with all pasta, almost all mistakes are edible! (N.B. the Italian word Arucola translates in the US to Arugula, and in the UK to Rocket.) For the Filling 2 good sized potatoes (idaho, if you’re in the US – desiree or king edward in the UK) 100g/3 1/2oz arugula – cleaned and large stems removed a little grating of nutmeg 1 handful grated pecorino 1 lemon 1 clove garlic - sliced 2 or 3 tablespoons good olive oil salt and pepper 1 egg yolk For the Pasta 1/2 recipe of Fresh Pasta parmagiano or pecorino to sprinkle semolina for dusting 90g/6 tablespoons good unsalted butter Put the potatoes, unpeeled, in a pot of cold water, and bring to the boil. Leave for 20-30 minutes, until soft, and drain. When cool enough to handle, peel the potatoes, and run through a potato ricer, or mash. During this, sauté the garlic in the oil on a low/med heat until softened – 2-3 minutes. Add the arugula (rocket) and wilt, stirring until it starts to lose its water. Place a lid on, turn the heat down, and leave for 3-4 minutes. Remove lid, and sauté the mixture until most of the liquid is gone. Season with salt and pepper to taste, a grating of nutmeg, and a squeeze of lemon juice, and remove from heat to cool. If you like, you can place this in a food processor to semi-puree, but I often just roughly chop it on a board. Combine potato, arugula mixture, pecorino, and stir together. Test for seasoning and adjust. You might like to add a couple of glugs of good olive oil, and/or a squeeze of lemon, for taste. The mixture should be full of flavour. Finally, add the egg yolk, mix it in well, cover, and place in the fridge for 20 minutes. Roll out the pasta to the setting appropriate to your machine, and cut into 6 inch lengths. Place a large tablespoon amount of filling in the middle of a section, moisten around the edges, and place another section on top. Using your hand, make sure there’s no air in the filling; seal well. Using a knife, trim the edges to make them square, and proceed to the next one. Poach in simmering water for 3-5 minutes (depending on how dry the pasta is). Serve one as a starter, or three or four as a main – sprinkled with parmagiano, black pepper, and melted butter. Variations: Instead of arugula, you could add slices of prosciutto, or cooked pancetta. Cappelletti in Brodo (Small hats in broth) This dish, traditionally part of a New Year’s Eve, or Christmas Eve feast, is often the precursor to a Bollito Misto (less charmingly translated as ‘Mixed Boil’). The brodo, or broth, used in the recipe is made from the different meats, poultry, calf’s tongue, and cotechino (a kind of sausage), which are then served afterwards as part of a multi-course meal. As a quick alternative, you can use good home-made chicken broth. (Of course you could use shop-bought; but after going to all that trouble to make the tortellini, why would you want to?) Warning: This dish is best made by a family with many small fingers! As you get more experience, you’ll be able to do more. Also, if you wanted to take this in a slightly different direction, instead of chicken, you could use some pork shoulder or belly, or turkey. Don’t be too worried about removing fat – we’re making a farce or stuffing here, so any negligible fat will equal flavour! The Filling: 100g / 3 1/2oz sliced prosciutto (or prosciutto hock, chopped roughly) 100g / 3 1/2 oz mortadella 150g / 5 oz chicken breast or thigh (deboned, skin removed) 30g / 2 tablespoons unsalted butter. Half a medium onion, chopped fine 1 cup/handful grated parmagiano (to taste) 125ml / 1/2 cup of white wine 1 egg salt and pepper Nutmeg (grated fresh – optional) The Cappelletti: 1 quantity fresh pasta 3 litres/quarts chicken broth 1 cup semolina flour for dusting Parmagiano for sprinkling Cut the chicken into 1 inch pieces. Heat a sauté pan over a medium flame. Add the butter, and when the foam begins to subside, add the chicken and onion. Sauté, stirring regularly, until the chicken is cooked through, and the onion is softened. Raise the heat, add the wine, and deglaze the pan, scraping up the bits on the bottom until the wine has almost evaporated. Remove pan from heat. Cut the mortadella and prosciutto into small pieces approximately the same size, and place in the bowl of a food processor. When cool, add the chicken mixture, and process until relatively smooth. Add half the cheese, and process again. Taste – now is the time to adjust the seasoning. You can always add more cheese if it’s not salty enough. Add the egg, and pulse until blended. Add a few gratings of nutmeg if you like. Remove the stuffing to a bowl, cover, and place in the fridge for twenty minutes. Roll the pasta out to the thinnest setting (Imperia – or No. 8 on the Atlas). It is easier to work with one sheet of pasta at a time, as you need it to be flexible. If it starts to dry out, a little drop of water on each cappelletti will help it to seal. Using a knife or roller, cut each sheet into approximately 1 1/2” squares. Using a couple of spoons, place a small nub of filling on each square (I do 10 or 15 at a time). Take each square of pasta, and fold it in two, pressing the opposite corners together (making a triangle). Then take the two corners along the long edge, and press them together. Finally, take the remaining corner, and bend it back. When you finish one sheet of pasta, roll out the next one and continue. Alternatively, marry a good man or woman, have plenty of children, and train them to do it while you drink a glass of wine and grow a moustache. NOTE: Don't lay these on a floured tray. As you're cooking them in broth, the extra flour will - as Adam Balic points out - turn into wall-paper paste. Best to use them soonish after making them. If you want you can par-boil them for a minute, then quickly rinse them under cold water, drain well, and drizzle with a little oil to finish cooking later. These should hold for a few hours. To Cook: Place the chicken stock in a pot onto boil. Season to taste. Add the cappelletti, lower heat, 5-10 minutes, depending on how dry they are. When cooked, ladle some broth and cappelletti into a bowl, sprinkle with a little parmagiano, and serve. Variations: Instead of the Cappelletti, use a circular cutter, and make classic Tortellini. To some, this pasta has mythic origins. In Bologna they are sometimes referred to as umbillichi sacri or “sacred navels,” after the story of Venus staying at the Inn. Apparently the inn-keeper, so entranced with her beauty, spied through the key hole but could only see her navel. Wasting no time, he raced downstairs and created this pasta. Serve with a thick ragu; or add to a béchamel/cheese sauce, sprinkle with parmagiano, and bake in the oven. Or just boil, and serve with a spicy tomato sauce - Ask your questions about this course here. Part three of this course, which covers pansotti, tortelloni and raviolo will be published Wednesday March 31.
-
Ask your questions about the Stuffed Pastas course on this thread.
-
Stuffed Pastas by Moby Pomerance Ravioli, tortelli, pansotti, capelletti, tortellini, tortelloni, raviolo... Introduction Making pasta is easy. My friend supports Queens Park Rangers Football Club. That's hard. Riding a skateboard is hard. Learning the violin is hard. Riding a bike? Nearly impossible. I used to play the cello. Ah, the misery. Until I took up the electric guitar. Misery at a 100 db. But pasta? In six months, you'll have bruises up and down your legs from kicking yourself so much. All that time you spent watching Sex in the City you could've been making pasta. In 40 years, you'll look back on your life, and kick yourself again, just in case you didn't do it right the first time. The purpose of this course is to help people realise how simple it is to make your own stuffed pastas. Ravioli, tortelli, tortellini, cappelletti - there is nothing difficult about any of the basic forms – it only takes a little practice. Not even a lot of practice. I'm not just going to stick to Northern Italian. I might head a little west. Then north. Then a little east again. The point is as much to go into the principles behind these particular forms of pasta, as it is to go into individual recipes. Hopefully, by the end, you’ll be left with enough confidence to invent fillings of your own, and incorporate these techniques into your repertoire. Did I say repetoire? I meant dinner. Which are the simplest? If you've never made stuffed pastas before, start with the tortelli. You roll the pasta out, fold it over something tasty, and cut it up. Really. This is simple. Special Equipment (see above pic) A Pasta Rolling Machine- Unless you have the rolling pin skills of an Olympic Level Italian Grandmother, a pasta machine is absolutely vital. There are two brands which dominate the domestic market – the Imperia, and the Atlas Marcato. They’re both suitable. They are calibrated on a slightly different scale, however, so I’ll give the settings for both. I’ve noticed people talking about the Kitchen Aid attachment. I haven’t used one, but I would presume the thinnest setting would be suitable for our purposes. A large stock pot - This is crucial. Unlike dried pasta, most ravioli are quite fragile, so you want to give them as much space to poach as possible without crashing into each other. Tortellini and similar pastas tend to be much sturdier. A wide and deep sauté pan (min. 11 inches/28cm) is an acceptable alternative. A large slotted spoon – For removing the pastas once they are done. I use a Chinese-style ‘spider’. Ravioli cutters - These are by no means necessary, but they do save time. Food Processor - If you didn't mind getting messy, I'm sure you could make do without one of these - using either a pestle and mortar (al'Italiano) or smashing everything to a pulp using a club - just don't send me your laundry bill. Special Ingredients Type ‘00’ Flour (or Tipo ‘00’ if it’s imported). I have yet to be in a major town or city in Western Europe or America where I couldn’t track down this flour. Almost as a matter of pride, any half decent Italian food store will have it – even if sometimes you have to ask, or they have to pull it down off a shelf. In America, Batali and Co. will tell you to substitute Unbleached all purpose if you can’t find the real thing. I have never done this, but only because I’ve always been able to find it. Semolina – or durum wheat flour (Semolato di grano duro). Although I don’t use this flour in the pasta itself (you tend to find it more in Southern Italian recipes), it is invaluable for flouring the work surface and the finished pastas, in order to prevent them from sticking to each other. In the US I have seen this sold as ‘Pasta Flour’ – though you shouldn’t confuse this for type ‘00’. Large Eggs – Always buy the absolute best eggs, preferably organic, that are available in your area. In Parma, the egg yolks are an incredible orange, which stain the pasta a wonderful gold. In the UK and America, the end product tends to be paler. Basic Pasta Recipe (For use in all subsequent recipes) 400g/14oz ‘00’ flour 4 size ‘large’ eggs 1 egg yolk 1 tablespoon Extra Virgin Olive Oil pinch of salt semolina flour for dusting (Occasionally I might suggest a half-recipe; in which case use 250g flour, 3 eggs, and just a splash of oil.) By Hand: In a large bowl or on a clean large surface, make a mound of the flour. With your fingers, stir a ‘crater’ into the top, so you have a circle of flour surrounding a well (see image). Break the eggs into the well, and add the oil and pinch of salt. Using a fork or your fingers, stir the eggs, incorporating flour slowly from the edges. Use your left hand to maintain the flour, and stop the egg from breaking through and spilling over. Eventually, when you’ve incorporated about half the flour, creating a paste, start folding it all together. At first it might feel like a sticky mess, then as if it’s too dry to come together – but keep kneading – pushing the dough away from you, then folding it back over itself, and giving it a quarter turn, and repeating. When it coheres, scrape down the rough bits off your work surface and discard. Give yourself a fresh sprinkle of flour, and continue. (I find with experience the less I have to scrape down, and the more I can work into the dough). By Machine: In a food processor, combine all of the ingredients, and whiz until it resembles coarse bread crumbs, or comes together in a ball. Turn out onto a lightly-floured surface. By Mixer: Make a mound of flour in the mixer bowl, add the mixed eggs, oil and salt, and using the paddle attachment, mix until it comes together in a ball. Turn out onto a lightly-floured surface. Knead the ball of dough for 8-10 minutes, until it feels smooth and elastic (if it feels a bit lumpy, keep kneading). If it feels sticky or damp, sprinkle some flour over it and work it in. [see: ‘Tips and Tricks.’] Wrap in cling film, and place in the fridge for 30mins, and preferably 1-2 hours. To Roll Out the Pasta Set the pasta machine up on a long clean surface, giving yourself room to work. Sprinkle semolina in front of it, so that the sheet doesn’t stick to itself or the surface. Cut off a quarter of the dough (wrapping the remainder), and flatten it slightly in your hands. Give it a light sprinkle of semolina, and run it through the widest setting of your pasta machine. Fold the resulting piece in 2 or 3, and do again. Repeat this action approx. 10 times, until you have a smooth and elastic piece of dough. If it feels too damp or sticky, sprinkle it with semolina, fold it, and run it once again through the widest setting. Then decrease the machine setting incrementally each time until you reach the desired thickness (for this course, it will be the last setting on the Imperia and the Kitchen Aid, and No. 8 on the Atlas). Once the pasta is rolled out, you need to work with it relatively quickly before it dries. All recipes should feed 3-4 as a main course, or 6 as a starter. Tips and Tricks Making Pasta Is All In The Hands. That’s not to say there’s anything difficult, or magical in the process - it’s just that as you become more experienced, it will be your hands that tell you when you have kneaded the dough enough, or if you should incorporate more flour, or if you’ve incorporated too much. When the dough is perfectly elastic and malleable, you’ll feel it before you see it. When making taglietelle, or papardelle, you’ll want a ‘stiffer’ dough. You might cut down to the traditional 1 egg for every 100g of flour. With ravioli, you’ll want something a little more flexible. - The Filling has to taste great before it goes in if you want it to taste great once you've made the ravioli! What does this mean? Taste! Keep tasting! Adjust the seasoning. It's only going to be one component out of 3 (filling, pasta, butter/sauce), so it has to be able to stand up for itself. - Always make sure the pastas are sealed completely. Otherwise water will seep in and ruin the filling, or trapped pockets of air may cause the pastas to burst. - If you want you can substitute 3 egg yolks for every whole egg omitted (i.e. 2 whole eggs + 9 yolks = @ 5 eggs). Some people do this for a ‘richer’ taste, or for the colouring – but I can’t say the difference is substantial. - When making any kind of stuffed pasta, work with one sheet of pasta at a time. If you roll out all the dough, most of it will have dried out before you have time to include the stuffing (the dry dough will cause it to crack, and break in the water). - You will find you have a lot of scraps of pasta left over after you’ve cut your ravioli or tortelli – provided these aren’t too dry, you can collect them and run them through the machine once more to make additional pastas. - You can freeze most stuffed pastas - but you must do it on a tray, or large flat plate. Sprinkle evenly with semolina, and then place the pastas in rows. They must not touch! When they do, the fillings melt through the pasta, and the pastas will dissolve in the hot water. Once frozen, you can place single or double portion amounts in sandwich bags, as crowded as you like, and defrost them by throwing straight into boiling water. - Experiment! Take notes (even mental ones) about pasta thickness, cooking times, textures, tastes. Once you get the basics down, you can soon leave the recipes behind. Find out what's in season at your market. Can you turn it into a ravioli filling? Tortelli Tortelli are pastas with vegetable fillings, resembling elongated ravioli, traditionally found in and around the Parma region of Northern Italy. As with many pastas, the specifics of shape and size vary depending on which valley you’re in, and whose cow you’re leaning against when you ask. Traditional fillings include pumpkin, spinach, chard, potato, stinging nettles, beetroot. Usually they’re served with butter and a little sage. For me, they characterize the perfection and simplicity of Northern Italian cuisine. When they’re done well, they’re unbelievably good. A Note: These types of tortelli have a softer, more liquid filling, and so don't freeze as well as the tortellini. They are best cooked soon after being made, but can be placed on a well floured (semolina) tray for a few hours in a cool dry place, so long as you flip them over every 45 mins or so, and add additional flour. Otherwise you'll find the filling tends to 'melt' the pasta on the under-side. Tortelli di Zucca (Pumpkin Tortelli) In this recipe I haven't used amaretti – though for some it’s vital. I find the balsamic vinegar adds sweetness, but also more depth of flavour to the pumpkin or squash. In some traditional recipes you’ll find ‘Motarda di Cremona,’ a sort of pickled, fruit mustard/preserve – so experiment. Always taste as you go – and find what works for you. Also, the bread crumbs are there to add substance, but also to control the 'dryness' of the filling. I've made them optional, only because I prefer to use cheese instead (which does the same thing, and adds more flavour). The Filling 1 roughly 1 Kg/ 2-1/2lb/medium-sized pumpkin or butternut squash. 2-3 tablespoons of good balsamic vinegar salt and pepper olive oil 1- 1 1/2 cups / 1-2 handfuls freshly grated parmagiano (to taste) 1/4 cup bread-crumbs (optional) a few gratings of nutmeg 1 egg yolk (optional) The Tortelli 90g/6 tablespoons good unsalted butter 1 recipe pasta dough extra parmagiano for grating small bunch fresh sage semolina for sprinkling Pre-heat the oven to 375F/180C. Cut the pumpkin or squash into slices, about 1”/ 2 1/2cm thick. Place the pieces on a roasting tray, and give a light coating of olive oil, salt and pepper. Roast for about 45 minutes to an hour, or until very soft. Remove from oven and let cool. When cool, remove the meat from the skin (I use my fingers), discarding the seeds and fibers, and mash with the back of a fork, a masher, or a potato ricer. The flesh can be quite fibrous, so you need to be thorough. (Alternatively, force the pulp through a sieve or tamis for a smooth purée.) Mix in the balsamic vinegar, 1 cup of the grated cheese (you can add more if it needs it), the bread crumbs, salt and pepper, and grate a little nutmeg. Taste for seasoning. There's a lot of liquid in pumpkins, so you have to moderate it: if it seems a little wet, you can add more cheese or bread crumbs. (Note: if the filling is too wet, it can make the tortelli difficult to deal with later on). If too dry (like stiff mashed potato), add the egg yolk, and stir well to combine. Cover, and place in the fridge for 20 minutes or so. Meanwhile, roll out the pasta to the thinnest setting (Imperia, Kitchen Aid – or No. 8 on the Atlas). Try to aim for a narrower strip, rather than one the full width of the machine (you’ll waste less pasta that way). On a large cutting board, lay the sheet out lengthwise in front of you. At 3” intervals, place a spoonful of the pumpkin filling in the middle of the sheet. Next, with your finger, or a pastry brush, dampen around the filling; then fold the top half of the sheet over the filling, and lay it against the bottom half. The trick here is to seal the tortelli with as little air as possible inside (the air can expand in the hot water, and cause them to burst). Using a cupped hand, press around the mounds of filling, making sure they’re sealed well. Then, using a knife or scalloped roller, cut out the tortelli on three sides (the fold will act as the fourth). Sprinkle a tray generously with semolina, and place the tortelli at regular intervals, making sure they don’t touch. Continue until the filling, or pasta is used up. Place a big pot of salted-water onto boil. Carefully drop the tortelli in, and reduce to a high simmer – if it boils too violently, it can break the pasta. Poach for about 3-5 minutes, depending on the dryness of the pasta. Meanwhile, in another pan, sauté a handful of sage leaves in the butter until they start to crisp. Using a slotted spoon, or a spider, transfer the cooked tortelli to a heated platter, pour over the melted butter and sage leaves. Serve sprinkled with the remaining parmagiano, and some black pepper. Tortelli: 2 ways. Butternut Squash and Asparagus. Variations I wanted to pair the pumpkin with fava/broad beans, but fat chance finding favas in London in blinkin' March! But this is the point I wanted to get across – what looks good? How can we take it and turn it into a ravioli filling? In this case, I found some asparagus. I always thought there was a quality and intensity of flavour that favas and asparagus share. So – I thought I’d adapt the fava recipe into this. Tortelli d’Asparagi (Tortelli of Asparagus, pecorino) The Filling 1 large bunch asparagus juice from 1 lemon 3/4 cup/1 handful grated pecorino romano 1 egg yolk salt and pepper mounded tablespoon of ricotta (optional) The Tortelli (as above) 90g/6 tablspoons good unsalted butter 1 recipe pasta dough extra parmagiano or pecorino for grating small bunch fresh sage semolina for sprinkling Prepare the asparagus: if you don’t have much experience with this vegetable, one simple way to prepare it is to take a spear by each end, and bend it gently. It should snap a little past half-way towards the root end. Discard the tough stem, and keep the top part, cutting that in two. In a pot of salted boiling water, blanch the asparagus for 3-5 minutes, depending on the thickness of the spears, until you can pierce them without much resistance. Drain, and place in a food processor with the pecorino, lemon juice, ricotta (if using). Pulse a few times, scraping down the walls in between. Taste for seasoning. If it needs more salt, add a little more pecorino (but be careful, as pecorino is very salty). Add the egg yolk. And keep pulsing, and scraping down the sides, until you have a mixture resembling guacamole. Cover, and place in the fridge for 30 minutes to firm up. Then proceed as with the other tortelli recipes. Ask your question about this course here. Click here for Part 2 of this course, which covers Tortelli, Ravioli & Cappelletti.
-
Ask your questions about Mexican Table Salsas on this thread.
-
Mexican Table Salsas by Nicholas A. Zukin with Sharon A. Peters Introduction When asked to reflect on salsa, the average American will imagine a somewhat fresh and fiery tomato-based sauce they dip their chips into between beers, something akin to the offerings of Pace or Old El Paso. Hopefully their mind avoids the dark places, those plastic packets of goo weighting the bottom of Taco Bell bags. Jarred salsa can be found on the shelves of every supermarket in America and has become ubiquitous in the country's refrigerators, surpassing ketchup in sales. Yet the variety is limited and provides only a shadow in both flavor and freshness of the palate pleasing options in Mexico. Salsa vs. Table Salsa "Salsa" simply means sauce in Spanish. Tabasco and enchilada sauces are salsas. Moles are salsas. (In fact, the word mole is a Spanish version of the Nahuatl molli, or sauce.) Even a béchamel is a salsa -- a salsa francesa. However, what Americans refer to when they use the word "salsa" are table salsas, condiments spooned over tacos and dipped with chips. These salsas adorn the tables of Mexican restaurants like salt, pepper, and ketchup in American diners. They are always there waiting and are eaten with breakfast, lunch, and dinner, on eggs, fish, meat, and starches. Each region of Mexico has its unique salsas and so does each fonda, taqueria, and tía. Class Objective To illustrate the ease of making great tasting table salsas using traditional Mexican techniques and ingredients and provide templates that can be used to create new, unique salsas. A typical taqueria salsa bar, Salvador's in Woodburn, Oregon. Ingredients The majority of table salsas are made with at most five ingredients: a fruit/base ingredient, an aromatic or herb, a chile, an acid, and salt. Traditionally, tomatoes or tomatillos are used for the fruit, onions, garlic, or cilantro are used for the aromatic, and the chile, dried, smoked, or fresh, gives the salsa its unique character. The acid (usually lime or vinegar) and salt round out and intensify the flavors. Fruits Mexicans primarily use plum (roma) tomatoes. They're an excellent choice due to their low proportion of seeds, firm, deep-red flesh, and wide availability. However, do not tie yourself to a specific tomato. The best tomato will always be the one that is the freshest and most flavorful. Canned tomatoes can be a good alternative in cooked and fried salsas, especially in winter when they will often be much tastier than the "fresh" option. Tomatillos, or tomates verdes, are not green tomatoes. They're a member of the gooseberry genus (Physalis). They have a tart and seedy interior and can be used either raw or cooked, though most often cooked. Choose darker green tomatillos with tight husks. Remove the husk and any residual stickiness under hot water before using. Tomatillos are actually the most typically used fruit in Mexican salsas. The common tomato we most often see in Mexican-American salsas is a native of South America, whereas the tomatillo is a native of Mexico and grows better there. (See photos of tomatillos, along with other memebers of the Nightshade family, Solanaceae, including tomatoes and chayote, a Mexican squash, here.) Avocados, aguacate in Spanish, have been eaten and cultivated in Mexico for over 7,000 years. There are several varieties available in Mexico, but in the United States we primarily have access to two types: the pebbly, dark-skinned Hass (or California) avocado and the large and smooth, lighter-green West Indian (or Florida) avocado. The Hass is a hybrid of the Mexican and Guatemalan avocado and much closer to native Mexican version in flavor and texture. (The Fuerte, Californian in origin, is similar in size to the Hass and makes a good substitute. Its peel is a lighter green color and smoother than the Hass.) You might be tempted to use West Indian avocados because they can be much larger and less expensive, but it's not worth it. The flavor is quite muted in the Caribbean variety and the texture is wrong, lacking sufficient fats. (See photos here.) Hass avocados are ripe when moderate thumb pressure leaves an indentation in the skin. Feel confident buying hard avocados for later use as, unlike most fruit, they will ripen once they are picked. Avoid wrinkly or mushy avocados. Be warned: once an avocado's meat is exposed to air it discolors very quickly and even acids will not delay this process much. They also bruise quite easily. Aromatics The most common herb found in salsas is cilantro, or coriander leaf. It can be found in nearly every kind of salsa, though it's best in the brighter, fresh and fruity ones. Some people find its flavor unbearable, describing it as "soapy" or "chemically". However, for those that like it, it's indispensable in tacos and salsas. Cilantro doesn't fair well in the refrigerator (much worse than the similar looking flat-leaf parsley) and the best method of storage is on the counter, stalks submerged in water, changed on a daily basis. It's an annual and, like basil and many other herbs, can be grown indoors. In Mexico, cilantro is sold with roots attached and some farmer's market vendors do the same. (See photo and more information here.) Onions and garlic are found in every kind of salsa. Onions are usually used raw, while garlic is usually cooked, roasted in its skin. The white onion, which has little sweetness, is almost exclusively used in Mexico except in the south where red onions gain favor. Chiles Chiles are the heart of salsas in Mexico. You can have a "salsa" without chiles, but you cannot have a Mexican table salsa without them. Often confusingly referred to as peppers but actually part of the same family of fruits as tomatoes and tomatillos, chiles vary greatly in heat, sweetness, and flavor. The red-ripened bell pepper can be intensely sweet and has no piquancy. The jalapeño can be much brighter and its fire attacks the lips and front of the mouth. The serrano is more peppery and focuses its heat in the back of the throat. The poblano has an earthy fruitiness and a moderate bite. The habenero, while being among the hottest natural chiles, is also quite fruity. Each of these chiles can be dried or sometimes even smoked which intensifies and deeps their flavors adding layers of sophistication. Unfortunately, nearly all assume a new name in this transformation confusing matters somewhat. For example, a ripened, smoked jalapeño is called a chipotle and a dried poblano becomes an ancho. To make things worse, these names sometimes change from region to region within Mexico. You should be able to find fresh jalapeños, serranos, poblanos (often mis-labeled as pasillas), and habaneros (or their near twin, the Scotch bonnet) in many large supermarkets or Latin grocers. Look for un-wrinkled specimens with a firm flesh. Dried anchos, chipotles (if not dried, then in the can), and chile de arbols should also be widely available. (See photos of fresh and some dried chiles here or here.) The seeds and flesh of a chile contain just 10% of its fire. The majority of the capsaicin (the alkaloid that gives chiles their piquancy) resides within the ribs and placental tissue to which the seeds are attached. If a dish with chiles is too hot, try removing these first so that none of the flavor that the chiles impart is lost. Using just the outer flesh of a chile can greatly reduce its spiciness which may be preferable for those without asbestos-coated mouths. A few final warnings: Capsaicin (also the active ingredient in pepper spray) does not wash off with soap and water. If you scratch your eye after handling chiles it can be quite painful for several hours. It may be worthwhile to use latex gloves. You can use lemon juice or acidulated water to remove the capsaicin. Also, a bleach solution of four ounces bleach to one quart water will eliminate the burn. However, even Mexicans often use a plastic produce bag on their hand while digging through chiles at the market. When tasting fiery salsas, keep a glass of sugared water on hand to cool the tongue. Be careful not to burn dried chiles. The fumes are quite harsh. Aztecs used the smoke of burning chiles to punish their children and torture enemies. Acids and Salt Many salsas contain an acid to brighten their flavor, usually lime juice or vinegar. The Key Lime is traditionally used by Mexicans although its larger cousin, more common in American grocery stores, is also quite typical in Mexican markets. White and apple cider vinegars work well enough in table salsas, especially those with a heavy dried chile component. The milder rice wine also works quite effectively. However, you should also consider pineapple vinegar if you can find it or are willing to make it yourself. Diana Kennedy provides a recipe in her book From My Mexican Kitchen (p 270) which is paraphrased below: Peelings of one medium pineapple 4 tbsp brown sugar 1 1/2 quarts water Mix ingredients in 3 quart container. Cover and leave in warm place. Strain after six weeks when it's foamy and has flies or when maggots form. When a gelatinous layer forms after about two months, separate it from the vinegar and it's ready. If it remains sweet after a month, throw it out and try again. A quick note on salt: use it. Salsas are a blend of ingredients and salt helps extract the flavors to create a unified whole. It can also bring out subtleties that otherwise would be overshadowed by the heat of the chiles. Produce at a small Mexican tienda, Salvador's in Woodburn, Oregon. Tools Most salsas require some measure of pureeing. Traditionally this is done in a Mexican mortar called a molcajete (the pestle is called a tejolote.) However, most contemporary cooks, even in Mexico, take the easy route and use a blender. Blenders A blender works well for most salsas and can quickly and easily process large batches. An under-appreciated appliance for salsa-making is an immersion, or stick, blender. It allows finer control over the texture of salsas and makes smaller batches easier to produce. You won't be able to effectively puree dried chiles with one, however. Don't feel like you're being inauthentic by using a blender. Most Mexicans use blenders for their salsas. Walking through the market-streets of Mexico City, for example, you'll even see used blenders and blender parts for sale. Molcajetes Western marble mortars or Thai granite mortars are not good substitutes for the basalt molcajetes. Molcajetes have a rough, somewhat porous, texture. They are not always the best tool for grinding spices or making pastes (a job traditionally done with a metate and mano), but they are unequaled in their ability to create a rustic, textured salsa with maximum flavor. Unfortunately, most molcajetes found in Mexican-American tiendas, ethnic grocers in the United States, or even tourist-oriented markets in Mexico are low-quality and made of very porous, brittle rock or even concrete. When choosing, bear in mind that darker rock generally signifies a better material. Likewise, search for a less porous or rough interior. You do not want a molcajete with a chalky surface, a clear sign that you'll always be burdened with grit in your salsa. You can find decent quality molcajetes through Sur La Table (not available online) and GourmetSleuth.com. Make sure to season your molcajete before use. The most straight-forward method is to take a handful of uncooked rice and grind it to a powder, brush it out (if you purchase your molcajete at a Mexican supplier, look for the small straw cleaning brushes), and grind more rice until the powder becomes off-white instead of grey. This may take several sessions, after which you should be able to see some amount of smoothing of the interior. That's all there is to it, but be prepared for some sore shoulders if you do this in one day. (Additional information and excellent photos here and here.) TL: Molcajete and tejolote; TR: Grinding rice to season the molcjaete; BL: Why seasoning is important, chunks of rock that could be in the salsa; BR: The ultra-rough surface of a cheap molcajete. Comales A comal is a round, slightly concave, clay griddle used for cooking tortillas and ingredients for salsas. They were used by the Aztecs and they're still used today, though often the fragile clay comales have been replaced by metal ones. You're most likely to find metal comales of differing composition and quality at Mexican-American grocers. However, the Lodge cast iron (eGullet Amazon link here for the 10 inch or here for the 12 inch) does an excellent job, is readily available, cheap, and useful for more than just Mexican food. Each of these comales require seasoning, but you can put a layer of foil on your comal if you want to use it for cooking salsa ingredients. Most skillets make poor substitutes for a comal, but are passable. For the purposes of roasting ingredients, a broiler works nicely. Just place the ingredients on a broiler pan approximately 2 to 4 inches from the heat source and cook according the recipe's instructions. Foundational Recipes and Techniques Below are five recipes representing five styles of salsas. Each recipe contains a unique preparation method for the salsa as a whole and the ingredients in the salsa. Try the recipes to familiarize yourself with the basic techniques of salsa making. However, these recipes can also be used as templates. Tinker with the quantities or wholly replace ingredients with others to make the recipes your own. Salsa Mexicana Ingredients: Raw Salsa: Raw Form: Chunky Tool: Knife One of the most basic styles of salsa, a salsa cruda (raw sauce), is simply composed of ingredients chopped and mixed together. Sometimes called a pico de gallo (rooster's beak) or salsa fresca, the most common version, the salsa mexicana, consists of tomatoes, onions, fresh chiles, cilantro, lime juice, and salt. An extremely versatile salsa, it especially goes well with fish and chicken. 1/2 lb. or 2 medium tomatoes, approximately 3/4 C when diced 1/2 C white onion, diced 1-2 jalapeño chiles 2 T cilantro, finely chopped 1 tsp lime Salt Remove the core and seeds from the tomatoes and dice the flesh. The tomatoes should be firm, yet ripe. Plum tomatoes make an excellent choice here because of their naturally firmer flesh. Toss in a bowl with the diced onion. Holding the jalapeño upright, slice down the sides of the chile removing the flesh until only the stem and attached seeds remain. Finely chop or mince the jalapeño strips and toss them in the bowl. Serranos are actually typical to this salsa, but I prefer the bright front-of-the-mouth bite of jalapeños instead. Traditionally, all ingredients are chopped quite finely and similarly-sized to allow the flavors to unify. I prefer about a 1/4" dice for the onions and tomatoes with the jalapeños minced so that the chiles do not overwhelm the salsa. Add the cilantro and mix, taking care not to crush the tomatoes. Add the lime juice, mix again, and salt to taste. Let rest for 15 minutes to allow flavors to mingle. Makes about 1 1/2 cups. TL: The flesh of the jalapeño cut into strips, then julienned, then finely chopped; TR: Adding a loosely packed tablespoon of finely chopped cilantro; BL: Gently mixing ingredients; BR: The final salsa mexicana. This is the best template to use for most fruit salsas. Substitute mango, papaya, or even apple, for tomatoes and you still have a wonderful, but entirely different, Nuevo Latino salsa. Substitute corn, beans, or cucumber for the tomatoes and again the salsa takes on a whole new character. Salsa de Molcajete Ingredients: Roasted Salsa: Raw Form: Textured Tool: Molcajete Making a salsa in a molcajete isn't as difficult as someone prejudiced by grinding spices in a mortar or pounding a Thai curry paste might think. The bulk of the ingredients are soft. Only when you add spices or dried chiles does it become labor-intensive. While I'm not convinced that using a molcajete makes a significant difference in the flavor of most salsas, it makes a very meaningful difference in the texture of many components and anyone who prizes texture highly should give a molcajete a try. You'll be able to compare the texture of the cooked chiles in this recipe with that of the cooked chiles in the salsa verde that follows. I think you'll find that the smashed and ground chiles have a far superior texture to that of the blended chiles. Ultimately the main benefits of a molcajete are two-fold: 1) connecting with the traditions of Mexican cuisine, and 2) the beauty of serving a salsa in the hunk of volcanic rock in which the salsa was made. This salsa is closest in style to what Americans know as salsa, though the wonderful freshness makes the flavors incomparable. Serve with chips, on eggs, on enchiladas, tacos, or even nachos. This recipe was adapted from Diana Kennedy's Salsa de Jitomate in From My Mexican Kitchen (p 200). 1/2 lb, or 2 medium tomatoes 1 garlic clove with skin 1-2 serrano chiles 1/4 C white onion, diced 1 T cilantro, finely chopped Salt Char and soften the tomatoes, garlic, and serranos on a medium-heat comal or its substitute (see tools section). The skin of the tomatoes should be mottled black and the insides squishy. The garlic should be soft to the touch and the serranos should be even blacker than the tomatoes (see photo). The roasting intensifies and sweetens the tomatoes, while softening both the flesh and flavor of the serranos and garlic. Some people are put off by the crispy black skin of the roasted tomatoes and remove it, but it's my favorite part. I've even encountered salsas consisting primarily of just this blackened skin from the tomatoes and they had a wonderful sweetness. Place the garlic (skin removed), chile, and a little salt in the molcajete and grind to a paste using a circular motion. Add the tomatoes one at a time, mashing and grinding until there are no large chunks remaining and the chile-garlic paste has been fully combined with the tomatoes. Stir in the diced onion and chopped cilantro and salt to taste. Serve in the molcajete. Makes about 1 cup. TL: Cooking the tomatoes, serrano, and garlic on a foil-lined comal. These are just about ready; TR: Grinding the serranos and garlic in a circular pattern; BL: Smashing the tomatoes with the tejolote; BR: The finished salsa in the molcajete. Salsa Verde Cruda Ingredients: Simmered Salsa: Raw Form: Textured Tool: Blender There are many salsas verdes, or green salsas, in Mexican cooking. Most of the table salsas use tomatillos for the base. In this example, the tomatillos are simmered before blending. Because tomatillos are so naturally tart, cooking them can subdue this characteristic and bring out their sweetness. It also changes their texture from something like an apple to something closer to a ripe tomato. While I use this recipe as an example of using an immersion blender, it would be more traditional to use a molcajete and the final product would be superior. You could also fry this salsa afterwards, like in the chipotle salsa that follows, for a less bright, richer version. This recipe is adapted from one provided by the taqueria La Iguana Feliz in Portland, Oregon. 3/4 lb or 4-6 tomatillos, slightly larger than golfballs 1/4 lb or 3-6 jalapeños 1/2 C white onion, diced 1/4 C cilantro, finely chopped Salt Remove the husks and sticky film from the tomatillos under warm water. Place, along with the jalapeños, in enough simmering water to just cover the tomatillos. All items may float. Simmer until tomatillos are soft and have changed from a dark to a pale green, about 10 minutes. Remove the stems from the jalapeños and place them along with the tomatillos in a blender jar and pulse until just pureed, but not entirely smooth. There should be texture to the salsa mimicking that of a molcajete salsa, although the chiles will appear chopped. An immersion blender works better here than a standard blender which has a tendency to make such salsas too smooth. Salt to taste. Chill the salsa approximately 30 minutes to let the flavors blend. Mix in the diced onion and chopped cilantro when ready to serve. Makes about 1 1/2 cups. TL: Rinsing the tomatillos under warm water to remove the husk and sticky coating; TR: Simmering the tomatillos and jalapeños. Note the change in color; BL: Using a stick blender to lightly puree; BR: The final salsa, onions and cilantro added at presentation. This, and the salsa de molcajete above, are excellent templates for any salsa you might want to create. You could alter this salsa by preparing the tomatillos and chiles differently, roasting or leaving them raw which would completely change its character. Taking a giant leap outside of Mexican tradition, you could simmer carrots with fully-ripened red chiles or habeneros and puree with extra water, adding honey for sweetness and raisins for texture and contrasting color. Salsa de Chile Chipotle y Jitomate Ingredients: Roasted Salsa: Fried Form: Textured Tool: Blender A wonderful distinction between Mexican and Italian tomato sauces, besides the heavy use of chiles, is that Mexicans usually fry, rather than simmer, their sauces. In just five minutes, a tomato sauce will darken and develop a rich, sweet depth of flavor and lose the bitterness of its dried chiles. The rich, sweet, and smoky flavor of this salsa goes especially well with beef and pork and even makes a good base for a stew. The recipe also highlights the use of dried chiles. Substituting another dried chile for the chipotle would drastically change its character and the recipe simply begs for experimentation. This is an adaptation from Rick Bayless' book Mexican Kitchen (p 34). 3/4 lb or 2-3 medium to large tomatoes 2 cloves garlic with skin 1 chipotle, preferably dried 1 T lard Salt Char and soften the tomatoes, garlic, and chile on a comal or using one of the substitute methods (broiler method pictured below for the tomatoes). The tomatoes should be mottled-black and squishy. The garlic should be soft and the chipotle quite pliable. Try not to burn the chile. It should be slightly darkened and fragrant, reminiscent of the smell of a campfire. It's worse to burn the chile than to not toast it at all. The toasting wakes the chile's flavors, but burning it will turn the chile violently bitter. The chipotle should finish well before the garlic and tomatoes. You can press down on the chile with a spatula to cook it more quickly and evenly. On medium heat, it should only take a minute at most on each side to liven the chile. With other larger chiles, such as guajillos and anchos, you can cut off the stem, slice up the side and spread the chile into a broad, single-layer piece for toasting. This also allows you to remove the veins and seeds. If your chiles are too brittle, you'll need to soften them on the comal first; it only takes a few seconds of toasting. Place the chile in a bowl of tepid water, topping it with something to keep it submerged. After about 20 minutes, the chile will be re-hydrated, softened so it can be easily pureed, and some of its bitter taste will have been removed. Place the tomatoes, garlic (skins removed), and chile into a blender and pulse. Try to leave some texture, simulating the chunkiness created in the molcajete. Put a pan on medium-high heat. The salsa will splatter as it's fried, so something deep is preferable. Ceramic-coated dutch ovens work perfectly for this purpose, but any heavy saucepan is fine, too. When the pan is heated, add the lard and let it get almost smoking-hot. Add the salsa, stirring occasionally until it turns a deep red, about 5 to 10 minutes. You want it to slightly thicken but not dry out. Salt to taste. Makes about 1 cup. TL: Dried chipotle on the left, can of chipotles in adobo sauce on top, a canned chipotle with adobo sauce on the right; TR: Toasting the chipotle and garlic on a comal; BL: Re-hydrating the chipotle; BR: Broiling the tomatoes. TL: Gently pureeing with the immersion blender; TR: The pulsed sauce still with some texture. Note the orange color; BL: The salsa sizzles as it is poured into the hot lard; BR: The final salsa with its deeper red color and richer flavor. Salsa de Chile de Arbol Ingredients: Roasted Salsa: Raw Form: Smooth Tool: Blender Most Americans are familiar with Tabasco Sauce. If you ever eat in a taqueria you'll almost certainly encounter a bottle of Tapatio. Whereas the first three salsas in this course are similar to relishes, chutneys, or tapenades, smoothly pureed table salsas are more akin to ketchup or mustard and generally have more intense flavors, frequently using a heavy proportion of dried chiles. Add this salsa to soups, tacos, cheesy dishes, and even other salsas to provide a kick. Many other chile de arbol salsas add vinegar or tomatoes to counter the strong chile flavor, but I like this recipe's unadulterated taste. If the result is too bitter, you could add a little sugar or even re-hydrate the chiles, though neither should be necessary. This recipe is adapted from one provided by the taqueria La Iguana Feliz in Portland, Oregon. 24 chiles de arbol 1 garlic clove 1/4 C white onion, diced 3/4 C water 2 tsp oil 1/2 tsp salt Sweat the onions, garlic clove (whole, no skin), and chiles in oil over medium heat. Be careful not to burn the chiles. When the chiles are pliable and slightly browned and the onions and garlic are softened, transfer them to a blender. Add 1/4 cup of water and puree. When it stops making progress, add another 1/4 cup of water and continue to puree. When it appears to be fully blended, add the final 1/4 cup of water and the salt and puree, stopping to scrape down the sides until the salsa is as smooth as possible. Makes about 3/4 cup. TL: Sweating the chiles, onion, and garlic; TR: Adding the ingredients to the blender; BL: Scraping down the sides after blending with water; BR: The finished fiery, orange salsa. Conclusion This course has introduced you to the basic methods and ingredients used in Mexican table salsas. Remember to treat these recipes as templates, mixing and matching ingredients and techniques to invent your own fiery flavors to suit the salsas to your tastes. Salsa making isn't baking and exact measures are not necessary, therefore the improvisational cook is free to explore. Appendix I: Choose-Your-Own-Salsa Table The following table provides a matrix for creating your own salsas. Just choose selections from each column and combine them. Choosing one item from each column allows for 57,051 combinations. That exponentially increases if you start selecting more than one item in the first four columns (and you can always choose none in any of the first four columns). Add your own ingredients to the lists and you're quickly in the millions of possibilities. Example: Fruit/Base: Avocado Chile: Serrano Flavoring: Onion Acid: Lime Ingredients: Raw Salsa: Raw Form: Textured End Result: Guacamole Appendix II: Additional Recipes Guacamole Ingredients: Raw Salsa: Raw Form: Textured Tool: Molcajete Guacamole is one of the oldest Mexican salsas. It's great as a side dish or a relish. 1 large, or two small, Hass avocados 1 lime Salt 1/4 C white onion, minced 1-2 serranos, minced 1 tomato, seeded and diced Halve the avocado by running a knife lengthwise down the center of the fruit against the pit and around to the other side. Gently twist and separate the halves. Remove the pit by swiftly embedding your knife blade into it and twisting away from the avocado. Dice the avocado in the peel by running a knife first lengthwise and then side-to-side creating a cross-hatch. Scoop out the flesh with a spoon into a bowl or molcajete. Add the juice of the lime and a pinch of salt. Lightly mash the mixture with a potato masher, fork, or the tejolote. Add salt to taste. Mix in onion, serranos, and tomato. Serve immediately. Makes about 1 1/2 cups Tomatillo-Avocado Salsa Ingredients: Raw Salsa: Raw Form: Smooth Tool: Blender This is a common taqueria salsa that provides a counter to the chile de arbol salsa above. Where that is quite hot and earthy, this one has a cooling effect and a much brighter flavor. This recipe is adapted from one provided by the taqueria La Iguana Feliz in Portland, Oregon. 1 small Hass avocado 1 tomatillo 2 jalapeños 1/2 C white onion, diced 1/4 C cilantro, chopped 1/2 Tbsp salt 1 1/4 C water Remove the meat from the avocado and the tomatillo from the husk and add to a blender. Remove the jalapeño stem and add the jalapeño along with the onion, cilantro, and half the salt to the blender. Add 1/2 cup water and puree until smooth. Add more water until the salsa reaches the consistency and intensity you desire. Finish salting to taste. Makes about 2 cups with all the water. Kiwi-Apple Salsa Ingredients: Raw Salsa: Raw Form: Smooth and Chunky Tool: Blender and Knife By experimenting with various substitutions you can create splendid, unique salsas. This is one I first made a couple years ago. It's sweet, so I recommend leaving in the seeds and ribs of the jalapeño. I especially like this as a balance to richer salsas and on seafood and poultry. 1/2 lb. or 3-4 tomatillos, golfball sized 1 kiwi 1/4 C white onion, diced 1/4 C cilantro, chopped and loosely packed 1 jalapeño 1 lime Sugar Salt 1 Granny Smith apple Remove the husk and quarter the tomatillos and put them in a blender. Peel the kiwi, quarter it, and add it as well. Add the onion and cilantro. Remove the stem (and the ribs and seeds, if you wish) from the jalapeño and add it along with the juice of the lime. Puree until all large chunks are gone. Add salt and sugar to taste. Peel and dice apple and add to the salsa. Chill and let rest approximately 15 minutes so the flavors can mingle. Makes about 1 1/2 cups. Appendix III: Resources Some of these books and websites were used as a knowledge base for this lesson, all are worth checking out. Favorite Books Authentic Mexican by Rick and Deann Bayless: A great introduction to Mexican food with useful illustrations and sidenotes on tools, techniques, and ingredients. Mexican Kitchen: Recipes and Techniques of a World-Class Cuisine by Rick Bayless: Another excellent book by Bayless that expands the descriptions of tools, techniques, and ingredients, adding depth to the reader's understanding of traditional Mexican cooking. From My Mexican Kitchen: Techniques and Ingredients by Diana Kennedy: Ms. Kennedy really deserves the upmost praise for legitimizing Mexican food in America. This, her latest book, is one of her best with thorough discussions of ingredients, tools, techniques, and dishes. It has wonderfully instructive full-color photos, too. My Mexico: A Culinary Odyssey with More than 300 Recipes by Diana Kennedy: A regional exploration of Mexican food by its pre-eminent English author. The recipes take on a time and place through her travelogue and it's wonderful reading along with having excellent recipes. A Cook's Tour of Mexico by Nancy Zaslavsky: An irreplaceable resource for anyone traveling to Mexico in search of food. But it also includes recipes that take a regional approach and are consistently interesting and successful. 1,000 Mexican Recipes by Marge Poore: There isn't much information here, but there's no more extensive collection of quality Mexican recipes. The Great Salsa Book by Mark Miller and Mark Kiffin: A large and diverse collection of salsas that should inspire you to invent your own. America's First Cuisines by Sophie D. Coe: The best history of pre-hispanic Mexican cuisine in English I've found. It focuses on Aztec, Mayan, and Incan foods before the conquest. Favorite Links MexConnect.com: A great site with a lot of conent even without becoming a member. Their food section doesn't require membership and has many recipes and articles. GourmetSleuth.com: Nice site with an emphasis on Mexican cooking. It includes a Mexican ingredient dictionary, articles on tools, ingredients, and dishes, and lots of very good links. Includes links to quality Mexican tools that you can purchase online. MexGrocer.com: Online store with broad selection of products, including canned chiles, salsas, masa harina, tortilla presses, and cookbooks. Desperately Seeking Authenticity: Article for the LA Times written by By Rachel Laudan on the illusory notion of authentic Mexican food. (Originally posted to eGullet by John Whiting.) Appendix IV: Internal Links Topics Most Singular Guacamole: Thread in Mexico forum on guacamole. Guac Talk: Another topic on guacamole. Making Hot Sauce: donk79 requests things to do with the fruits of a chile garden. Rick Bayless' Salsas: The enigma that is jarred salsa. Salsa versus Chutney: Defining salsa. Salsa et al: Another topic on salsa versus other relishes. Tomato Chutney: What's the difference between a tomato chutney and a salsa? You be the judge. Raw Sauce: Members give their favorite salsas crudas. eGCI Hot & Spicy Class: Discussion of chiles includes salsa-talk. Nopales: Discussion of nopales, or cactus paddles, a great salsa ingredient. Cilantro: eGulleter's love/hate realtionship with cilantro. I Love Cilantro: Tommy loves Cilantro. Storebought Chips and Salsa: Yes, pure eeeevil, of the deeeevil. Northern Mexican: Varmint makes a northern Mexican meal. Gets lots of suggestions as to what he can do with that Mexican meal. Mexican Food and Diana Kennedy: Topic that quickly moved into Jaymes' fried tomato recipe using canned tomatoes and garlic salt. Mexican Food in the UK: Lament over making Mexican outside the colonies. Condiment Personality: See if you're truly a salsa person. Recipes Guacamole Lime and Serrano Chile Sauce Nacho Dip Pico de Gallo con Aguacate Rancho Relish Post your questions on Mexican Table Salsas here.
-
Put your questions to Andy Lynes about Leaf Salads on this thread.
-
Leaf Salads by Andy Lynes and chef Bruce Poole Introduction In the wrong hands, the salad bowl, like the stockpot, is at risk of becoming the dustbin of the kitchen, merely a receptacle for leftovers from the fridge drenched in bottled vinaigrette. A well made salad is a joy, but its creation demands as much thought and attention as any other area of cooking. A successful salad requires the application of a number of culinary fundamentals, such as the balancing of texture, flavors and tastes and it's these that will constitute the focus of this course. A salad should be a simple thing, the combination of a few carefully chosen and prime ingredients with an appropriate dressing. Errors of judgment on the part of the cook will be quickly betrayed by the stripped back nature of the dish. Sounds like a culinary minefield doesn’t it? Well the good news is that once you have a few simple, basic rules under your belt, there are endless variations available to you and a world of creativity opens up. There is very little that you cannot include in a leaf salad: pulses, grains, meat, fish, offal, vegetables, fruit, cheese and eggs all have their place. This course provides example recipes using most of those groups, just not all at once. Its worth noting that some successful salads are somewhat more "busy" than the examples provided in this course. For example the classic American "Cobb Salad", with its chicken, avocado, tomato, bacon, cheese, various salad leaves and multi-ingredient dressing, appears to break all the rules. But if you review the relatively long list of constituent parts you'll see that the all important balance of the dish has been maintained: crisp bacon against unctuous avocado, acidic tomato against creamy Roquefort cheese and so on. It's a personal favorite of mine and I had considered including a recipe for Cobb salad in this course, but I can really do no better than direct you to Arthur Schwartz's TheFoodMaven.com site, where he provides the definitive recipe, including the story of its creation. Scope This course will describe techniques for the construction of leaf salads. It will identify leaf types rather than attempt to provide a definitive catalogue of all those currently available. The most well known salads such as Caesar's and Nicoise will be conspicuous by their absence. Rather, I will present my own takes on the main styles of leaf salad and explain the reasons behind the choices I have made in terms of leaf, ingredient and dressing type. In addition, Michelin starred chef Bruce Poole of London's Chez Bruce has kindly contributed two recipes which provide another perspective. Although this course contains recipes for a number of dressings, please refer to Jack Lang's Non-Stock Based Sauces for a definitive run down on oils, vinegars, vinaigrettes, mayonnaise and its derivatives. Objectives By use of annotated example recipes and supporting background material, the course will demonstrate methods for incorporating a wide range of groups of ingredients into a salad. By focusing on the balancing of flavors, textures and temperatures, the course is designed to provide you with the knowledge, skills and inspiration to create your own leaf salads. Definition Larousse Gastronomique defines salads as "a dish of raw, cold or warm cooked foods, usually dressed and seasoned, served as an appetizer, side dish or main course." Doesn't narrow things down too much does it? In order to make this course manageable therefore, I have simply added the restriction that the dish must include salad leaves. Equipment You won't need much, if any specific equipment over and above your usual batterie de cuisine. However, make sure you have: a large bowl for mixing the salad a small to medium sized bowl for preparing dressings a whisk serving spoons or salad tongs for mixing and serving adequate pots and pans for blanching and sauteing chef's knife and paring or turning knife I try and minimize the amount of specialist kitchen equipment that I might only occasionaly use for three reasons: my kitchen is small and I simply don't have the room to keep a lot of non-essential items; my wallet is not overflowing with spare cash and I don't like washing up. So my philosophy is, wherever possible, do the task by hand. You may however be feeling the need to purchase a salad spinner, which is a simple and effective device for drying salad leaves after they have been washed. I would not necessarily discourage you as I have used them in professional kitchens and found them to work very well where I have had an industrial sized sink full of wet leaves to deal with. At home however, I find it just as efficient to wash and drain the leaves, transfer them to a clean cloth, create a sort of beggar's purse around the leaves and then step into the garden and swing the cloth around my head. Not only does this dry the leaves perfectly, it will provide you with some exercise and your neighbor's with some free entertainment. Types of Leaf Choosing the correct leaf type or mix of leaves for your salad is crucial. Whether you start from the leaf and build up your other ingredients around it, or select a leaf to accompany a main element, you need to bear in mind its flavor, particularly in terms of how bitter or peppery it is, physical make up (soft, crisp, or structured) and appearance (color, size and shape). I've divided the leaves that I would typically include in a salad into 5 groups: Sweet and Buttery: the butterhead varieties including the likes of Bibb, Boston, Continuity and Red Oak Leaf. Although they may look rather floppy and perhaps therefore less appealing than the more crisp and structured varieties, used properly, they are as deserving of fridge-space as any other salad vegetable. Lambs lettuce and baby spinach, although dissimilar in appearance to the butterheads, are included in this category for their soft texture and sweet almost bland flavor. Crisp and refreshing: Iceberg has its place of course, shredded in a burger perhaps, but your attention should go to Cos (or Romaine) and Little Gems. These are a highly adaptable variety with a mild nutty flavor that will lend bulk and interest but not overpower other ingredients. The weapon of choice for many everyday applications. Bitter: approach with some caution, think carefully about an appropriate dressing and chicory (Belgian endive) curly endive, frisee and radicchio will add a huge amount of interest to your salads. Chicory and radicchio can also be braised very successfully and included in a warm salad. Peppery: rocket (arugula), watercress, mizuna, mustard greens and cress all deliver that delicious peppery kick that partners well with goat's cheese or the sweetness of roasted vegetables. "Structured Leaves": this final category overlaps the others and includes those leaves that can be employed to provide height and shape to a salad on the plate and include frisee, chicory and radicchio. The recipes in this course will demonstrate how to select the right leaf for your dish and how to successfully combine the various types. Queer Gear - The Lollo Rossa Effect Some things just shouldn't be allowed: kissing in public, the British licensing laws and Christina Aguilera spring to mind. But I could put up with all of that if someone would do something about the dreaded Lollo Rossa. That this nasty looking, unnecessarily frilly yet limp and unappetizing excuse for a salad leaf should have been developed to honor the frankly gorgeous Gina Lollobrigida is sadly ironic and does an injustice to both actress and salad alike. A triumph of attempted style over substance but landing wide of the mark on both counts, Lollo Rossa is indicative of the still apparent need for novelty and variety for its own sake. For a time, it was a badge of honor for chefs to include the most obscure and unusual leaves in their salads, identifiable and distinguishable only by the label on the packets they arrived in and colloquially referred to in the professional kitchen as "queer gear". For the most part, that type of needless one-upmanship is long gone, but wherever you go, you still run the risk of encountering Lollo Rossa. It might be lurking in supermarket ready-prepared-salad pillow packs or loitering with intent to garnish your plate of sandwiches in the pub. You however have it in your power to exclude it from you salads. I would urge you to do so. Croutons - The Essential Crunch Croutons are one of life's small joys and can help bring a salad to life. Where, I ask myself, would Caesar's salad be without those little fried cubes of delight? I use two crouton making methods: deep frying and baking. Both are very simple and it's simply a matter of having the right bread for the job. For deep frying I always use what Nigella Lawson so charmingly refers to as "plastic bread" i.e. the industrially produced sliced white supermarket loaf. Just trim the crusts, slice into cubes and deep fry in hot sunflower oil until brown. Drain on kitchen paper and season with salt and maybe some grated parmesan if appropriate whilst still warm. Once cooled, these will keep quite happily for a day or two in an air tight container. However, I've found that croutons tend to disappear pretty quickly so this will probably not be a problem for you. For baking, you need to find the longest, skinniest baguette you can lay your hands on. Slice thinly on the bias and arrange on a wax paper lined baking sheet. Season with salt and pepper and drizzle over some good quality olive oil. Bake in a pre-heated medium oven until golden brown. Rub with a cut clove of garlic and allow to cool. Try and prevent your guest/children from scoffing the lot before you have a chance to get them into a salad. A Word on Stalks Before we move on to the recipes, I'd like to say a few words about stalks: ALWAYS REMOVE THEM. If you don't, your friends and family will think you are a lazy, no-account bum. They will stop returning your phone calls, people will point at you in the street, your reputation as a cook will be ruined and you will slip into a life of self pitying misery and alcoholism. I can't stand it when I am served a plate of arugala or baby spinach or frisee that has not been properly trimmed. Stalks are simply too fibrous to be considered good to eat and they have little flavour. Yes they can be a pain to get rid of, but hey, you're making a salad, the whole idea is to stand in your kitchen and listen to the radio whilst you prepare the leaves with the sort of love and devotion the star of any show deserves. Green Salad Green salads are most often a mixture of a number of salad leaves, but here I'm just using two strongly contrasting types; the bitter flavored and structured frisee with the soft textured and blandly sweet tasting English round lettuce. In the UK, round lettuce may be combined with a thinly sliced cucumber and insipid hothouse tomatoes to create the world's most boring salad. With this recipe I wanted to demonstrate that in the right company, it can shrug off years of misuse and be employed to good effect. Here I'm using it as a foil to the stronger tasting frisee, which in turn adds some much needed textural interest and acts as a sort of skeleton to give the salad shape and height on the plate. But to a certain extent, the leaves most important job in this very simple salad is to provide a vehicle for some top quality single estate extra virgin olive oil which plays such a vital role in the dish by adding its own fruity, peppery notes. This recipe also demonstrates the very simple method of dressing salads in the mixing bowl. It's quick and easy and precludes the need for preparing a dressing separately and is also a very good way to build up your confidence in the kitchen when judging volumes and amounts by instinct. Ingredients yellow leaves from the heart of one large head of frisee 1 round lettuce (butterhead), outer leaves removed best extra virgin olive oil juice of half a lemon salt and pepper Wash and dry the leaves well and place in a large mixing bowl. Season with salt and pepper and drizzle over enough of the oil to coat the salad. Squeeze over enough lemon juice to cut through he oil, but not so much that the salad tastes acidic. This is a matter of trial and error and is down to practice and developing your culinary instincts. (Alternatively, follow the instructions for vinaigrette in the Non Stock based Sauces class and pour over sufficient to coat the leaves). Toss the leaves to distribute the dressing evenly and then correct the seasoning if necessary. Allowing one good handful per portion, mound the salad onto a plate and serve as a simple starter or as a side dish. Herb Salad This salad is designed as a garnish for starters or main courses. Treated like a vegetable, it should be integrated into the dish itself in order to provide a little explosion of herby flavor. It can be served on a risotto for example or to provide freshness to rich roasted or braised dishes. Most versions of this I have encountered includes frisee for body, but here I am just using soft herbs. You can pretty much use anything you like, but avoid the more woody varieties of herb like rosemary and thyme which will not work. Coriander should only be used in the context of Asian cuisine as its citrus, perfumed flavor can be overpowering. Ingredients 1 bunch tarragon 1 bunch flat leaf (continental) parsley 1 bunch chives, chopped into 1 inch sticks 1 bunch basil good quality extra virgin Olive Oil white wine vinegar salt and pepper Pick the leaves from the stalks and combine in a bowl. Dress as per recipe for green salad above. Using your hands, form very gently into small balls use to garnish the dish of your choice. Chicory, Caramelized Apple, Salted Pecan and Beenleigh Blue Salad with Mustard and Honey dressing This recipe demonstrates the principle of substitution as a method for creating salads. The inspiration for this dish came from the classic combination of pear, blue cheese (normally Stilton) and walnut, and in particular chef Alfred Portale's recipe "Autumn Salad of pears, Gorgonzola and Walnut Vinaigrette" as published in the Gotham Bar and Grill Cook Book. I wanted to showcase the unique bitter flavor of chicory (Belgian endive) but needed to find a way to moderate its impact whilst still retaining it as the main ingredient. The apple in its raw state would not have the required sweetness to balance the bitterness, but does the job when caramelized with butter and brown sugar. The loss of the fruit's crispness by cooking it is not an issue here as the chicory has sufficient crunch to carry the dish. I chose pecan over walnut for its smoother taste and the Beenleigh Blue over a Stilton or Roquefort for the same reason. This cheese from the South West of England is not as salty and has a more rounded flavor than most other blue cheeses and suits the dish perfectly. The dressing introduces a note of spice and heat from the mustard which is carried on the back of the sweet honey which gives the vinaigrette some body and rounds out the salad nicely. Chives are included not only for a little extra contrasting color and decoration, but are also used to unify the flavors of the salad in a similar way that a chopped and sweated onion provides a unifying base for a sauce or stew. Ingredients 4 heads of chicory 2 dessert apples 25g butter 25g dark brown sugar 30 pecan halves, salted 200g Beenliegh or other blue cheese 1 handful of chopped chives for the dressing 1 teaspoon of Dijon mustard 1 teaspoon of honey 1 dessertspoon of red wine vinegar salt and pepper 2floz extra virgin olive oil 2floz sunflower oil Ingredients for the salad. Trim the end of the chicory with a small pairing or turning knife. Seperate the leaves. Peel, core and slice the apples into 16 segments. Place into a bowl of acidulated water if your not using them straight away. Melt the butter and brown sugar in a thick bottomed pan. Caramelise the apple over a medium heat then allow to cool completely. Ingredients for the dressing. Put the mustard honey, vinegar and salt and pepper in a small bowl. Whisk to an emulsion Whisk in the oils slowly. If the resultant dressing is too think, let it down with a little water. Chop the chives as finely as you can manage. Roughly chop 10 of the pecans and 12 of the apple slices and place in a bowl with the chicory. Crumble in half the cheese (dice the rest and reserve), then spoon in enough of the dressing just to coat the salad. Arrange 5 apple slices, 5 pecan halves and 5 cubes of cheese on each plate, then divide the salad mixture evenly and pile it into the centre. Bruce Poole's Salad of Young English Vegetables with Tarragon Cream It seems to me that there is something quintessentially English about a salad. The word seems to conjure up picnics on a summer day in the Sussex Downs or on the South Coast's stony but packed beaches. The reality of those al fresco meals however is probably not quite as romantic as one would like to imagine. Sand in your sandwiches, scotch eggs and a flask of tea are the stuff of culinary nightmare, not dreams. It's fortunate then that I can draw on another memory to illustrate my point. Dining in London's Chez Bruce restaurant a few April's ago, I had the opportunity to sample chef Bruce Pooles spring vegetable salad. The flavors were piercingly clear and made me realize how delicious a plate of food without meat or fish can really be. The recipe calls for the vegetables to blanched and refreshed. This simply means plunging them in to boiling, salted water and cooking them until tender then draining them and "shocking" them in a bowl of iced water to arrest the cooking process. Chef Bruce Poole introduces the recipe: "This is totally delicious with romaine lettuce hearts or any good crunchy leaves. The spring vegetables are simply blanched and refreshed then dressed to order. Good vegetables to use are carrots, radishes, tomato concasse, turnips, broad beans, green beans, peas, leeks and beets (dressed separately)." Ingredients 1 head of romaine lettuce, trimmed of outer leaves and separated 20 baby carrots, peeled, blanched until tender then refreshed in ice cold water 20 radishes trimmed 2 tomatoes, skinned, deseeded and cut into concasse 20 baby or 4 small young turnips quartered, blanched until tender then refreshed in ice cold water 250g broad beans, blanched until tender then refreshed in ice cold water 250g peas, blanched until tender then refreshed in ice cold water 8 baby leeks (or 2 medium young leeks sliced into rounds), blanched until tender then refreshed in ice cold water extra virgin olive oil white wine vinegar salt and pepper Combine all the ingredients in a large bowl and dress as per green salad recipe above. Divide the salad equally amongst four plates and arrange attractively. Spoon over the tarragon cream dressing (recipe follows). Tarragon Cream Ingredients yolks from 2 hard boiled eggs, sieved 1 teaspoon of Dijon mustard 1 tablespoon of white wine vinegar 150ml double (heavy) cream 1 small bunch of tarragon, finely chopped Mix the yolks, mustard and vinegar in a bowl, whisk in the cream then stir in the chopped tarragon. Bruce Poole's Salad of Soft Boiled Eggs, Leeks and Anchovies 4 soft boiled eggs 12 baby leeks or 4 medium young leeks sliced into rounds, blanched until tender then refreshed in ice cold water 1 250 gram tin of salted anchovies 2 baby gem lettuces, trimmed of outer leaves and cut into quarters 1 quantity of tarragon cream (see recipe above) Cook the eggs according to the instructions in the Hard Cooked Eggs course. Slice into quarters and arrange on 4 plates along with 2 lettuce quarters, 3 leeks and some of the anchovies. Spoon over the tarragon cream and serve as a starter. Warm salad of orange and chicken livers with watercress and sherry vinegar dressing This recipe illustrates the principle of combining warm ingredients with salad leaves to provide a contrast of temperature within the dish. It is inspired by chef Nico Ladenis' famous "Hot Foie gras with Caramelized Oranges on Toasted Brioche". We are using the slightly more affordable but no less delicious offal of chicken livers rather than the expensive and tricky to handle foie gras. These are paired with fresh, rather than cooked orange segments which would overpower the more delicate flavour of the chicken liver. The sherry and walnut flavors in the dressing marry well with the liver and the peppery leaves, and the croutons provide that "essential crunch". Ingredients 500g fresh chicken livers Vegetable oil for frying 50ml of sherry for deglazing 1 orange peeled and cut into skinless segments and sliced into halves 1 large bunch of watercress, stalks trimmed 20 baked croutons (see recipe above) for the dressing 1 crushed and minced clove of garlic salt and pepper 1 teaspoon of mustard 1 dessertspoon of sherry vinegar 1 tablespoon of walnut oil 75ml of olive oil To make the dressing, combine the first 4 ingredients in a bowl and whisk together. Whisk in the oils and set aside. Heat the oil in a large think bottomed pan until smoking. Season the livers then sauté for a few minutes. They should still be pink in the middle. Deglaze the pan with the sherry. Combine the water cress and orange segments in a bowl and toss with the dressing to coat. Divide the salad between 4 plates, piling it into the centre. Arrange 5 croutons over and around the salad, then divide the livers equally between the plates and arrange around the salad. Drizzle over the juices from the pan and a little more of the dressing. Serve immediately. Post your questions on Leaf Salads here.
-
This thread is only for questions directed to Ellen Shapiro regarding her photo-essay on cooking with the pros at Tavern On The Green. For questions about the All About Eggs cooking lessons, please use the appropriate Q&A thread. Thanks.
-
All About Eggs Cooking With The Pros By Ellen R. Shapiro On Saturday, Valentine's Day 2004, Fat Guy and I spent the morning at New York's famous Tavern On The Green restaurant observing the brunch shift. There were 600 brunch reservations at Tavern that day, and 2500 dinner reservations. It's a big restaurant. Fat Guy was there to meet Tavern's executive chef, John M. Milito, and to do broad research for his book about what goes on behind the scenes at restaurants. He also asked me to come along to document the way the Tavern kitchen produces eggs for so many customers. ~~~ We begin early, in one of the prep areas, where we are placed under the guidance of Fernando, the sous-chef in charge of, among other things, eggs. Fernando is, in restaurant parlance, the "egg man." But of course he is not just any egg man. He is the egg man at one of the world's largest and best known restaurants, and he has been with Tavern for 21 years. No slouch is he when it comes to eggs. In Fat Guy's eGullet Culinary Institute (eGCI) class on poaching eggs, a number of tricks were covered all with the goal of improving your chances of getting well-formed poached eggs. Tavern uses a much different approach: there are very few tricks employed, and the main way they get good poached eggs is by throwing out all the bad ones. In the production setting of Tavern, where Fernando's time is far more valuable than an extra carton of eggs, there isn't time for pricking, par-cooking, shaping, swirling, or anything of the sort. Fernando explains to Fat Guy the simple steps they use in poaching eggs at Tavern: 1) the freshest eggs available, 2) a large (to say the least -- this was like poaching eggs in a Jacuzzi) water bath set at a slow simmer, 3) a healthy amount of white vinegar in the water, and 4) throw out all the bad ones. The basic theory, according to Fernando: "The yolks, they try to rise. The whites, they try to sink. When the egg goes in, if the white wraps around the yolk the yolk brings it back to the top and it's a good egg, round with a tail. If the white doesn't wrap around the yolk, either the yolk pops away or you make a fried egg on the bottom." Fernando repeatedly illustrates with his hands how the yolk and white need to come together just so. And so we go off to poach eggs. Tavern uses Grade AA Extra Large eggs and they come by the case. Each case contains 30 dozen eggs -- 360 eggs in 12 trays of 30 eggs each. Fernando estimates that today the restaurant will use 7 cases for the brunch service. "On the busiest day," he says, "I might open 15 cases. Or more." The water bath in which the eggs are poached is about the size of the tubs they use at pet salons to bathe large-breed dogs. It is filled with water and vinegar and brought to a simmer. Fernando works with 60 eggs at a time. He places 2 trays (30 eggs each) next to the water bath. The selection process begins at this point, as he discards any obviously damaged eggs. He then proceeds to crack the rest into the water bath with staggering speed, one hand feeding the eggs to the other hand as he cracks the eggs one-handed directly into the water bath. Fat Guy clocks him at 26 seconds for a tray. "If I go slow," Fernando says, "half the eggs cook before the other half are in." But at +/- 13 seconds there is no worry of great variance. Fernando informally separates tray 1 from tray 2 by working at both ends of the water bath. In order to avoid damage to the eggs as they enter the water, he cracks them very close to the water's surface. He then pulls away swiftly, a motion that helps the egg form its shape: a sphere with a tail of whites. At this point he begins culling the worst of the eggs, throwing them into the large garbage pail he keeps next to the poaching station for this purpose. There are a lot of eggs that break up or otherwise don't meet the standard. But most of them do come out right. The eggs will poach for around 3.5 minutes, Fernando says, and Fat Guy hits his stopwatch. Fernando, amazingly, wanders off to do something else: he is also preparing lamb shanks for the dinner service. I had wondered earlier why there was a case of lamb shanks sitting on top of each two cases of eggs in the prep kitchen. Fernando manages to get an entire tub full of lamb shanks into another gigantic bath-like contraption in less than the time it takes the eggs to poach. He has never used a timer for poaching eggs, but it is almost exactly at the 3 minute mark that he wanders back over to the poaching station and tests an egg. He also makes Fat Guy press on the egg to see the right texture of a correctly poached egg. It is now almost exactly 3.5 minutes into the poaching process, and he rapidly removes all the eggs with a wire mesh scoop and plunges them into tub of ice water. There are still a lot of imperfect eggs, even though at every stage of the process Fernando has discarded several flawed ones. Fernando repeats this 60-egg poach several times, and also continues to multitask with the lamb shanks. It only takes him about a half an hour to poach several hundred eggs and finish browning the lamb shanks (later they will be braised in veal stock and red wine, this liquid will form the basis of the sauce, and they will be plated with creamy polenta). One of Fernando's cooks then goes through the poached eggs that are sitting in the ice water and selects only the ones that are up to standard. Each of them has a tail of whites hanging off the spherical part of the egg. The assistant plucks these tails off by hand and lays the eggs in stainless trays, which are then covered and stacked. Poaching is not the only use of eggs at Tavern, needless to say. There are scrambled eggs, par-cooked in a gigantic cauldron. There are crab cakes, which contain -- in addition to jumbo lump crab meat, shredded crab meat, scallions, and seasonings -- eggs in two forms: whole beaten eggs, and a little mayonnaise. For Valentine's dinner, they are making heart-shaped mini crab cakes (for brunch, they are making larger round ones). There is French toast, par-cooked and heated to order at service. There is a "frittata" (a hybrid of an omelette and a frittata really) on the menu, and the eggs for that are cracked in advance. And of course when poached eggs are served they are most commonly made into eggs Benedict ("eggs Benny" in kitchen-speak) and that requires Hollandaise. In this case, about 300 eggs worth of it. There are so many things going on in the prep areas at the same time. Over in an adjacent room, they're washing spinach. The bags of spinach are dumped into the largest commercial sink I've ever seen. They are then moved around with a shovel, and removed with a big strainer into one of the greatest kitchen tools in the world: the Salad Ace electric salad spinner-dryer. I want one! I also notice a garbage-pail full of peeled potatoes. Hmm. Maybe there will be French fries. Fernando and his crew will now turn their attentions fully to dinner prep. So it's time for us to transfer the breakfast materials to the main kitchen, and for brunch service to begin. Frank is in charge of the station that handles poached eggs, crab cakes, frittatas and several other items. His first words to me are, "Don't I know you from somewhere?" And it turns out he does: 10 years ago, Frank was the counter-man at Canard & Co., the deli-grocery around the corner from my apartment. I used to buy coffee from him every day. He has been at Tavern for the past 6 years. The orders come in on a little computer printer and the crew (Frank has two other cooks in his station, and there's also a roving sous-chef who checks in from time to time) starts to produce. Frank has done some eggs Benny prep of his own: while Fernando was actually poaching the eggs, Frank was toasting English muffins and laying out slices of ham. Another cook -- a man from Bangladesh who has done it since 1984 -- made the Hollandaise. Everything is laid out at Frank's station and shortly before the first orders come in, hot water is added to a tray of poached eggs to bring them up to a warm temperature. Frank quickly assembles the orders as they come in. He puts each plate under a broiler briefly to heat the muffin and give the ham (which is already cooked) a little color. He then adds the eggs, sauce, and garnish, and places the eggs on the "pass" where they are given a final sprinkling of herbs. A lid is then placed on the plate to keep it warm as a runner carries it down the long hallways and through the sprawling premises to its final destination. The end result is a great plate of eggs Benny, with the poached eggs nicely liquid at the center. Fat Guy, who has a knack for reappearing whenever there is something to eat, enjoys the snack greatly. Farther along the line, another cook is preparing the day's special frittata. These are cooked to order, and are a bit like omelettes but are not folded. The frittata-du-jour is crabmeat, potato, and asparagus, topped with cheddar. The cook begins with the fillings in a small skillet, adds an egg mixture, and uses a combination of shaking, tossing, and a rubber spatula to get the eggs into an almost-done state, at which point he sprinkles cheddar on top and places it under a broiler to finish and fluff a bit. The French toast and scrambled egg stations are also cranking. I was wondering what had happened to all that spinach, and it turns out that on another station it is being used as a garnish for two of the more lunch-like brunch dishes: salmon and chicken. And I finally get my French fries, which by the way are totally outstanding: cut fresh and fried twice. On the way out, I check in with Fernando's crew in the prep kitchen. They're boiling up some special Valentine's Day ravioli. Fernando is happy: he's going on vacation tomorrow. Happy Valentine's Day, everyone. ~~~ You may ask questions here.
-
All About Eggs Basic Technique Unit IV: Souffles Carolyn Tillie Please post your questions here --> Q&A (Note: Here is a listing of preceeding courses -- All about Eggs Introductory Material, All About Eggs -- FAQ, All About Eggs -- Hard Cooked Eggs, All about Eggs - Poaching eggs and All about Eggs -- Omelettes and More) In Billy Wilder’s 1954 Sabrina, Audrey Hepburn, trying to forget her obsessive love of William Holden, travels to Paris to attend the Cordon Bleu Cooking School. There is a very charming scene where the entire class, all lined up in a row, holds out their finished souffles for the instructor’s approval. Some are too high, some are too low, and in Audrey Hepburn’s case – well, she forgot to turn her oven on entirely and her’s went uncooked. According the The Joy of Cooking, it IS the prima donna of the culinary world – displaying a level of elegance and understanding of both the ingredients and the chemistry of the Egg. When FatGuy asked how my souffle technique was, I proudly proclaimed my confidence, having made dozens and dozens in the past, but forgetting to admit to a several-year hiatus on creating souffles. Inasmuch, in this class on souffles, you will learn and see what NOT TO DO, as well as how to correctly and successfully create a fabulous baked souffle. (I’m not going to discuss frozen souffles, which I think are look-alikes to the baked masterpiece). There are quite a few important factors that MUST be remembered in creating souffles: 1. Use absolutely the freshest eggs possible. Separate the eggs while cold, but allow them to come to room temperature before continuing with the preparation (I like the Jacques Pepin method of separating eggs by breaking all the eggs into one bowl and then manually scooping out the yolks with your hand). Make sure all your dishes and pans are absolutely clean and dry when dealing with the eggs – the smallest amount of dirt in a bowl can hinder the whipping of egg whites! Many books recommend wiping a bowl with a little vinegar to clean out any potential grease or residue. 2. Use straight, high-sided ceramic souffle dish(es). Refrigerate or freeze the prepared dish as it will assist in getting your souffle to rise a bit higher. 3. Check the temperature of your oven! Here is something I forgot to do and very shortly you will witness its repercussions! James Beard preheats the oven to the desired temperature then adds 25° to give an extra “push.” I have never tried this. 4. Do not continually open the oven door to check on the status of a souffle – drafts are death to a souffle as its ascent is based on the whipped egg whites and steam. 5. The finished dish must be served immediately – at best, there is a ten-minute window when a souffle can be held in an oven before service. After that time, it will begin to fall. To put it most simply, a souffle is nothing more than a flavored base heightened with whipped egg whites. Wanting to demonstrate both a savory and sweet souffle, we started with a Crab and Asparagus Souffle with a bechemal base. I modified the CIA’s recipe with the following ingredients: 2 oz. Butter 2 oz. Flour 1 1/4 Milk 15 Egg Yolks 3 oz. Parmesan cheese 3 oz. Gruyere cheese 10 Egg White 8 oz. shredded Crab Meat 1/2 lb. diced/blanched Asparagus not pictured: salt, pepper, chives, and a dash of white wine to taste. In preparing the base, the butter is melted for a roux: And the flour is added: Stirring the roux – this is done for about three minutes, to get rid of any floury taste: When the roux is thickened, the milk is added for make a bechemal – this is a slow process. Cook, stirring very often, on medium heat for 15 minutes: When ready, the bechemal will be thickened and start to boil. Beat the egg yolks in a small bowl. The bechemal is added slowly, to temper the eggs. I use a ladle to add a half-a-cup at a time, slowly bringing the egg yolks up to the same temperature as the bechemal If all the bechemal were added to the egg yolks at once, it would begin to cook the egg yolks and you would end up a stringy mess. This is your base, to which any variety of flavors can be added – various cheeses, vegetables, herbs, or spices. I added a tablespoon of freshly chopped chives, a splash of Gewürztraminer, eight ounces of shredded crab, and a half-pound of diced, blanched asparagus, and three ounces each finely shredded gruyere and parmesan cheeses. Adding cheese: Adding crab: Base is ready: Preparing a souffle plan is very similar to preparing a cake pan – the inside is liberally spread with butter and coated. In the case of a savory souffle, it is usually coated with shredded cheese. A sweet souffle has dishes coated with either sugar or cocoa powder (if chocolate souffles are made). When the pan is ready and the base ready, THEN the egg whites are whipped to soft-peak stage: Note: It is better to underbeat the eggs than to overbeat them! I do now own a copper bowl for whipping eggs, but I know many people ask if there is a significant difference. On the use of whipping eggs in copper bowls, Anne Marie Helmenstein, Ph.D. states: The bowl you use makes a difference when you are whipping egg whites. Copper bowls produce a yellowish, creamy foam that is harder to overbeat that the foam produced using glass or stainless steel bowls. When you whisk egg whites in a copper bowl, some copper ions migrate from the bowl into the egg whites. The copper ions form a yellow complex with one of the proteins in eggs, conalbumin. The conalbumin-copper complex is more stable than the conalbumin alone, so egg whites whipped in a copper bowl are less likely to denature (unfold). When air is whisked into egg whites, the mechanical action denatures the proteins in the whites. The denatured proteins coagulate, stiffening the foam and stabilizing the air bubbles. If the foam is overbeaten in a non-copper bowl, eventually the proteins become completely denatured and coagulate into clumps. There is no going back from the clumpy mess to nice foamy whites, so overbeaten whites are usually discarded. If a copper bowl is used, then fewer protein molecules are free to denature and coagulate, because some are tied up in conalbumin-copper complexes. In addition to forming complexes with conalbumin, the copper may also react with sulfur-containing groups on other proteins, further stabilizing the egg proteins. Although the iron and zinc found in other metal bowls also form complexes with conalbumin, these complexes don't make the foam more stable. When glass or steel bowls are used, cream of tartar may be added to egg whites to stabilize the whites. When the egg whites are ready, they are gently folded into the flavored base: The prepared batter is poured into the prepared pan. Be careful to wipe away any drips to assure very clean edges. The souffle is going to climb up the edges of the dish and there should be no hindrances. Put the souffle in the hot oven (heat up at least 15 minutes beforehand!): Carolyn’s Note: Having just moved into a new house when asked to teach this class, this was the first time I used this oven. I very foolishly did NOT check the temperature of my oven! If you can look closely at the picture, you will see that the temperature is almost to 500° when it should have only been at 425°! 30 minutes later, I pulled out my finished Souffle! Carolyn’s Note: My oven was way too hot! The top of my souffle browned too much before the inside got a chance to be completely cooked through! Learn from my mistakes! Upon eating another error was discovered – I thought the addition of asparagus would be a nice accompaniment to the crab. Wrong! This particular vegetable exuded far too much residual water and the subsequent souffle was watery: Learning from this error, I was ready to try again – this time with dessert! I decided upon individual chocolate souffles. Without going through all the steps, the ingredients were as follows: 4 eggs, divided 1/2 cup sugar, divided 1/3 cup unsweetened cocoa powder (I used Valhrona) 1/4 cup all-purpose flour 1 cup whipping cream 2 tablespoons butter 1/2 teaspoon vanilla 1/2 teaspoon cream of tartar butter and cocoa for buttering and dusting souffle dishes powdered sugar for garnish The base was made of 1/4-cup sugar, cocoa, flour, and cream cooked over medium heat until smooth. The butter and vanilla are added until smooth. Because it is a sweet souffle, this recipe calls for the egg whites to be whipped with the other 1/4 cup of sugar and the cream of tartar. The whipped eggs are folded into the chocolate base: This batter was poured into the individual prepared dishes: This time, I was careful to gauge the temperature of my oven. I learned that to get the desired 350° needed for this recipe, my oven had to be set at no higher than 225°! These individual souffles were baked for exactly 20 minutes and only at that time did I pull them out of the oven. Perfect! Individual souffles were served dusted with powdered sugar and freshly whipped cream (slightly sweetened with a tablespoon of powdered sugar, a splash of vanilla, and a tablespoon of cognac): A final note: I truly believe that baking individual souffles of either a savory or sweet quality tends to be far easier than a single, larger souffle. Please post your questions here --> Q&A (Note: Here is a listing of preceeding courses -- All about Eggs Introductory Material, All About Eggs -- FAQ, All About Eggs -- Hard Cooked Eggs, All about Eggs - Poaching eggs and All about Eggs -- Omelettes and More)
-
This thread is only for questions and answers regarding the All about Eggs -- Souffles lesson . Please do not post any comments or contribute any of your own knowledge here. If you wish to make a contribution, please do so on The Wit & Wisdom of Eggs thread. Please do not engage in discussion or debate on this thread -- if you wish to have an egg-related discussion with other eGulleters, please start a topic in the regular Cooking forum. Thanks.
-
All About Eggs Basic Skills Unit III: Omelettes & More Steven A. Shaw Please post your questions for this class here -->> Q&A (Note: Here is a listing of preceeding courses -- All about Eggs Introductory Material, All About Eggs -- FAQ, All About Eggs -- Hard Cooked Eggs and All about Eggs - Poaching eggs) PART A: OMELETTES It's unusual to encounter a properly made, traditional, French-style omelette in the US. We have something called an omelette that gets served in restaurants and in people's homes, but it's really just a gigantic sheet of overcooked eggs folded in half over too many fillings. It's so denatured that you could make it with that artificially flavored and colored egg stuff from a carton and it wouldn't make all that much difference. A real omelette is a much purer expression of eggs: both fluffy and moist (if you're sensitive about food-safety, stop reading now), it's a minimalist creation with just a small amount of filling for enhancement. Once you get the basic technique down and acquire the taste for real omelettes, there's no going back to the flavorless rubbery crap they serve at the local diner. Omelette basics Size A proper omelette is small, at least in relation to the size of its pan. The ideal omelette size is in the range of two large eggs if you're using a 7-8" pan, and three large eggs if you're using a 10-10.5" pan. It's essential that the eggs have plenty of room to spread out, otherwise they can't cook rapidly enough to acquire the fluffy-moist texture of a good omelette. I prefer the smaller ones anyway, though, because it's easier to work with a smaller omelette and also because omelettes degrade so rapidly after being served. I'd rather eat two small ones than one big one -- a nice thing for a couple to do is each eat an omelette and then share another one. Tools When cooking an omelette, the only tool you need is the pan: no spatula required. All the necessary actions -- and this is what gives the omelette much of its character -- are performed by swirling and shaking the pan itself. The non-stick skillet, shortly after its invention, quickly became the most popular pan for cooking omelettes (as well as for frying, scrambling, and other basic forms of skillet-based egg cookery). Even die-hard anti-non-stick folks usually keep one non-stick skillet around just for cooking eggs. Some hardcore traditionalists, however, prefer to use a "French steel" omelette pan. This kind of steel -- which is very much like a lighter, thinner version of cast-iron that hasn't been cast -- needs to be seasoned and as a result of the seasoning develops something akin to a non-stick or at least easy-release coating. I confess, I believe omelettes made in a French steel pan come out slightly better (there's something about the way the eggs interact with the butter and the steel surface that gives them a slightly nuttier taste), but non-stick skillets are so much more convenient I never use either of my French steel pans. Of course, to beat the eggs you will want a bowl and a fork (for small quantities) or whisk (for larger quantities). The egg mixture Omelettes offend the food safety contingent not only because they need to be undercooked to be good, but also because and significant production (for more than, say, two people) requires "pooling" of eggs. You will need to create an egg mixture that you can scoop into the pan (or two pans, or even four if you're really good at it and you get a rotation going where two pans are reheating while two are in use) quickly so that you can get everybody served in just a few minutes. But if you crack a dozen eggs into a bowl, you have "pooled" your eggs -- the objection is that if one of the eggs is somehow infected then it will infect all the others. You will have to make a personal choice here. I suppose, if you're really committed to avoidance of pooling, you can use a lot of little bowls. The egg mixture should contain four things: eggs, salt, pepper, and water. Because an omelette is a relatively clear vehicle for the flavor of eggs, you will benefit from using the freshest and best eggs you can find. It's not going to make as much difference as it will with a poached or fried egg, but it will make some difference. What you don't have to worry about is the grade or size of your eggs: because you're going to beat them, all you care about is their quality and overall yield. A little salt and fresh-ground (preferably white for cosmetic reasons) pepper will slightly enhance the flavor of your eggs. I use a pinch (maybe 1/8 teaspoon) of salt and two grinds of the peppermill per Large egg -- that's probably more than most people use. One teaspoon of cold water per Large egg will make a difference in the fluffiness of the omelette. Though it would seem that the addition of water would dilute the egg mixture, what happens with much of the water is that it becomes steam upon hitting the pan. This steam rises through the omelette and acts as a leavening agent of sorts, thus making the omelette fluffier. The other nice thing about adding that little bit of water is that it almost invariably makes it such that two eggs yield 1/2 cup (four fluid ounces) of omelette mixture -- nice if you're making just one or two omelettes and you want them to come out the same as big-batch pooled-egg omelettes that you actually measure before cooking. (As you'll recall from the introductory material, a Large egg weighs roughly two ounces, but you lose the shell and some left-behind material when you crack it open.) The final insult from a food-safety perspective is that, from a culinary-excellence perspective, your omelettes come out best if your omelette mixture is at room temperature or at least not ice-cold refrigerator temperature. You remember how to crack eggs from yesterday, though, right? Maybe this will help offset some safety concerns. Butter For each omelette you make, you'll want to add a tablespoon of butter (1/8 of a stick) to the pan. Don't skimp here -- it's as essential an ingredient as the eggs themselves. Unsalted (sweet) butter is preferable here, and doubly preferable is "European-style" cultured butter. Still, overwhelmingly more important than type is freshness. Fillings Although the word omelette is often understood to carry with it an implicit promise of fillings, you may find that your favorite omelette of all is a plain omelette. This is the bread-and-butter of omelette cookery: the minimalist ideal. Fillings are nice too, though, but there are a couple of things to remember: First, the quantities you use should be very small. If you're using cheese, for example, you decidedly should not strive for the cheese-oozing-all-the-heck-over-the-plate effect of a standard greasy-spoon omelette. Instead, the cheese should just be an enhancer. Second, the fillings need to be pretty much completely cooked before you add them. Omelettes go from start to finish in 1-2 minutes, so you don't want to add anything raw unless it cooks very quickly. The things you do add raw need to be cut very small, such as finely chopped fresh herbs and grated (never sliced or chunked -- it won't melt quickly enough) cheese. And as with the eggs themselves, fillings incorporate better if they're not ice cold to begin with. You can be as inventive as you like with fillings, but the classics I favor are gruyere cheese, fines herbes (fresh chervil, chives, parsley, and tarragon), and wild mushrooms. Not all together. I'm talking about three separate omelettes here. Cooking an omelette So now you're ready to cook some omelettes. Here's what you do. Begin by making sure you're really ready. This is a very quick process. You need everything in its place: the egg mixture, the fillings if any, the butter, the (preferably warm) plates on which you're going to serve the omelettes, and any garnishes or accompaniments you may wish to use. In terms of your guests, as with risotto, you need people waiting for omelettes not omelettes waiting for people. An omelette cooks over medium-high heat in a relatively hot pan. It's a quick process that you keep moving along quickly so as not to let anything burn or overcook. So begin by heating the pan, empty, for about a minute (until a few drops of water "dance" on the surface). Add the butter and swirl it around so it covers the entire surface of the pan. The butter will melt, then foam up, and finally the foam will settle down. As the foam is settling down, your butter is ready. Theoretically, you're not supposed to let the butter brown, but as far as I'm concerned a slight bit of browning can contribute some nice flavors. It's up to you. Certainly, don't let the butter burn. Without delay, add a thin layer of eggs to the pan. You may have to experiment a bit with your pan and your measuring cups. I find that the easiest thing is just to use a dry measuring cup as a scoop, but you can of course fill a Pyrex measuring pitcher to the right level or use ladles of various sizes -- or you can do it by eye once you acquire some experience. My 8" omelette pan (different from the one pictured here) holds 1/2 cup of egg mixture very nicely at what seems to be an ideal depth-of-liquid of about 1/4". As soon as the eggs are in the pan, swirl them around a bit to make sure you've achieved an even coating and to make sure they don't set into a rubbery layer. The whole idea is to keep this process moving along so nothing sets in too heavily. Very soon after, you will notice some bubbling and quivering of the surface. This indicates that the bottom of the omelette is coherent enough for you to start shaking the pan around without fear that egg will fly all over the room -- assuming, that is, you haven't made your layer of eggs too thick to begin with. (We are currently illustrating a plain omelette, but this is the stage at which you would add your fillings, if any, in a well-distributed even layer. This is not a folded omelette, so you don't want to just cover half. The idea is to get the fillings spread out so they heat quickly and evenly.) At this point, you should firmly shake the pan several times. The motion you're looking for at this stage is not a flipping motion (full extension and jerk back) but, rather, a firm even shake. This will cause the omelette to begin to take on its final appearance. Once you've done that, you want to move into a jerking and upwards-flipping-back motion (as you would use, and as you've seen every TV chef use, to toss onions or vegetables around in a skillet) in order to get the omelette to roll over on itself. Release the omelette onto a plate such that it rolls around on itself and makes a nice package, garnish (if you like), and serve. One more plain omelette, to recap: A fines herbes omelette: And one with cheese: PART B: MERINGUES PART B: SEPARATING EGGS AND MAKING MERINGUES FROM THE WHITES So far, we've concentrated on whole egg cookery. Another set of properties of eggs, however, emerges when you separate the yolks from the whites. The yolks are wonderfully creamy and luscious. Among other things, they are the basis of the various "-aise" sauces. Those have already been covered extensively in the eGullet Culinary Institute curriculum. (Cream Sauces and Non Stock based sauces ) The whites have significant leavening power and are fundamental to the structure of many dishes. Tomorrow, Carolyn Tillie will walk you through the making of savory and sweet soufflés. Today, we'll look at one of the purest expressions of egg white cookery: meringues. Separating the eggs There are quite a few ways to separate eggs. We'll discuss three. The first two are the most popular methods among home cooks. The third is the way many professionals do it, and the way I recommend. Method 1: Back-and-forth in shell You've certainly seen this done: you crack open the egg and gently transfer the yolk back and forth between the two halves as the white drains away. This method works well enough but it's slow if you're doing large quantities and it's the method most likely to get bits of shell in your whites or yolks. If you're not going to use them right away, you can store the yolks in cold water or you can freeze them (especially for mayonnaise, frozen yolks can work very well). Method 2: Egg-separating device Devices like these are widely available, and they work pretty well. But like the back-and-forth method they're rather slow. Method 3: With the human hand The human hand is the greatest of all kitchen tools, and this is a place where it really shines. Be sure to start with, as Julia Child says, "Your impeccably clean hands!" Then just dump each egg into your hand and let the whites fall through your fingers. The other way to do this, which is even more efficient though it requires a bit more practice, is to crack all the eggs, whole, into a bowl. Then you just reach in and pluck out each yolk. The meringue recipe Types of meringues When I speak of meringues here I'm speaking of what would technically be known as "Swiss meringues" or "Hard meringues." These are hard "cookies" made from egg whites and sugar. "Soft meringue" is almost the same product, with somewhat different ingredient ratios, and is what you'll see in such items as lemon meringue pie. There is also "Italian meringue," which can be used in various applications soft and hard. It is made using sugar syrup. Proportions for hard meringues The basic rule is 1/4 cup of sugar per egg white, although there's some flexibility here. The following are the ratios that worked for me: 8-10 egg whites (this is approximately 1 cup of egg whites from Large eggs) 2 cups granulated sugar (in other words, if you're measuring by volume, twice as much sugar as egg whites) 1/2 teaspoon salt 1 teaspoon cream of tartar 2 tablespoons vanilla extract (this sounds like a lot, but I find that most recipes benefit from more vanilla than they specify) We use egg whites for leavening, sugar for sweetness, salt for flavor balance and enhancement, cream of tartar to keep the whites stable, and vanilla for flavor. Additions There's virtually no limit to what you can add to meringues: chocolate, almonds, and coconut are three popular versions. There are even savory meringues. Since we're focusing on basic technique here, however, we're just going to make plain ones. Preparation for beating the whites A warning Humidity is the enemy of meringues. If you're in a hot, humid environment and your kitchen isn't climate controlled, don't bother making meringues that day unless you really have to. It's much easier to make them when conditions are not terribly wet. How to give yourself the advantage Three things will help your whites whip up better: First, if they're at room temperature, they'll be easier to aerate. Second, if the bowl is very clean, you'll avoid possible failure. The best way to clean the bowl (which should be stainless or glass -- not porous plastic) is with a little salt and vinegar, wiped out with a paper towel. Third, you want to be certain that there is no yolk whatsoever left in with the whites. Even a few drops of yolk will degrade the process. Beating the whites These photographs demonstrate the technique using a whisk, because it's the most elementary method, but you may use an electric hand-beater or stand-mixer. Place the whites in the clean bowl. Whisk the whites until they become a bit bubbly. This is the point at which you should add the cream of tartar and salt. Then whisk the whites until you get very soft peaks. This means that when you lift the whisk out of the whites, they form little peaks that soon collapse back into the liquid. This is the point at which you should start adding sugar. It's best to add it in a few shots, whisking in between each addition. Keep whisking until stiff peaks have been achieved. This would be a good time to add the vanilla. Note, if you're using an electric mixer, be careful not to go beyond this point. As soon as you have stiff peaks, stop. I don't have to tell you that if you're using a whisk: the whisk is a self-regulating tool -- nobody uses it more than he or she has to. Forming the meringues You don't have to get fancy with meringues. You can simply put a piece of parchment on a sheet pan (anchor the corners with a bit of the meringue mixture) and form your meringues with a spoon. If you want a more slickly produced look, you can fill a bag with the meringue mixture and pipe it onto a Silpat. You can also use a variety of pastry tips if you want more professional looking results. Drying the meringues Meringues aren't really baked; they're dried. Around 200-225 F will get you where you need to be. Approximately 2 hours at that temperature followed by an hour of cooling in the turned-off, door-slightly-ajar oven should do the trick. Please post your questions for this class here -->> Q&A
-
This thread is only for questions and answers regarding the All About Eggs -- Omelettes and More lesson . Please do not post any comments or contribute any of your own knowledge here. If you wish to make a contribution, please do so on The Wit & Wisdom of Eggs thread. Please do not engage in discussion or debate on this thread -- if you wish to have an egg-related discussion with other eGulleters, please start a topic in the regular Cooking forum. Thanks.
-
All About Eggs Basic Skills Unit II: Poaching Steven A. Shaw (Note: Here is a listing of preceeding courses -- All about Eggs Introductory Material, All About Eggs -- FAQ and All About Eggs -- Hard Cooked Eggs) For this class, please post your questions here - All About Eggs -- Poaching Eggs Q&A Though it is one of the most feared forms of egg cookery, poaching an egg is in many ways simpler than hard-cooking an egg: there is no shell to worry about. This eliminates both the cracking and troublesome-peeling problems that can make hard-cooked eggs difficult to deal with. Still, if you just crack any old egg into boiling water and cook it until it's done, you will probably not get a very nice poached egg. There are some basic principles and techniques one needs to get comfortable with. I strongly encourage you to waste as many eggs and as much water as you need to waste today to get this right. Once you get the hang of poaching eggs, you'll find them to be one of the great secret weapons of the kitchen arsenal. Basic theory To poach an egg is to cook an egg, without its shell, in hot liquid below the boiling point. Poaching is not boiling; it is more akin to a very low simmer. Just as hard-cooked eggs should not be boiled, neither should poached eggs be. The ideal poached egg looks somewhat like . . . an egg. So why not cook the egg in its shell -- "soft-boiled" -- and peel it very carefully? Well, you can try and I wish you luck. I've seen it done in at least one haute cuisine restaurant kitchen. But the poor cook had to peel about 4 eggs for every 1 he got right. We tried peeling a soft-cooked egg; it didn't work very well Thus, we crack open the egg and try to get it to retain as much of its egg shape as possible as it cooks in the liquid. A properly poached egg arises as a result of the white coagulating nicely so as to encase the yolk on all sides -- ideally the yolk won't be visible from any angle when the egg is done. Pretty much all of poaching technique is dedicated to achieving this result. Fresh eggs Your life becomes very easy if you have very fresh eggs at your disposal. You will have a ton of leeway with respect to all other elements of poaching technique if, for example, your neighbor is a farmer. The reason restaurants have better luck poaching eggs than you do isn't necessarily because the cooks are better, smarter, or more experienced than you. A big part of it is that they get a lot of eggs delivered every day direct from the distributor, so their poached eggs come out really well. Once, awhile back, a friend who is a restaurant cook came over to my house and tried to poach some eggs. As they disintegrated in the pot, he exclaimed, "What the hell is wrong with your eggs!?!?" He had never poached eggs outside of the brunch service at a high-volume restaurant -- week-old eggs weren't something he had the experience to deal with. Still, you can get pretty fresh eggs -- 3 or 4 days old if you're lucky -- at a supermarket. When your eggs start getting closer to the one-week mark, though, they won't poach well without assistance. Indeed, when preparing for this lesson over a two-day period, we had significantly better luck with poaching on Saturday (when the eggs were 4 days off the farm) than on Sunday (when they were 5 days old). We're going to be fighting an uphill battle with an egg like this one It's when you're working with older eggs that you have to employ various modes of poaching trickery to get them back into shape. Cracking an egg Nearly every home cook I know cracks eggs against the lip of a bowl or pot. Nearly every professional I know cracks eggs against a flat surface. The problem with cracking eggs against the lip of a bowl or pot is that this action can drive bits of shell into the egg's interior. This is bad because you can wind up with those bits of shell in your eggs, and also because if there are any bacteria on the egg's surface this can push them inwards. Occasionally you can also break the yolk this way. The better way to crack an egg is to give it a firm knock against a flat surface, such as the countertop (those who work the griddles at restaurants often just do it against the cooking surface itself). Then, pull the egg decisively apart and the shell should separate nicely as the egg drops out. If you practice a bit, you can easily learn to do this with one hand: use two fingers and your palm to hold half the egg, and two fingers and your thumb to hold the other half. After you knock the egg against the flat surface, simply use your hand to separate the shell. If you're very ambitious you can practice doing this ambidextrously, so as to be able to crack two eggs at a time. Cracking an egg against the lip of a bowl or pot can drive bits of shell into the egg's interior (left); knocking it against a flat surface creates fracture lines that make the egg easy to split without any shell remaining behind (right) You can crack a very fresh egg right into the poaching liquid and it will probably come out fine, but for the most part it's best to crack the eggs into individual dishes. Small Pyrex ones work nicely, as do little dessert plates or saucers if they're not too flat. This way you can bring the dish right to the surface of the poaching liquid (even better, lower the leading edge of the dish 1/4" or so below the surface) and gently slide the egg in. The poaching liquid We will be assuming water for poaching, but you can poach eggs in many liquids. Stock will add its color and flavor to the poached eggs, as will tomato sauce. Some enjoy eggs poached in milk. I don't recommend poaching them in red wine, though -- it gives an unpleasant mottled appearance. The major factors to consider with the poaching water are its amount, temperature, and added ingredients. I prefer to work with a lot of water. The increased thermal mass and space are more forgiving, and a good deal of egg-shape formation can occur during the journey to the bottom of a stockpot. But you can poach eggs in a relatively shallow pan so long as the eggs will ultimately be covered by a couple of inches of water. I personally use a medium-large saucepan (2.5+ quarts) for poaching one or two eggs and a stockpot (8+ quarts) for poaching larger quantities. (The photos you see here, not taken in my kitchen, use different utensils.) The water you use for poaching eggs should be below the boiling point. If your water is at a rolling boil, it will cause so much agitation that the egg will not coagulate neatly. You want your water at a very low simmer -- just the little bubbles occasionally popping up to the surface. This will cook the eggs without messing them up structurally. (If you're poaching only a few eggs, you can also remove the pot from the heat just before you add the eggs -- this will prevent agitation and doesn't much affect cooking time.) For the same reason a rolling boil doesn't work, the "whirlpool" trick that I've sometimes heard advocated is often counterproductive. It sounds theoretically appealing that if you stir the water rapidly to create a vortex in the middle of the pot, and you crack an egg into that vortex, it will magically wrap the whites around the yolk. It rarely works this way, though. Gentle water is best. And even were it effective for one egg, it wouldn't be particularly workable to poach a lot of eggs using the whirlpool method. Two additives can help with poaching: salt and white vinegar. They both improve coagulation of the whites: vinegar because it lowers the coagulation temperature, and salt because it directly aids in coagulation. There's really no harm in adding these two things to the poaching liquid -- I use about a quarter cup of vinegar and a tablespoon of salt -- so you may as well do it for insurance purposes. In our experiments, we observed a significant difference between the quality of coagulation in the vinegared and non-vinegared pots. Mechanical manipulation Once the egg is in the pot, you can shape it a bit using a spoon or spatula. This definitely helps to rein in the loose bits. It's not going to transform a totally incoherent egg into a beautifully contained one, but it can make some difference. A spatula or spoon can help contain some of the loose bits of egg There are also all sorts of dedicated devices in which you can poach eggs. Most common are little perforated metal cups that sit on the bottom of a pot. I haven't had much luck with these devices, or with those special poaching pans, but some people swear by them. The temperature of your eggs The food-safety police argue stridently against letting eggs come up to room temperature before cooking them. I'm no expert on food safety, but for me the difference in egg performance based on temperature is pronounced in almost every application, from poaching to frying and from soft-cooking to omelettes. As I mentioned in the introductory materials, all over the world you will find eggs sold and stored at room temperature and it's hardly the case that there are salmonella pandemics in all those places. So, it's really up to you. Julia saves the day Let's say everything goes wrong: You're serving eggs to a group of elderly, infirm, and infants so your conscience requires that you use them direct from the refrigerator. You're out of vinegar and salt and there are 12 inches of snow outside and your car was just repossessed. Your spoons, spatulas, and poaching all got lost during that big cross-country move. And all the eggs you have are three weeks old. Not a problem. There is a last resort. And it's such an effective one that you may decide just to do this as a matter of course. In Julia Child's video series, The Way to Cook, she offers this great piece of advice. Not that she invented it, but it's how I and many other Americans learned about it. The trick is to cook the egg in its shell for a few seconds before cracking it into the water. Now, if you've ever watched Julia do this, there's a bit of questionable information provided: she says to cook the eggs for 10 seconds. If you watch her, however, here's what you'll see her do: First, she pricks the large end of the egg with a pin. As we've discussed already in the previous units, this avoids rapid expansion of the air pocket which can break the shell. Next, she places the egg in simmering water (gently lower the egg in with a spoon; don't just drop it from a great height.) Then, she counts: "One one thouusand!" "Twoooo one thouuuuusand!" "Threeeee one thouuuuuuuuuuuuuuuuusand!" Well, by the time she gets to ten, it has been about 15-20 seconds. That's how long you need to do this for if you really want it to work. From there, you can crack the egg directly into the water and you'll be fine. Or you can crack the egg into a dish and slide it in; but the white will coagulate so well using this method that it's really an unnecessary step. On the left, this is how most people's poached eggs look: kind of like a fried egg that has been boiled; on the right, a really nice poached egg totally enrobed in its white thanks to Julia's method and a spatula Cooking time The standard recommendation is 3-5 minutes. I prefer to gravitate towards 3 because I like a my yolks on the runnier side. Those who are highly concerned about food safety will want to go with 5 or more, but their eggs won't taste as good. Removing the eggs from the water for service or storage A slotted spoon is the best tool for removing poached eggs from their cooking liquid. If you're going to serve the eggs immediately -- as in really immediately with no delay, like you're cooking for yourself or just a couple of people and they're all sitting at the table ready to eat -- just place each egg on a couple of thicknesses of paper towel and roll it around a bit to dry it off, then serve it right away. In most cases, however, you're going to want to prepare your poached eggs at least a little bit in advance. In that case, use a slotted spoon to transfer the finished eggs to a bowl of ice-water. This will "shock" the eggs and stop the cooking. If you omit this step, your eggs will continue to cook once they've been removed and they will eventually overcook themselves. You can keep the eggs in ice water, covered in the refrigerator, as long as overnight or even longer, though the food safety people would rather you didn't. In any event, you will need this trick even if you're preparing your eggs only a little while in advance. You can also utilize the opportunity that cool eggs present to trim any wayward bits of white (use either a knife or scissors). When it's time to serve the eggs, reheat them in simmering water for about 1 minute. Then blot on paper towels and serve. Cooking with poached eggs A poached egg on a piece of buttered toast with a little coarse salt and pepper is one of the great meals -- breakfast, lunch, brunch, dinner, afternoon- or midnight-snack. But of course there are quite a few other things you can do with poached eggs. You can add them to so many dishes. When we were preparing this lesson last weekend, we had as you can imagine quite a few extra poached eggs lying around. So for breakfast Rachel Perlow created an impromptu south-of-the-border feast based on diced potatoes, onions, red pepper, chorizo, tomatoes, tomatillo salsa, and roughly chopped poached eggs folded in ever so briefly at the last minute -- all wrapped in flour tortillas. You could do this with many combinations of ingredients, depending on what you have around. You could even use scrambled eggs, but it's better with poached. An impromptu poached egg creation -- they can make so many dishes better But of course the most pervasive -- and for good reason: it's great -- recipe with poached eggs is eggs Benedict. It's hard to get a straight answer on the origins of this dish, but here's the word from the James Beard Foundation: According to Version One, a certain Mrs. LeGrand Benedict, a regular at New York's landmark Delmonico's, had grown weary of the restaurant's offerings. She consulted with the chef, and together they devised the now classic brunch item — English muffin topped with Canadian bacon, poached eggs, and Hollandaise sauce. (Incidentally, Delmonico's also gets recipe credit for Baked Alaska and Lobster Newburg.) A conflicting tale attributes the dish to a hung-over Wall Street broker named Lemuel Benedict. He allegedly put together a breakfast approximating Eggs Benedict from items on the buffet table at the Waldorf-Astoria. The Waldorf's legendary Oscar Tschirky is said to have fine-tuned the dish, substituting English muffins for toast, and Canadian bacon for ham. Eggs Benedict first appeared in print in 1898, and by 1912 were so popular that Underwood Deviled Ham published a recipe for them in an ad campaign. The company used its canned ham, of course, and substituted cream sauce for Hollandaise. I'll assume you all know how to toast an English muffin and how to cook a piece of ham or Canadian bacon. If you didn't before, you also now know how to poach an egg. So all you need to do is make some Hollandaise, and for that you should visit Jack Lang's class on cream sauces. Tomorrow we'll make some omelettes, and then we'll separate some eggs and whip the whites to make meringues. For this class, please post your questions here - All About Eggs -- Poaching Eggs Q&A (Note: Here is a listing of preceeding courses -- All about Eggs Introductory Material, All About Eggs -- FAQ and All About Eggs -- Hard Cooked Eggs)
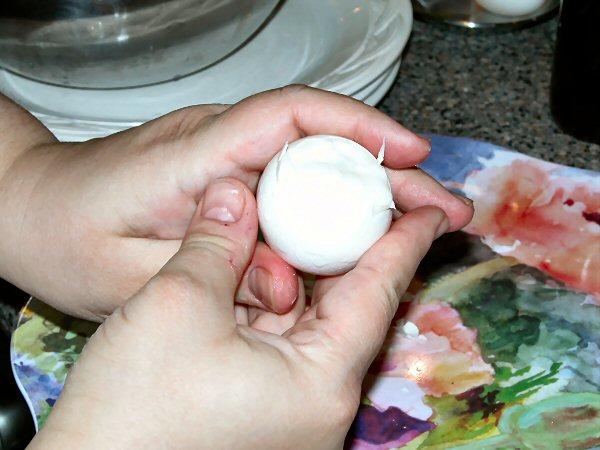
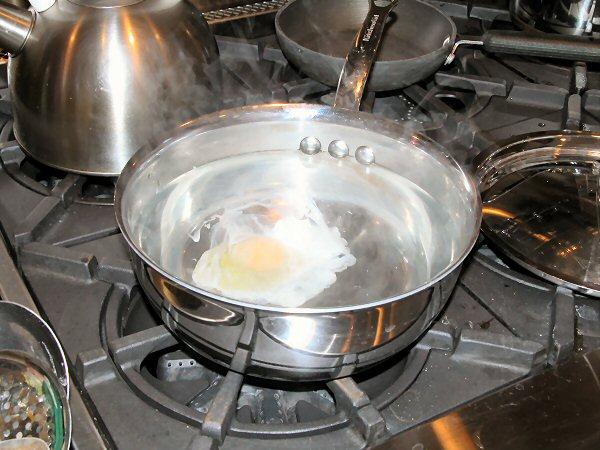

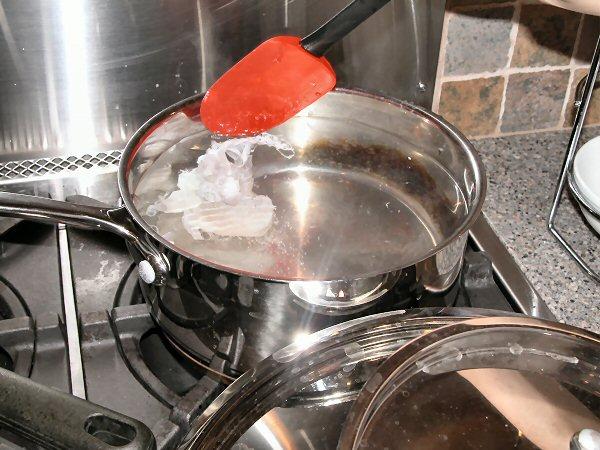
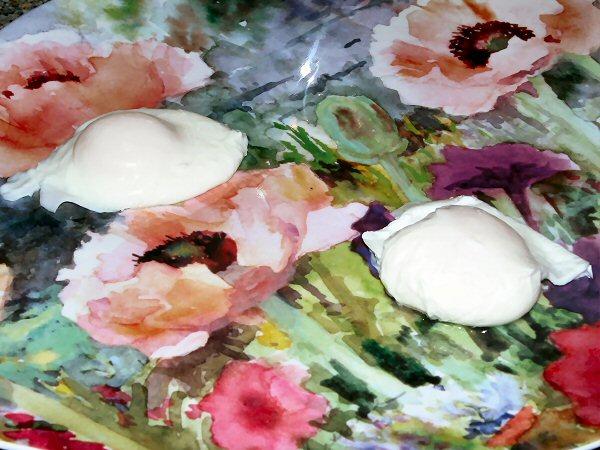

-
This thread is only for questions and answers regarding the All About Eggs -- Poaching Eggs lesson . Please do not post any comments or contribute any of your own knowledge here. If you wish to make a contribution, please do so on The Wit & Wisdom of Eggs thread. Please do not engage in discussion or debate on this thread -- if you wish to have an egg-related discussion with other eGulleters, please start a topic in the regular Cooking forum. Thanks. Important Note: Steven Shaw will be available this evening (Eastern Time US) to answer questions
-
This thread is for your contributions regarding eggs: favorite recipes and techniques, quotes, songs, poems, whatever you like. Please do not ask any questions or engage in any discussion on this thread. Questions should go on the Q&A thread. If you wish to have an egg-related discussion with other eGulleters, please start a topic in the regular Cooking forum (link). This thread should contain your contributions only; not replies to other people's contributions, not questions, and not general comments on the course. Thanks!
-
This thread is only for questions and answers regarding the hard-cooked eggs lesson . Please do not post any comments or contribute any of your own knowledge here. If you wish to make a contribution, please do so on The Wit & Wisdom of Eggs thread. Please do not engage in discussion or debate on this thread -- if you wish to have an egg-related discussion with other eGulleters, please start a topic in the regular Cooking forum. Thanks.
-
All About Eggs Basic Skills Unit I: Hard-Cooked Eggs Steven A. Shaw Introduction Hard-cooking an egg (we will use the term hard-cooked rather than hard-boiled because it's more accurate) seems like just about the simplest thing in the world, and if you drop an egg into boiling water and boil the heck out of it for awhile you will indeed produce a hard-cooked egg. But it may not be a good one. It may crack while you're cooking it. It may be difficult to peel. And the yolk may take on a greenish cast. These are the three issues with hard-cooked eggs that we'll try to tackle today, and then we'll tackle a few more. How to keep eggs from cracking during cooking There are two main reasons eggs sometimes crack when you hard-cook them: First, they sometimes crack on account of impact with the cooking vessel, or each other. Plan A: I have found that the best way to avoid this issue altogether is to place the eggs in the pot before adding the water. This works for me because I have an extension on my faucet that brings water directly to the stovetop. You may have one of these, or you may have a pot-filler spigot on your sink, or you may just wish to fill the pot from a pitcher. If you don't wish to approach it that way, I suggest you avoid taking a whole pot of eggs to the sink to fill -- the jostling about presents more of a risk of cracking than is necessary. Plan B: Because the preferred method for hard-cooking eggs starts with cold water (more on the reasons for this later), you can simply place the eggs in the water with your hand. You need to place them in the water, though -- most people I've observed doing this simply drop them in, so they fall to the bottom and often get damaged. Stick your hand right in there and gently lay the eggs on the bottom. Plan 😄 If for some reason you're in a rush and you have a pot of liquid already at a simmer, the best tool I've found for placing eggs in the pot is a pair of standard kitchen tongs. You can also, if you get the right angle, use a spoon to lower the eggs and gently roll them onto the bottom of the pot. Do not under any circumstances place the eggs in multiple layers in the pot. This will almost certainly cause cracking as the eggs hit one another. Only cook as many eggs in a pot as can fit in one loose layer on the bottom. The second reason eggs often crack during hard-cooking is that they usually have an air pocket at the large end. As we've mentioned several times in the introductory materials, this air pocket forms as the two layers of the shell membrane separate on account of the egg's temperature and moisture loss. When this air pocket is heated, it expands and can break open the shell. (Why doesn't the rest of the egg expand and break over the shell? Because the liquid portions of the egg are roughly 800 times as dense as air and therefore barely expand at all when heated just a couple of hundred degrees.) The most straightforward recommendation for addressing the air-pocket problem -- and this has been repeated in a million books -- is to eliminate the air pocket by piercing the eggshell. You simply take a pin -- a safety pin is easiest to hold, or there are dedicated egg-piercing devices available at housewares stores for about a dollar -- and make a hole in the large end of the egg. When you cook the egg thus pierced, you will actually be able to see air bubbles coming out of this little hole -- that's the air that could have cracked your egg. The latest wisdom from the egg experts, however, indicates that piercing has two drawbacks: first, it can create micro-fractures around the piercing site and thus actually increase the risk of cracking; and second, the needle can introduce bacteria and provide a site for bacteria to enter the egg if it is held after cooking. Neither of these problems has affected me, but it's up to you to decide if you want to bother with pricking. I don't. Pricking works, but is probably unnecessary if you follow all the other guidelines presented here For the most part, starting with cold water is sufficient protection against cracking caused by gas expansion, and it certainly saves you the time and inconvenience of all that pricking: if you throw a cold or room-temperature egg into boiling water, the air pocket expands rather quickly. If you bring the temperature up slowly from cold, even if you don't prick the egg, you will reduce your risk of breakage because the egg may have time to exhale a bit of gas through its many small pores. Some people throw a bit of white vinegar into the water. For hard-cooking, this isn't particularly necessary. It won't actually prevent the eggs from cracking. What it will do is help the whites coagulate if the eggs do crack (technically, vinegar does not aid coagulation but, rather, lowers the temperature at which coagulation occurs). But if you follow all the above guidelines, the addition of vinegar will be like a belt atop suspenders. While we're on the subject of water, it's important to use enough of it. Cover the eggs by at least one inch and preferably two, and make sure there's enough space so that the water can actually circulate around the eggs -- if they're all jammed up against one another you can get spotty results, and if there's not enough water there won't be enough thermal energy to cook the eggs properly. How to produce easy peelers, and how to peel them There are two main strategies for ensuring that your hard-cooked eggs will be easy to peel: First, avoid too-fresh eggs. The same process that causes an air pocket to form between the two layers of the shell membrane is a great ally when it comes to peeling hard-cooked eggs. Having experimented a bit, my suggestion is that you aim for eggs to be around a week old when you hard-cook them. That's not a week from purchase but, rather, a week from picking and packing -- you can use the Julian date on the carton to figure this out, but a safe rule of thumb is that in a high-turnover American supermarket your eggs will already be around 4 days old when you get them. So give your eggs 3 or so days before you hard boil them, and they will be easier to peel. Second, shock the eggs with cold water when they're done cooking. You can either transfer the eggs into ice water with a slotted spoon or tongs, or you can put the whole pot in the sink and run cold water over them until they've cooled significantly. This shock will cause a slight contraction of the egg inside the shell, making the shells easier to remove. But you have to act quickly. If you leave the unpeeled eggs sitting in the shell for too long, they will again become difficult to peel. Peeling methods vary, but most everybody agrees (as do I) that eggs peel better if you do them either under running water or submerged in water. In terms of the actual approach to peeling, the people who seem to have done the most research recommend crackling the egg all over by repeatedly knocking it gently against the counter, then rolling the egg between the palms to further loosen the shell, and then starting at the large end and peeling downwards. I personally have found that it's a waste of time to do all that crackling -- indeed, many of the methods recommended by the experts tend to be unworkable if you have to do, say, four dozen eggs at once. I just give the large end of the egg a few taps against the counter or the bottom of the sink and I start peeling under running water. The first few little pieces come off with some difficulty, usually, and then as I go down the egg the rest tends to come off easily in big pieces. If that doesn't work for a particular batch of eggs, though, I suggest you revert to the crackle-and-palm method. Peel hard-cooked eggs under cool running water or with the assistance of a bowl of cool water Piercing, discussed above, can also be helpful in this regard: it can allow some water to enter the egg, creating a layer of fluid that enables easier peeling. But, again, I don't find that it's necessary or worth the trouble. If after following all the other guidelines here, however, you're still having trouble, I think the piercing trick will put you over the top. Use a clean needle, though. The color of the yolk The reason egg yolks sometimes acquire a greenish cast is because of a sulfur and iron reaction that happens at near-boiling temperatures. The main way to avoid it is to make sure your eggs never actually boil. That's why I don't like to call them hard-boiled eggs. This is what you don't want your hard-cooked egg to look like You can handle this one of two ways: Starting with cold water, bring the eggs near to the boil and, just as a rolling boil is about to set in, remove the pot from the heat (or just turn off the burner), and let it sit covered for 12 minutes. It helps, in this regard, to have a pot with a see-through lid. If you don't, and if you're not particularly familiar with how long it takes to boil various quantities of water on your burners, I suggest you go with uncovered so you can watch. If your eggs hit a hard boil for any significant period of time, my experience has been that they are likely to discolor. I use the 12 minute number because it works well for me with Large eggs (the American Egg Board recommends 15 minutes, but that strikes me as too long -- we recently experimented with eggs cooked for various lengths of time and found that 12 minutes or even a little less will be just fine). I recommend departing upwards or downwards 1-2 minutes per size: around 10 minutes for Medium, 13-14 minutes for Extra Large, and 14-15 minutes for Jumbo. There's a lot of leeway in these guidelines, though, and your eggs will come out fine if they spend an extra couple of minutes in the water. Or, starting with cold water, bring the eggs near to the boil and, just as a rolling boil is about to set in, turn the heat down so you achieve a gentle simmer, and cook the eggs for about 9 minutes (with the same adjustments per size above). Either of these methods will give you attractive, yellow, tender eggs. (In addition to ruining the color of the yolks, a hard boil will make the whites rubbery.) The wrong way (left) and the right way (right) Storage It's a total pain to peel a hard-cooked egg that has been refrigerated for any significant length of time. Yet the food-safety recommendation is not to store peeled eggs. I personally disregard this recommendation: in a tightly sealed container, in a home refrigerator, working under clean conditions with clean hands, I'm willing to take the risk of storing peeled hard-cooked eggs. You can decide either way, but you're not going to be happy if you store them unpeeled. If you don't want to store peeled eggs, just cook as many as you're going to use that day and then cook more as needed. Presentation basics If you want to slice hard-cooked eggs in half and lay them on a platter, there are three presentation issues to bear in mind. First, centering of the yolk. Most of the time, if you've done everything else right, the yolk will be fairly well centered in the egg. But once in awhile you will see some yellow at the surface and this means the yolk is off center. If you slice directly into the yolk at that point, you will wind up with a cosmetically defective egg-half. An off-center yolk showing through An off-center egg-half If you encounter an off-center yolk, starting with the visible yellow part at the top of the egg, rotate the egg 90 degrees along its axis. Then cut. You will wind up with one half containing a larger portion of yellow than the other, but the yellow will be centered in the white. Second, cutting. A crinkle-cut garnishing knife is a nice tool to have if you're cutting and serving hard cooked eggs. These knives come in various depths-of-crinkle and make for an attractive presentation. Shallow garnishing knife Deeper garnishing knife Third, garnishing. Egg halves will benefit greatly from a sprinkling of coarse salt and a grind of white pepper. In addition, a finely chopped green herb or a single herb sprig may appeal to some. Cooking with hard-cooked eggs A hard-cooked egg is complete in and of itself, but it can also be the basis for many excellent (and usually simple, quick, and convenient) recipes. Eating them straight If you haven't done it in awhile, I recommend you eat a well-prepared (using all of the above guidelines) hard-cooked egg straight, while still a bit warm, with just some coarse salt sprinkled on between bites. If you're like most people, you've forgotten how delicious and satisfying this can be. On occasion, a hard-cooked egg is a lunch for me, accompanied by whatever other snacks I have lying around in the kitchen. As garnishes and additions to other dishes Beyond eating them straight, halved or quartered hard-cooked eggs are excellent additions to salads as well as to many dishes where you don't typically see hard-cooked eggs: served atop pasta, or sauteed spinach, or just about anything. They are quite versatile. Egg salad Moving slightly upwards in the scale of hard-cooked egg cookery, we get to egg salad. I believe our friends in the UK call this "egg mayonnaise" -- at least that's what they call an egg-salad sandwich at Pret A Manger. Egg salad is simply a mixture of chopped hard-cooked eggs and mayonnaise, with perhaps a bit of salt and pepper added. I love egg salad because of that combination of hard-cooked eggs and a luscious egg-derived sauce (mayonnaise is, indeed, a sauce and if you need a refresher course on how to make it you can review Jack Lang's eGCI class on the subject). There are only a couple of variables in the basic egg salad: the type of mayonnaise, and the way you chop the eggs. Egg salad comes out very well with commercially prepared mayonnaise, but it will taste even better if you make it with homemade mayonnaise. You can also make it with many of the derivatives of mayonnaise, such as garlic aioli. In terms of chopping, there are many ways to do it and I have no preference: a rough chop with a knife is nice, as are the uniform cubes you can get with a dedicate wire-mesh egg slicer/chopper. When making a portion for one person, though, I just mash the egg and the mayo together with a fork, add a little salt and pepper, and eat. You can add most anything to your egg salad: herbs, olives, scallions, pimentos, and even other salads like potato salad. The ratios you use in making egg salad are highly flexible, but a good rule of thumb is 1/4 cup of mayonnaise for 4 Large eggs -- in other words 1 tablespoon per Large egg. I like to use more than that -- almost twice as much -- but I've heard tell that my egg salad is too "wet" for some people's tastes. Deviled eggs Deviled eggs are pretty much the pinnacle of hard-cooked egg cookery. If you haven't served them at a party in awhile, you'll be amazed at how quickly they get devoured. Don't be surprised to see some guests eating eight or more halves of an egg. For deviled eggs, you cut the hard-cooked eggs in half (you may still wish to use a garnishing knife as discussed above -- it will give an interesting appearance to the whites) and separate out the yolks. You then add, at a bare minimum, mayonnaise and prepared mustard to the yolks, mix them up, and pipe them back into the whites. Salt, pepper, herbs, and lemon juice will improve them as well. In terms of ratios, I recommend 1 tablespoon of mayonnaise and 1/4 teaspoon mustard per 2 hard-cooked yolks. Salt, pepper, herbs, and lemon juice should be added to taste, not according to any particular formula -- but the amounts should be pretty small. I think you'll also very much enjoy your deviled eggs if you replace half the mayonnaise with some other kind of fat. For example, on New Year's Eve this past year, Dave-the-Cook and I, following the lead of Guajolote, prepared deviled eggs with half goose-fat and half mayonnaise -- and we garnished them with duck cracklings. They were very good. To mix the yolks with the mayonnaise or fat, you can just use a fork for small quantities. You can also pack the ingredients into a Zip-Loc-type bag and mash them together by hand. For larger quantities, though, you'll probably be happier using a KitchenAid-type mixer. If you don't want to use a pastry tip, you can still pipe out very respectable deviled eggs with a plastic bag. Just pack the bag with the yolk mixture and squeeze it down to one corner, then snip off the corner to make about an 1/8 - 1/4 " hole. This becomes your pastry bag. It's also the best way to transport deviled eggs: keep the yolks and whites separate, and pipe the yolks into the whites when you reach your destination. Thanks for joining in this part of "All About Eggs." Tomorrow, we poach.
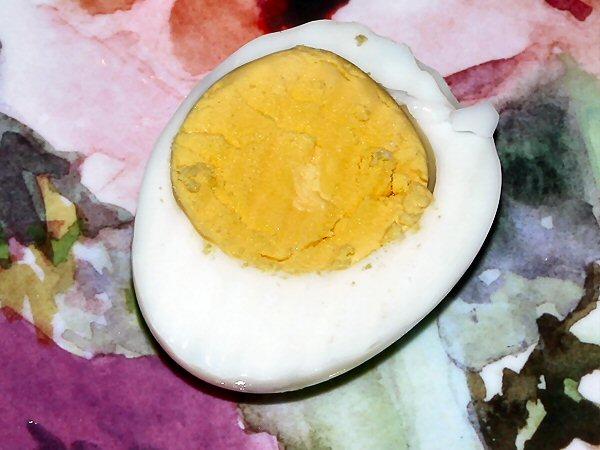
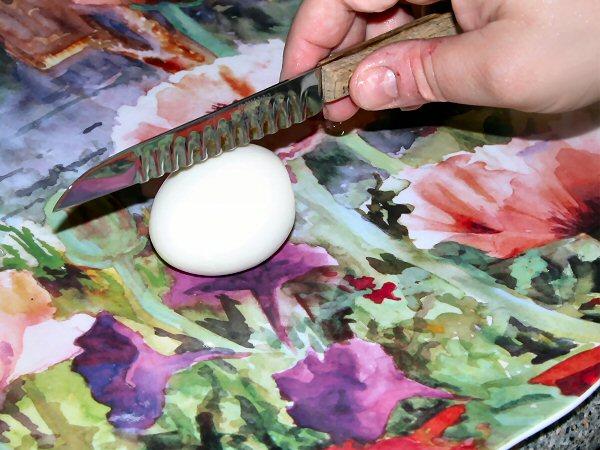
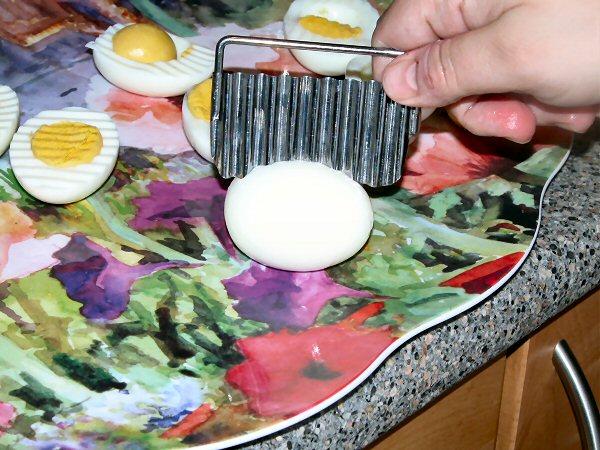
-
The "All About Eggs" FAQ Steven A. Shaw Questions from members I was thrilled, on Wednesday and Thursday, to receive so many interesting egg-related questions from eGullet members. I have answered about 90% of those questions below. If you don't see your question answered here, it's probably because 1) another question covered the same material so I answered the one that arrived first; 2) your question strayed into the cookery realm and will be addressed next week in the discussions of hard-cooking, poaching, etc.; or 3) I wasn't able to find the answer to your question (this only happened in a couple of instances, and I've written to some experts in the hopes of getting answers -- I'll post those next week if they come in). ~~~ Q: My fiancé, who is from Massachusetts, remembers a commercial that claimed "Brown eggs are local eggs and local eggs are fresh." I hail from Ohio, and have never heard that commercial. I read that you said that there is no difference between a brown and a white egg other then the breed of chicken. So do the farms in New England have more chickens that produce brown eggs or was that commercial a scam? Are there regions of the country where the local chickens produce more of a certain color of egg? If so, please tell us what eggs we should buy now that we live in Virginia in order to get the freshest egg. A: The dominant breed of egg-laying hen in use here in America today is the Single Comb White Leghorn. According to the American Egg Board, "This breed reaches maturity early, utilizes its feed efficiently, has a relatively small body size, adapts well to different climates and produces a relatively large number of white-shelled eggs, the color preferred by most consumers." In New England, however, a disproportionate number of consumers prefer brown-shelled eggs. Thus, the dominant breeds in New England are Rhode Island Red, New Hampshire, and Plymouth Rock -- which lay brown-shelled eggs. (White hens lay white eggs, and red/brown hens lay brown eggs -- there are also some hens that lay pastel-colored eggs, which also taste the same as other eggs.) These birds are somewhat larger and consume more feed than the Leghorns, so brown eggs are slightly more expensive to produce. Ultimately, though, the advertisement to which you refer (and I haven't seen it) doesn't sound particularly compelling. A date-stamped carton is far better evidence of freshness than the color of an egg. ~~~ Q: Every few dozen eggs I get a fertilized one. Is it safe to eat if I just remove the blood spot? and Sometimes in small farm raised eggs, one sees a tiny blood red spot on the yolk. I have been told that this shows the egg has been fertilized. True or False? A: A blood spot does not indicate a fertilized egg. These spots are, simply, what they look like: blood. During formation of the egg, a blood vessel sometimes breaks, causing a spot of blood to remain on the yolk. It's safe to eat, or you can remove it with a spoon, a knife, or half of the eggshell. The reason you see more of these on small-farm eggs is that these operations don't necessarily use as advanced technology for what is called "mass candling" -- a process that detects various defects in the egg by strong illumination. It is extremely unlikely that you will ever get a fertilized egg from a supermarket because production hens at large egg-laying operations never get anywhere near a rooster in their lifetimes, and if you get one from a small farm chances are the embryo will be too small to detect via a casual glance. Like eggs with blood spots, fertilized eggs are safe to eat -- but you probably wouldn't even know you were eating one. Some people think fertilized eggs are more healthful -- there does not seem to be any strong evidence in support of this proposition, though. If you really, really must know whether your egg is fertilized, it is possible to do so upon careful examination and with some practice. According to Rick and Gail Luttmann, in their book Chickens in Your Backyard: A Beginner's Guide: "It's not impossible to tell whether or not an egg is fertile just by looking at it, but it's also not the casual matter some people assume. All eggs have a small white lump on the yolk called the blastoderm, which usually can be seen when the egg is cracked into a pan. People sometimes mistake this for a little chick beginning to develop.... Actually, this is where fertilization takes place, but the lump is there whether the egg is fertile or not. With close examination of the blastoderm you can distinguish between a fertile and an infertile egg. If the blastoderm is irregular and disorganized, and appears entirely opaque, then the egg was not fertilized. If it is neat and rounded with a small translucent eye in the center, you are looking at the very tiniest of baby chickens!" Thanks to Julie Layne (aka "ChickenLady") for digging this information up for us. ~~~ Q: I've heard that some recipes work better with older eggs, is this true? A: I'm trying to avoid cookery questions in this FAQ -- we will deal with different types of whole-egg cookery next week and discuss the best egg for each task in context -- but the general idea is this: As you'll recall from our earlier discussion of grading, a really nice fresh AA egg has a very tight internal structure. It stands tall and maintains its integrity. Such an egg is ideal for poaching or frying sunny-side up. You'll also recall the discussion of the inner and outer membranes of an egg, and how those membranes begin as one and eventually get separated by an air pocket as the egg cools and loses moisture. It's not hard to imagine that such an effect makes an older egg preferable for hard-cooking: it's going to be a lot easier to peel. So, as a rule of thumb, for poaching and frying you want the freshest eggs possible, and for hard-cooking you want eggs with a week or so of age on them. Beyond that, there's little benefit to additional age and the eggs start to lose enough flavor that it's better only to buy what you'll use within a week or so. ~~~ Q: You said in the introductory materials that "In 1975 Americans ate an annual average of 277 eggs per capita. The all-time low was 233 in 1995. As of 2002, consumption had rebounded to 252." But what was the all-time recorded high? A: 402 eggs per capita in 1945. Here's a US egg industry fact sheet detailing various production and consumption figures. ~~~ Q: How long does it take a hen to produce an egg? A: Approximately 24-26 hours. A typical egg-laying hen lays around 300 eggs per year. ~~~ Q: How old do hens have to be before they start laying production eggs? How many months/years do laying hens last before they stop being productive? Is it common practice to give laying hens hormones, etc. to increase production? Do hens past their laying period get sold for food? A: Hens start laying at around 18 weeks of age, and under standard large-scale farming conditions they're productive for about a year before their output starts falling off. According to the Egg Nutrition Center, a US industry group, "Growth hormones are not used in the egg industry. Neither specialty eggs nor generic eggs have hormones in them. And while antibiotics are sometimes used to treat sick birds, this is not a routine industry practice." Older hens are slaughtered and their meat is mostly used in utility applications (canned soups, etc.). ~~~ Q: What about duck, quail, and other types of eggs? A: They're great. The chicken egg, however, is the dominant egg consumed by humans -- the hen's efficiency has put the other egg-laying animals out of business. By all means, enjoy them if you have a source of fresh ones. For the most part, anything I say here about chicken eggs can be carried over to other birds' eggs, but I won't specifically be discussing those other types. ~~~ Q: How do you tell if an egg has gone bad? A: It will smell bad, or be slimy. There's also a lot of lore that says a bad egg will float in water. While it's true that a very fresh egg will likely be just a bit more dense than an equal volume of water (and therefore will sink) it's not necessarily true that a floating egg is bad. As we discussed before, an air pocket forms in an egg as it cools and loses moisture. As a result, a perfectly fine 1-week-old egg could potentially float. It wouldn't be necessary to throw it out. It would just be a waste of an egg. ~~~ Q: How do you pronounce chalazae A: ka-LAY-zee ~~~ Other questions These are questions I've heard asked about eggs in the past, questions I received from other eGCI instructors, and questions I just thought needed to be addressed. ~~~ Q: Does a hen need to "do it" with a rooster in order to lay an egg? A: No. ~~~ Q: Not even once? A: No. It's just like with a female human: she's going to ovulate and produce eggs on a given schedule no matter what (in the case of a human around once a month, and in the case of a hen around once a day). The difference is that chickens don't grow their young internally -- they grow them in the egg, externally. If a rooster happens to come along and "do it" with a hen while an egg is forming, that egg will be fertilized and, if properly incubated, a chick will grow in it. Otherwise, it comes out anyway and we can eat it. ~~~ Q: Can you really tell a raw egg from a hard-cooked egg by spinning it? A: Though I've never met anybody who actually couldn't figure out which eggs were raw (they're the ones in the carton!), it is indeed true that a raw egg wobbles (on account of the liquids getting jostled around) and a hard-cooked egg spins smoothly. ~~~ Q: What's up with double yolk eggs? A: It happens. Some hens produce a double yolk egg every time; and occasionally a hen (particularly a young hen) will produce a yolkless egg. ~~~ Q: What are all the numbers on the carton? A: Here's one of the cartons of eggs we used the other day: A typical egg carton, purchased in New Jersey on January 31, 2004 The expiration date is self explanatory, but the numbers on the top are somewhat cryptic. However, they're the information you want -- the expiration date isn't particularly relevant. The first number you see on that carton is 027. That's a "Julian date," which is a series of dates running from 1 to 365, where 1 is January 1 and 365 is December 31. The 027 on our carton means the eggs were packed on January 27. Since we bought them on January 31, they were pretty fresh. Dates in January are pretty easy to convert, but if you want to know what 204 is you can use this handy Julian date converter to determine that it's July 22. The second number you see is 1417 immediately following the letter P. This is the plant number, which tells us where the eggs were packed. If you're curious, you can enter the plant number from any carton of eggs into this tool. I learned that plant 1417 is ISE Farms, Inc., in Broadway, New Jersey. I have no idea what the 13 before the expiration date means. That whole line is optional under the USDA system: you don't have to put an expiration date on your eggs; only a packing date (different manufacturers use different expiration periods -- they're free to do so as long as the number is lower than the USDA's limit). Chances are the 13 is some sort of internal corporate designation that the packer uses for identification. Those are the USDA rules. But USDA grading of eggs is actually optional, so some packers (especially smaller local ones) go with various state rules -- if your state department of agriculture has a good Web site, you should be able to find the decoding information there. If, however, your egg carton has a USDA grade shield displayed on it, as most supermarket eggs I've seen tend to, you should be able to decode the numbers using the above instructions. Note that state rules must conform at a minimum to USDA rules, so state-labeled eggs are not in any way worse than USDA-graded eggs. ~~~ Q: How long after the expiration date are eggs still good? A: Because packers have flexibility in setting expiration dates, and because they opt for longer and shorter periods for a variety of reasons, the more relevant question is how long after packing do eggs stay good. And the answer is a long time. Especially under refrigeration, an egg that isn't smelly or slimy is most likely safe to eat for months. Certainly, you should expect that eggs will be perfectly fine for six weeks after they've been packed. Really, the greater concern is that their taste deteriorates after awhile. I wouldn't want to eat poached 2-month-old eggs but I might use them in a baking recipe. ~~~ Q: Should eggs be stored in the carton? A: The carton is the best place to store eggs, much better than those dumb egg-shaped depressions built into some refrigerators. The shells of eggs look solid but they actually contain tens of thousands of pores through which odors can pass easily. If you leave an egg exposed in the refrigerator, it may pick up various ambient odors. Much better to leave it in the carton, which is designed to protect the egg against odors and impacts. Though even the carton won't protect you if you store your eggs adjacent to your Stilton. Occasionally, you might want to take advantage of an egg's permeability, though: for example some people like to store several eggs in a tightly closed container with fresh truffles. ~~~ Q: What determines the color of the yolk? A: Diet. It's fairly simple to manipulate the color of an egg by adding marigolds or other foods containing xanthophylls (yellow pigments) to a hen's diet. Eggs in the US are the color they are because that's the color consumers seem to like. In Europe for whatever reason they like their eggs to be more orange in color. It's theoretically possible to make an egg with virtually no color, for example by feeding a diet of white corn. There's not necessarily a connection between color and flavor, though there can be. In the US, it's unlawful to add food coloring as such to chicken feed -- though this would be an effective strategy for coloring eggs. ~~~ Q: Are organic, "vegetarian," free range, etc., eggs preferable to regular supermarket eggs? A: They may be preferable to certain individuals from a social justice, political, environmental, or other standpoint, but they don't necessarily taste any different. Some of the best eggs I've had have been from small farms, but they haven't been organic or free range -- and I think most of the superiority in flavor is attributable to the fact that I had them at the farm before they got wrecked by processing, transportation, and refrigeration. When purchasing from a supermarket, bear in mind that the fancier brands have lower turnover -- your label-reading skills should come in handy when it comes time to make that determination. +++ Q: What exactly do the designations "free range" and "organic" mean? What about "cage-free"? A: I think that relying on label terminology -- without more -- is not particularly wise. "Organic," for example, refers mostly to feed and supplements, not humane treatment or flavor. I've visited an industrial egg producer -- it wasn't a nice place -- but you can raise hens organically and still abuse them in most every evil industrial manner. Likewise, "free range" hens (there's no such thing as a free range egg outside of cartoons, of course) may only roam free for a short time each day, or during some seasons, and their roaming space may be a five-foot patch of concrete. Other terms, like "cage free," "natural," and "sustainable" are difficult to verify and equally susceptible to abuse. Unfortunately, there is no label term that means exactly "These eggs came from chickens that were raised in a nice way, and they taste really good." At the same time that lousy eggs can carry fancy designations, a wonderful small farmer might very well produce top-quality eggs from humanely treated chickens yet not qualify for an organic designation. I met a farmer in Manitoba in summer of '02 and really enjoyed touring his egg-laying operation. The chef I was traveling with took some of this guy's eggs back to the restaurant and we cooked them up -- they were amazingly good. I suppose, were I to live there, I'd always buy my eggs from that guy. They're not free-range and I don't think they're organic, but they're a product I'd choose over other products and pay a premium for. If I meet someone locally here in New York who produces up to that standard, I'll buy from that person whether the eggs have a special designation or not. But I'd much rather buy from a small farmer I trust than from a stranger with an organic or free-range designation. ~~~ I hope you've enjoyed the "All About Eggs" FAQ. Next week, we'll actually be cooking eggs. Lots of them. So if you go out this weekend and purchase about four dozen of them, you'll be all set to participate in next week's units. See you then.
-
ALL ABOUT EGGS Steven A. Shaw Introductory Materials Overview The word "perfect," so overused in food writing, is rarely accurate: how many of the dishes or ingredients described as "perfect" in restaurant reviews are truly ideal and impossible to improve upon? If there is a perfect food, however, it is surely the egg. From the simple flawlessness of a properly poached egg to the miraculous leavening power of egg-whites folded into a souffle, the egg is always there for us. It can be the star of the film, a supporting actor, or the technical crew -- and it can win an Oscar in any of those roles. If you have eggs in your larder, you're never without a delicious meal of poached, boiled, scrambled, or fried eggs. If you have just about any additional ingredients on hand, you should be able to produce an omelette, a frittata, a quiche, or a souffle. These aren't just subsistence recipes -- if you make eggs properly, you should be proud to serve these dishes to guests. This eGCI presentation, "All About Eggs," will cover basic egg theory and technique. In these Introductory Materials, I'll present foundational information about eggs, from nutrition and safety to weights and grades. Then, on Friday, I'll present an egg FAQ, assembled from both personal experience and research. In the units to be presented next Monday, Tuesday, and Wednesday, I'll go over basic egg cookery: boiling, poaching, omelette-making, etc. Finally, next Thursday, my co-instructor Carolyn Tillie is going to present the final unit: sweet and savory souffles. Bear in mind that, while this class will be somewhat detailed, it really covers only one aspect of the multi-faceted egg, which I'll call "whole-egg cookery." In previous classes, eGCI instructor Jack Lang has covered egg-derived sauces like mayonnaise (in his "Non-Stock-Based Sauces" class) and hollandaise (in his "Cream Sauces" class. We will also not be discussing most of the thousands of applications of eggs in baking and pastry. Because this class is so tightly focused on eggs as such, I won't present a shopping list. I suggest you acquire at least 4 dozen eggs, however, to get yourself through the next week of the eGCI. Beyond that, as long as you have basic pots, pans, and utensils, you should have no trouble participating in every unit of this class. In addition to Carolyn Tillie and the eGCI Team, I'd like to thank Rachel Perlow for assisting in the preparation of this class. She's the official "All About Eggs" hand model and did most of the actual cooking while I took the snapshots in her kitchen in New Jersey last weekend. A few additional photos came from the US Department of Agriculture (USDA). For research, I have relied most heavily on the USDA and the American Egg Board (AEB), and for refreshing my memory on the finer points of technique I'm grateful to Julia Child for producing the excellent videocassette series, The Way to Cook, in the mid-1980s. Eggs and Nutrition In the USA, at least, eggs suffered an unjust setback in the early 1990s on account of a public and media panic attack about their cholesterol content: a single egg contains most of the USRDA (Recommended Daily Allowance) of cholesterol, and two eggs puts one over the limit. Yet cholesterol in food (dietary cholesterol) does not necessarily translate into cholesterol in the body (serum cholesterol), and the causes of coronary artery disease are varied and complex -- it's not a simple equation where the more cholesterol you eat the more your cholesterol rises and the more your risk of heart disease increases. In fact, the most comprehensive studies done to date have indicated that, in healthy people, there is no connection whatsoever between egg consumption and increased risk of coronary artery disease -- only among diabetics was any correlation found. ("A Prospective Study of Egg Consumption and Risk of Cardiovascular Disease in Men and Women," Hu et al., JAMA.1999; 281: 1387-1394.) The researchers theorized that perhaps whatever small potential adverse effect the cholesterol in an egg could have on the body is counterbalanced by "other nutrients including antioxidants, folate, other B vitamins, and unsaturated fats.'' And what an embarrassment of nutritional riches eggs contain. Looking beyond the cholesterol bugaboo, one can easily see that the egg's perfection is more than just culinary -- it's also the food you want with you on a desert island. It is, according to every source I've found, the most efficient natural protein source available. A whole large egg contains only about 70-75 calories -- it would be nearly impossible to eat enough eggs to make you fat. Nutrient-wise, eggs are teeming with good stuff. Source: USDA Eggs and Safety The bum nutritional rap that eggs got in the '90s was compounded by another erroneous accusation: that eggs are somehow unsafe. It's almost as comical as it is sad to see the way so many people, Americans in particular, handle eggs as though they're toxic substances. People run frantically from the grocery store to the car to the home refrigerator to make certain their eggs don't spend more than a few minutes unrefrigerated, yet in most of the civilized world eggs are sold and stored at room temperature. Americans frequently cook their eggs to death for fear of salmonella, yet only about 1 in 20,000 eggs is likely to be contaminated -- at average rates of consumption, you would encounter a contaminated egg once every 42 years, and you probably wouldn't get sick from eating it (the last estimate I saw was that there is 1 salmonella outbreak per 1 billion eggs consumed). Likewise, while it's always a good idea to "work clean" when cooking, it's somewhat alarming to see people run to wash their hands every time they touch an egg. I'd much rather see everybody who uses a public toilet wash his or her hands. I'm not going to bog this lesson down with appeals to safety. Certainly, infants, the elderly, and those with compromised immune systems need to be extra careful. If you're interested in the official version, the Centers for Disease Control will happily make you paranoid about eggs even if you're young and healthy. You're responsible for whatever risks you're willing to take, but in this class I will be undercooking eggs, "pooling" eggs, letting eggs sit at room temperature, etc. Do it or don't do it, it's up to you. Despite the nutrition and safety concerns, though, egg consumption has been slowly rising since its '90s low. In 1975 Americans ate an annual average of 277 eggs per capita. The all-time low was 233 in 1995. As of 2002, consumption had rebounded to 252. These days, however, nearly a third of the average American's egg intake comes not from whole eggs purchased in the market but from eggs incorporated into prepared food products. In 1975, of those 277 eggs, only 30 were consumed in processed form. Today, 74 of those 252 aren't whole eggs. Thus we are still seeing a decline in the kind of egg consumption that is important from the standpoint of cuisine and cooking. Weights and Measures For the bulk of this discussion, I'll be assuming the American standards for eggs that have been set by the USDA. Those of you in other countries may need to do some conversion, but you'll find that local regulations in most nations roughly correspond to one another. These links will take you to: the EC regulations, the Canadian regulations, and the Australian regulations. Eggs in the US are categorized in size ranges from Jumbo down to Peewee. Most published recipes assume Large eggs. These designations are not made on a per-egg basis, though -- they are averages based on cases of cartons of 12 eggs, with various tolerances allowed as per lengthy and obscure regulations. Any given egg from a carton could range in weight by quite a bit -- so much so that in applications where precision is important, such as professional baking, you will always see eggs measured by weight rather than by number of eggs. The following are the USDA's guidelines for what a carton of eggs should weigh, followed by a calculation of the weight of an individual egg. Jumbo Carton weight: 30oz. Egg weight: 2.5oz. Extra large Carton weight: 27oz. Egg weight: 2.25oz. Large Carton weight: 24oz. Egg weight: 2oz. Medium Carton weight: 21oz. Egg weight: 1.75oz. Small Carton weight: 18oz. Egg weight: 1.5oz. Peewee Carton weight: 15oz. Egg weight: 1.25oz. Remember, though, there are several reasons you can't just use the above assumptions when cooking. First of all, these are weight not volume measures. Secondly, these weights are for whole eggs in the shell. The shell may not weigh all that much, but most people when cracking eggs leave around 1/4oz. of product behind in the shell. If you're cooking a recipe with a lot of eggs in it, this really adds up. (If you want to avoid some of this waste, stick your finger inside the halves of each shell to get out those last bits of white.) And third, of course, because eggs are weighed in bulk there's no guarantee that a given Large egg won't be a bit heavier or lighter than 2oz. In all, you most likely will never be able to fill an 8oz. measuring cup with 4 large eggs -- chances are you will need 5, although this might take you a bit over. The composition of an egg, from the USDA Grade and Quality There is no nutritional or safety-related difference among the various grades of eggs on sale at the supermarket. The grades are complex and the standards go on for pages and pages, but they mostly pertain to the cosmetic and performance characteristics of eggs. The top USDA grade is AA; it indicates a near-flawless shell with a tight internal structure. There is very little difference between AA and A eggs, but the A eggs are allowed to have more imperfections and a looser structure. B eggs are still totally fine, but they tend to have some visible defects and they spread out more -- thus they are not as effective for poaching, frying, and boiling in shell as the AA and A eggs. USDA illustration of the coherence of various grades of eggs The grade of an egg, however, has little to do with its flavor. Eggs of the top grade can range from the more flavorful farm-fresh variety (which most people these days have never even tasted) to the less interesting mass-produced supermarket eggs. There is a bit of good news here, though: in researching this class, and in past tastings, I found that if you can find a high-turnover source of supermarket eggs (such as the Fairway market in New York City) you can get pretty good, pretty fresh eggs. They certainly won't be as deeply flavorful as the Greenmarket eggs that cost several times as much, but the primary differences I noticed had to do with appearance and concentration-of-flavor. If, however, your supermarket isn't getting particularly fresh eggs and isn't moving them quickly, they will have off flavors -- you may never have noticed these flavors, but if you do a side-by-side tasting with better eggs you'll pick up on them immediately. This past weekend, the Perlows and I tasted the regular eggs from ShopRite in Englewood, New Jersey, along with two higher-end brands that were about twice as expensive. We agreed that the more expensive, organic/vegetarian/free-range eggs had slightly better flavor when served sunny-side up (just about the purest expression of the egg), but we also agreed that the difference was not dramatic and that the basic eggs from ShopRite were quite good. Also, when buying fancy eggs at the supermarket, pay careful attention to the expiration date. These brands tend to have lower turnover. Three brands of eggs we bought at the local market; the more upscale brands had slightly deeper flavor but the supermarket brand was probably fresher and as you can see (on the right) had a technically better structure I think we are particularly prone to be fooled by the color of eggs. The last time I was in the UK I was so impressed by the deep orange eggs sometimes available there that I bought half a dozen of the most expensive eggs at Harrod's (there was even a little booklet of photographs hanging by the display, showing the wonderful treatment the hens received on the organic farm) and snuck them back into the US. But when I compared them to my local eggs, it turned out that the color difference was far more noticeable than any flavor difference. They were a bit better tasting than Fairway's eggs, but no better than my local free-range brands. They sure did look pretty, though. The Composition of The Egg As the final part of this overview, I want to make sure we're all on the same page regarding the parts of the egg. The structure of an egg, from the American Egg Board The shell is of course the outer layer of the egg. It can be brown or white, or in some cases pastel colors. The color of the shell makes no difference at all to the flavor of the egg -- it's purely an issue of pigmentation. However, you will notice when peeling brown-shelled hard-cooked eggs that it's a lot easier to see bits of shell that you might have missed. Directly inside the shell are two shell membranes, and inner and an outer. They provide protection against bacteria (the shell itself is quite permeable). At first, there is no space between these membranes, but as an egg cools and loses moisture an air pocket forms in this space. The air pocket is the chief culprit in cracked eggs during boiling -- when the egg gets heated, the air pocket expands and can crack the shell. This can be addressed by pricking the egg with a needle at the large end before boiling. Next are two layers of albumen, aka the egg white, which are well illustrated in the egg-grading diagram we looked at earlier. There are a couple of things attached to the yolk that sometimes alarm people, chief among them the chalazae. These are not baby chickens. Don't worry. The eggs you buy in the store are not fertilized -- they're not chickens in any stage of development; they're just the food that baby chicks would have eaten had the eggs been fertilized. The chalazae are simple strands of albumen that hold the yolk in place. Thanks for joining in the class, and I'll see you back here on Friday for the egg FAQ. We'll start the Q&A sessions next week, when we get to the actual cooking part of the class. In the meantime, if you have a general egg question you'd like to see answered in the FAQ -- a general one such as "How many eggs a year does a chicken lay?" as opposed to a specific cookery question -- please send me an e-mail sshaw@egullet.com and I'll try to include your question on Friday.

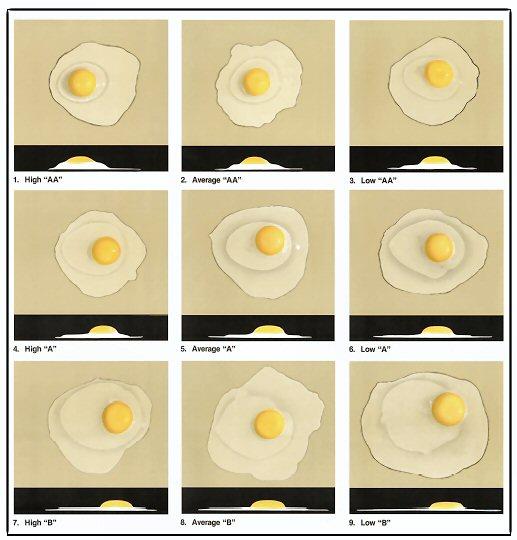
-
Post your questions for Cooking Through the Jewish Year here.
-
Post your questions here-->>Q&A PASTA FROM AROUND THE MEDITERRANEAN Instructor: Adam Balic Outline: Introduction What is pasta? History of pasta in the Mediterranean region Making pasta Recipes Introduction: To most of us, pasta conjures up thoughts of a fast meal, easily prepared, with a definite Italian slant. But pasta has appeared in many cuisines over the years. Our supermarket shelves groan under the weight of a multitude of pasta types, both fresh and dried, and their accompanying sauces. Now, this in itself is not a bad thing. The range and quality of pasta types has increased greatly in the past few years. But almost all signal "Italy". Of course, this is only natural given that around the Mediterranean region and within Europe, the Italians are the foremost producers and consumers of pasta. However, outside of Italy there are other enthusiastic consumers of pasta, who often have very different notions of how pasta is best prepared. Even within Italy itself, the forms of pasta that we are most familiar with barely hint at the true range and diversity of pasta types available. In this class I will concentrate on the pasta from around the Mediterranean, not because I think that this region produces the best pasta, but simply because this is where my interest lies and what I am most qualified (hopefully!) to talk about. We will look at the history of pasta in this region, how to make several types of basic pasta and then I will offer recipes using these pastas. I hope, at the end of this class, you will have a better understanding of the different types of pasta, of the various pasta cooking techniques common around the Mediterranean and, more importantly, that you will be encouraged to cook them yourself. History of Pasta in the Mediterranean Region: In 1274 Marco Polo set off from Venice with his family for the unknown East. Twenty-four years later he returned with a bag full of loot and a head full of fabulous stories about exotic locations. One of the things that he brought back from the Far East was pasta. It is from the East via Marco Polo that Europe gained knowledge of pasta. Well, it is an excellent story, but story it is I’m afraid. Marco Polo was an excellent observer (his notes on a Unicorn he saw is a rather good description of a rhinoceros) and a sharp businessman on the look out for new products to market back home. While Marco almost certainly did see pasta made from wheat while in China, what he brought back was a product made from starch extracted from either breadfruit or the sago palm. We would call this “tapioca” or “sago”, but we wouldn’t call it pasta. You see, the problem for Marco was that pasta already existed back home in Venice, so it was slightly pointless for him to bring it all the way back from China as a ‘new and exciting product’. So who did introduce pasta to the Mediterranean region? Well, the truth is that there isn’t an easy answer. What is pasta after all? The distinction between pasta and other farinaceous products isn’t always great. Bread, dumplings, puddings and pasta, while being distinct in the main, blur into one another on the fringes. In fact the most primitive of extant pasta are suspiciously similar to failed bread (see Mlnici recipe). Or perhaps not ‘failed’ after all. Many European peoples have developed methods of preserving grain products. In the cooler North where many grains will not ripen, rye, oat and barley flat-breads/biscuits dominate. In the warmer South, dried wheat breads prevail. What distinguishes pasta from these other products is the main ingredient -- wheat. Wheat contains gluten and it is gluten that makes pasta-making possible (see “What is pasta?” section). So perhaps the best that can be concluded is that many peoples have contributed, together or in isolation, to the ‘invention’ of pasta. Pastas around the Mediterranean can be divided into two main groups based on the type of wheat used. Pasta made from hard wheat flour (Durum wheat), the product familiar to us as dried pasta, was almost certainly introduced to the Mediterranean, and then to the rest of Europe by the Arabs, either directly or as a trade item. On the other hand, it is difficult to determine where pasta made from soft wheat flour originated. It is likely that it evolved independently in several locations. What is clear is that the earliest mention of pasta made from Durum wheat flour can be found in Near-Eastern sources (see Tunisian steamed pasta recipe), mostly in Greek, Persian, and later in Arabic literature and that by the 13th Century pasta began to appear in European Christian literature. One early Muslim pasta recipe, from what is now Andalusia, refers to fidawsh. The descendent of this pasta still exists in modern Spain, France and Italy (see Fideos recipe). During this time, it seems that pasta was a food for the wealthy and this remained the case for several centuries. While the names of many of these historic pasta would be familiar to us, the recipes are not. Some pasta was fried rather than boiled (see “Barbajouan” recipe) and there was little distinction between sweet and savoury courses. Often ravioli contained fruit as well as spices such as cinnamon, cloves and mace. Over time, as the people changed, so did their food including their pasta. As is the case today, the peoples of the Italian peninsula became the main consumers of pasta and spices disappeared from recipes in most locations, with a few exceptions (see Cialzons recipe). And what had been a food of the rich, became a food for the poor. By the 17th Century pasta became a food for all people in the South of Italy and by the 19th Century, pasta was being made on a commercial scale in both Genoa and Naples. Today pasta is eaten all over the world and when people think of European pasta, they think of “Italy”. But, while Italy is a major part of this story, it is by no means the only part. What is Pasta? “Pasta” is derived from the word “paste” and so pasta is a food derived from a paste made almost exclusively from wheat flour (but see Chestnut flour papadelle recipe). Why wheat? Well wheat flour has several components that give the paste or dough made from it ideal properties for pasta making. Although flour is made up of many different components, the most important are starch, glutenin and gliadin. Starch is a complex carbohydrate made from chains of sugar molecules. In wheat flour starch exists in the form of “tiny little balls”. Glutenin and gliadin are proteins. In flour they are separate molecules, but with the addition of liquid they link together to form a larger molecule known as gluten. Gluten forms strands and these strands interlock to form a large tangled net. This gluten net traps the starch grains (like a tangle of wire springs trapping a collection of basketballs) and gives the pasta dough elasticity so that it can be stretched and deformed without breaking. Depending on the type of wheat, these components can vary in proportion. This is important to remember when making pasta. In fact it is the amount of gluten that can be formed in a flour that is the important point. The less gluten the harder it is for the gluten net to hold together the starch basketballs. Flour made from Durum wheat (known as hard wheat flour or semolina flour) contains more glutenin and gliadin than soft wheat flour and therefore produces a dough containing more gluten. Durum-type flour mixed with nothing but water can produce a dough that is easily formed into threads and sheets of pasta. It is also possible to extrude this type of pasta dough to give us most of the familiardried pasta shapes such as Linguine, Bucatini, Fusilli, Penne, Spaghetti. Durum wheat flour is naturally yellow and so produces a pale yellow cooked pasta. Dough made from soft wheat flours contains less glutenin and gliadin and hence produces less gluten. While it is possible to make pasta dough from soft wheat flour and water alone, these doughs commonly have eggs added. The egg proteins take on the same function as the gluten strands. Soft wheat flour is white in colour and therefore produces a white pasta, unless copious amounts of egg yolks are added to the pasta dough. Pasta made from soft wheat flour is common in the north of Italy and is often used to make ravioli, tortellini etc. While soft wheat flour plus egg forms a dough that is good for making fresh pasta, the dried pasta that results is very brittle. Most dried egg pasta is made of semolina flour or a blend of flours that remain more stable when dry. While glutenin and gliadin proteinS form gluten in pasta dough, this would occur far too slowly if the flour was simply mixed with water and formed into a dough. To increase the rate of gluten formation, the dough is kneaded. The lower the amount of glutenin and gliadin protein in the flour, the more kneading will be required to form gluten. Both the gluten strands and starch grains absorb water. So once the dough has been kneaded it must be allowed to rest for a time to allow the starch grains to fully absorb water and break up. All these procedures produce a pasta with good mechanical properties and texture. One final note on flours and pasta-making. In Italy flour is classified as “Semolina” (Durum wheat flour) or “Farina” (soft wheat flour or a blend of the two). Italian flours are further classified numerically on the basis of refinement. “00” being the most refined, “2” being the least. The level of refinement also indicates the protein levels and, for most practical purposes, these indicate the level of gluten in the pasta dough (Durum wheat flours have a protein level of approximately 15%, by way of comparison.) “00” has a minimum of 7% protein, while “2” flour contains a minimum of 10% protein. It would therefore be logical to conclude that “2” flour would be more commonly used to make pasta because it would be able to form more gluten. Wrong. In the North of Italy were most pasta is made from soft wheat flour they mostly recommend “00” flour (as do most English language recipe books). The most common reason given for this choice of flour is that it produces a “more tender a pasta with a delicate flavour” and who am I to argue with that! Making Pasta: Making fresh pasta is a relatively simple task, easily mastered and quite rewarding. In terms of equipment, while it is possible to roll pasta dough using a rolling pin, I recommend a simple hand-cranked pasta machine. It simplifies the pasta making process and allows the production of not only a more consistent product, but also a wider range of pasta types. Many machines have attachments for making different sized pasta ribbons and for making ravioli. Ingredients: 3 cups of Durum flour (fine semolina flour) or 3 cups of Italian “00” flour (or “all-purpose” flour if this is not available” 1 cup of warm water (if using semolina flour) or 3 large eggs (if using “00” flour) Semolina flour for dusting Method: 1. Add three cups of one flour type to a large bowl. Add water if using semolina flour or eggs if using “00” flour. 2. Mix flour into liquids using a fork. When the liquid has been fully absorbed by the flour, form the dough into a ball. Start kneading the dough ball with the heel of you palm. Do this for five minutes. 3. As different flours absorb different amounts of liquid, and eggs differ in size, the dough may be either too dry or wet at this stage. The dough ball should be elastic and soft. If it is sticky, add a little more flour; if it is very stiff add a little water. 4. Knead for a further 5 minutes. If you intend to roll out the pasta by hand, most people recommend that you knead the dough for a further 5 minutes. So 10-15 minutes of kneading in total to form those gluten networks. 5. At this point wrap the dough in plastic wrap and place in a cool place for an hour. If using semolina flour it is especially important to wrap the dough in plastic wrap to exclude air. The yellow carotene compounds in the dough react with oxygen to form melanin, in effect “tanning”. These melanin products are brown in colour and can result in discoloration of the dough. 6. After the resting period, take out the dough and divide into four. Re-wrap three of the dough portions in plastic. Flatten the remaining portion and dust with flour. Set the machine to its widest setting and wind the dough through. Repeat this six times, folding the dough sheet in half and turning it 90 degrees each time. This will give you a squarish, flattened brick of dough. 7. Decrease the roller separation by a notch and crank the dough through. Repeat this process until the pasta sheet is of the desired thickness. Should the dough begin to stick, dust with a little flour. Cover pasta sheet with a clean kitchen towel and repeat the process with the other dough portions. This method, using a pasta machine, will produce sheets 15cm wide and up to a metre of so long. I cut them down to 40 cm lengths for ease of use. This is the basic method for producing lasagne pasta sheets. From this point you can create other pasta types as described in the following recipes. CROATIA Mlinci: These are the most primitive of the pasta recipes in this course and the pasta I have the most fondness for. They are basically an early solution to the problem of storing wheat flour in a stable, easily transportable form. While variations on Mlinci exist throughout the Balkans, I am familiar with the form cooked in Croatia. Once a year at Christmas, my grandmother would unlock the “Big Room” and we would have a Balic family gathering. Under the rather ugly and prominent painting of Tomislav the Great (he was riding a horse across a field of decapitated heads), the family would gather to bicker, drink and eat. I still wonder why my grandmother had a locked room full of expensive furniture, paintings of unsavoury ancestors, but the thing I remember the most is her Mlinci with Roast Turkey at Christmas. Ingredients 250 g of all-purpose flour 1 egg 1/2 cup of water Extra flour for dusting Method 1. Pre-heat oven to 150C/300 F. 2. Place flour into a large bowl. Add egg to flour and incorporate. Gradually add water and mix until a dough is formed. The dough should not be sticky at this point. If it is, add slightly more flour. 3. Knead dough on lightly floured bench for eight minutes. Allow to rest for 1 hour. 4. Roll out, using a rolling pin until very thin, about 2 mm thick. The easiest way of accomplishing this is to roll in one direction the full length of the dough, then turn the dough 45 degrees and roll again. Repeat this process until the dough is roughly circular and approximately 2 mm thick. 5. Rest pasta sheet for an hour to dry out a little, and then cut into 15 cm squares. Place these squares carefully onto baking parchment and cook in the pre-heated oven until the pasta sheets have blistered, dried and are a light tan colour, about 20 minutes. Don’t worry if there are some darker patches. 6. Leave to cool. At this point they can be stored and as long as they are moisture-free, they will remain fresh for many weeks, enough time to dispose of a few enemies...a la Tomislav the Great! Using Mlinci Mlinci are ‘ready to go’. Basically they can soaked in hot water for 10-15 minutes then mixed with a savoury or sweet dressing and they are ready to eat. However, the way my grandmother would prepare them would be to place the soaked Mlinci under a roasting turkey for the last hour of cooking. Or she would pour the juices from the roasting turkey over the Mlinci and bake them separately. Primitive, but good. FRANCE France is known for many foods but when people think of pasta it is not often that France comes to mind. Nevertheless, France does have pasta of its own. Alsace and Lorraine have noodles (“nouilles”) and small dumplings (“Spaetzli”), the former thought to have been introduced by Italians during the Thirty Years War. Provence has macaroni, gnocchi (“gnocchis”) and ravioli (“Raviolis”). Many of these pastas are made in Nice whose official language from the mid-16th Century until its incorporation into France was Italian. Garibaldi, a native of Nice, spoke a Ligurian dilect of Italian as did many other inhabitants of this region. This recipe for “Barbajouan” (“Uncle John” adapted from Colman Andrews' Flavours of the Riviera: Discovering the Real Mediterranean Cooking of France and Italy ) This recipe for “Barbajouan” (“Uncle John” adapted from Colman Andrews' Flavours of the Riviera: Discovering the Real Mediterranean Cooking of France and Italy ) echoes the some older traditions of pasta-making in regions known for their stuffed pasta, such as in Nice, where many of these early stuffed pastas were fried, rather than boiled. "Barbajouan: Ingredients: Egg pasta made with Italian “00” or all-purpose flour (see Making Pasta). 1 finely chopped onion 150 gm Swiss chard/Silver beet, stalks removed and greens finely shredded. 300 gm fresh ricotta cheese 100 gm Prosciutto 50 gm Parmesan cheese, finely grated 1 egg, beaten Salt, black pepper, nutmeg Additional beaten egg for sealing ravioli Vegetable or peanut oil for frying Method: 1. Make pasta sheets as directed, cover with a clean cloth and put aside. 2. Gently fry onions until translucent and slightly coloured, but not browned. Add Swiss chard. Reduce heat and cook until Swiss chard is wilted. Allow to cool and then finely chop this mixture. 3. Mix together ricotta, prosciutto, parmesan, egg, and the Swiss chard and onion mixture. Add salt, pepper, and nutmeg to taste. 4. Place a sheet of pasta on a floured bench. Place 1 teaspoon of filling at one end of the sheet, 3 cm from the end. Place teaspoons of filling down the centre of the pasta sheet, separated by 3 cm from each other, until sheet is filled. 5. Brush gaps between fillings with beaten egg. Place second sheet of pasta over the first sheet. Carefully press down between the lumps formed by the filling, excluding all air. Cut into squares, using a ravioli cutter, stamp or a knife. Place ravioli on a floured baking sheet, ensuring that the ravioli are not touching. Refrigerate for 20-40 minutes. 6. Heat oil until 180-90C/350-375F. Fry pasta in small batches until golden brown (the pasta will puff up and expand quite a bit). Drain on kitchen paper, and eat as soon as possible. Excellent with a Rose de Provence wine. SPAIN If you visit the Mediterranean coast of Spain, in addition to the bland mass-produced paella, you will sometimes see the bland rice replaced with bland industrial noodles. This is sad as these noodles are “Fideos” and they are a very interesting pasta indeed. A pasta dish known as “Fidawsh” is known from medieval Muslim “Spain”. From this origin we get a class of pasta known as “Fideos” in Spain or “Fidelanza/Fedelini” in Italy. These pasta are distinguished by being cooked in their sauce. The following pasta is adapted from Colman Andrews’ excellent Catalan Cuisine: Europe's Last Great Culinary Secret Fideos with Clams: Ingredients: Olive oil for frying onions and pasta 1 large onion finely chopped 400 gm of dry Fideos pasta or durum wheat vermicelli broken into 3 cm lengths (these must not contain egg) 1 (400g) can of chopped and peeled tomatoes (or equivalent of skinned, seeded and chopped fresh tomatoes) 250 ml of dry white wine 6-8 saffron threads, lightly crushed 2 Tbs of finely chopped parsley 500 gm of cleaned clams (smaller and sweeter types are best) For allioli/aioli/garlic mayonnaise 3 large cloves of garlic, peeled 1 egg yolk 250 ml good quality olive oil salt and pepper Method: 1. Fry onion gently in a shallow casserole that is designed for stove-top use (or if you have an earthenware cassola, now is the perfect time to use it) until translucent. 2. In a separate pan, very gently fry pasta in a small amount of olive oil, until they turn opaque and a light tan colour. Stir constantly as they can burn if not carefully watched. 3. Add tomato, wine and saffron threads to the onion and bring to boil. Reduce to a simmer. Cook at a simmer for 20-30 minutes (this reduces the liquid and removes the ‘canned’ taste from the tomatoes. Taste at this point and correct seasoning. It will need salt and pepper and possibly a pinch of sugar, depending on the quality of the tomatoes. 4. During this time make an allioli/aioli/garlic mayonnaise from the garlic, salt and olive oil (consult your favourite recipe). 5. Add pasta and parsley to sauce and continue to simmer until pasta softens and absorbs the sauce. 6. Add washed clams to pasta and sauce. Cook until clams have opened. Discard any that are closed. 7. At this point the pasta should be soft and the dish should be a loose stew or a thick soup in consistency. Place a few tablespoons of the allioli in the centre of the dish and partially stir into sauce. 8. Serve from dish. NORTH AFRICA As I have mentioned previously, there are very good reasons to believe that many forms of pasta, especially the familiar dried durum wheat pasta, are derived from North African sources. Of the contemporary North African pasta, many of us know very little. When is the last time you saw a celebrity chef making an Algerian, Tunisian or Libyan pasta recipe? Although there are many types of pasta found throughout North Africa, one class of pasta cooked in this region is particularly interesting. These pasta are steamed, rather then boiled. Like their first cousin, couscous, these pasta are steamed in a kiskis (or couscousiere in French). The following Tunisian recipe is adapted from Clifford A. Wright’s award- winning: A Mediterranean Feast: The Story of the Birth of the Celebrated Cuisines of the Mediterranean from the Merchants of Venice to the Barbary Corsairs with More Than 500 Recipes. Nawasar Mafawwra ( Steamed pasta squares with spiced lamb and chickpeas) Ingredients: 500 gm of pasta (pasta squares called “Nawasar” in Tunisian or “Quadratini” in Italy*) 500 gm of boneless lamb shoulder, trimmed of fat and cut into 2.5 by 3.5 cm chunks (or you can use leg of lamb or even lamb shanks). 1 small onion, finely diced 2 Tbs of Harisa 1 tsp of cayenne, Aleppo or other hot chilli powder 2 Tbs of double concentrated tomato paste 2 cups of cooked chickpeas 250 gm of small potatoes or Jerusalem artichokes (the latter isn’t traditional, I just like them) 1/2 cup extra virgin olive oil, plus a few splashes more 3 Tbs of unsalted butter (the Italian Alpine butter is particularly good, its sourness contrasts well with the hot pasta sauce. 4 raw eggs in the shell (wash the shells well) Salt and ground black pepper Method: 1. In a large heavy-based casserole dish or kiskis, if you have one, cook the onion in a little oil until soft and translucent. Remove onion. In the same vessel, brown the lamb on all sides. Do this in small batches. 2. Add all the lamb and the onions back to the pot or kiskis base. Add red and black pepper, harisa, tomato paste and water to cover. Bring to a boil and then reduce to a simmer. Add the four eggs in their shell. In the last half hour of cooking add the chickpeas and potatoes. Check seasoning at this point. 3. If you have a kiskis, mix the pasta with the remaining olive oil until well coated and add to the top section of the kiskis. When steam begins to appear, place the lid back on and steam for three hours. Yes, that’s right, three hours! Toss the pasta in the kiskis every 20-30 minutes or so to prevent sticking. 4. If you don’t have a kiskis, cook the stew for three hours in a lidded casserole pot and cook the pasta in salted boiling water as per normal. However, the pasta must be cooked to a softer stage than al dente. This is not an Italian recipe after all. When the pasta is cooked, drain and mix with butter until coated. 5. After three hours the lamb should be very tender and the sauce will be reduced somewhat. Remove the meat, potatoes and eggs from the sauce. If the sauce looks very liquid still, reduce it until it thickens. Mix this sauce with the pasta, place in a serving bowl and place the meat, peeled eggs and potatoes on top of the pasta. Serve. * I have difficulty finding this pasta, so I tend to use 2 cm “farfalle” or “orrechiette” pasta, as I happen to like them. ** The eggs cooked in this manner, in their shells, are very good as caramel type flavours start to develop in the egg white. You can use peeled, hard- boiled eggs if you are not convinced. ITALY Of all the Mediterranean regions, it is Italy that most people associate with pasta with good reason. It is the Italians who not only consume the most pasta, but also have by far the greatest diversity of both pasta types and recipes. They have also been making pasta for at least 800 years. It is known that pasta was manufactured in Sicily, on a commercial scale, from the 12th Century and by the 13th Century it was also being manufactured in Genoa and Pisa. While this is quite a pedigree, most of the pasta recipes from this period do not resemble any extant forms. Often the pasta was cooked in spiced broths rather then water and the pasta was dressed with butter, cheeses (such as parmesan and ricotta), sugar and spices such as cinnamon. From the 14th Century onward, these types of spiced and sweetened pasta dishes gradually disappeared from both recipe collections and literature. Today they are almost non-existent. Well almost so, because there are a few happy exceptions. The town of Crema in Lombardy is famous for its tortellini stuffed with an extraordinary mixture of dried and candied fruit, amaretti biscuits, dark chocolate, Marsala, and cheese. Throughout the rest of Lombardy, a more home-style pasta stuffed with pumpkin and amaretti is common. Emilia-Romagna has a sweet pastry pie, stuffed with a mixture of macaroni or tortellini dressed with porcini mushrooms, sweetbreads, and chicken livers and bound in béchamel sauce flavoured with cinnamon and cloves. Recipes that are similar to this pie can be traced back to the Renaissance. These recipes are an example of a few survivors from a once great clan. One indication of just how popular and widespread these spiced and sweetened pasta were, is indicated by the four recipes for ‘Tortelleti’ in Robert May’s ‘Accomplisht Cook’ (1660). These pasta were again stuffed with either veal, bone-marrow, cow udder, vegetables (such as spinach, beets or green peas) and a mixture of parmesan, curd cheese, currants, cloves, rosewater, cinnamon and nutmeg. Now, while these pasta are obviously Italian in origin, the surprising thing is that they occur in a 17th Century English cookbook for upper-class Catholic families! This is an indication of how widespread these pasta were in the courts of Europe. The following modern recipe for Cialzons pasta is from Friuli in the north-east of modern Italy. Cialzons come in two basic forms: a meat stuffed pasta served in brodo (broth) or a meatless version containing fruit and ricotta dressed with browned sweet butter. It is this latter form, first mentioned in the 14th Century and which shows an obvious similarity to ‘Tortelletei’ of Robert May and to "Tortellini di Crema", that we will prepare. Cialzons: Cialzons can be stuffed with a variety of fresh fruit including, pears, apples and plums and/or dried fruit such as prunes, currants or figs. In the case of dried fruit it is often plumped up by gently pre-cooking in red wine. In this recipe I am using quinces, as quinces are not only traditional, but also utterly lovely in appearance, flavour and scent. Ingredients: One recipe of ‘00’ or all-purpose flour basic pasta dough (see above) Filling: 2 large quinces 250 gm of fresh ricotta (not UHT, as it is not suitable for this recipe) 2 tsps of white sugar pinch of salt 1/2tsp of cinnamon 1/2 Tbs of very finely chopped fresh marjoram 1 egg yolk 100 gm of sweet butter Method: 1. Pre-heat oven to 160C/325F. Prick quince several times with a fork or skewer (to prevent the fruit from bursting), place in a baking dish and bake for one hour or until the fruit is soft. Allow fruit to cool then peel and remove the flesh into a clean bowl. Mash fruit thoughly to produce a fine puree. Weigh fruit, it should weigh 100-150 gm. Mix this pulp with the rest of the filling ingredients. Taste for salt. 2. Roll out pasta sheets as directed and stuff cialzons as directed in steps 4-5 of the Barbajouan recipe. 3. Cook cialzons in boiling, salted water, until they float, about 3-5 minutes. Test one cialzon to make sure that the pasta is cooked. When pasta is cooked, drain and place in a serving bowl. While the pasta is cooking, brown the butter in a clean pan over medium heat. As the butter heats, it will at first foam, then the milk solids will begin to brown. When these are a medium brown colour and smell ‘nutty’ pour over the pasta, carefully mix and serve. While cialzons are ‘sweet’, rather then ‘savoury’, in modern terms, they traditionally come before the main dish, like most other Italian pasta. I have seen them offered as ‘Dolce’, but I don’t feel that there is any need for that. If one was going to be non-authentic I think that a better way of serving them would be to cook them like pot-stickers, dress them in butter and serve them as a side with roast game such as pheasant or with a roast goose or even turkey. Chestnut Flour Pappardelle with Wild Boar: While pasta can now be found throughout most regions in Italy, this has not always been the case. While some of the earliest medieval records of pasta in Italy come from Tuscany, in more recent times, only two types of pasta are known to be ‘traditional’ to this region. “Pici/Pinci” are a thick spaghetti type pasta from the area around Siena, especially Pienza, while “Pappardelle” are large tagliatelle type pasta. Pappardelle is most often seen served with a meat sauce made of game, most commonly hare, but also lamb, wild duck or wild boar. Many of these game/meat sauces now contain tomato, but this is not traditional and I prefer the “no tomato” versions. The combination of caramelized sugar and vinegar, as in the following recipe, when used in Tuscan sauces is referred to as “Agrodolce”. These Agrodolce sauces are not usually served with pasta, but I think that the slight sweet/sourness contrasts well with the chestnut pasta. Before I begin the recipe, I must confess that the pasta is not traditional at all. In fact, I have never seen this type of pasta, which makes sense since I made the recipe up.! After one trip to Italy I bought back a bag of chestnut flour. While, there are several types of chestnut flour pasta or dumplings found throughout Italy, I came up with this recipe simply because I had a recipe for buckwheat flour pasta from Lombardy. I think that the sweet earthy flavours of the chestnut flour go very well with game. If you cannot get chestnut flour, use buckwheat flour or whole wheat flour to make the pasta. The basic sauce recipe can be used with other game meats as well as lamb or pork. Ingredients: Pasta: 200 gm of “00” Italian flour or all-purpose flour 100 gm of chestnut flour 2 eggs 1 tsp of salt Sauce: 500 gm of lean wild boar shoulder (or other game meat) cut into 4 by 6 cm pieces 1/2 tsp of grated orange zest. 50 gms of finely chopped unsmoked pancetta 2 onions, one roughly chopped, one finely chopped 2 large carrots, one roughly chopped, one finely chopped 2 sticks of celery, including greens, one roughly chopped, one finely chopped 2 bay leaves, a sprig each of rosemary, thyme and sage leaves, tied in a bundle. 2 Tbs of white sugar 3 Tbs of finely chopped flat-leaf parsley 4 Tbs of good quality white wine vinegar 1 cup of dry white wine 1 cup of chicken stock Salt and black pepper Extra virgin olive oil Method: 1. Take the roughly chopped vegetables and gently sauté in a little olive oil. When beginning to soften, take off the heat and add white wine. Allow to cool. Place wine and vegetables in a bowl, add meat and allow to marinate overnight in a cool place. 2. Drain meat (reserving the marinade) and pat dry. Discard the vegetables. 3. In a large flameproof casserole, sauté the finely chopped vegetables and pancetta in a little olive oil. When the vegetables soften, add orange zest and meat. Gently brown the meat. Add the reserved marinade, chicken stock and herbs. Bring to boil then reduce to a simmer and cook for 2.5 hours or until meat is tender. 4. Discard the herbs. Strain the meat and vegetables, reserving the liquid, and put both aside. 5. In a small saucepan, gently heat the sugar until it begins to dissolve and caramelize. Add the vinegar and mix until sugar is completely dissolved. Heat gently for 1 minute then add the strained liquid that you set aside in step 4. Reduce liquid to one cup. Taste and season with salt and pepper. Add the parsley and the reserved meat and vegetables. The sauce should be very slightly sweet and tangy, but the flavours of the herbs and meat should dominate. Keep sauce warm. 6. Make pasta as directed in “Making pasta” section. Roll out pasta sheets until 1-2 mm thick. Cut pasta sheets into 2.5 cm ribbons. Bring a pan of salted water to a boil, add the pasta and cook for about four minutes. Drain. Add the pasta back to pot in which it was cooked, place on low heat and add three quarters of the pasta sauce. Heat through. Place on serving dish and top with remainder of the sauce. Serve. Pasta con Cozze: While durum wheat pasta is now found thoughout Italy, it is in the south that it remains a staple as evidenced by the endless variety of recipes and pasta forms found in that region. Sicily, where not only has Durum wheat pasta long been made and consumed, may also be where this pasta was first introduced to Europeans. One of the most common pasta dishes is “Pasta con le Sarde” (Pasta with fresh sardines). This is a baked pasta dish and I love it! The combination of flavours is exceptionally good. Unfortunately, since moving to Scotland I have great difficulty making this dish as fresh sardines (or even pilchards) are not very common. The following recipe is my attempt at capturing some of the better aspects of the dish. I could have used another oily fish, such as herring or mackerel, but I don’t think those fish are suitable for the recipe, whereas the excellent Scottish mussels are. As mussels dry out if baked for any period, the pasta is simply dressed. Ingredients: One recipe of Durum flour basic pasta dough (see above) 2 fennel bulbs, including their feathery tops. 1 finely diced onion 1 kilo of mussels in the shell (Cover them with fresh water, to which you have added the juice of half a lemon, leave for 4 hours then rinse, clean and de-beard.) 100 gm pinenuts 3 garlic cloves 20 strands of saffron (a small pinch) 1/2 cup of fruity good quality olive oil 1 cup dry white wine salt and pepper Zest of one lemon (or half a citron if available), cut into fine slivers, like rosemary leaves. Method: 1. Roll out pasta sheets until 2 mm thick. Cut pasta into 4 mm ribbons using either a pasta machine or a knife. Alternatively, buy a good quality dried linguine. 2. Remove feathery tops from fennel bulbs, chop finely and set aside. Remove any discoloured outer leaves from the fennel bulbs and put them into a saucepan, cover with water, bring to boil and cook until the bulbs are easily pierced with a fork, about ten minutes. Remove from water, allow to cool and dice fennel bulbs finely. Put aside. Gently brown pinenuts in a saucepan Do not allow to burn! Put aside. 3. Place mussels into a large pot and add the white wine. Bring to boil, cover with lid and steam mussels until they open, about 4-5 minutes. Remove mussels from liquid and put the liquid aside. Discard any un-opened mussels. Strain the liquid through cheese cloth or a fine strainer to remove any debris. Remove flesh from half of the mussels and set aside. 4. Sauté onion in olive oil and when translucent, add crushed saffron and garlic. Stir for one minute, then add the strained mussel liquid. Reduce heat and simmer. 5. Bring a large pot of salted water to the boil and add pasta. Cook pasta until tender to the tooth (al dente), around five minutes for fresh pasta; 10 minutes for dried. 6. Add the diced fennel. lemon zest and toasted pine nuts to the sauce. Taste and adjust seasoning. When the pasta is cooked, add it and the shucked mussels to the sauce and combine. Place in a serving dish, top with the rest of the mussels in their shells and garnish with the finely chopped fennel fronds. Serve. Post your questions here-->>Q&A