Chocolot
-
Posts
932 -
Joined
-
Last visited
Content Type
Profiles
Forums
Store
Help Articles
Everything posted by Chocolot
-
Spraying Chocolate: Equipment, Materials, and Techniques
Chocolot replied to a topic in Pastry & Baking
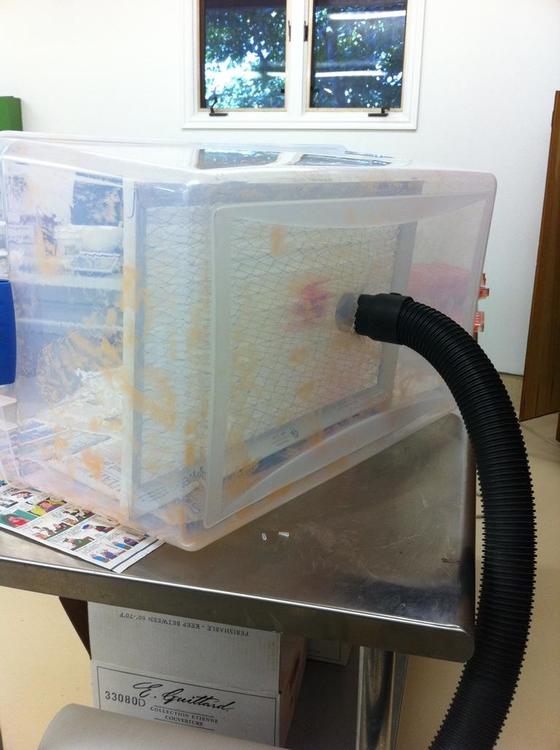
In 2011 I tried something similar. I used a shop vac and a furnace filter. It mostly just trapped the cb where the hose was. I am no engineer and it shows:).
-
PLANNING: eGullet Chocolate and Confectionery Workshop 2020
Chocolot replied to a topic in Pastry & Baking
No!!! First Bob thinks his daughters wedding is more important and now you? We will miss you. -
Thanks, Kerry. I think I gained 10# just looking at the photos.
-
Some help with Salted Caramels (caramels au beurre salé)
Chocolot replied to a topic in Pastry & Baking
Yes, that is how I make my cut caramels. For pipeable caramel, I use the other method. -
How about using a table fan to remove the latent heat?
-
Spraying Chocolate: Equipment, Materials, and Techniques
Chocolot replied to a topic in Pastry & Baking
Are you supposed to measure???:). Some just seem thicker, like the metallics. I just squeeze some in the gun. I"m not exactly precise. -
Spraying Chocolate: Equipment, Materials, and Techniques
Chocolot replied to a topic in Pastry & Baking
She keeps a large hard plastic "salad" bowl next to where she sprays. She takes her large scraper and runs it across the sprayed mold. Then scrapes off the excess color. Then she scrapes it against the edge of the bowl. She works her way around the edge of the bowl when she changes colors. After it sets up, I break it up and put it back in the bottle. Sometimes it is a bit hard to stuff it back in, but you could always remelt each color and pour back into bottle. I'm amazed at how much color you can save, I looked back on video from /vegas workshop, and Lionel is doing the same thing. I tried to post video here, but I don't know how to change it from a .mov extension to an acceptable one. I did a screen shot. You can see a small amount of color on the edge of the bowl.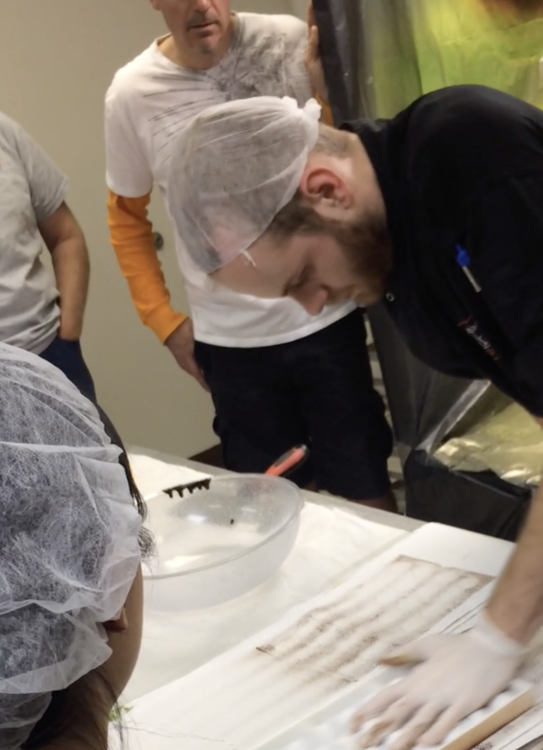
-
Spraying Chocolate: Equipment, Materials, and Techniques
Chocolot replied to a topic in Pastry & Baking
No on the saving clear CB. Not worth it and would have a lot of colors in it. -
Spraying Chocolate: Equipment, Materials, and Techniques
Chocolot replied to a topic in Pastry & Baking
@BottleRocket I'm guessing you are in Utah County? Feb 1, I'm teaching a mold decorating class at Gygi's. We aren't using spray equipment! Too much for a beginning class:). If you want, bring up your equipment and I could show you some stuff after class. There is usually some space we could claim for a little while. I agree with what Jim has said. If you don't want to take your gun apart after using water, you can just use melted, plain cocoa butter and spray on brown butcher paper or even paper towels. I have never taken my guns apart and don't want to. To splatter, I turn the knob on the hose to 9-3 o'clock, then very carefully, open it up a tiny bit and test. I fiddle with it until I like the pattern. Like Jim said, the pattern changes a bit with each color. I don't mind, as it gives variation. The Fuji uses a fair amount of butter, but Melissa Coppell showed us how to scrape off the excess and scrape onto a bowl. When hardened, you can refill your bottle and use again. If just doing a few molds, I don't bother, but when doing a hundred, I do. The knobs are just like on a regular spray gun. I visited with a bodyshop painter and had him explain the various settings. Basically, I don't touch the gun. I only use the knob on the hose to restrict the air flow. I might open up the knob at the back that tightens the trigger, but that is just to get the last of my paint into the last mold. I put the gun in the dehydrator along with my colors and warm them up over night. If really cold, I will use a hair dryer to warm the gun. The biggest waste of color is in changing color. I try to use a logical sequence to avoid this. Yellow to green, to blue to purple to brown. Doesn't always work out, but I will clear the gun with plain CB. Also, I thin my colors with CB. Makes them go further. I actually have two guns so I don't have to clean it out completely. One of the best features of the Fuji, is the lack of too much atomizing of the color. Kerry would have a fit, but I don't use a mask. It just hasn't been a problem. Also, you need to be sure the unit is flat on the floor and not on a shelf that allows the hose to dangle. Don't forget to wash the filter occasionally. -
Upon rereading your directions, you say that you pull until it starts to crystallize. You are pulling too long. You should stop pulling when lines form and it begins to look satiny. If you pull until crystallizing, you will have real problems.
-
Remember, the description in the book says these are the trickiest candies in the book to make. We meant it! It does help to be where it is cold to pull them. I also use a dough scraper to turn the batch until it is cool enough to handle. You might play with the temperature a bit. I am at 5000 ft and cook to 256. We might have put a too low temp in the book.
-
Some of my batches start to crystallize while pulling, and some don't. I think I sometimes pull them too long. If I leave in a "lump" and pull out and cut as I go, it usually works better. Also, by the time i cut, there is very little butter left to slip. Try using corn starch or powdered sugar or a mix, if it sticks. If you pull out a rope, you can cut with a knife rather than scissors.
-
My 2 cents: You don't need a thermometer for peanut brittle. You can go by sight and smell. I look for the boiling bubbles to be straw colored. If I used a thermometer, it would be the thermapen. You simply wipe the probe with a cloth towel between tests, if you are worried about it. My recipe is similar, but calls for butter, vanilla and salt. Once temp is reached, I remove from heat and stir in butter. vanilla and salt. This causes it to steam briefly. Then I add soda. It foams up almost to the top of the pot. Pour out and after a minute, I stretch to make it thin.

-
https://www.amazon.com/Ontel-Resistant-Silicone-Grilling-Kitchen/dp/B01HBKGYY2/ref=asc_df_B01HBKGYY2/?tag=hyprod-20&linkCode=df0&hvadid=198065490425&hvpos=1o3&hvnetw=g&hvrand=17630400058269999854&hvpone=&hvptwo=&hvqmt=&hvdev=c&hvdvcmdl=&hvlocint=&hvlocphy=1026969&hvtargid=aud-799728744414:pla-352353032315&psc=1 How about these, Jim?
-
Chocdoc does the City so Nice they Named it Twice!
Chocolot replied to a topic in Food Traditions & Culture
The kitchen faucet looks like a Grohe, If it is, it has a lifetime warranty-free replacement. Or has Gary got it fixed already? -
Don't know if it applies here, but Melissa told me she much prefers the Sosa cooked apple aroma. She said it has a much better flavor than the others.
-
Use the white flowers instead of white chocolate.
-
Anna, I couldn't help but notice a lack of beer or wine with your lunch. Is Kerry a bad influence or your daughter a good one?😀
-
I think the workshop would be valuable to someone already in the business that is wanting to go "big". I think you would be better served with baby steps. Get in the business and get confident in what you do before taking a giant step. FFS is fun to walk and see all the new products and talk with vendors.
-
How is the NEW Lotus? As good as the old?
-
Planning quantity of bonbons to produce for high season
Chocolot replied to a topic in Pastry & Baking
Yes, parchment between layers. -
I rarely clean them out. Yes, that is why I have 3:). Cleaning is fairly easy. You just drain the chocolate-It has a wonderful spigot for dispensing. Then, you have to get above it and just pull the agitator up. Probably 8-10 pounds are needed. It uses 110v. I can barely lift it when empty. It has a water jacket that is designed to be plumbed into cold water line. It heats and then cools with the water when needed. That means you need a drain. I have a water line available, but no drain. I do not have mine plumbed. I just turned it into a closed loop. It takes longer to cool, but I have worked that way for years without a problem. Mine are the old ones that have a dial timer. I adjust the heat to turn off about 3 a.m. By the time I get to work, It has cooled to the preset temp and I am ready to go.
-
PLANNING: eGullet Chocolate and Confectionery Workshop 2020
Chocolot replied to a topic in Pastry & Baking
He has a new method of doing laminations that I want to see. -
You would love it. I have 3 of them.
-
PLANNING: eGullet Chocolate and Confectionery Workshop 2020
Chocolot replied to a topic in Pastry & Baking
What??? Of course you can!