

jedovaty
-
Posts
445 -
Joined
-
Last visited
Content Type
Profiles
Forums
Store
Help Articles
Everything posted by jedovaty
-
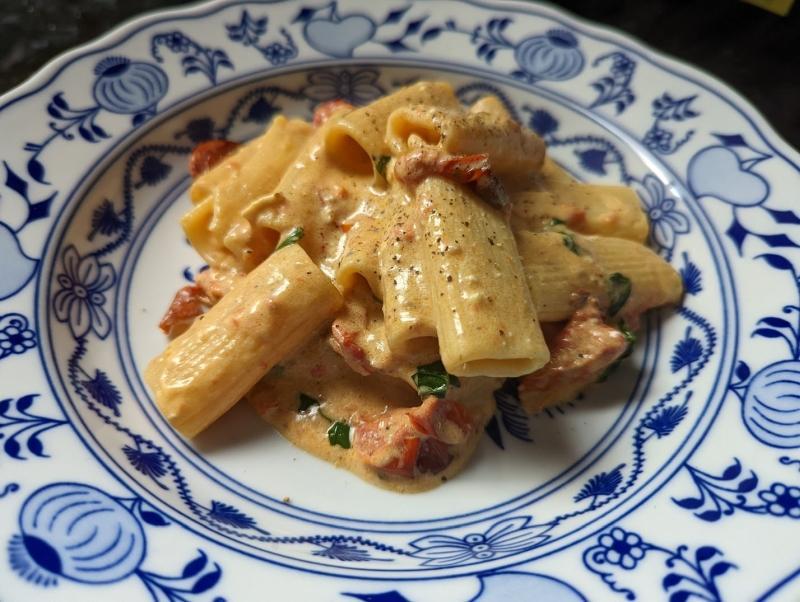
I read a super simple recipe someplace on the interwebs: bake feta with cherry tomatoes, garlic, and olive oil, then stir in noodles with a little cooking water and basil. Tastes great, but texture was a little grainy.
-
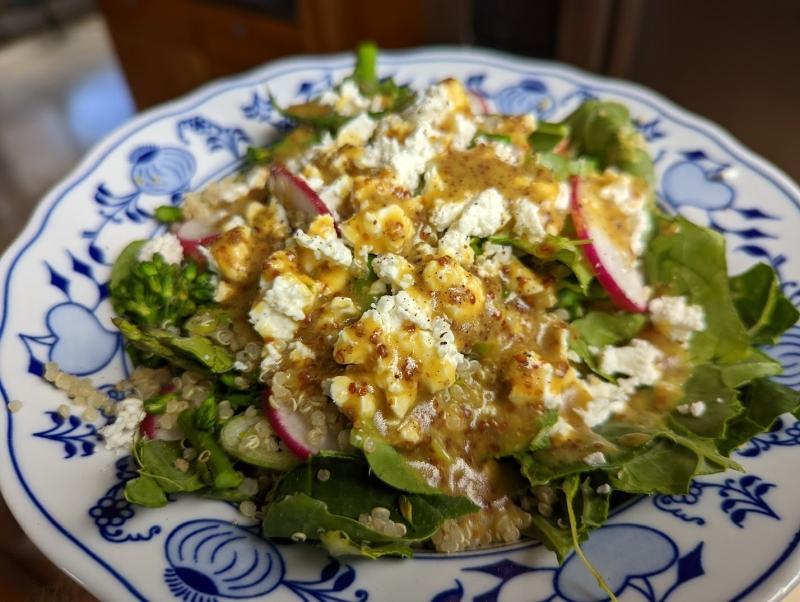
Leftover fridge stuff salad with honey mustard dressing.
-
Whoops, sorry, didn't click with me that you did not have a vitamix, hopefully the aldi-branded blender can handle berries. I don't see why it wouldn't. Good luck
-
Hi: First a tip: if you use the vitamix (or any fast-home mill for that matter), it helps to keep your berries in the freezer, you'll end up both preventing bugs in the long term and keep the flour from overheating. Many people on the internet recommend not overheating the flour since apparently it'll lose its nutritional component, because, you know, it's not like it'll get baked in the oven at a higher temperature later 🙄 I used the vitamix to grind wheat berries for a long time (5200 model from 2010), and it was great. A friend had a mockmill and, we compared the results of baked bread afterwards (did not compare the flour itself, decided to use the flour for our tests). There was no noticeable difference, and our conclusion to why get a dedicated machine: first and foremost, get one if you want one; second it is nice having a mill size via setting and just pushing a button to go vs setting a timer with the vitamix; and third to have a nice appliance to look at. Again, slight differences in flour consistency, grind size, etc, did not make a difference for us home bakers. So try before you buy. You will need to experiment with timing first. Now some fun stuff. Also, if you like the end results from the vitamix, you might decide to investigate their dry container. I have both thanks to costco bundle, and a few years ago compared the two side by side grinding 1 cup (~175g) frozen berries for 45 seconds, then sifting from a 40-mesh sieve from breadtopia. I should have used a larger quantity, but I typically only need less than 1 cup whole wheats. I lost the photo I took of the results, but here was the difference: - Dry container: flour measured 85F temp, and sifting revealed incomplete grind, leaving 57g in the sifter (68% extraction) - Regular container: flour measured 96F temp, and sifting revealed much finer, more complete grind, leaving 24g in the sifter (86% extraction); there was still an errant berry or two. Funny coincidence with the flipped numbers. The dry container would probably yield similar results if we let it run longer, and certainly had the option to do so since the temperature was lower. I will also guess that it would perform better with a bit more quantity, as it sent the berries flying in the container vs. the vortex of the regular one. The dry container creates an "inverse vortex" and I think this design is meant to keep temperature lower, let you grind more quantity and longer, and thus achieve a more uniform particle size. We concluded the dry container is not a required purchase unless you use the vitamix often for other purposes and don't want to wait for it to dry or clean between uses. The dry container is is nice luxury to have if you have the space for it and use the blender on a regular basis. Before I got a wet grinder, I also used the dry container to make nut butters, results were same as standard container but was slightly easier to get the goods out due to orientation of the blades. And even more fun stuff: I also have an ek43 coffee grinder (don't judge me). I stopped drinking coffee and, not wanting to sell this grinder, decided to try it with wheat berries. It grinds up small quantities faster than the vitamix and appeals to my inner lazy because I don't have to time to get my desired grind size. Naturally, this became my current flour mill. And more FWIW, I had an opportunity to test out Maelkoenig's flour burrs, and didn't find any material differences compared to the coffee burrs for the small quantities I mill. If you've read this far, here's one more thing. One day I accidentally bumped the grind size setting on the ek43 so it was set to fairly coarse when I milled the wheat. I baked with the flour anyway, and I really enjoyed the result.. the texture of the resulting bread was excellent, a bit moister than if the flour were finely ground. Anyway, I may not have a blast chamber or chamber vac sealer or a centrifuge or homogenizer or whatever else gadgets everyone here has, but I still feel like I belong because I'm using a >$3,000 grinder to mill flour for my bread. So there. 😝
-
My term is poison detection.
-
Aww dag nabbit! I bought last time and got the 5 button version, now they have the 7 button version for $10 more. Bah. Oh, well.
-
Advice on adding whey protein powder to breads and cakes, please.
jedovaty replied to a topic in Pastry & Baking
I tried adding WPI long ago to some home-made healthy crackers and found it did not bake up well at all; also, at the time, I had almost no experience with baking. You have interesting questions, if you decide to try, please follow up. I'd be especially curious about angel food cake option. Have you looked into pea protein? That seems to be a pretty popular product lately, although, I think it's just ground up dried peas and would probably taste rather vile.. actually, thinking it through, I want to say the vegetable proteins might give better results with certain baked goods, but there's no science or theory behind this, just pure conjecture. -
Any of you have a tasty, dairy and egg free vanilla base recipe for the creami? I found a few on the creami recipe website, and there are several on the interwebs, none jump out and I'm getting too many options.
-
Hmm... To each his/her/its own. I tend to reach for the shorter knives, they feel better, but would prefer if they had deeper bellies so I don't end up rapping my knuckles like Kim's husband. As long as the knife is sharp, it'll do me good.
-
I always forget the process when making fermented cucumber pickles.. is the salt based on water weight only, or water weight + cucumber weight? I tried a small batch, 2.5% salt of water + cucumber, and the pickles were way too salty after a couple weeks when I tasted them. Something seems off, internet suggests people go 3-4% with cucumbers and I can't imagine that would taste good
-
Followed the same idea with pluots, but replaced the agave syrup with maple syrup, added 3g lime juice, and did half the exotic ingredients. The cold base was almost delicious, except for the garam-masala flavor because I made saag paneer the night before in the vitamix. Fortunately, that wasn't detected in the frozen spun treat which tasted more like cold fig jam. Good, but odd. Right now I have two white and yellow sorbets freezing for tomorrow: one is roasted, other raw, just to see what the difference is with roasted as suggested by other here earlier. Same proportions as above. Seems to be working?
-
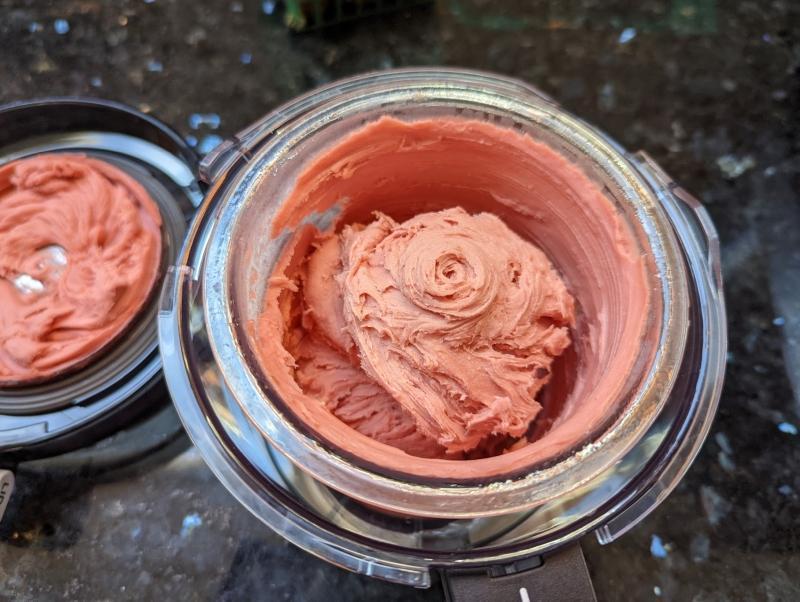
and I ended up eating the nectarines before getting to making any sorbet. That said, family has a rather sad plum tree in their backyard, which had ripe fruit. I stole a few, roasted them, and ended up trying this on creami sorbet setting: - 235g roasted plums - 25g each sugar, agave syrup, and dextrose - 100g water - 1g MP's perfect sorbet - 0.5g kappa carrageenan This only filled the container to 2/3rds. Not sure how I arrived at the sugars and water, just sort of, well, gave it a go. It all worked? It has a gelato-like texture, and is still soft the next day. Flavor is.. well.. reminds me of slivkovy lekvar (plum butter), and is very singular, pretty tart, too. Not my favorite thing in the world, but still good and was fun to try I think a little citrus would have really helped, or, as you wrote, an infused simple syrup (I think I'd probably like ginger or mint with the plums), to give it a bit of complexity. The farmer's market last weekend had a nice selection of stone fruits, and thus later this week as they ripen I'm going to try again. Pluots should be fun and easy, but it'll be hard processing the nectarines and peaches because they are just so tasty! I may try comparing roasted and unroasted as well.
-
I went through this last year - in addition to a good machine, you need proper humidity and temp. I had some back and forth with Pastaidea support, and we came to the conclusion, most people dry way too quickly - it needs time, nice and gentle. A comfortable room temp at 65-70% humidity should work for most shapes, and can take up to a week. Depending on your machine, more delicate shapes are probably not possible and will be prone to cracking. For example, with my philips, bucatini will crack while the macaroni/rigatoni shapes are solid. Not sure about food safety here with using only semolina and water. There is at least one mybook group that also does a lot of end-user support for pasta extrusion. I don't use twitface, but if you do, look these up and you'll find a lot of recommendations for making and drying extruded pastas. I'm not the one to whom you addressed this question, however, in addition to "Cada loco con su tema", here's another paradigm that works I enjoy extruding my own pasta, but some of the dies are a real pain in the arse to clean. Therefore, I will make a lot at one time, much more than I could eat in one or two sittings. I also have very little room in my fridge and freezer, therefore, drying makes sense for me. It's all about reaching the ultimate lazy/self-made balance.
-
@Kerry Beal Thank you again for suggestion on different sugars. I tried the MP pistachio gelato recipe with peanut butter again, this time changing about 30% of the sugar with dextrose. It was a lot better! Family who has dairy and egg issues said the taste and texture was awesome, but it smelled like dog food haha. It was tough to scoop on day 2, though, and I have more sugars to play with. I also made a variation of underbelly's strawberry sorbet, since I didn't have all the ingredients. It was delicious, but definitely still had crystals. Despite missing half the unique sugars and things, I was surprised the texture remained scoopable on day 2!!! I've got my hands on some delicious nectarines, almost criminal to process them for sorbet but the urge to do so is strong, especially if the strawberry sorbet can be repeated. I read @blue_dolphin made a roasted plum one recently, something like that sounds fun.
-
If only companies would embrace technology and put their manuals on line. Oh, wait. https://sharkninja-cookingcircle.s3.eu-west-1.amazonaws.com/wp-content/uploads/2021/10/05194707/NC300Series_IB_E_F_S_A4_MP_Mv7_LR.pdf Also available here: https://ninjacreami.com/ 😛
-
Oh! You edited the post after my post, thank you for the link, that is very helpful!! That site has a strawberry sorbet recipe I hope to try some day, but not sure I'm ready to get that deep into the hole yet, would have to buy more of those sugars (I only have dextrose right now, but I'm a bit afraid because I read here recently someone said it "tastes like ass" so... yikes?). Also, I thought the underbelly site was actually @paulraphael for some reason, I will correct to unconundrum from now on. Funny, I've shared the Frolic link Kerry provided now with a few people, and when topic got to discussing the business, all brought up "like keurig" . I've been taught the technical term is "razor and blades" business model, but I guess keurig really has made such an impact... perhaps the caffeine addiction plays a part, certainly more pleasurable than nicks, scratches, and ingrown hairs from daily chore of shaving 😛
-
Their response to questions about whether people can make their own cracks me up: "Currently the best way to make Frolic is with our fresh Pods. You will be able to make your own if you reuse the pods but I assure you they will not taste the same, nor as fresh." Interesting, they are going for a gilette business model.
-
I looked this up.. regular sugar is sucrose. I recall reading it is sweeter, thank you for the reminder. Now to figure out what other sugar I can use (maybe I'll try coconut sugar, or ???).
-
Followed the MP recipe for pistachio gelato, but used peanut butter instead, and I forgot to add their "perfect gelato" product to my cart so used their "perfect ice cream" one instead. Also froze at the top shelf in my freezer, which is at -1.5F (previous two were done on bottom, which is around +3.2F). The first spin cycle was rough, the machine hopped around a bit and I could smell a little motor. It did require a respin, but the resulting texture was amazing, smooth, and like what I'd imagine fresh gelato to be. The recipe, however.. way too sweet for me, almost cloying, and had an almost powdery mouthfeel on the aftertaste? I'm still reading up on the science of this stuff, how much sugar would you all recommend I leave out to make this less sweet but retain the texture?
-
Tested temperatures in three parts of fridge: bottom (where I have space for the tubs), middle, and top 8hr each. Bottom average was 3.2F, middle average -2.5F, and top -1.5F. I'm not complaining about the consistency of the ice cream frozen from the bottom, it was great. I do have a tub chillin' on the top shelf now, but this time it includes the modernist ingredients so not sure it'll be an exact comparison. The range falls within line of the creami manual. Also of entertaining note, I happened to notice the freezer temp can be controlled.. the buttons are in the fridge part, and I've been staring at them for the last five years without realizing this. Or maybe I had, because I read the manual when I first moved here, set it to "0F", and never looked back. I do use the immediately adjacent buttons to defrost and quick chill stuff, very nifty feature of this old fridge. This whole experience reminds me of childhood when I'd yell across the house to mom asking here where the milk was because I couldn't find it. 🙃
-
I have it set to "Freeze" 🥶
-
I made two pints from the ninja website to test before my MP exotic gums and things arrive tomorrow: https://ninjatestkitchen.com/recipe/vanilla-bean-gelato/ and https://ninjatestkitchen.com/recipe/toasted-coconut-chocolate-avocado-ice-cream/ (without the coconut flakes) Vanilla gelato: Not sure why they call this a gelato with so much heavy cream. Anyway, the vanilla bean caviar fell to the bottom, no way to suspend, after reading here, I probably should've kept it at the 165F temp for a bit longer to thicken. The flavor of this was okay, I guess? Nothing amazing. But, good to know the machine works with basic custard recipe. The chocolate: directions say to whisk until combined.. yeah, didn't work... the base was initially seriously gross (tasted like chocolate avocado with oats). I ran my stick blender through it before freezing, and it transformed into a chocolate pudding that was delicious! The frozen result was pretty good, more like a milk chocolate flavor than chocolate. Both flavors spun with only one spin. Super smooth when squished inside mouth. When I "chew", there was light crunching.. I'm assuming those are ice crystals? I don't recall feeling/hearing that crunch noise with commercial ice creams. Will pay more attention. Both had texture that was more fro-yo or soft serve than actual ice cream or gelato. Not complaining, just noting. So far, happy with the refurb unit @blue_dolphin Wow.. roasted plums?! That sounds fantastic. When you write, "adjust with simple syrup" is that a taste thing or are you using science to match up sugar somehow? My library had the Dana Cree book so I borrowed it. No dairy/egg free recipies. I liked some of the science in the book.
-
I have an apron from amazon that I don't like, it has plastic clasps that rub against my neck, and as such I rarely wear it and have ruined so many expensive shirts (when I'd come home from work, first thing I'd do is start cooking before changing, I'm a nerd in salesmen's clothing). Looking at the recommended/influenced rough linen brand here, the aprons seem like they'd sit too low on a skinny dude, so I think I'd prefer a more traditional kind over the neck so it sits up higher. There was a link here to an eater article.. "Merci" brand has some, but all the models are women. Any of you tried that brand? Any good? Similar pricing to rough linen it seems. i.e. expensive 😖
-
I have a 7 or 8 year old foodsaver, no chamber sealer (yet?). My fridge has a quick-chill drawer with fan that will be perfect to cool things down. Let us know if you notice a difference with the vacuumed base. My wootcreami arrived yesterday, 11 days earlier than expected, and sadly I don't have time until the actual expected delivery day to play with it. Meantime I should probably order some exotic ingredients like gums and add ins I suppose - take the easy route and go with the modernist pantry mixes, or pick up individual types mentioned in MC and member Paul Raphael's web log?
-
I was wondering about air bubbles, but before getting to this, do you think the container lid will be strong enough to take the vacuum? It seems too floppy/flimsy and would suck down, deform, or even crack. Maybe pull a vacuum in a different container, then gently pour into the creami one? In reviewing many recipes last couple days, it appears the blender is used quite a bit, and my experiences with a vitamix yielded a lot of excess bubbles and foam. Wouldn't this cause the resulting frozen treat to be full of air which ultimately leads to ice and unpleasant texture? After reading about using a vacuum sealer to pull out the bubbles a couple weeks ago on this forum, I tried it with my food saver mason jar hose thing on some blended veggie soup**. The contents in the jar expanded very quick and could have resulted with hot soup everywhere, fortunately, I stopped it in time. Use caution. Oh, and thank you for the idea that one can use the foodsaver hose with other lids besides just the mason jar attachment. Can't believe I didn't think of this after 7 years with this thing haha. 🤦♂️ I can use a larger jar, poke a hole in the lid, stick in a grommet, and all's good. Thanks!! **all remaining veggies in fridge near wilting get boiled in water then blended into a hot smoothie sort of soup thing, called green soup, brown soup, or camo soup mmmmm


