

jedovaty
-
Posts
445 -
Joined
-
Last visited
Content Type
Profiles
Forums
Store
Help Articles
Everything posted by jedovaty
-
Hah, didn't realize the gasket could be removed thank you! There was a little moisture, and a little schmutz, cleaned right up. However, the smell remained, and I took a closer look into the holes along the top side, and sure enough, there was growth inside. Toothpick got some of it out, and since I don't have a waterpik, I aimed the faucet on spray mode at hottest into the little holes, wiggling the paddle the whole time. Also soaked in hot, soapy water for a few minutes, eventually the toothpick got more gunk out. Can't tell if any remains. I rarely use bleach to clean things, and may consider it after this dries. I suspect some lingering smell may remain if it was absorbed by the plastic. On closer inspection, it does look like the lid can be disassembled, however, it is pretty tight and it may be a one-way install that'll break. Curiosity may get the better of me since replacement lids are available, currently debating whether it is worth it given how detailed a cleaning needs to be uggh. What I found fascinating: there are unbranded, knockoff lids available for same cost as the official lid. Huh. Thanks again
-
Found a video where the dude uses water through the side ports and has the paddle half-way open. It's for a deluxe model, my lid is from the first gen units so I'm sure it is similar. He uses a waterpik for extra power if necessary. That gives me a place to start. If I manage to take it apart, will share.
-
I appreciate the response, and sorry for the confusion. Removing the blade is not my issue. The lid with the paddle which holds the blade is what smells really bad. When I have cleaned it in the past, I would run a soapy sponge through the hole, then block the hole and fill with hot soapy water and open/close the latch several times, and clean the whole thing with a sponge as well. Then shake out and let air dry. It smells pretty bad. Since it has moving parts and a tensioned action, there should be a way to disassemble it. If no one knows, I guess I'll give it a go and if it breaks, oh well, I don't want to use this for now due to the smell. Could those of you who use the unit on an infrequent basis take a sniff of the lid and see if it's tolerable or gross? The nooks at the shaft are also bothering me.. I found a few repair videos (here's an example quick teardown) and am going to try to take it apart and see if maybe my unit had different tolerances such that stuff got up inside (I bought a refurb unit).
-
I haven't used mine in a few months. Apparently I didn't clean the lid well enough, it reeks of mold. I can't figure out how to take it apart, shining a flashlight, I don't see anything but clearly there are some nooks and crannies. Ideas? The surrounding nooks around the shaft seem to be prone to collecting stuff as well, I used a toothpick and guess I hadn't cleaned it well enough before putting it away last time. Yuck
-
Haha great Recently and coincidentally I was reading up on dried chili recipes and the idea of possibly mixing up pineapple juice with some of the dried chilies instead of citrus popped up. I wish I had more time to play.
-
I wonder if done long enough, one might still get low-temp caramelization of the apples, like with garlic or onions. Different product from apple butter of course, and might be an interest experiment.
-
This is how I grew up eating it, pealed and cut into ~1/2" cubes, then added with other veggies especially in chicken or turkey soup. Also pickled - I recall Alpine Village (RIP) carried some jarred version of julienned, pickled celery root, unsure if other euro markets offer this. Really good as a snack or side to fatty foods.
-
I've made non-wheat pastas with my older philips pasta maker. It is challenging but doable. There are facebook groups dedicated to home pasta making and those folks might be able to help? I don't have facebook, I'm not sure why the groups are more popular than forums which are so much easier but anway... I have been able to gleen some info from them browsing. One in particular is pastafanataholics, which is a collab between the italian company Pastidea and some home cooks: https://www.facebook.com/groups/767285674024266/ There are also german and french groups dedicated to it. Pastidea is an italian company and I'm sure they might have insight how to create corn-only noodles, you can even reach out to them directly, in my experience they have always been helpful but there is a little language barrier. The ingredients suggest it is simply ground corn, and as suggested above it's possible there are trace other ingredients. However, I think their success is likely to do with different methods of processing which would allow it to correctly bind, perhaps specific pressure, temperature, steam, etc. If available to you cheap, you might try using masa, since that corn has undergone nimxtamalization (and might make it easier to bind... ? If you are okay doing so, a little xanthan gum or perhaps something like ground chia/flax might be helpful, too. I once made noodles from wheat flour and avocado, as an eggless-egg pasta, maybe the avocado could be used with the corn flour, too. Lots to experiment! If you do learn something, please get back to us here, I'd be very curious to know
-
In 2017 my local TJ's had Pickle Chips. These were amazing, and then I never saw them again. They showed up this past week! I bought it to try - same flavor, although the chips were fried a bit more boldly. Despite this, I'd recommend. They also have begun carrying some horseradish ruffled chips, these are addicting. Also recommended! Sadly, mine did not have freeze dried mangosteen - only figs and mangos, and these are good.
-
HI. I tried the Korean Beefless Bulgogi from the freezer section for laughs (been on a vegetarian kick most of this year now). The overall flavor is great, even has this high-heat seared taste to it! However, the texture was rather odd when I gave it a poke: a springy, spongy mass, with an unexpected familiarity to it. As I prepared to take a taste I somehow instinctively gave this peculiar thing a couple shakes and then slowly came to my now terrified realization that I've recently (and certainly daily) handled something with such a texture before. Anyone else dare try it?
-
Check out the USA made Vollrath heavy duty mixing bowls, available in local restaurant supply shops in the US (e.g. Chef's Toys). Not quite as yikes pricing as the M-B bowls, though still pricey. You don't get that extended lip to help hold the bowls, however, the quality of the SS is rather luxurious (never thought that would be a description for cold metal). I treat myself to one every couple years. https://www.vollrathfoodservice.com/products/smallwares/kitchen-essentials/mixing-bowls/heavy-duty-stainless-steel-mixing-bowls
-
Thank you! Are you just using the starter powder each time, or making your own with existing culture? That's what I'm trying to figure out, I've seen instructions, but I'm not sure it is worth the effort and just keep it simple with purchased starter.
-
What sort of bug/starter/inoculation are you using?
-
Wow @franci, awesome! It's on my todo, since I recently discovered and enjoyed the stuff (grocery store options, don't judge me). Just need to find the time And looks like a great way to finish off all this buckwheat I bought a while back haha
-
I got a new fridge and replaced the OTR microwave with an exhaust hood (I went to great lengths to do this.. did a roof replacement and added the ducting for the exhaust, very expensive toy!). Happy with the exhaust hood, it is louder than I expected based on the decibels (extreme air) but it works and now finally I can burn sh.. ...tuff without smelling up the house!
-
Depends on the brand.
-
A friend asked me to try to make a frozen treat with Yakult. Quick search online shows others have used this ingredient wit a custard or cream base, and traditional ice cream makers but no ninja. I thought I'd try it straight up 😁 The ingredients did me a concern, since it's water, couple types of sugar, skim milk, cultures, and some flavor - i.e. this is going to be very close to ice, and I think the instructions state not to blend pure water. 😇 But.. I had to try, so in went several of those plastic bottles to fill up the container and froze it for 24 hours. The first spin made so much noise, so so much. Four spins later, it was still somewhat powdery, but a spoon mixed it up well. It had a citrus-like flavor, gave me a searing brain freeze almost instantly, and a very thin mouthfeel (actually, it was very close to snow, though I haven't seen or tasted snow in over 10 years). Not recommended. I am not sure if it makes sense to pursue this further.. I can add some inulin, fat, emulsifiers, gums, different sugars, maybe follow the Underbelly strawberry sorbet example, or I can do a little custard or mix with some heavy cream, but I think the latter will take away from the yakult flavor. Worth a pursuit? Thoughts? My next idea is to freeze some greek yogurt. Or, maybe mix some jam into greek yogurt (or euro-style yogurt) and see what happens. I'm enthusiastic about testing things, though generally slow, so if someone beats me to it, please share results

-
It could be something with the motor itself, the motor controller, or a capacitor - if you have access to the control board in it, see if any capacitors may be inflated. That said, I had unusual speed and heat issues with my 10+ year old unit and discovered the outlet and/or circuit was problematic. My unit worked great once I plugged it in elsewhere on a different circuit (i.e. routed to a different breaker). i.e. try a different outlet that is separate from the one you typically use? Of course, the suggestion to send it in to Bamix may be good, too I probably would do that with mine since I have a long-shafted one.
-
Ooohhhh that's what happened to @Maison Rustique's drumsticks! 😁 Reference: https://forums.egullet.org/topic/166794-how-to-turn-chicken-legs-into-chicken-breasts/
-
How about ground chicken (debone, lightly freeze, food processor)? From here, all sorts of other options: mix with other ground chicken or protein (turkey, shrimp, etc), chicken skewer thingies, burgers, meatloaf, sausage/chorizo, ravioli/gyzona/potstickes/dumplings, mapo tofu, stuffed peppers/cabbage, mix with eggwhites to make a raft for consomme, etc.
-
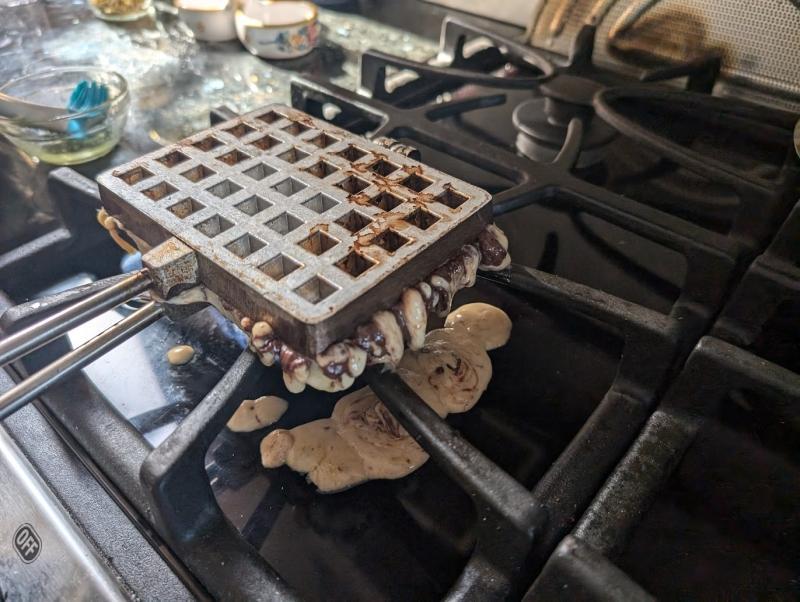
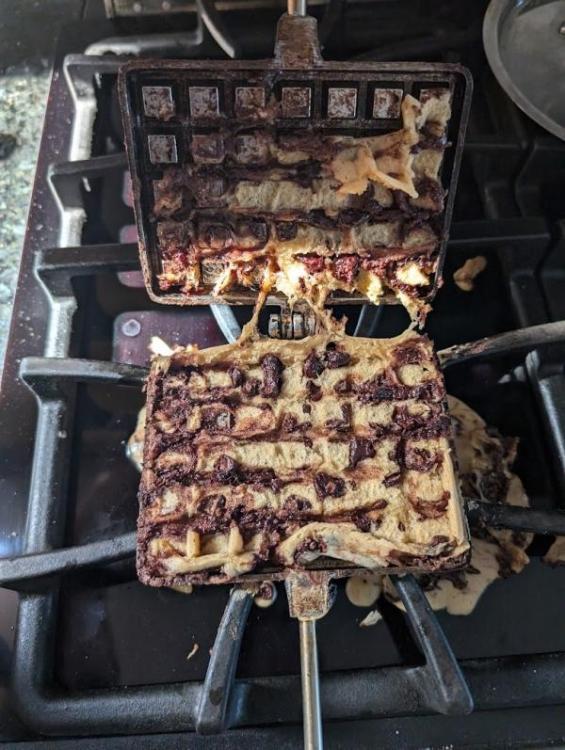
Long story short, I attempted to make some sort of chocolate chip wafflookie with leftover sourdough starter. It seems whatever powers that be did not approve this for me. Good news, it didn't actually stick, a chopstick wedged everything out. I was harmed in the making of this waffle as well, burned my fingers and tongue. Ah, well, what's new, right?! 😛. I plopped the rest of the dough out onto my cast iron griddle in a fit of disappointment, and made a large pan-cake thing. It did not taste good. Maybe next time.
-
Didn't an american company purchase duralex just before or during the pandemic?
-
Hi: I tried a couple more recipes from Salt and Straw book that was gifted to me: strawberry balsamic and black pepper, and strawberry sorbet. For SBB, I swapped out the milk base for coconut base, and replaced honey with sugar. It tasted like the strawberry push pops I had as a kid in the 1980s omg what a blast to the past! The Strawberry Sorbet calls for cilantro/coriander essence/extract, which I have no clue what this is so I added a few twigs of natural organic fresh home grown urban raised evil sourced unfair wage [free labor] non-d.o.p. cilantro. This was delicious.. a variation of strawberry with mint! The book itself is poorly written. They don't list all the ingredients in the ingredients side bar of each recipe, and they are inconsistent with when they include parts of a recipe or move it out into its own paragraph. It's like we have to read and comprehend the recipe, can't just skim and know what to do. Bah. That said, results are tasty, and they all keep a soft-serve texture after undergoing the ninja treament, maybe from all the corn syrup. No pictures, sorry, I just ate each straight out of the cream-i jar and it's ugly. If you can use your imagination, SBB was light pink with streaks of jam, the other was dark pink, borderline maroon.
-
@weinoo Nope and nope. The joy and wonderment of growing up as a child of immigrants. 😁 PS: I also enunciate the L the salmon and call lettuces salad 😈
-
Huh. I grew up calling it "spaghetti sauce", before ever knowing that spaghetti actually referred to the noodles. I was child of immigrants, and even today as a burgeoning crotchety old fart, people feel the need to correct me. Not sure why. Afterall, Hector, a mildly famous chef from the early 20th century, might agree with me? Check out all the spaghetti sauce options in the middle! https://digital.lib.uiowa.edu/islandora/object/ui%3Aszathmary_1732


