Bentley
-
Posts
301 -
Joined
-
Last visited
Content Type
Profiles
Forums
Store
Help Articles
Everything posted by Bentley
-
I have used a large cardboard box with a cut out n the back for an air filter and a box fan behind it to pull air out of the box. Worked great.
-
I would think the Savage Bros. Firemixer 14 would do the job.
-
When I enlarge the photos, it doesn't look to me like it's a ring around a solid bonbon. The part below the ring looks wider at the top than the part above the ring and the lower part also seems to be curving inwards where it meets the ring. . To me, it looks like the top part is a separate tier. Maybe it's an optical illusion. Like I said in my original post, I can't even figure out exactly what I am seeing, much less how to recreate it. From what I can tell on his Instagram, Giorgio doesn't ever seem to answer questions about technique, so this one may remain a mystery.
-
Which meter did you purchase and are you happy with it?
-
Interesting things to try. I need to up my creative thinking...you guys are amazing. By the way, @gfron1 I saw your Valentines Day chocolates on instagram. Really nice. I see the Asian strainer made a comeback.
-
Interesting possibility. My first thought is that the ring would either melt into the shell ( I assume it's a thin band of white chocolate colored black) or there would be difficulty in getting the bonbon to release from the mold. I also wonder if there owuld be issues with the ring falling out or dislocating when you flip the mold the remove the chocolate to create the shell.
-
Here's another one that I am curious about. I am not even exactly sure about what is going on here. are there two separate red pieces separated by that black ring or is that black ring just wrapped around the shell?
-
I'm curious what Milk and Cookies is.....
-
You can get that distinct line by putting more pressure on the inside of your finger than the outside We also know that Susanna is not opposed to tedious designs that take multiple passes - just reference her New York, NY bonbon from earlier in this thread where she did one brushstroke each of six or so colors.
-
That looks to me to just be overlapping finger swipes . Finger swipe one color, let it crystalize, then swipe the next color, etc.
-
There are so many factors that go into successful CCB use. Start with clean molds. I clean my molds with hot soapy water then polish them with cotton balls and a little alcohol but there are a lot of different approaches to cleaning molds. I temper CCB every time I use it. I take it to 45C then cool it in the freezer or in an ice bath down to 28C (agitating it frequently along the way), at which point it is ready to spray or paint. I learned this technique from Melissa Coppel. I keep the tempered colors in a warmer to make sure they don't get too cool before use. If they do get below 28C, I use a heat gun to bring them back to temp. I let the CCB fully crystalize in the molds at room temp (or in the fridge briefly if the room is warmer or more humid than usual). There should be no shine to the CCB - it should be completely set and all matte. Then I shell with the chocolate. A good temper on the chocolate is important too, so that the CCB and the chocolate will contract together as the chocolate crystalizes. Proper crystallization is also important. I leave the molds out at room temperature until the chocolate starts to set and begins to lose the gloss of melted chocolate, then it goes in the fridge to finish. Takes about 5-10 minutes in the fridge. You can tell when it's ready by looking at the underside of the mold - the shell will have the appearance of having pulled away form the mold.
-
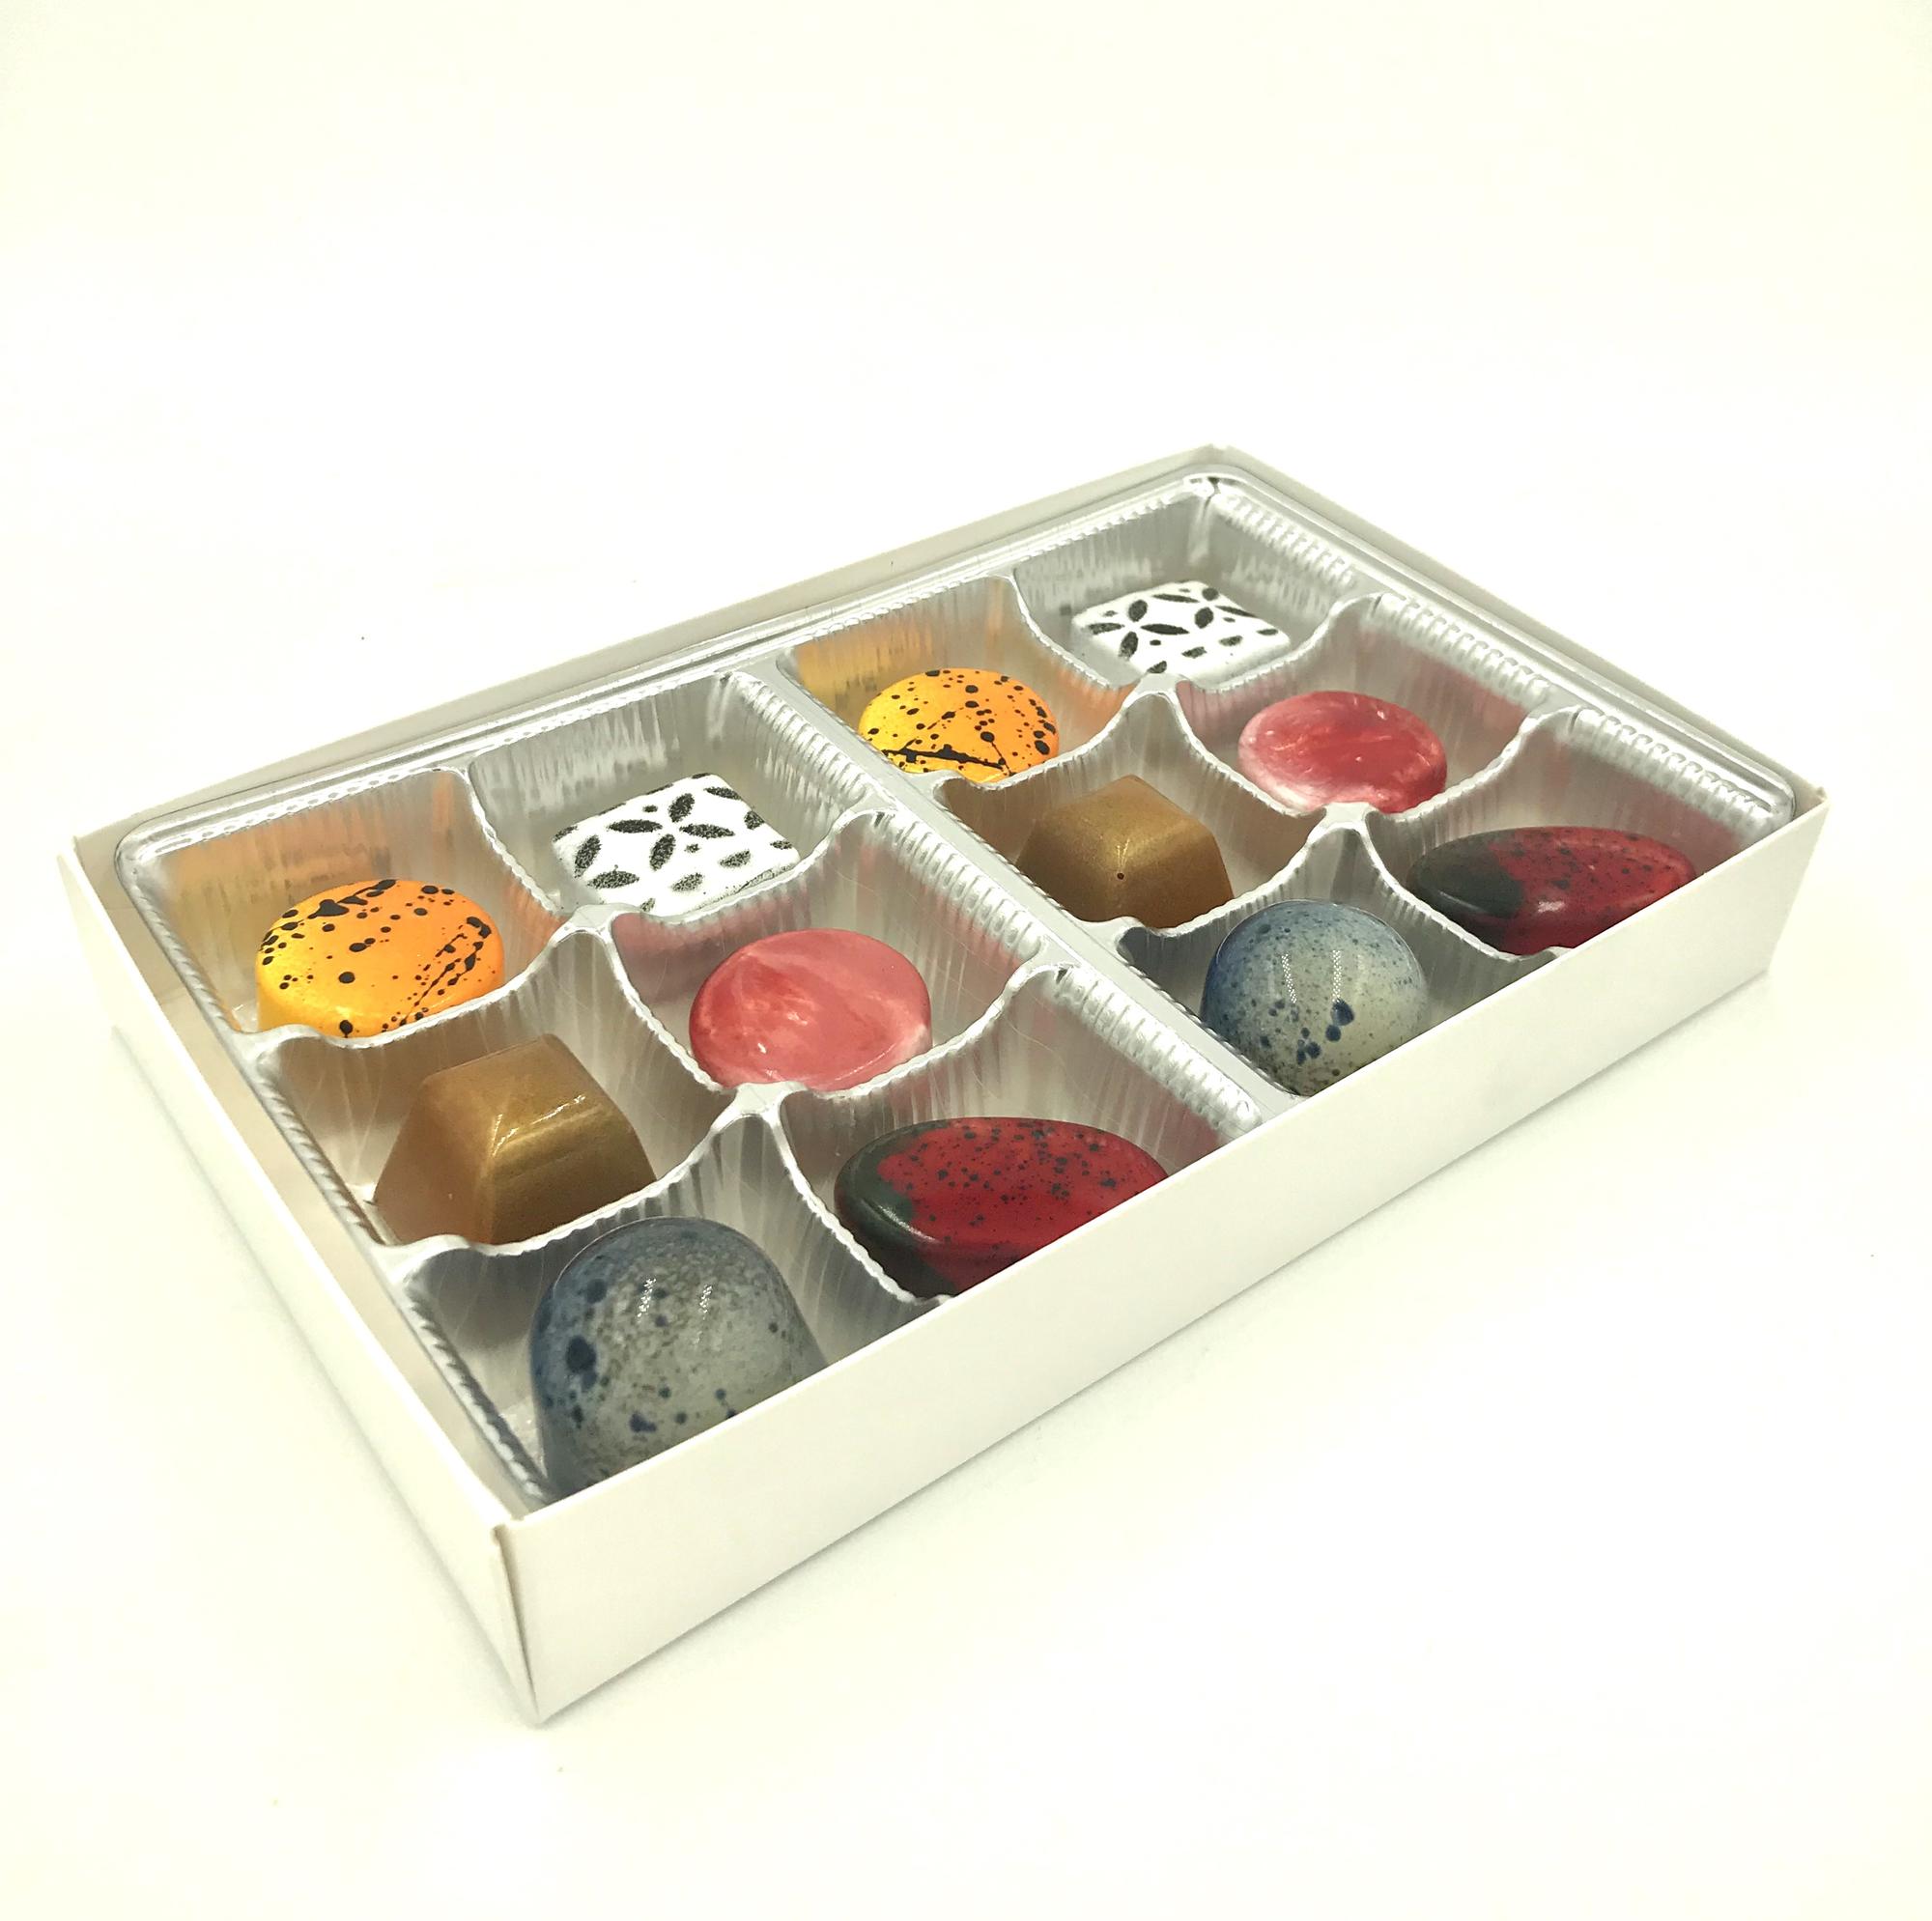
Hope these are forum-worthy! Flavors are Passionfruit, Cookies and Cream, Hazelnut Latte, Raspberry mint, PB&J and Strawberry Vanilla. Made these all in one day....could never have done that without my EZTemper.

-
Rob has it right....but here is a video of Susanna Yoon at Stick With Me Sweets in NYC making these Bon Bons from start to finish...the painting is at about 0:46. http://www.instyle.com/videos/stick-with-me-sweets-how-to-make-bonbons
-
It is a cut-down barrel from a ballpoint pen. The original video is from the instagram of Salvatore Martone - pastry chef at Joel Robuchon in las Vegas.
-
I am curious if the quality of the Chinese polycarbonate molds is on par with the Chocolate World and similar molds?
-
Hmmm. The coconut oil I saw at Costco was unrefined. I need to look again I guess.
-
Molded and Filled Chocolates: Troubleshooting and Techniques
Bentley replied to a topic in Pastry & Baking
Would love to see a picture of your molds before you attempt to cap them. Then we could see the level of your filling. Also, are you letting your filling set sufficiently?I also second what Kerry said: you want the chocolate at the highest possible working temperature so that it is as fluid as possible. Use as little chocolate as possible to cover all the molds then one quick scrape. Also, make sure you bring the molds back to room temperature before capping them. If they are coming out of refrigeration, they will be too cold to cap properly, and the chocolate will begin setting before you have a chance to get it over all the molds and scrape it. It also appears that your caps are not bonding with the shell. This could cause leakage and shelf life problems . You can use a heat gun or hair dryer to warm up the surface of the molds a little bit (but not enough to melt or untemper the shells) before capping. This will allows the shell and the cap to bond and contract together. -
If you look at the last pic, it appears he is putting color over milk chocolate as well. I don't know how you could do the dip and swirl technique and ensure another color under the gold. Here's another view:
-
The one I'm using is called "Gold" from the Jewel Collection.
-
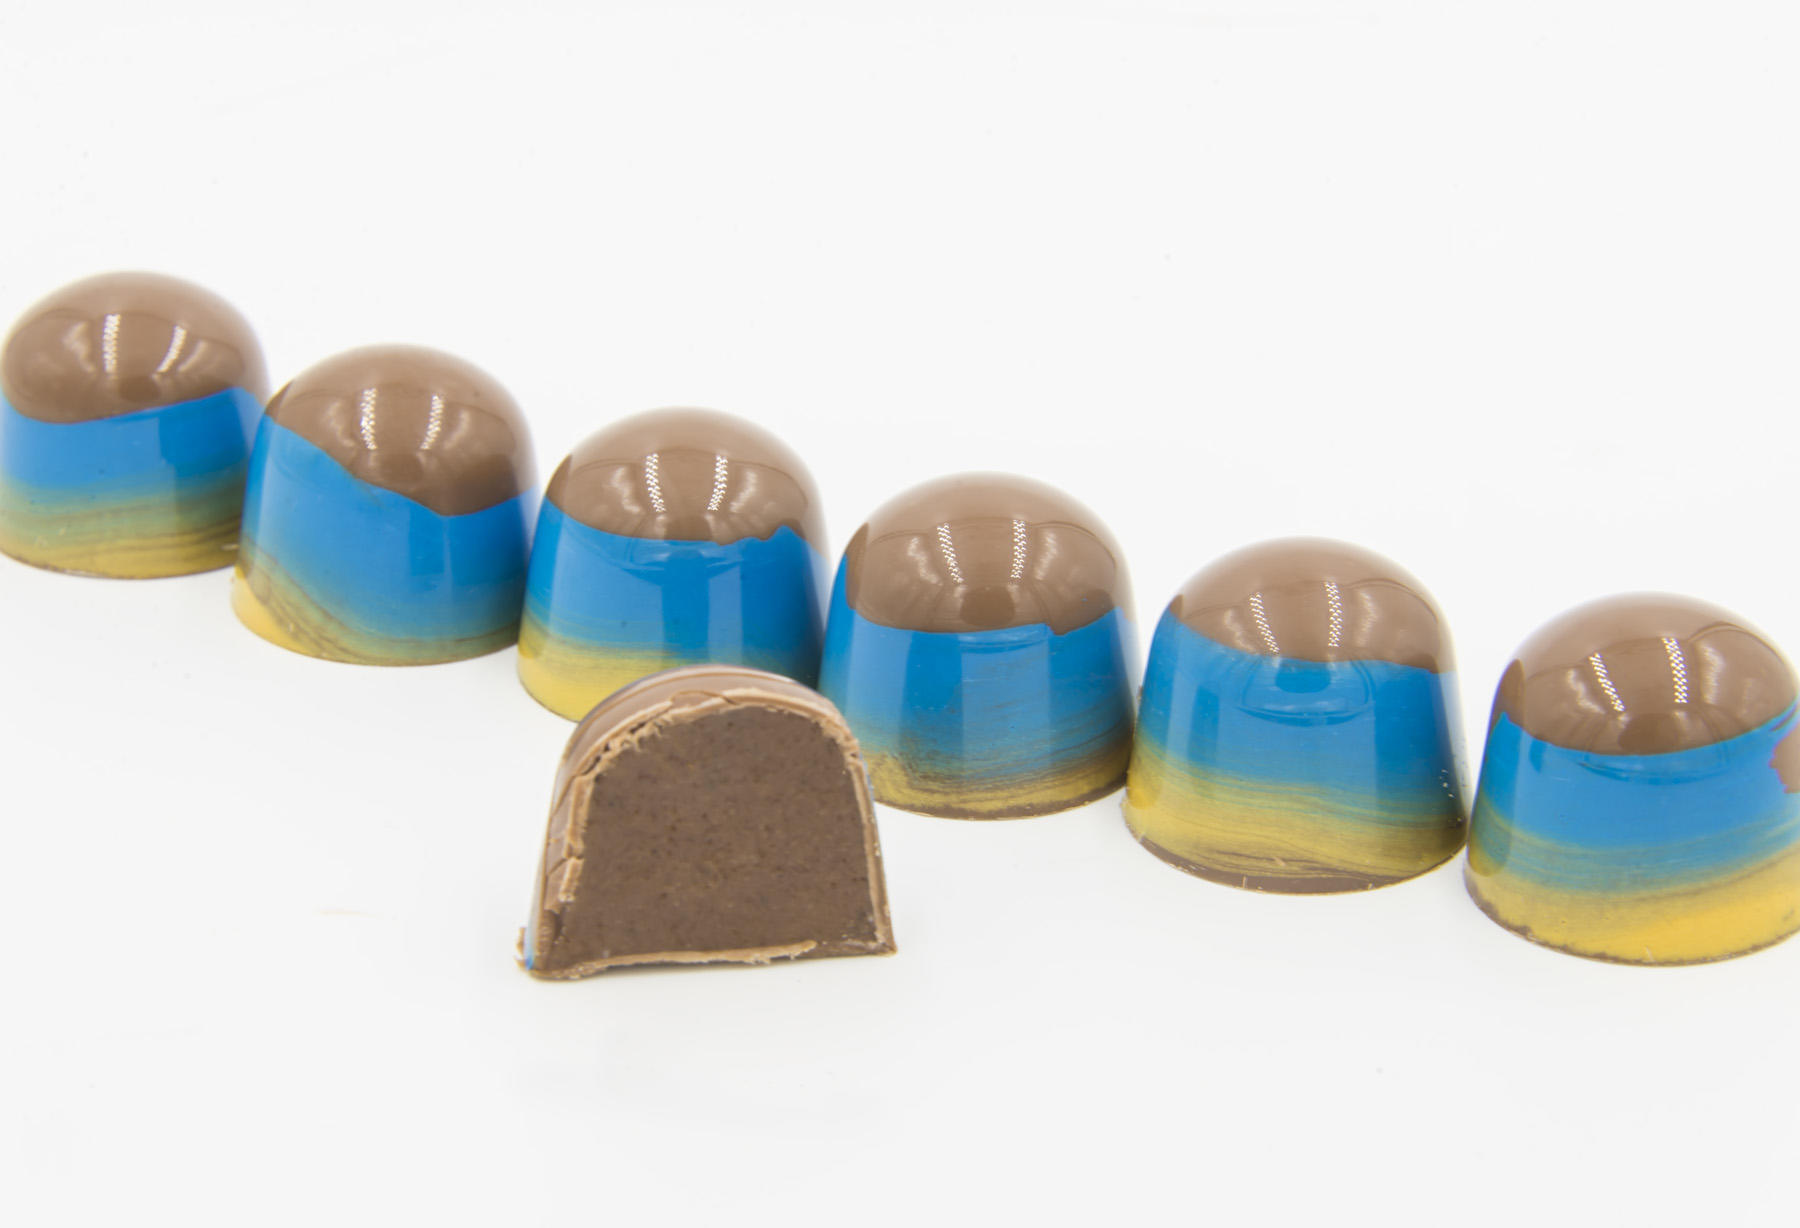
So you think he's dipping the truffle in chocolate, letting it set then dipping in a swirl of colored cocoa butters? Also, how come my gold cocoa butter (from Chef Rubber) is never that metallic and shiny. It comes out looking more yellow - as in this picture from a recent bonbon run:

-
I figured it had to be something like that...I don't know any other way to do marbling. Do you think he is using different colors of white chocolate? I guess you would pick a base color, then layer up the additional colors on top and dip using one of those dipping forks that had a ring at the end.
-
I have a new one that intrigues me. Giorgio Demarini from Roselen Chocolatier in Peru does these amazing marbled truffles in a variety of color schemes. What's your best guess as to the technique. The first one almost looks handpainted to me. The others look dipped. Not sure if it's colored chocolate or cocoa butter. Is it as simple as just drizzling all the colors on top of your container of chocolate and then dipping into it?
-
EZtemper - The Help You Need to Achieve Perfectly Tempered Chocolate FAST!
Bentley replied to a topic in Pastry & Baking
I guess it's just my nature to seek precision.....it's a blessing and a curse. -
EZtemper - The Help You Need to Achieve Perfectly Tempered Chocolate FAST!
Bentley replied to a topic in Pastry & Baking
Not to derail this thread - maybe La Chocolatiere needs its own thread - but how precise is the thermostat? My complaint about my mol d'art melter is that it's hard to be precise when setting the temperature. If I want 32C, it's hard to know if I am getting 31, 32 or 33. Given that the La Chocolatiere costs a lot less than the Mol D'art, I am guessing the thermostat is not any better. Am I correct? -
I know Tomric has bulk packaging for storage. See if this is suitable for your needs: http://shop.tomric.com/Category/36_1/Production_Storage.aspx