

martin0642
-
Posts
88 -
Joined
-
Last visited
1 Follower

Recent Profile Visitors
2,680 profile views


-
I've been digging around a it more (mostly to avoid doing actual work...) and it seems that..... When we temper chocolate properly; we should only have Type V crystals in there. However - as chocolate cools in various machines/bowls etc....it will likely cool/heat unevenly. This is what can lead to the formation of other crystal types. So basically...as we already know...stir stir stir stir....no really...stir it. I'm guessing even the best home tempering machine will be prone to uneven temperatures, at least under some conditions (ie: Jim D's situation above). Also - as we also know.........chocolate has yet to read any of the chemistry books and will behave exactly as it chooses, no matter what the "science" says
-
I think there's more than one thing going on here - as Keychris said, if you use a heat gun then you are melting out all the crystals in a very localised area - so that thins the chocolate out, stirring melts more but the majority of the chocolate is still in temper/contains the desired crystals so overall it's in temper (as long as you stir well of course). But alongside that (and this probably explains the tempering machine better) - as I understand the science, even well tempered chocolate contains some of the other crystal forms. Remember, we can temper chocolate with just 1% by weight of seeding cocoa butter (ie Mycryo, Kerry's splendid cocoa butter machine ). Not every single crystal in the finished product will be the Type V crystals. Whilst the other forms won't leave it setting with a sharp snap - they will contribute to it thickening. They also melt out easily at the higher temperatures. I may be entirely wrong here....but that's my understanding of it!
-
That's the traditional method of tabling I referred to.....that would be my choice if you're going to table (as opposed to cooling it all and then using a microwave).
-
I'm slightly confused by the method - if you're going to table it then I wouldn't put it all on teh counter, tabling it and then reheating in a microwave sounds like a recipe for issues. Pouring about 3/4 to cool by tabling, then add it back to the molten chocolate in the bowl. Reheating to 29 would be fine in theory....
-
Nope - compound "chocolate" doesn't require tempering at all. (Although calling it chocolate is debatable.....chocolate flavoured maybe...but that might just be me being a chocolate snob )
-
The possible problem with using an IR thermometer, regardless of how accurate it is, is that it only measures surface temperature. With chocolate, that's fine if you have stirred it enough....but using a Thermapen (way more accurate than just about any IR) I've seen temperature differences of several degrees between the top and bottom of a bowl or the middle and sides. That difference could be a tipping point in some situations. None of that means you can't use an IR of course; it's just something to bear in mind
-
I used MyCryo extensively (almost exclusively in fact), due to the small batches I was working with (and the tiny kitchen not lending itself to tabling). My procedure was as follows: 1. Melt to 45 c 2. Cool to around 34 c - I have heard that Mycryo needs the temp to be precisely 35 c but that hasn't been my experience at all. As long as it's 34-35 it seems fine. 3. Make sure it's well stirred and then add 1% mycryo by weight 4. Stir stir stir...as per any chocolate work... 5. Test temper - almost invariably fine. The only thing that ever threw it off was ambient temperature or humidity. When casting or dipping, I would sometimes chill in the fridge briefly to remove latent heat as Kerry mentioned, but again...depended on ambient temp to some degree. I maintain the temperature of the chocolate by using a heat gun every now and then; never really checked temperature after I got used to it, but I did re check temper before doing large (relatively speaking)batches. And lots of stirring - always. I would say possible issues are - as Kerry and Chocolaot have suggested, also playing with temperature up and down too much, not stirring enough and possibly ambient temperature.
-
WOW - that looks amazing...definitely going to try that idea! One question though....how did you get the clean stripes? Did you lay acetate in teh mould and then spray...or spray and then wipe the stripe in? Or option C...?
-
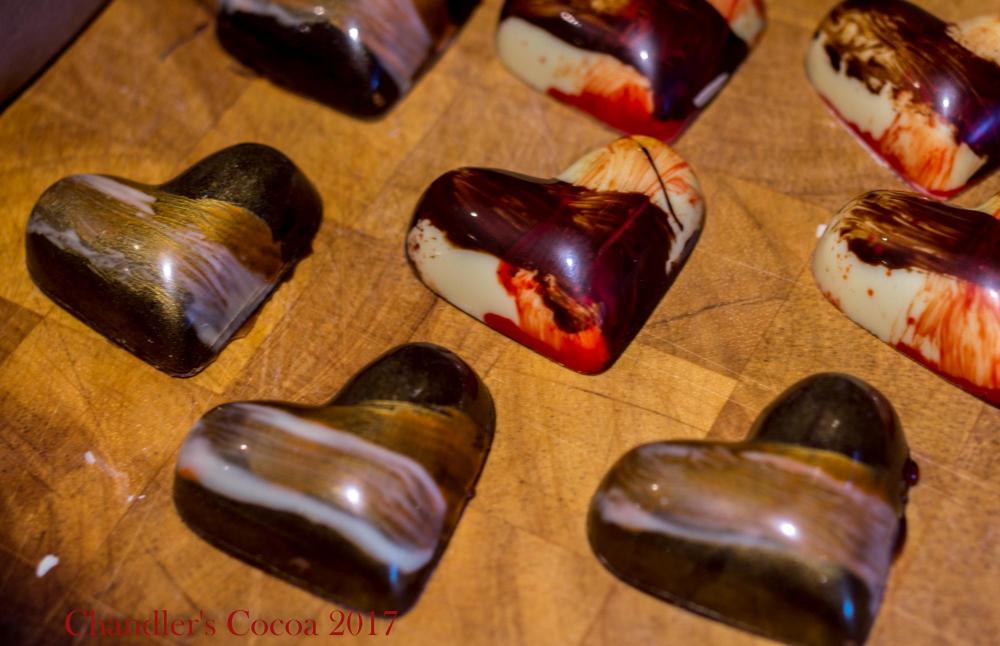
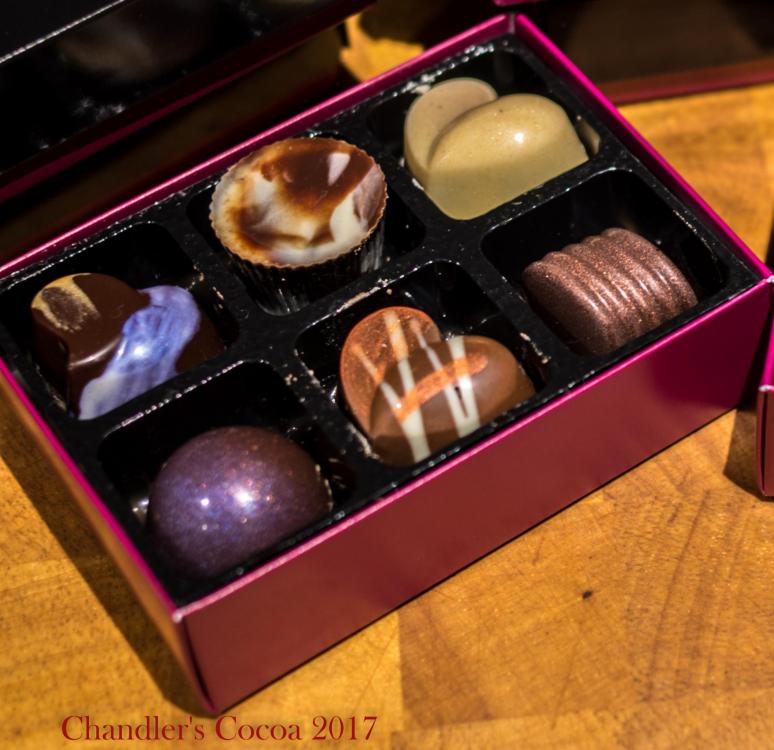
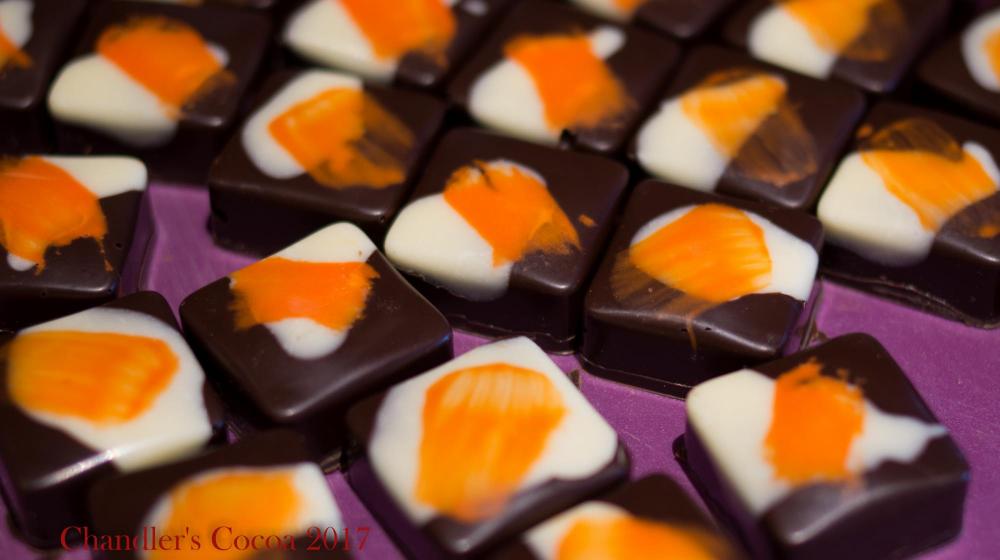
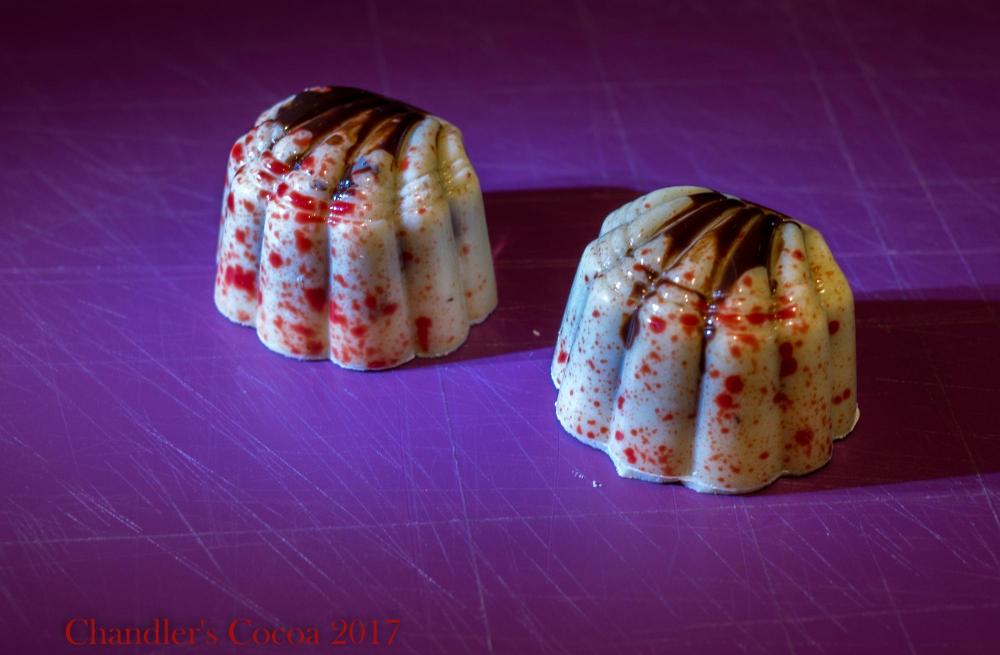
As ever, I am stunned by the artistry of people here - just beautiful. So...figured it was time I put some of my semi-amateur (semi because I do have a chocolate business :)) efforts up! Large Valentines Hearts (double normal size) - Dark ones are a 65% shell filled with a little Orange & Balsamic caramel (William Curley recipe) and a firm dark chocolate ganache infused with a little orange zest and cinnamon. White ones are a Casa Luker white chocolate (yummy!) filled with a homemade hazelnut gianduja. The boxed chocolates are some of my Valentines selection - Top row = 70% dark heart with a Vanilla Sencha ganache, Dark and white cup with a fresh coffee ganache, White heart with a morello cherry pate de fruit centre (blended to make it pipeable) Bottom Row = 70% half dome with an orange & balsamic caramel, 45% Milk heart with a hazelnut praline centre, 65% dark shell with a ginger caramel centre (the caramel is actually a dulce de leche, blended with milk chocolate and pieces of preserved ginger) Then - Dark squares decorated with white and orange cocoa butter - filled with an Orange & Clove ganache Finally - White & Dark chocolate shells, filled with an Apple & Cinnamon ganache (big favourite for many people!) I have to thank the many people who post helpful tips on this board for helping me to be able to do any of these chocolates
-
 Hi all... I'm looking for a place to get small samples of my dipped/molded chocolates tested for aW and possibly shelf life and microbiological activity (depending on cost). Does anyone have any experience of sending off samples to such places? I had an issue with mold in some vegan chocs I made recently, I think I've identified the issue but I'd like to start testing batches if possible. I'm a very small producer at the moment though, so cost is a factor.I simply can't afford hundreds of pounds... Yet :)
 -
My pleasure CacaoC As noted above (somewhere!) the guar gum or other stabilisers made it impossible to work with....it stuck to both the mould and the piping bag and refused to let go of either. I had to use scissors to try and get it in the mould...wasn't worth the effort! Otherwise - that Aron-d looks perfect. You may want to use a little more cocoa butter as the milk I used was only 50% water...and the fats are important. It's a 'cleaner' tasting caramel when it's done because there's no dairy fats or proteins. But it works well enough and doesn't really taste of coconut. Do NOT add salt..the coconut adds a slightly salty taste anyway. Happy cooking!
-
Absolutely - happy to help....it drove me mad getting a vegan caramel to work! 1. Add a few drops of lemon juice to the sugar and stir it in with a fork to distribute it. 2. Get a large, heavy bottom pan on the hob and start heating it - when hot (but not stupidly hot!) add a third of the sugar. Shake it around and stir it on med-high heat until it's almost all melted. Continue adding sugar (I do it in thirds) and stirring until it's all melted and a nice dark amber colour. 3. Meanwhile - heat the coconut milk - you'll need to stir that as well because it'll be lumpy to start...that will change as it heats. Do not boil it (you'll lose too much water). Just heat until bubbles start to appear. Try and time it to hit that point at the same time as the sugar is done (you can always take the sugar off the heat briefly if need be) 4. Take the sugar off the heat (or turn to very low heat if you have gas) and deglaze: pour in the heated coconut milk *slowly* - stirring vigorously. If you start to get lumps...slow down pouring and turn up the heat a little to melt them out. 5. Still stirring and still on low heat...add in the cocoa butter in small pieces. 6 Take off the heat - stir some more - pour into a bowl and leave to cool (I use cling film/saran wrap over the bowl to help prevent a skin forming) Points to note: - Some recipes say you must NOT stir. They're wrong. A wet caramel should not be stirred as it may cause crystallisation. This is a dry caramel and should be stirred to prevent burning and lumps. - Use white sugar, if you want it vegan use beet sugar or any that is not refined with bone char..must be white sugar though. Brown sugars and some unrefined sugars interfere with caramelisation. - With this small an amount of sugar you can probably put it all in at once in a big enough pan...I find it easier doing it in thirds. The coconut milk I used was Biona organic - 100% coconut milk...no additives (and about 50% water). If you ind it's too stiff afterwards you can use other milks or water to thin it out if need be. If you're going to pipe it into moulded chocolate shells - be patient...it's not *quite* as user friendly as dairy caramel...but it's workable. Hope that helps!
-
I use a vegan coconut milk powder from a company called Real Food source - it contains: coconut milk, maltodextrin (from corn), tapioca syrup (no idea why) and cyclodextrin (dietary fibre). Works beautifully
-
For anyone who dips into this thread lookin for a recipe - it's here
-
So.....just thought I'd report back on *finally* having a success with vegan caramel! Many thanks to all of you for your contributions..they were a HUGE help. Final working recipe: 190g Sugar (from sugar beet...not cane....cane sugar is refined with bone char and therefore not vegan) 97g Coconut Milk (plain full coconut milk, not just the cream. Finally found one with no additives at all) 40g Cocoa Butter No need to add salt as the coconut milk adds some saltiness anyway. I found it's REALLY important to watch the coconut milk as both heating that and then adding it to the dry caramel releases a lot of water and you can get a very thick caramel much more easily than with a dairy version...which is of course a nightmare to pipe into shells. However - it worked!! Yay! Also in the same week i cracked making my own vegan white chocolate using coconut milk powder (in a proper grinder I hasten to add....simply combining the ingredients doesn't work). It obviously has a coconut taste but not overpowering and way WAY better than commercially available vegan white chocolate - which is just nasty stuff I find.


