Josh71
-
Posts
131 -
Joined
-
Last visited
Content Type
Profiles
Forums
Store
Help Articles
Everything posted by Josh71
-
What would be the temperature and duration to have this "steak like short ribs"? Is it that 55C for 72 hours?
-
Thanks for all the feedback. On the double cooking method that I use, the first boiling is very short and I don't think that would cook the tail meat. When I take the meat out, it was still translucent and uncooked. I think, next time I would try to get smaller one (600-700 grams). And for the timing, I would try 60C for 20 minutes. Hopefully this would be better! http://www.seriouseats.com/2016/12/food-lab-complete-guide-to-sous-vide-lobster.html At 140°F (60C), your lobster becomes as firm as if it were cooked via traditional methods, though it still has the flavor advantages offered by sous vide. This might be a good temperature if you're serving a dyed-in-the-wool New Englander who insists on lobster the old-fashioned way. It might well convince them that sous vide is something special here. As for timing, it takes about 20 minutes for the tail from a one-and-a-half-pound lobster to cook through, though anything up to an hour, or even a little longer, won't hurt it much. Cook it too long and it'll begin to suffer, turning mushy.
-
I have been trying few times to make a simple lobster tail dish, but all were not good. The lobster tail was still though (chewy?) and worse, it was tasteless (not enough lobster taste). Here how I made it: 2 fresh still live lobster, each about 800 - 900 grams in weight To get the tail, I boil the live lobster in hot rolling boiling water until it stop moving, about 3 minutes. Yes, I don't dare to kill it instantly with knife. Then immeditaly put it under cold tap water until it is cold to handle (and I don't see steam out of it). The lobster meat would be still quite raw (un-cooked) this way, after boiling. Take all the meat, put the lobster tail in vaccum bag with a little bit unsalted butter. The lobster claws meat were put in other bag, but sous vide together. Sous vide (Annova): # first experiment: 55C for 30 minutes # second experiment: 60C for 45 minutes Before serving, I would reheat by dipping in warm water (about 40 - 50C) for a few minutes. Put some sauce in it, simple garlic butter sauce. That's all. Me and my wife were not satisfied, the tail were though (chewy) and kind of tasteless. No problem with the sauce obviously. But when compared to the lobster claws, the claws were good! The second experiment at 60C for 45minutes, the claws texture were nice and very strong lobster taste. Any idea to "correct" this lobster tail? Different sous vide temperature / time? Different technique? Should I choose "smaller" size? The place where I bought the live lobster they also have 500 - 600 gram and 600-700 gram in size. I read that bigger = thougher (chewier)! Next Valentine Day would be the third attempt Thanks.
-
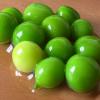
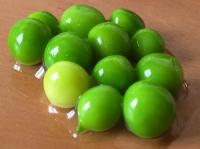
I found this dish in one of the chinese restaurant in my town. Basically, it's very simple and it might be typical dim sum dish. Although, I have never found it elsewhere. And sadly, the restaurant doesn't serve it anymore. It's not in the menu anymore. You will get a small plate of steamed squid, cut in bite size, only the body, not tentacle. No seasoning nor sauce mixed with the squid. The sauce is served separately consisting soy sauce, green onion, red onion, chilies and a bit of sugar perhaps because it has a little bit sweet taste. It is steamed because the squid is served warm (not piping hot). It is very delicate, clean and tender. Tender, but not mushy, it has still kind of bite (crunchiness?). I had ika sashimi before, it's not that. ika sashimi won't be served warm. That's the dish. ======== Now, regarding "type of squid" that I mentioned, I don't mean about the species But rather in "size". To me, all squids sold in the market look the same! The only different is size, length of the body. At least in the market here, I could buy small one 10 to 15 cm long, or bigger than that like 20 cm or even bigger than that. But definitely the squid used in this dish is not the biggest, it's too thick! So, that's the story. ========= As this is kind of dim sum, I would try to steam it traditionally though. But again, I have no idea about the timing etc, related to the size of the squids. Probably small squid and steam for 1 minute? I could buy some and do "weekend experiments". Try 1 minute, 2 minutes, 3 minutes and so on!
-
I wanted to make "steamed squid". It's quite simple dish, consisting squid, steamed, and cut in bite size, served with kind of sweet soy sauce, green onions and sliced red onions. I tried several times, but it wasn't like what I had in the past. Sometimes, it was OK, most of the time not tender, or rubbery. Well, yes, I read many articles about cooking squid, either super quick just few seconds or longer than 40 seconds. Last time, I thought, "Hey, let's try sous vide!" (I have Anova). Searching egullet and found several reference: https://forums.egullet.org/topic/136274-PostX/?do=findComment&comment=1453732 https://forums.egullet.org/topic/136274-PostX/?do=findComment&comment=1655512 https://forums.egullet.org/topic/136274-PostX/?do=findComment&comment=1666362 On average, they did at 59C for about 2 hours. So, I did the same. BUT! I think I used wrong type of squid. My squids were smallish, like 10 to 15 cm long (body only). Result? Terrible! The squid broke apart, turning into mushy kind of mashed potatoes! Please don't laugh I threw them all, inedible. So, have you done sous vide squid successfully? If yes, what temperature, how long and especially how big is the squid? Thanks.
-
Preserving can also include "salt curing", correct? I am trying to make bottarga
-
Franci, you are correct. Probably rock hard is not the right word, but hard enough to be grated I have never bought bottarga in the original form, only in a bottle which has been grated. Well, as I have 3 pieces, I will put one inside a cheese cloth and see in a week to compare!
-
I am currently in the process of making bottarga, salted fish roe. Recipe reference: http://www.sbs.com.au/food/recipes/salted-fish-roe-bottarga So far, here what I have done: - sub-merge the fish roe in salted water (10% salt) for 24 hours - put the fish roe on top of kitchen paper with layer of salt and then cover it with another layer of salt * Change the kitchen paper and salt every 24 hours * Do this for 3 days After this, the recipe reference said to hang the fish roe in a cold dry place for a week or more. Well, I don't have cold dry place. So, I thought I could simply put it in the refrigerator, like this: - after 3 days, I rinse the fish roe under cold water and pat dry with kitchen paper - put back the fish roe in the refrigerator, uncovered My question, regarding this last step. Do I need to wrap it using kind of cheese cloth? I used to make "duck ham" and I wrapped the salted duck breast with cheese cloth for a week, which makes it hard. PS: After those 3 days layer salting, and rinsed, it smells and taste very nice. It is quite hard, but not rock hard which I think it's the bottarga texture supposed to be. Thanks.
-
Interesting, I would love to buy that kind of iron branding. Where did you buy that? Thanks.
-
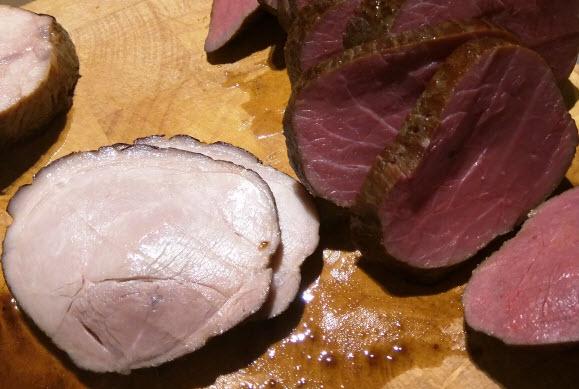
So, here it is. I cooked the pork at 69C (156.2F) for 4 hours 30 minutes, and the beef at 58C (136.4F) also for 4 hours 30 minutes, one day before. Both were excellent, juicy and not dry. But the beef was a bit "tough", probably because of the type of cut, I don't know. As you can see the meat structure, it's quite dense. The difficult part was to brown it. Blowtorch doesn't do much, I use standard torch "attached" to a butane gas canister. So, I browned in a very hot skillet wok with oil instead.
-
Usually, I don't mind experiment on cooking as I always do. But, this time, I am in charge for the main course for our New Year party. There will be 10 adults and 7 small kids. We have 3 of those beefs and 2 pork. My main concern is of course food safety. Note that I bought these beef and pork from supermarket, so I don't know the source. Those families might never heard of sous vide cooking, so this will be the first time to introduce it SV is a bit new to me, I have done mainly the common things: steak, eggs, duck breast, duck legs, creme brulee, chicken legs. All those are small, which I usually do in 30 to 60 minutes, following the timing / temperature chart that I found in the internet. Great result by the way. So, I have never done meat that size, especially the thickness. That's why I am asking. Well, I could buy 1 set to experiment, still have time, but that would be costly. Agree with daveb, I think I will re-package them also add oil (yes, I like this as well). The plan, for now: Beef: 135F for 5 hours Pork: 145F for 5 hours Yes, I will try to make some photos and share it here.
-
Thanks! Both are tender cuts, but I don't know which cut of beef/pork. It is not mentioned in the package 8 hours for the beef and 5 hours for the pork. Hmm ... it seems quite long. I guess, I must do it a day before lol. Thinking about the temperature though. I would do the pork well done at 68C (145F) and the beef medium at 58C (136F).
-
I don't have that app, and I think that's iOS only? I tried to search it on the sous vide index post, strange that it's not there. About the pork roast well done using sv, that's because I don't want to over cook it if using conventional method. And this is for later New Year celebration, many of my friends, I think would still think pork should be well done
-
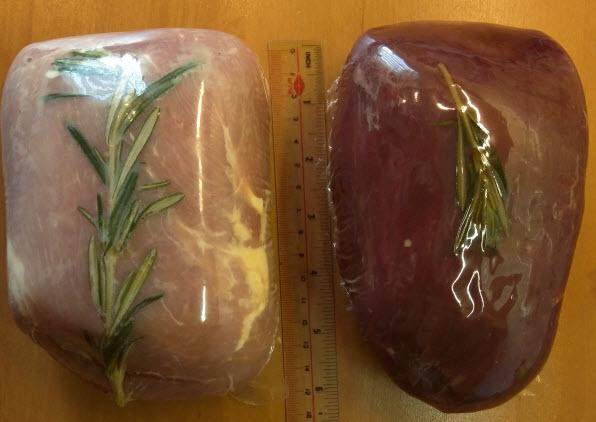
Hi all, I bought vacuum packed roast beef and kind of pork, see in the attached photo. The size is about 15 cm x 10 cm and the height is about 6 to 7 cm, with weight 785 grams (from the package). Anyone can suggest the timing and the temperature for sous vide if I want to have "medium" for the beef and "well-done" for the pork? I have never sous vide this size of meat before My plan is to sous vide it first on their own vacuum sealed package, probably 1 day before. Then simply sear it before serving to get browned. Thanks!
-
Thanks for all the feedback. I feel confident now
-
While I researched "dry brine", I ended up with this Serious Eats article: http://www.seriouseats.com/2010/05/how-to-roast-a-chicken-butterflied-tips.html I have read it before though. Now, I think I am going to do it that way and also "add" dry brine. So, - Butterfly the chicken - Rub with salt (dry brine) - Put inside fridge, on top of a wire-rack, uncovered for a day (air-drying) If I air-dry for let say 3 days, would it be too salty because of the dry brine? Hmmm ...
-
Good point on wire-rack, for sure I will do that.
-
I am thinking to do the ChefSteps Ultimate Roast Chicken: https://www.chefsteps.com/activities/ultimate-roast-chicken But, I have some questions regarding air drying a whole chicken in the fridge. My fridge is not big that I can hung a whole chicken, so I plan to simply put it in a tray, uncovered and place it inside the fridge. Now, I am wondering if this would not cause any "problem" in the fridge? Like "smelly" or even "bacterial contamination". Because, as per the instruction, I need to air dray for 3 days. I have never left a raw chicken in the fridge, together with other ingredients over there Anyone has done this before? Please if you can share your experience
-
Interesting topic, I came here because of huiray post: https://forums.egullet.org/topic/152191-dinner-2015-part-6/?p=2036338 Anyone tried to make milky stock using pressure cooker? To cut down the boiling time. I am thinking to make kind of "tori paitan ramen" which is using chicken to make the stock. And the ramen soup should be white-milky like tonkotsu ramen. My plan for the base stock: - 1 whole old-chicken (in here, this is called "chicken-soup", a whole chicken for making chicken soup). - 3 liter waters Cut the whole chicken into pieces Boil the chicken pieces for about 5 minutes, then rinse clean with tap water Then pressure cooker on high for 2 hours each time, and repeat as necessary.
-
Thanks for all the inputs, really appreciated. For the temperature and timing, I took it from Serious Eats: http://www.seriouseats.com/2015/07/the-food-lab-complete-guide-to-sous-vide-chicken-breast.html To be honest, I have never done sous vide chicken breast. So, I will adjust the temperature to 145F for 1 hour 15 minutes I added the bacon in the sous vide bag is just for flavor, as I also found it in other recipe by David Chang Momofuku: http://momofukufor2.com/2010/01/chicken-egg/ I thought this would improve the original recipe which also uses bacon during roasting. For serving, I would add crispy bacon which would be cooked separately. For the honey-mustard sauce, you right, the original recipe will be too sweet, much too sweet. And I don't like it either. But, I haven't figured out the sauce. For sure I would reduce the honey a lot, and replace the mayonnaise with Japanese Kewpie because it tastes more savory. Well, this all started because I watched that video. It looks interesting, and I thought it's a good start to try sous vide chicken breast
-
I just watched this Aussie Chicken recipe : https://youtu.be/yHnWgiQDKcc Basically, it's roasted chicken breast with bacon, sautéed mushrooms, honey mustard sauce and topped crispy cheese. But I am thinking of better method instead of guessing the roasting time. I have never done this before and I don't like overcooked roast chicken breast. Ok, sous vide would help. Here is my idea of better method : Sous vide chicken breast together with few pieces of bacon at 150F (65C) for 1 hour. Then sear with oil and a bit of butter to brown it. And finally, arrange it in baking tray. "Glaze" with the honey mustard sauce. Put some sautéed mushrooms, topped with cheese. Broil it under very hot oven (240C) "just" to melt the cheese. Serve with more honey mustard sauce and crispy bacon. Sounds good? My concern is with the last broiling step, if that will dry up the seared chicken breast. But I don't have any other ideas.
-
How long did you sous vide the ribeye? Really nice btw
-
I usually do this: - Toast all the nuts in frying pan - Put all the toasted nuts in a plastic bag Then I use my DIY hammer to crush them. Easy and fast, well for small amounts
-
What does "GS" and "TG" stand for?
-
Removing the skin would be a good idea, so we can process it further to make crispy skin. For example using oven or deep fried. Searing skin-side-down, no matter how long, it won't make the skin crispy