

Wholemeal Crank
-
Posts
1,756 -
Joined
-
Last visited
Content Type
Profiles
Forums
Store
Help Articles
Posts posted by Wholemeal Crank
-
-
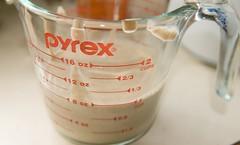
Inspired by discussion in another forum, I found Jeffrey Hamelman's recipe for lebkuchen on ckbk.com (from Bread), which is quite similar but richer than the version linked above from Wild Fermentation. I used Hamelman's as my starting point, and decreased the quantity because it was an experiment, used fresh-milled whole rye flour because that's how I roll, and it was quite an interesting process.
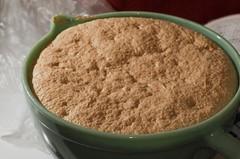
I mixed honey and flour without heating the honey first, and put the quite firm dough into a half-gallon mason jar (I would not do that again because it was quite hard to get it back out!), put on a lid but left it a bit loose. And then I put it on a bottom shelf of the kitchen, and put a reminder on my calendar to check it out in 3 months. It did not visibly change in that time.
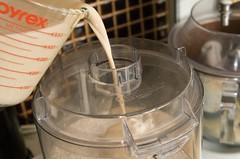
Then I prepped everything else to be mixed into the dough. I chopped dried pears (I prefer dried fruit to citron in confections) and candied ginger (TJ's 'uncrystallized ginger' is softer and less sugary than more easily available harder versions with thicker coatings of sugar) in the food processor with some unbleached all-purpose flour to keep the pieces separate. Unfortunately the pears were softer than usual and I was wary of adding too much flour so they were more pasty separate/fluffy bits.
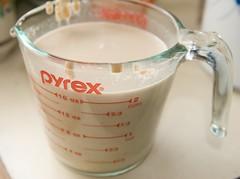
I dissolved the ammonium carbonate and the baking soda in cream instead of milk because I had some extra cream.
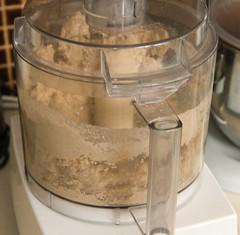
And I added extra cream and water because the long-aged/fermented dough was just too hard to mix; my fresh whole grain flours need more water than the usual refined flours and I expected this. I should have broken the hard dough up smaller first, and I added the spices, liquid and dried ingredients all together so again, the dried fruit and ginger got pulverized by the long mixing needed to really break up the aged/fermented dough.
Finally, I overbaked the result, so there is a relatively hard crust on the outside.
But despite all that, they're pretty good, and while I usually find cookies made without butter and/or nuts sadly lacking, these have a fine depth of flavor that must come from the long aging. I also expected them to be very sweet--equal weights of honey and flour, oh my--but they feel well balanced. I'm now very curious to know if there is some enzymatic or microbial activity that breaks down some of the fructose so it isn't so sweet.
Another surprise: I was quite far along in the process before I realized that this version includes no ginger or cloves--unlike virtually every gingerbread recipe I've encountered before. But mine got the candied ginger and maybe that's enough. I like them enough to try again...but I'm not sure if I'll use ginger or cloves this time. I've got several months to decide!
Here's what I ended up doing....but as noted above, I'll do some things differently next time.
500 grams fresh whole rye flour
500 grams honeyMixed until smooth and aged 3 months covered but not super tightly sealed in my Los Angeles kitchen with temps 60s-70s throughout.
When preparing to bake the lebkuchen:
100 gram TJs uncrystallized ginger
1 tablespoon unbleached flourChopped in food processor to very small individual bits
200 grams dried pears
1/4 cup unbleached flourChopped in food processor (may need a bit more flour next time to avoid pear paste)
about 75 grams (4 large) egg yolks
1 teaspoon salt
about a tablespoon of lemon zest
1 teaspoon ammonium carbonate
1/2 teaspoon baking soda
4 teaspoons ground cinnamon
2 teaspoons ground coriander
1 teaspoon ground aniseed
1/2 nutmeg, grated (about 1 1/2 teaspoon of grated nutmeg)
1 teaspoon black peppercorns, ground1/2 cup cream
1/4 cup waterI scooped the dough out of the jar (bending a few spoons and spatulas in the process, maybe I can wrap the dough in a cylinder of plastic wrap and stick that inside the jar, so it still gets the protection against insects from the canning-jar lid but is easier to remove at the end for next time) and broke it up to no more than walnuts sized pieces in the bowl of my kitchenaid mixer.
I foolishly added the chopped pears and ginger and eggs at the same time, and it was ugly lumpy solids-in-wet stuff for a very long time, mixing on low power (with one or two breaks to cool down my mixer--this was HARD work for the moter).
I dissolved the spices and leavenings in some of the cream, and mixed that in, and kept adding a tablespoon more here and there, ran out of cream, and added water, and mixed until the dough was more or less smooth--but still firm enough that never left low speed. The ammonium rendered it unpleasing to taste so I wasn't sure what I had at that point.
I scaled the dough to as carefully as possible match Hamelman's recommendations of baking it in loaf pans to speed baking and avoid overdone crusts, and ended up doing a bunch of algebra to figure out how many grams to a muffin cup when I didn't have enough loaf pans. I pressed the dough into the pans by hand--and was surprised afterwards to see how lumpy the bottoms were when the tops smoothed pretty nicely.
I also messed with the baking temps because I was too lazy to remove my baking steels from the oven. I won't be so lazy next time. And I probably will not use the convection setting either. The thickness of the crusts on this first batch are not very pleasing. I baked them 350 for 15 minutes and 20 more minutes at 300.
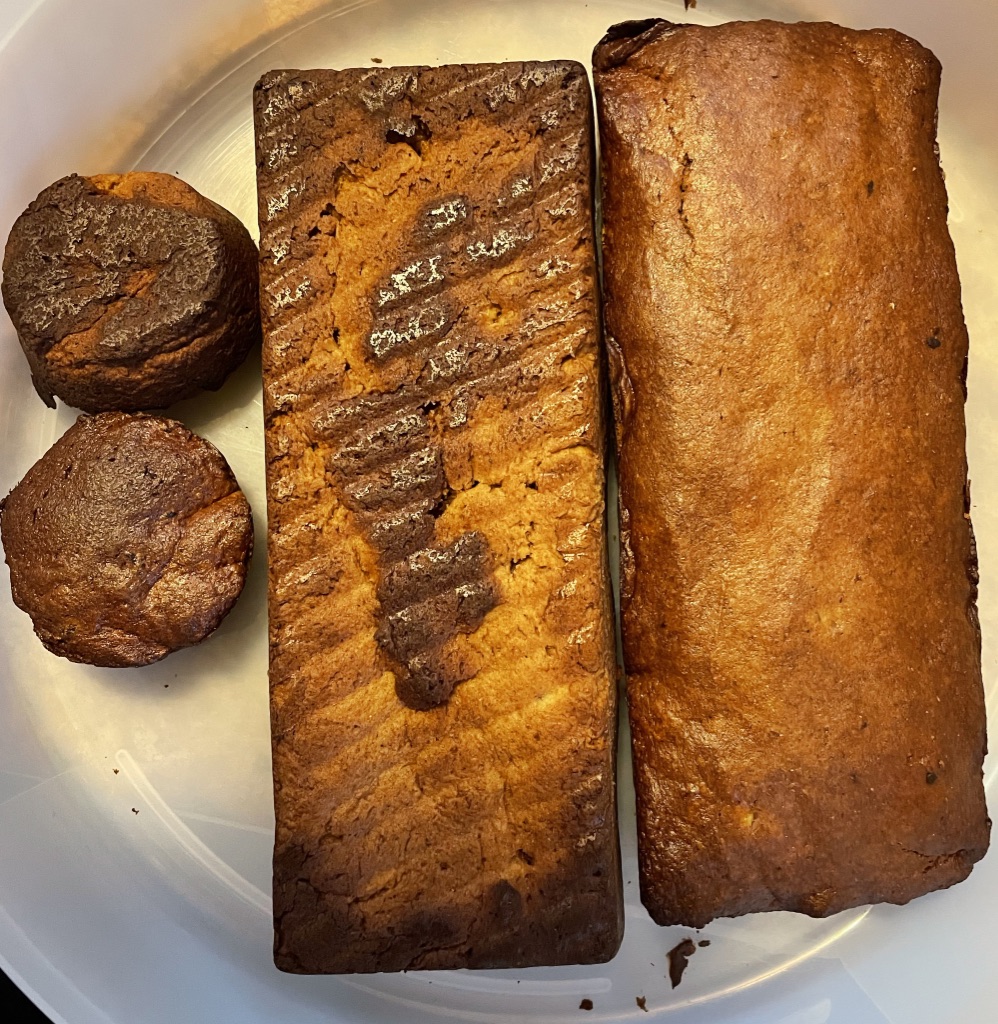
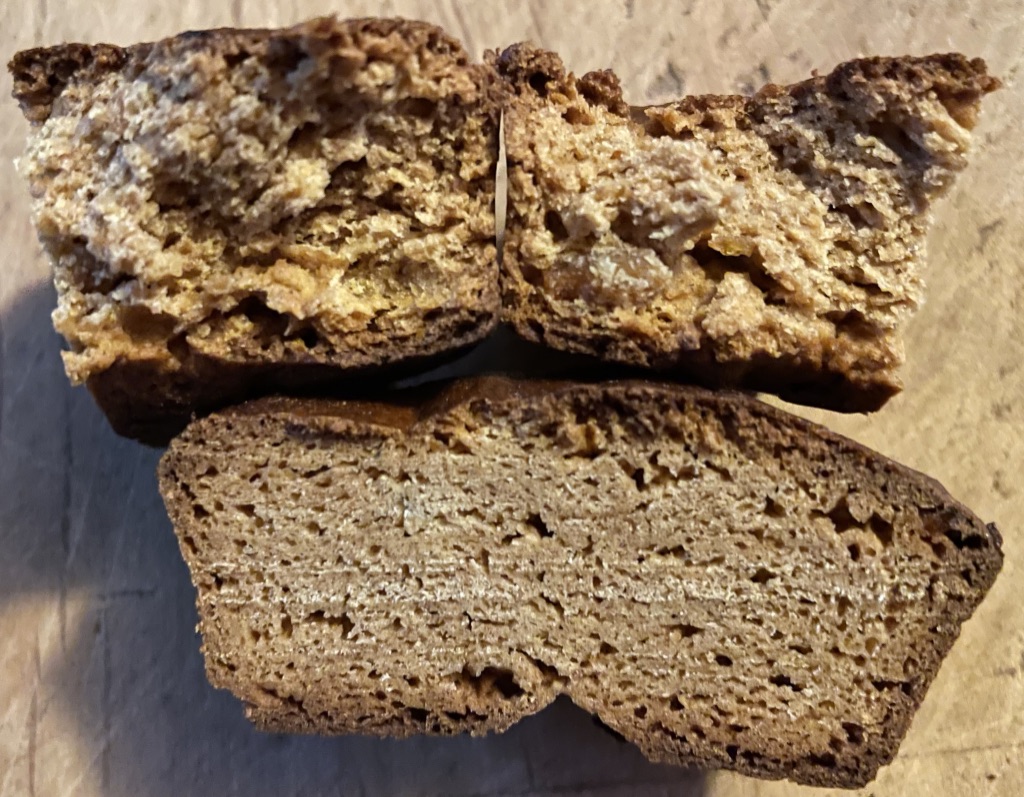
In spite of being less than beautiful, and some foolishness planning out the recipe, they're really quite tasty. They're dense but chewy and fruity and spicy.
The recipe made enough for 2 narrow loaf pans (8.5 x 3 inches) and a dozen muffin-sized pieces (2 inches diameter standard sized cups). It's about 1/2 inch thick.

(cut with serrated knife one direction, and torn open the other way)

-
 4
4
-
 1
1
-
-
15 hours ago, dscheidt said:
Carefully block the spout (don't burn yourself) when it's boiling. If it it whistles, the problem is in the spout. If it doesn't, it's the lid.
Doesn't whistle, as best as I can close off the spout (using a heavy oven mitt over a soft washrag; then jammed a bit of old rag in the spout--helped maybe a tiny bit, but not enough; and steam is definitely coming from the back of the lid/pot junction. I got a reply from the company, pursuing that now.
-
1
-
-
7 minutes ago, dcarch said:
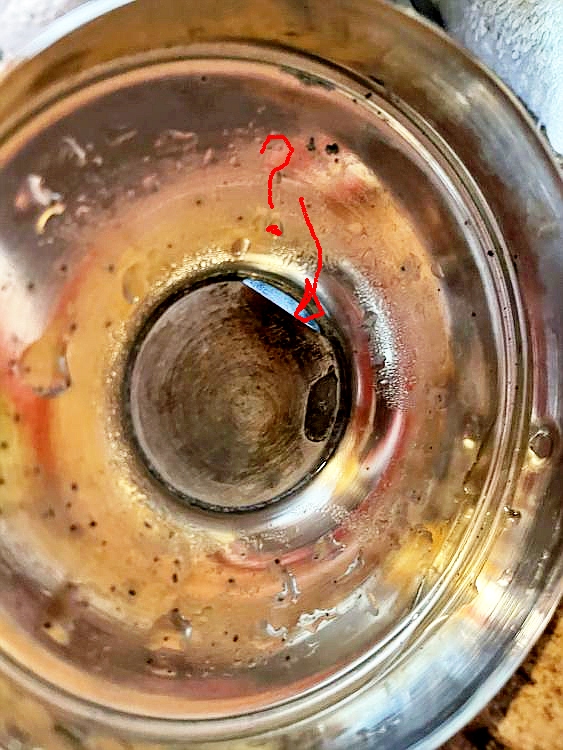
That looks like corrosion damage. And I don't think that piece of metal is supposed to be there.
dcarch
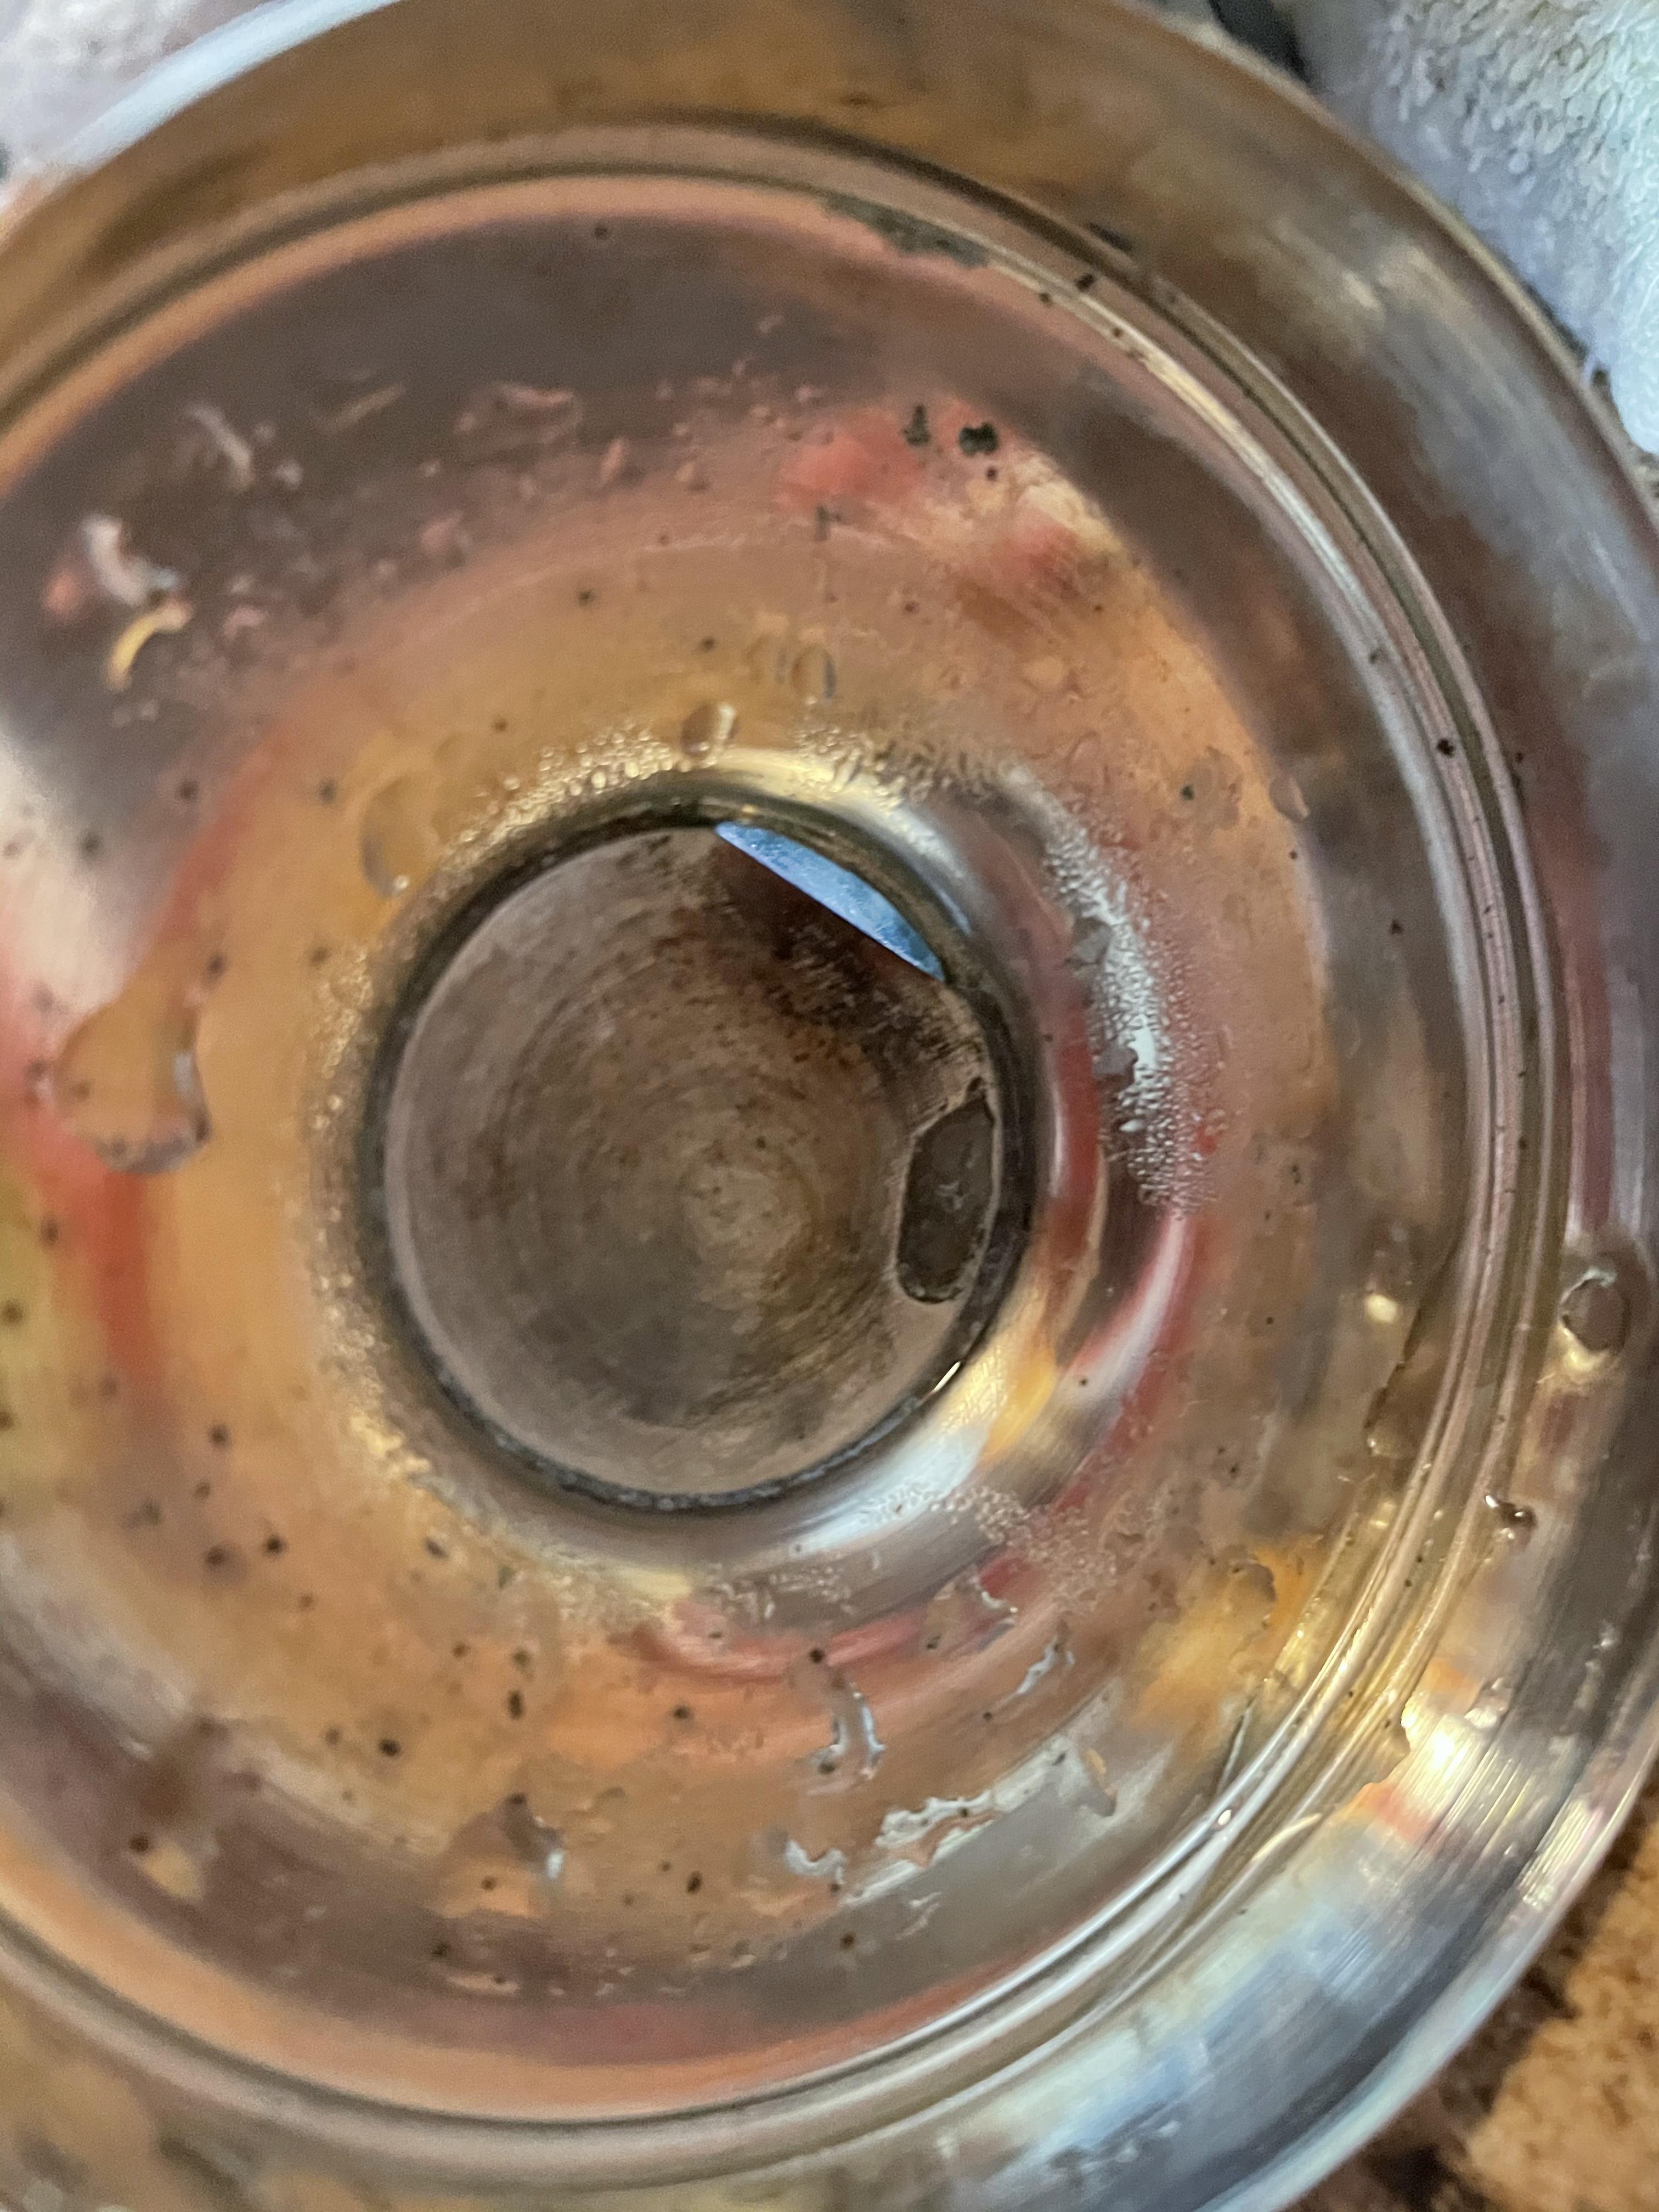
I believe that is the inside of the whistle slit.
-
The light spot blue spot is the slit on the inside of the whistle part of the lid, with the whistle passage lit by light from the outside of the lid.
The dark spot is a bit of tarnish that looks original, like from soldering or welding that inner bit of the whistle in place. It is not a hole.
-
D'Oh. Just reread. So the whistle is the hole in the lid, and insufficient blockage by the ball valve in the spout, letting too much air out that way, would not allow the whistle to sound loud enough. So back to my original idea that the valve and/or lid seating may not be tight enough. The lid rim and pot rim are now spotless, so no scale there to encourage leaks; the spout....hm...
-
1
-
-
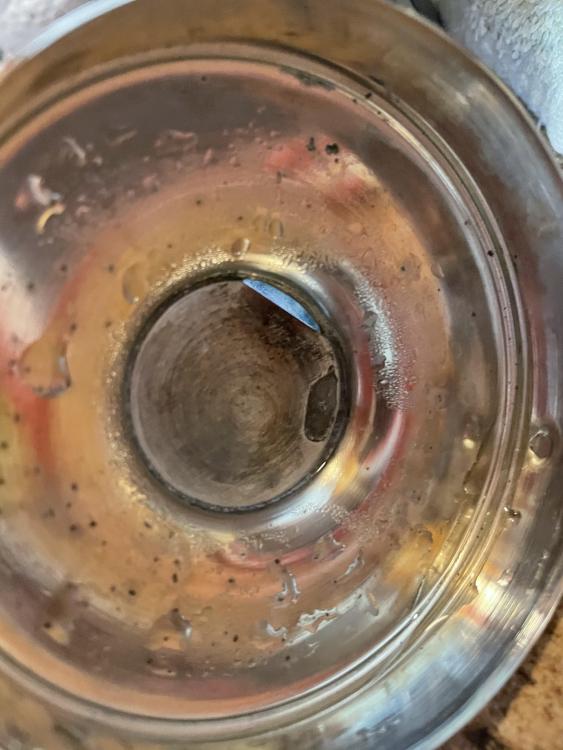
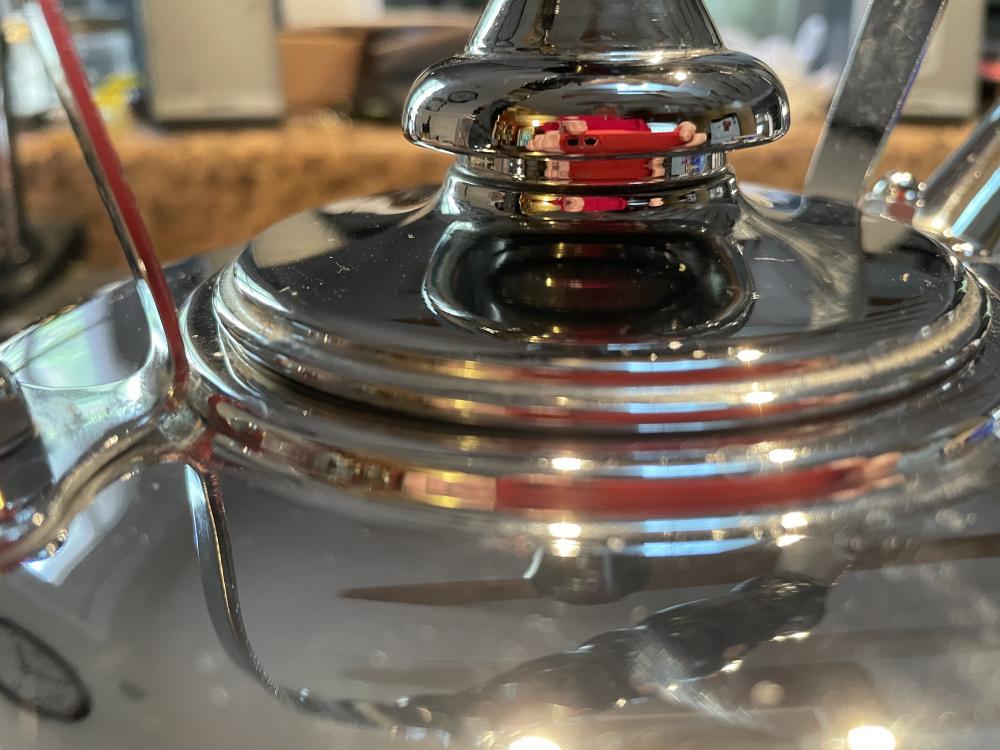
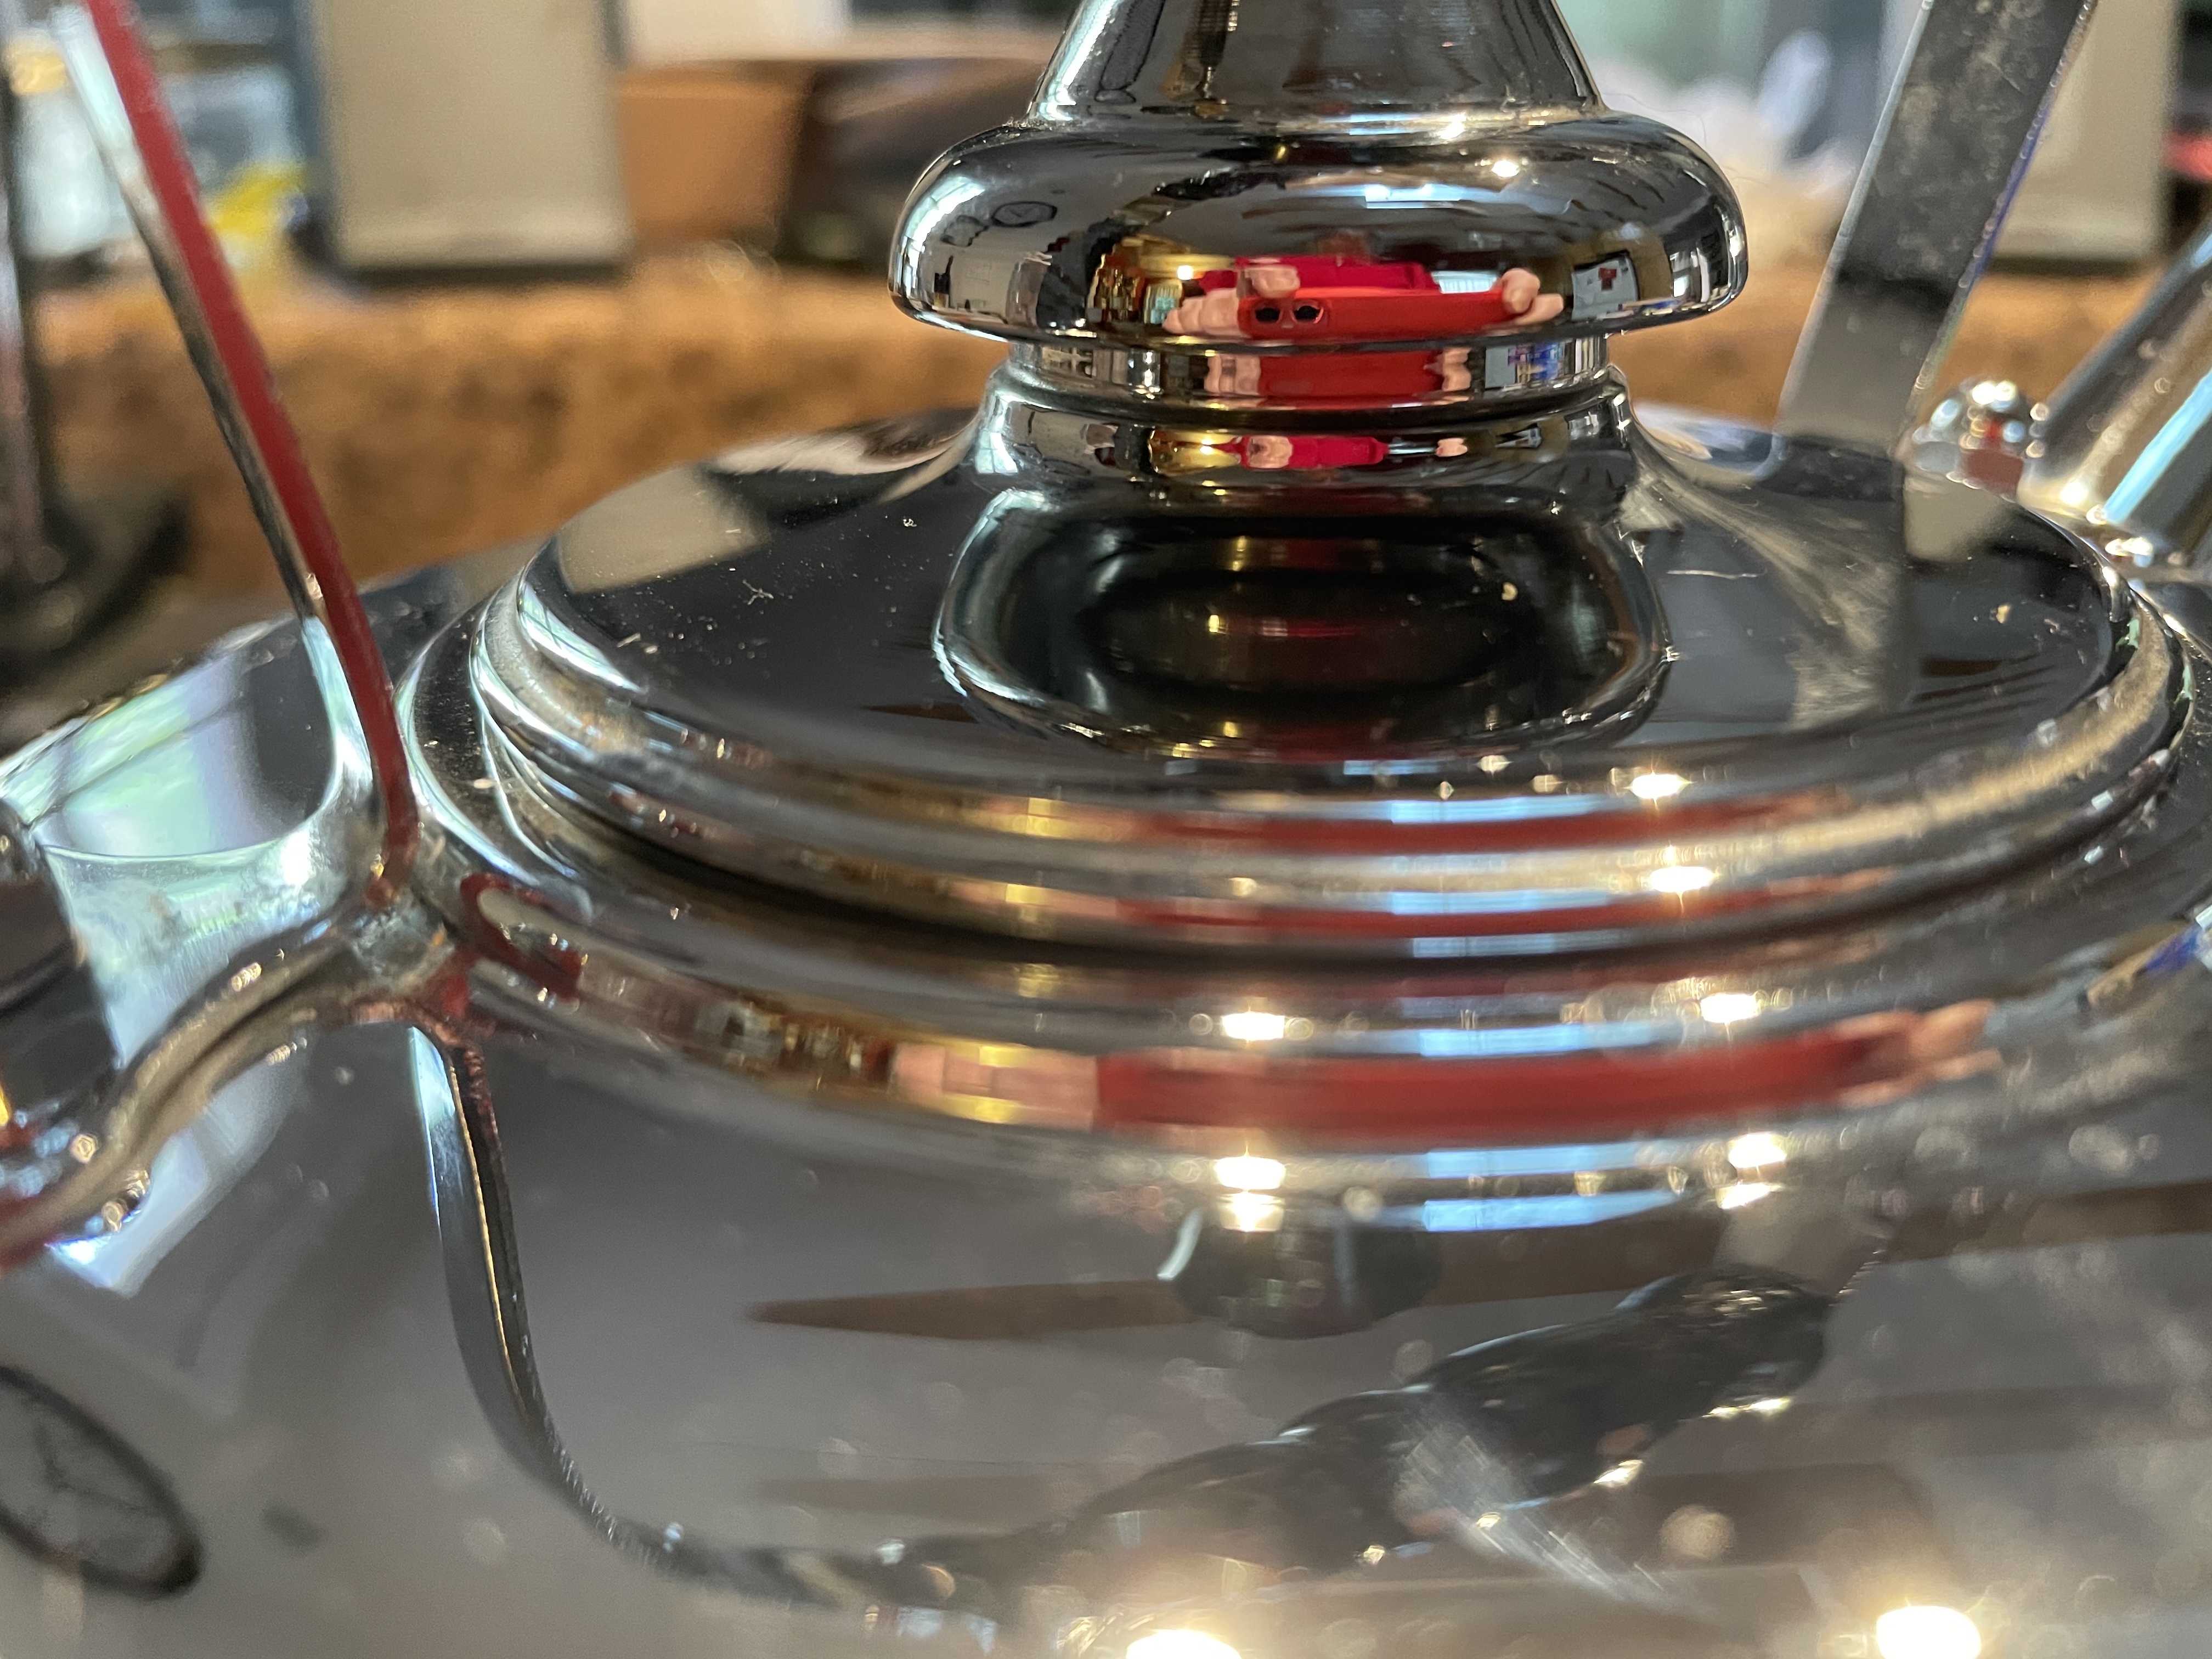
This is the hole from the front of the lid

and this is the hole on the inside of the lid, with a light aimed from the front hole to make it more obvious.
-
The whistle is a ball-valve in the spout, so steam is supposed to exit there. That ball does rattle as usual when I shake it suggesting it moves freely.....my first idea was scale where the ball sits so it doesn't sit as tight and the ball lets steam out at too low a pressure. Looking again, there is also another valve in the lid itself....which would seem to permit free exit to steam, so lid fit can't need to be that tight when this hole is clearly part of the design.
-
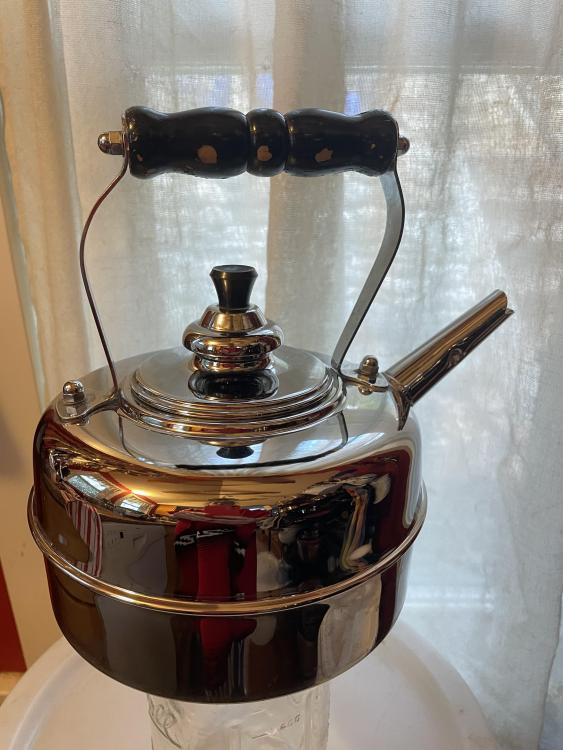
I took a closer look and the lid does not fit quite as snug on the front and back near the handle. Perhaps this is a warp issue.
-
1
-
-
3 minutes ago, weinoo said:
This was your first problem.
I prefer not to add to pollution & climate change by bottling, shipping & filtering water when what comes out of my tap is perfectly fine to drink.
-
1
-
-
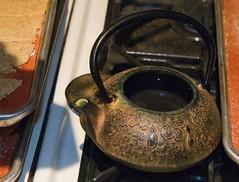
My 10 year old Simplex kettle stopped whistling. It now makes a sadly muffled croak, not the sharp piercing sound that makes it easy to hear from any room in the house. Online searches haven't gotten me very far. I did find an official looking use and care guide PDF that says nothing about fixing this issue, but does warn against what would have been my next step--boiling some vinegar in it:
Quote- Don’t use abrasive cleaners that may harm the exterior or interior finish of your kettle.
- Don’t use wire or other abrasive de-scaling products such as lemon or vinegar, which will cause damage to the pure tin or nickel plated lining of your kettle.
The ball in the spout rattles when I shake the empty kettle, so it's not completely stuck or jammed. I presume it's something to do with scale or rust or something keeping it from seating tightly enough to hold the steam in until whistle pressure is reached.
It's always and only been used with Los Angeles city tap water.
Suggestions for next steps?
I've already entered a query to the company here, but am asking the smart community here because I anticipate a long time before I get a reply from them due to life in COVID times.
-
A fabulous invention this morning:
Rosemary-Raisin Walnut Scones
Preheat oven to 400 degrees
If you have a mill, mill these together:
250 grams soft white wheat
50 grams brown rice (makes the scones a little crunchy on the outside)
1 teaspoon dried rosemary
1/2 teaspoon thyme (optional)
1/2 teaspoon coriander seeds (optional)
1 clove (optional)
1 inch vanilla bean, cut into bits[If no mill, consider
2 cups of all purpose flour or whole wheat pastry flour or blend of these, substituting up to 1/3 cup of rice flour, if you have it, for some extra crunch
1 teaspoon ground rosemary
1/2 teaspoon ground coriander (optional)
1/2 teaspoon ground thyme (optional)
itty-bitty pinch of clove (optional)
and add 1 teaspoon vanilla with the juice, water/buttermilk, and egg below]
1 teaspoon soda
1 teaspoon cream of tartar
1/2 teaspoon salt
2 tablespoons brown sugar
1/4 cup buttermilk powder OR use buttermilk to complete the liquid volume below (powdered version allows more concentrated flavor despite limited liquid component of recipe)25 grams flaxseed, ground in a clean coffee mill/spice grinder (optional, good fiber & omega 3 and nutty flavor)
Stir/strain/sift all the dry ingredients together until thoroughly mixed
1 cup raisins
zest of orange you juice for the next step
up to 1 teaspoon fresh rosemary leaves
3/4 cup toasted walnuts (about 12-15 minutes at 325 spread onto bare baking sheet usually does fine)Chop these an add to dry ingredients or easier still, put the dry ingredients in the bowl of your food processor, and process the raisins, zest and rosemary until the raisins are small bits; then add the walnuts and pulse a few times until coarsely chopped
8 tablespoons cold butter
grate or use pastry blender to cut into small bits and mix with the dry ingredients
1 egg
1 lemon, juiced
1 orange, zested and juiced
plus water or buttermilk (if not using powder) to total 3/4 cup
Whisk the egg, juice, and water or buttermilk together and just stir into dry ingredients until all moisteneddrop large spoonfuls on lined or greased baking sheets; wet your hands and pat into neat rounds 1/2 inch thick, and bake for 20 minutes. I bake 2 sheets at once in my convection oven and turn front/back and top/bottom at the 10 minute mark.
-
3
-
-
Try it, I think you'll love it
-
Had to redo upload, processing wasn't ever going to finish
Corrected link above
-
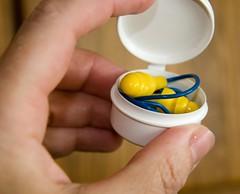
ZAP YOUR GARLIC
seriously: faster, easier, better taste. TRY IT! I haven't chopped garlic in DECADES. And I use a lot of it.
Microwaving whole cloves of garlic makes prepwork a breeze, takes less time than peeling and chopping, and a whole a lot less time to do it than to show how to do it! It gives oven-roasted mellow garlic flavor in a few minutes, and makes the garlic press an instrument of joy. Many cooks turn their noses up at pressed garlic because it is 'crude' or makes the garlic 'too strong' compared to larger pieces that cook more gently. Zapping it first TAMES THE FLAVOR so that you're adding mellow sweet nutty garlic wonderfulness to your fresh sauces (I was prepping for hummus in these videos) as well as cooked preparatons and not overwhelming Ka-POW! to your food. Add the zapped, pressed garlic after sauteeing to other ingredients to avoid scorching; it is already cooked so doesn't need that tricky step of taming in hot oil with all the risks of scorching. Try it, and you'll never go back to the slow peel & slice & dice again.
Finally put a video together on my non-commercial youtube channel.
-
1
-
 1
1
-
-
I haven't tried any of the recipes yet, and I'd love to have some opportunity to try some of these things to know where to invest limited time--would I really find them appealing enough to justify setting up a fermentation chamber? Does anyone know of any commercial sources for something like the lower sodium nontraditional misos in the book?
-
6 hours ago, Katie Meadow said:
Saltines. Real homemade saltines with just milled whole grains. @Wholemeal Crank, won't you be my neighbor?
The problem wih the saltines is that they're so darn good they disappear FAST. Even double or triple batches. The butter is definitely part of the reason.
5 hours ago, kayb said:Got any good gluten-free crackers you can suggest?
I've only recently started to work on this due to friend's celiac diagnosis, and the 'Tangy Aromatic Crackers' from Alice Medrich in Flavor Flours, are by far the best yet.
-
1
-
-
There are different kinds of crackers! I mostly make whole grain crackers without laminations, depending on thinness, coarseness of grains/seeds and levels of fats to keep them from breaking teeth. That's where the coarse-ground grains from the hand-mill come into things--they break up some not-so-fat-rich doughs. Peter Reinhart's seedy snapper crackers used the oily seeds for tenderizing, but they depend on absolutely fresh seeds and being eaten quickly to keep the crackers tasting fresh. The eating quickly bit is mostly not a problem because they're delicious, but the absolutely fresh seeds is not always easy to arrange.
I did finally figure out how to make laminated soda crackers (saltines) , but I've not prepared a photo primer on that yet. Here are the finished crackers....
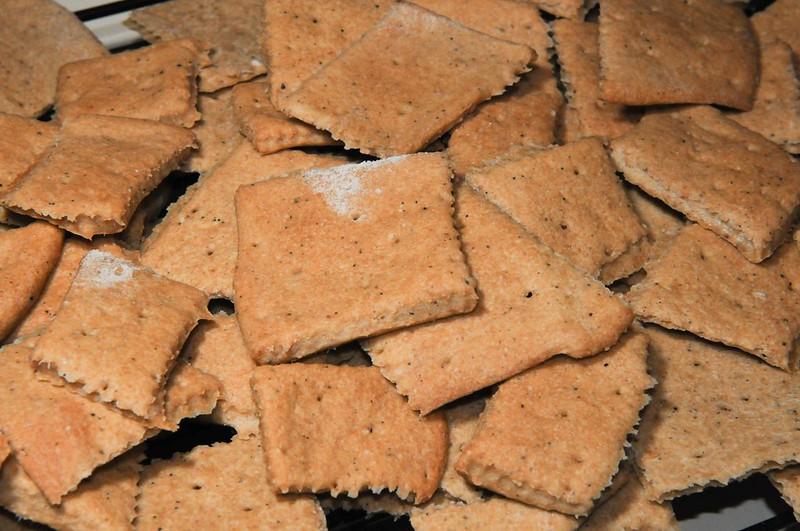 Homemade Saltines by debunix, on Flickr
Too much to do, too little time. I'm working on photo primers on a couple of cookies right now.
-
4
-
2
-
-
More on how home milling is not just about bread.....
A Cracker Primer
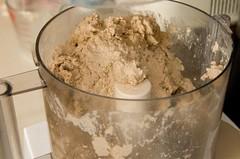
This is how I make crackers. I was making two different batches of crackers this day, one batch of Corny Crackers, and one batch of Four-Seed Snapper crackers from Peter Reinhart's Whole Grain Breads.
I love crackers, and like homemade ones, but was frustrated with the effort to yield ratio required, and the lack of crispness if I didn't get the dough perfectly thin, or the high proportion of scorched crackers if I did roll them perfectly thin. I've since figured out some tricks that make it a lot easier and more efficient to make a bunch of them at once.
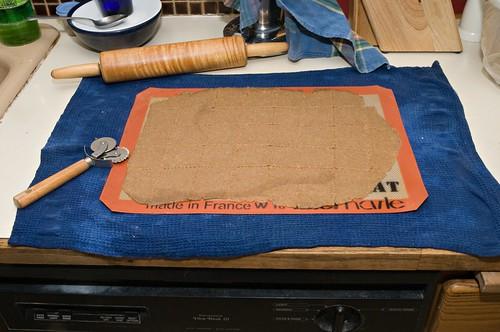
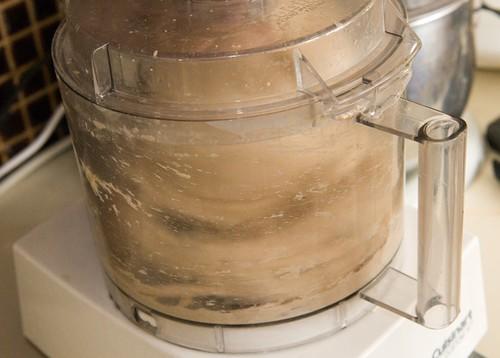
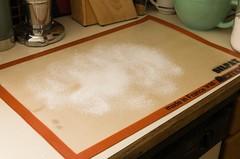
After you've prepared the dough of your choice, let it rest and chill if required, and preheated the oven to about 400 degrees or as called for in your recipe, pat handfuls of dough into a rough rectangle and place on a baking sheet liner (teflon, silicone, heck, parchment would probably work too). If needed, set the liner on a damp towel to keep it in place on your work surface as you roll out the dough.
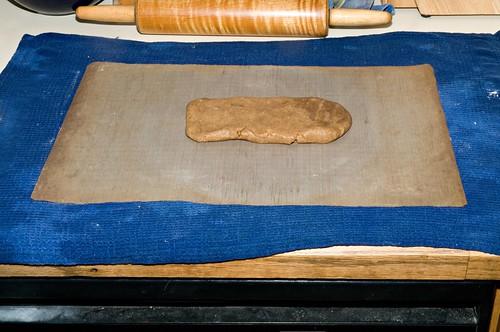
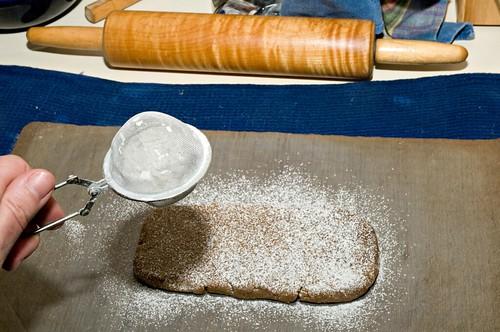
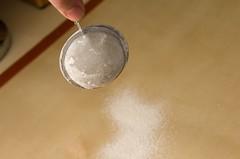
Dust below and the top of the dough lightly to keep it from sticking to the rolling pin.
EDIT:
I've since figured out an even easier way to work with cracker doughs during the rolling out, because I can't use wheat flour for dusting when I make gluten-free crackers that might be shared by my friend with celiac disease, and the "Tangy Aromatic Crackers" from Flavor Flours are a quite wet and sticky dough.
I just prep and flatten the piece of dough as shown in this photo, and top it with another silpat, and roll the crackers out between the dough sheets. Usually that top layer peels off pretty easily, and I use that one for the bottom of the next tray's worth of dough.
Roll out the dough to desired thinness (usually 1/16" to 1/8", 2-3mm), rolling always from the center out to the edge, to avoid the edge rolling sticking and rolling up onto the pin.
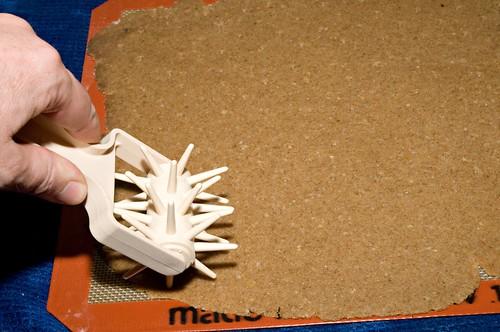
Next, dock the dough: with a fork, or better yet, a rolling docker, prick the dough evenly. This is to keep the dough from ballooning up like pitas as it bakes and making uneven crackers.
Now cut the crackers, with a knife (gently so it won't damage your baking sheet liner) or a rolling pizza cutter or other cutter. I use a pasta cutter here.
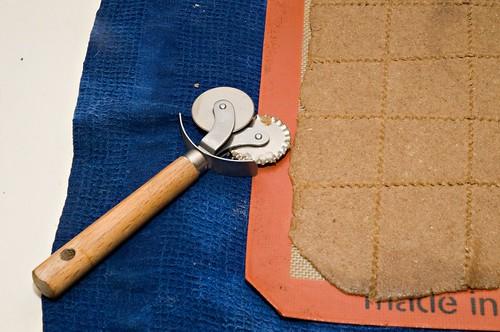
Now the crackers are ready to transfer to the baking sheet.
This is a slick trick: no spatulas and careful arrangements needed. Just slip directly onto the baking sheet, liner and all.
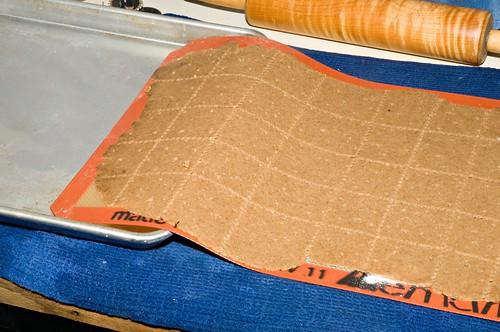
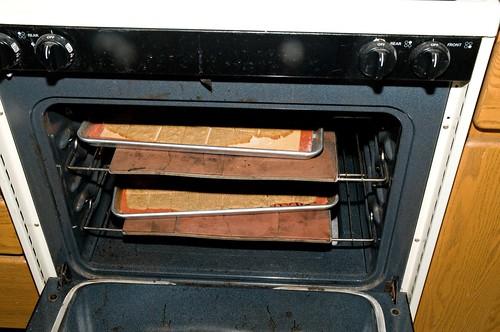
Now slide the baking sheet into the preheated oven. I keep baking tiles in the oven pretty much all the time, and bake two sheets worth of stuff at once.
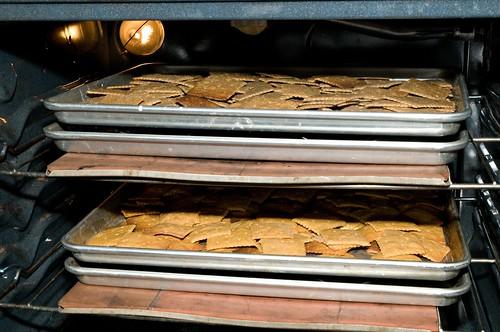
I set the timer for halfway through the baking time, and switch the sheets top and bottom and flip them front to back for even baking.
I do not try to get them fully crisp at this time--the first baking is to brown them. They're going back in the oven like biscotti do to get crisp. This way I will be able to get all of them crisp without burning many or any, or doing a dance with the oven to remove them as they're done while letting others bake on.
Once they're done, I set them aside, still on their baking sheet, unless I need to reuse the sheet and liner. If I were not double-baking them, I would remove them to cooling racks at this step.

Then after all the dough is baked once, I turn off the oven and open the door until the temp is about 250 degrees F or so. Then I return the crackers to the oven, loosely piled on baking sheets, and set the temp to 150°F (for overnight crisping) or 200°F (for at least two hours). This is hot enough to dry and crisp them but not hot enough to burn them.
Remove them carefully--even 150°F is plenty hot to burn bare fingers--and let them cool on a rack.
Then enjoy your double-baked, crisp, easy crackers.
-
5
-
2
-
-
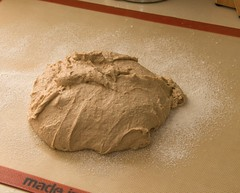
Bread from Wheat to Eat
This was not the best batch of bread ever, but still illustrates my bread technique pretty well. I've played around with different techniques for mixing, kneading, rising, proofing, and baking, and this is what I do most of the time.
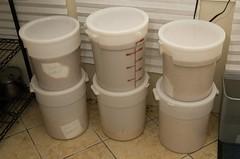
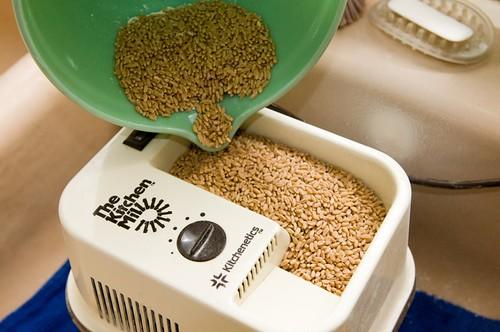
I start with whole wheat berries, which I buy 25 or 50 lbs at a time, so I have a collection of buckets for storing the several varieties I usually keep on hand (hard white, soft white, and durum are the usual suspects, plus whole field corn).

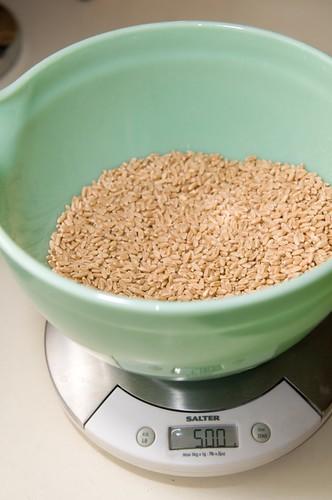
The wheat gets weighed out before milling, here 500 grams is about the limit of what my food processor motor can handle:
I set up the mill in the sink like this to help contain the dust and lining the sink with the towel also cuts down on the noise a bit. I call the mill my baby jet plane, because the milling heads on this impact mill spin at 28,000 rpm and it is LOUD. I never mill without earplugs.
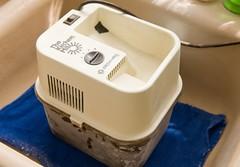
Milling now, adding wheat to keep the hopper full as it blasts away. Note the dust spot on the side of the sink.
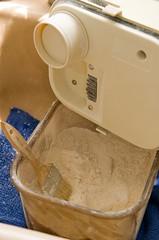
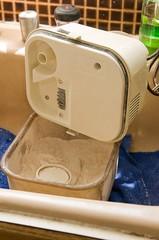
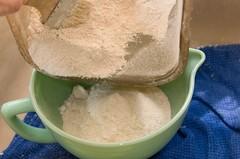
Next, after unplugging the mill, everything stuck on the lid gets brushed into the bowl. The metal teeth there are the milling heads. The little cups also get removed because a few teaspoons of flour gather in there and need to be brushed out. Then the whole thing gets emptied into whatever is needed for the next step--here, into a mixing bowl, but it could also go straight into the food processor.
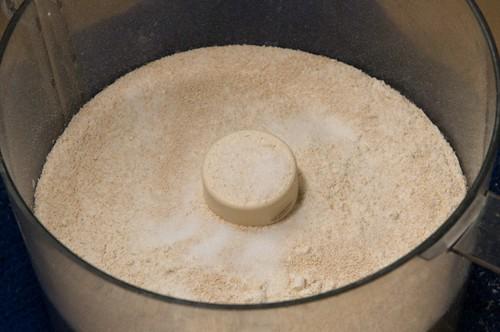
Now in the food processor, I add about 1 teaspoon of salt and 1 teaspoon of instant yeast directly on top of the flour. I'm using the regular metal blade, not the 'dough blade' that came with it.
I have some sourdough starter that I'm going to add for a bit of extra flavor, but because it hasn't been refreshed in a while and is not strong enough to raise the bread, this 'psuedo-sourdough' will also use a full complement of yeast.
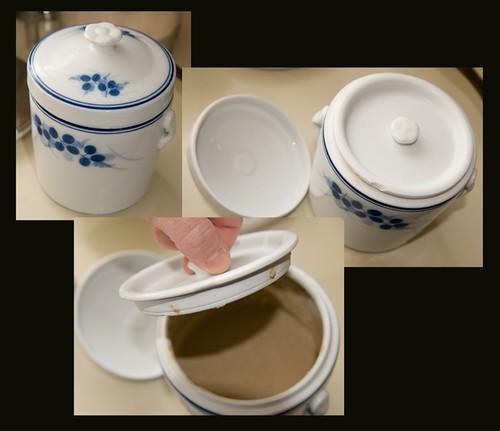
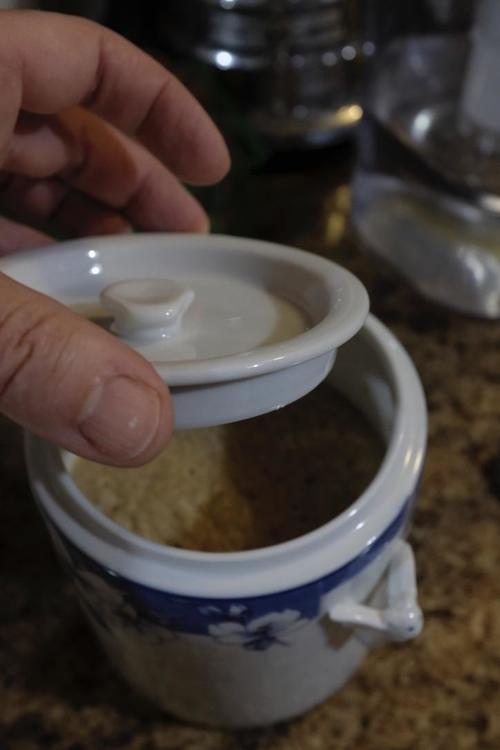
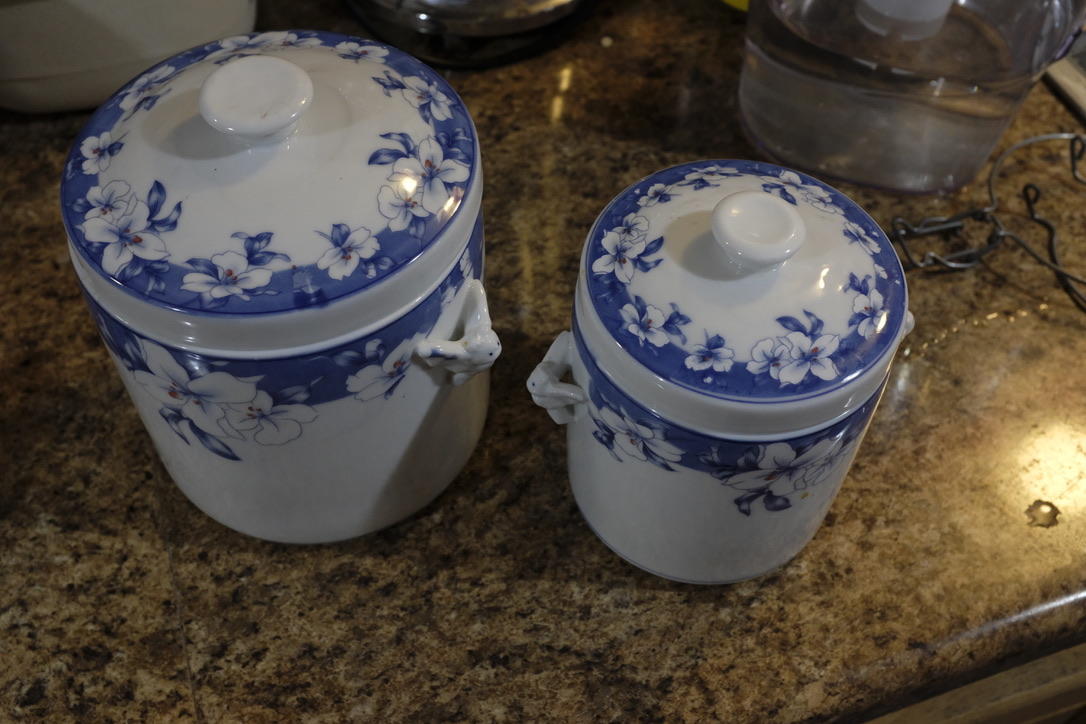
The starter lives in a neat little three-part ceramic crock that seals tightly enough to keep it from drying out, but loose enough to let fermentation gases out so it doesn't explode all over the fridge.
I used about 1 cup of starter that is about 1:1 water:flour, and mix it with the rest of the liquid used for the bread before adding it to the flour mixture. Here, I'm just using another 1 cup of water, no honey or oils.
starter
1 cup of starter
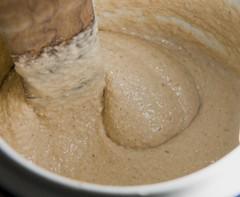
1 cup of starter plus 1 cup of water, and a bitPour it all straight in, and turn on the processor.
A dough forms pretty quickly--within much less than a minute:
Now I let it sit for the 'autolyse' to hydrate the flour--10-20 minutes--before the kneading. The dough is a bit stiff and dry, however, and I can tell that it needs more water--because it is rough and doesn't sag when the motor is stopped. The 2 cups of liquid I added contained some flour, so my 'about 2 cups' wasn't enough.
After the 'autolyse', I've turned it back on to knead, and added another 1/3 cup of water as it worked. After about a minute, the liquid is absorbed and the dough is 'cleaning the bowl'
This is now a very soft, rather sticky dough, might have overdone the water a bit:
A tea strainer makes a great dredger to dust the work surface (a silpat sheet) with flour, thinly and evenly
And now the dough is dumped onto the work surface, and kneaded a few strokes to round it, before it gets plopped back to a bowl for rising.
The rounded dough here is a bit saggy:
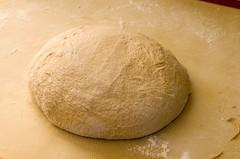
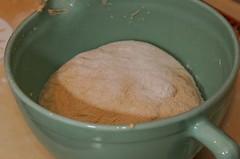
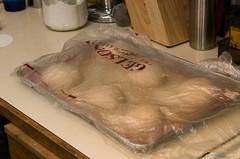
The dough and bowl are put into a plastic produce bag, and if you handle it right, it's easy to capture abundant air in the bag so it is puffed up well above the rim of the bowl. This gives the bread room to rise without touching and sticking to the plastic, and keeps it nice and moist. The clip is tight enough to keep enough air in the bag but not so tight as to cause the gases released from the fermenting dough to pop the bag
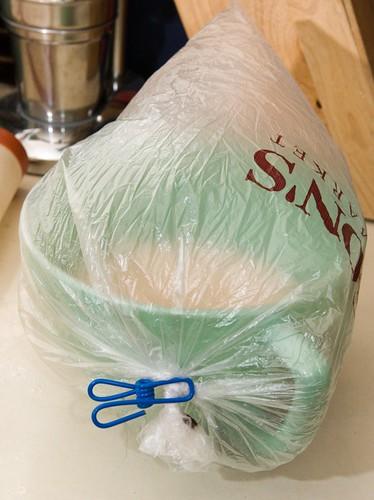
After 45 minutes at room temperature, the bag is already misted on the inside with moisture;
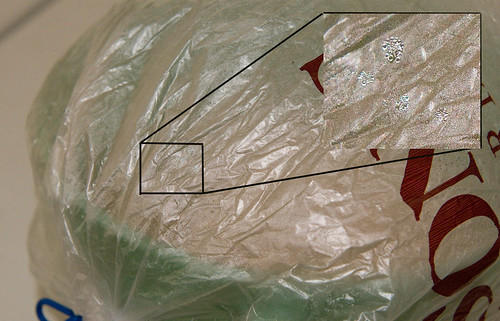
and a few hours later there are a few little trails where water drops have formed and run through the condensation

The dough has gone a little over the top here, starting to sag back already before I got to it. That's what happens when you're having too much fun in the garden to stop and tend it; fortunately, the bread will forgive the neglect. Still, you want to catch it when it is still domed.
Turned out again onto the silpat, re-rounded with a few turns, and back to the bowl:
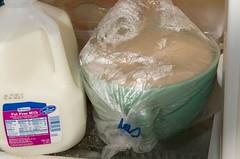
And into the refrigerator for rising overnight:
The next day, the dough is removed from the fridge, and returned to the work surface for dividing and shaping:
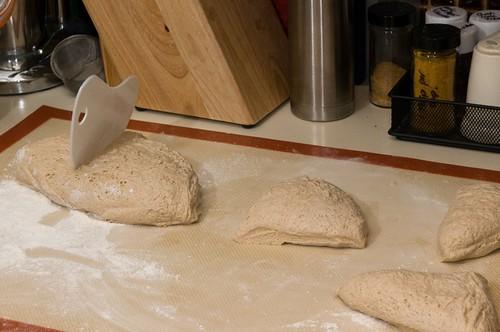
I divided this into six pieces for large rolls or small loaves--enough for one morning's toast or to eat with a bowl of soup. Single serving loaves work best for me.
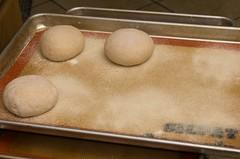
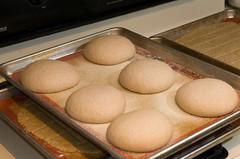
The shaped loaves are set on a silpat-lined baking sheet, sprinkled with coarse semolina flour, and are put back in the bag for rising--in this case, I just open up the bag to a single layer of plastic, which just covers one baking sheet, loosely, and doesn't stick to the dough because it's already pretty damp on one side:
Now they proof for about 45 minutes. The dough has to come to room temperature, and then rise, so this takes a while. Here they're about doubled in bulk, and relaxed to a flatter shape. Meanwhile, I've been preheating the baking bricks in the oven.
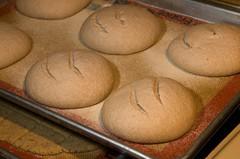
Last stop before the oven is slashing the loaves. I'm still not very good at making the right kind of deep, angled cuts, which permit the dough to expand without having to tear the already formed crust. I used my bread knife because I couldn't find the lame.
Now into the oven, onto the preheated bricks. If I were really determined, I could carefully place the formed loaves directly onto the bricks, with a fresh layer of semolina in between, but here I take the lazy way out and just put the pans on the bricks. I probably lose a bit of potential oven spring that way.
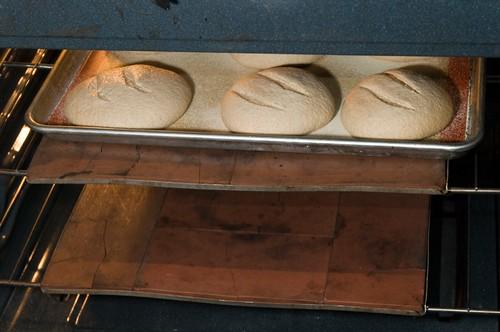
This time I tried a new trick for keeping the oven steamy, which helps keep the crust soft until the dough is fully expanded. I put a small cast-iron teapot full of boiling water directly on the bottom of the oven, beneath this lower tray of bricks. In theory, it was supposed to keep bubbling and steaming away....
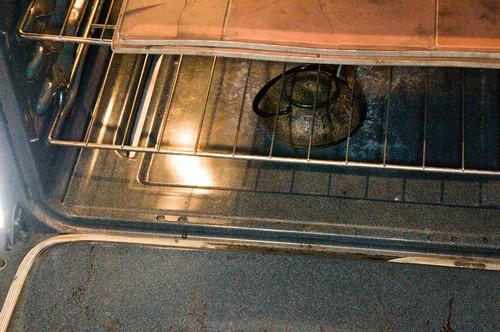
afterwards, though, there was still quite a bit of water in it, which I'm trying to show here, so I'm not sure how much steam it really made:
I check for doneness not by knocking their bottoms, but checking the temp. For simple country rolls like this, I want 205-210 degrees internal temperature
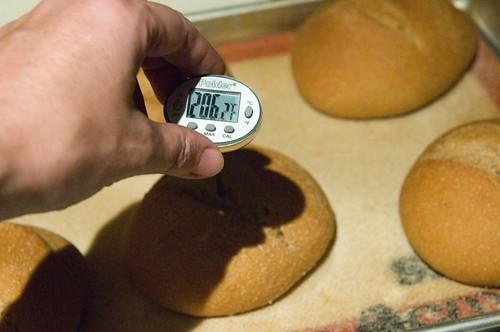
And here are the finished loaves
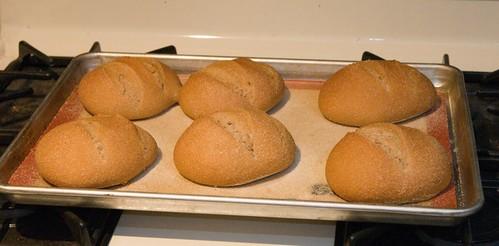
Transfer to a cooling rack, out of reach of bread-thieving cats or other dangerous creatures, and you're done.
-
8
-
2
-
-
I am so thrilled to see this topic here. There are very few places to really dive deep into discussions about home-milled grains. I resorted to posting some tips on my very plain website (text/photos only, no ads, animations, but I might still have a google analytics on older pages that goes nowhere but to a page whose password I've lost), but I would be surprised if more than a dozen people besides me have ever looked at it. This is about why I mill in the first place (short version: it's Dad's fault):
And this is how I adapt recipes written for refined flour for home milled flour:
Adapting refined-flour recipes to whole grains
And here is my whole process from wheat grains to a loaf of bread:
What makes it all worth it for me are really these things
1) I get the whole grain and the whole grain nutrition and all the fiber I need to keep things moving!
2) I again the most exquisite control over the flavor and texture of my baked goods by combining different grains and custom milling the flower for every single recipe immediately before I prepare it. It is definitely about a lot more than just wheat bread!
–For most cookies, I start with 100% soft wheat if I want a texture like a toll house chocolate chip cookie, but if I want a shatteringly crisp short bread or biscotti, I use up to 30% brown rice, usually short grain or sweet rice.
-If I want softer for a cake, I might use a significant proportion of oat with the soft wheat, up to 30-50%, or if I want softer with a different flavor, corn.
-If I want pasta, I use durum (durum gluten is very strong but not as elastic as hard wheat gluten). Or if I want a extra firm texture for some crackers, with an earlier than usual flavor, durum is great.
-I have moved away from a long period of almost exclusive use of white hard wheat because I think there might be a little more nutrition in the compounds that make the whole red in more traditional hard wheat, on the general principal that many of the key phytonutrients happen to be colorful, and because I started using some locally-grown heritage wheat from Roan Mills (I particularly like the Glenn, Red Fife (hard) and Sonora (soft) wheats), but unless I can special order and pick it up at the mill, they only sell them in combinations they control--not my thing at all.
-I have been studying Alice Medrich's Flavor Flours to see how she combines non-wheat grains with different flavors in various recipes, more assiduously now that my best friend has been diagnosed as celiac. And I am playing more with non-wheat grains (even beans) for flavor and texture even when I am combining them with wheat, in part because I figure more variety in my diet should be healthier overall.
3) I virtually always use whole or lightly crushed/cut up spices milled in with the wheat for the freshest, brightest, strongest flavor. Most spices can be milled in with the grain because you are not using them a high enough concentration for their oiliness or hardness to be a problem, with few exceptions (dried ginger, dried galangal!). I used kitchen shears to cut up cinnamon quills and to cut whole vanilla beans into short lengths (no need to bother cutting it open and scraping out the seeds, just drop quarter inch pieces mixed in with the grain when milling).
This offers an additional benefit because I can buy my spices and slightly larger quantities, whole, and they keep for years without significant loss of quality, not something you would want to try with ground spices.
MILLS
I first used a Kitchenetics Kitchen Mill, the same model my Dad bought, and I still use it regularly 35 years later. It's an impact mill, and mills the flour extremely fine. It has a setting dial for coarse to fine, but the coarse is very fine and the fine is silky. It's loud. I call it my baby jet plane, because it is loud. Not that long ago, I did a comparison with a decibel meter between the kitchenetics kitchen mill (110db) and the mockmill (100db). A Nutrimill Plus clocked in at 90db, definitely the quietest of the 3 I had available for my informal sound test. I always wear earplugs when milling! Its advantages versus the others are speed, finest flour, and it seems a little less prone to becoming jammed than the mockmill. When milling a lot of grain at a time, it does heat the flour 130 to 140 degrees F. They describe the motor as permanently lubricated; other than one servicing 5 or 6 years in when I foolishly attempted to powder sugar (DO NOT DO THAT!), it has just been brushed clean after each use. It has certainly withstood the test of time, because I am sure that by now it must have milled more than a ton (US) of grain. Blendtec now makes the same machine with slight differences.It did have a problem with a clamp that prompted me to try out potential replacements, but I still keep it and use it with a strap clamp to help contain the dust in use.
I bought a Mockmill 200 to have more options from coarse to fine textured flour, and to see if the stone milling would truly be cooler. I really do enjoy the different textures, quieter function (remember that the dB scale is logarithmic so 110 is way louder than 100), and that it is easy to keep it set up on my encounter without taking up too much space.
I gave away the Nutrimill Plus: I found the set up & cleaning just a bit more than either of the other machines, its large size harder to store, and it had more difficulty with both very small and very large grains (e.g., whole corn and teff). Still, especially for someone who lives in an apartment, it might be an excellent choice because neighbors have ears.
I have also used a Wonder Junior Deluxe hand mill, which I still use to get some very coarse grind that is almost closer to a longer or steel cut texture for some flatbreads, where that course grain adds flavor and helps control the thickness as I am rolling that though out. It takes too much time and muscle power to get truly fine flower that I want for most of my baking, however, and it does not permit milling in the spices with the same evenly distributed result I get from the kitchenetics or Mock Mills. So it mostly sits in the back of the cabinet until I am ready to make those particular flat breads or crackers.
All of these mills do fine with your basic wheats (hard, soft, einkorn, emmer, spelt, durum, kamut, farro); rices; oats; rye; barley. As I noted above, the Nutrimill had difficulty with whole corn, but the others do not. They generally are fine also with mixes that include millet, quinoa, amaranth, buckwheat, sorghum and teff; but chia and flax will gum them up if used at more than about 5% concentration because they are too oily.
I do like to add flax and Chia to many recipes at low concentration, because of their high omega-3 content obtained without resorting to strip-mining the oceans, and because they are useful binders for gluten-free baked goods without needing to resort to xanthan gum. Plus they add nuttiness that is often quite nice. But, as mentioned above, these cannot be milled except as part of mix with wheat or other grains at very low percentage, because they gum up the mills (>5% in the Kitchenetics, >2-3% in the Mockmill). I get around this by using a coffee grinder/spice mill which is reserved only for seeds and spices, so it does not make everything taste like coffee. I cannot get the flex and Chia as fine as the impact mill, but I can use them at larger proportion if I mill them separately.
(my take) SOURDOUGH STARTER & THE PINEAPPLE JUICE SOLUTION
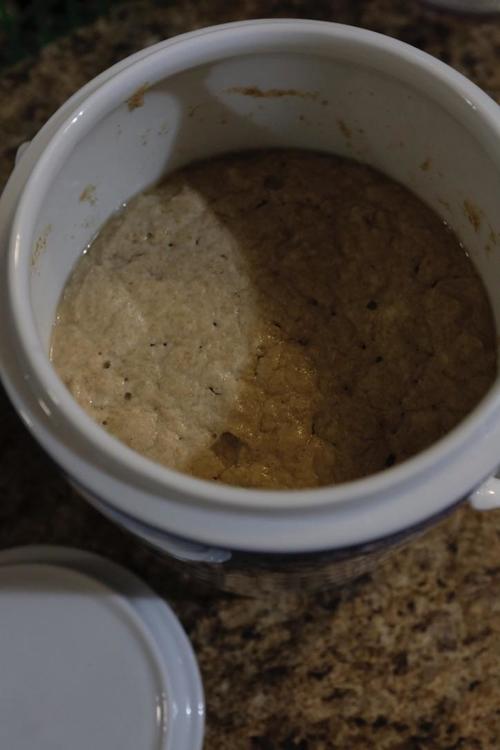
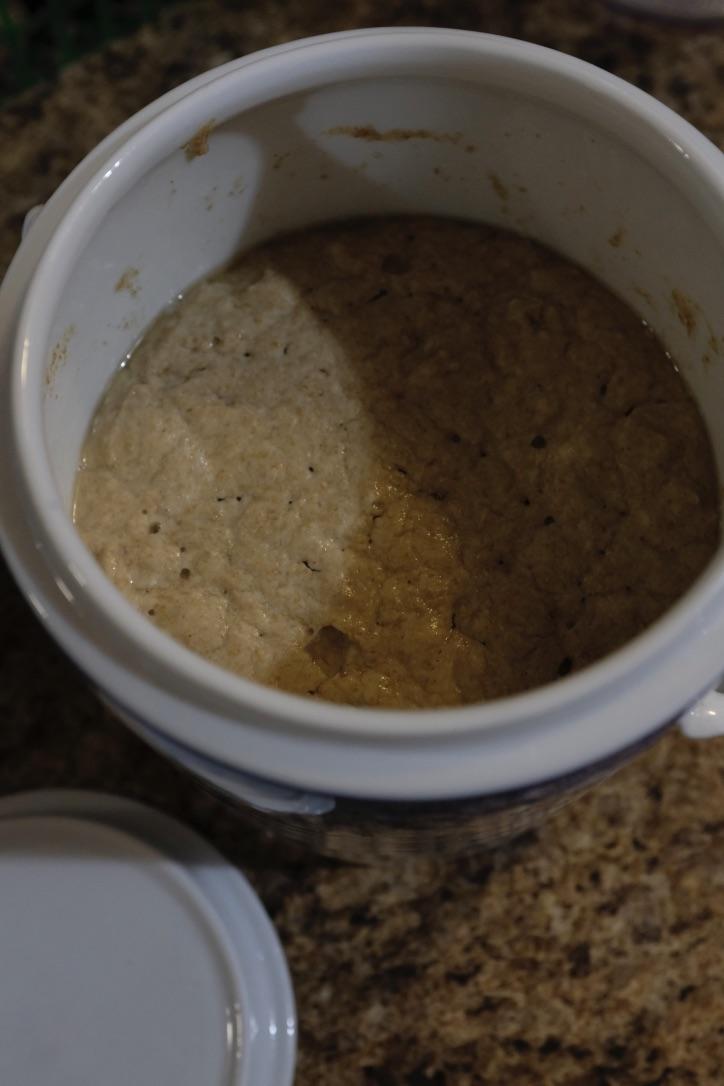
Regarding pineapple juice and sourdough starters, I buy the small six-packs of pineapple juice and start new starters often, because I don't bake that much bread, and mine sometimes sadly becomes moldy when I neglect it a bit too much. It can be quicker to make a new one than try to rehabilitate a neglected one when I use Peter' Reinhart's guide in his Whole Wheat Breads book & pineapple juice.That said, I can keep a starter going for ages if I store it as a chunk of fairly dry dough buried in flour in my chinese crock in my fridge. It's when I am building it up for a recipe and don't use all of it and don't take the time to prep that dry little ball of it and it sits as a very wet starter for months that it gets sad.
As it happens, I've got a phase 4 starter in the crock and today I'll bake with it for the first time, some crackers and flatbreads.
I love these Chinese crocks, because they seal just enough to keep my cats out of it when it's on the counter, and refrigerator odors out when it's in the fridge, but let the gases out.

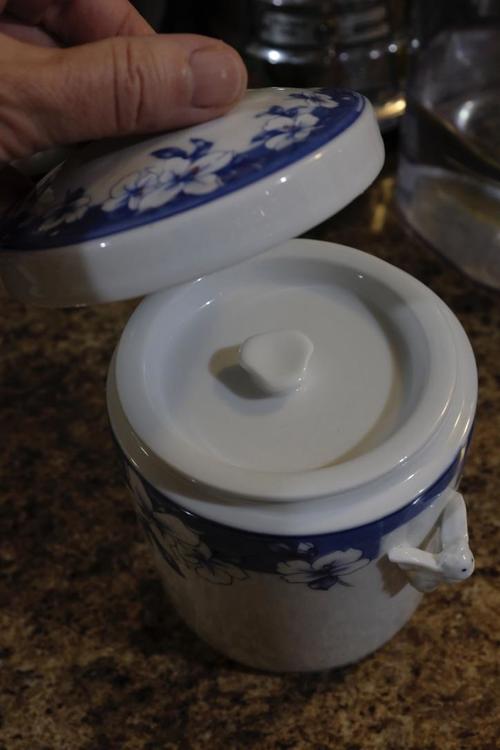
I use the little crock (about 3 cups volume) for getting it started, and storing 'dry'' starter in the fridge; the big crock is for feeding/expanding higher volumes without overflow.
When I can figure out how to do it, I'll post Wheat to Eat here with all the images but right now it's time to get off my duff and go prepare the stuffing.
-
2
-
3
-
-
The plan was to prepare this for a potluck party, with no concern for leftovers past about 36 hours.
But it's another good point.
-
10 hours ago, teonzo said:
Ah, I thought that recipe was new to you, so things are different.
Possible problems with your recipe are these ones:
1- curd's egg proteins coagulate during the cake cooking process, so the curd becomes grainy;
2- cake cooking process breaks the curd's emulsion (lots of butter there), so the curd becomes grainy;
3- curd becomes too runny during the cake cooking process, so it ends up being (partially) absorbed by the underlying cake batter.
Case 1 should not apply here: you already cooked the egg yolks while making the curd, so there should be no risk.
Case 2 could happen, most custards that are baked in the oven don't have troubles but some do, it depends on the single recipe and the cooking process. I would say this is possible but chances are small.
Case 3 is more probable. You have the cornstarch that binds water, but there is that lot of butter that liquefies before the cake batter starts setting (egg proteins are still uncooked, starches are not gelatinized). This is the more worrysome risk, especially if it's combined with case 2.
Only way to know is trying.
Teo
Thank you, this is exactly what I was groping towards asking. I think I have figured out a way to test this with much smaller batches as cupcakes, and will report back on how it goes.
-
4 hours ago, heidih said:
Tunnel cakes were a thing in the 70's. Not necessariy baked in - but tunneled out after baking. My mom's entertainment dessert for special folk was angel food split and tunneled out. (innards pulled out) with a stunning black cherry mousse "tunnel".
That sounds delicious. But I'd rather be lazy and 'bake it in' than to hollow out and keep it neat.
-
5 hours ago, teonzo said:
Personally I would avoid egg yolks and butter, they would mask the pomegranate taste. I would avoid lemon juice too.
I made something similar years ago, here is the photo:

Those look delicious!
I am specifically asking about this curd, which I created as part of a different dish (a tart with apples and pomegranate curd), and I loved the pomegranate curd as written , with the richness of the eggs and the butter. What I am wondering about are the limits of a cornstarch/egg curd or custard being used to 'fill' a cake by being baked inside it--will they separate or liquify or come out (when cooled) as a thick sliceable center to a slice of cake?
Today I went simple and prepared a pomegranate curd to pour over the pistachio cake. There's lots of room for improvement because I discovered that pomegranate molasses has too strong of a 'cooked' flavor already to substitute for pomegranate juice, although the intensification of the pomegranate flavor was pleasing against the relatively bland cake.
I think the way to go for practice is small-batch cupcakes with dollops of filling to see how each filling is affected by being 'baked in'. Walk before I run....
-
1
-


Cheap set up for growing my own tea?
in Coffee & Tea
Posted
Someone has posted in another forum about getting enough for one small session of tea from one tea bush after growing it for several years, or a few sessions from a single row of plants in their California back yard.
I've never tried it, but one of these days I probably will, just because I like odd stuff in the garden.