

Jim D.
-
Posts
2,411 -
Joined
-
Last visited
Content Type
Profiles
Forums
Store
Help Articles
Everything posted by Jim D.
-
I have had the same issue, so I add waxed paper (or similar flexible paper or bubble wrap will work) between the top of the chocolates and the pad. Chocolates are sturdier than they look, so I make sure I fill up the space as much as possible so that there is as little wiggle room for them as possible.
-
That should work. If we really want to see what effect time has on Aw, I could take several samples just after the filling has been made, then put on the lids (yes, the tiny little cups come with tiny little lids) and test them over a period of days. An after-Christmas project.
-
As Kerry pointed out, the machine cannot read the sample until the it and the sample are approximately the same temperature. It makes sense to me that the sample should be measured when it has crystallized, but, for a filling that eventually firms up quite a lot, it's very difficult to get it into the little cup if you wait, especially since the entire bottom of the cup is supposed to be covered for best results but there isn't supposed to be any of the sample at the top edge of the cup--in other words, the "target" area is quite restricted. I have no scientific evidence about this, but it seems to me that the filling would be at its most "watery" (and therefore have its highest Aw reading) when it is just made. I'll experiment and see if I can get more information.
-
I was thinking of you but didn't want to reveal your inmost secrets on eG.
-
Most people use an immersion blender to mix the cocoa butter with colorant. That's what I have done. It takes more effort than it might seem to get them mixed, so I'm wondering if the gentle action of the Chocovision bowl turning would accomplish that. Some people also strain the mixture afterward to get out any remaining lumps. If you use this method, be sure and have a deep container to prevent coloring your kitchen walls.
-

Molded and Filled Chocolates: Troubleshooting and Techniques
Jim D. replied to a topic in Pastry & Baking
So you didn't try the seed method? It's so much less messy. Or perhaps you enjoy playing with chocolate? 😄 -
I agree with what Kerry wrote. I can't imagine a situation where you would need enough colored cocoa butter (of a single color) to use a Chocovision machine (recall that the machine needs extra to make sure the thermometer is covered at all times). You can just follow one of the usual methods of tempering chocolate: (1) raise the temp, then cool the c.b. down, then up again or (2) raise the temp, cool the c.b. down to around 93F/34C, then add seed (you could use fresh cocoa butter for that), then lower temp to 86F/30C, then test the c.b., you will have tempered c.b. Just don't let the temp go down too low or up too high while using it or it will go out of temper.
-
Molded and Filled Chocolates: Troubleshooting and Techniques
Jim D. replied to a topic in Pastry & Baking
These are not pro tips, just the way I temper a small amount of chocolate (standard procedure, I think). Here I'm speaking of dark chocolate (temps are, of course, a little different for milk or white). If I am using "used" chocolate, I melt it to over 43C to melt out all the crystals. Then I add some more chocolate (whether it's more used chocolate or new from the bag doesn't matter as any Type V crystals are going to be melted out--the purpose of this step is to cool down the chocolate as quickly as possible). When it is in the 35C area, I add the seed. It's easier if you have a block, but callets/pistoles/fèvres from the bag work. I stir as the seed is melting to distribute its Type V crystals throughout the bowl. When the contents of the bowl cool to the 31.5 - 32 range, I remove the seed. I stir for another minute or so, then test the chocolate for temper. If your chocolate is all "new" from the bag, then you don't have to go all the way to 43. You just heat it up to its working temp (31.5 to 32 for dark), being careful not to get it too far above that or if you do go above 34, make sure there is enough unmelted chocolate to act as seed. This method is a bit more tedious but quicker. -
Molded and Filled Chocolates: Troubleshooting and Techniques
Jim D. replied to a topic in Pastry & Baking
Why not try using seed? Since it rarely (if ever) fails, at least it would restore your confidence. And it's so much less messy than tabling. -
Molded and Filled Chocolates: Troubleshooting and Techniques
Jim D. replied to a topic in Pastry & Baking
Which tempering method are you using? -
Molded and Filled Chocolates: Troubleshooting and Techniques
Jim D. replied to a topic in Pastry & Baking
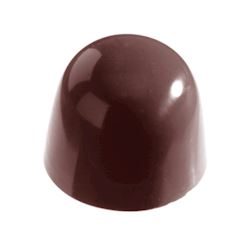
I have now edited my earlier post with the images to include this dome. A cynical viewer might think CW has used the same image for all its domes! Perhaps they need to add a new category, something along the lines of "difficulty of unmolding." -
Molded and Filled Chocolates: Troubleshooting and Techniques
Jim D. replied to a topic in Pastry & Baking
Now I am more puzzled than ever. On the top row below are the two molds I use, CW 1157 (18g, 29.7mm diameter x 25mm tall) and CW 1433 (15g, 29mm x 25mm). On the bottom row is CW 2207 (14g, 29mm x 21mm), which @pastrygirl and @Kerry Beal use, and CW 2116 (14g, 29mm x 23mm), which @gfron1uses: To me the shapes look the same. But perhaps the 4mm less tall of the third one makes a difference?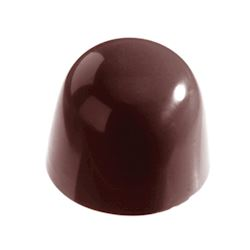

-
Molded and Filled Chocolates: Troubleshooting and Techniques
Jim D. replied to a topic in Pastry & Baking
But which one do you use? -
Molded and Filled Chocolates: Troubleshooting and Techniques
Jim D. replied to a topic in Pastry & Baking
I just remembered that @gfron1 uses domes that look deep (I don't know the weight). Perhaps he could weigh in on any unmolding difficulties he has had with them. I think @pastrygirl uses them as well. -
Molded and Filled Chocolates: Troubleshooting and Techniques
Jim D. replied to a topic in Pastry & Baking
I remember that story vividly; I'll bet that mic picked up some choice language. In fact, I often think of the incident when I am banging molds on the counter (thankfully I'm not doing this at a show!--and thankfully polycarbonate and granite both withstand great abuse). I think it was you who recommended the domes that are a little more flattened out, such as CW 2207: -
A tip that might be of use to others: For a soft, sticky ganache or other filling that needs to be flattened out after being piped or even moved around in the shell a bit, you can dip a paintbrush (stiff bristles work best) in melted cocoa butter and uses it to move the filling as you wish. The brush does the moving, the cocoa butter keeps it from sticking. I discovered this when I was following Greweling's suggestion of creating a cocoa butter layer between two fillings that might experience moisture migration in the shell. So I was brushing on a layer of cocoa butter over a pâte de fruit and found that a substance that resisted everything else (gloved finger, plastic wrap, etc.) would flatten out with this trick. Today I used it on the stickiest thing I have ever piped into a mold, dulce de leche, and again, it worked. It helps with those annoying times when you notice that a few cavities need just a bit more filling, but the usual leveling techniques (tapping on the counter) are too late to work.
-
They definitely are not always soft, but don't usually set up as firmly as a dark- or milk-based ganache. I think balancing the ganache is the key. For that I use a formula calculating amount of cocoa butter, fat, water, etc. When I have my Christmas chocolates more under control, I'll run your recipe through it and see what it says. It is based on Melissa Coppel's and Ramon Morato's formulas, but is annoying to the degree that it requires you know amounts of the categories in each product you use, and, as we know, labels often don't provide all that info.
-
Molded and Filled Chocolates: Troubleshooting and Techniques
Jim D. replied to a topic in Pastry & Baking
@Rajala, I am more puzzled by the fact that you were using a hemisphere. My followup post to my previous one was going to be that I have trouble with domes, almost never with any other shape. But I mean domes, not hemispheres. I was going to say that I almost never have trouble with hemispheres falling out of the mold without an issue; in fact, any "flattened round" cavity does not often give me trouble (such as the ones called quenelles, the cocoa pods, the flattened domes). Nor do molds with some design to them (ones I call "grooved domes," the CW pyramids, squares with designs--all give no problems). There was a thread on eG some years ago from @lebowits discussing his problems with shelling domes, but I don't recall there was ever a definitive answer. Since I do all the things mentioned above in this thread (stirring the pot between shellings, testing the chocolate, etc.), I'm wondering if geometry plays a role as well. But then I know many chocolatiers use nothing but domes. My other idea about the cause is overtempering. In a recent thread, someone was saying his/her chocolate (in a Chocovision machine) got overtempered quickly. That person has not replied to my response, but I was going to ask how to know so definitively. One can tell from the "feel" of the chocolate that it's getting too viscous, and the chocolate in the molds changes its look more quickly, but aside from a temper testing machine, I don't know how to judge. I read somewhere (probably eG) that overtempered chocolate does not release well from molds. I don't know if that is true, but it might be a clue. -
Molded and Filled Chocolates: Troubleshooting and Techniques
Jim D. replied to a topic in Pastry & Baking
I had a similar issue today with some cavities releasing the chocolates without any coaxing at all, others took banging on the counter, still others took time in the freezer. I also find this very frustrating because there seems to be no logical explanation. For what it's worth, my space was 20C, the molds were room temp, I don't heat the molds (I have tried it for caramels that tend to leak, but it seems to make no difference). All molds had been painted then sprayed with colored cocoa butter--all done at the same temp, same place, more or less same time. I don't think there is any limit to how often you can temper the same chocolate since I don't think Type V crystals know how old they are. I have not encountered an expert who said chocolate could be too old (as far as tempering it goes--taste might be another matter). The good news was that every single chocolate eventually came out of the molds in question, with only one damaged with cocoa butter left behind in the mold. Obviously they are not contracting properly. But with some other molds every piece fell out immediately or with slight coaxing. All had been done on the same day, same chocolate, etc. In desperation, I'm now looking at two additional factors. So could you first tell me what molds you were using? The mold that gave me the most trouble today was CW 1433 (15g dome). -
Your Daily Sweets: What Are You Making and Baking? (2017 – )
Jim D. replied to a topic in Pastry & Baking
Looks beautiful (like all your work) and sounds delicious. Any chance you can provide the recipe? -
@heidih, you certainly brought back memories. My Aunt Polly, a "home economics" (as it was called then) teacher, and I made that recipe from that same cookbook as our first "gourmet" effort together. I learned so much at her side over the years. I can still remember finding a proper wooden board to hold the baked Alaska, soaking it in water so that it wouldn't burn, then putting the dessert into the oven, never believing for one second that the ice cream wouldn't melt. Guests were in awe--and so were the bakers!
-
As I write this, I have just finished using my Delta, so everything is fresh in my mind. I can provide what I have learned over many batches made with the machine. I heat my chocolate to somewhere in the 110-115 range. I do it overnight in a dehydrator before using the Delta, so it is ready to be poured into the machine. Before I had the dehydrator, I melted the chocolate in a large bowl in the microwave. Either of those methods will speed the melting process along. But before melting, I remove 250-300g of the chocolate and set it aside (small pieces work best). You are right that one drawback of the Chocovision machines (and any tabletop temperers, I suspect) is that they don't have a cooling mechanism. Of course, if they did, they would cost a great deal more money. There are such machines; they are called Selmis (or similar products). A cool room temp will also speed the process. I use the manual mode of the Delta so that I can control the process more precisely. (Someone at Chocovision told me that the automated methods offered by the machine can be programmed to use whatever temps you want, but my machine was made just before that option was added.) When I add the melted chocolate to the bowl and start the machine, I set the temp for 95F and add the amount of unmelted chocolate I set aside. That helps to bring down the temp more quickly. Then, at 95F, I add whatever seed I am using (there is no point in adding seed above that temp since it won't do any seeding). You could add it earlier (as Chocovision directs), but I like to use a block of chocolate for seed and don't want to use it up just for cooling the chocolate. I set the temp for 90, at which point I remove the seed and set the machine for whatever final working temp I want. I have checked, and the Delta holds the set temp very well. That is the reason I like this machine. But the constant rotation does overtemper the chocolate. Needless to say, overtempering happens with whatever method you use to temper. It's just the way chocolate is. Chocovision suggests several methods for coping. The simplest is to raise the temp. Raising it a degree at a time somehow thins out the chocolate. I say "somehow" because I have no idea why this occurs--no Type V crystals are being melted out until we get above 93F or so. I posted this question on eGullet once, and no one had a definitive answer. When the overtempering appears again, you can take the step of raising the temp to something like 95 for a period of time, then lowering it to where it was. I always check the temper at that point because you never know what has happened to those crystals. Chocovision speaks of "killing" some Type V crystals--a vivid image, however inexact it might be. This method works. But the method I prefer, especially if I am doing a large batch, is to add untempered chocolate. For this purpose, before I begin melting the chocolate the night before, I remove 1/4 to 1/3 of it and place it in a separate bowl to melt at the same time as the contents of the larger bowl. When I want to start tempering, I leave the smaller amount in the dehydrator. So when the overtempering starts, I remove the small bowl from the dehydrator and let the chocolate cool down but not below 95 or so. I have found that it's OK to add it, small amounts at a time, to the Chocovision bowl at 95F, even as high as over 100 (which I just did today). As long as you don't add too much, the temper will be maintained and the chocolate will be more fluid. To me it feels like starting the batch all over again with freshly tempered chocolate. Of course, the overtempering process starts again, and so it goes.... Probably more detail than you wanted, but I have experimented a lot over the years and wanted to include what I have learned.
-
EZtemper - The Help You Need to Achieve Perfectly Tempered Chocolate FAST!
Jim D. replied to a topic in Pastry & Baking
I'm thinking he might be a keeper. -
I temper with silk from the EZtemper and test each time before spraying.
-
I also continue to try to find the "right" procedure, while having the suspicion that there may not be a right way. I dutifully temper the cocoa butter and test it before use. I do not work in an especially cold space. I think one factor that has not been mentioned is humidity, and I often wonder if that is important. It will always be a mystery to me: In a recent batch, most bonbons released with no issues, but some (far too many for my sanity) left cocoa butter behind in the molds. I can't think of any sensible explanation for these erratic results. The adjoining cavities were washed, polished (cloth only), etc.--in every conceivable way treated exactly the same. But how many times has this observation been posted on eG? I am going to pay more attention to the temperature of the cocoa butter as it is being used (swirled, airbrushed, etc.) on the suspicion that I may be using the heat gun too carelessly (or letting the cocoa butter cool too much while in use). It is a major pain to stop airbrushing to take the temp of cocoa butter, but I continue to seek a factor I can control. Just another guess in the puzzle.


