Jim D.
-
Posts
2,415 -
Joined
-
Last visited
Content Type
Profiles
Forums
Store
Help Articles
Everything posted by Jim D.
-
Thanks for your suggestion about the ladyfingers. I more or less settled on a method that is like yours, but with less work. I use whole eggs and beat the mixture, but not over heat (it doesn't rise much). Then I spread it on Silpats and bake it until it begins to brown, and then grind it into powder. It is the taste I want, so the rise is not important. I could not tell the difference in taste between this version and the traditional method. My recipe for tiramisu bonbons is one I developed based on the ideas of others (and my own experience of tasting tiramisu). I first tried Kalle Jungstedt's recipe, but tiramisu must be different in Sweden because it had an almond flavor. So I use a typical coffee ganache, with cream (steeping coffee beans in it beforehand) and a mixture of extra-dark chocolate, white chocolate. and a little extra cocoa butter. To that I add mascarpone and Kahlua. This combination gives a noticeable coffee flavor, but it's diluted enough (with white chocolate and cocoa butter) so that the coffee doesn't totally dominate and the mascarpone and ladyfinger flavors show up. I pipe this ganache into a mold, filling the cavities about 2/3. Later I mix the ground "ladyfingers" with caramelized white chocolate, cocoa butter, and sea salt and pipe that on top of the coffee ganache. I haven't tried Madeira or marsala; I don't think I would want to add additional flavors, but it is an idea worth pursuing. The aW reading of my ganache is 0.83. According to Melissa Coppel, that translates to 3-6 weeks. First, I think a span of 3-6 weeks isn't a terribly useful guide. Second, 0.83 is higher than I like to go. I think that if I replace some of the glucose added to the ganache with sorbitol, I could lower the water content, but haven't had time to try that yet.
-
About using the stamp: There is a very precise method for using stamps (posted by the people who make them). It involves heating the stamp to a high temp, then pressing it into the cavities (previously sprayed with CCB) for a very brief time (just a few seconds). It sounds as if you may be pressing the stamp for a longer period of time. You are probably overtempering the CCB (all that movement does it). I have had this happen (with the same results as yours) when I used a finger to mix several colors in a cavity to get a marbled effect or when I use a sponge to deposit color. It's always difficult to determine what causes a particular defect in a bonbon--any mistake along the way can do it, and the result isn't always logical. Your results are often attributable to humidity . I live in Virginia, and making chocolates in the summer months is very difficult, even with my space air conditioned. You mentioned recent rains in your area. 50% humidity inside will work, but it's not ideal. This probably isn't the cause of your issues, but I'm just trying to cover all the possibilities. I tried using silk to temper CCB for a while, but when working with small amounts, it probed to be too easy to overtemper the CCB, and so I returned to the raise/lower/raise temperature method. If you use silk to temper larger amounts of CCB, I would use less than 1%. In the online course I took with Andrey Dubovik, he always checked the temper of his CCB before using it. On the advice of people on this forum who know far more than I do (especially Kerry Beal and pastrygirl), I don't worry so much about the temper when spraying CCB (with spray gun or airbrush) because the movement involved in spraying contributes to tempering.
-
As a start, could you say more about what you mean by using a stamp to get the colored cocoa butter into the cavity? What sort of stamp? Are you referring to the hugely popular silicone stamps that make a pattern in the cavity or something else (a sponge perhaps?). I know it's a nuisance, but another check would be to test the cocoa butter before using it. Spread a little on stone or parchment or just waxed paper and wait to see if it firms up and turns from shiny to matte. If it does, then it's tempered regardless of which method you are using for tempering. The traditional method for tempering includes the third step of raising the temperature back up to working temperature (the theory being that all types of crystals formed as you cooled the cocoa butter, so you have to melt the I-IV crystals, leaving type V). Kriss Harvey's method (also used by James Parsons) is not typical, but it seems to work--although I don't quite understand the science behind it.
-
If I recall correctly, Kate Weiser uses the method of shipping her chocolates when frozen and uses special packaging to protect them. Especially during the upcoming holiday season, there is no guarantee as to how long a package may sit around, so some sort of serious protection needs to be used.
-

Molded and Filled Chocolates: Troubleshooting and Techniques
Jim D. replied to a topic in Pastry & Baking
I have tried using the heat gun for all chocolates and noticed no difference. I have tried it for just caramels to avoid leaking, and I wasn't sure it made a difference. I tried it with half-spheres (which often show the chocolate line), and I probably overdid it because the bonbons stuck in the mold and needed more than a little pounding on the counter (they usually pop right out). I'll give it a try with this difficult square mold. With using silk to temper, I keep the chocolate a full degree above the norm so as to get as much heat as possible to join the bottom to the rest of the shell. -
Molded and Filled Chocolates: Troubleshooting and Techniques
Jim D. replied to a topic in Pastry & Baking
I have had cocoa butter separate into plain CB and the color, but never with the CB liquid. -
Molded and Filled Chocolates: Troubleshooting and Techniques
Jim D. replied to a topic in Pastry & Baking
If the bonbon has a dark color, the seepage doesn't show so much, but with the rose color in the photo, the chocolate was really obvious. I scraped it off for a few of them. Fortunately these molds make 40 bonbons per mold, so I had lots of extras. But for Christmas production, this is not acceptable. My "solution" for Christmas: I'm painting flowers similar to the ones shown and then shelling in Dulcey--no airbrushing involved, thus seepage will be invisible. Strangely, the shallower version of this same mold had no seepage at all. Work flow: Since I work alone in a very limited space, I have to color all the molds, then shell, fill, and seal the dark chocolate ones, follow the same process with the milk. I think the problem occurs between shelling and sealing, and I don't see a solution to the time it takes to make the fillings (depending on the recipe, I can do 3-4 per day). So I think my "Dulcey solution" is the only thing I can do. As you suggest, if I could shell, fill, and seal in a short period of time, the seepage probably would not occur. I can't do the fade trick with color as I ordinarily use the Fuji sprayer, which does not allow for such subtlety. What I lose with the Fuji I gain in speed--and, most importantly, with the lack of clogging of the gun. If I preheat it in a heating pad and keep it warm with a heat gun, it does not clog. I have frequent clogging with my Grex. With your much larger production, I think you would love the Fuji. No, I don't use cups. I bought trays so that I could stop using cups. Separating cups is a job I need to avoid for sanity's sake. -
I should have added that the e-book showing the stripes design (and others as well) is available at https://www.tinepreferschocolate.dk/item/no-airbrush-needed-beautiful-designs-english-version. It's just US $22.
-
No, one color at a time is used. You can see more of the designs on Tine's Instagram page: https://www.instagram.com/p/DRAgznvDc_4/
-
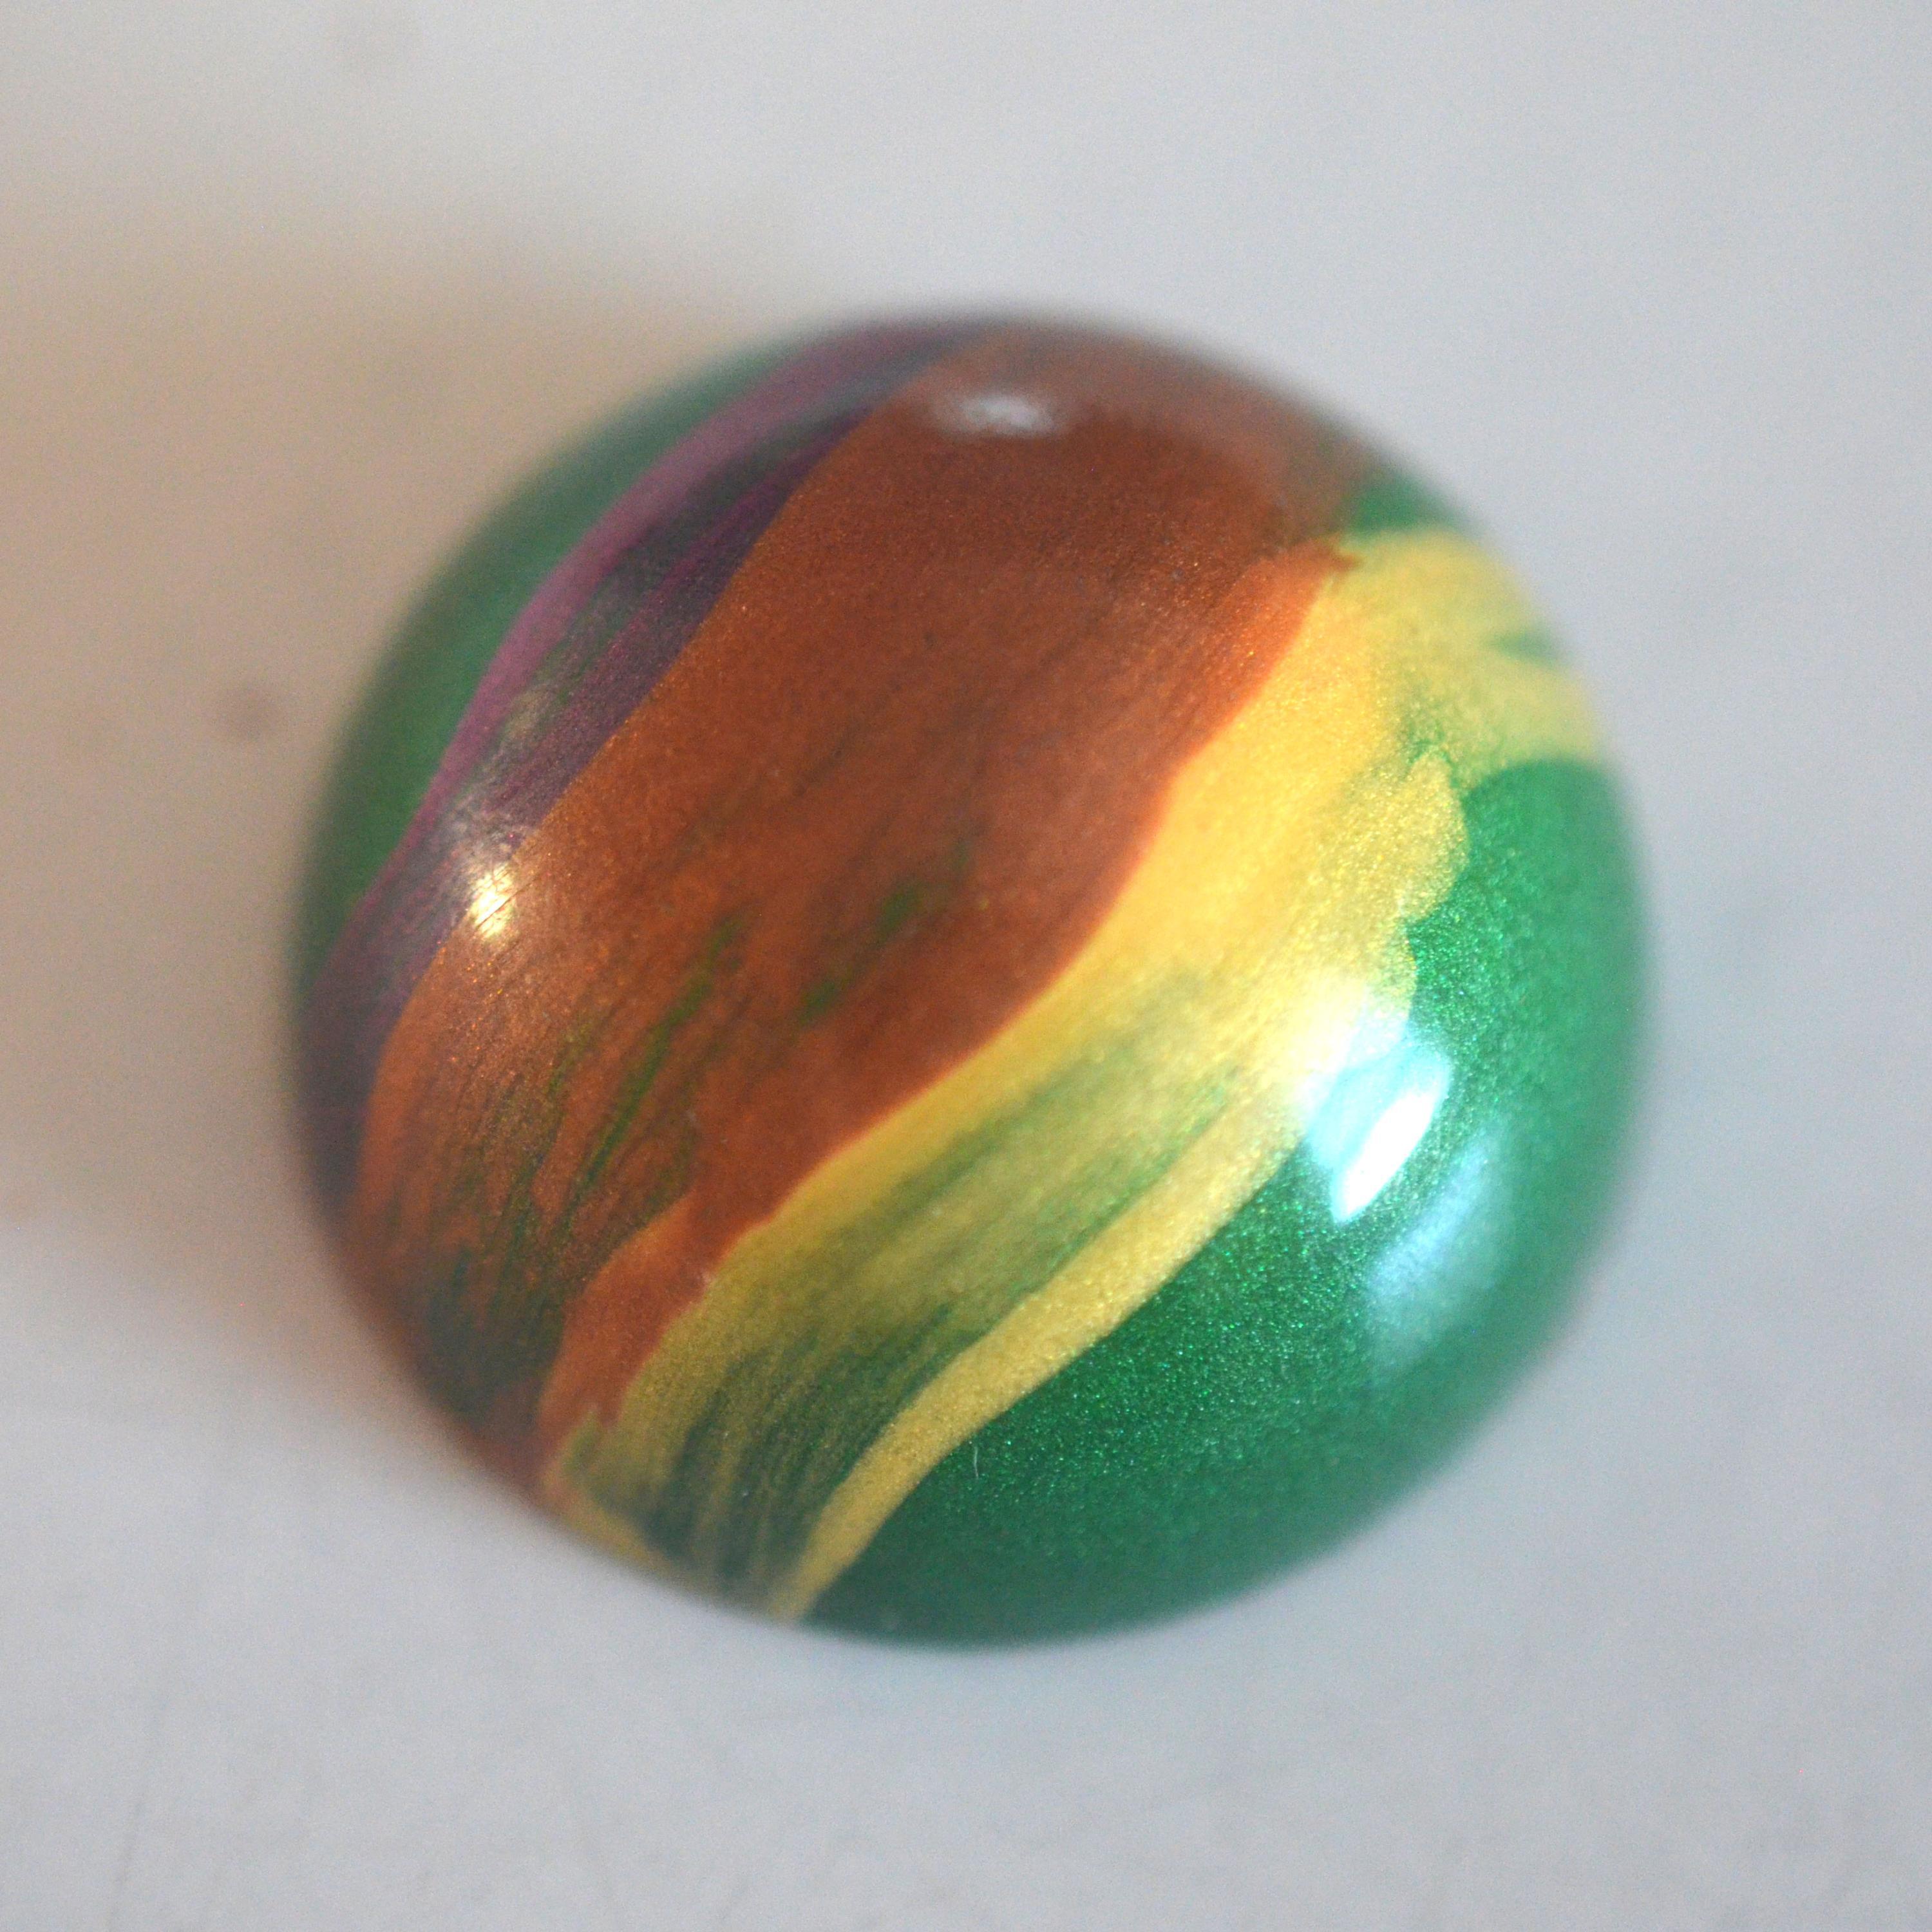
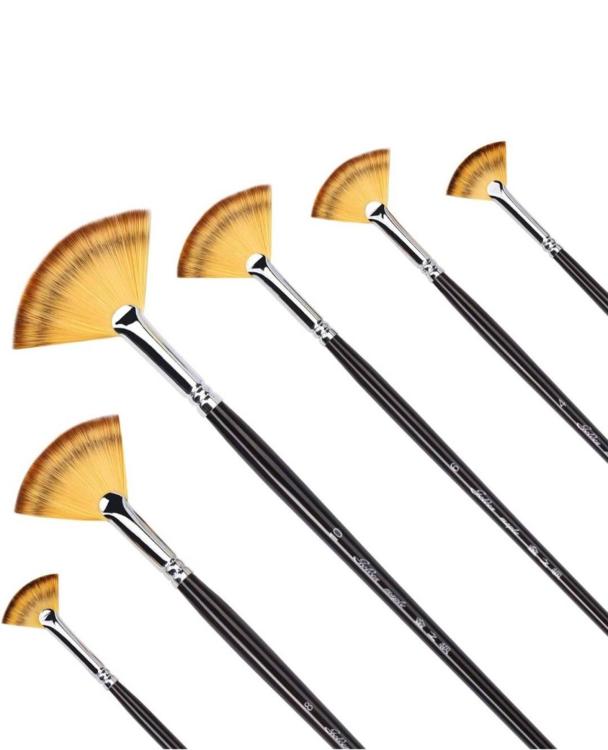
Tine Forst has a keen eye for complementary colors. I wish she would produce a video (rather than just the ebook) showing this technique. I think it's all in the texture of the brush and the force used in moving the brush. Almost worth a trip to Denmark to watch the process. Ordering the fan brushes online is not terribly useful; purchasing them in an art store would be much better--if only one could find an art store these days.
-
-
Molded and Filled Chocolates: Troubleshooting and Techniques
Jim D. replied to a topic in Pastry & Baking
And, to follow up yet again, on my Turkish mold saga, here is the bonbon I made using the mold: And, for the plus and minus factors: I love the square shape. Decorating it has so many possibilities that don't work in a dome. And the bonbons come out of the mold very easily; I am assuming this is because the square is not completely flat but has a slight curve to it (Chef Rubber sells a smaller version, from the same manufacturer, and calls it a "slumped square"). The negative: Too many of the bonbons have that irritating line of chocolate that shows along the bottom of the finished item. The explanation that makes the most sense is that the chocolate contracts as it crystallizes and so allows the chocolate used to seal the mold to seep down the side, thus showing up on the finished product. It can be scraped off with a tiny knife, but what a pain! A question for the scientists among us: why would the creepage happen in this shape? Or why would it happen in some cavities and not all of them? These molds are not particularly shallow (the usual issue). I know it happens in half-spheres (and even a very famous U.S. chocolatier posts photos that show the problem). Kalle Jungstedt says the "solution" is to use white chocolate and a light-colored cocoa butter. These molds are also very large (8 rows x 5 rows), much larger than any other mold I have seen. They require a lot of wrist strength to hold when they are full. I suppose the advantage of having so many bonbons is that when the "chocolate creepage" happens, those bonbons can be put aside and not used. So, one of my "ideas that come in the night to the chocolatier": For Christmas I will cast the molds in Duicey and fill them with perhaps passion fruit ganache or perhaps apricot PDF plus almond giandiuja or ... ?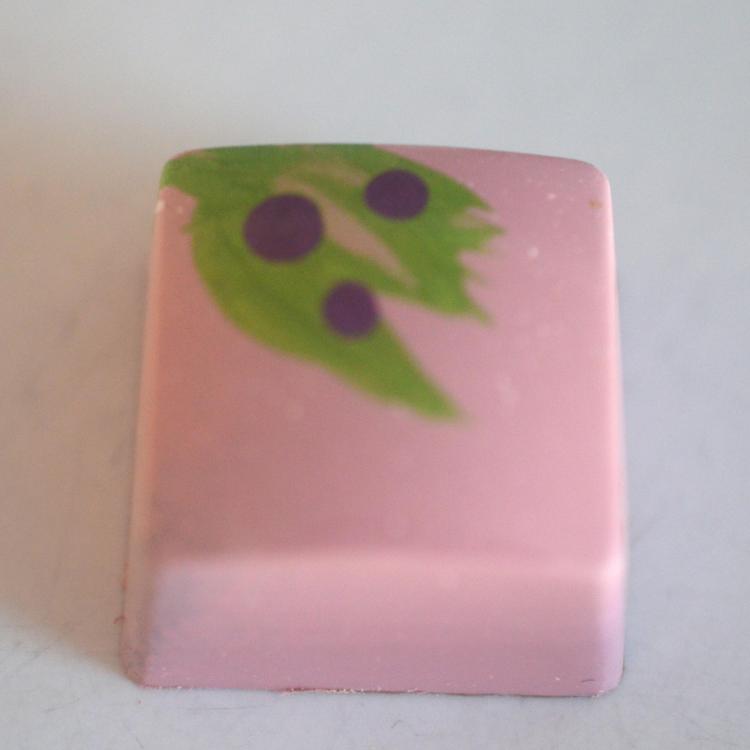
-
That is one of her color combinations; there are many others. The "secret" is in the brushes. She uses fan brushes, applying colors with some pressure so that the fan spreads. I ordered fan brushes, but they were too flimsy to work. Tine Forst is very helpful, answering any questions sent to her (even, in my case, when I asked her more or less the same questions several months apart!). Here is my version, definitely not up to her results:

-
Chocolatier and author Tine Prefers Chocolate has an ebook on decorating without an airbrush. Her striped bonbon is beautiful; alas, my experiments have not equaled hers.
-
With chocolates, there is a thin layer of chocolate (called a foot or a chablon). Most experts say it should be untempered so as not to be so firm. Then the filling is spread on top of the chocolate. The chablon makes it easier to pick up each piece to be dipped and keeps it from sticking to the guitar so much. Some people add another layer of chocolate on top of the filling(s). As pastrygirl suggests, the biscuit layer may not be as crisp as it appears; it may be more like pie crust than a cookie. I would probably risk cutting something like that.
-
Watching the video, I can certainly see why you want to make something similar. You can see the difficulty of cutting the marshmallow--it has to be just the right texture for the wires to go through it (mostly) cleanly. The video's caption states that the layer is a biscuit. Just in case...somewhere on this forum @pastrygirl has posted a video showing how to replace a guitar wire. She helped me through my first (and so far only) guitar crisis.
-
I would not risk my guitar on a baked biscuit (if you ever had to replace a wire, you know what I mean). I also think cutting the biscuit risks having it break into bits. Instead I would make a "praliné" (as some people call it). This technique requires a bar mold. Bake the biscuits, grind them into crumbs, add some melted cocoa butter and whatever kind of chocolate that fits with the flavors in the bar. Pipe that into the bar mold on top of the other fillings. If your proportions are correct, the crisp layer will firm up. This way you have your desired layer without endangering the guitar, and you also get the flavor that was in the biscuit. If you don't want to use a mold, you can pour the crispy layer onto a flat surface and wait for just the right consistency to cut it into the same size as you want the finished product to be. I can send you a recipe showing the proportions for the crispy layer if you need that. I realize this is not exactly what you were aiming for, but it does avoid endangering wires.
-
Yes, that is a new bonbon for Greweling (or at least a new decoration). He has not been a huge fan of decorations, certainly not the elaborate ones that are all over Instagram and elsewhere in the past few years. I am interested that he would go for a third edition: I watched an interview with him that Tomric did in which Greweling expressed his reluctance to participate in the second edition--he said he was quite satisfied with the first one. I suppose what the publisher wants, the publisher gets. And we will all purchase the new one for "fear of missing out."
-
In the interest of completing the eGullet record on this topic: With the help of Kerry Beal and Luis Amado, the molds departed Istanbul November 3 and arrived at my front door today, November 5. They have been washed and are now air-drying, ready to be decorated and filled in the next couple of days. Thanks to these kind and thoughtful kingpins of the chocolate world.
-
I had that idea earlier today and sent him a message on Facebook but haven't heard anything back yet. On another forum someone who had this same issue with Greyas said he contacted "someone famous in the world of chocolate, who is friends with owner" and the molds came. I think the someone is Luis. Unfortunately I don't know Luis personally.
-
I made the mistake of finding a mold I really liked and got that feeling that it was something I had to have. It is made by Greyas, a company perhaps best known for its affiliation with Luis Amado. I have one set of Greyas molds from Chef Rubber and another from Bakedeco (that one a Luis Amado mold) that are well made and sturdy, but nobody in the U.S. or Canada appears to carry the one I now want (which is a larger version of the one from Chef Rubber). I had seen reports from many chocolatiers that Greyas is not strong in customer support, but others said they had no difficulty with shipping at all. In any event I forged ahead and bought a substantial quantity of the new mold. I received an automated acknowledgement of the order and later an email (possibly also automated) from someone who said he is an owner of Greyas inviting me to reply, so I did and asked when my order would ship. There was no answer, and, in spite of trying to reach the company via many routes, I have had no further information. So in desperation I ask if there happens to be someone out there who would have more ideas on how to proceed. I don't want to have to cancel the order and have my credit card company get my money back because I really want the mold, but I also don't want to lose the money. Below is the object of my desire. It is rated at 16g, a size I like for making bonbons of several layers, and I think the pillow effect on top may make it unmold more successfully than flat squares.
-
There was a thread about chestnut bonbons. Sadly, my experiments ended sadly, and I had to abandon the idea. There was no discernible chestnut taste when it was mixed with chocolate.
- 4 replies
-
- 1
-

-
- Chocolate
- Confections
- (and 1 more)
-
@Sweet-Tempered I get "pouring fondant" (as opposed to the version that is used to enrobe cakes) from www.lepicerie.com. If you don't know of this resource, I highly recommend it for many ingredients used in pastry and chocolate in manageable sizes for a small business and at reasonable prices (I'm assuming you are in the U.S.; otherwise this idea won't work). I have the Pawkit Aw meter (https://aqualab.com/en/pawkit). When I bought it quite some time ago, it was what was recommended by people here on eGullet, and it was about the only device available at a price less than astronomical. Since then others have bought and recommend less-expensive versions. I don't remember the brand names, but you can find the discussion in this thread:
-
Let me second Kerry's welcome. As you have no doubt discovered already, this time in history is a particularly difficult one to begin making chocolates, but I think all of us here have experienced that urge that will not go away and continue to make chocolates, regardless of the cost of the base product. Particularly at the beginning, I would stick with recipes from trusted sources, Peter Greweling being one of the most trusted. When you start to experiment (such as using a cider reduction instead of purée), you are dealing with water activity (and eventually shelf life). Ideally you would purchase a water activity meter, but the expense of that instrument means putting that in the future and, in the meantime, using trusted recipes. I recommend looking into Kalle Jungstedt's online courses. He is obsessive about detail and quite confident about his own methods, but he clearly knows what he is talking about. He provides recipes with water activity stated. Other recipes can be found in Ewald Notter's book and in the giant volume from Jean-Pierre Wybauw with hundreds of recipes. I also recommend the Danish chocolatier Tine Forst, whose ebooks contain lots of basic information and recipes. Recipes that I particularly like can be found on Mats Rajala's Instagram page; he provides water activity readings. And, about the apple caramel: I make one using apple cider jelly, which has a bit less water than juice. Another apple recipe uses apple pâte de fruit with ground dried apples to decrease the water activity dramatically. You will also find many chocolatiers (Tine Forst, Mats Rajala, and Melissa Coppel being some) who use sorbitol, a sugar alcohol that has marked influence on water content. If I seem overly concerned about water activity, it's simply because I have had an experience with mold in a chocolate and have not forgotten that episode. Forgive me if I am providing information you already know from the course you completed.
-
Chocolate transfer sheets and white cocoa butter problems - please help!
Jim D. replied to a topic in Pastry & Baking
Sorry this reply is so late, but this is an issue on which I have worked. I tried making my own transfer sheets for molded chocolates, and inevitably they cracked and were unusable. I gave up on the idea but am giving it more thought since my favorite transfer sheet maker has closed his business. Most transfer sheet manufacturers may say their transfers are fine with milk and dark chocolate, but--if one really wants colors that stay the color they originally are--they are not fine, unless you don't mind red turning into brown or blue turning into gray, etc. I think the site I am about to link can help you. It sells a substance used to ensure opacity of transfer sheets (that is the big issue with using transfers on milk or dark chocolate), and I have spoken with the owner at length about the issue and her possible solution. Here it is: https://www.yelibelly.com/online-shop/transfer-blender-for-chocolate-transfer-sheets- 1 reply
-
- 2
-

-