chefpeon
-
Posts
1,800 -
Joined
-
Last visited
Content Type
Profiles
Forums
Store
Help Articles
Everything posted by chefpeon
-
I can't disagree with you there. If I were still at the wedding cake shop where we did 20+ wedding cakes nearly every summer weekend, and catered to brides who were very concerned with was what was hot and what was not (which is dictated largely by bride's magazines and the like), then investing in a printer and some frosting sheets would be a no-brainer. But now, I'm just an independent artist/baker who doesn't crank out cakes like a stressed out robot anymore. I do the cakes I want to do, and refer the cakes that I don't want to do to other folks in the business. I still want to do cakes, now, just on my terms. Not everyone has that luxury....I'm grateful. I also live in a small town that doesn't really support the "big money" stuff. People may WANT my stuff, but they can't afford it. So if I really want to do something, and I'm inspired enough, a lot of people get my stuff for free. Crazy, huh? Anyway, that's not really the point......the point is, now that I'm "small-time", investing in a fancy schmancy system would be hella fun, but maybe not so financially responsible....especially since the odds of getting a bride that wanted something done in that technique are small, and if I do get them they are few and far between. I have found that the farther you get away from larger metropolitan areas, people seem less concerned with "trends". They just want what they want. I kind of like that, actually. I love new tools and toys.....I'd like to have EVERYTHING!! But I can't afford everything, so I have to pick and choose and make do most of the time. I also realize that having the tools and being able to use them effectively, are two different things. As a part time computer-geek, mastering printing and using the frosting sheets is also a no-brainer. It's just a matter of, "can I justify the expense?" At this point, the answer, sadly, is "no."
-
What a quandary! I'm sure this will start a trend that won't go away. Should I spend the money for the technology and utilize it, speculating that brides will request it? Or just say, "I don't do that", or just do everything by hand (like I usually do) and charge appropriately? It's not just a financial quandary, but an artistic quandary. I'm proud of my handwork and always thought it gave me "an edge". But if less skilled people can now come up with eye popping designs with the click of a mouse, I feel like my personal value is depreciated. People won't spend more money if they don't have to....that's just a fact of life. The technique of it and relative ease of use is kinda cool.....but a little disappointing to me nonetheless.......
-
50+ wedding cakes in Grand Central Station
chefpeon replied to a topic in New York: Cooking & Baking
Ooooooooh! I really love the horizontal striped one! And I can pick out the "Margaret Braun" right away! -
50+ wedding cakes in Grand Central Station
chefpeon replied to a topic in New York: Cooking & Baking
Hey Steve..... Say I wanted to participate in one of those grand cake show thing-o's. How does one get a "heads up" on those kind of events? Or does one have to be invited to participate? -
When that happens to me, I rub a little oil on my fingertips, then run my fingers over the smudge, and it disappears.....it's like "Pledge" for cakes! Thanks, Keith for the tip on subbing the water for airbrush color. If I ever make my own fondant, I'll do that.
-
Wouldn't that only be a concern in a gas oven, where there is open flame involved? And if so, isn't that kind of occurrence fairly remote? Man, I'd hate to think I'd have to add "exploding brownies" to my job hazards list..... By the way, I bake with alcohol all the time.....usually a nice Syrah.....no, not for the brownies......for the baker!!!!
-
Hey, thanks for the leads! Silly me.....I have Country Kitchens bookmarked because I order from them.....I haven't been to the site in a while though, so didn't realize they carried the colored fondant. I like Country Kitchens........I can vouch that they are a good source.
-
Well, gosh, that's the easy part. The smallest cakes will be done first. If the recipe states "30 minutes in a 350 degree oven" for a 9 inch cake, then I can safely assume that if I bake a 6 inch cake or little bundt cakes, these are going to take significantly less time. So I cut the time in half and set the timer for 15 minutes. At 15, I check their progress.....if they're done, I pull them, and if not, I make a guesstimate depending on degree of doneness about how much more time the cake (or cakes) need. Then keep checking.
-
They do? Well Halle-freakin'-lujah! That's worth a buy I'd think. Save me some work. Oh, and who is "they"? Any particular brand or supplier?
-
Gosh, I love all you pi people! Sigh.....the only pi I know much about is apple.....pumpkin....cherry......banana cream....... Seriously, though, math is not my greatest subject either. I'm competent.....but still.....if I can avoid *math* I will! This is what I'd do: (really) 1. Make the batter. 2. Pour into pans. 3. If I have some left over, I bake mini bundts, or cupcakes, or a 6 incher or whatever. 4. If I don't, well.....great! 5. If I need more, I make another batch. Oh.....sure.....you may LAUGH at my simpleton ways! But you know, I've always found it extremely handy to have extra cakes hanging around in my freezer when some bonehead calls to make that last minute order 'cause they FORGOT Mom's birthday was tomorrow. My simpleton ways just saved that guy's ass....so.......everyone wins! And I don't have to do math! YAY!!!!!!!
-
Regarding black fondant........and things I have done...... I've started with chocolate fondant and colored it black from there.....since it's already darker in the first place, you don't have to add as much color as you would with regular fondant. I've added a CRAPload and I really mean a CRAPload of black paste and/or powder to get it as dark as I want it. It's pretty disgusting how much you have to add, and it tastes like crap too. One thing to note, once you color fondant and let it sit a bit, the color gets deeper. I've also used an airbrush on dark grey fondant to make it black. That works ok, but you have to worry about sweating. My favorite way, of course is to start with the chocolate stuff. It's the best solution that I know of.
-
Yeah, what chefette said...... UNBELIEVABLE!! And everything TePee and jskilling said too! This part cracks me up..... If someone paid THAT MUCH for the kit, then handed it to me, "the professional baker", I'd be kind of insulted....to say the least. Ahem! I'm a professional baker! I don't NEED the freakin' KIT!!! I gotta say though if she makes money selling kits, then she's smarter than I am. I know people will buy them.....the question is.....how MANY people will buy them? Enough to make it a goldmine? Only time will tell I guess. I also know there will be some professional bakers out there that will be there to "pick up the pieces" when the bride, or the bride's friend, or the bride's mother, decides they're not such a savvy baker after all.......
-
Corn meal isn't fine enough to prevent sticky doughs from sticking to fabric. You need something that is fine and will actually embed itself into the cloth. Also, depending on the bread, cornmeal remnants on the crust isn't always desirable. Cornmeal is great for its "ball-bearing" effect on doughs on hard surfaces.....like rolling loaves or pizza crusts off of a peel for instance.
-
I forgot to add my congrats, jgarner! We've followed you through pastry school and now we're putting you on the bus to work! It's a bittersweet moment for us "pastry parents"..... Do you know what kinds of job duties you will have? Like make the danish? Or make scones and bread doughs....or?
-
Actually, after I downloaded the pattern, that was the size it printed out as. Is yours printing tiny? I'm lucky enough to have Adobe Photoshop on my computer, and I alter my pictures using that program. Do you have any type of graphics or desktop publishing program on your computer? If you do, open the program, then open the downloaded picture in that program. You should be able to alter the size of it within that application...... Hope that helps.....
-
That's pretty much it. When I was doing artisan loaves our cloths were so floury they were quite heavy. We used an UNGODLY amount of flour in those things. I used to joke we had more flour in the cloths and on the floor than we did in the bread! We had to have a special cleanup guy come in after our shift was over because it always looked like some guy set off dynamite in our flour bins! If you think you have too much flour, add more.......
-
As one of those "crack of dawn" bakers (I get up at 3:30 am), here is my advice: If you require a certain amount of hours to sleep (me, I need at LEAST 6, but preferably 7), get to bed early enough so you can get the sleep you need. If the persisting daylight during summer prevents you from sleeping early in the evening, get a blackout shade if you don't already have one. Take a shower before you go to work....it really does wake you up and you feel fresh and ready to go. I think it's worth getting up a little extra early to do that. You may have trouble getting to sleep early before your first day, but believe me, after that, you'll be tired enough to hit the hay early from that point on! I expire promptly at 8 pm every day! And last, but not least.......coffee is your friend.
-
Gosh, you know, I think I could start another thread all about cake pricing! I must say, as long as I've been doing it, it's still kind of a puzzler. But I've gotten better over the years at how I price my cakes out. First, though, you are SO RIGHT about the questions you get from brides......! The stories I could tell.....my oh my......! I always knew I was in trouble when the bride came in with the Martha magazine. "I really LOVE this cake! But I only want to spend $250!" Yarrrrgh. Pricing cakes that I do over and over is a cinch. I know exactly how much time it will take me, and better yet, because I do them all the time, I'm more efficient with them and it's more profitable for me. Although I curse, and continue to curse, and will always curse Martha for as long as I shall live, she does provide me with a lot of brides that request the designs in her mag. This can be a "good thing", because I can crank them out without a whole lot of effort. For instance, a few years ago her mag featured a cake with a fancy monogram on it. That really set a trend, and I've done tons of them. I now consider that design to be boring, but it's easy money. But since I'm an artist at heart, most of the time I wish they'd just put the magazine away and let ME design something for them because I know it will be better, and more fun for me. I really enjoy doing my OWN designs....not other people's. But back to price. One thing I always do early in the consultation is the money aspect. I may not know exactly how much to charge them at first, but I always know within a short period of time if we are talking about "big money" or not. If I suspect that their idea does involve big money, I tell them upfront......you are talking about spending at least "x" amount of dollars here. Either they blink, or they don't. If they don't blink then we proceed. If they do, then we start talking compromise, and I design something that better fits their budget. Often, when I take an order for a project that could be difficult and it's something I've not done before, I will tell my client that it will be at LEAST "x" amount of money, but I have to think it out and estimate my hours and methodology before I commit to a final figure. I think better when people aren't staring at me expectantly to pop out a price. I've done that before under pressure and severely underpriced myself, and cost my shop money. This is not a good thing to do! When pricing wedding cakes, my prices start at $3.50 per serving and go up from there. $3.50 per serving includes some very nice basic piped designs. Every decorator has to come up with their own pricing system. We all have our "specialties" or "fortes", and some of us will take longer with a certain design than another.... we're all comfortable with different things. For instance, I can crank out a Swiss Dot cake with my eyes closed, so I don't charge a whole lot for those. Another decorator may hate doing Swiss Dot, or it's more of a struggle for him/her to get the dots spaced out right without spending a lot of time at it, so they may charge more. If I get a bride who is "shopping around", I always encourage her to do so, but also tell her that I don't negotiate. My price is my price. If she prefers to get a cake elsewhere for cheaper, then by all means. There's nothing that annoys me more than to have a bride call back and try to bargain me down by saying that "so and so" only charges "such and such". Well, great, then you need to get your cake from "so and so"! People DO have a hard time understanding why cakes cost so much. In their mind, it's food, and food should be cheap (relatively). I just keep it simple because most people don't want to be lectured. I just tell them that time is money, and these cakes take time, plain and simple. Oh, one more thing......before I discuss money with a client, I bring up the most important thing before we even START talking design.....and that question is, "when do you need it?" Would you believe that more often than not I get the answer, "this Saturday" or "tomorrow"? Yeah, sure ok, and for my next trick, I'm gonna pull a rabbit outta this hat!!
-
My apologies! I also wasn't aware of meaning number 3. I've always used the word "precious" in regard to meanings 1 and 2, so that's why it made no sense to me in the above sentence. I've also never heard the word "precious" used in reference to a dessert either. I've never had any of my customers say, "Ew! Send this back! It's far too precious!"
-
Within the context of the sentence, "precious" makes no sense at all. I'm certain that "precocious" is the correct word in this case. Sam?
-
I agree! Let's put the Sugarveil to the real test! It also sounds like the easiest and quickest way to get the job done!
-
Had to laugh at that li'l typo. I think you mean precocious, don't you? I really like the site though. I kinda like the flashy TV thing. For those of you annoyed by the music, you CAN turn it off. Up at the top, where the music credit is given, is a little off button. Just click. You can turn off the flashy TV too, by clicking "Stop the madness".
-
Gosh guys........ Master? Demigod? Not quite! I've worked with Demigods and I'm nowhere close! But thanks.......all the same! I'm all about sharing the info, I'll tell you that. There's no reason any of us should struggle, 'cause we're all in this together! When I worked in the cake shop, I taught my assistants all they were willing to learn. The more they knew, the more pressure was off of me, and I could actually put in a "short day" of maybe.....12 hours! Let's see......the questions..... Yes, I color white modeling chocolate....usually with powdered color, but sometimes paste or a combination of the two. My modeling chocolate recipe is 6 lbs of white chocolate to 2 2/3 cup corn syrup. Gosh, anyone can PM me anytime! Ask Abra.....Celenes.....Deborah....they know....I'm just regular folk who loves to help! Well, you just start at the top, and do your best! In this case, I gently lifted the flowers out, took the baby off, and set it all on plates next to the cake. The kids asked me if they could have the flowers and I said "sure"! I'm glad someone wanted them....I hate throwing them away! Then I took the knife and cut the top pot in regular thin slices and then sliced each slice in half, since the cake was so tall. I did the same for the bottom pot. The cake fed about 75 people total. As I ran into the straws and skewers that were supporting the cake, I just pulled them out as I cut and served. It's hard to say exactly how much of each color I used to get the terra cotta color....I just add what I think it needs til it looks ok. Not only that, but I started with fondant that was already colored.....you know how you always have colored fondant left over from other cakes? Well I save all that and use it to mix and color other fondant projects. So I took shades that I had that would transform well, like browns, pinks, reds and yellows. I mixed those all together, then added more color to it to get it that deep brownish yellowish burgundyish shade. I mostly used brown, yellow, red, and orange. The bubble tea straws are roughly twice the diameter of of a regular heavy duty bar straw, and about twice as heavy. Here's a place to get them..... Hee hee..... I think cake decorating was INVENTED to cover mistakes! As hard as I try, with almost any big cake project, there's always some kind of "oops" in there. I used to stress about those little mistakes, but not anymore. They can always be fixed or covered. I used to work with a chef who told me, "It's only a problem if you can't fix it." Do you know how many times I've finished a cake only to jam my fingers in it when I go to put it in the box? I can't even count.....! Yeah, that's where I got mine.....I haven't purchased any new silicone molds in a long time.....where do you get them now? This is where I get most of my luster dusts. Basically, luster dust is a very very fine powder that is ultra shimmery. There are all sorts of colors, but my favorite is "Super Pearl". If you brush it on fondant, gumpaste, chocolate or whatever, it looks pearlescent. It's really neat when you're trying to make chocolate bows look like satin. But for the flowers, I took regular powdered color and mixed it with a little Super Pearl so it would have a shimmer, rather than look flat. I brushed the centers of the flowers with deeper shades so they would have a little depth rather than being one solid color. I brushed my leaves with a dark green silvery foliage color to bring out the veining, and so they'd look a little more realistic. Modeling chocolate isn't stretchy at all.....if.....you work it at a rather cool temperature. The key to working with modeling chocolate is to keep it cool. After I knead it, it's too warm to work with, so I flatten it out into a disk and throw it in the cooler for a few minutes. I'm constantly bringing my chocolate in and out of the walk-in, to keep it at the right temperature. Modeling chocolate that is too warm is totally un-manageable. Luckily I live in a cool climate....I can get away with a lot of things that my friends in warmer parts of the country can't. However, the summers can get pretty warm here, and there have been some days that I've had to do my chocolate work at night, because the days were too warm to do anything. Sometimes I'd have to work directly in the walk-in. I hated that. Anyway, after I rolled out, embossed, and cut my strips, I set them in the cooler for about 5 minutes, so they would be easy to handle and a cinch to get on my pots without losing their shape. With fondant or gumpaste, refrigerating does no good.....they're stretchy no matter what, and on top of that, the longer they sit the more they dry out, and then when you go to put the strip on your cake, you get ugly cracks. Modeling chocolate is the way to go when you need straight, exact type stuff......like pot rims. I knew someone would ask this! And, believe it or not, my price for this kind of work isn't set in stone. I have a general formula to figure it out.....sort of. This is going to be kind of confessional here, because my "formula" is more emotional than uh, practical. When I worked at the cake shop, the formula was "subject to quote from the pastry chef". This meant that my salesgirls couldn't quote a price on a big project, because only I knew the variables involved. They'd come back and tell me what the client wanted, how many people to feed, what my lead time was, how many other projects I had in that time frame, etc. Sometimes I'd talk to the client personally.....what am I saying? Gee, MOST of the time I talked to the client personally. If the client was a real pain in the arse, I'd quote an outrageous price, just to make them go away. If my quote didn't make them go away, then whatever I quoted would be what it was worth for to me to deal with them. So, for instance, if you were a jerk and wanted that cake, and you wanted in less than a week, then I'd quote you $1800. But, if you were really nice, and gave me a huge lead time, I'd charge about $750. Think I'm kidding? Nope.....! Most of the time though, I charge for my cakes based on difficulty levels, and the time it takes me to do them. My general formula was my (estimated hours) x (my wage, doubled). Then I'd add in the food cost and overhead, and that was the price. Then there's delivery and set-up fees if applicable. You're right a lot of people DO have a stroke over price. They really don't understand. That's why when someone comes to me with a cake idea, I usually approach it from a cost standpoint first so they know upfront that what they are talking about is NOT going to be cheap. Either they deal with it or they don't. If they can't deal with the price, then at least they know right away and we aren't wasting each other's time. Early in my career, I'd be talking to people about cakes they wanted and saving the pricing til last. After over an hour of consultation time, they'd find out what it cost and then they'd say, "Oh......we didn't know it would cost THAT much.", and they'd walk out and I'd have no sale and I just wasted a valuable hour or so of my time. I learned my lesson quick! There's no reason why a nice italian meringue buttercream wouldn't do the job......a layer of marzipan.......or fondant......
-
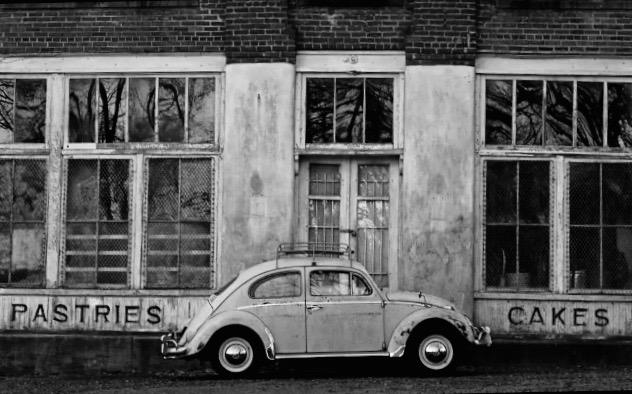
So, strangely, as of late, I sort of seem to have my shit together, and I actually had enough forethought to bring along my digital camera to document the construction of my latest cake project. Since so many of you seem curious as to how one of these things comes together, I thought you all might enjoy the picture filled journey down the path of a sculpted cake. How it started: First a little history. I'm a semi-burned out pastry chef who transplanted herself from the "big city" (Seattle) scene to a tranquil and liberal, artistic, intellectual, granola chewing, Birkenstock wearing, marine and tourist trade Victorian Seaport......also known as Port Townsend, Washington. I love this place. I affectionately call it Tinytown. In Seattle I spent a lot of years doin' the PC thing in various bakeries and specialty shops, but mostly I was employed as a high-end cake artist. I loved the work I did (and do) as a cake artist over there, but the long hours and snotty brides took their toll, and I wanted to walk away from it for a while. After a couple of years living here in Port Townsend and establishing a life with my new husband and love of my life, I decided to get back into doing cakes just a little. I'm only doing the ones I want to do, and only the ones that make it worth my while. But sometimes I'm so inspired to do a cake, I do it for nothing just because I want to do it, and I love to see the look on people's faces when I present it to them. Usually, that's all the payment I need. Such is the case with this cake. A side note: I do have a regular job baking for a cute progressive little deli (Provisions) and a cookie wholesale outfit. I love that job.....it fulfills my need to bake. Not only that, the people I work for are so freaking nice as to let me use the kitchen for my cakes also. I only have to pay them 10% of whatever I'm charging for the cake.....but anything under $100 is free. I also get to order all my ingredients wholesale on their account. Sweet, huh? Here's a picture of Provisions, Port Townsend's source for gourmet European ingredients, and the best take-out on the Peninsula! Since this town is small enough that everyone seems to know everyone else, I heard that one of my boss' wife's friends was getting a baby shower on May 1st. Of course, the boss' wife, who is a chef in her own right and runs the deli, offered to do the food. So I chimed in and said I'd do the cake. The person giving the shower, Lily, showed me the invitation and told me that she was going to do a May Day theme with lots of flowers. When I offered to to the cake, I was just going to do a simple round cake....but when Lily told me the details I had this epiphany. Into my head immediately popped one of those Anne Geddes babies that is coming out of the flowerpot. I immediately started forming this vision of my cake, and this is what I sketched: Now, I knew I would be putting in a lot of work for no monetary gain, but what the hell.....it would be fun. Once I get a bee in my bonnet, there's no stopping me. A week before the day of the shower, I started all my prep work.....which included: making the flowers, out of gumpaste making modeling chocolate and kneading in all the colors I would need making the umbrella out of gumpaste baking the cakes making the buttercream making simple syrup kneading all the fondant colors I'd need buying chocolate cookies and liquor cutting and covering my bottom board dying bamboo skewers green with vinegar and food color I did a little each day. I had to fit that in between my regular job and family-care duties. On Saturday, the day before the shower, and one of the days I'm off from my regular job, I went into the kitchen to build the cake. I'd had a nutritious breakfast of Oreo Mint Creams thanks to my stepson who'd been eating them the night before as he was watching TV. Gulped down a little coffee, and packed up all my equipment in the back of my truck. Only 4 minutes to the kitchen......man, I don't miss commuting!!! The night before, I had filled and stacked the cakes, so they would be ready for me to carve, first thing. The top cake is a lemon cake with raspberry buttercream, and the bottom cake is chocolate cake with mocha-toffee buttercream. All the cake layers are soaked with simple syrup; the lemon was soaked with lemon syrup and the chocolate, soaked with Kahlua syrup. I prefer to use buttercream as a filling in sculpted cakes....it sets up firm and makes carving a cinch. Mousses and jams and curds don't set up enough and are also very slippy-slidy. When you are carving out a cake, you don't want your layers sliding around on you. Here is my top cake.....I baked off two 8 inch rounds and 1 10 inch round. Cut them all in half and filled. Ready to carve! Here is the rough cut: I just used my long serrated knife to get a general pot shape. Now for the fine tuning: Lookin' like a flowerpot! Mmmmmm......look at all those cake scraps on the table. Yep, a few went in my mouth (quality control you know) but the rest went into the garbage......Next it's time to put a layer of buttercream on there, for extra smoothy goodness: I snapped the pic with one hand as I was holding the pastry bag in the other. Not easy. I like to use the giant pastry bag with the giant tip for applying icing....makes for less work later. Ok, here's a pic for folks that wanted to see that "paint masker thingy" in action. Tried to snap a pic myself, but just couldn't muster up the co-ordination. Luckily, Amber, the front deli counter girl, took a pic for me. I hadn't meant for her to include ME in the pic (Gawd!) but I wanted more of a close up of Mr. Smoothing Tool. Oh well, you take what you can get. See that I have my sketch on the reach-in behind me....along with all my other wacky magnets. Hey, I like to decorate my workspace.....Notice I hold the "pint masker thingy" by the bottom when I am smoothing the sides. If I don't, and hold it by the handle, it tends to kind of bend. I hold it by the handle when I go across the top. See how nice and smooth?: Now it's really starting to look like a flowerpot. But wait! It's upside down! Why is that, you ask? Because it's easier to carve and ice that way, and most importantly, much easier to apply the fondant. Into the walk-in it goes, to firm up. Now for the second pot: This is going to be the bottom flowerpot. It's going to be larger, and a slightly different shape than the top flowerpot. I baked off 2 10 inch rounds and 1 8 inch round for this one. I only ended up using half the 8 inch round, as you can see. I have the saran wrap underneath the cake and on top of the board, so it will be easier to flip over later. Here it is all carved out.....mmm....more cake scraps.....into the garbage they go..... Below, here it is, with a layer of buttercream. I didn't use the "paint masker thingy" on this one because of the curvature of the cake. I just piped the icing on and then smoothed it out with my offset spatula as best I could. After I refrigerate it, I will do the final smoothing. So now I'm waiting for my pots to set up. Time to do some other stuff, like: "Cuiz" my chocolate cookies to make the "dirt" for my pots. And...... start dusting my flowers and leaves with luster dust to add a little depth and realism to them. For this project I just made "whimsical flowers" in that they really aren't any particular flower....they're just cartoonish and colorful. Well, the roses are, well, roses.....gotta have a few roses. In the background there, you can see sort of how I did the gumpaste umbrella. I happened to have a dessert cup at home that was well suited for it. I filled out the top with gumpaste and added "ribs" with gumpaste, then put some saran on the top of that and put a gumpaste disk on it. I then cut out the rounded parts between the ribs.....and voila....umbrella! This was the first thing I made because I wanted it to have the maximum amount of drying time. Now if I were really smart, I would have made not one, but two or even three umbrellas because stuff always breaks. Always. No matter how careful you are. Especially in a commercial kitchen.....not only do you have to worry about yourself but everyone else too. I make more flowers than I need because I always manage to break quite a few. But, as it was, I only made one umbrella since I was so cocky and sure of myself. Turns out I was lucky......this time! Ok, time to roll out some terra cotta colored fondant! Dust the table liberally with cornstarch and roll away. I've done this so much I can just eyeball how much fondant I'll need to cover a certain sized cake. When rolling out fondant, waste no time from the time you're done rolling til you get it on the cake, because it starts drying out right away. Drying out means yukky little cracks, and me no likey little cracks! So I race to walk-in, retrieve cake, and cover it quickly. Then I take my trusty little pizza wheel and cut the excess away. This excess will get kneaded back into the remainder of my fondant so that I'll have enough to cover the other pot. So I take the rounded pot out of the walk-in, and, after washing my hands like a surgeon, I use the warmth of my hands to smooth the buttercream out so I have a perfect surface on which to cover with fondant. I tried using latex gloves for doing smoothing, but they are too much of a barrier to my body warmth. I need that warmth to lightly soften the buttercream for the proper smoothing. And here we have a nice smooth surface for the fondant: Into the reach-in it goes to set up while I roll out my fondant.......and here it is covered, with the excess trimmed away. Notice that I trimmed off my plastic wrap quite a bit before I covered it. Otherwise I would have gotten into a wrestling match with it and the fondant. So back into the walk-in they go to stay firm while I take me a little breaky: This is the view out the back door of the kitchen. We look over the Kai-Tai Lagoon and the Olympic Mountains. Unfortunately you can't see the Olympics in this picture because it's cloudy. But man, on a clear day......it's outstanding. Off to the right, beyond the trellis thing, is a large garden full of culinary things....a la Chez Panisse. We've got rosemary, bay, basil, fennel, oregano, chervil,onions, squashes (in the fall), thyme, decorative flowers, arugula, and more. Whenever we need herbs....just go out back. We get most of our produce from local farmers who come to our back door. One of the things I LOVE about Tinytown. It really beats the in-city large mass produce vendors. As I look out the back door, I sip on a latte that I made myself from our aging and undependable espresso machine. Luckily, today, I managed to pull a pretty good shot. Ok, break time over! Back to work! My next step is to turn my pots over. I will turn the larger pot over first. I slip my offset spatula underneath the saran wrap and lift the cake off, and set it aside on the table. An important thing to note: If I'd used a mousse, curd, or jam filling, I wouldn't have been able to do this so easily. With a refrigerated buttercream filling, the cake doesn't flex at all as I lift it. I managed to nick a little of my polyfoil covering with my spat when I went to lift the cake. Nuts. Oh well, I'll cover that with a flower later. I melt some white chocolate and smear some in the center of my board. I need to anchor the bottom pot so it doesn't slip around. I flip the bottom pot over, place it on top of my melted white chocolate, make sure it's centered, and peel the saran wrap off. My next step is to mark where I'm going to place my top pot, then insert straws within that area to support the weight of it. I decided to place the top pot slightly off center, and traced a circle with my paring knife to mark it. For most cake supports I use straws. They're easy to cut to fit, cheap, and they work. The only time I use wooden dowels is when there is an UNGODLY amount of weight or a weird center of gravity involved. I used to use regular heavy duty bar straws, until I discovered.......bubble tea straws! They are super heavy duty and very large.....they have to be for people to suck up that lovely bubble tea. I don't really think that fad is going to catch on here much in the states, but as long as I can get the straws I'm happy. I get them from an asian novelty wholesaler in Seattle. I think it's Viet-Wah, but can't remember for sure. Anyway, I insert the straw, mark it with my thumb where it's flush with the top of the cake, then pull the straw out and cut it. I use that straw as a measure to cut the rest of my straws. In this case I will use 5. One in the center and four around. Now I'm all ready to place the top pot on......oh, wait, except for a swirl of buttercream on top of the straws to anchor it a bit. Next, I use my melted white chocolate to adhere an appropriately sized round cardboard on the bottom of my top pot. Once that's set, I flip over the top pot, and place it on my bottom pot. Voila! Now, I really have to make sure that the top pot won't slide around, so I stick a few bamboo skewers down through the middle and through the cardboard til it hits the bottom board. I use the side of my needlenose pliers to pound the skewer down through. Now starts my very favorite part of this whole thing.....details! I figured that using my silicone lace impression molds will make great detailing on the pots. Here's the one I'm going to use to detail the bottom pot: I dust the inside of the mold with cornstarch........then roll out a quick piece of fondant, and roughly press it in: Then I place the top piece of the silicone impression on top, and roll it like crazy with a rolling pin. With the top part of the impression still in place, I pull off as much of the excess as I can. Then I remove the top piece, and pull all the ragged edges back in...... Then I brush a little water on the back of the piece, and adhere it to the pot. I keep making them until the pattern has gone all the way 'round. I use a different lace mold to make a pattern on the top pot. Now it's time to do the rims. When I did the lace impressions around the pots, I used fondant, because I needed the stretchability of it to conform easily to the shape of the pot. A little stretchiness in this case is good. But when it's time to do the rims, I don't want ANY stretching going on whatsoever.....I want uniformly thick and perfectly straight strips, so for this I'm going to use modeling chocolate, which of course has been colored the same color as the fondant. See the neato embossing on my strip? I found that little embossing wheel at Seattle Pottery Supply, believe it or not, and it was cheap too. The embossers are interchangeable and it came with about 10 different patterns! I rolled out my strip, then embossed the pattern twice (one next to the other) then used my pizza wheel to cut nice straight even edges. I made two top strips and two bottom strips....the bottom strips are just plain. And here are the pots with all their details..... These guys are going into the walk-in for a while while I work on the other details. Gotta make the baby! First I start with a styrofoam core. The reason for this is for stability and less weight. There was a time in my career when I thought I shouldn't use ANYTHING that wasn't edible, but talk about making life hard. I've made things out of solid modeling chocolate, but they were very heavy and hard to support. Then over the years, I realized that people really don't eat the decorations anyway (except for a few overzealous kids), so I decided to reduce my chocolate expenses and weight by using styrofoam to bulk things out more and more. I pat out a disk of flesh colored modeling chocolate, and place my styrofoam ball in the middle. Then I bring the edges up around the ball and squeeze the chocolate together so that no seams show. I stick a couple of skewers in it so that I can hold it in one hand and model it with the other. Then I manipulate it in my surgeon-scrubbed hands to model the face, add a little nose, eyes, mouth, ears, hair and of course, a dimple. The baby head needs to go somewhere while I work on other stuff.....oh, here's a good place.....right in the edge of my equipment box. I've been so good about taking pictures at nearly every step! But here's where I fail you.......when I get "in the zone"......meaning that I'm so intent on my little details....I sort of forget about the camera! Here's what I did in between this picture and the next two: *made the baby's shoulders and neck and arms out of modeling chocolate *sprinkled my cookie dirt inside the pots *dusted the centers of my flowers with luster and color, made the calyx's (sp?) and mounted *them on my green skewers *rolled modeling chocolate onto a skewer to form the umbrella stem *made the bottom banner and wrote on it *made the baby's flower bonnet I modeled the baby's neck and shoulders, then stuck that right on the top pot. Then I cut the skewers that are coming out of his head to the right length and pushed it down through the neck and shoulders. I placed the arms and formed the hands. I stuck my umbrella stem through the arm and down into the cake so there would be adequate support......but darn, I wasn't watching carefully, and the skewer came out of the side of the pot because my angle was a bit off. Oh well, I'll cover that up with a leaf. At least you can see where the umbrella stem is on the skewer. On top of the umbrella stem is a little half dome of modeling chocolate, to support the gumpaste umbrella. I dab a bit of melted white chocolate on that, and stick the umbrella on top. Now all I have to do is place my flowers, mount the banner, and put his little bonnet on. And here we have the finished product. It's sort of hard to read the banner....it says, "May Showers Bring Adorable Flowers". One thing I always seem to to do.....I'll shoot the picture of my finished cake and I'm always tired.....so I'm too lazy to find a good backdrop. Then I curse myself later when there's that yukky kitcheny background. God, in one picture I took, my cake had a dirty mop bucket behind it! All I can say is, thank god for Photoshop......I can always "fix" it later. It took me 8 hours to put this together and that's not counting all the prep I did the whole week prior. I don't think a whole lot of people realize the time that goes into this stuff.....and it's also why you don't see it very often. Anyway, the girl that's getting the baby shower has NO IDEA this is coming. Surprising her is going to be the best part! Fast forward to the next day. My boss's wife and I are bringing the box inside the house, then removing the cake from the box. Kids are dancing around us....."is that a CAKE? Is that a CAKE?" People gather round, and the girl who's getting the shower sees it and starts crying. She gives me a big hug and says "I don't know how to thank you!" I told her she just did. The shower went on, presents were opened, food was eaten, champagne was sipped.......and then.....it was time......the part that the kids almost couldn't wait for.....time to eat cake! Which of course, means, time to cut cake. And guess who gets to do it. Yep. Me. I don't have to cut my own cakes very often, and that's a good thing. Usually I'm nowhere in the vicinity when my cakes are cut and consumed.....I have only the memory of a photograph and my labor. This time I also do the deconstructing.....and I gotta say it was bittersweet. Especially since knowing it took me 8 hours to build it and only 15 minutes to take it apart. May I say.......wah? Yes. Wah. Luckily I'd had a couple glasses of Mumm's so my "pain" was numbed a bit....... Hope you all have enjoyed this bit of cake sculpting. Now back to our regular programming.......
-
As long as you don't get it near his mouth.....
