-
Posts
41 -
Joined
-
Last visited
Profile Information
-
Location
Mayagüez, Puerto Rico
Recent Profile Visitors
The recent visitors block is disabled and is not being shown to other users.
-
Thank you! I found some more information out there, plus watched a couple of videos. I prefer reading because I can easier focus on my burning questions. I read that post you linked to @lemniscate. Looks like it will definitely work. Soursop is a pulpy, spiky fruit with embedded seeds. We have several in our tree now. I’ll take a photo when I get a chance. I love the flavor, and it’s very popular here, but a lot of work to clear the seeds from the pulp.
-
I finally am living in my Puerto Rico home full time. We’ve been here about 7 months, and I’m learning the rhythm of things here in the garden. I haven’t yet started making chocolate, but will be soon, and have a good local source already for cacao beans while I wait for my trees to grow. One thing I am learning is preserving things for later use, mostly fruit since I’ve been pretty good with the vegetables from when I was in Colorado. For example, in a few months we are going to be inundated with mangoes (trees are flowering now). We’ll freeze what we can, but a friend mentioned a steam juicer recently to me. I got to thinking it would be great for making juice from the leftovers of the mangoes after getting the easy part off for freezing. Or for making juice from guanabanas (soursop) which are a mess to clean. I was wondering if anyone here had some insight on Steam Juicers since I’ve not found much online regarding them.
-
As Gap says, getting repeatable results using different beans is impossible. I have made batches from the same beans/year bought at different times with the same (or very close) results, it’s not an equipment or batch size issue, it’s a raw material issue. Making couverture and bean to bar chocolate are two different things. The fun of bean to bar is trying chocolate from different areas/farmers/years, kind of like with wine, and tasting different flavors. I’ve also made bonbons from my own chocolate, and really haven’t seen any issues with the performance of the chocolate, but I am also not a professional, and everything is difficult for me so I wouldn’t notice. 🤣
-
Man, picking out a mold for bars can be daunting. I really wanted a nice design first and foremost, and I wanted a 2 ounce size. I’m kind of a geek about these things even though it’s “just a hobby”. When I started out I bought several different ones and realized that the polycarbonate ones are the way to go. Then I spent hours searching. I ended up getting the CW1936, which has worked out really well for me. I’ve gotten lots of comments about the design, and even a suggestion from a chef on how to wrap it (I use paper backed foil). Having said that, having a beautiful designed bar, I wouldn’t want the inclusions to take away from it. My brother has some friends that have a small bean to bar business. When I checked out their website, the first thing I noticed were bubbles in the bars with inclusions (and their regular bars too). I know it doesn’t affect the taste, but the aesthetic is so important, especially if you’re trying to make a product at a premium price.
-

Molded and Filled Chocolates: Troubleshooting and Techniques
Douglas K replied to a topic in Pastry & Baking
Hi all. It’s been a busy year, and not enough chocolate making. Suddenly I now have Christmas gifts, and my first actual order of chocolate bars, and I’m cramming 8 batches into nine days. I wasn’t sure where to share this, and didn’t want to create a new thread since it’s not really earth shattering, but it was nice for me, and I wanted to share my method in case someone is looking to do something similar. I have fine tuned my process for making seed coco butter for tempering chocolate. It’s based on bits I’ve gathered from all the smart and wonderful contributors here. First, I melt the coco butter, and get it above 150 F on the stove. Then I pour it into a mason jar that I will use in the sous vide. Once it gets to 95, I add some shavings of my previous batch of coco butter seed, stir it up and let it set. The next day I put it in my sous vide set to 92.5 and leave it for 24 hours. When I take it out it’s the perfect consistency. I know Kerry calls it silk, but I call it snot ‘cause it’s kind of that way. I usually have a batch of chocolate to temper when I’m making a batch of seed, so I use it right out of the jar. Then, I usually put it in some 2 ounce bar molds to keep on the shelf. The stuff works amazingly well. I’ve only had one batch not be in perfect temper, and that was because I was trying to do too many things at once, and didn’t wait long enough for the seed to melt, and didn’t stir enough. I keep using less in my tempering process, and I’m using less than .5% now. For a 1400 gram batch of 56% milk chocolate I usually use 5 grams shaved with a Microplane. My tempering process is pretty standard. Once I get the chocolate out of the melanger and stabilized in the bowl it’s usually 105 to 115 F. I let it cool to 95 F, then add the seed coco butter, stir some to get it mixed in, and let it stand for 10 minutes. I stir until it’s time to pour into molds, and I like to pour at around 89 F. After trying different things, this works perfect for me. Having said all that, if I were making chocolate regularly, (which once I retire and am in Puerto Rico I might be doing with my hobby cacao farm and chocolate business) I would definitely want Kerry’s EZTemper. Using it in silk (snot ) form is the most foolproof method possible. -
I haven’t been making chocolate for the summer months this year, and as a result haven’t been to this forum for awhile. I’ve been making chocolate in my melanger for just over two years now, and started roasting my own beans last year. (Mostly I’ve been roasting our own coffee which I buy from Sweet Maria’s which is excellent, and a nice side benefit to the coffee roaster). Anyhow, I saw this thread came alive again, and so thought I’d add my experience. I have a Spectra Melanger, and I grind my cacao beans with the Crankandstein grinder, which leaves the nibs pretty large, so I whir them up in the food processor first. It just goes smoother. When I’m making dark chocolate, usually 75%, I normally wait about 30 minutes to add the sugar. With milk chocolate, there’s more coco butter, so I generally add the sugar right after the nibs, but wait about 30 minutes to add the milk powder. The key for me is to just gradually sprinkle in the ingredients (except the coco butter) as the mix can take it. Fortunately I’ve never had anything seize up, or any mechanical issues. I did break off the outer plastic button on the on/off switch, but it’s such a poor design, and it works fine and is safe as it is, so I didn’t bother with getting a replacement. As far as cleaning, I don’t find it too much work. I tend to make a few batches in a row now, and have gotten pretty good at the scrape out as much as possible between batches thing. With chocolate, I just let it set up overnight, then scrape all that I can to save, and then the washing part is really just maybe 15 minutes. I take the wheels off and bushings out every cleaning. It does the job for me for sure. I know I’ve made at least 40 or 50 batches over the last 2 years, and will probably do 20 or so before Christmas this year. Some of the people we gave it as gifts to over the years want to buy from me to give as gifts themselves, so this is starting to take on a life of it’s own.
-
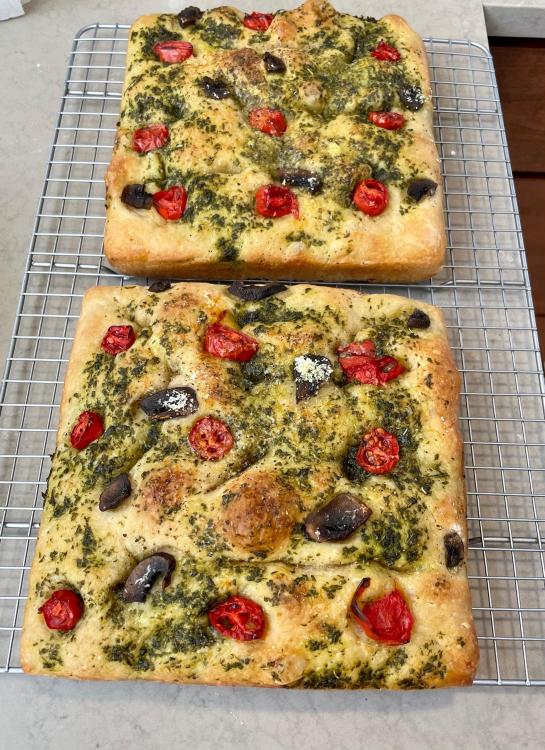
I know, I should have taken an interior shot, but I always forget. To busy eating! I really like my sourdough starter since it rises so well, and isn’t super sour. The interior of these was a good mix of open crumb with areas of tighter. I’m learning and getting better!
-
Some sourdough focaccia made from the recipe at The Perfect Loaf, though I like to add some whole wheat flour. Topped with olive oil/basil purée, mushrooms, Parmesan, and some San Marzano tomatoes that were super ripe and jammy tasting.
- 246 replies
-
- 12
-

-

-
I would think, from others’ experience I’ve read here, that you’d end up more with a potato chip with the flat bars. Or at least a big dish. The best idea I’ve seen is the one above involving spraying a cocoa butter/chocolate mix first. I’m just not in the mood for that kind of work right now, but I have thought of doing some decorated bars in the future.🙂
-
My experience with this is the bar contracts as it cools/solidifies. Since the back of the bar cools faster, it contracts faster than the top of the bar, and the bar cups. You end up with a last spot that always stays in contact with the mold, which is what leaves the mark. It's always in the center, though sometimes can be offset towards either long side. I just made three batches of chocolate on successive days, so thought I would try a few things. I'm primarily using a Chocolate World mold CW1936, which is a 57 gram bar. I'm making chocolate in a melanger, and the batches this time were around 1600g for a 56% milk chocolate. I also re-tempered a 75% dark chocolate. Since the house is warm, I've been putting the molds into the refrigerator for 15 minutes after filling, then moving to the basement to finish. I tried changing the spot where I pour the chocolate when I start filling each cavity, and I found no difference in where the marks form on the finished bars. Also, since the fridge has glass shelves, I tried raising the molds off the shelf to get better air circulation underneath to no avail. I think unless I can figure out a way to cool the bottom of the mold rapidly first, I will always get these marks. I know I'm not alone since I've purchased bars from bean to bar shops that have worse marks than mine, so I don't feel so bad. I wouldn't be too worried about the piping method. I just did a whole bunch of chocolate letters without issue by piping them to fill. I've done very little of that before, and it went quite well without anything getting lumpy. I just don't think piping is going to make any difference regarding mold marks.
-
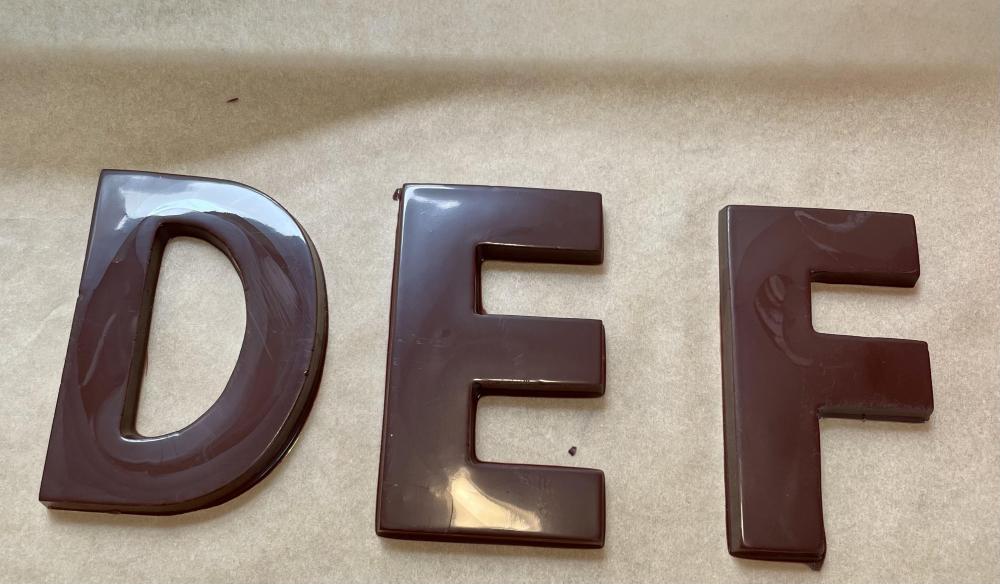
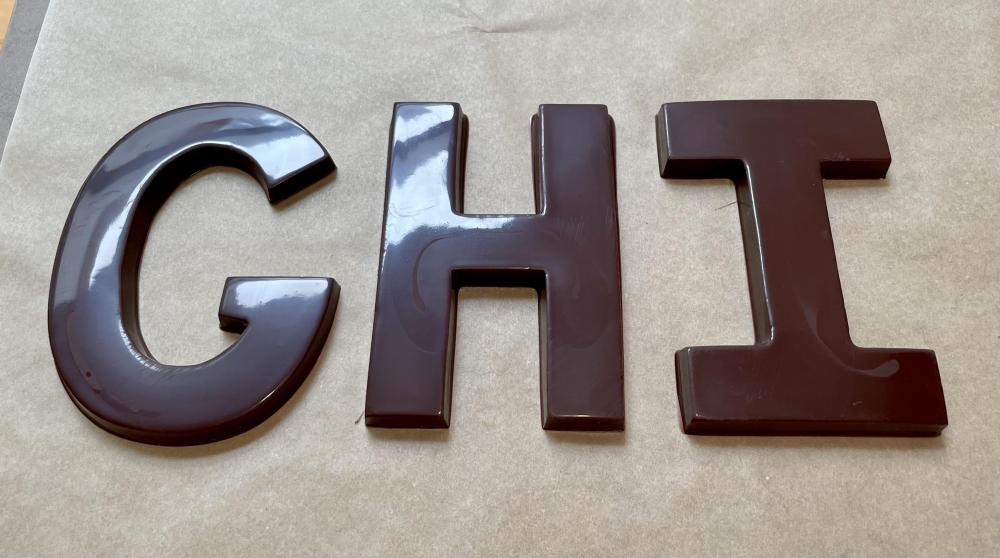
At last some photos. I did the lot in 7 batches. 93 letters, and all of them tempered perfectly. I packaged them carefully and carried them on the plane with me. Got them to their destination without incident thankfully. Was worried that TSA would think 9 lbs of chocolate letters would be a bomb or drug smuggling. The photos with 3 letters are my first test letters done with different chocolate, but give you an idea of the mold marks etc. The wedding party packaged them for distribution, and they did a fantastic job. They looked great in their clear bags, and they put a sticker on the back with a story about the Dutch tradition of getting chocolate letters at Christmas. It was a fun project, if not a lot of work, and it was great to be able to provide some very special chocolate for my nephew and his wife. The Peru Marañon tasted fantastic. It is perhaps my favorite dark chocolate so far.
-
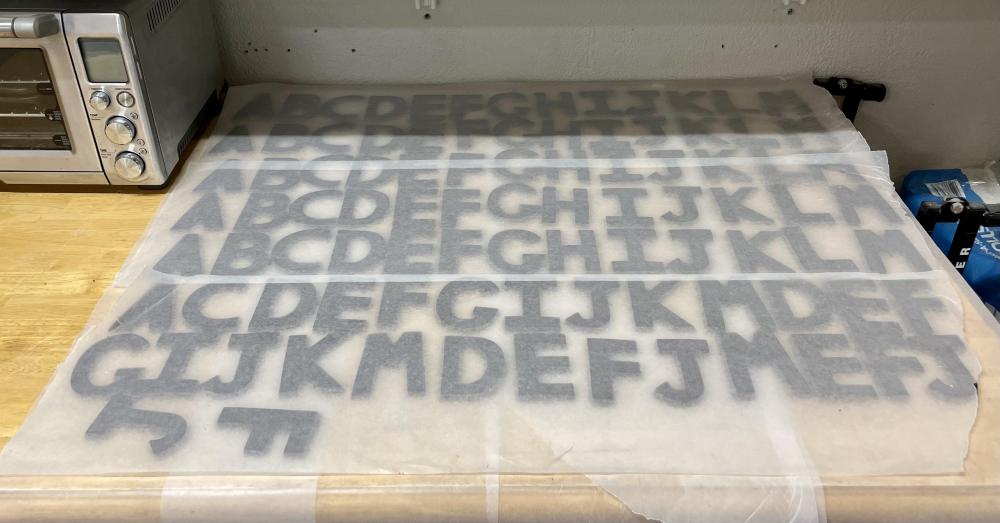
I wanted to do a follow-up just in case anyone is interested. I am currently in the middle of making 100 chocolate letters for my Nephew’s wedding. I did some tests earlier, and pouring these molds and scraping is a non-starter. First, there’s no good way to get a good scrape, and the tops of the letters are curved, so you end up with a little foot when you do. I’ve been piping these, and I’m not great at it since I’ll have a little trimming to do, but it’s going pretty well. It’s warm in our house as well, so the 15 minutes in the fridge, and then putting them in the 70 degree basement is working well. There are some mold marks, but it looks fine for something an amateur like me made. The chocolate is a 70% bittersweet chocolate ( Peru Maranon) that I made, and I’ve been tempering with tempered cocoa butter. I’ll post some photos later.
-
Interesting. We will be moving to Puerto Rico in a couple of years, and I was wondering this same thing. Here in Colorado during the summer I can get the house cool enough in the mornings to be able to work until 11 AM or so depending on the day. I do use the fridge, and our basement pretty much keeps below 75 so I can put my molds down there.
-
These are definitely like the Tomric molds, but more bendy as you say because there’s no rim around the mold to stiffen up the whole thing. The letters themselves don’t seem to flex too much. Piping the chocolate is definitely a good idea. We’ll see how it goes!
-
Thank you Kerry. All I’ve used are the heavy polycarbonate ones, well except for the one Tomric bar mold that is lighter weight. Here’s hoping this works, and it’s what my family member wants!


