RichardJones
-
Posts
139 -
Joined
-
Last visited
Content Type
Profiles
Forums
Store
Help Articles
Everything posted by RichardJones
-
Oh, thanks!
-
I'm afraid purdy is not a word which translates across the pond... what does it mean? x
-
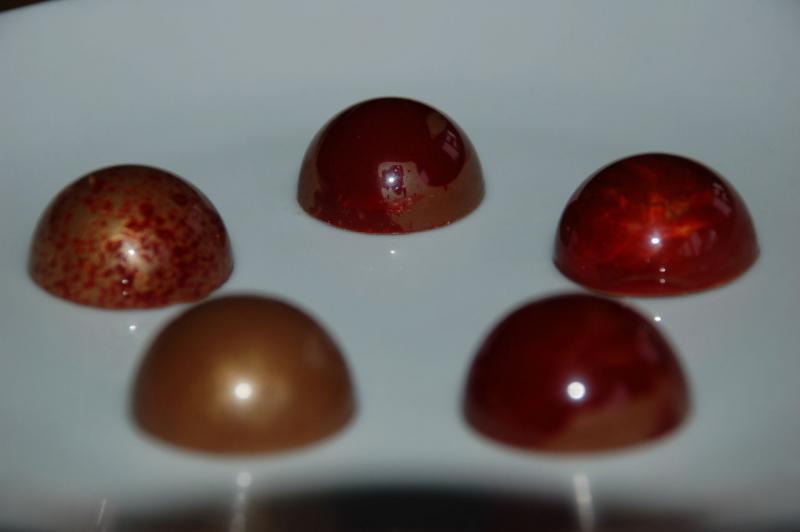
Thanks for your help on this one. I had my first play with coloured cocoa butter last weekend. Here are some of the results: At 12 o' clock, red CB swirled in mould with finger. At 2 o' clock, gold lustre sprinkled into mould then red CB swirled with finger. At 4 o' clock, well, it's out of focus (arty photographer) but I squirted CB into the mould with a 49p miniature spray from the supermarket, then let the CB run around the mould. At 7 o' clock, even spread of gold lustre (also hard to see). At 10 o' clock, a light sprinkling of gold lustre, then CB speckled off toothbrush. As for the tempering aspect, I stood the CB (in its plastic bottle) in a tall glass and filled the glass with boiling water. I let it sit for a good ten minutes to let a portion of the CB melt. Then I let it sit at room temperature, frequently agitating it (so the unmelted CB would seed). It seemed to work fine like this.
-
Thanks for your advice on using cocoa butter in another thread. Here are the results of my first experiments with some red CB and milk chocolate (filled with a passion fruit and milk chocolate ganache):

-
Hi All, I've done a quick search on this topic but cannot find the answers I was after. I hope no one minds if I start a new thread. I've never used cocoa butter for decor before but would like to use some coloured CB for a sculpture I am working on. I heard that if you are airbrushing CB you do not need to temper it as its passage through the nozzle of the gun will have the desired effect. Others say the CB should be tempered. And I have read mixed opinions on CB applied by hand to moulds. My instinct says that, like chocolate detail, it would need to be tempered but others say not. I would never attempt to temper a small quantity of chocolate but CB often comes in bottles of just a few hundred grammes. Who is correct/what are the parameters? Thanks, Richard
-
I've never tried this but I keep meaning to. I read a brief explanation once which I found rather good... Cream has an optimum level of fat content to provide the greatest increase in volume when whipping. Too little fat and there is not enough structure, too much fat and the weight is counter-productive. Bau discusses this in Au Coeur des Saveurs. He gives the results of his experiments to find the greatest increase in volume as somewhere in the region of 35% fat (can't remember exactly, sorry). Effectively with the chocolate chantilly, you are adding water to the chocolate to bring the fat content down to a similar region c.35%. Then you can whip away and achieve a similar effect to whipping cream but with cocoa butter trapping the air rather than butterfat. Or so I read and I am afraid I cannot remember the source. Hopefully this helps explain why the quantity of water needs to be precise. Too much and you're trying to whip milk; too little and you're trying to whip butter... R
-
I tend to pour excess chocolate into a spare mould (usually a half sphere mould) and then bag up the solid pieces when crystallised.
-
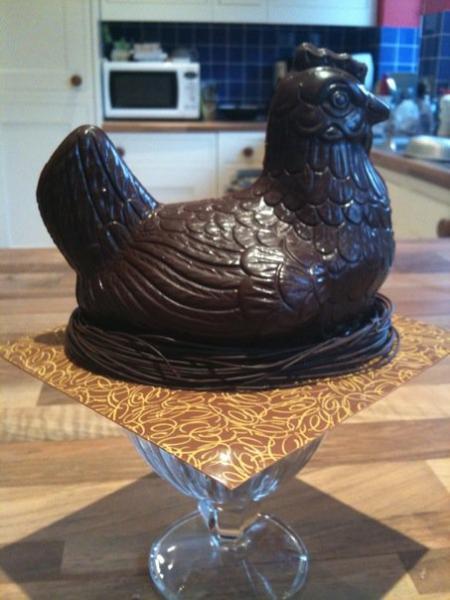
And here's a little hen in time for Easter. She's sitting in a dark nest on a milk base.
-
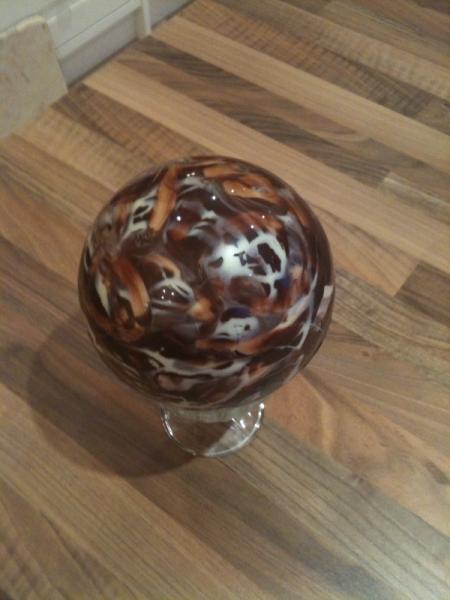
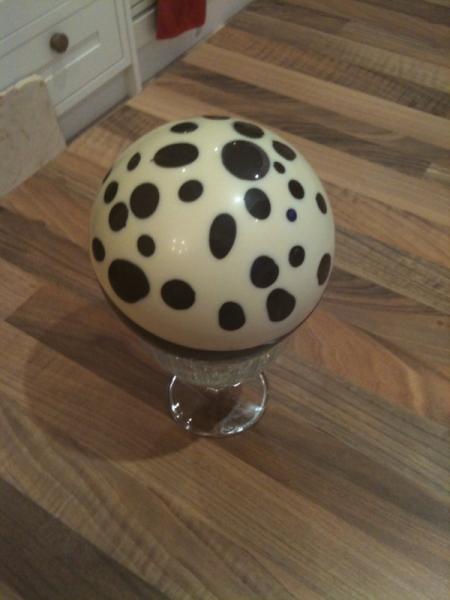
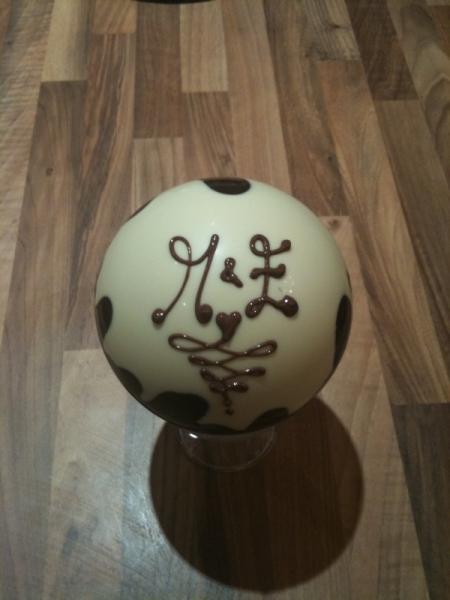
Thanks for the comments. The spheres aren't filled - they're enormous, c.15cm round. Here are a few close-ups I found which show the detail better - still taken on my phone, though.


-
Steb, I am afraid I do not have my dimensions to hand (I'm away from home) but the basic principle is, the bigger you want them, the bigger the sheet of pastry you need to beging with. For the largest ones, that is a very long sheet (probably heading for the best part of a metre). A few things which might also help are... don't leave the pastry too thick. Puff pastry puffs more if you roll it more thinly (up to a certain point - if it's super thin you risk breaking the layers, but head for c.3mm). Better to have the pastry thinner then create more folds when shaping the palmiers. Also, don't fold the pastry too tightly when you shape the palmiers. This will allow room for them to expand to their maximum potential without restriction. Similarly, position them on the baking tray in a Y-shape (i.e. spreading out the two ears a little). They'll form their usual shape naturally as the pastry expands during cooking. Good luck! Richard
-
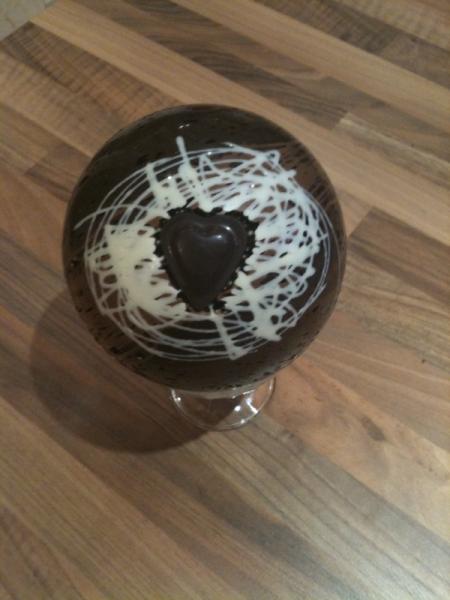
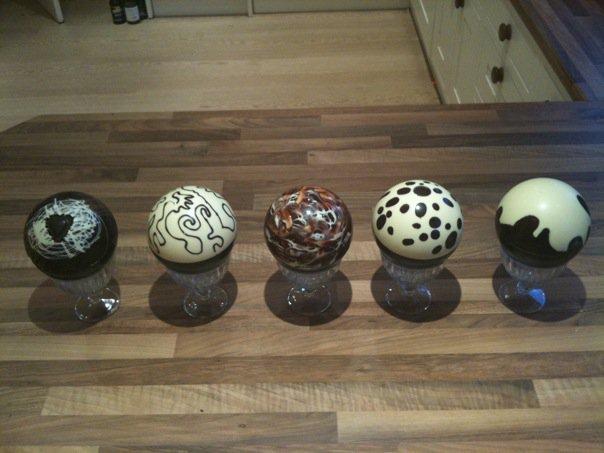
Here are some Easter eggs I've been playing with. Well, they're actually spheres because I have more sphere moulds. Mainly based on ideas from Wybauw's decor book.
-
Chris, this is interesting but also surprising given the low temperatures at which enzymes normally denature. A quick google on amylase suggests it denatures around 65C (one source said 80C) which would suggest while boiling does deal with the problem, it is not necessary to get a cream that hot for THIS reason... Any food scientists out there?
-
Yes, that's correct. First sugar thoroughly mixed with pectin is added to the water in the saucepan and dissolved. Then the second sugar and glucose is added to the saucepan.
-
Here is the nappage neutre recipe which I tried to link to (and Schneich managed to): The recipe is from a book published by l'Ecole Lenotre. The nappage gives a professional, shiny finish which prevents fruit from oxydising and will also prevent mousse-based entremets from drying out. Ingredients: 500g water 20g NH pectin 125g sugar 400g sugar 33g glucose Method: 1. Heat the water to 50°C in a saucepan. 2. Mix the pectin with the sugar in a bowl until well combined then, while whisking, add to the warmed water. 3. Add the rest of the sugar and the glucose and bring to the boil. 4. Sieve into a bowl and cover with film, ensuring the film is touching the surface of the glacage. 5. Let the nappage cool then keep at 4°C Further thoughts: The reason for the funny business with the pectin and the sugar is to prevent the pectin clumping when it is added to the water. As Schneich says, you can heat this kind of nappage up for glazing. I haven't tried this specific recipe but with commercially available nappage neutre you can also just work it until it is supple and spread it with a palette knife (eg onto the surface of a framed entremets). If you spread a layer then add a few drops of food colouring and work with a palette knife you can create some interesting (if dated) marble effects. Re freezing, Schneich may have been talking about a specific dessert but in general mousses, glazed or not, do not need freezing, especially if you are just making a small quantity at home for immediate consumption. It's a conservation thing. Re recipe for mirror glaze. Certainly, I will post it here when I next go home and can lay my hands on it. As it happens, it worked fine on my frozen bomb (which I served immediately) but I have not tried freezing and then thawing this glaze. It might lose a bit of shine but you ought to be able to revive it with gentle encouragement from a blow-torch.
-
Hello QbanCrackr, You found some pretty patisserie there! For my money: 1. As you say. Probably individual moulds. The first mousse layer is piped in. Then chilled (we would use a blast chiller) - this ensures a clean line between the layers. Then the second layer is added. Chilled again. Then the glaze is added and the product is not normally frozen again (although it may be). This kind of glaze is most often bought in by patisseries (then coloured for use) but can be made. Here is an example recipe: http://lapatisseriedebarzaz.over-blog.com/article-11371539.html. I am happy to translate this if you would like. This kind of patisserie can be made in a large frame and then the pieces stamped/cut out (this is why they are often square edged - it causes less wastage and means you can use a knife!) Here though you can see the chocolate mousse is at different heights which implies they were done individually. Probably line the moulds with acetate ribbon. NB There is most probably some kind of biscuit (i.e. thin sponge) at the bottom of these even though it is not visible. 2. These are similar to the previous ones but look like mini individual charlottes. That is to say, the funky coloured bottom halves are in fact a thin genoise (or similar biscuit), coloured with one of a variety of techniques (eg colour applied directly to silpat before the batter is spread onto it and baked) and then cut and placed into the mould. A large sheet of genoise will be baked and the individual pieces cut out. As above, there is probably also a disc of genoise at the bottom. There also may well be some kind of gelee/fruit insert in the middle of the mousse. The coloured portion may not be genoise. It may, for instance, be coloured chocolate (done onto acetate and then used to line the moulds). The glaze is as above. 3. Yes, you seem to be spot on here. Blast chiller to set, popped out and then glazed. This kind of mirror glaze kind be purchased ready made. I would be happy to share a recipe I have for a home made glaze which is the one I have used on my iced bomb on this page: (half way down) The glazing is done by placing the items on a wire grill over a baking tray and ladling/pouring the glaze over at the correct temperature. 4. Same as 1. Hope this is clear and, of course, people may have other ideas! Richard
-
Dear eGulleteers, Are any of you aware of a supplier of chocolate texture sheets in the UK, please? I'm referring to the plastic sheets used like cocoa-butter transfers which impart a relief pattern. I know several suppliers of transfer sheets, but none does texture sheets (except in bulk). Or, if you are exceptionally kind, does anyone have a few spare (any texture) they could sell on to me? It's just for a one-off chocolate sculpture. Thanks, Richard
-
...which you might like to think about warming slightly.
-
Merlicky, I cannot offer any specfic details of weights &c. but just a more general observation: there is a large variation in chocolate size in the commercial/artisan market. I must preface these comments as coming from my experience as a consumer of artisan chocolate all over Europe rather than being a chocolatier myself (I'm not). In my experience which is not as vast as some people's here, I've found that Belgian truffles tend to be a bit bigger than French truffles. At least, many truffles seem to warrant two bites for any normal bouche while others can easily be popped in whole. With this in mind, I suppose the filling may well have a bearing on the size: do you want the customer to bite into the truffle for textural/other reasons? While it's important to be consistent within a product line (especially if you are selling sight unseen) it's not unusual to find one seller with different sized truffles for different fillings. After all you can change the ratio of chocolate to filling quite a lot with just small adjustments of size. I find it interesting that a lot of quality enrobed French chocolates (Genin, Fauchon) are large squares with little depth (these, for example, are only 6-7mm thick) while others go the opposite way like William Curley, in London, who has a lot of cuboid enrobed chocolates (eg these). You might say that the bottom line is chocolates are sold by weight (at least in Europe) so you can make them any size you fancy without losing out... But as for what sells the best I think there are other better informed than me on here. R
-
Cooking with "Chocolates and Confections" by Peter Greweling (Part 2)
RichardJones replied to a topic in Pastry & Baking
Lucy, IMHO using a cutter is potentially easier and less messy than a stencil... -
Cooking with "Chocolates and Confections" by Peter Greweling (Part 2)
RichardJones replied to a topic in Pastry & Baking
Lucy, One way to get round not having a stencil is to spread a thin layer of tempered chocolate on a sheet of acetate and stamp out discs with a small cutter (or even the back end of a piping nozzle) once the chocolate is semi-crystallised (i.e. still soft but no longer tacky). Once you have indented the discs, leave the chocolate to set properly as normal (with a weight on to help keep things as flat as possible). When the chocolate has set you can pop out the discs and proceed. In this instance, you make like to leave the discs attached to the acetate until you have piped the beehives as this will make piping easier than on a freefloating disc. Hope this is clear, Richard -
Yes, Pierre Hermé. PH10 is a very large (and similarly priced) collection of some of his best work. A really excellent book.
-
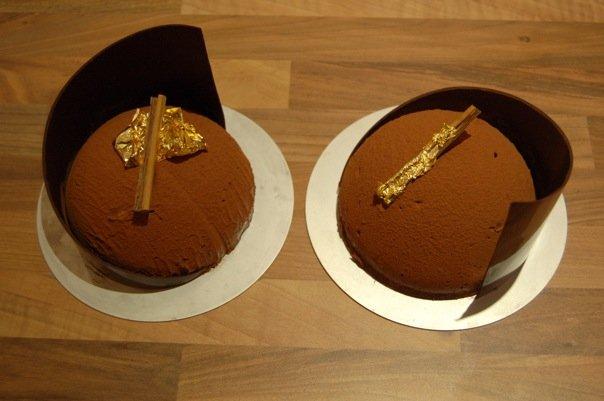
I went home yesterday to make some house-warming presents for my sister and a friend. It's based on Herme's Mozart but I used a different recipe for the mousse. In other words, three layers of a very short cinammon pate sablee, and layers of chocolate mousse studded with cubes of caremlized, flambeed apple. The pastry is interesting because it contains hard-boiled egg yolks which you pass through a sieve. I think this is traditionally a German technique but I may well be wrong. It helps add a lovely crumbly texture to the pastry which is enhanced with a little baking powder, too. The mousse was based on a creme anglaise, lightened with whipped cream and Italian meringue. Had to make them all in a terrible rush so the finish is a little rough and ready (just cocoa powder, hastily sieved).
-
Pâte de Fruits (Fruit Paste/Fruit Jellies) (Part 1)
RichardJones replied to a topic in Pastry & Baking
The first time we made pates de fruits at college I was working with a partner which is always conducive to errors. Between us we managed to leave out the Tartaric Acid which we only realized once the jelly was sitting happily in its frame. Neither of us dared to tell chef. To our great mutual relief the slab did set up all right and guitared fine. The texture might otherwise have been firmer but we still gelled! I wouldn't rely on this though... R -
A large chocolate exhibition has opened in Beijing: http://news.bbc.co.uk/1/hi/world/asia-pacific/8486259.stm
-
Scout_21, What did you think of the finished tart? I had one from Herme (Rue Bonaparte) just before Christmas and found it unpleasantly sweet. I also thought the whole thing was just too rich. I was quite disappointed to be disappointed as I have always loved the look of them. Give me a Plaisir Sucre any day! R