andiesenji
-
Posts
11,033 -
Joined
-
Last visited
Content Type
Profiles
Forums
Store
Help Articles
Everything posted by andiesenji
-
It is alkaline water that produces the blue or gray color. adding a tablespoon of vinegar for each pint of liquid will keep it the nice red color - which is why so many dishes include vinegar. Cooking with apples also lessens the color change. If you don't like the idea of using vinegar, ascorbic acid or citric acid powder - about 1/2 teaspoon per quart of water. I had a friend who used to add a bottle of 7-Up to her cabbage - both green and red - because she swore it lessened the "gas" effect and her red cabbage dishes were alway very red.
-
Ah - sorry. I forgot to mention that I used my big poultry shears and cut the backbone out of the duck and "bent" it in a arc. My pressure cooker may be a bit larger than the instant pot.
-
Your Daily Sweets: What Are You Making and Baking? (2015)
andiesenji replied to a topic in Pastry & Baking
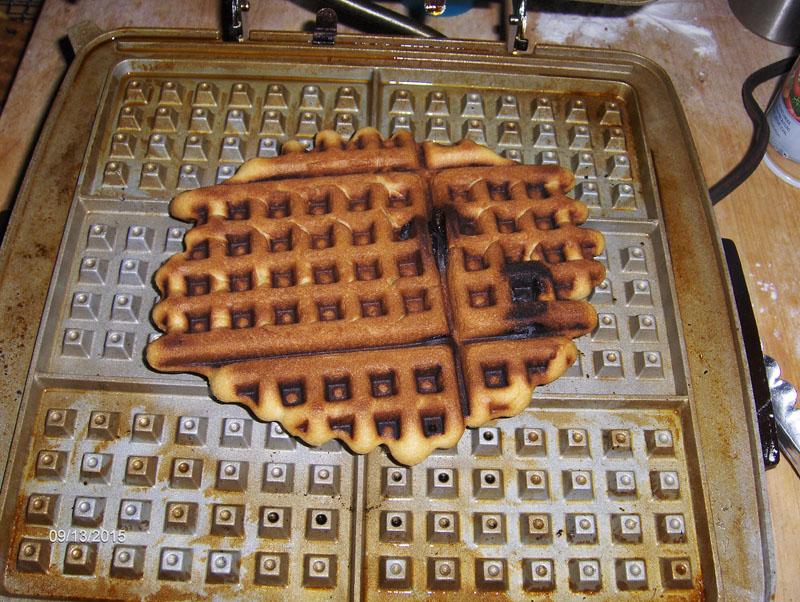
A neighbor came over this afternoon to borrow some eggs and I "forced" one on her along with a cup of tea. "OMG, OMG, OMG" this is fantastic." And that was just one at room temp. I printed out the recipe for her. She has to buy self-rising flour and heavy cream but has a waffle iron (purchased from me last year). Even my dog is nuts about them - did not give him any with cranberries. Another thing I tried "waffled" a few days ago was some salt-rising bread that I had baked, sliced and froze a few weeks ago. It was not turning out well in the toaster so I heated up the waffle iron - cut off the crusts, just in case they would be too hard and banged them into the iron. Super tasty, crunchy and with all those handy little pockets to catch the butter... -
Your Daily Sweets: What Are You Making and Baking? (2015)
andiesenji replied to a topic in Pastry & Baking
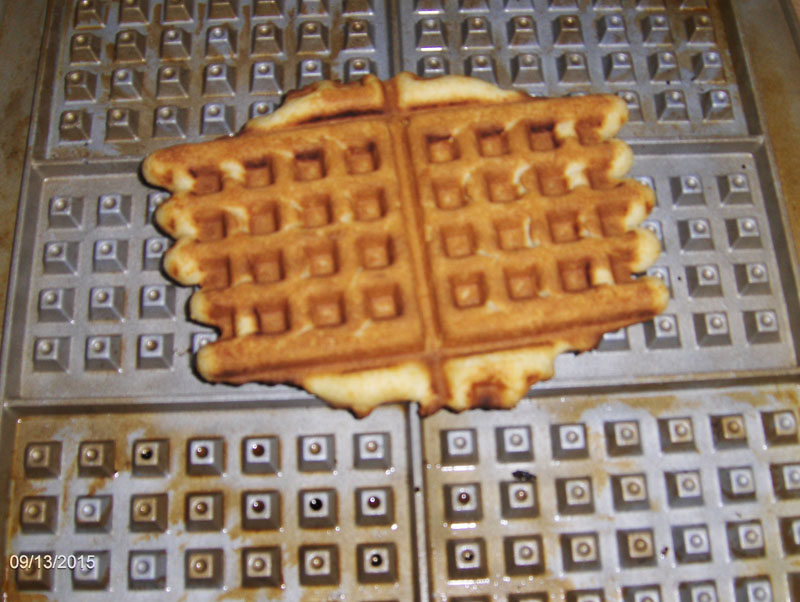
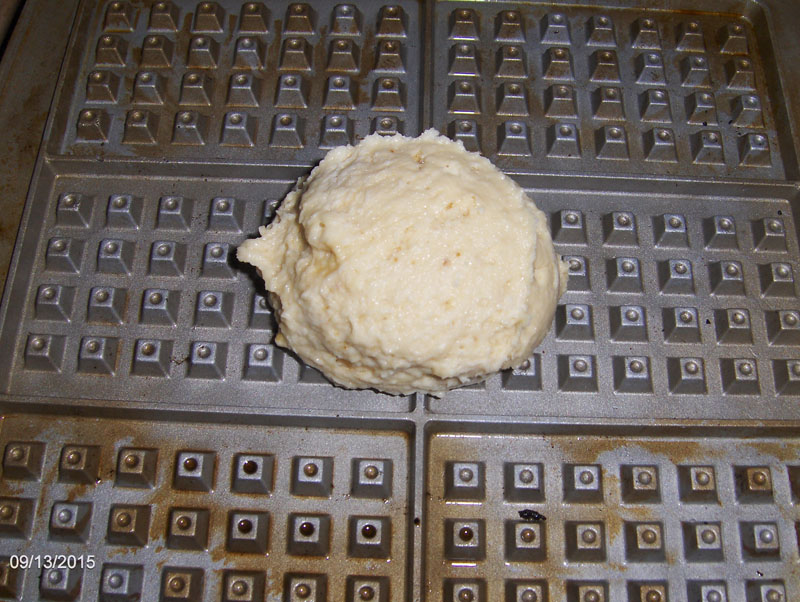
These are on the periphery of "sweets" by some definitions. Actually scones are usually considered sweet so this post is going here. I had a brainstorm this morning - a good one - and I'm passing it on to you. I was mixing a batch of scones - the extremely easy ones that are made with SELF-RISING FLOUR (or SELF-RAISING Flour if you are in the UK) and heavy cream plus a little sugar - not much, scones should not be sweet like cake. For this batch I decided to splurge a bit and added a couple of eggs and a little vanilla extract and about a tablespoon of oil (my preference is rice bran oil but any neutral vegetable oil will do) to make them a bit more tender. The basic recipe is the same as my BISCUITS! recipe, 1 cup heavy cream 2 cups self-rising flour (it should be fresh - after several months the baking powder tends to lose strength but you can add some yourself) For scones with just a hint of sweetness, add a 1/4 cup of sugar 1 teaspoon vanilla extract (or other flavor - almond, lemon or orange - with some of the zest grated from the rind) 1 Tablespoon vegetable oil 2 eggs. Measure out everything. In a medium-sized mixing bowl, pour the cream, add the eggs and the oil beat with a whisk to combine add the sugar and vanilla and beat. Add one cup of the flour and beat just until it is completely incorporated add half of the remaining cup and beat until it looks like thick batter It should hold its shape when mounded up. If not add a little more flour, stir to combine and add more if it still seems too soft. Usually at this point we turn the dough out onto a board and knead a bit more flour into it, cut into rounds and bake in the oven. NOT TODAY, Today I am making waffles from this dough. VARIATIONS: At this point you can add dried fruits - cranberries, raisins, chopped apricots, dates, figs, etc., to the dough, mixing well. You can also substitute up to 1/3 the amount of flour with almond flour, other nut flours, coconut flour, and the various "exotic" flours that have become popular in the past few years. Sorghum flour (Bob's Red Mill sweet white is excellent) is somewhat sweet so cut the sugar by half if using it. You can add finely chopped nuts or thinly sliced almonds but anything in larger chunks tends to stick between the bumps on the grid and pull the waffle apart when the top is opened. (I have experienced this so I know what happens). My waffle iron is a "vintage" one that has the bare metal grids that need periodic "oiling" and I use the spray stuff. It's a regular waffle iron, I don't care for the Belgian type. And with this treatment, it is virtually non-stick. I used a "disher" or ice cream scoop - a large one but a serving spoon will work. The one pictured is a Size 8 - holds 4 ounces to the rim, obviously with the dough mounded up, there is probably 6 ounces in each scoop that goes onto the waffler. The waffle when first turned on (Med/Hot) takes a while to heat up but once hot, stays so until turned off. Yours may heat faster - and there should be a signal to show when it is hot. I set my digital timer for 5 minutes. When the light on the wafflers goes out - that signals it is hot. I spray both grids - just roughly in the center ALWAYS spray oil when hot - apply the dough to the center and close the iron and start the timer. As soon as it sounds I open the waffler, remove the waffle with tongs to a cooling rack (so they will stay crisp) I give both grids a quick oil spritz and apply another batch of dough. And so on until all the dough has been waffled... The following photo shows one with dried cranberries stirred into the batter. The little "pockets" in these waffle scones are prefect for holding additions such as clotted cream, jam or jelly, whipped butter with honey or maple syrup or whatever you fancy. And, when completely cool, they can be closed in a zip lock bag and refrigerated for a couple of days or frozen up to four or five weeks and reheated in your toaster or toaster oven. ENJOY!


- 487 replies
-
- 10
-

-
I just typed for 15 minutes and suddenly this reverted to the main page and I lost everything I had types. This has happened several times lately and it is most annoying. I am going to type my post on TextEdit, where I know I won't lose it, and then copy and paste it into this post. I've been doing further experiments with cooking pasta in the microwave, different types. ORZO was problematic, it cooks so rapidly once the water gets hot and I had some clumping problems with the regular method. So, I put the orzo and some salt in the Pasta Boat, added HOT tap water and put it in the microwave set for 2 1/2 minutes at full power (1000 wt). It came out perfect. I cooked some long ziti - the uncut tubes that are the same length as regular spaghetti. It cooked perfectly in the microwave - I use it in a sort of "pie" - something like a quiche with pasta (and tomatoes) and the preferred pasta of the lady who gave me the recipe was this type. I am thus anxious to try some more of the "different" shapes and types but sadly we no longer have an Italian market in the Antelope Valley, the nearest is nearly an hour away in Valencia. The market that was here for years carried a huge variety of imported pastas, some I had never seen before: the leaf-shaped spighe and the long, tapered shells called castellano. They also had about ten varieties of tortellini. Other oddities were regional specialties like strozzapreti and the ones that look like little trumpets, three sizes of bow ties and every size of spaghetti and linguini and macaroni. Sigh! Anyway, in this morning's email there is one from ChefShop with this "new" pasta. So I ordered some.
-
I went to the market very early yesterday and the produce people were filling bins and one had just opened a "crate" of red cabbage and one just happened to call my name. And I bought some interesting new apples from New Zealand. So tomorrow I am going to prepare Sweet and Sour Red Cabbage - as per THIS recipe and I am going to add some caraway seeds. My German friends call this Rotkhol - which to me is rather a rough-sounding name for such a lovely side dish. My egg man brought me a nice duck, which is going to be cooked part way in the pressure cooker and finished in the oven. At present the duck is "resting" in the fridge with a "rub" of maple syrup and Lapsang Souchong tea, a treatment of my own devising, which lends a bit of smokiness to the duck without actually smoking it. The duck, with a scant cup of the brewed tea, gets set on high pressure for 15 minutes and then into a 325 degree oven for 30 minutes covered and then 20 minutes uncovered.
-
I like the German dish (popular in Wisconsin during my brief sojourn there in the '50s) of cabbage, apples and sausage - bratwurst or the local venison sausage.
-
When my Mexican neighbor was teaching me the "tricks" of tortilla making, she told me my "pin" was too long. Her husband made hers from a 1 1/2 inch dowel rod - cut to 12 inches, so it could be rolled with the palm of the hand. He made one for me too and it made a lot of difference in that I could roll with one hand while turning the tortilla with the other.
-
What are the interior dimensions of the oven? I have one of these, which I use in my Cadco oven and in the combo Sharp conv/mic. I use it for bread - direct on the surface - and have used it for a spatchcocked chicken.
-
Very well expressed and documented process. However, I think I will stick to my method, which is easier for me. And I am almost exclusively using half and half for my yogurt because I like the much thicker result and the "store brand" half and half in the 1/2 gallon size works out to not much more than the cost of regular milk - and no additives needed. With the heat we have had lately, I haven't even had to use the "incubator", just set the container out on a table on the deck. Temps have been hovering around 100°F or in the 90s for the past few weeks.
-
When I ordered my second one, I noticed Amazon has a much more expensive one - blue and opaque, which to me is a bit of overkill. I can't imagine paying $37. for something that sells for half that.
-
I have a bunch of those Duralex tumblers and they are hard wearing and don't seem as affected by the dishwasher "film" as other glasses. I have to do some searching because I broke one of my Eva Zeisel Harlequin plates (sob) this morning and they are much harder to find than a few years ago. Not a single one on ebay and the only ones on Etsy are not in good shape.
-
Having used them both, and with not so good results with the Fasta Pasta, I am a big fan of the Pasta Boat. In fact, I just ordered another to put away as a "backup" in case they stop making them. And in case this one suffers a fatal accident. So far it seems to be fairly indestructible. Goes thru the dishwasher just fine. (I have several of these "just-in-case" items and some have been extremely pertinent - like the TWO extra Perfect Pod sealers I bought - because they stopped making them and my first died a year or so ago.) And I am still making pods for my Senseo machines - of which I also have backups.
-
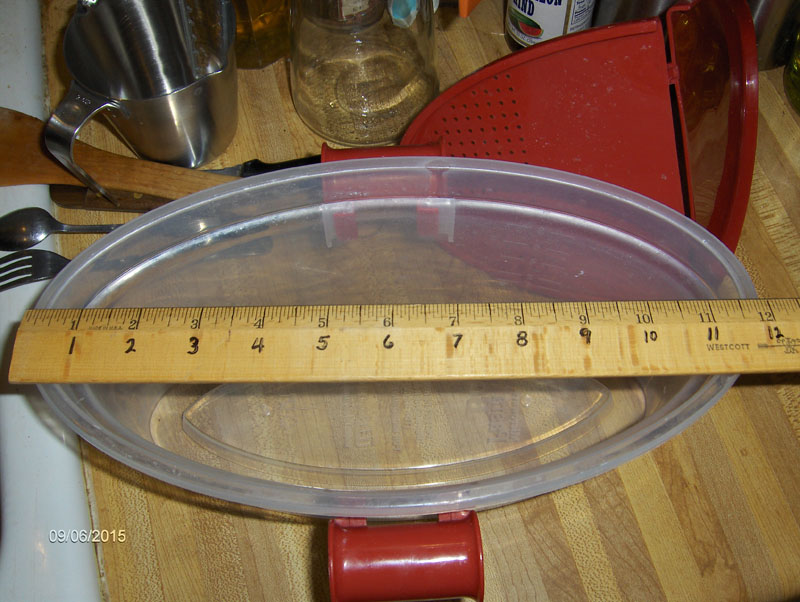
The Westcott wood rulers with metal edge are available at Staples. I have both 18" and 24" and they are also available at Amazon. Most art supply stores carry them and Michael's craft stores also had them but since the Michael's here in Lancaster closed, I haven't been in one of their stores.
-
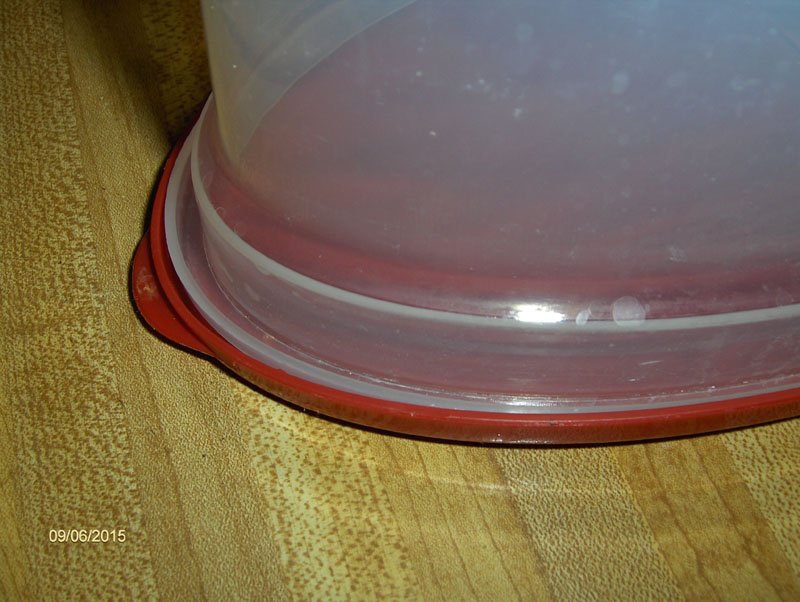
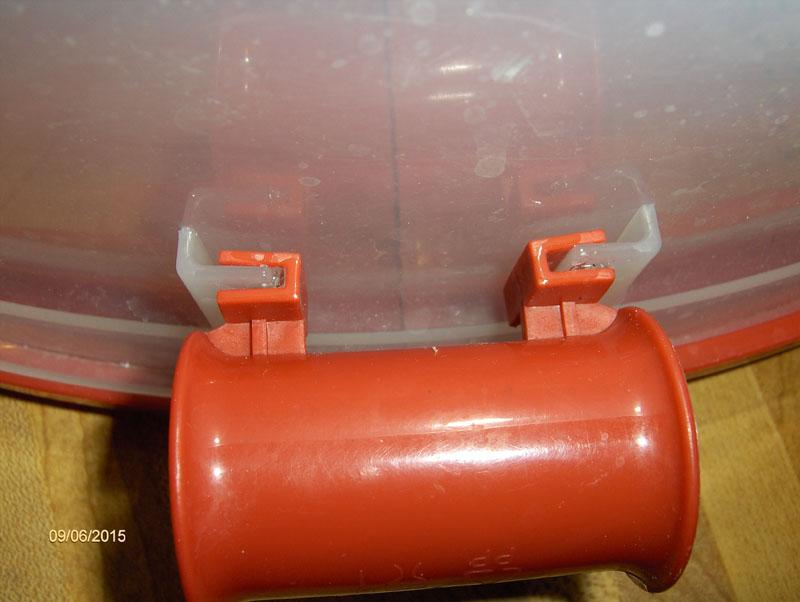
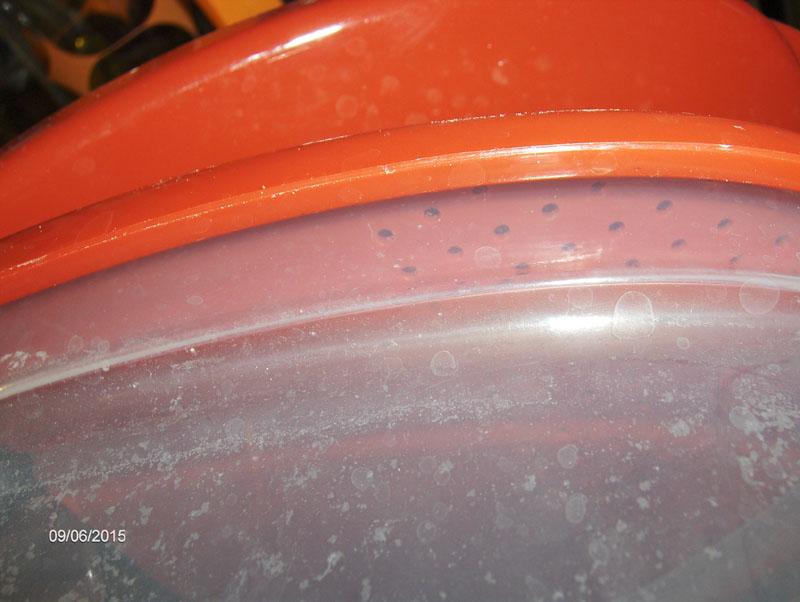
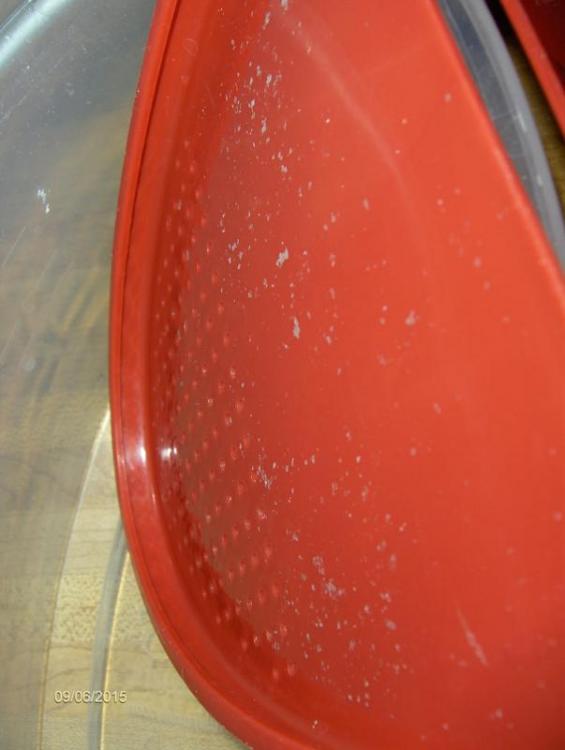
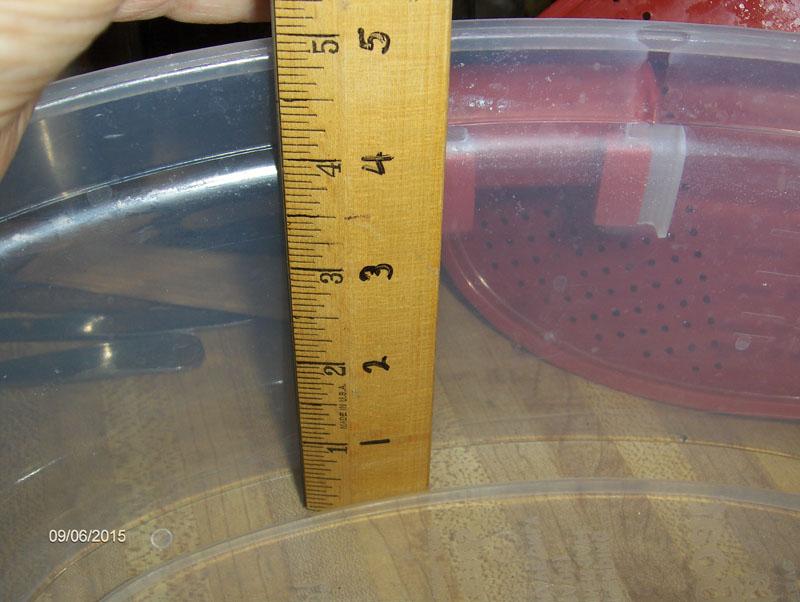
Details about my Pasta Boat. My Pasta Boat holds 9 cups of water without pasta. When pasta is in the bottom, it holds less - maximum amount - less than 8 cups of water. The handles are removable - but I have mine permanently attached - used Gorilla super glue - the thick gel type. The handles do get hot so I use my non-slip gloves. The overall length is a smidge under 12 inches - the depth overall is 5 inches - not quite 4 inches to the maximum fill line. The perforated end of the lid, which is not left on during cooking, has a LIP which slides over the end of the boat and then the back part folds down to secure it so THE TOP WILL NOT COME OFF AND DUMP THE PAST IN THE SINK! Which was the problem I had with the Fasta Pasta twice! This is the back end of the top folded down after the perforated end has been affixed to the other end. There is a "well" around the outside of the bottom which facilitates keeping the pasta from sticking together in clumps - or so it has worked for me, you can see it in the photos. I used it this morning to cook some small elbow mac for a salad and took it out of the dishwasher to take these photos, which is why it looks a bit grungy. Even with the arthritis in my hands and a bit of tennis elbow, I can handle this safely because I can move it from the MW to the counter and slide it along the counter to the sink, fit the lid on and drain.


-
I make lime marmalade. There is a trick to getting rid of the bitterness. More later - someone is pounding on my back door.
-
Regarding the time needed for cooking. I began with the recommended cooking times (these are based on a 1000 watt MW) When using my 900 W Sharp combo I added a few minutes. I used tongs to pick up some pieces BEFORE DRAINING!!! If not done enough, I cooked it a few more minues, tested it and more time if needed. I added up the times and the next time cooked it for the total minutes. Some pastas that are thicker, take longer Penne - in the 900 W oven 22 minutes total WHOLE WHEAT PENNE or any of the "Gluten-Free" pastas take at least that time, some take longer. I make a lot of my own pasta - FRESH PASTA that cooks rapidly - 7 minutes for linguini 1/4 inch wide. Bow ties, a little thicker - 9 minutes. And the same formula for FRESH commercial ravioli - Usually takes 4 minutes on the stove top - add 4 - 5 minutes for the water to get hot, depending on the volume. This is not rocket science. Use it, test the pasta before draining. put it back and nuke it some more if it is still too chewy. And the GIANT SHELLS for stuffing - 30 MINUTES! total And there is a lot of steam when you open the door so be careful, especially if you wear glasses... I almost forgot. Tortellini takes longer than expected - the larger torteloni takes even longer. Anything that is compressed, thicker, heavier, filled, etc., will take longer to cook. Test for doneness before draining. This is when one of the small "olive" spoons with slots and a long handle really comes in handy.
-
The boat has greater volume.
-
I just put them in the boat - add COLD water and gentle separate any that initially stick together - not much because the water isn't hot. It is the hot water that causes them to stick when they are first dropped into a pot of boiling water. This doesn't happen and they are not agitated and they cook through, even though they might stick together a little bit.
-
Wait till you use it for things like ravioli - that is where it really shines. I always have some come apart in the cooking water on the stove top. Not only my homemade ones but those I buy - the fresh ones from Trader Joe's or Whole Foods or some of the other places that have them refrigerated. No matter how careful I am, they have to be stirred a bit or some stick together and when I try to separate them they break. This simply doesn't happen with the Pasta Boat.
-
I love my heavy iron stuff also. However, since I can no longer lift my huge Staub oval oven (no longer sold in the U.S.) when it is empty, much less loaded with meat or ???, it is going on eaby soon. I have some LeCreuset but mostly I have the older Descoware (Belgium) which I think is better - I certainly like the handles better - and some Copco and some Dru and even the ancient Griswold cast iron, which has been in constant use for a century. I was thinking about what I would take with me if threated with eviction - my simple answer is, if I can't take it, I ain't going. As I can bake in the big cast iron skillets (the only way to bake cornbread), I could leave most of the baking pans - heck, I have a #10 (12 inch) cast iron skillet that I use for pineapple upside-down cake anyway - it also handles sticky buns without complaint. So those things are versatile. And I have used my old cast iron Dutch oven to bake bread in a campfire, so that too could double up. Being old and becoming rather infirm, I do have to part with some of the extremely heavy stuff - if I can no longer move it around easily, I don't need it. I am making a list - my lovely 3-head Hamilton Beach malt mixer - which is so handy for buzzing sauce mixes, blending flour and water or other thickening agents with absolutely no clumping - and unlike using the immersion blenders, it leaves both hands free as the "foot" holds the malt cup in place. I tried to move it to clean the counter recently and could barely budge it. I will need help packing it, but it is going, which will free up a considerable amoutn of counter space in that corner. My copper omelet pan - absolutely indispensible so it will stay to the bitter end - along with my crepe pans and the cast iron griddle that was my great grandmother's. More later.
-
As long as it encourages people to bake, I believe in using the "tools" that make it easier. For many that are novices in the kitchen, the whole yeast bread thing is quite daunting. Removing all the drudgery and leaving just the "fun" part makes all the difference in the world. Getting someone to deviate from the regular instructions is a bit more difficult but once they give it a try, they become more enthusiastic. I instructed a class in cooking and baking at the women's and children's shelter a few years ago and I donated one of my spare bread machines (I still have several) and the women, and one teen took to using it regularly and even did some experimenting. None of they had ever done anything with yeast bread prior to that. Some had done no real cooking at all. Not every one got through the entire 6 classes (once a week) but those that did stuck with it, or so the shelter director, a friend, told me. It was the same thing with making yogurt - once they learned the milk could be heated in the microwave, with no chance of scorching, as with heating on the stove top, they were very enthusiastic about it.
-
Me too and I have put a step by step instruction photo series on my blog - for exactly how to do these cinnamon rolls. I don't like icing on cinnamon rolls. Spoils the flavor for me.
-
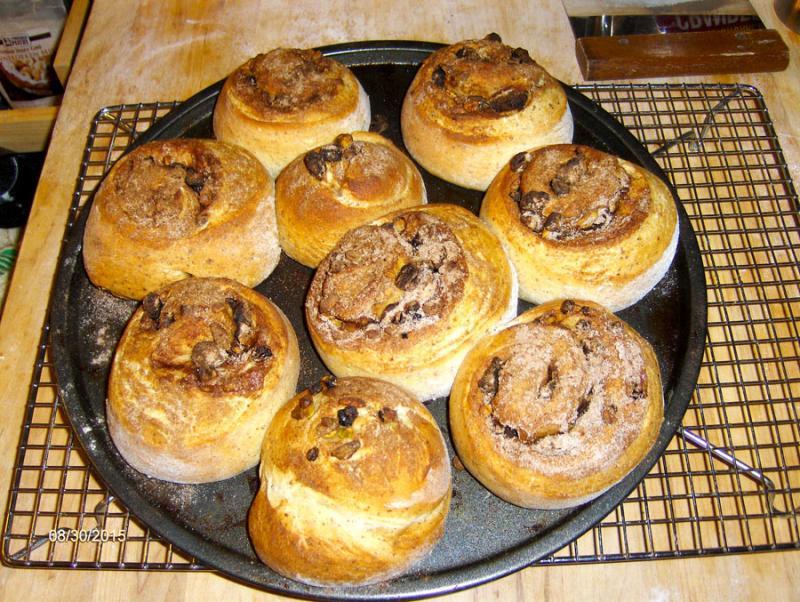
I know a lot of people dismiss the idea of bread machines but I have been using them since I first discovered how versatile and helpful they can be some 35 years ago. I am teaching a young woman, mother of 7 (2 adopted) baking techniques. Like so many busy stay-at-home moms, she really doesn't have the time for baking in the traditional way. So I talked her into getting a bread machine several months ago (9 people can go through a lot of bread in a week). She has since bought a second one - larger capacity (the 3 pound Black and Decker like mine) and bakes bread every day. Today we had a lesson in cinnamon rolls - used two boxes of bread mix, cracked wheat and Sweet Hawaiian. Since we aren't going to bake in the machine, this will work just fine. Set on the DOUGH cycle, the machine does all the boring work, while one can go about other tasks and not even think about it. There is a signal when the cycle is finished but we just left it in the machine for another 45 minutes. Dumped it out on the dough board, divided it into two pieces, one I would work and she would duplicate what I was doing. less than 30 minutes the rolls were formed and covered to rise for another 30 minutes and then into the oven. Total time expended, only a fraction of the usual time of mixing, kneading, rising, punching down, rising, and so on. End result - My pan, she would not allow me to take a photo of hers because I put a lot on Facebook. That's a 15 inch pizza pan - to give you an idea of the size of these rolls. Without the bread machine, she says she would not even bother to try to make these.
-
I use very little water when cooking meats and poultry that I KNOW will produce a lot of liquid. Usually no more than a cup for whole chickens, duck (and duck cooked in the PC is amazing AND you can recover a large amount of duck fat!) . For a whole turkey breast I used about 2/3 cup of turkey broth (from my freezer). I used more for the smoked turkey legs because they are much dryer - and were tough prior to cooking in the PC. For chuck roast/7 bone roast I use less than a cup of water and cook it with Lipton onion soup mix. I then use this as a base for "instant stew" with my slow-roasted root vegetables.