
Knishes
According to Wikipedia a knish is:
Quotean eastern-European Jewish or Yiddish snack food. It is a dumpling covered with a dough shell that is either baked or fried.
My grandmother would plotz if she knew people were frying their knishes! I’ve sampled them in both Toronto and New York. Compared to the flaky-crusted, tender knishes I’ve been raised on they didn’t make the grade – but I’m sure they appeal to some  .
.
Like many Jewish foods popular in North America, knishes were created by eastern European Jews who wanted to add some variety to their humdrum diets. By wrapping dough around kasha (buckwheat) or potatoes they made something new and interesting out of rather mundane ingredients. All inexpensive items, they were staples of the peasant diets. As is common across the world, these inexpensive items are what became traditional foods full of wonderful memories for future generations.
This is how I make my potato and onion knishes. It’s not that different from how my grandmother made hers (other than the fact that I let a machine do the hard work). When I take the time to make them, it throws me back to Friday night dinners at Baba’s house. When knishes were on the menu they were always snatched up by all of her children and grandchildren.
The Recipe
The recipe for Potato and Onion Knishes is located here in RecipeGullet. Step by step directions are included in this thread.
The Dough
4 cups flour
1 tsp. salt
2 tsp. baking powder
2 large eggs
1 cup oil
1 cup warm water
2 tsp. white vinegar
Some recipes use puff pastry, some use phyllo, some use a dough made of flour, water and egg that is rolled out with a rolling pin. The best knishes use a stretch dough – similar to a strudel dough – that is stretched out across large tables as thinly as humanly possible. When you roll the stretch dough around the fillings, you create thin, flaky layers.
Dough ingredients – flour, baking powder, salt, eggs, canola oil, white vinegar and warm water.
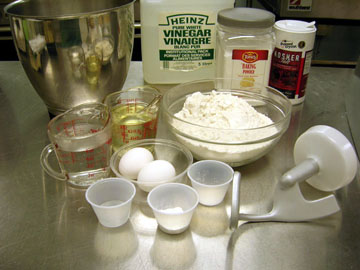
Place all of the dry ingredients into the bowl of a stand mixer fit with a dough hook and mix briefly. This can be done by hand, but using a machine makes it so much easier. I’ve also tried this recipe using a food-processor with a regular blade and it will do if you don’t have a mixer.
Form a well in the middle of the dry ingredients and add all of the wet ingredients:
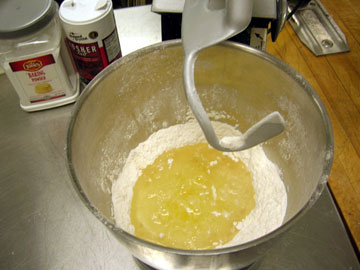
Mix on low until most of the ingredients are combined, then turn the mixer to high and knead for 8-10 minutes:
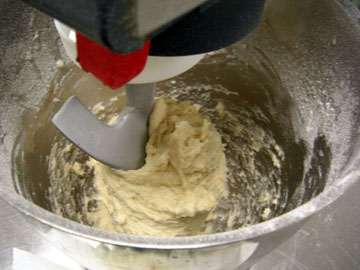
When the dough has been kneaded enough, it should be smooth and you should be able to see little bubbles beneath the surface of the dough (unfortunately the photo doesn’t allow you to see this):
If you are not using a stand mixer, use a spoon or your hands to get everything mixed together. Next, I was taught, you must slap the dough onto a counter 100 times, giving it the occasional kneading. (I told you the mixer was an easier method).
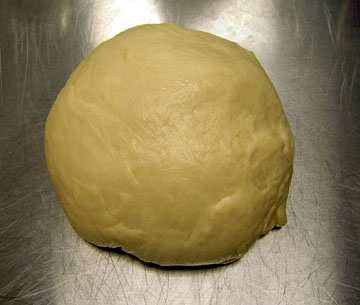
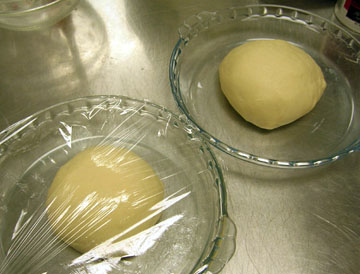
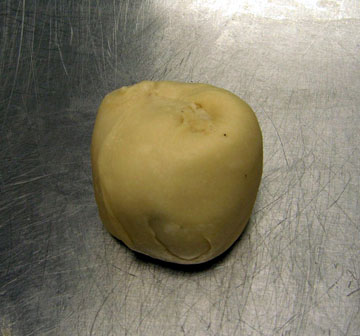
Divide the dough in two, and form into two balls. Cover each with plastic wrap and let it hang out for at least an hour, relaxing at room temperature.
While the dough is resting, prepare the filling.
The Fillings
The best thing about a knish is that you can fill it with many different things. Let your imagination run wild. The most common (and one of the best) fillings is potato and onion. Onions sautéed until a deep golden brown – adding a caramelized sweetness to the boiled potatoes. Add some vegetables (spinach and mushrooms are two popular choices) or cheese (cheddar mixed with potato or cottage cheese on its own), maybe some kasha (buckwheat) or grind up some chicken or liver for a meat version.
Potato and Onion Filling
3 Tbsp. oil or schmaltz
1 lb. yellow onion, peeled and chopped
3 lbs. red potatoes, peeled and cut in half
1 1/2 tsp. salt
1/2 tsp. garlic powder
1/4 tsp. black pepper
My preference is for red potatoes and yellow cooking onions. As a general rule, I find baking potatoes too dry. The problem is that sometimes reds are too wet! 9 times out of 10 I use straight red potatoes – but if I know that they are especially wet, I’ll add a couple of bakers to lower some of the moisture content.

Cook onions in oil or schmaltz for 30-35 minutes over medium to medium high heat. I use a non-stick pan as I have a tendency to walk away and do something else – but use whatever you like. The onions should turn a deep, dark brown without burning. They won’t start to brown for at least 15 minutes – if you find them browning much before that, turn the heat down. Stir every 1-3 minutes, making sure that nothing is burning at the bottom of the pan.
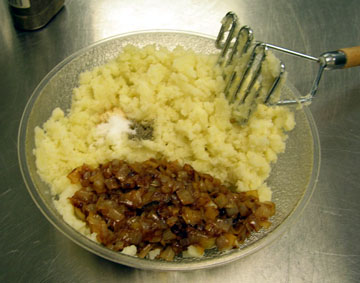
While the onions cook, place the peeled potatoes into a large pot with cold water. Cover and place over high heat – bring to a boil, lower heat and simmer until the potatoes are fork tender. Drain the potatoes very well and mash. I prefer a potato masher over a food mill or ricer because I like the final knish to have some small potato chunks (I want to know there’s real potato in there!).
Add the deep brown onions, salt, black pepper and garlic powder.
Mix everything together, taste and adjust seasoning. Make sure you can taste the seasoning – you’re going to wrap a dough around this that will suck out some of the flavour.
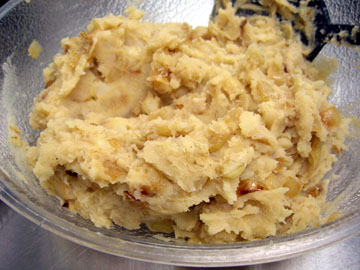
Cool (but don’t chill) and proceed to the next step.
Stretching and Forming
When I was young, my grandmother and great-aunts would place a clean, beautiful linen cloth on the kitchen or dining room table to stretch there dough on. We no longer use the linen – finding it easier to stretch the dough if it is actually able to stick a little to the table.
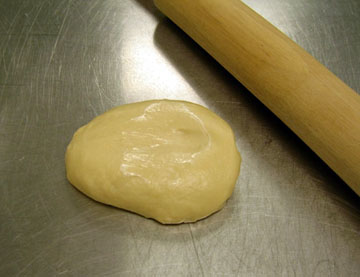
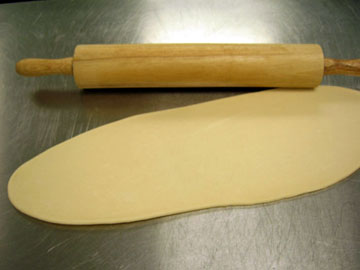
First you must roll the dough into a long rectangle:
Start to gently stretch the dough. Place your hand under the edge of the dough and gently pull towards you. Work your way around the table, pulling in every direction.
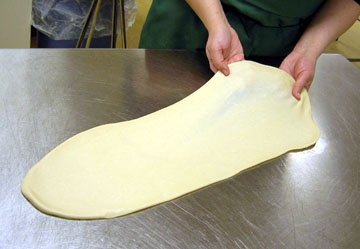
The dough will probably tear in places – that’s ok. Just try to avoid any really large holes.
I like to gently hit the dough/table with an open palm as I stretch, to stick the dough to the table and keep it from rolling back over itself.
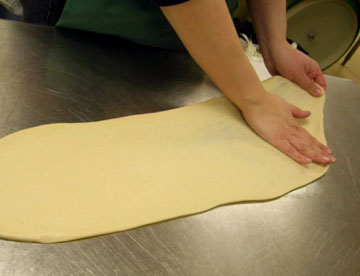
All stretched out:
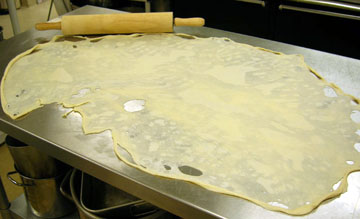
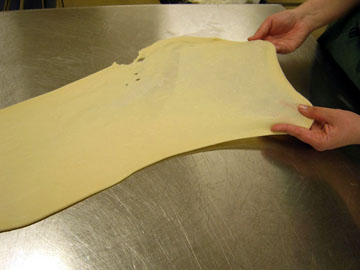
Use a paring knife to trim the thick dough on the outer edges:
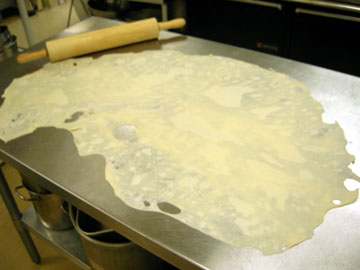
Here is a close-up of the stretched dough – I hope you can see the little bubbles that have formed in the dough – this is good:

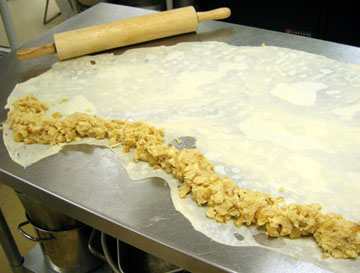
Place a row of filling about 1- inch from the edge of a long side of the dough Use ½ of the filling you’ve made. (For a small, hors d’ouevres size knish, cut the dough in half lengthwise – then place a much smaller row of filling along the edge and proceed.):
Start pulling the edge of the dough up and over the filling:
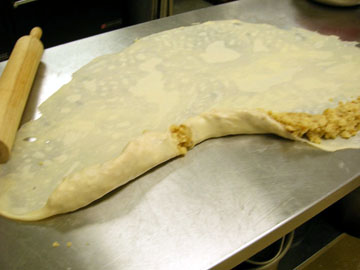
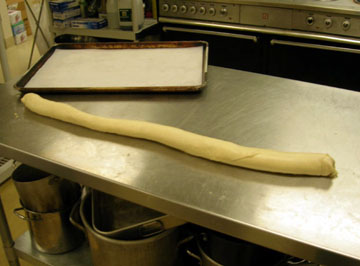
Continue to roll the filling in the dough, gently pulling the rope towards you stretching the dough a little more, until you have one long rope:
Pinch the rope where you would like to cut the dough. This is where you decide how large you’d like the knish to be:
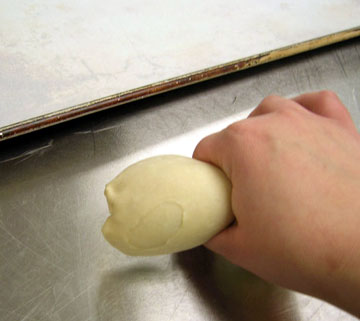
Then twist the dough where you want to cut it:

Then use the side of your hand to saw the knish off of the rope:
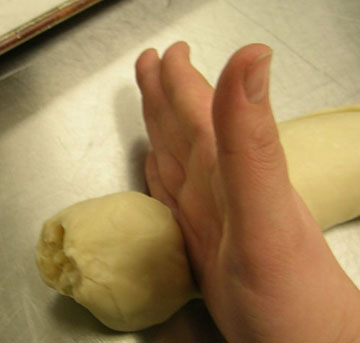
Continue to do this until the entire rope has been cut up:
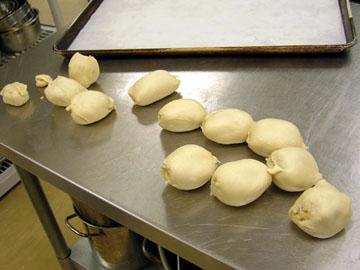
This is a pre-shaped knishes that has been well cut and just needs to be shaped:
Here’s a knish that didn’t cut quite as well. You need to stretch the dough over the edges and pinch them together if this happens – or you can use a piece of scrap dough to help cover holes:
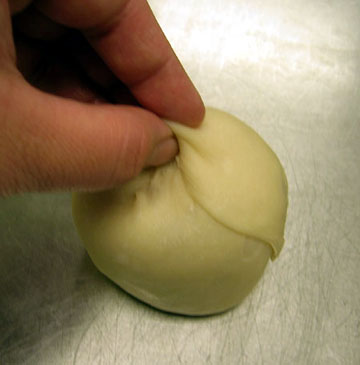
Whether it had to be patched, or it was well cut, you still need to pinch both the top and the bottom, to ensure that the holes stay closed:
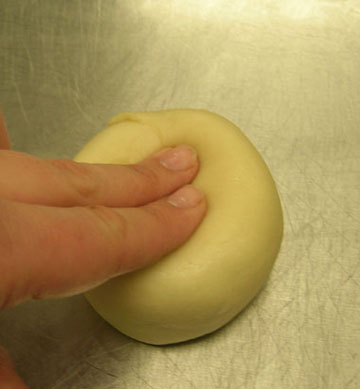
Press down to create an indentation in the middle of the knish:
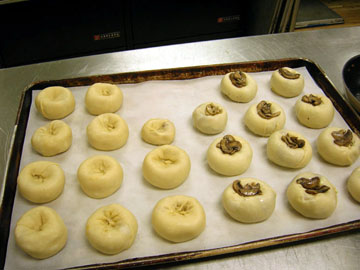
All trayed up and ready for the oven – the ones on the right have some sautéed mushrooms on them (they also have sautéed mushrooms mixed into the potato/onion mixture):
Into a 350º convection oven (375º conventional). They will bake for 15-25 minutes depending on your oven. Always check them after 15 minutes and see how they’re doing. They’re done when golden brown.
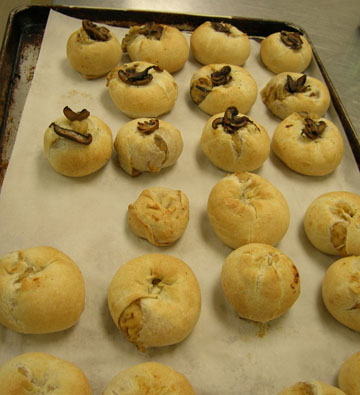
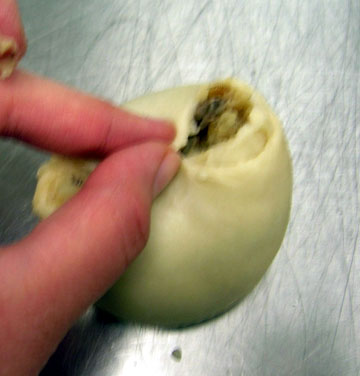
(If some of them split a little as they bake, gently push the filling back in.)
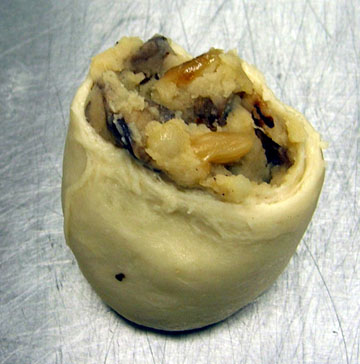
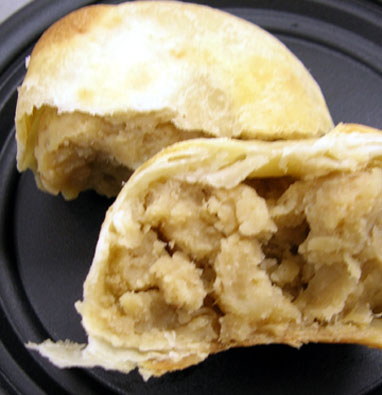
A view from the inside (the picture doesn't quite do justice to the skin, but I think it gives you an idea of the layers):
Helpful Hints
Once all of the kneading is done, the dough can be used for later use. Place each dough on a baking sheet lined with parchment, freeze then wrap well with plastic or place in a freezer bag. Pull them out of the freezer the night before you want to use them and thaw, on a baking sheet covered in plastic wrap. A couple of hours before you need them pull them out of the fridge and let them come up to room temperature – then stretch away
Knishes are also great frozen – as long as you freeze them before you bake them. Freeze them in a single layer on a baking sheet lined with parchment – when they’re frozen transfer to a freezer bag or container. Pull them out as you want them and bake them – no need to thaw. The cooking time for frozen knishes won’t be all that different from fresh – maybe an additional 5 minutes.