

Tony S.
-
Posts
23 -
Joined
-
Last visited
Content Type
Profiles
Forums
Store
Help Articles
Posts posted by Tony S.
-
-
^^ This. I've had moulds that look perfect on the outside with a lovely bloom on the inside that no-one sees

Keep a close eye on the temperature (even though it's not the be all and end all) - if you're out of the working temp range you're more likely to see problems. I find this with my tanks that the temp can slowly creep up even though I don't move the dial, they're starting to get old and worn out (just like me!)
Do a test set on a spatula or a knife 10 minutes before you start, if that sets up nicely with no streaks, you should be good to go.
I've noticed that too, with the bloom inside the shells but nothing on the outside. So I guess the temper wasn't perfect to start with. Is there any way to know at what point something went wrong to throw off the temper? In other words, would this most likely be a result of the chocolate getting too hot when reheating? Or perhaps not seeding enough?
I'm using the Guittard 'Lever du Soleil' Couverture. This was the first time using this chocolate. I don't recall seeing any info on the package indicating the proper working temp, so I just used what I normally do for dark chocolate. Melt the chocolate to about 113°F, cool to about 105°F then begin adding seed chocolate. Gradually add more seed until the temp falls to about 86°F, all the while continually stirring. I'll then hit it with a some quick shots from the heat gun to bring it back up to 91°F. I try to keep it in the 90°-92°F range as best I can.
After going through this process, which took me about 30 minutes, and testing on a spatula, if I do notice streaks forming is there anything I can do to correct it, short of starting over from the beginning? Is there something glaringly wrong in my process that I need to change?
-
At 60º, you should not have had to put them in the fridge...brrrr....I keep my room as close to 68ºF as possible. This morning I worked at 64º
Maybe the ganache was too cold, but based on how you describe setting it out, I doubt it.
I think the temper was just off. Try, try again!
You're probably right. I'll probably just stick to molded pieces for now. I like those better anyway. Thanks for the input.
-
 1
1
-
-
streaking and bloom (what you're describing) means your chocolate wasn't quite right. Was your room a little warm? Perhaps the heat release as the chocoplate set up was enough to cause the problems. I always try to have my ceiling fan on when I'm dipping to improve air circulation around the pieces and allow the heat to dissipate quickly

Thank you for the reply. The room was actually quite cool. Maybe mid to high 60s F (A rare "cold" few days in San Diego). Should I have put the pieces in the refrigerator after dipping to set? Would that make much of difference, considering after dipping the 30th piece, the first few pieces had pretty much already set and streaks were already showing? Could the ganache being cold when dipped contributed to the streaking? It had been refrigerated but I pulled it out and let sit at room temp for about an hour before dipping.
-
Hello everyone. Not sure if I should've started a new thread for my question. My apologies if I should have. But since it's primarily about tempering, I figured it fit here.
This past week I made chocolates for the first time in a while. I tempered my chocolate using the seeding method, melting it in a microwave and continually stirring by hand as I seeded. Once the chocolate was tempered (as best as I can tell, at least) I kept the work bowl wrapped in an electric heating pad. I regularly stirred the chocolate, checked the temp with an IR thermometer and hit it with a heat gun to bring it back to working temp whenever necessary.
When I used the chocolate to line molds, everything came out great. I was able to get nice thin shells that released easily from the molds. Good sheen & crisp snap. So I was pleased with that. However, truffles that I hand-dipped all developed streaks. Some turning almost completely grey after a bit of time. They still had nice crisp shells that didn't immediatley start melting when handled. It was just the appearance that disappointed me.
So is the streaking just a result of not properly tempered chocolate? Or could there be other factors that cause the streaks? I hand-dipped some dried figs and those didn't develop any streaks. It was only the hand dipped balls of ganache.
Any input would be greatly appreciated. I will be making another batch this week but thinking I may just stick to molded stuff. -
In short, corn syrup is the cheapest and most accessible liquid invert sugar, or you can also use honey if the honey flavor works with your other flavors.
I think I'm a little confused. Corn syrup is an invert sugar? Obviously it's a glucose syrup but do glucose syrups serve the same functions as invert sugar? As far as I understand the concepts (granted, that isn't very far) the primary function of corn syrup in a recipe is to prevent recrystallization of sugar, which invert sugar will also do. But is corn syrup as hygroscopic as invert sugar? Will it lower water-activity level and extend the shelf-life of a confection the way invert sugar does? Is corn syrup as sweet as invert sugar? Depending on the role it plays in the recipe, I'm not sure if substituting one for the other would give the same results. But I've never worked with invert sugar so I could be wrong. I'm just going by what I read in Grewling's books. Could someone please clarify for me? Thanks.
-
Personally I would be reluctant to use a water bath to either cool or heat melted chocolate. Just a tiny bit of water getting into the chocolate will cause it to seize and you will not be able to temper it at all. I guess for such a small amount, you're not risking that much but I know if that happened to me I'd be pretty frustrated.
Also, I don't think milk chocolate needs to be heated to that high of a temperature to melt all the crystals. 120F is about the high end for dark. Milk chocolate should be taken to around 110F at the most. And the working temp of milk (and white, for that matter) is a few degrees lower than it is for dark, more around 82F-85F. But if what you did worked for you than I guess it doesn't really matter.
As for piping ganache, I've never done it for hand dipped truffles. I just let the ganache crystallize in a bowl than scoop into balls and dip. But given the choice, I much prefer to use molds and pipe the ganache into shells. Guess it all depends on the look you're going for with the final product. But if you use molds, you'll definitely want to work with a larger batch of tempered chocolate, like was suggested before.
-
I bought this Cara Heating Pad w/ Select Heat, which allows me to set the pad to a specific temperature. I place that in a large mixing bowl and then set my bowl of tempered chocolate on top of the pad. The outer bowl allows the pad to wrap around the bowl of chocolate to heat all around it instead of just from the bottom. I make sure to stir the chocolate often and I'll check the temperature w/ my infrared thermometer. If I need to bring the temp up a bit, I'll pop the bowl in the microwave for 10 seconds or so or hit it with my heat gun. I'm able to keep about a kg of tempered chocolate at its working temp for much of an afternoon with little fuss.
-
Tony, in regards to your question of docking/puffing, some recipes (such as for mille feuille) have you put a second baking sheet on top of the pastry, effectively weighing it down so it can't puff too much. I thought this might be undesireable since I assumed that puffing up was part of the point of puff pastry, to get nice distinct layers, but perhaps this isn't the case.
I've seen that done on a cooking show once but didn't think about it before hand. And my intent was to create a border that would puff and the interior to remain relatively flat. Well considering how much trouble I had unfolding the pastry and keeping it even, folding in the edges for a border was just ineffective. But I docked the interior section quite a bit, at least I thought it was enough. Perhaps since the dough got pretty soft, the holes just kinda sealed up before they could be of any use.
I watched an old episode of "Good Eats" on puff pastry and my dough looked nothing like the dough Alton was working with. Obviously I made a lot of mistakes in regards to defrosting and handling. Next time I'll try to correct some of those mistakes.
-
It's weird seeing folded puff pastry in the US. It was always sold unfolded in Australia and I can't understand what possible benefit there would be to it being folded.
I'm sure it's all just about packaging and display space in the store. Probably easier & more effective to display a 3" tall box than a 9" one. Grocery stores probably don't move as many boxes of puff pastry as they do, say, frozen pizzas which would be a similar size as unfolded pastry. Therefore don't want to dedicate the amount of freezer space needed to display the larger box. That's just speculation on my part though.
-
If you are in the US, Smart & Final stores sell a box of frozen puff that's flat. Catch is, it's a big box and thus a hefty investment. That said, if you have the freezer space, it's very convenient because you can pull out single sheets to thaw and leave the rest frozen.
Thanks Lisa. That's funny b/c my bro-in-law is a manager at a Smart & Final. I'll have to find out from him if his store carries them and the price. I'm sure he could get me a discount.

And thanks everyone else for the tips. Nice to know that I wasn't so off-base with that "not unfolding" idea.
-
Thanks. The unfolding part was definitely the most difficult. Once I got it unfolded the best I could I didn't really handle it much more. The first one I did try to roll it out a bit but it was sticking to the rolling pin and I wasn't sure about dusting it w/ flour so I just left it as it was.
I'll have to do some hunting to see if I can find larger sheets.
I'm curious though (and this thought just popped into my head so I haven't really thought it through)...What if I didn't unfold it at all. If I kept it chilled, could I just roll it to the size I want? That is basically how it's made anyway, right? Roll it, tri-fold it, chill it, roll again.
-
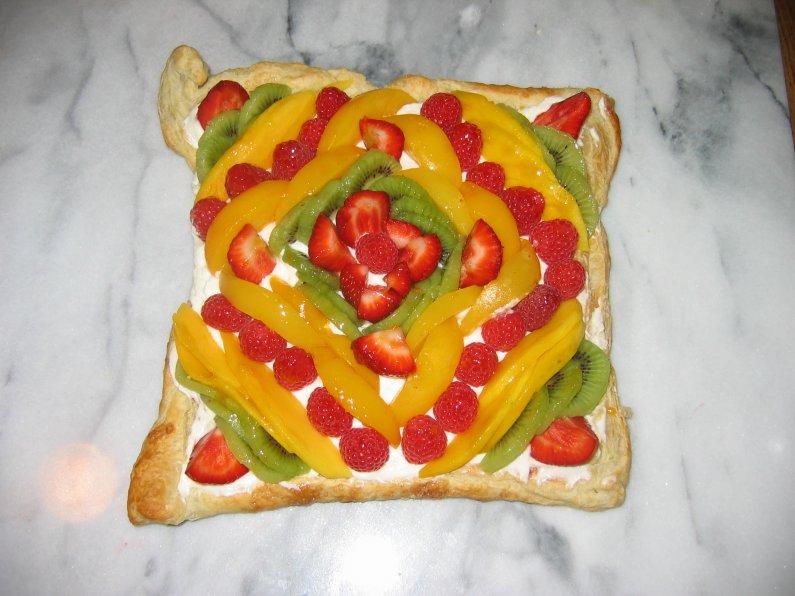
I had zero pastry experience before today when I attempted to make a fresh fruit tart for my niece. Basically puff pastry topped with pastry cream and strawberries, raspberries, kiwi, and mango. I bought frozen puff pastry from the grocery store and let it thaw on the counter for 40 minutes or so, as per the instructions on the box. After it thawed I had the hardest time unfolding the pastry and keeping it in a relatively even square that it should be. It just stuck together and I felt like I was stretching it too much in order to separate it. And one portion got really thin while the part that it was in contact with was thicker than the rest, like the layers didn't separate where they were supposed to. And while I did dock the pastry before putting in the oven, it still puffed up like a pillow. After it cooled I had to press it down and flatten it so I could spread the pastry cream on top, thus making a bunch of flaky crumbs on top. The finished tart tasted fine, but I really wasn't happy with the way it looked.
So what are the secrets of working with puff pastry. Specifically unfolding it so it remains a nice even sheet. Should I try unfold it while it's still a bit frozen? Perhaps I let it thaw too much. It was pretty warm today. And why wouldn't the docking keep it from puffing up so much?
Any advice would be appreciated. I'd like to try this again, but there was a point there where I was getting pretty frustrated with it all. Thanks.
-
The Ponthier puree that I have has 10% added sugar. I'll probably try Greweling's PdF recipe from "Chocolate & Confections at Home" which doesn't require the apple compote and uses liquid pectin instead of powdered. Would I need to adjust the amount of Ponthier puree and sugar I use? The recipe calls for 16oz fruit puree, 24oz sugar. So if I'm thinking through the math correctly, I would need 17.6oz of Ponthier puree and 22.4oz of sugar.
I've never made jellies or used pectin before, so I have no idea how important the ratio of sugar/pectin/acid is in order for it to gel properly. Greweling states that sugar "is a necessary ingredient for the pectin to bind properly. Cutting down on the sugar in the pectin jelly recipe will cause it not to set properly." Does that also mean that increasing the amount of sugar will cause it to set too firmly? Would 10% make that much of a difference in texture of the finished PdF? Or would it just be sweeter?
-
Thanks JBailey for the link to those videos. I actually have a 1kg bag of the Ponthier passion fruit puree. I'm going to make a passion fruit caramel for a chocolate filling and I needed ideas for other things I could make with it. I was thinking of PdF and now seeing this vid I think I'll try that.
Question though. Caster sugar is finer than common granulated sugar, right? Does using caster sugar make that much of a difference over granulated? If so, can I just whirl some granulated sugar in a food processor to refine it a bit?
-
The way I've seen this done is to first unmold both halves. Then slightly melt the edge of each half by rubbing it on a flat surface that's been warmed. You can use a heat gun on a marble slab or metal work table or the bottom of a sheet pan. You can also heat a large flat metal scraper or pastry knife and touch that to the edge of the halves to melt it. Then just join the two halves together. Doing it this way, I don't think you need much of a lip or build up the walls very thick. This would probably work with whatever thickness of a wall you like. However I would assume the thicker the wall, the more solid the joint would be. I've never actually done this myself, so I can't say how the seams look. I'm sure not as good using a clipped mold. But probably a bit cleaner than a piped bead of chocolate that gets squeezed out like glue. Hope that helps.
Here is a video I found of "Madame Chocolat" Hasty Torres (Jacques's lovely wife). At the 6:00 mark, she demonstrates how this is done using the heated marble slab and the heated metal scraper...And can I just say, I LOVE the marbled effect she created on the egg. I'm so going to use that.
-
As these double molds are invariably white or opaque polycarbonate, it's harder to decorate them, but joining the two halves is the hardest part. You have to run a bead of chocolate around the lip, then pop out the back and stick it on. In order to have a lip to pipe chocolate on, you have to build up the walls. Even then, when you "glue" the two halves together, the seam is not attractive.
So my question is, is there some trick to joining these figurine halves?
The way I've seen this done is to first unmold both halves. Then slightly melt the edge of each half by rubbing it on a flat surface that's been warmed. You can use a heat gun on a marble slab or metal work table or the bottom of a sheet pan. You can also heat a large flat metal scraper or pastry knife and touch that to the edge of the halves to melt it. Then just join the two halves together. Doing it this way, I don't think you need much of a lip or build up the walls very thick. This would probably work with whatever thickness of a wall you like. However I would assume the thicker the wall, the more solid the joint would be. I've never actually done this myself, so I can't say how the seams look. I'm sure not as good using a clipped mold. But probably a bit cleaner than a piped bead of chocolate that gets squeezed out like glue. Hope that helps.
-
After reading through this report, I'm really bummed that I wasn't able to attend. Thanks to RobertM and Chris Hennes for posting their videos. I picked up so many tips in just those 12 minutes alone.
I do have a few questions regarding tabling of ganache. At what point do you begin the tabling process? As soon as the emulsion is formed? Or do you first let it cool below the point where agitation would cause it to separate? I have Greweling's book and the only discussion of tabling ganache is in the piped ganache technique. There he states that after the ganache has cooled to 72F, it needs very little agitation. I would think that what Derrick demonstrated is more than a "little agitation". And I'm curious to know how Derrick used that ganache after he tabled it. Spread into a frame then cut? Piped into molds?
Tabeling a ganache does not effect the texture/grain of the finished product, it has to do with how the fats crystalize, and specifically the cocoa butter which "traps" the flavors within the ganache. This allows greater flavor "explosion" in the mouth.
I'm a bit confused with this because in Greweling's book, he states that tabling ganache causes it to set with a shorter and firmer texture. Also that an over agitated ganache will not have the smooth, creamy texture that is desired. Does Derrick's book, or any other book, have more detailed information on this technique than Greweling's?
Thanks for any insights you're willing to share.
-
Forgive me if this question has been asked & answered before. I tried doing a search but scouring through 40 pages of search results was taking too long.
I'm wondering if it's okay to use hardware store tools that aren't necessarily designed for use with food when working in the kitchen. Specifically, I want to get a scraper that's about 8" wide to use on my chocolate molds. Ones available from JB Prince, Chef Rubber or other pastry/confectionery supply companies cost $20-$35. An 8" drywall taping knife from a hardware store would cost less than $10. If the blade is made of stainless steel, cleaned thoroughly and used only for this purpose, is there any reason why I shouldn't use these less expensive tools?
-
Thank you, Kerry.
-
Hello. I guess I should offer a bit of an introduction before I ask my question. I'm not a professional chocolatier, just a bit of a hobbyist making chocolates in my home kitchen. However, a few years ago I did have the good fortune to work with a local chocolatier for a few months learning the basic techniques. I also have both of the Greweling books and the Shotts book and have read 'em all cover to cover multiple times. I've been reading this forum for years now but just recently signed up and am looking forward to more active participation here.
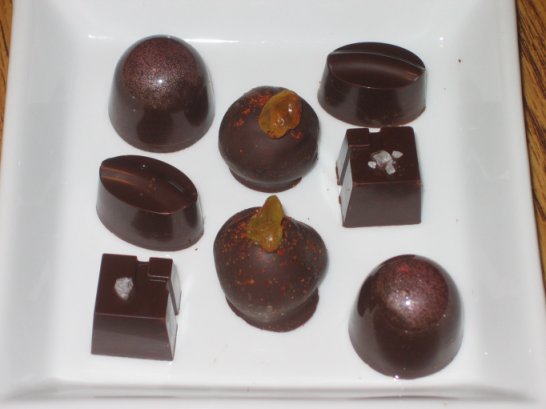
Two weeks ago I wanted to try out a flavor combination I'd been thinking about for a while. I made a batch of ganache, scooped and rolled it into balls and hand dipped 'em in chocolate. As the chocolate set, I noticed most developed cracks in the shell. I guess the tempered chocolate was a bit thin resulting in a pretty thin shell. Since I had already decorated the shell with a sprinkling of spices I didn't want to dip 'em again. A couple of days later I looked at the pieces again and it appeared that the cracks had sealed. You could still see where the cracks were but they were closed and no ganache burst out through the cracks.
I still have some of those pieces left as well as some ganache that I hadn't scooped and dipped. I'm curious if these would still be good to eat. I know there are a lot of things that can affect the shelf life of a piece. But is mold the only sign that it's time to trash these pieces? If there is no mold, can I assume the pieces are still good?
Here's a pic of the different pieces I made. The hand dipped pieces are the only ganache ones. The molded pieces were caramels.
Thanks for any input and advice.
Tony

-
Hi Jeff. Thanks for the welcome. I've been reading these forums for a while. Not sure why I didn't sign up earlier. But I'm looking forward to participating in this community.
I uploaded the "Foodcrafters" segment on Dude Sweet to YouTube if anyone is interested in seeing it.
I'm actually not anywhere near Dallas. I'm in Southern California. But I would defintely love to visit Dallas one day.
-
So is the "Dude, Sweet," moniker have some sort of meaning for the owners or is it just a catchy name they came up with. I think of "Dude" and chocolates in Texas and I'm not sure I see the link over to the style of confections they offer.
The Cooking Channel did a profile of Dude Sweet on their show "Foodcrafters" a few weeks ago. The owner, Katherine Clapner, seems to be a bit of the renegade type. As she says herself that she chose the town where she opened her shop because she "wanted a neighborhood where rules are not important." "Dude Sweet" refers to her view of males and females, Dudes & Sweets, and her flavor collection is divided into these two categories to reflect that. The "Sweets" are more delicate, flowery flavors; rosepetal jam, lavendar, passion fruit. The "Dudes" are more "aggressive"; tobacco & cognac, black garlic & mushrooms, Irish Whisky. I think it's a pretty clever concept that fits her personality and the flavors are pretty intriguing, although I haven't had the opportunity to try any yet.

Troubleshooting Tempering
in Pastry & Baking
Posted
Thank you Kerry & Yeti. That is great information. While I love working with chocolate, I don't do it very often. This was my first attempt in a couple of years. So I haven't realy developed a feel or eye for what's right. I probably should've did a bit of a refresher on the details. I'm going to try again tomorrow so hopefully I can effectively apply this info and get it right.
I'm curious now about using a block of chocolate as seed vs discs/pistoles. Is one more effective than the other? I've always used pistoles b/c that's what I learned with and I hate the idea of having to chop down a block before melting. And since I'm tempering w/o a machine, I would think stirring a bowl of melted chocolate w/ a block in the middle has the potential for a lot of mess. But if experienced chocolatiers say using a block is more effective or easier, I'll consider trying it.