Search the Community
Showing results for tags 'Recipe'.
-
Here's my recipe for the infamous "jail slaw," which I learned to make while a rookie reporter covering courts and cops in Crittenden County, Arknsas, and often being invited to eat lunch at the jail. It's a great, crisp accompaniment to burgers or pulled pork barbecue or fried fish, It goes well in place of lettuce on a bacon and tomato sandwich, and keeps in hte fridge approximately forever. 1 large head cabbage, shredded 4-6 carrots, shredded one large onion, shredded one large bell pepper, shredded (the latter two are optional) Dressing: 1 cup vinegar 1/2 to 3/4 cup sugar 1/2 tsp dry mustard 1/4 tsp white pepper 1/4 tsp turmeric 1 tsp celery seed Heat dressing ingredients until almost boiling. Pour over vegetables. Let sit on counter for three or four hours to marinate, stirring and tossing occasionally. Refrigerate at least overnight before serving. 4-
- 11 replies
-
- 12
-

-

-

-
Host's note: this recipe video was posted in response to a request in the Dinner 2018 topic; a description of the recipe, and a photo of the results, is here. Cheesy Chicken Fritters: https://natashaskitchen.com/cheesy-chicken-fritters-video/
-
CAPE MALAY PICKLED FISH Ingredients: 2 to 2.5kg fish salt & pepper oil for frying 750ml brown vinegar 1 cup water 170g sugar 1 tablespoon turmeric 3 tablespoons curry powder 1½ teaspoons salt 1 tablespoon black peppercorns 4 large onions, finely sliced 6 Bay leaves 170g sultanas (optional) 4 teaspoons flour Method: Fillet the fish and cut into cubes. Season lightly with salt and pepper and fry in hot oil until cooked though. Drain on kitchen paper. In a large saucepan combine the vinegar, water, turmeric, curry powder, salt and peppercorns and bring to the boil. Add onions and Bay leaves and simmer for 10 to 12 minutes until the onion is cooked but still slightly crunchy. Layer the fish, sultanas (if used) and onion in a large non-metallic dish, pour sauce over and refrigerate. Keep refrigerated for at least 3 days. It keeps refrigerated for over a month. I layer the fish in a Tupperware type plastic container with a locking lid. Let it mature for more than 3 days if you can. Also, try and use a firm white fish. Sometimes I have used tuna when doing a yacht deliver.
-
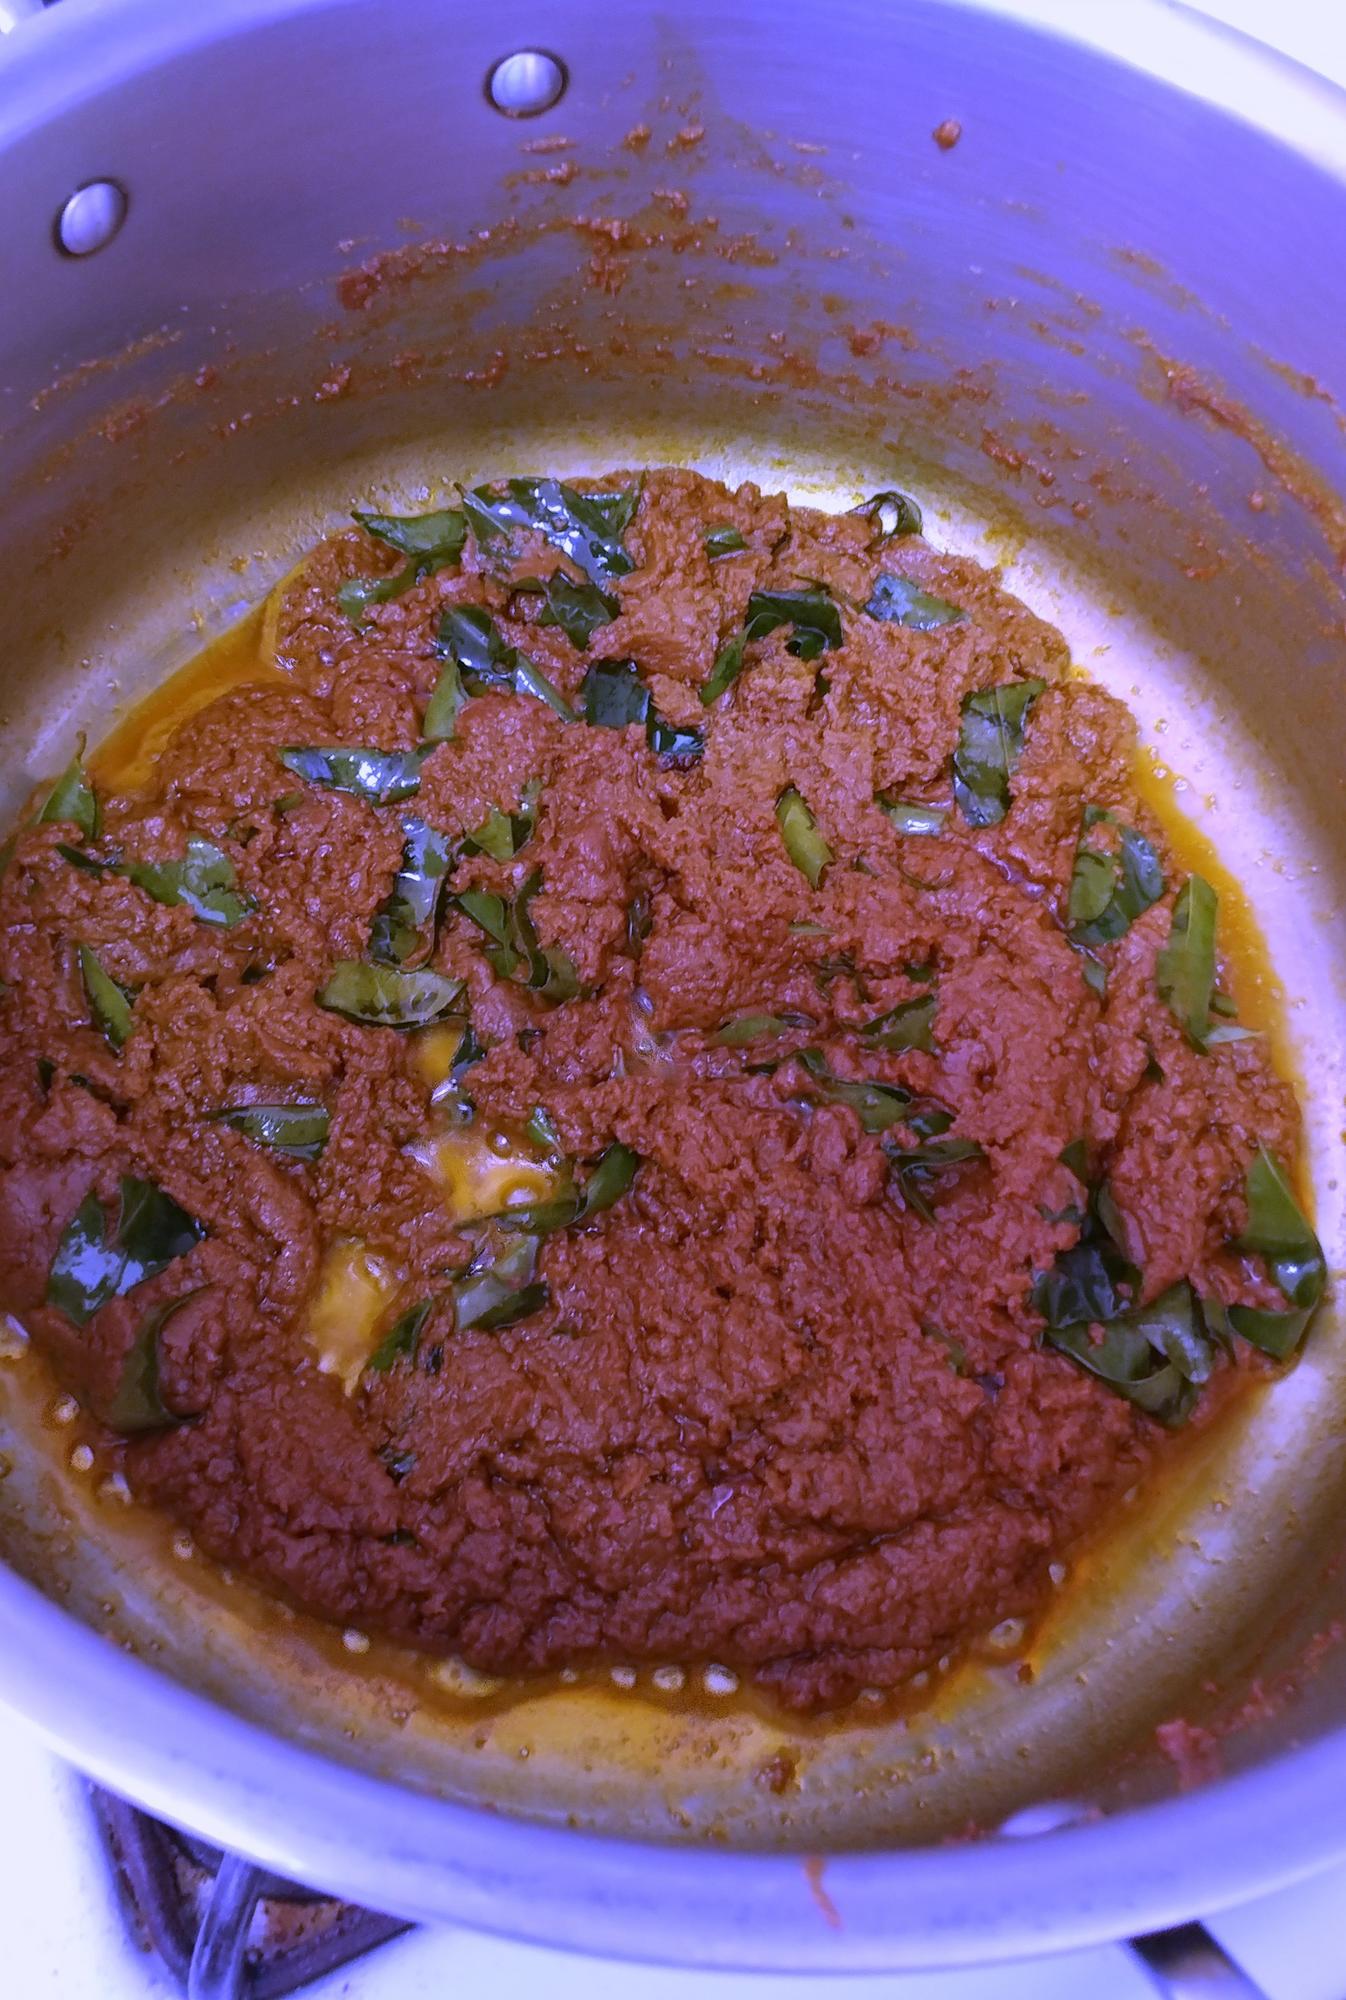
I had a chicken curry for breakfast several days in a row at the original Killiney's Kopitiam - it was one of the tastiest things I had on that trip, which is saying something. When I got home, I tried to recreate it many times but could never get it right. But I think I did it last time.... even if it's not an exact recreation (I haven't had the real thing in 2 or 3 years), it was really tasty. While I've never written a recipe in RecipeGullet before, I have written recipes down for myself - mostly notes of quantities of ingredients.... this one is difficult for me because I didn't really measure anything while making it - so the quantities are going to be REALLY imprecise - to tell the truth though, I don't think exact quantities matter all that much in this case. Makes 4 meals for 2 people each - I cook the rempah and make the curry itself in one large batch since it's a bit of work, then portion and freeze. While it's not typical, it makes fast and convenient meals for us during the week when we don't have that much time. Because I don't like to freeze and reheat meat, I'll make the curry with everything except the chicken in advance and freeze, then I'll defrost one batch in a pot - once simmering, I'll add the chicken. Rempah: about 10 shallots, peeled, chopped very roughly about 10 cloves of garlic (a little less than a head), peeled, chopped roughly about a 6" piece (or bunch of pieces adding to it) fresh turmeric, peeled, chopped roughly about 5T belacan (dried fermented shrimp paste) 6-8 dried puya chiles, destemmed and seeded, chopped roughly (or snipped with scissors), then rehydrated and drained 4-5 dried thai chiles, destemmed and seeded, chopped roughly (or snipped with scissors), then rehydrated and drained a large handful (how do you like THAT for a measurement!?!) ground coriander a small handful ground cumin a small handful ground fennel 3/4C grapeseed oil (or other neutral oil) 2 stems curry leaves, stemmed 1 3" stick of true cinnamon (not cassia) 2 star anise 3 cloves 2-3T coconut cream Curry: 8 yukon gold potatoes, peeled, quartered and par boiled 4C coconut milk about 1T salt about 1T sugar Chicken (for one meal for 2): 4 chicken thighs (we usually only get the thighs as my wife is not too fond of the legs, and it's a lot juicier than white meat) salt 1/2C water (optional depending on thickness of coconut milk used - the curry shouldn't be thick, but more viscous than water) Method: 1) Traditionally, you would pound the first set of rempah ingredients (without the oil) in a mortar/pestle until a smooth paste - but I don't have the time for that... so I use a blender - the results may not be as good, but it works pretty well. To do this, add all the top section rempah ingredients to a blender jar in order. Blend until smooth. 2) In a deep pot over medium heat, add the rempah paste plus the second set of rempah ingredients and fry until the oil separates out and the paste moves around in a more or less solid mass. You need to constantly stir and scrape to make sure it doesn't burn on the bottom. If you made the paste with mortar/pestle, add oil to the pot first, then add paste when hot. When it's done, it should look like this: 3) Add the potatoes, coconut milk, salt and sugar, and simmer for a few minutes 4) Chill, dividing evenly into 4 portions; refrigerate overnight, and then freeze for later. 5) To make the complete meal, add one frozen portion to a 4 qt saucepan and add 1/2C water (if needed to adjust consistency) - cover and cook over medium heat until simmering. 6) Meanwhile, salt the chicken and let sit until curry is simmering 7) Add chicken to curry and make sure the meat is submerged. Cover, and simmer for about 8 minutes. At this point the chicken should be mostly cooked through - if so, turn off the heat and leave covered for another 5 min. or so while prepping vegetables etc. 8) Eat with french bread to dip into the curry, or Singapore style roti prata.

-
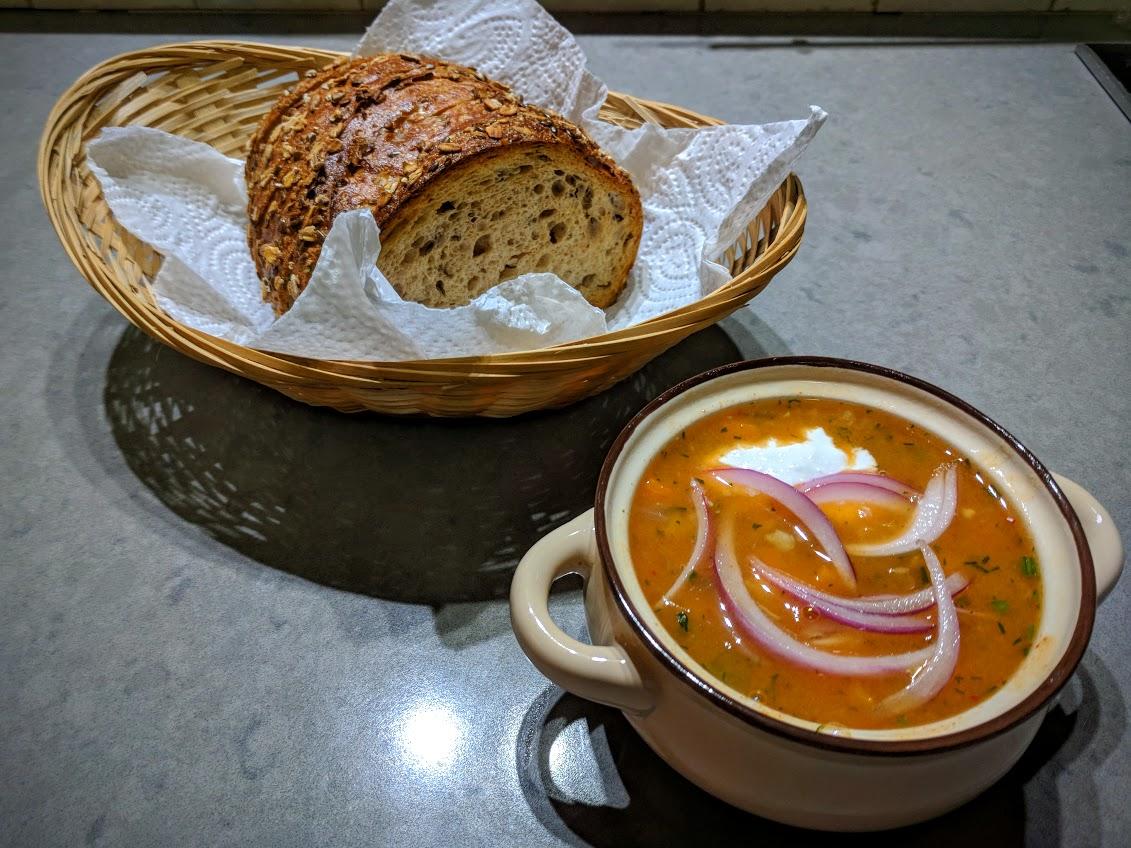
180 g dry small white beans, soaked in water overnight 1 teaspoon salt 3 bay leaves stock (chicken or veg) 1 large red pepper 1 medium onion 3 large celery branches (keep the leaves) 1 parsley root (you can use a parsnip or more carrots instead) 2 small carrots 4 garlic cloves, finely chopped 1 tablespoon butter 1.5 tablespoons flour 1 tablespoon tomato paste 1.5 teaspoon salt To finish: 3 teaspoons Hungarian paprika (you can replace some with smoked paprika) 3 small garlic cloves, crushed 3 teaspoons wine vinegar A little chili powder, to taste 10 tarragon leaves, chopped 3 tablespoons chopped parsley 2 tablespoons chopped dill To serve: Red onion, finely chopped, mixed with a little wine vinegar and salt Sour cream (important) Light country/seeded bread, not sliced - before serving, put it (or a portion) in a low oven and bake until it's crips on the outside preparation In a pressure cooker, cook the beans in the stock with a teaspoon of salt and bay leaves. Cut all the vegetables into small cubes. Keep aside the celery leaves (check that they are not bitter, if they are, discard them). In a large pot, heat the butter. Add the chopped vegetables (pepper, carrot, parsley root, onion, celery) and saute while stirring over medium heat until the vegetables soften, but not browned. Add the garlic and flour and mix well until it is absorbed. Add the tomato paste, salt and celery leaves. Add the beans with their cooking liquid. Add more water/stock as needed Mix well, cover, and cook until the vegetables soften. Add vinegar, paprika, crushed garlic, tarragon, parsley and dill. Serve very hot, accompanied by vinegered onion, sour cream and bread.

-
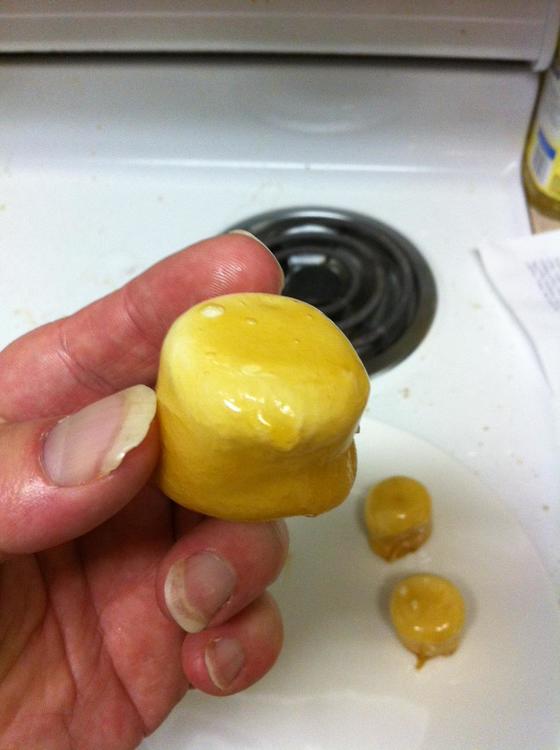
Here's a fun little recipe I put together - it's a bit casual and unrefined, so I won't be at all offended if any experts jump in with improvements, but it's pretty easy to make, and makes a really tasty treat Toffee covered Marshmallows: 1 lb. bag large marshmallows (large homemade marshmallows should also work - feel free to give it a try) 1 1/2 cups sugar 1/4 cup light corn syrup 1/2 stick butter (or 1/8 lb., for non-US people who wonder what the heck a stick of butter is) A splash of water (yay for exact measurements! ) Also needed: 4 or 5 skewers (preferably metal), and a reasonably heavy coffee mug 1. Remove the marshmallows from the bag, separate them, and put them in a plastic bag or other suitable container in the freezer. It's OK if they are touching in the bag, but make sure they're not squished together. 2. After a few hours, add the rest of the ingredients to a saucepan (use just enough water to wet the sugar so it doesn't burn as easily) and cook on medium heat, stirring occasionally. 3. Cook the mixture until it just starts to turn brown - if you have a candy thermometer, this will be around 290F/143.333C. If you don't have a candy thermometer, just occasionally put a drop of the mixture on a white plate to check the color (then put "candy thermometer" on your shopping list, because candy thermometers are awesome) 4. Once it starts to just barely (but definitely) start to turn brown, take the pan off the heat, turn the stove burner down to very low heat, and put the pan back on (you want just enough heat to keep the mixture from cooling too much, but not so much heat that it continues cooking) - this is the toffee that you will dip the marshmallows into 5. Take the bag of marshmallows out of the freezer, stick a marshmallow on the end of a skewer, and dip it into the toffee. You must dip it quickly, so that the marshmallow doesn't melt, and also try to avoid dipping it in far enough that the toffee gets on the skewer (toffee on the skewer makes it really hard to remove the marshmallow cleanly) 6. Find someplace to stick the skewer while the toffee cools (this only takes a minute or so, but the toffee will stick to anything it touches until then, and it will probably drip until it cools). My recommendation is to put the aforementioned coffee mug on a plate (to catch drips), and place the end of the skewer in the coffee mug (see photo below) to hold it. 7. Once you've dipped the fourth or fifth marshmallow, the toffee on the first one you've dipped should be hard, and you can use a fork to ease it off the skewer so you can dip another marshmallow 8. Continue dipping marshmallows until you run out of marshmallows or toffee, or get tired of trying to keep them from sticking to each other in the coffee mug. Notes: -The heat from the toffee mixture slightly cooks the marshmallow, so you'll end up with a slight campfire-marshmallow flavor once you get through the thin candy shell - it's really quite tasty! -The toffee should drip off in long thin drips like in the photo (these easily snap off once the toffee cools. If you are instead getting thick oozing drips that make it look like the marshmallow is trying out for the part of "elephant" in the school play, you are dipping the marshmallows in the toffee for too long and they're melting - dip quicker -keep the marshmallows at least one inch apart in the coffee mug - if they make the slightest contact with each other, they'll stick permanently (and they make this really cool marshmallow-toffee bridge when you try to pull them apart). This will happen at least once in the process - just consider them samples for quality-control purposes -For those who are afraid of boiled sugar recipes, try this one out - just take your time and be very careful not to drip any toffee on yourself, and you should do fine. Feel free to message me if you have any concerns - I'm happy to help people get into candymaking -The toffee shell is quite happy to suck up any humidity in the air, so once they're made, they need to be eaten within a few hours or they start getting sticky on the outside - this is either a good point or a bad point Enjoy!

-
Wowotou buns ( 窝窝头 wō wō tóu), also known more simply as wō tóu are originally from northern China. The name means "nest" and they come in many forms. These are the ones I use. As you can see, they are usually stuffed with whatever the cook decides. These are stuffed with spicy pork and pickled greens, but I've also served them with a seafood stuffing. This is the recipe I usually use. 窝窝头 350 grams all-purpose/plain flour 150 grams black soya bean flour 3 grams instant yeast 260 grams milk Mix the flours well, dissolve the yeast in the milk and stir into the flour until a dough forms. Knead the dough until smooth. Cover with plastic wrap and leave in a warm place until double in size. Sprinkle flour on the chopping board, knead the dough, adding more flour if too wet. until all air is expelled and the dough has a smooth surface. Form the dough into six even-sized balls and rub between the palms until smooth and round. Flatten slightly, then use your thumb to press the dough into a nest shape. Steam covered for 30-35 minutes. Note: The flours used vary a lot. Corn or sorghum flours are very popular, but I don't like corn and sorghum isn't the easiest to find here in southern China. Use what you like, but the overall quantity for this recipe should be 500 grams. It has been suggested that pure corn flour is too sticky, so probably best to mix it with regular wheat flour. They freeze well. Recipe adapted from 念念不忘的面食 by 刘哲菲 (Unforgettable Wheat Foods by Liu Zhefei). This isn't a direct translation, but retelling of the gist. Any errors are mine. Not Ms. Liu's.

-
Prawn Balchao is a very famous Goan pickle that has a sweet, spicy and tangy flavor to it. For the balchao paste you will need: > 8-10 kashmiri red chillies > 4-5 Byadagi red chillies > 1/2 tsp cumin seeds > 1/2 tsk turmeric powder > 1 tsp peppercorn > 6 garlic cloves > 1/2 tsp cloves > 1 inch cinnamon stick > Vinegar First you will need to marinate about 250 grams of prawns in some turmeric powder and salt. After 15 minutes deep fry them in oil till them become golden n crisp. Set them aside and add tsp vinegar to them and let it sit for 1 hour. Now, make a paste of all the ingredients mentioned under the balchao paste and make sure not to add any water. In the same pan used for fryin the prawns, add in some chopped garlic and ginger. Lightly fry them and immediately add one whole chopped onion. Next, add the balchao paste amd let it cook for 2-3 minutes. Add in the prawns and cook until the gravy thickens. Finally add 1 tsp sugar and salt according to your taste. Allow it to cool. This can be stored in a glass jar. Let this mature for 1-3 weeks before its use. Make sure never to use water at any stage. This can be enjoyed with a simple lentil curry and rice.
-
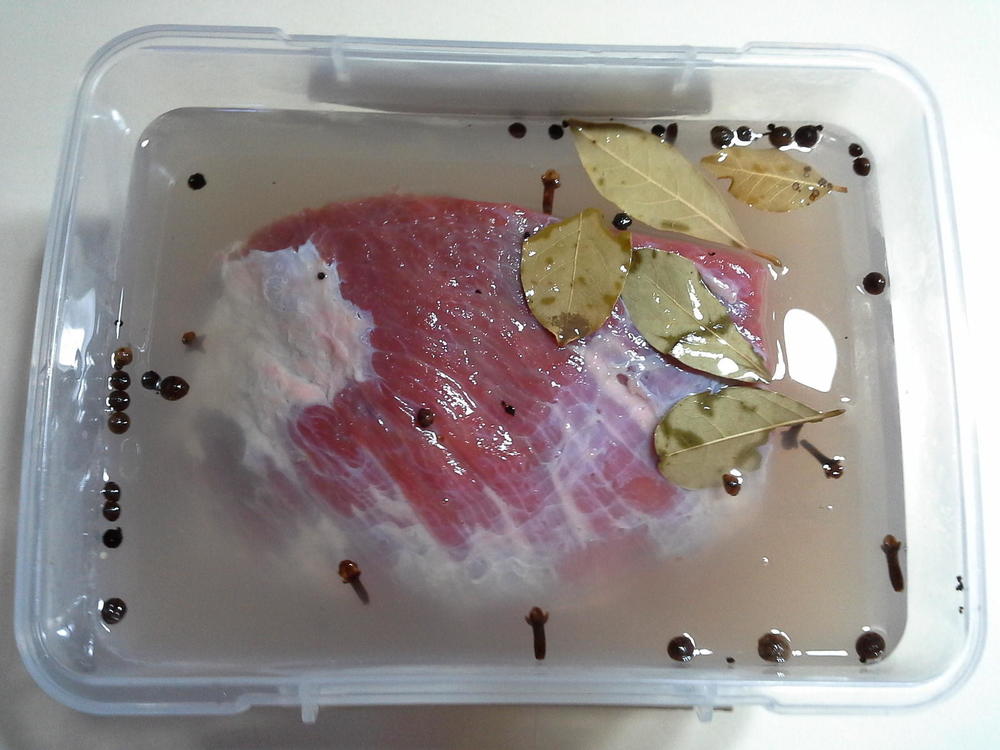
Home Style Corned Beef We still cannot buy corned beef here and I try to make this at least once a year and have it for St. Patrick’s Day. Then I invite all of our corned beef starved friends for dinner. Corned beef must be an acquired taste because all of the Latinos that come here think that we are crazy. Even if you buy your corned beef, the preparations given here are some of the best ways to cook it. Corned Beef Brine: 4 cups water 1 teaspoon saltpetre 4 whole cloves 8 whole allspice berries 1/4 cup white vinegar 1/2 cup salt 4 bay leaves 1 teaspoon whole black peppercorns 1/2 teaspoon mustard seed 1/4 cup granulated sugar Combine all ingredients, and bring to a boil. Cool thoroughly and add 4 garlic cloves, mashed. Meat: 5 pounds of beef brisket Pierce meat well with a sharp fork or a Jacquard tool and place in a large bag with a zip type closure. Add brine ingredients. Place in another plastic bag and refrigerate. (if you have a plastic container that the meat fits well inside, you can use that. See photo) if using a plastic container, place a plate on the top of the meat to submerge it in the brine. Be sure to turn it every 2 days. Turn the meat at least every two days. Let meat cure for 2 to 3 weeks (a small cut of meat can be used in as little as 8 to 10 days). If you don’t plan to use the meat at this time, wrap it well and freeze it. Preparation: Rinse meat well, and place in a large pot. Cover with water and add: 1 teaspoon whole peppercorns 3 bay leaves 2 cloves of garlic Simmer gently for 3 hours. At the end of 2 hours add; 4 large potatoes cut in quarters 10 to 12 small peeled onions, whole 2 carrots, cut in large chunks At the end of 2 1/2 hours, add 1 small cabbage, cut in quarters, with the core left on to hold it together. (I always please toothpicks in the wedges to hold them together) Serve with horseradish sauce and mustard. Instant Pot Preparation: Since I got my instant pot, this is my new favorite way to cook corned beef. Rinse the meat well, and place it in the instant pot. Cover with water and add the aromatics as in the previous method. Cover the pot and close, checking to see that the pressure gauge is in place. Select manual setting for 50 minutes and start. when the time is up let the pressure release naturally for 15 minutes. Release the remaining pressure, open the pot and remove the meat to a platter. cover and keep warm. Add the carrots, potatoes and onion to the broth inside. Close the pot and cook for 4 minutes. Using natural pressure release as before, add the cabbage wedges and cook for a further 5 minutes. Let the pressure release as before.

-
There are two ways in which I make this dish, in first one, listed here, I use one pot to cook the vegetables and beans together. In the other I dice the vegetables and lightly saute them separately in butter. In both the vegetables are blended. The first version has a cleaner flavor, the second a slightly browned, heartier one. I'm not sure which I like better. Ingredients: 450 g dried brown Borlotti beans, soaked overnight 2 onions cut into quarters (250-300 g) 1 large carrot or two small, peeled and halved (150-200 g) 3 medium-sized celery branches, with leaves, halved 2 rosemary branches + a few leaves to serve A small sage branch 1 teaspoon fennel seeds or anise seeds 2.5 teaspoons of salt 6 garlic cloves 2-3 teaspoons "nutritional yeast" (if not using stock) Black pepper, generously One or two tablespoons of lemon juice About 400 g small hollow pasta, such as: Ditalini (rings) or Gnocchini (small shells) 1 teaspoon salt To serve: Olive oil, use an aromatic one Plenty of black pepper Grated parmesan/pecorino cheese (optional, prefer a nutty cheese over a sharp one) A few rosemary leaves preparation In pressure cooker, place the beans, onions, carrots, celery, rosemary, sage, fennel seeds, garlic yeast and salt. Cover with stock or water. Cook until the beans are tender (about 25 minutes under high pressure). Remove the rosemary and sage branches and discard them. Remove a third of the beans, along with any vegetable, and blend smooth. Mix back with the whole beans. Add a little water if the dish is too thick. Add black pepper generously and a spoon or two of lemon juice. Add more salt if needed. To serve: Heat well. Add pasta to each dish. Drizzle with aromatic olive oil, sprinkle with some ground black pepper, a few rosemary leaves, and parmesan cheese.

-
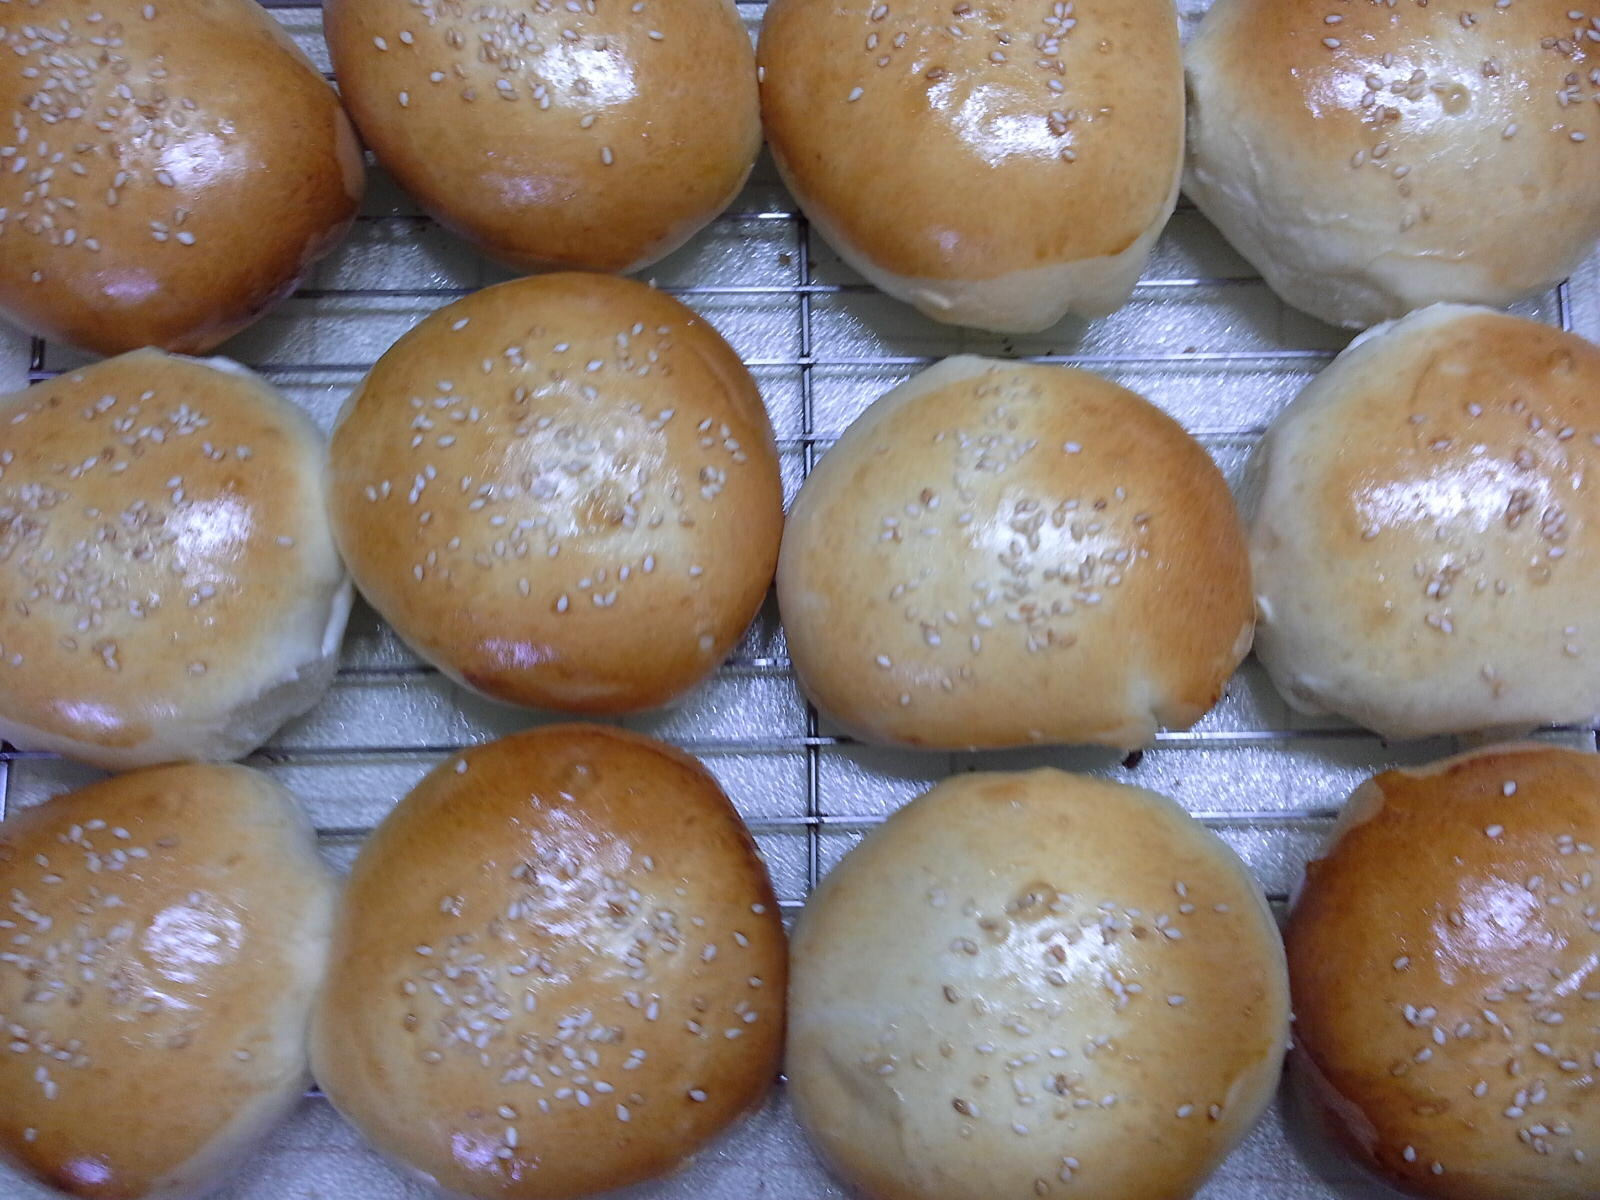
I have made Char siu bao many, many times and I had always considered it a chore until I found this recipe. It is not only easy, it is delicious. It is the closest one that I have found to the Char siu bao that I used to buy in the International District in Seattle in a little bakery called ‘Piece of Cake’. You had to get there early because they were usually sold out by 10. If you would like to go to the original site, this is IT. The pictures are mine. David Soo Hoo’s Bread Machine Bao Makes 6 buns (Bao) Dough 2/3 cup water 4 T. (1/2 stick) unsalted butter, melted 1 large egg 3 1/2 cup bread flour 5 tablespoons sugar 1 tablespoon nonfat dry milk 3 teaspoons bread machine yeast Pork Bao Gravy 1/4 C. water 1 tablespoon rice wine or dry sherry 2 tablespoons oyster sauce 1 tablespoon hoisin sauce 2 tablespoons soy sauce 1 teaspoon sesame oil 1 tablespoon sugar 3 tablespoons all-purpose flour Bao BBQ Pork Filling 3 tablespoons diced yellow onion or stalk of green onions 4 oz. prepared char siu (Chinese barbecued pork) Bao Egg Glaze 1 large egg beaten with 1 tablespoon sugar 1 1/2 tablespoons white sesame seeds Rising the dough in the bread machine Place all the dough ingredients in the bread pan according to manufacturer’s instructions, reserving 1 1/2 cups of the flour. Program for the Dough cycle; press Start. (This recipe is not suitable for the Delay cycle.) About 5 minutes into the Knead 2 cycle, slowly add the remaining flour. Dough will be stiff, but by the end of the kneading cycle be pliable and smooth. This is important; if the batter is too moist, the bows will flatten as they bake. While the dough is rising, prepare the gravy. Combine the water, rice wine, oyster sauce, hoisin, soy sauce, sesame oil, and sugar in the top of a double boiler. Whisk in the flour. Place over simmering water and, stirring constantly, cook until thick and smooth. It will be the consistency of mayonnaise. Remove from the water bath and cool in the refrigerator. For the filling, chop the pork into a large dice and place in a large bowl with the onions. Add the gravy and mix with the pork. Cover and refrigerate until needed. Line a large baking sheet with parchment paper. At the beep, remove the dough from the machine and place on a clean wooden work surface. Roll into a fat 3 inch wide log. Cut the log into 6 equal portions. Place a disc of dough on a wooden work surface (don’t shape on cool marble or ceramic because it will stiffen the dough). With the palm of your hand, press down on the center and rotate your palm, spiraling out from the center. The dough will grow into a 3-inch diameter circle (not lopsided, please) with a pretty spiral-pattern radiating from the center like a flower. Don’t use any flour. Using a 1 1/2-ounce ice cream scoop (size 40), place a scoop of filling in the center of the round of dough. Bring up the dough over the filling, and holding the two sides between your thumb and third finger, and pinching with your pointer finger, pleat the edges to encase the filling. Place, seam side down and at least 4 inches apart, on the prepared baking sheet. Cover loosely with plastic wrap and let rise at room temperature until double in bulk, 45 minutes to 1 hour. If the filling is cold, it will take 1 1/2 hours to rise. Twenty minutes before baking, preheat the oven to 350º. Brush each bao with the egg glaze and sprinkle with sesame seeds. Bake in the center of the preheated oven 30 to 40 minutes, until big, puffy, and golden brown. If you have a convection oven, they will bake about 20 minutes. Eat the day they are baked, or freeze in plastic freezer bags up to 2 months. Reheat in a microwave (no need to defrost) for 2 to 3 minutes for a quick dinner My Notes: I followed the recipe faithfully with only the following exceptions. My bread machine does not have a double knead cycle so I put all of the ingredients in at once, adjusting at the beginning to ensure that I had a fairly stiff dough. I made 12 buns instead of 6 and as a result they cooked perfectly in 20 minutes. I also prepared the gravy very successfully in the microwave. The one advice that I would give in forming the Buns is to have the center much thicker than the edges. Roll the edges very thin so that you don't have all the bulk at the bottom when you pinch the edges together. Do not overfill the Buns! I have made this recipe several times and no matter how small or large I make them the filling always seems to miraculously come out exactly even.


-
Char Siu (Chinese Barbecued Pork) This is the traditional Chinese Barbecued pork that used to be served as an appetizer in every Chinese restaurant. The best cut of meat for this is something with plenty of fat or marbling. Do not use pork loin. It lacks both the moisture and the flavor that a fattier meat will provide. 3 pounds pork shoulder, or butt 2 cloves garlic, mashed 2 tablespoons grated fresh ginger 2 tablespoons Shao Hsing rice wine or dry sherry 2 tablespoons hoisin sauce 2 tablespoons ketchup 2 tablespoons dark soy sauce 1 tablespoon honey or molasses 2 teaspoons sugar 1/2 teaspoon five-spice powder a few drops red food coloring, optional Cut the pork into strips approximately 2 inches wide and 5 inches long. Whisk together the rice wine or sherry, hoisin sauce, ketchup, soy sauce, liquid honey, sugar, mashed garlic, ginger and five-spice powder. If using the red food coloring, add it now. Place the pork and the marinade in a zip-top bag. Marinate the pork in the refrigerator, for at least 6 hours or up to 2 days, the longer the better. Remove the pork from the bag. Reserve the marinade.Preheat the oven to 425 degrees F. Fill a shallow roasting pan with 1/2 inch of water and place the pork on a rack above the water. Roast until brown, turning and brushing 2 or 3 times with the reserved marinade for about 45 minutes. The internal temperature of the pork should be 155 to 160 degrees F. Do not overcook or it will be dry. Note: Do not leave out the alcohol. If you don't have the rice wine or sherry you can use rum or brandy. It seems to make a big difference in the penetration of the marinade. Any extra marinade can be boiled and stored in the refrigerator up to a month or in the freezer to be used the next time I like to serve this in 1/4 inch slices with ketchup, Chinese hot mustard and sesame seeds. To make Chinese hot mustard, just mix dry, ground mustard with water to make a paste. Or use the in following recipe to make Char Siu Bao. if you don't have any Chinese five-spice powder you can easily make it with the following recipe. It is an essential flavor in this recipe. Five-Spice Powder 1 tsp. ground star-anise (3 whole star anise) 1 tsp. ground fennel seeds (3/4 tsp. whole fennel seeds) 1 tsp. ground Szechuan or white pepper (1 tsp. whole Szechwan or white peppercorns) 1/2 tsp. ground cassia or cinnamon 1/2 tsp. ground cloves Grind to a fine power in a spice grinder or mortar

-
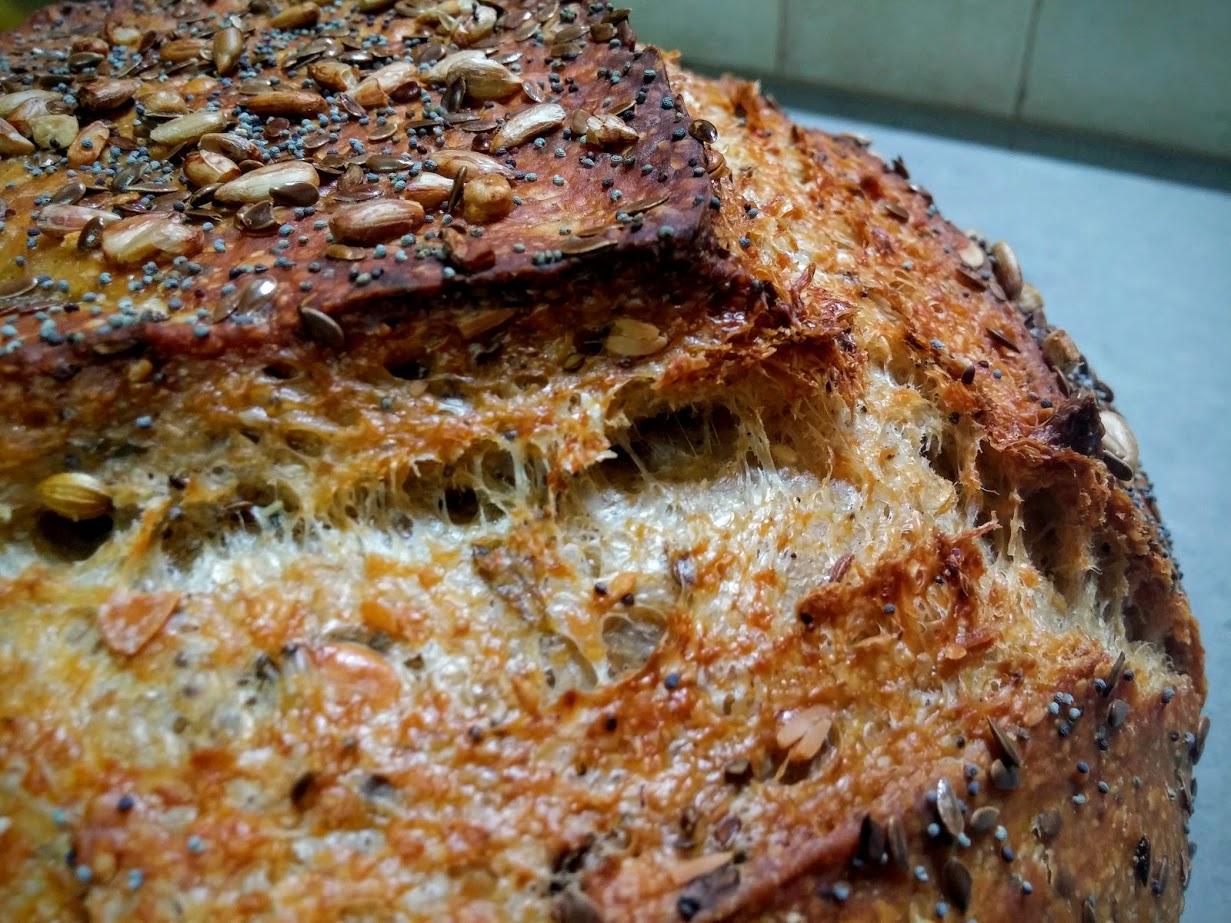
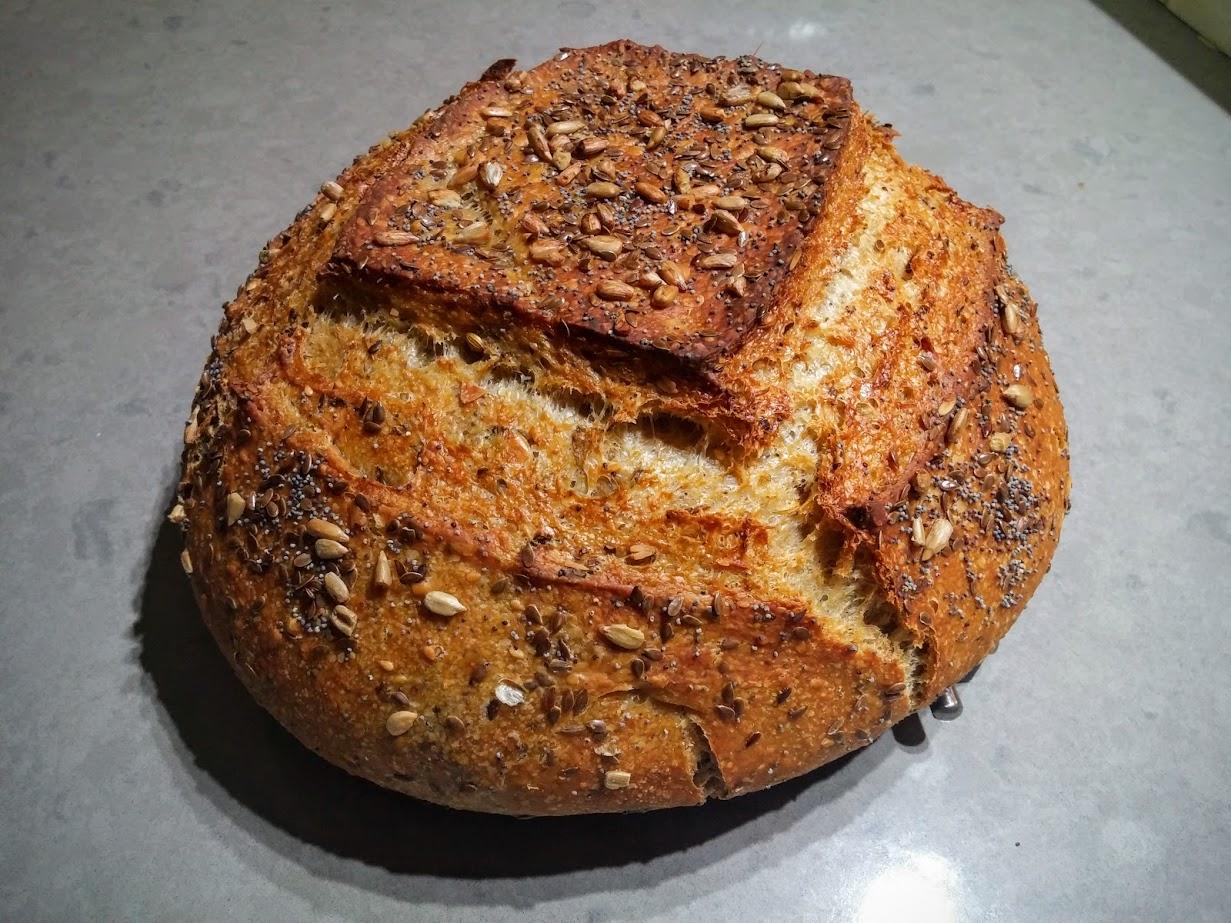
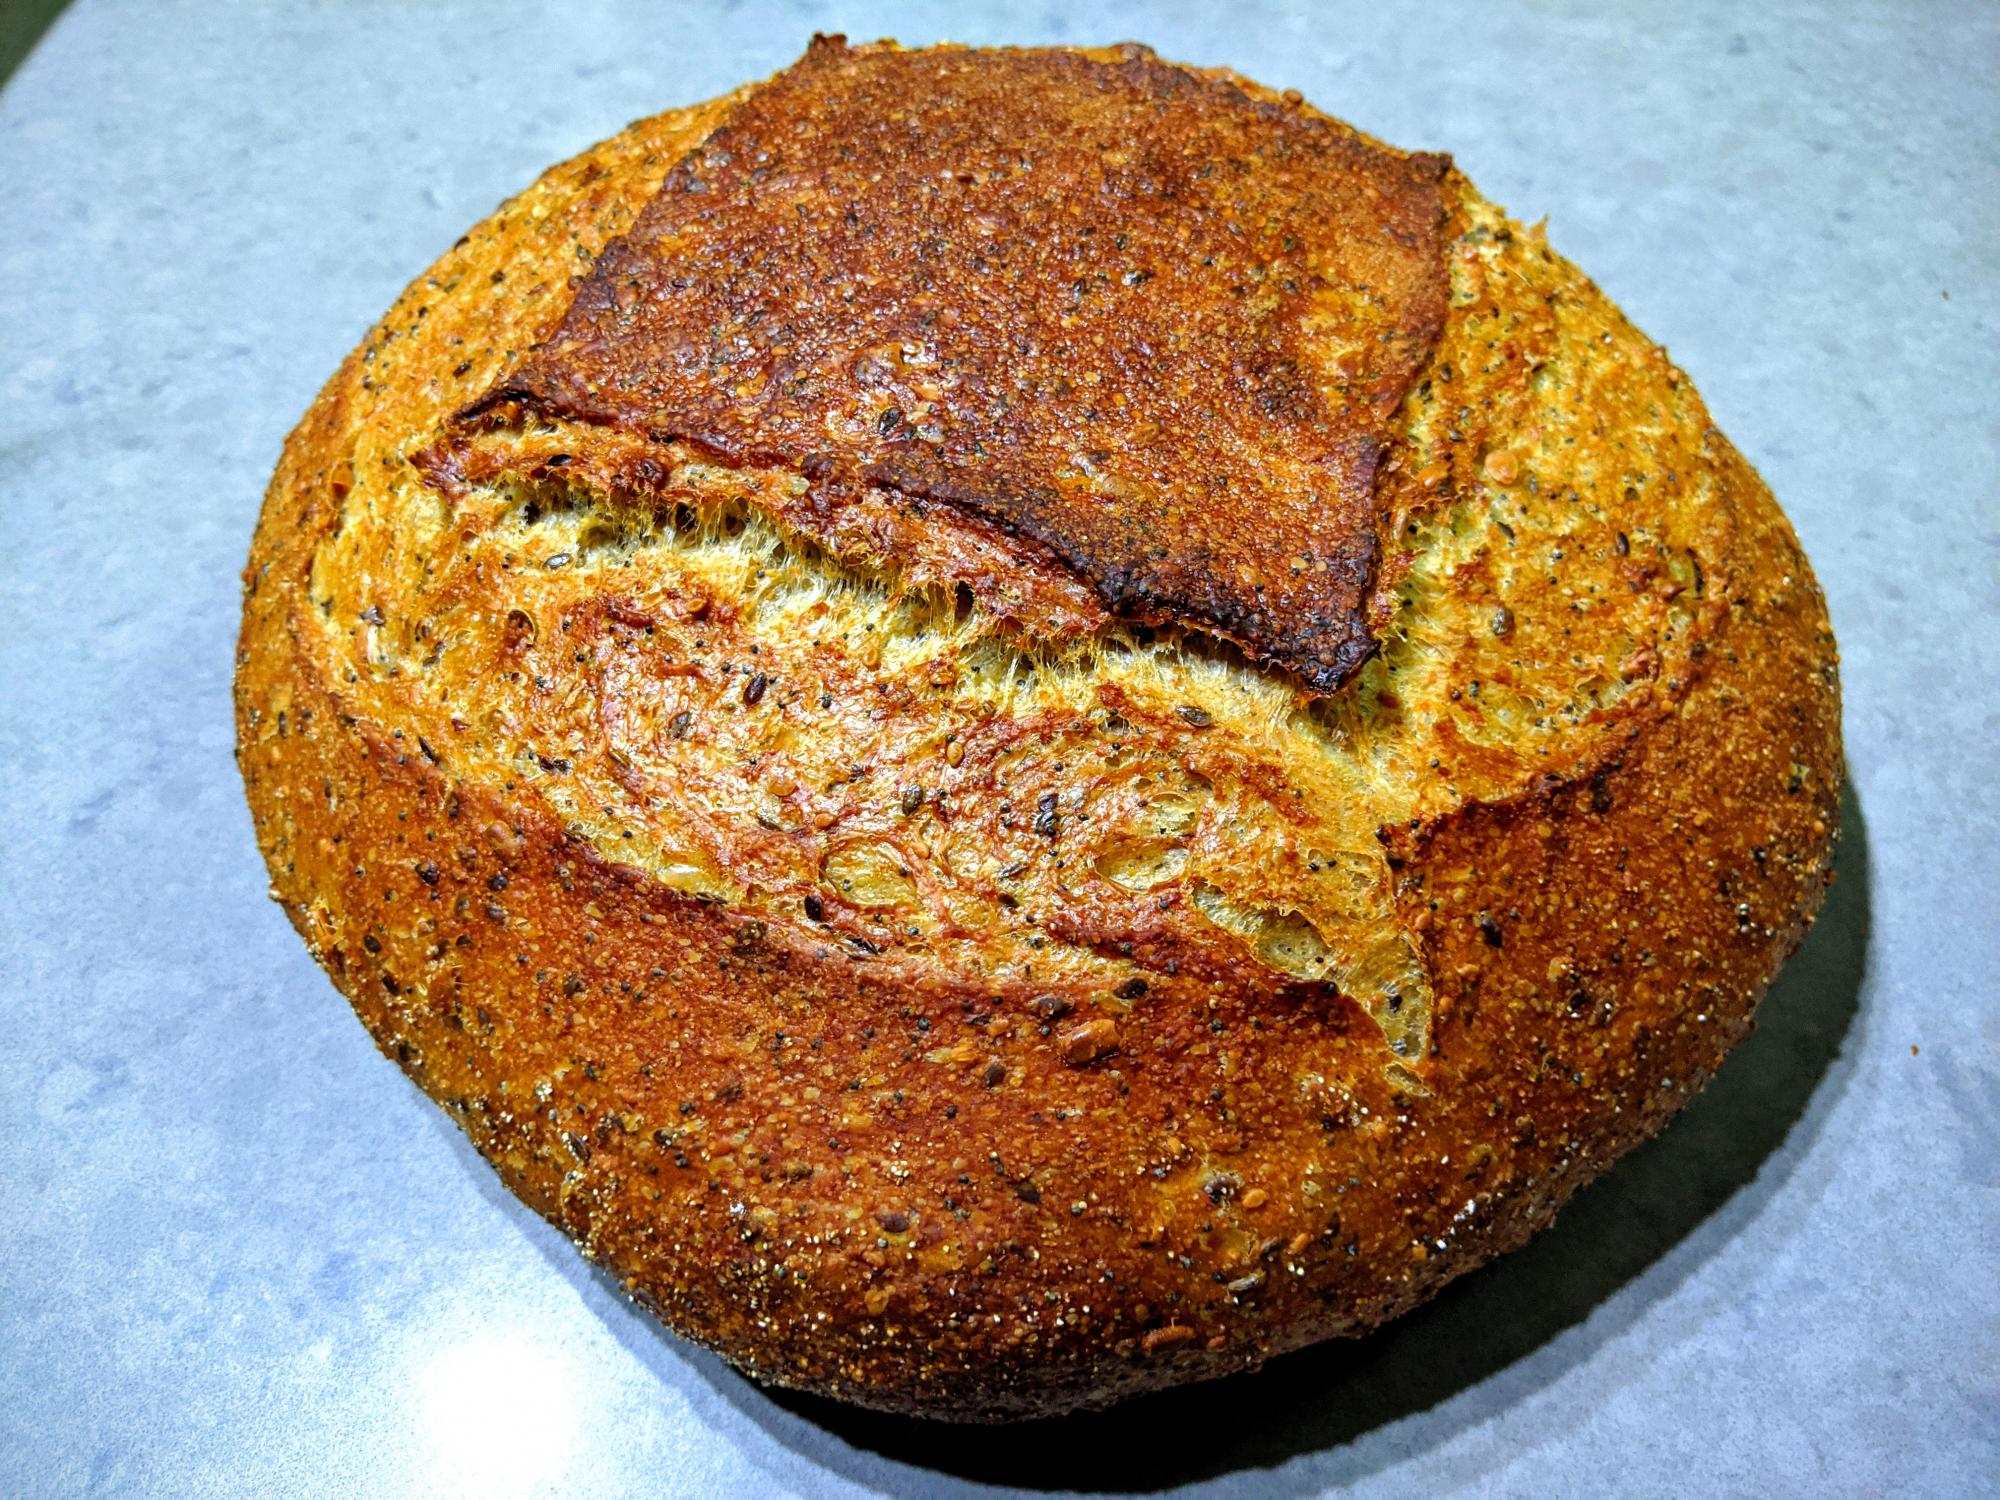
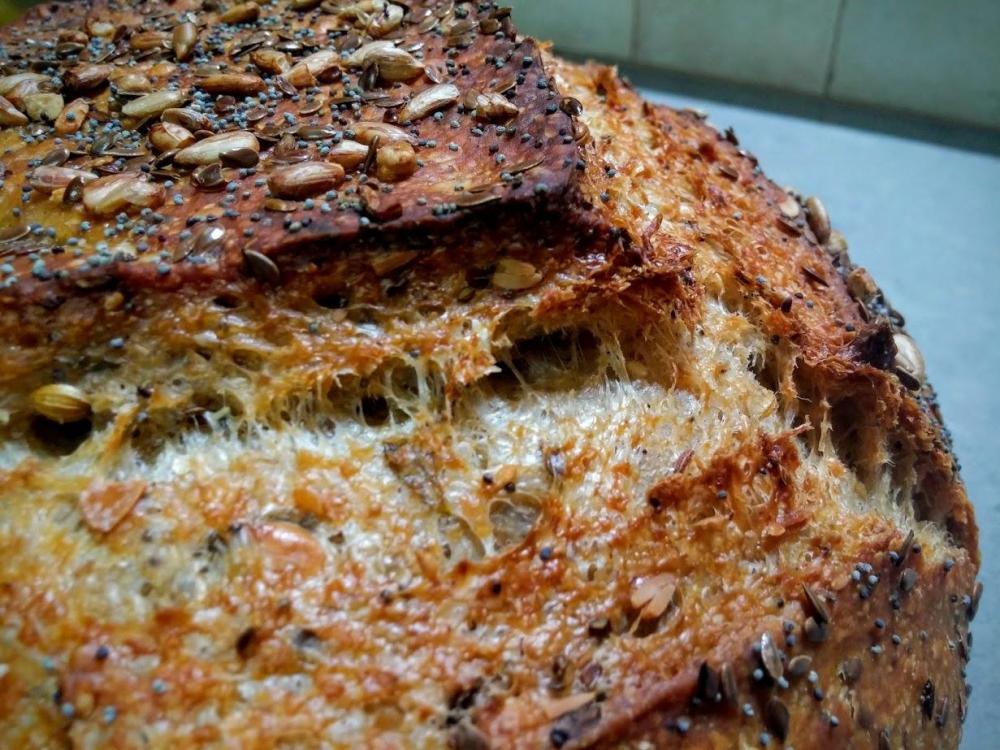
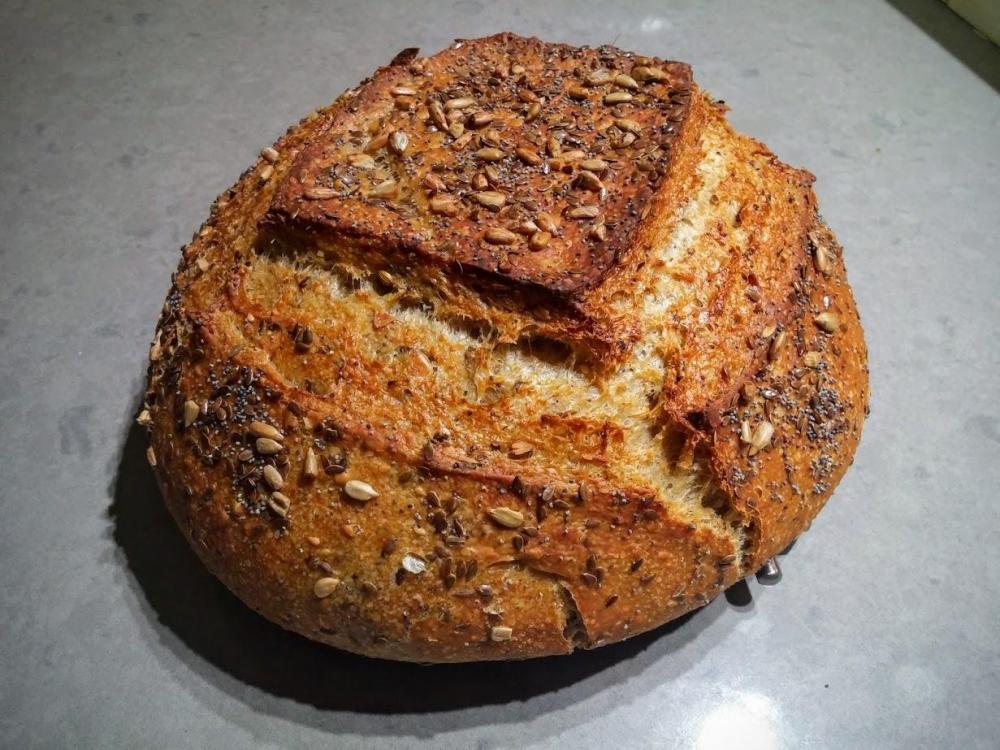
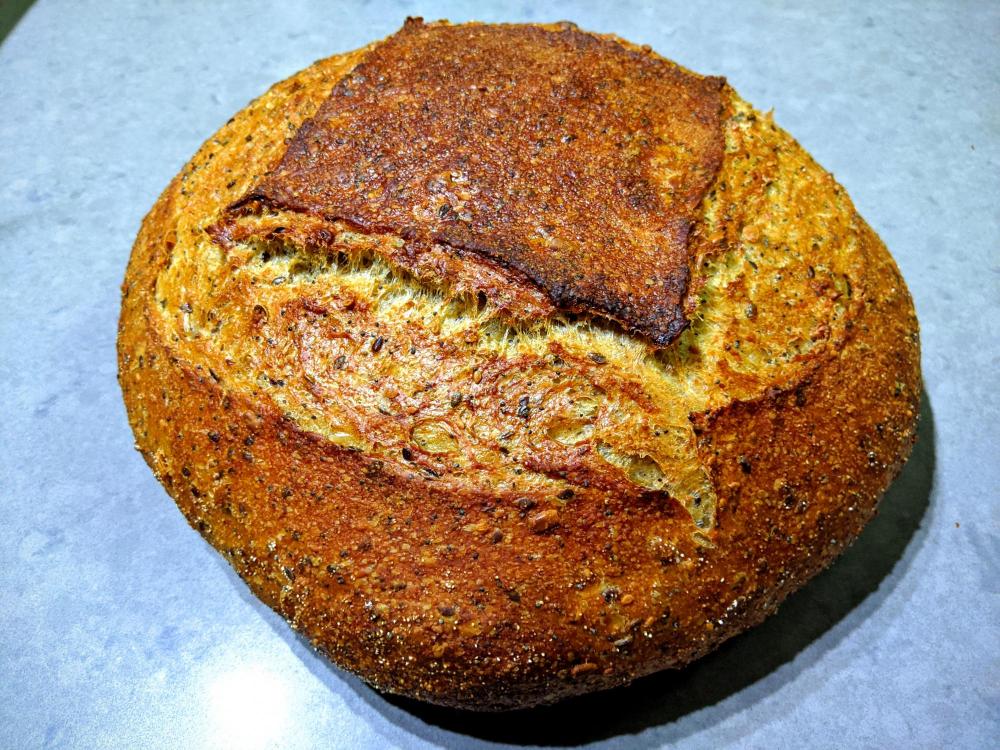
Updated June 2020 to match my current formula. Ingrdients Seeds: 20g sesame seeds 1 teaspoon coriander seeds (5g) 15g poppy seeds 30g flax seeds 1 teaspoon caraway seeds (5g) 30g sunflower seeds Porridge: 130g oat bran (or wheat bran) and/or corn meal 1 teaspoon of cinnamon 540g water Dough: 130 g cold water 3g fresh yeast / 1.5 g dry yeast 670g strong bread flour 17g Salt 30g dark malt syrup 5g apple cider vinegar or wine vinegar (1 tsp) Preparation One to three days before baking: Dry roast the seeds sesame, poppy and coriander. Add flax and caraway. Lightly mince in a morter and pestle to release flavors. Toast the sunflower seeds and add to the rest. ~ Cook the bran (and cornmeal) with the water, covered over low flame, until cooked into a porridge. Cool completely. ~ Add cold water, yeast, cinnamon, flour, salt, malt and vinegar. In a mixer, knead/mix for 5-7 minutes. Let rest for 5-10 minutes. Repeat kneading and resting about 4 times, until the dough is strong well developed. Cover and refrigerate overnight (and up to 3 nights). Prepare for baking: Grease the bottom of a 24 cm wide pot with a thin layer of oil. If the pot does not have an anti-stick coating, sprinkle with a thin layer of semolina or cornmeal. ~ Remove the dough from the refrigerator between 60 minutes (on a warm day) and two hours (on a cool day) before the baking. (It is better to err in the direction of a shorter proof). Gently separate the dough from the sides of the bowl and give it a roughly round shape. Pour the dough into the oiled pot and gently press it to fill the pot evenly. Cover the pot and allow the dough to rise until it almost doubles its volume and looks soft and airy (the time approximation is as mentioned above). ~ At least 45 minutes before baking, place an iron plate or baking stone on a shelf in the bottom third of the oven and heat it to 230 degrees C. ~ After the dough has risen and the oven is hot: Optionally, sprinkle the dough with sunflower seeds, poppy and flax for decoration. Score the dough if desired. Spray some water on the dough, sides of pot and lid. Bake covered for about 40 minutes. Remove the lid and bake for another 20-25 minutes until the bread is very brown and the internal temperature is at least 97 degrees C. Remove the pot from the oven and remove the bread from it (wait a little for it to cool). Allow to cool on a cooling rack for one hour before slicing. ~ For serving, return the bread to the oven for about 10 minutes (this is not mandatory, but will yield a crisper, less chewy crust, and a warm loaf). 2020's bake:


-
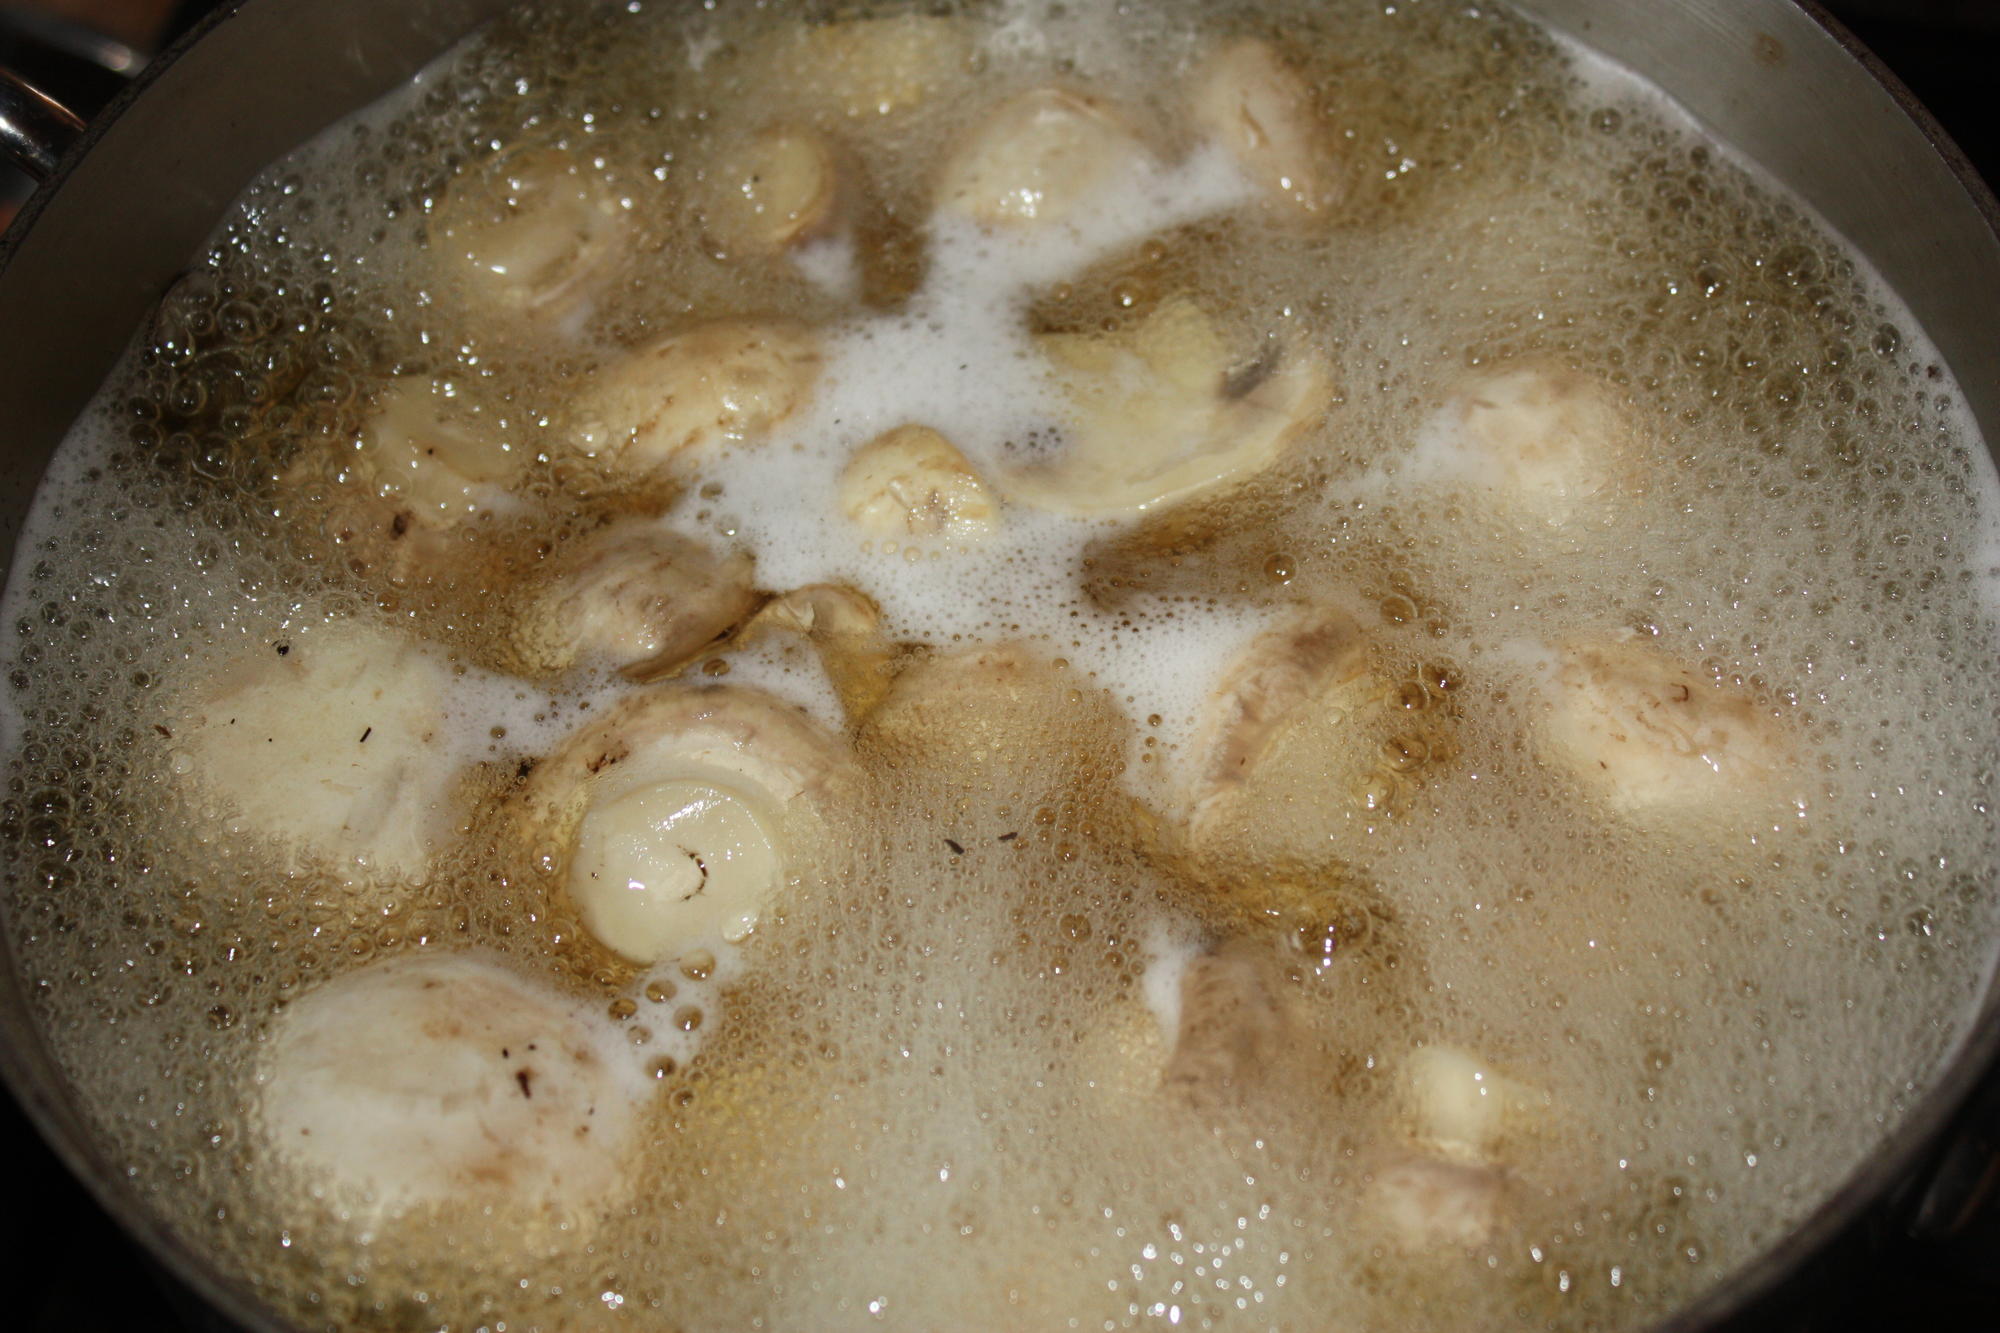
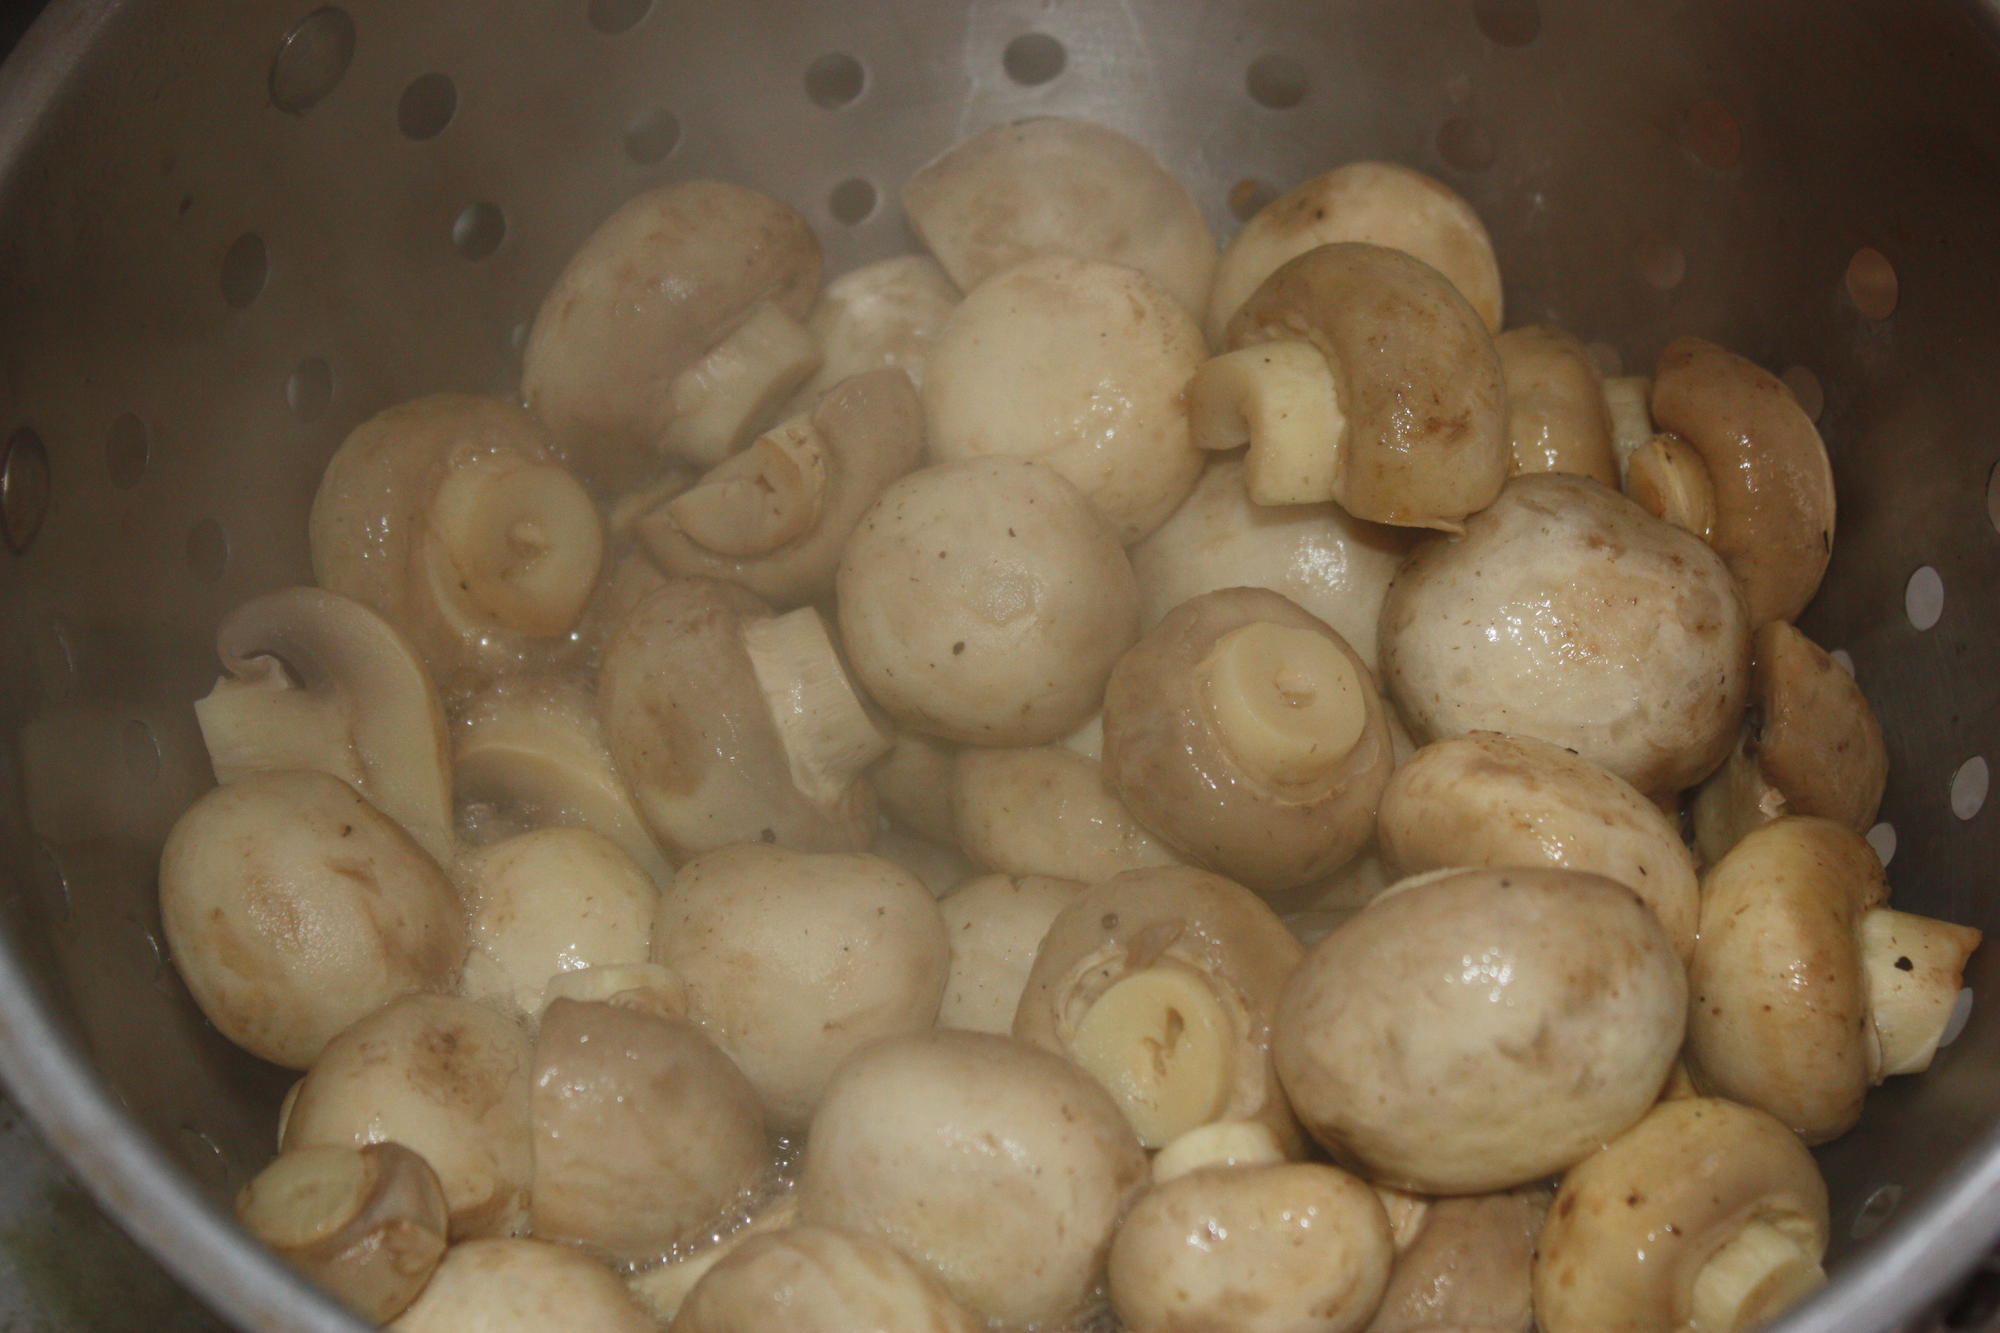
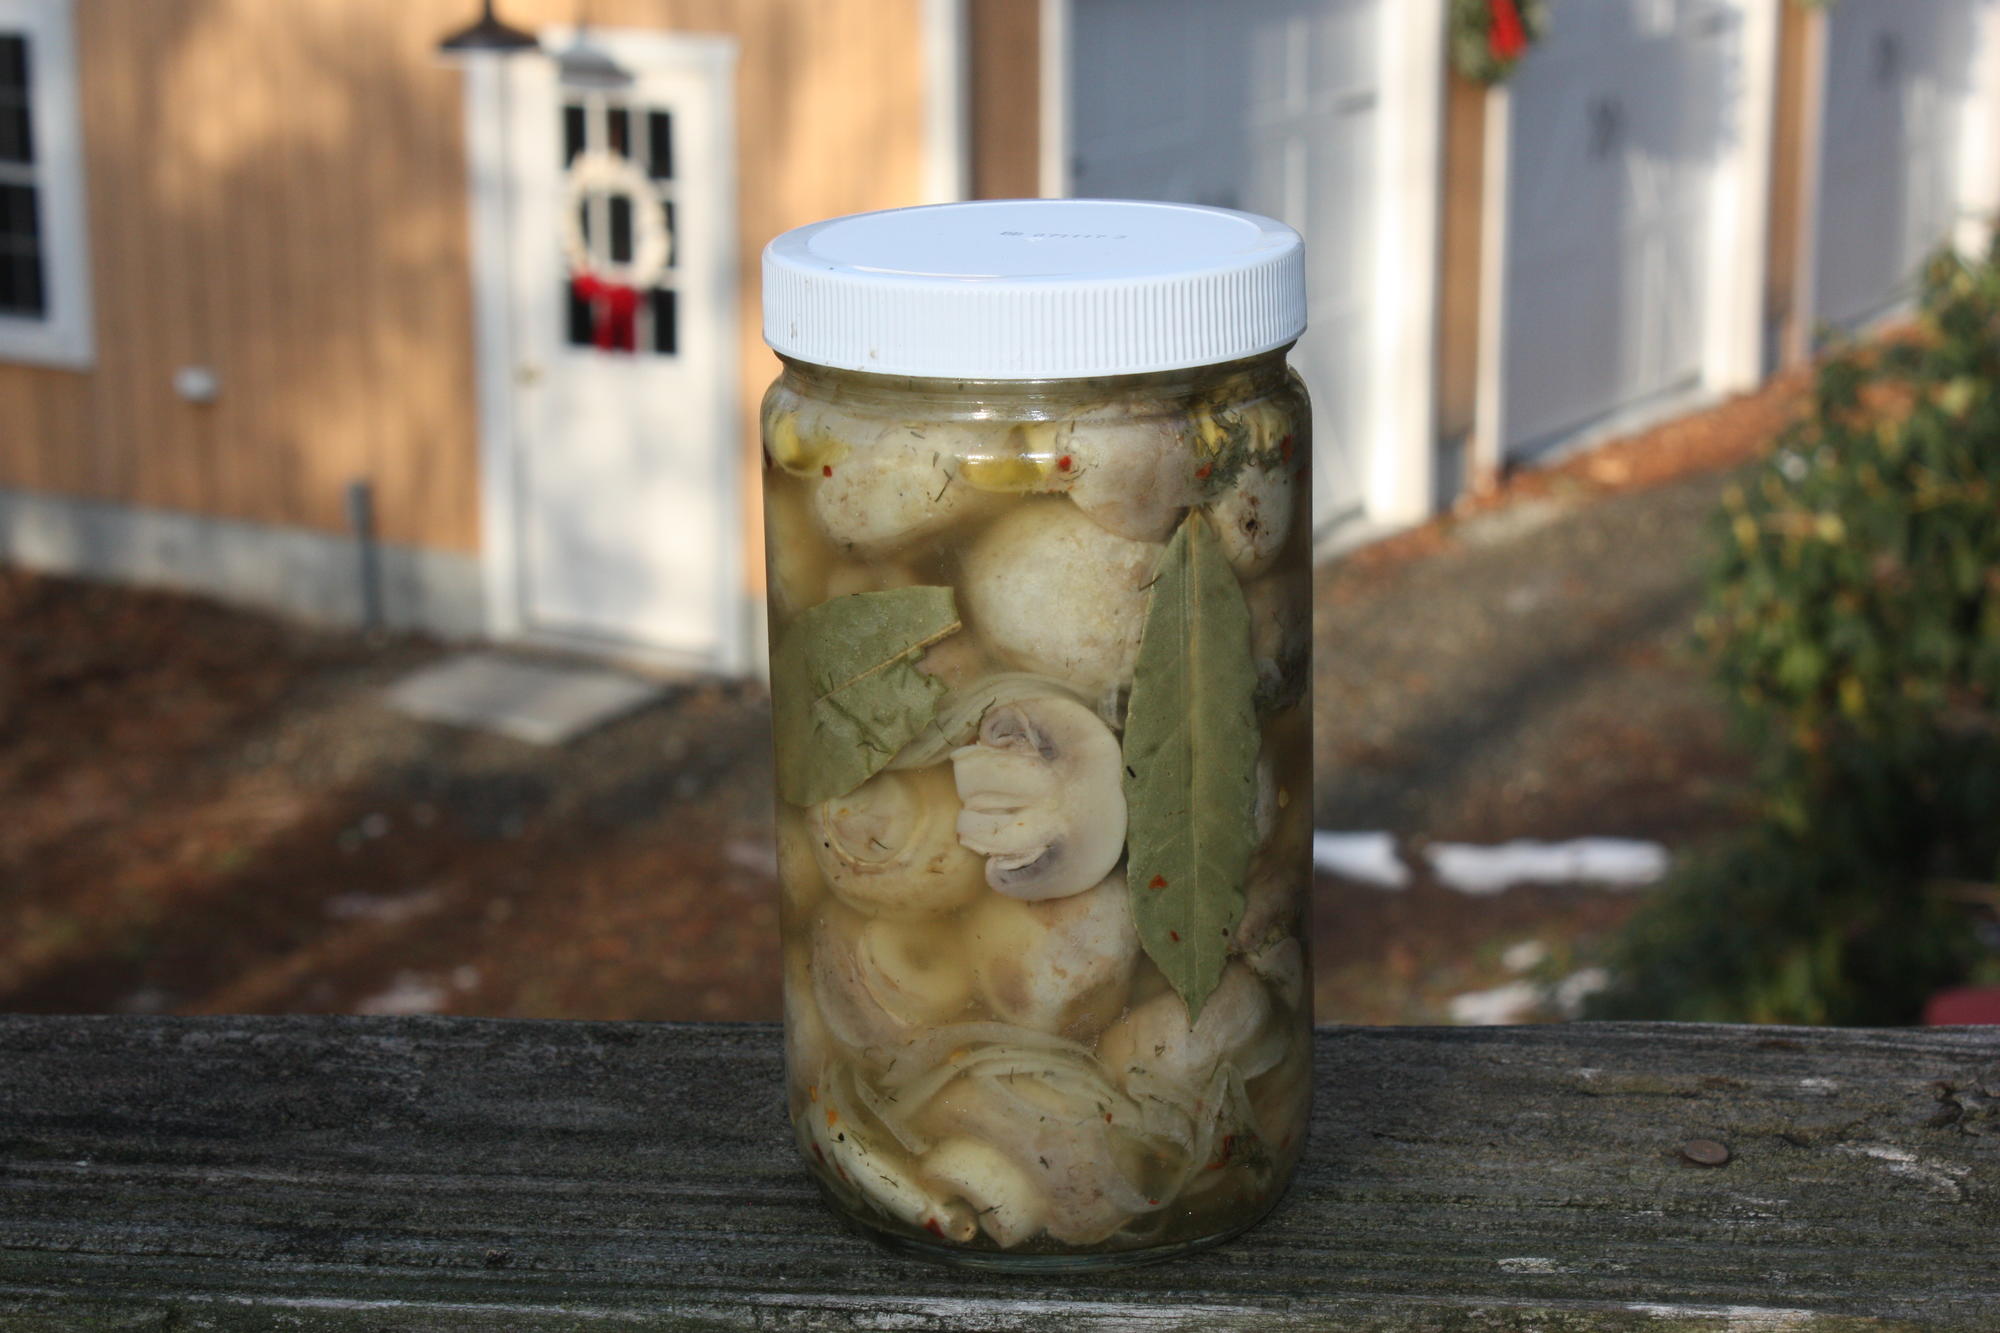
This is a quick refrigerator marinade that will last for months in the fridge. They are great as a snack or a side or on a tray with similar items. 2 pounds will make roughly a quart. Start by brushing off or rinsing off any dirt and trim longer stems so the mushroom is pleasing to the eye. Keep in mind that they will shrink, so only cut up the ones larger than a golf ball (unless you want them sliced). Put 1 TBS kosher salt and 1/2 cup white vinegar in a sauce pan, add the mushrooms and enough water to float them. Put on high heat to boil. In a clean quart jar, add 3 or 4 cloves of peeled garlic that have been slightly crushed (I use the flat side of a knife under the heel of my hand to do this), 1 TBS kosher salt, 1 TBS dried dill weed and a few shakes of crushed red pepper flakes to taste. Once the mushrooms have come to a boil, give the pot a stir and examine the surface of the boiling liquid for any dirt that may have escaped your attention and skim the foam it is floating on if you see any. Boil for about 5 minutes until you notice the color change from white to beige then pour the contents of the pot into a colander to drain. Allow them to cool until they can be handled and add them to the jar you have prepared along with a few bay leaves. I like to add a few layers of thinly sliced onions, but that is optional. When the mushrooms are all in the jar, pour in enough white vinegar to fill the jar half way to the top, then add tap water to 3/4 from the top and top off with a well shaken Italian dressing ( I use Ken's Italian Dressing and Marinade). Secure the lid and shake until you see that all the salt has dissolved. Refrigerate and give the jar a shake every day or so. The mushrooms will be ready in about 3 days. HC


-
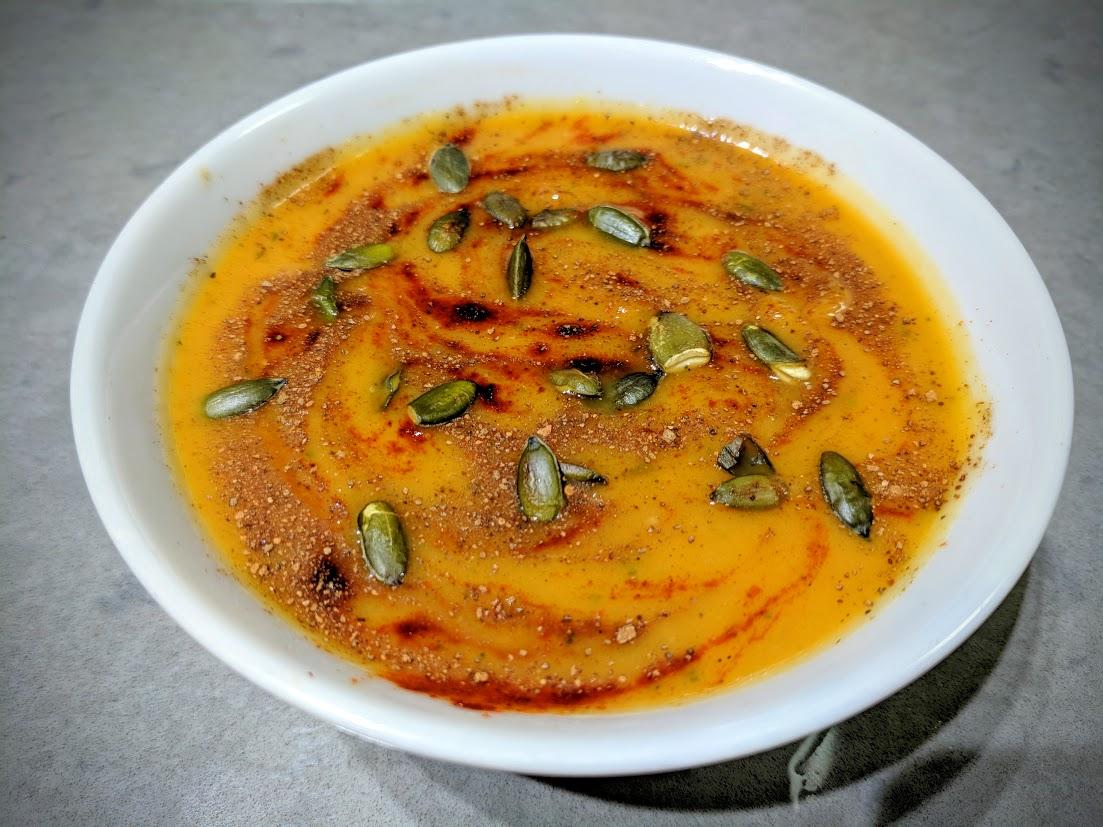
EXQUISITE JERUSALEM ARTICHOKE SOUP Jerusalem artichoke, also called sunchoke or earth apple, has been known in Poland since the first half of the XVIII century. It is a vegetable especially recommended for diabetics because it reduces the amount of blood glucose. Those who would like to lose weight should also reach for it. Jerusalem artichoke contains a lot of potassium so it reduces blood pressure, and inulin which reduces high cholesterol. I have looked suspiciously at the packaging of Jerusalem artichoke a few times. Only the soup I ate in a Warsaw restaurant convinced me to buy it. I prepared my own version of cream of Jerusalem artichoke. I found the recipe at the Polish page zakochanewzupach. However, I used my own spices. I served this soup with mushroom crisps and parsley olive oil. It was really excellent. Ingredients (for 4 people): 500g of Jerusalem artichoke 200g of potatoes 1 big onion 2 tablespoons of oil 500ml of vegetable stock 400ml of coconut milk 2 mushrooms fistful of parsley 2 tablespoons of olive oil salt and white pepper Dice the onion and fry lightly in oil. Peel the Jerusalem artichokes and potatoes and cube them. Add the vegetables to the onion and fry for a while on a low heat. Don't brown them. Put everything into a pot, add the vegetable stock and boil until the vegetables are soft. Add the coconut milk, spice it up with the salt and white pepper and boil for a while. Blend the soup thoroughly. If it is too thick, add more vegetable stock. Cut the mushrooms into thin slices. Fry the slices in oil until they are gold and crunchy. Grind the parsley in a mortar with a pinch of salt. Add the olive oil while grinding constantly. Serve the hot soup with mushrooms crisps and parsley oil. Enjoy your meal!

-
BANOFFE - MY DAUGHTER'S BIRTHDAY CAKE This year, mischievous nature tried to upset my daughter's birthday plans. Spending your birthday in bed with a thermometer isn't an excellent idea ¬– even for an adult. For a teenager it is a drama comparable to cancelled holidays. My daughter told me that you are thirteen only once. And she was right. Literally and figuratively. I wanted to sugar the pill for her on this day and cheer her up for a bit, so I prepared a caramel cake with bananas – banoffee in the form of a small birthday cake. My sweet magic and the dinner from her favourite restaurant worked, and in the end her birthday was quite nice. Ingredients (17cm cake tin): 150g of biscuits 75g of butter 200ml of 30% sweet cream 250g of mascarpone cheese 2 tablespoons of caster sugar 2 bananas 300g of fudge 1 teaspoon of dark cocoa Break the biscuits into very small pieces or blend them. Melt the butter and mix it up with the biscuits until you have dough like wet sand. Put it into a cake tin and form the base. It is worth rolling it flat with a glass. Leave it in the fridge for one hour. Spread the biscuit layer with fudge and arrange the sliced bananas on top. Whisk the chilled sweet cream with the caster sugar. Add the mascarpone cheese and mix it in. Put the mixture onto the bananas and make it even. Sprinkle with the dark cocoa and decorate as you like. Leave it in the fridge for a few hours (best for the whole night). Enjoy your meal!

-
 ON THE CHRISTMAS TABLE - ŁAZANKI - NOODLES WITH CABBAGE AND MUSHROOMS Traditionally, during the Polish Christmas Eve supper we don't eat any meat. Instead we have twelve dishes with fish, mushrooms, vegetables and cabbage. In my home everybody waits for their favourite meal: my husband and daughter for the herring dishes and vegetable salad, my son for the fried fish, while I wait for dumplings and jellied carp. One of the traditional dishes in many Polish homes is łazanki with cabbage and mushrooms. Łazanki are small, square noodles. The best dish is made with noble porcini mushrooms. I sometimes mix these forest mushrooms with sliced champignons, which look beautiful among the noodles. Łazanki are a Christmas Eve dish, but sometimes when my children ask me I prepare it during the rest of the year too. Ingredients: 500g of sauerkraut 1 onion 60g of dried porcini 6-7 champignons 1 tablespoon of caraway seeds 2 bay leaves 2 tablespoons of butter 300g of łazanki salt and pepper Soak the dried porcini in water for 4-5 hours. Cook them until they are soft. Cut them into smaller pieces. Dice the onion, slice the champignons and fry them in butter. Cut up the sauerkraut. If it is too sour, rinse it with water. Put the sauerkraut, onion, caraway seeds, bay leaves and cooked porcini and champignons in a pan with a heavy bottom. Spice it up with salt and pepper. Stew until the sauerkraut is soft (for 2-3 hours). Boil the Łazanki until it is al dente. Mix the noodles with the sauerkraut and mushrooms. Serve hot. Enjoy your meal!
-
ON THE CHRISTMAS TABLE - CHRISTMAS EVE CRANBERRY KISSEL One of my friends from Ukraine told me about her traditional Christmas dishes. Except for stuffed cabbage with potatoes (which I have made already) I was surprised about cranberry kissel. I searched the Internet and I saw that in many Polish homes Christmas Eve supper ends with cranberry kissel. In my home we always drink compote with dried fruit, but maybe this year we will try a new dish on our Christmas menu. I wonder why cranberries are on the Christmas table. I didn't find any particular information about it (except the fact it is tradition). I think that a few years ago cranberries were treated as a natural cure which aids digestion, and this could be quite useful after a hefty Christmas meal! At my Ukrainian friends' home Christmas kissel is runny like a drink, but you can prepare it like a dessert with a more dense texture. I made the drink version, but you should choose which is better for you. Ingredients: 500g of cranberries a piece of cinnamon and a couple of cloves 6-8 tablespoons of sugar 2-3 tablespoons of potato flour Wash the cranberries and put them with the cinnamon and cloves in a pan. Pour in 500ml of water and boil until the fruit is soft. Remove the cinnamon and cloves and blend the rest. Add the sugar and mix it until it has dissolved. Sieve the cranberry mousse to make a smooth texture. Mix the potato flour with a bit of cold water. Boil the cranberry mousse and add the mixed potato flour, stirring constantly so it is not lumpy. Boil for a while. Pour the kissel into some glasses. Enjoy your meal!

-
COURGETTE MUFFINS WITH LEMON Since I found the recipe for courgette muffins with lemon on the Polish blog gotujzcukiereczkiem I decided to prepare them. My children looked at the ingredients with surprise. Courgette and cakes don't go together well. The argument that they add caster sugar to the courgette pancakes didn't convince them. The muffins reminded my husband of the lemon cake his grandma used to prepare many years ago. I just liked them. They were short lived, because they disappeared in no time, slightly lemony, moist and not too sweet. They were perfect. If I didn't know they had courgette in them, I would never believe it. Try it, because it is worth it. Ingredients (for 12 muffins) muffins 200g of flour a pinch of salt half a teaspoon of baking soda half a teaspoon of baking powder 150g of sugar peel from one lemon a tablespoon of lemon juice 2 eggs 150ml of oil a teaspoon of vanilla essence a teaspoon of lemon essence 210g of grated courgette icing: 3 tablespoons of milk 10 tablespoons of caster sugar 1 teaspoon of lemon essence Heat the oven up to 170C. Put some paper muffin moulds into the "dimples" of a baking pan for muffins. Mix together the dry ingredients of the muffins: flour, salt, baking soda and baking powder. Mix together the sugar and lemon peel in a separate bowl. Add the eggs, oil, lemon juice and both essences. Mix them in. Add the dry ingredients and mix them in. Grate the unpeeled courgette, don't squeeze and don't pour away the liquid. Add the courgette to the dough and mix it in. Put the dough into some paper muffin moulds. Bake for 25-30 minutes. Now prepare the icing. Mix the milk with the caster sugar and lemon essence. Decorate the muffins with the lemon icing. Enjoy your meal!


-
MILLET GROATS CHOCOLATE CREME WITH CRANBERRY MOUSSE Today I would like to share with you the recipe for the best chocolate crème I have ever eaten. It is thick, smooth and very chocolaty in flavour and colour. Despite the chocolate, the dessert isn't too sweet. But if somebody thinks that it is, I recommend serving it with slightly sour fruit mousse. You can use cherries, currants or cranberries. You will make an unusually yummy arrangement and your dessert will look beautiful. My children were delighted with this dessert. I told them about the fact it had been made with millet groats after they had eaten it, and ... they didn't believe me. Next time I will prepare the millet groats crème with a double portion of ingredients. Ingredients (for 4 people)chocolate crème 100g of millet groats 200g of dark chocolate 1 tablespoon of dark cocoa 250ml of almond milkfruit mousse 250g of fresh cranberries juice and peel of one orange half a teaspoon of grated ginger 4 tablespoons of brown sugar Boil the millet groats in salty water and drain them. Melt the chocolate in a bain-marie. Blend the millet groats, chocolate, cocoa and milk very thoroughly until you have very smooth crème. Pour the milk in gradually to make the right consistency of your desert. Prepare the fruit mousse. Put the washed cranberries, ginger, juice orange peel and sugar into a pot. Boil until the fruits are soft. Blend. Put the chocolate crème into some small bowls. Put the fruit mousse on top. Decorate with peppermint leaves. Serve at once or chilled. Enjoy your meal!


-
Ingredients 4 medium carrots, peeled and cut into lateral halves (450 g) 3 medium-sized sweet potatoes, peeled and cut into quarters (950 g) 700 g pumpkin, peeled into quarters About 20 grams of butter 1 onion, peeled and chopped (130 g) 2 parsley roots peeled and chopped (2, 100 g) A quarter teaspoon of hot pepper Spoon of thyme 2 bay leaves 1/2 teaspoon fennel seed or anise (optional) 1 Tbsp ginger root, finely chopped (15 g) 5 garlic cloves, coarsely chopped 8.5 cups hot water 3 tablespoons chopped parsley 1.5 teaspoon cinnamon 3 teaspoons beer yeast 2-2.5 teaspoons of salt 2 tablespoons wine vinegar To serve (you can choose what you want from the following): Roasted pumpkin seeds Small croutons cinnamon paprika Sour cream Egg noodles Preparation Cut the pumpkin, carrot and potato into very large cubes. Place them on a baking pan without baking paper. Set the oven to 200 degrees. Place the vegetables in the cold oven. When the oven reaches the temperature, remove the pan and mix the vegetables with 2/3 to 1/2 of the butter to cover. Bake the vegetables until soft and lightly brown - about an hour and a half. In the meantime, fry the onion and the parsley roots with the remaining butter, until soft, but not brown. About 4-5 minutes. Add the thyme, the bay leaves, the hot pepper, the seeds of the guard, the ginger and the garlic. Fry in a medium to low heat for about a minute or two, until aromatic. Add the baked vegetables, including all their liquids and the pieces stuck to the pan. (Use hot water to help the pieces break free from the pan) Add the water and bring to a boil over medium heat. Cook in a very simmer for about 10-15 minutes. Add the cinnamon, beer yeast, 2 teaspoons of salt and parsley. Grind in a food processor or blender until smooth. If the soup is too thick, add more hot water. Add the vinegar. Taste and adjust seasoning. Add salt, chili and vinegar to taste. Mix well and serve. (Always mix before taking a portion of the pot.) Serve with roasted pumpkin seeds or croutons; Paprika, chili powder or cinnamon and also sour cream. The soup tastes better when it is not boiling hot.

-
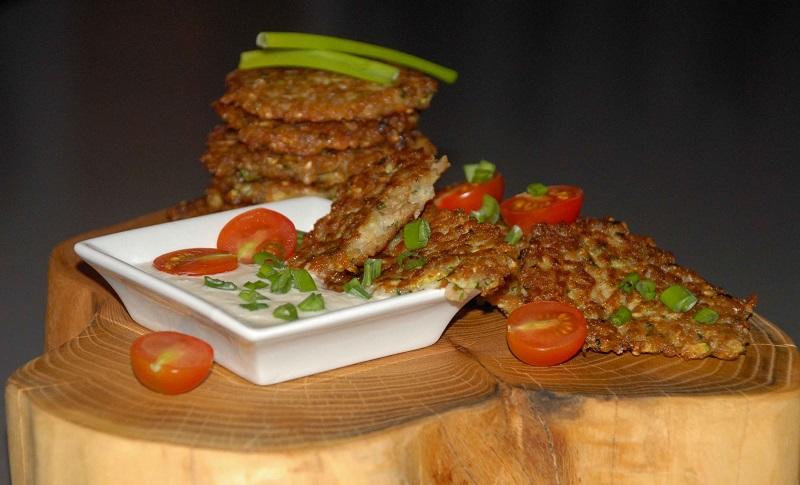
COURGETTE_BUCKWHEAT PANCAKES When I ask my son what I should prepare for dinner, you can be sure as hell he wants pancakes or crepes. He isn't a typical guy. He doesn't like meat. He likes groats, rice, potatoes, vegetables and salads, and he leaves the meat to the end. When I was a child I was the opposite. First, I ate what I liked the least so that I could relish my favourite dish. Today I would like to share with you a recipe inspired by my son's taste. I recommend courgette-buckwheat pancakes, which I served with horseradish dip on a natural yoghurt base. The recipe comes from Lidl cookery book. Ingredients: 100g of buckwheat groats 1 onion 300g of courgette 2 cloves of garlic 3 tablespoons of minced parsley 150g of 18% cream 1 teaspoon of baking powder 4 tablespoons of flour 2 eggs salt and pepper Wash the courgette, grate it, add salt, stir, leave for 15 minutes and then drain it. Boil the buckwheat groats until they are soft (not al dente). Dice the onion and crush the garlic. Mix the groats, eggs, parsley and onion. Add the drained courgette, cream, garlic and spice up the mixture with salt and pepper. Mix everything together. Fry the small pancakes in heated oil. Serve the hot pancakes with cold horseradish dip. Enjoy your meal!
-
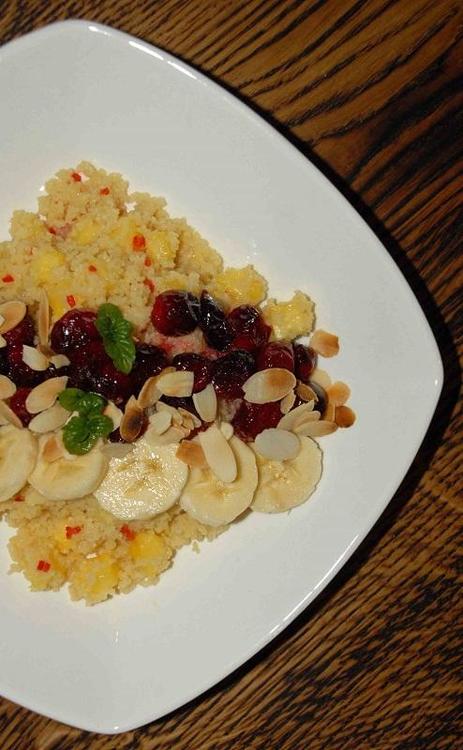
ALMOND CUSCUS WITH CRANBERRIES AND PINEAPPLE I hate getting up in the morning. My household knows that before 8 o'clock I'm unbearable, and because almost every day I wake up much earlier, I tend to be unbearable more frequently than I want. Every extra five minutes of sleep is priceless, so I appreciate a good breakfast that is not too complicated and is quick to prepare. Recently, I have been preparing breakfast with groats and flakes. This time I chose cuscus. This product is a cross between pasta and groats, and it doesn't need long to prepare. It is enough to add hot water or milk and leave for a few minutes. I added some fresh pineapple, cranberries and banana. I spiced it up with some hot chili pepper . Ingredients (for 2 people) 125g of cuscus 400ml of almond milk 1 tablespoon of honey 1 teaspoon of vanilla essence 2 slices of fresh pineapple 1 teaspoon of minced chili pepper 150g of fresh cranberries 2 tablespoons of brown sugar 1 banana 4 tablespoons of flaked almonds Wash the cranberries and put them into a pot. Add two tablespoons of water and the brown sugar. Boil, stirring gently until the cranberries burst and the sauce has thickened. Boil the almond milk with the vanilla essence. Pour the milk onto the cuscus and leave for 5-7 minutes. Slice the banana and roast the almond flakes. Peel the pineapple and dice it. Mix the pineapple, chili pepper and honey. Add the pineapple to the cuscus and mix it in. Put the mixture into two bowls. Put the cranberries and banana on the top and sprinkle with the almond flakes. Enjoy your meal!
-
SWIFT HOMEMADE NAPOLEON Sometimes we have days – may there be as few as possible – when nothing works out. I can even burn the water for tea. I have two ways of dealing with such days. The first is to sit in a corner and wait it out – maybe it will sort itself out. I can only do this when I'm alone. When I have a hungry family I have to look for another way. My second way is to use only well-known recipes and stick to them irregardless of how well I know them. Any experiments in this situation will end in failure. Last weekend was just difficult. My husband helped me prepare dinner, but the dessert was my problem alone. Following the rules, I used a recipe for napoleon that is so simple there is no way you could fail. I recommend it to anyone struggling with creative impotence or who likes glamourous results after not too much effort in the kitchen. Ingredients (for 9 napoleons) 1 pack of chilled French pastry 500ml of milk 6 tablespoons of sugar 1 packet of powdered blancmange 50g of butter 2 egg yolks 1 teaspoon of vanilla essence 1 tablespoons of potato flour 2 tablespoons of flour caster sugar Heat the oven up to 180C. Cover a baking tray with some baking paper. Cut the French pastry in half. Bake one half for 20 minutes. Remove it from the tray. Cut the second part into 9 squares. A cake prepared in this way is easier to divide into portions. Put them on the paper and bake for 20 minutes. Now prepare the crème. Boil 400ml of the milk with the sugar, vanilla essence and butter. Mix the rest of the milk with the powdered blancmange, flour and potato flour and egg yolks. When the milk has boiled, take it off the heat and add it to the mixture, stirring constantly. Put it on the heat and boil, stirring until the mixture is coagulated. Take the pot off the heat. Put the warm mixture on the whole part of the French pasty and then cover it with the sliced part of the pastry. Cover the dessert with aluminium foil and leave in the fridge for a few hours. Cut and sprinkle with the caster sugar before serving.

-
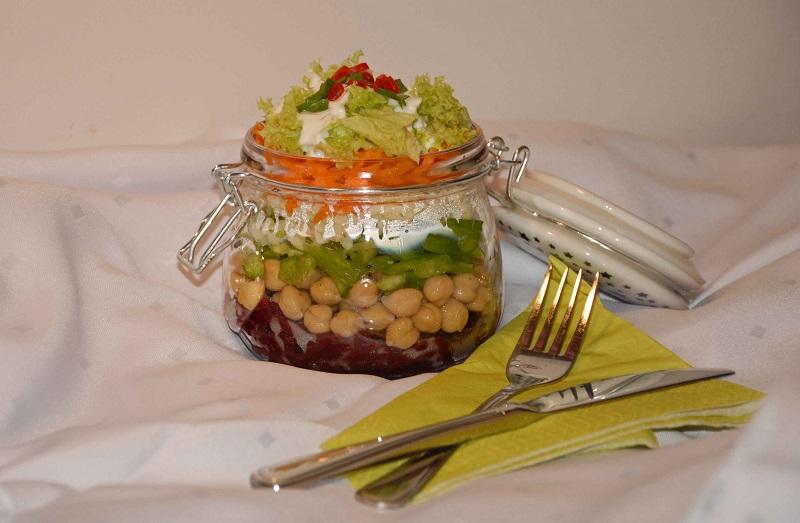
LUNCH FROM THE JAR, I.E. LAYERED SALAD IN THE OFFICE Most of us take lunch boxes to the office. Some lucky people can warm their food up at work The rest have to eat sandwiches. Sandwiches are great, but even if we absolutely love them we could get fed up with them in the end. Regardless of where we work we can save the situation with salads. Every day we can prepare a different one and we have an entirely new lunch. If we also take an attractive dish, we have something that is not only tasty but also glamorous. I would like to share with you the recipe for a salad which looks equally as beautiful as it is yummy. The chickpeas and groats make it a satisfying and balanced meal, after which we won't be hungry. I think that if you prepare your lunch in the morning and plan to eat it at lunchtime, we should keep the salad and the dip separately. Otherwise, after a few hours in the jar, we have an unappetising dish with squishy lettuce, which isn't what we want, is it? Ingredients (for 2 people) 1 beetroot 200g of tinned chickpeas 100g of bulgur 1 carrot 1 fresh green pepper 4 lettuce leaves 200g of natural yoghurt handful of minced chives 1 small chili pepper salt and pepper Clean the beetroot and bake or boil it. Grate the beetroot and carrot. Cut the pepper into thin strips. Boil the bulgur in salty water. Arrange in layers in a jar the beetroot, chickpeas, pepper, bulgur, carrot and lettuce. Dice the chili pepper. Mix the natural yoghurt with the chives and chili pepper. Spice it up with salt and pepper. Add the dip to the salad just before serving.