p_lo
-
Posts
7 -
Joined
-
Last visited
Recent Profile Visitors
847 profile views


-
I believe she did too. But that doesn't mean that someone else looking for a solution to "Hot Chocolate for Outdoor Events", that would have access to power couldn't benefit. Further, if one were to have access to a car battery, at said outdoor event (which seems quite likely), and say a power inverter, they would most certainly be able to access power.
-
http://www.carpigiani.com/usa/index.html?pg=103&prdct=48&prdid=229&langid=7&lngid=7&stid=11&siteid=11 These are potentially an option for anyone who would have access to the power requirements.
-
I've not tried this personally, but there are products sold to the home gardening/agricultural sector referred to as 'seedling heat mats'. These do not automatically shut off, and are designed to heat growing media to temperatures ideal for seed-sprouting. While that is a bit less than the ideal temperature for tempered chocolate, the small amount of heat they produce may be ideal for this application. For example: http://www.amazon.com/Hydrofarm-MT10006-19-1-2-Inch-Seedling/dp/B0001WV010
-
I've made these and they turned out very well by following the directions as stated — which did not require any slab tempering. Simply seeding in a bowl worked just fine. The coconut oil needs to be at a equal temperature to the tempered chocolate before they're mixed. The directions I have state to have the coconut oil at 85F, which is presumably what the tempered chocolate should be at as well, give or take a few degrees. I didn't take notes, but I'm fairly certain mine solidified at room temp after a couple hours. They were made in winter so room temp was about ~68F, however I didn't make these in a kitchen that I'm either used to, nor was climate controlled. These were Greweling Mint Meltaways specifically. As Kerry stated, refrigeration will help them solidify for cutting. The key seems to be correcting the ratio of coconut oil to chocolate. Looking at some different meltaway recipes, the amount of coconut oil used varies in relationship to the other oils being used in the recipe from chocolate or peanuts or whatever. The whole reason a meltaway 'works' is the inclusion of fat with a low melting point "melting" in the mouthfeel. So it should stand to reason that fixing the ratio of 'lower temp melting fats' to chocolate and other fats is necessary for creating a successful recipe.
-
Lisa, I'll give the hot water method a try to see if it makes a difference. Generally, once the butter is 'workable', I will pour an amount into a smaller container where the cocoa butter (henceforth "ccb") will reside while being applied. It will of course gradually thicken as the ambient is a steady 68F over the course of applying it to molds. Once it becomes too thick I'll give it a quick blast from a heat gun, stir, and verify temp is <=86F and proceed as usual, adding more ccb if the amount in the smaller bowl starts to run out. I've tried plastic, stainless, and ceramic bowls for this. Stainless seems to drop the temp of the butter too quickly, ceramic and plastic seem to be the better options. The procedure has worked fine in the past with acceptable results, which is the truly puzzling thing. The outside (underside) of molds does get touched/handled during the decoration/swirling process in order to create the effect. Once a mold is complete they're usually stacked alternating on a stainless steel or marble table at ambient to cool (I've tried not stacking them, thinking that somehow heat may be getting trapped between them, didn't seem to make a difference however.) Once they're decorated the underside gets minimal touching as they're primarily handled from the sides. I doubt that any of the actual cavities are exposed to 'human temperatures' for more than 8 seconds anytime during the process. I will try some as hands-off as possible however. Thank you for your suggestions . Gap, Have not checked therm., but will do so tomorrow. I am inclined to think your second idea may be 'on-to-something', potentially. I have tested this with numerous colors primarily from the current Glarus Gormet range, though they'd all been treated to the microwave method prior. The problem persists irrespective of color used. However I do feel like the first batch from a new, unopened bottle of ccb is generally the best and it seems to go downhill from there. Luckily I happen to have a few 'fresh', un-microwaved bottles so that I can test this idea further. I did contact the manufacturer of the ccb to see if they had any insights — they didn't, and admitted that they, 'just mix the colorants with the butter, and package it'. I've speculated that the ccb may be getting to an over-crystallized/tempered state. This 'flaking' is reminiscent of another previous problem I was encountering with a batch of Albert Uster Imports white chocolate which turned out have been manufactured with a bad batch of cocoa butter. The problem is though, that it isn't with a specific brand of ccb. I can reproduce the problem with other brands as well. Regarding your third point; as far as everyone in our kitchen can tell, yes, tunnel is properly functioning etc. We have no issues with bars or truffles which pass through the same system. I've tried leaving them in the fridge for numerous amounts of time (30 minutes to overnight and then some). However, even with being in the fridge overnight, I'll still see molds which have 'wet' cavities — which blows my mind, how could it be that 90% of a mold is released yet 1-3 pieces will still remain 'wet' and want to stick? I have observed that if the molds are cooled too quickly, they seem to exhibit the flaking behavior in higher percentages than ones which I let cool at ambient room temp (for instance, straight into fridge after shelling, bypassing the tunnel altogether). Basically, from my observations, extreme cooling or sticking them in the fridge too quickly will exacerbate the issue, while throwing them in the fridge after a trip through the tunnel seems to be better, it still doesn't solve the issue totally. I've even tried shelling and keeping the mold away from any temperature cooler than ambient room, and still got some small amounts of the flaking. If I fridge them too early, results seem to be guaranteed disastrous. Meanwhile, gradual cooling produces better results, but still get some pieces that flake. Thank you both, again for your suggestions, looks like I've got plenty of things to try out over the next couple days.
-
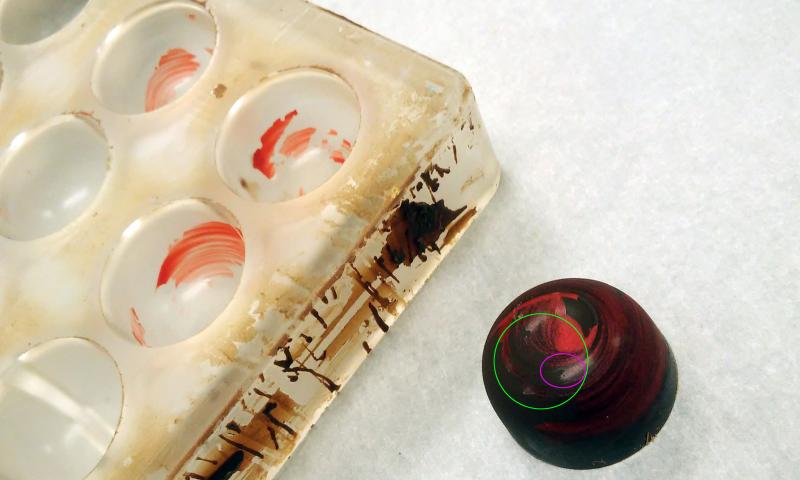
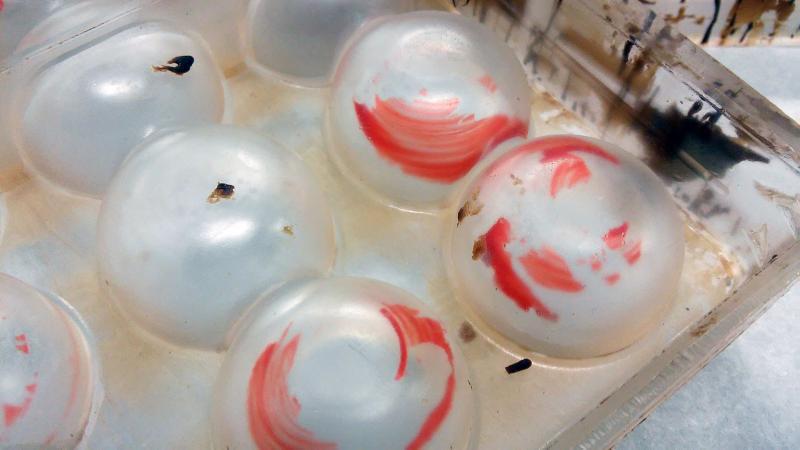
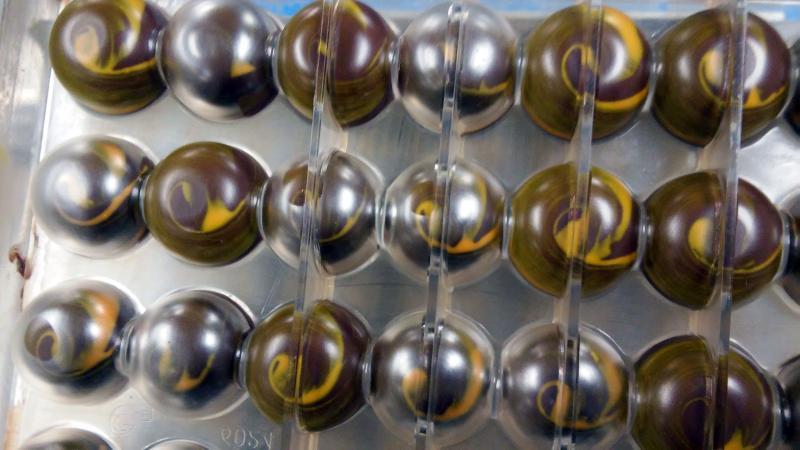
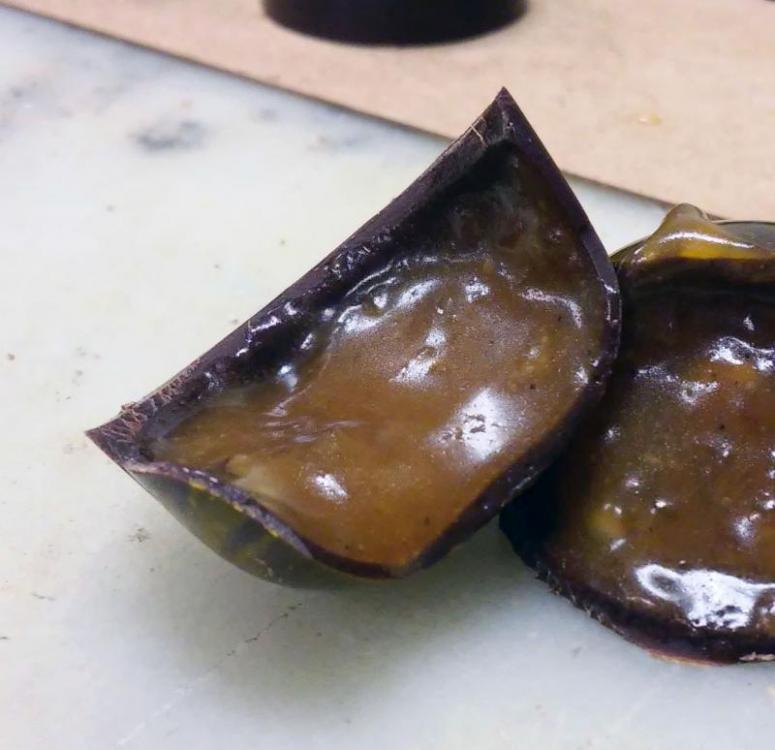
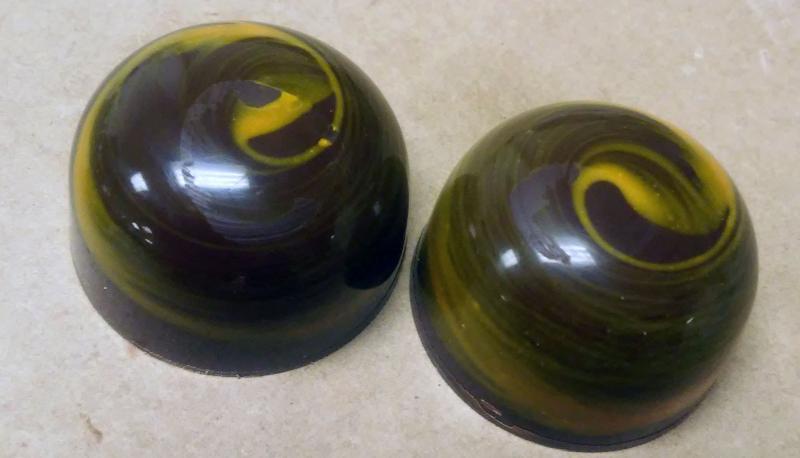
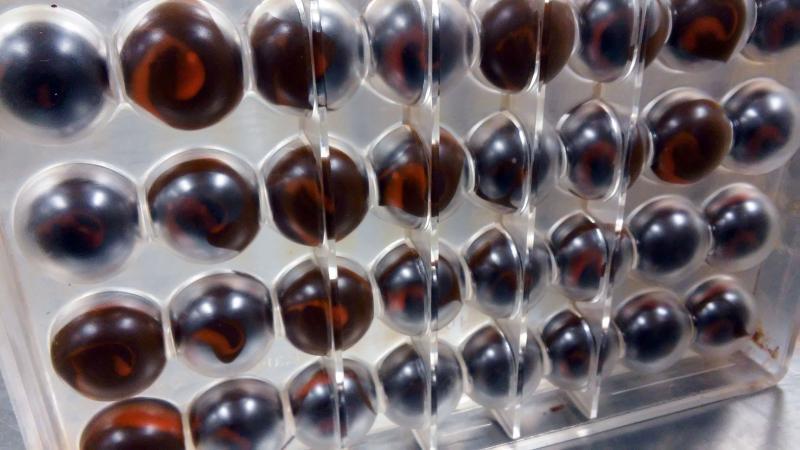
Hello eGullet. I was hoping that someone here may be able to help me in my quest to produce consistent, 'show-room' quality results. I've recently been encountering a serious problem with attempting to make piped domes that I've not been able to get a reasonable explanation to what specifically the problem is. Here is an example of what I'm referring to: As you can see, it is a pretty standard piece. Colored cocoa butter, swirled in mold, shelled, piped with caramel. My issue is with the apparent 'flaking' of the butter. This behavior has everyone I've asked about thus far stumped. Within the green circle you can see how the swirled pattern becomes 'broken'/flaked — stuck still within the mold after flipping. You can see within the pink circle how the highlight from the mostly acceptable, shiny finish is suddenly lost and the finish becomes matte where the flaking occurs. The mold itself obviously showing the retained cocoa butter, stripped from the piece. Here is a view of the mold from the underside. Showcasing some awesome shenanigans. Here's what a mold will generally look like once dry from the bottom. (Different cocoa butter yes, but still same basic issue). This has been after more than sufficient coolng/drying/setting-up/what-have-you. I don't understand why some cavities appear to be ready for release, and some obviously still 'wet'. The darker cavities, if this were to be flipped out, would most certainly be the ones to 'flake' the worst. However the ones which appear 'good', may still exhibit the behavior potentially after numerous tests. Here we have a picture of some lost profits because of this issue. Mainly showing this for anyone who wants to jump to the 'your shell is too thin' conclusion. The flaking happens whether the shell is thick, thin, or even if we just fill the domes with solid chocolate. This really showcases the flaking. If closely observed, you can see within the matte areas how the cocoa butter which has flaked off, has left impressions/grooves which follow the path of the swirl. I don't need to explain how infuriating it is to have a piece that is 80-90% immaculate, only to have it ruined by a small bit of flaking. A final example of how the molds will look post-shelling. Total nonsense. The technique followed to produce these goes as so: 1. Clean molds, immaculately. Either with hot water only, or with heat gun if not too messy. Polish all cavities with soft towels. 2. Melt cocoa butter down. Microwave method. 20-30 seconds until about half bottle moves to 'liquid' state. If in excess of 86-90F, shake like crazy until brought down. If all butter gets melted out, we'll remove a portion and left it cool to 80F before warming back to 86-90F. 3. Swirl butter into molds via finger (gloved). 4. Let cool at room temp (68F, constant, controlled) until butter has set. Which it generally will within 5-10 minutes. 5. Shell up. We use a Selmi for this with the Injection Plate accessory (each cavity gets filled by its own individual nozzle). 6. Once shell is formed, they take a trip down a cooling tunnel, anywhere from 46-53F, to then be piped, capped, cooled again, and flipped. I've tried numerous variations of the steps above but they all end up looking like the last picture when things are said and done. I've tried using the butter at warmer temps only (86-90), lower temps only (80-86, as low as 72 even) to see if it being 'thicker' would help. It didnt. Temp of chocolate on our Selmi doesn't seem to make a significant difference between 82 and 86F. I've temp-gunned my hands and fingers numerous times to make sure they're not exceeding 86F when applying the butter to molds to rule out breaking the butters temper that way. Basically I've tried everything I can possibly think of doing, all to no avail. The cocoa butter is agreed to be in temper. The chocolate is agreed to be in temper. The process has been proven many times before. It will occur on other molds too, not just these domes. Any ideas/input/experience...basically anything as to what would be causing this, would be greatly appreciated.

-
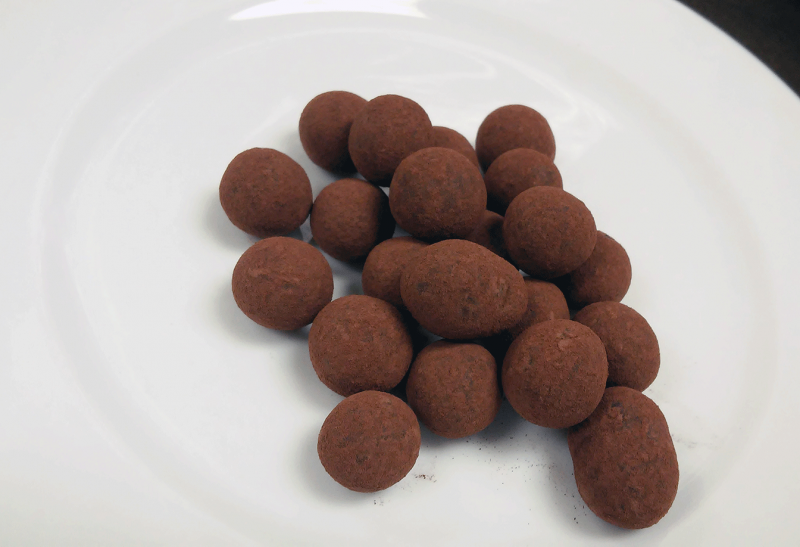
Here are some chickpeas which have been panned somewhat successfully. Unpolished, but coated with cocoa powder. Is there a specific benefit to the 'polishing' or is it mostly an aesthetic choice?