KootenayCook
-
Posts
32 -
Joined
-
Last visited
Content Type
Profiles
Forums
Store
Help Articles
Everything posted by KootenayCook
-
Damn - I just took delivery of a "backup" CSO, but this looks more interesting (and more expensive...).
-
Beat me to it!
-
Amazon.ca has the Cuisinart Steam-Convection Oven for $198.99 +tax. LINK
-
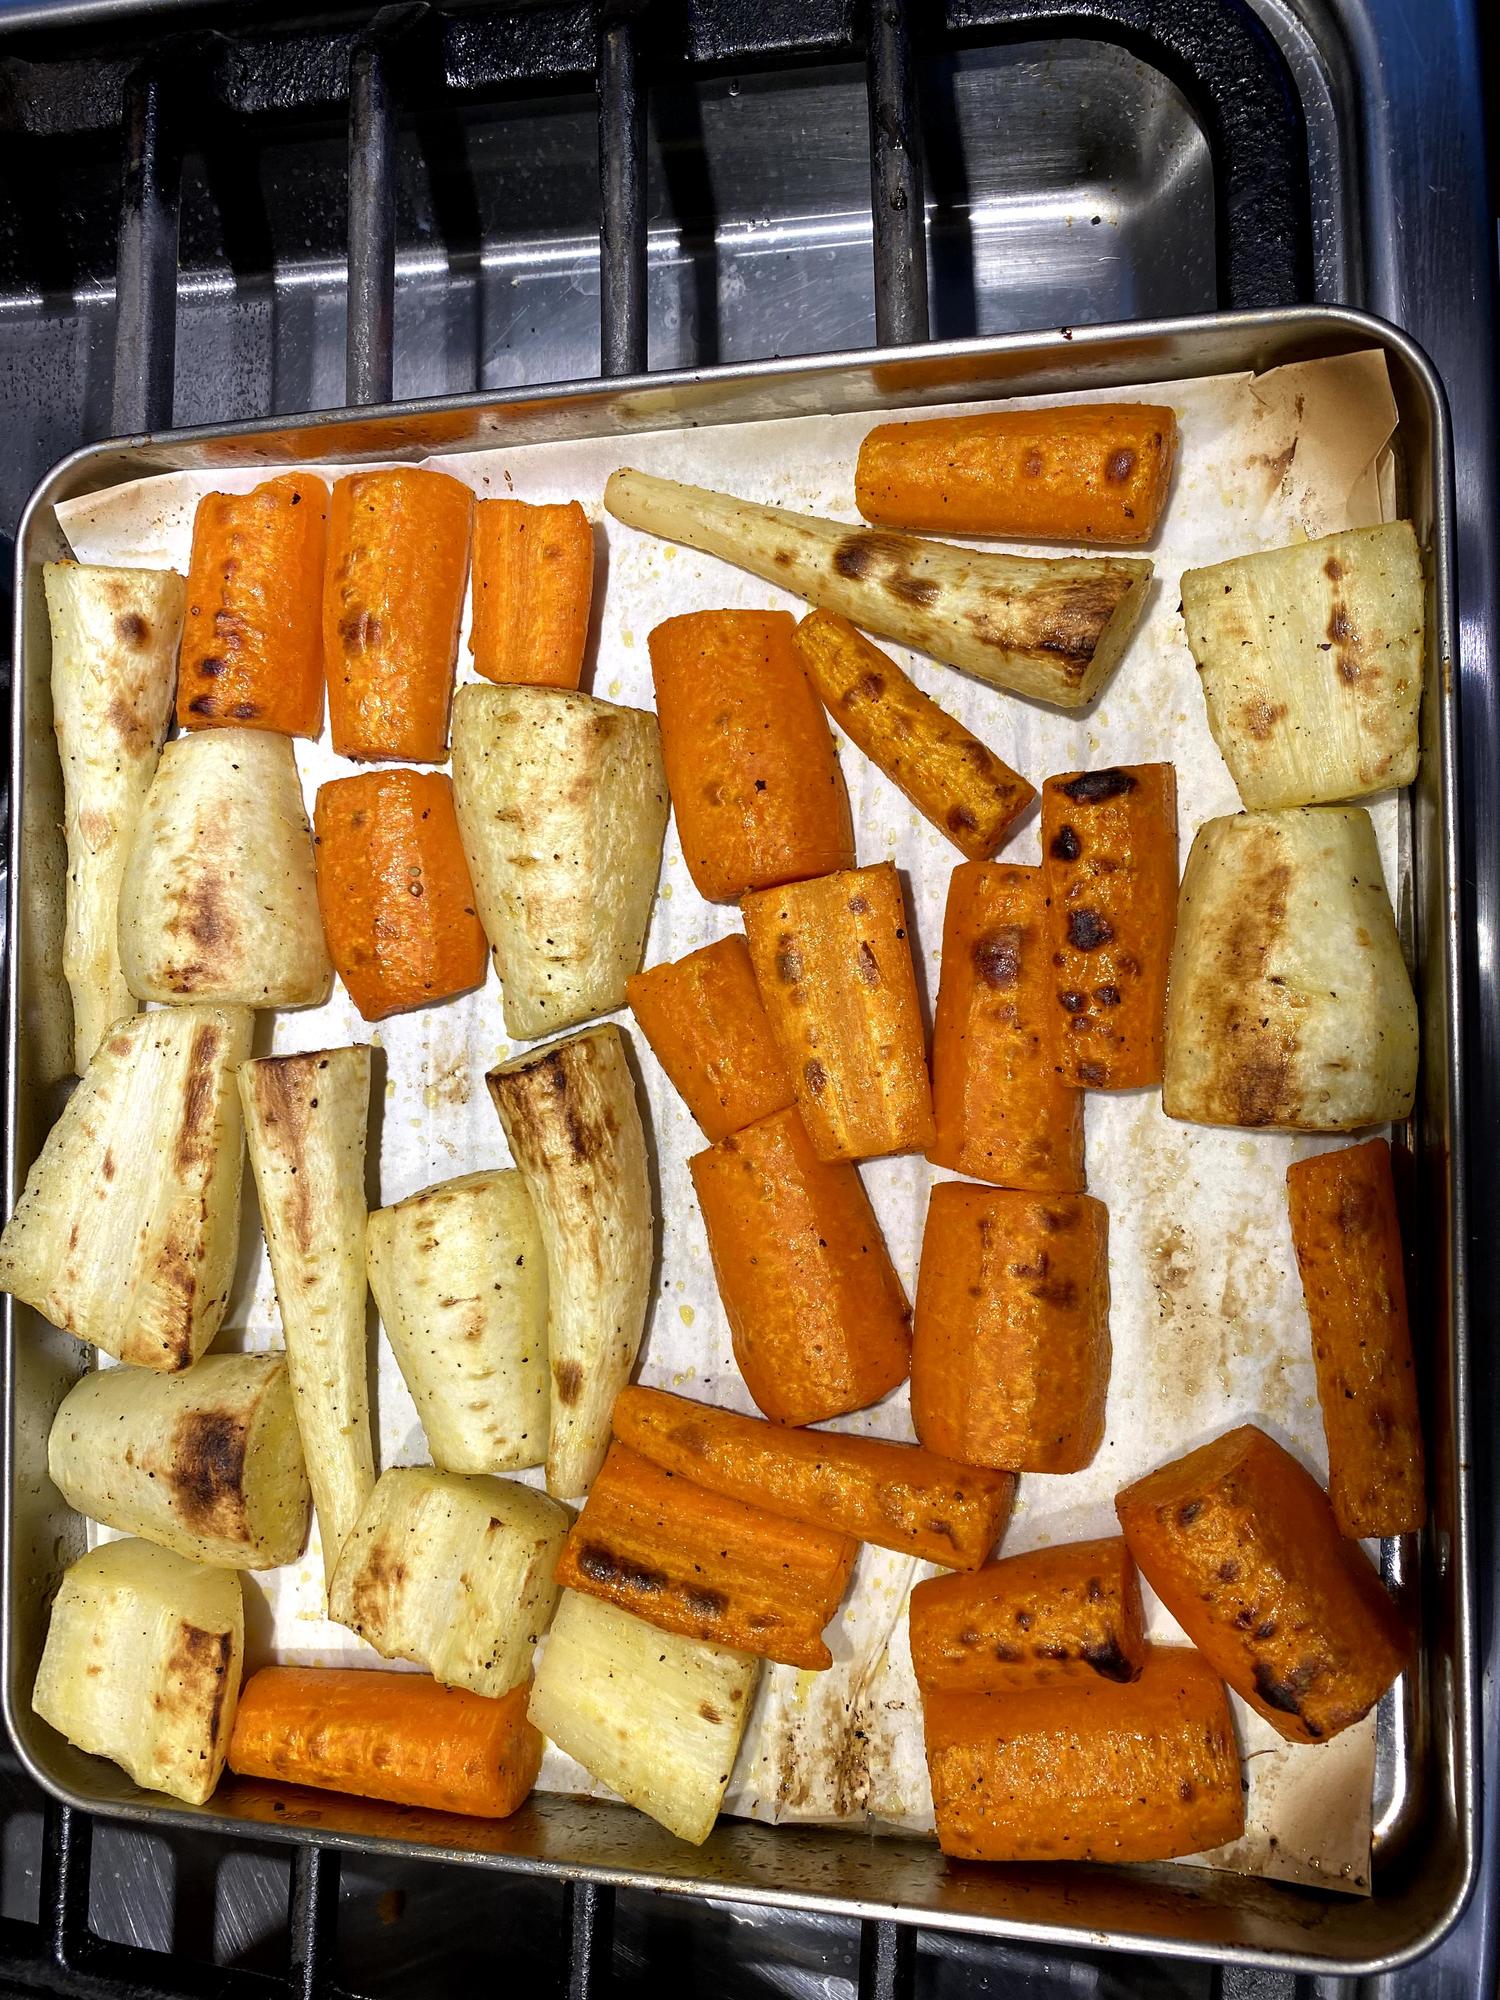
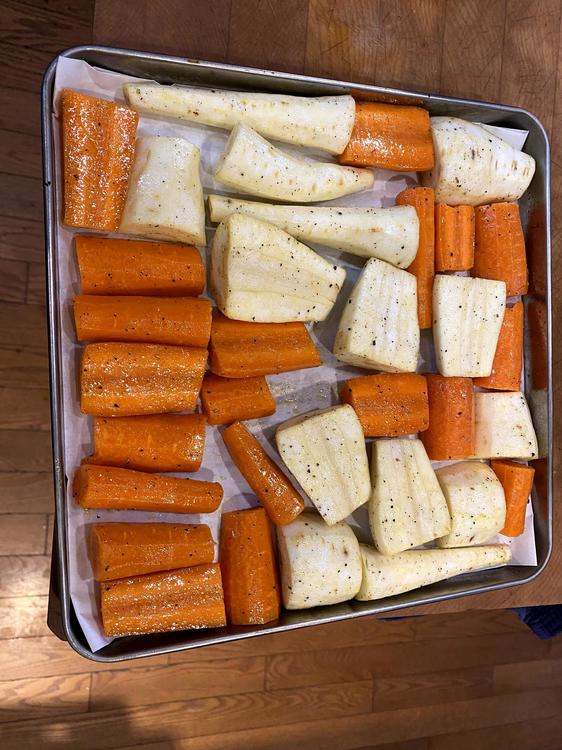
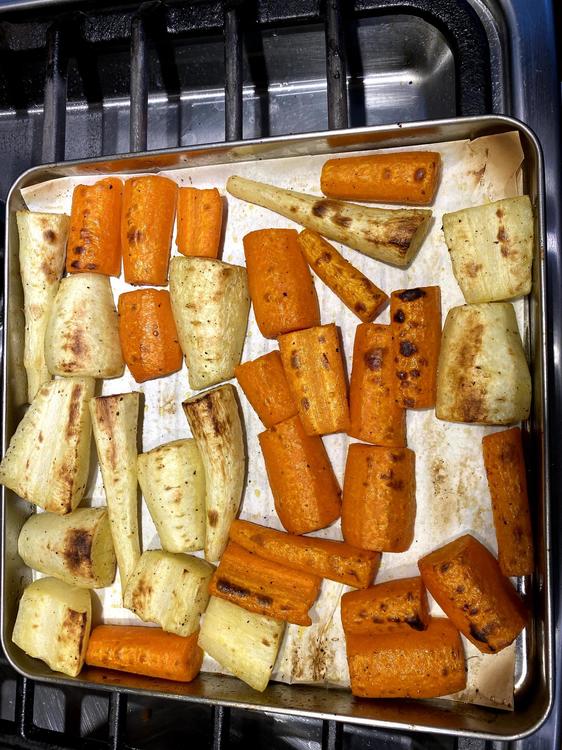
OK, here is the result. The CSO was set to 500 steam broil. The rack was set to its highest position. The first pic is before they went into the CSO. The second pic is at the end of 10-12 min. (Sorry, I didn't keep proper track of time.) In the middle, I transferred them all to the oil/salt/pepper bowl and drained the liquid from the CSO tray. When I put them back in the tray, I made sure that the pieces were flipped so that any browning was on the bottom. The carrots were fine: firm in parts, but cooked. The parsnips could probably have done with a minute or two longer. They were OK, but a little crunchy at the core. Ms Kootenay thought they were underdone.
-
Gonna try this tonight with carrots and parsnips
-
I like the hybrid method. Mine's similar but differs in the details: smallish skin-on bone-in thighs steam-baked at 275 for 25 min (probably a bit too long), then broiled (rather than steam-broiled) for however long it took. Result was crispy skin, flesh fairly moist (but red near the bone on one). Method and times need perfecting. Chicken thighs vary in size, so ideally the instructions would say steam bake at X temp until the internal temp is Y, then broil.
-
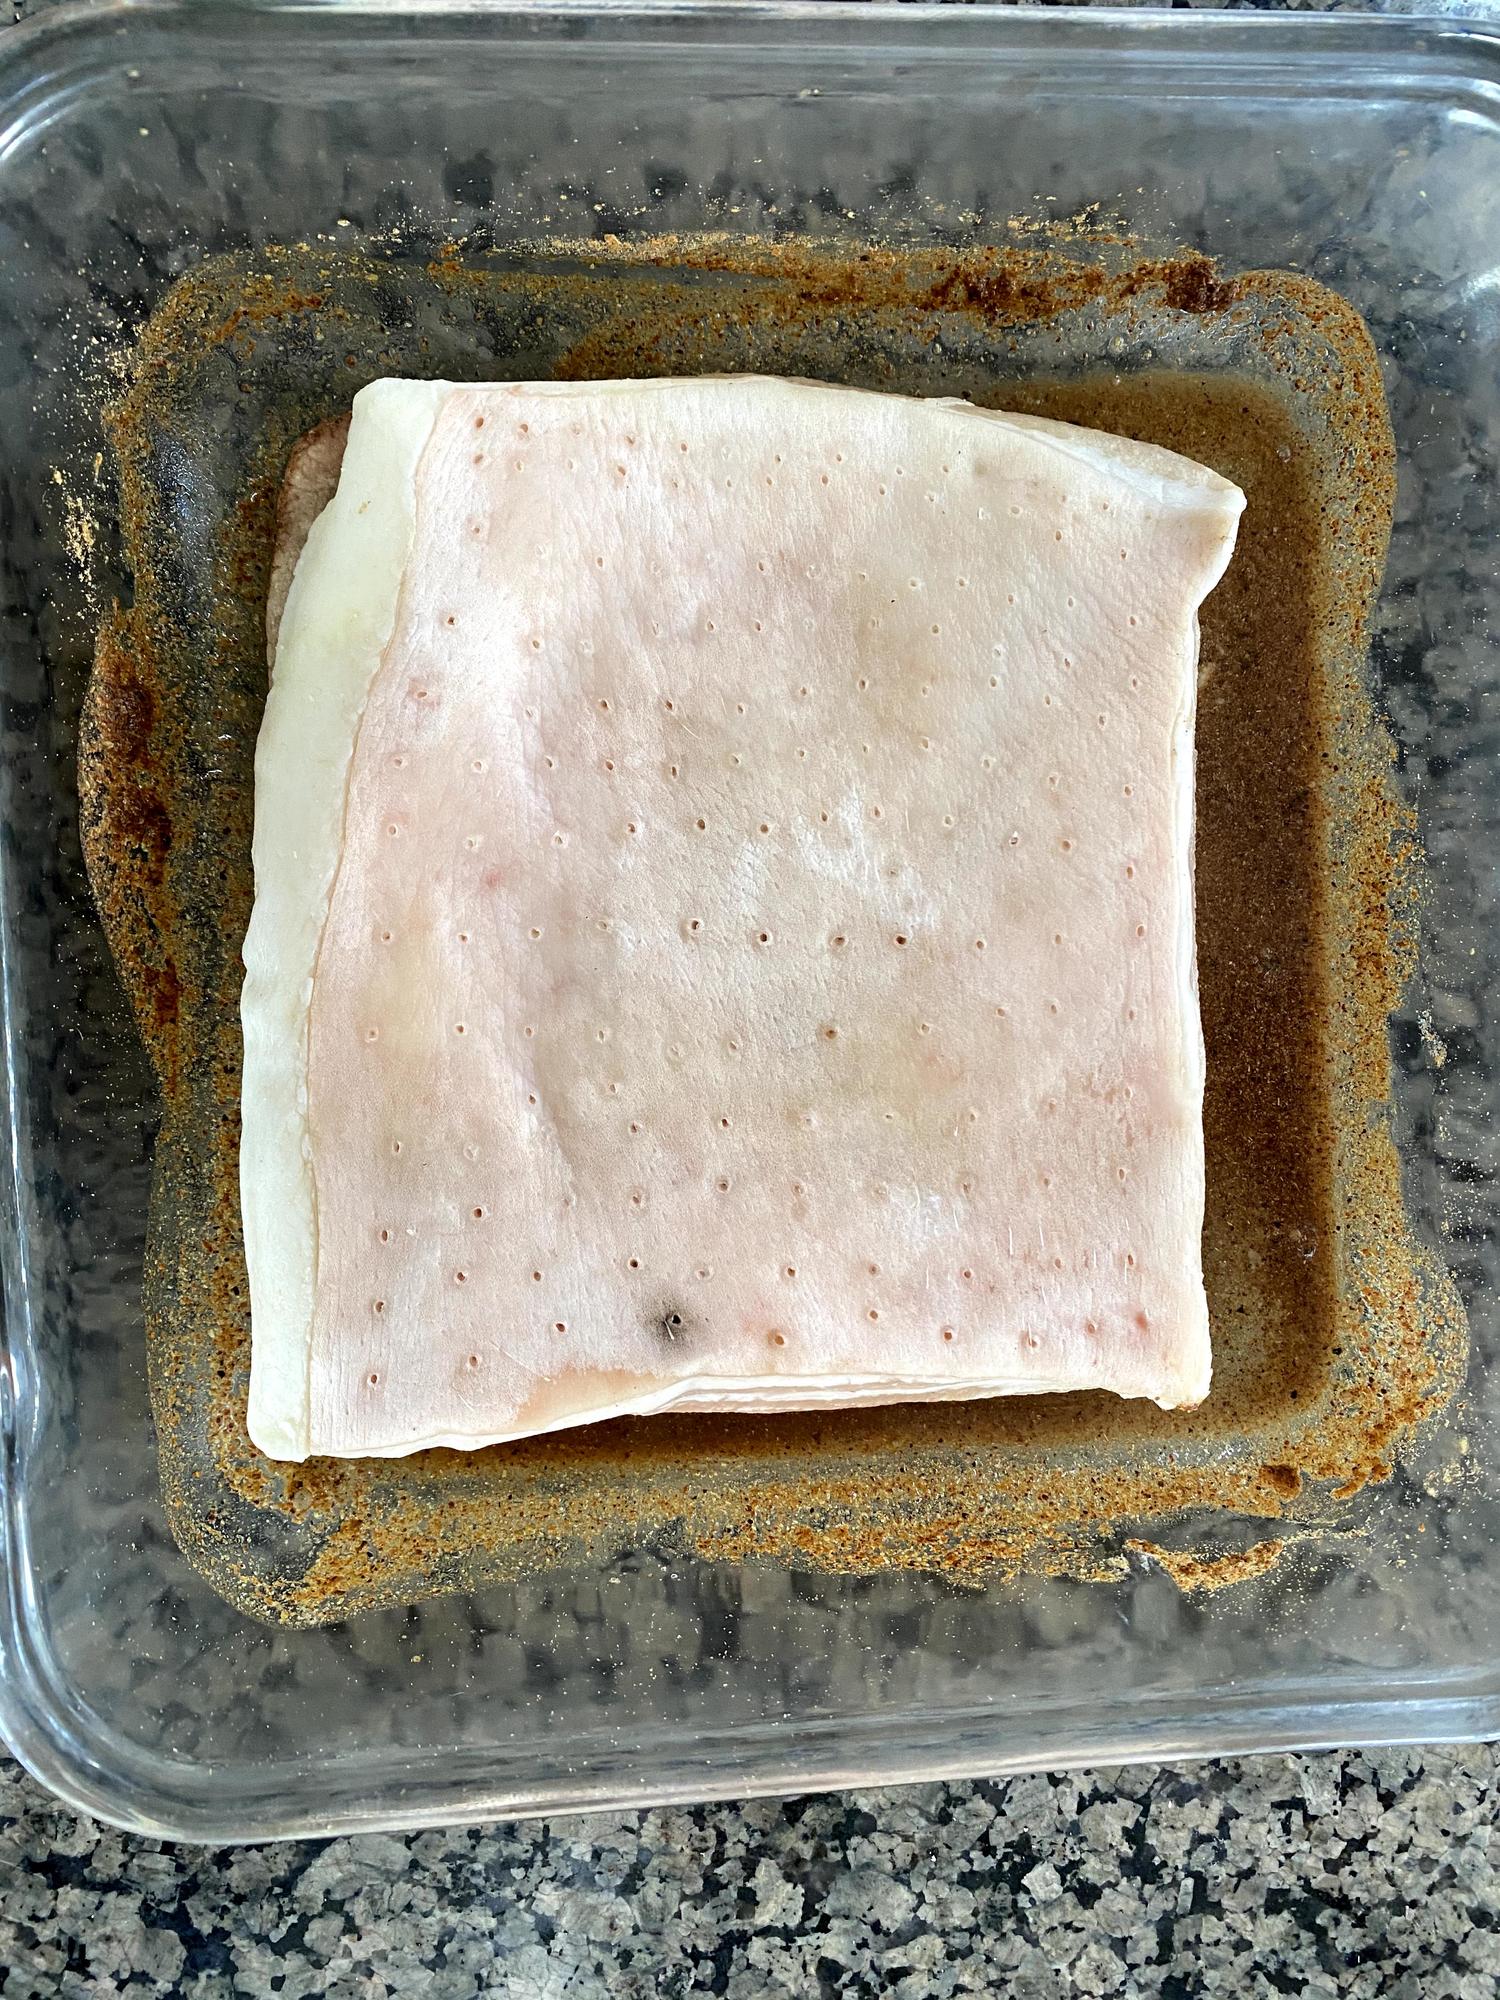
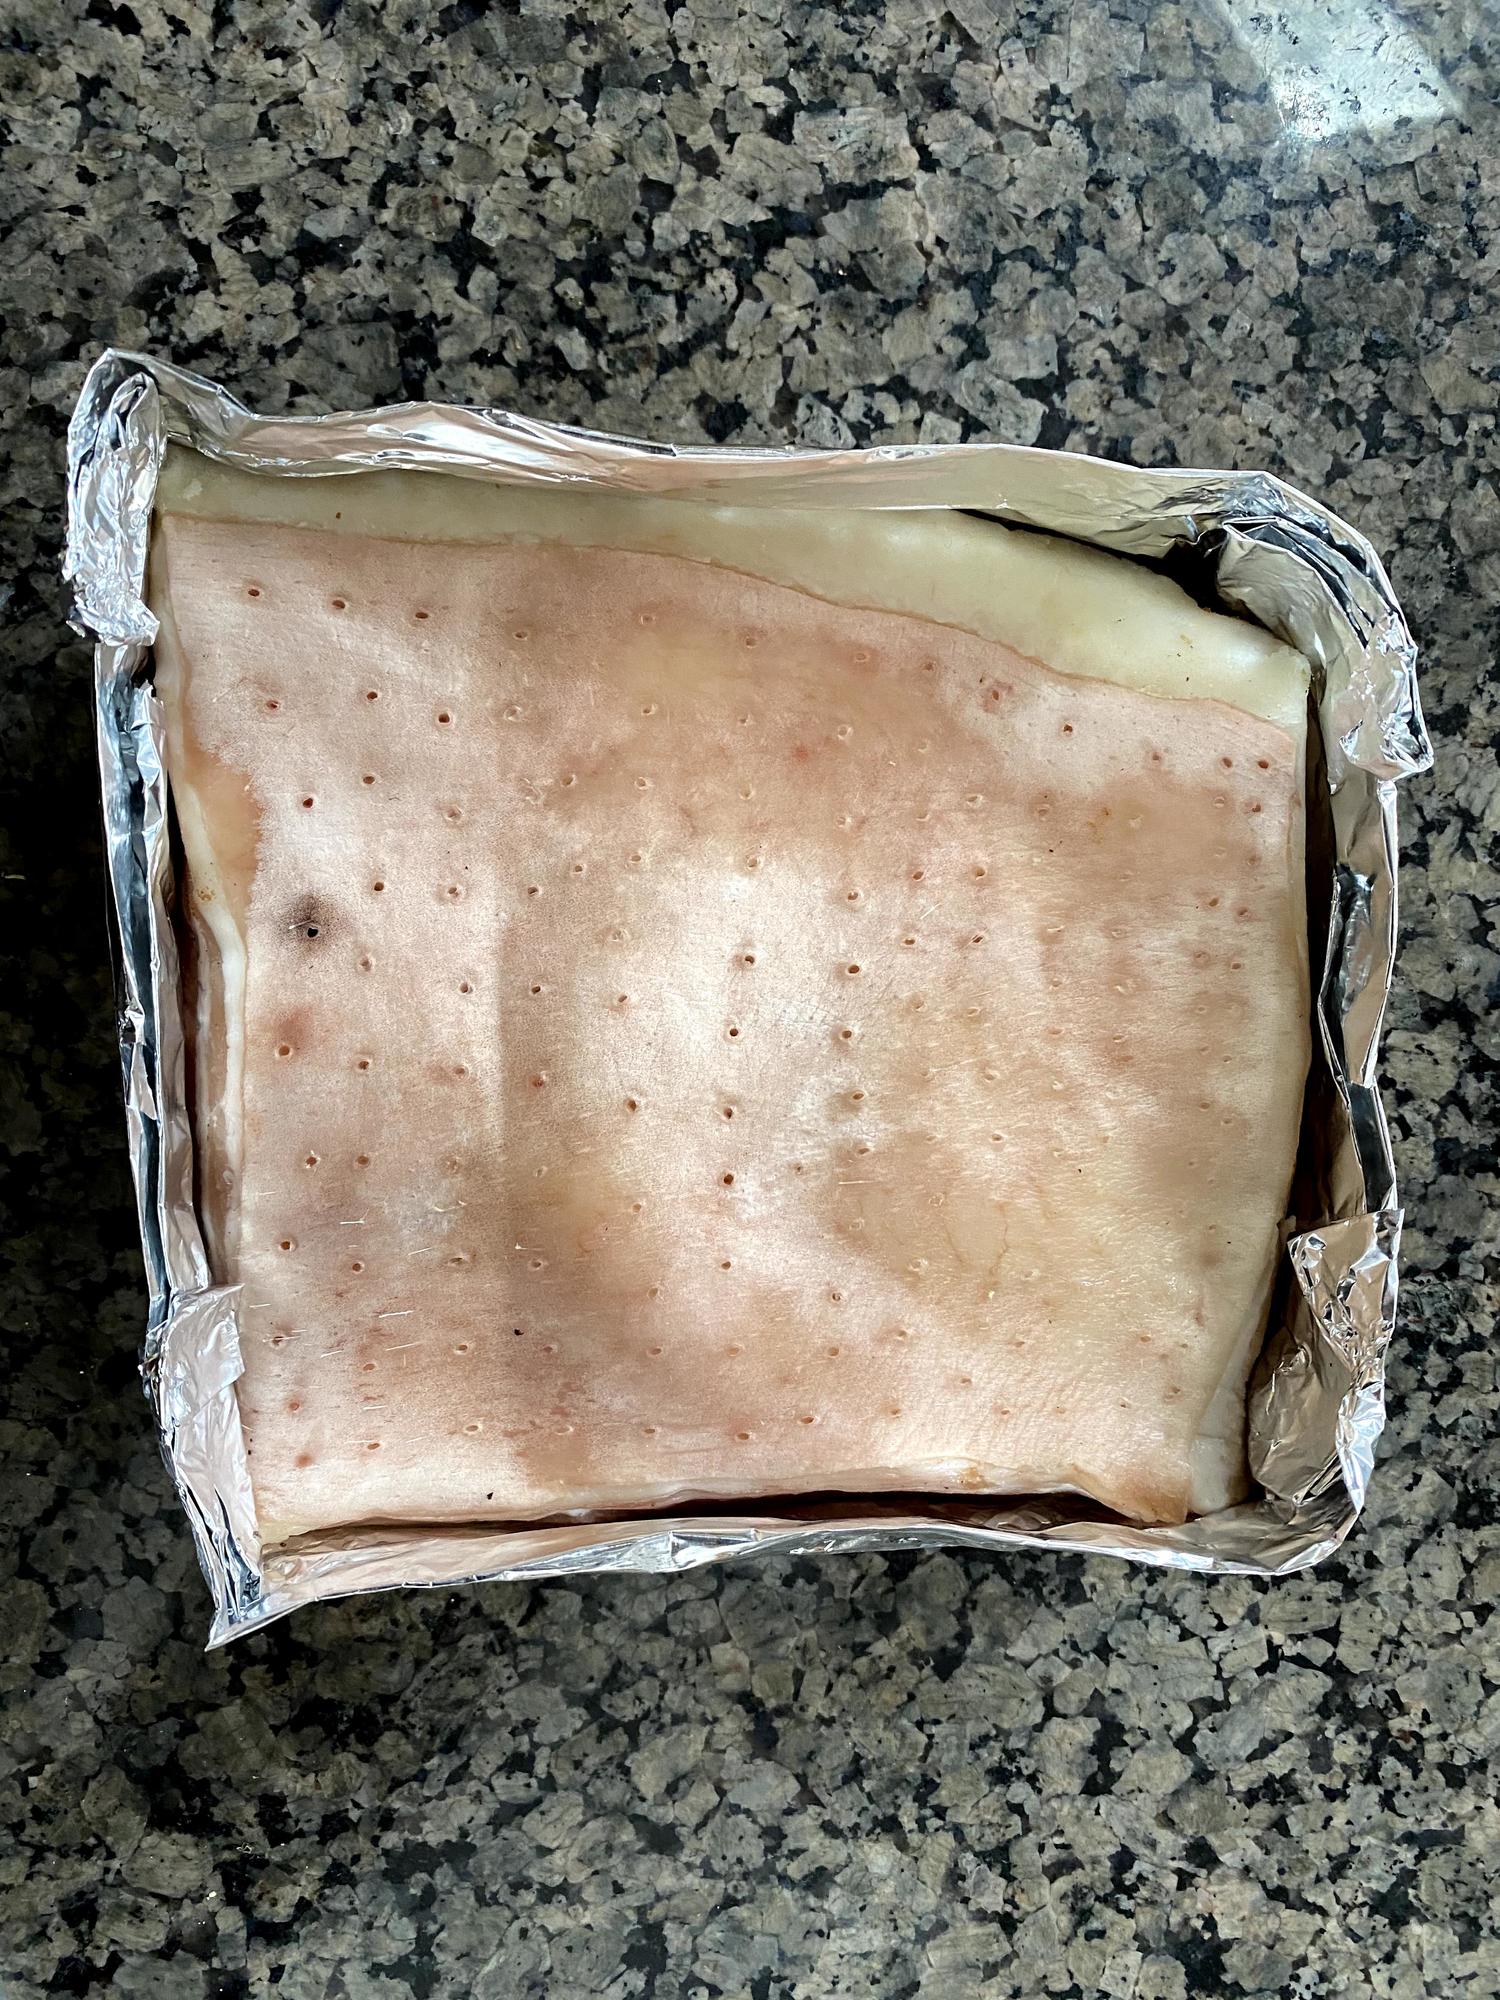
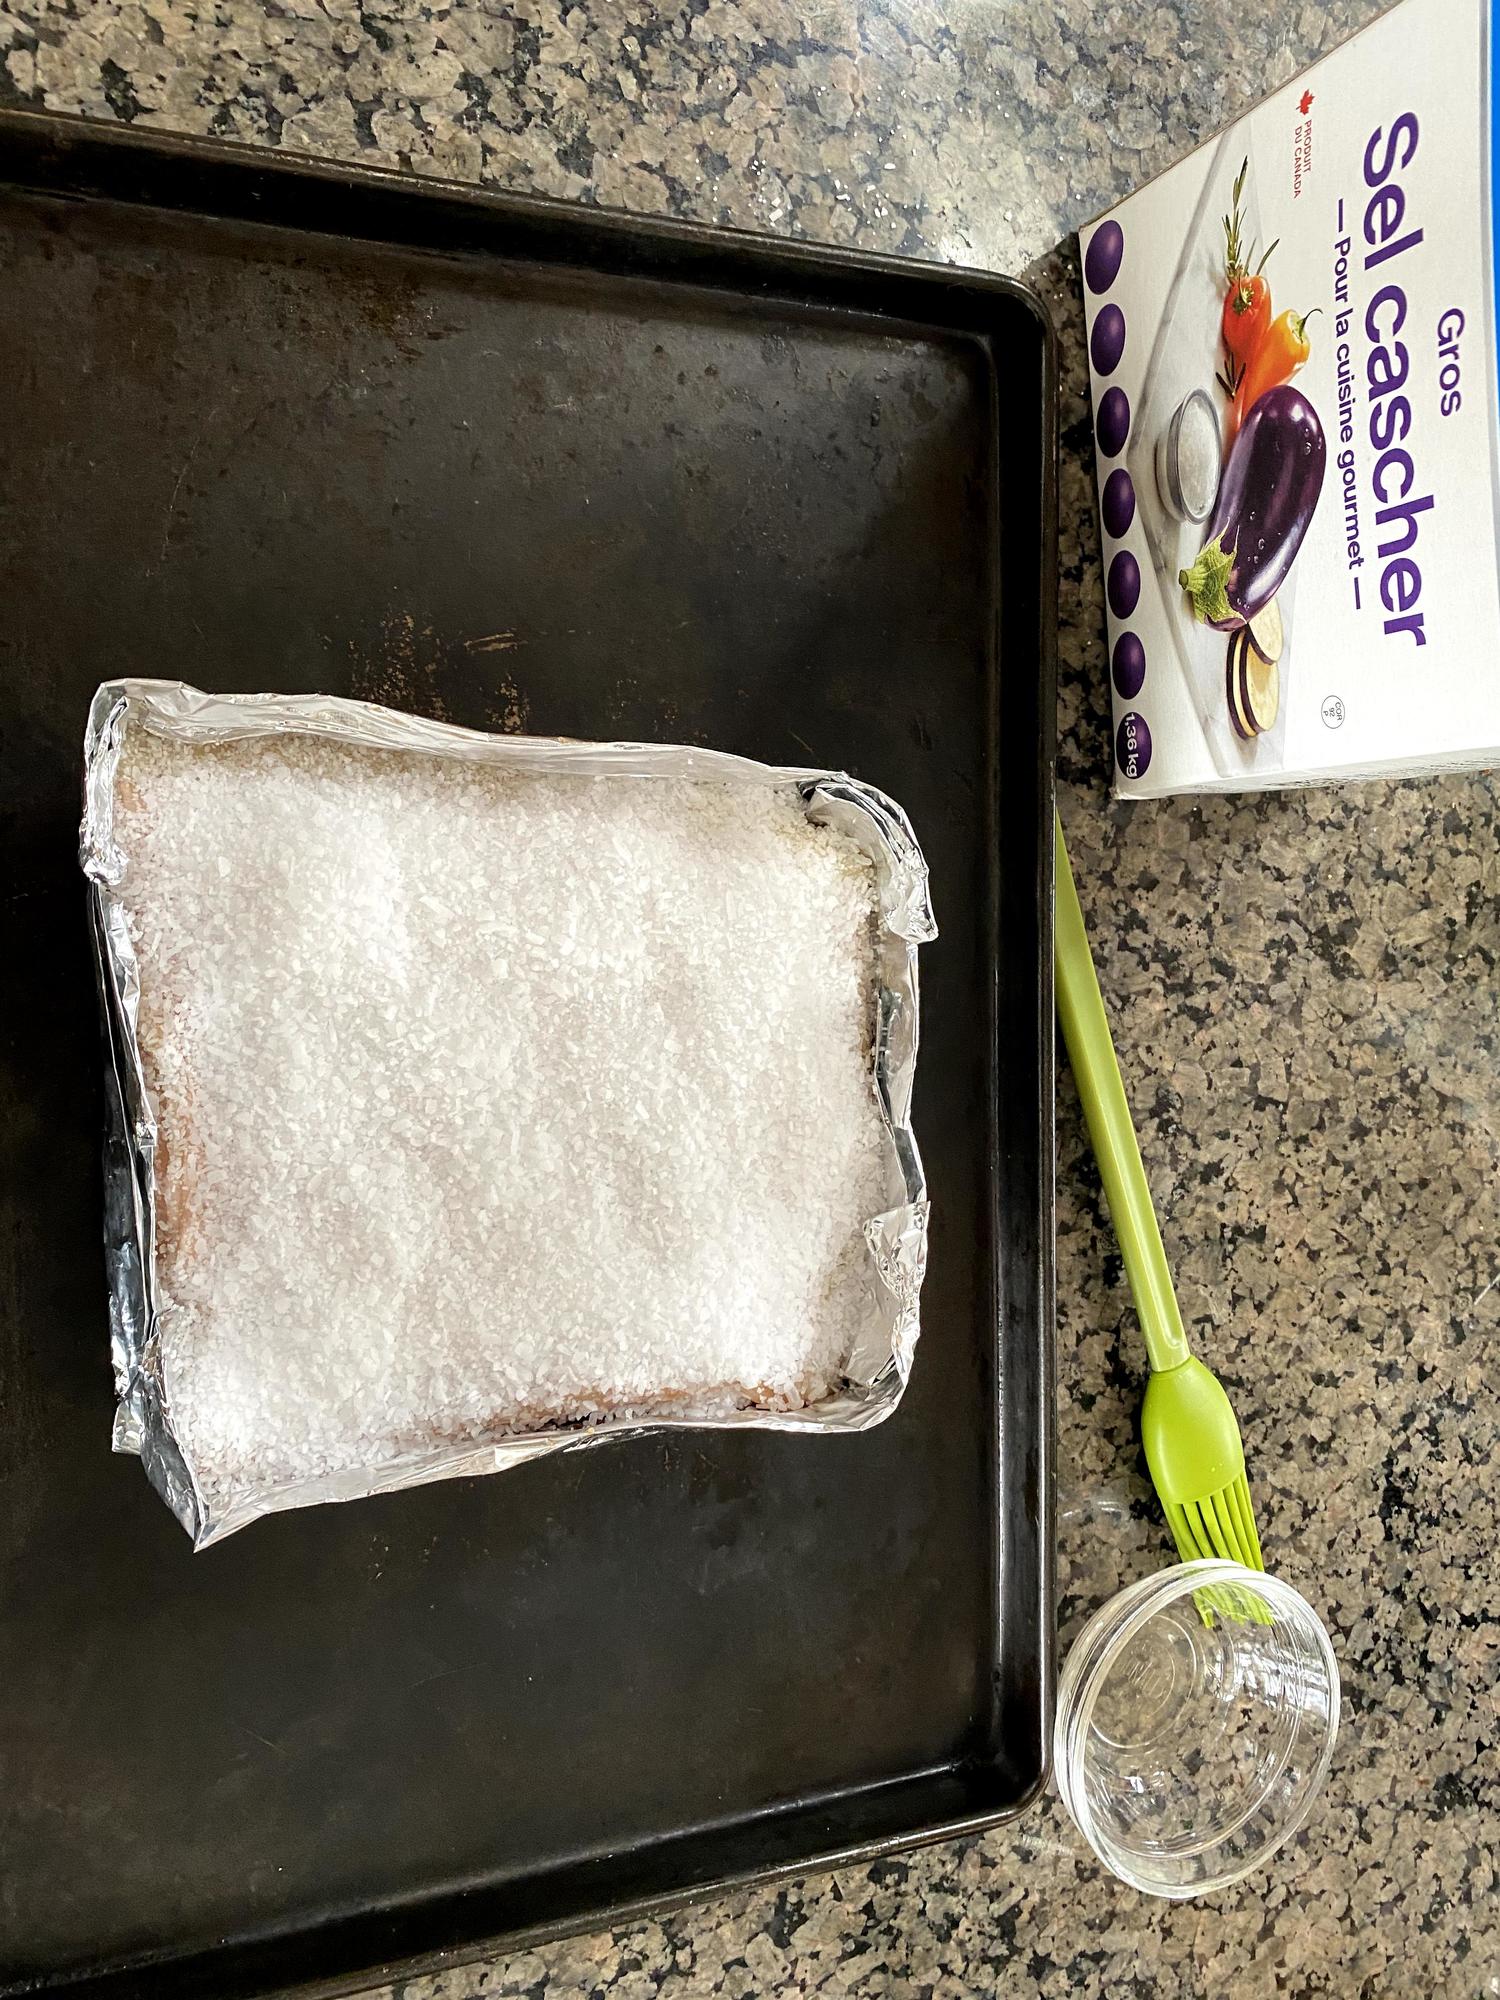
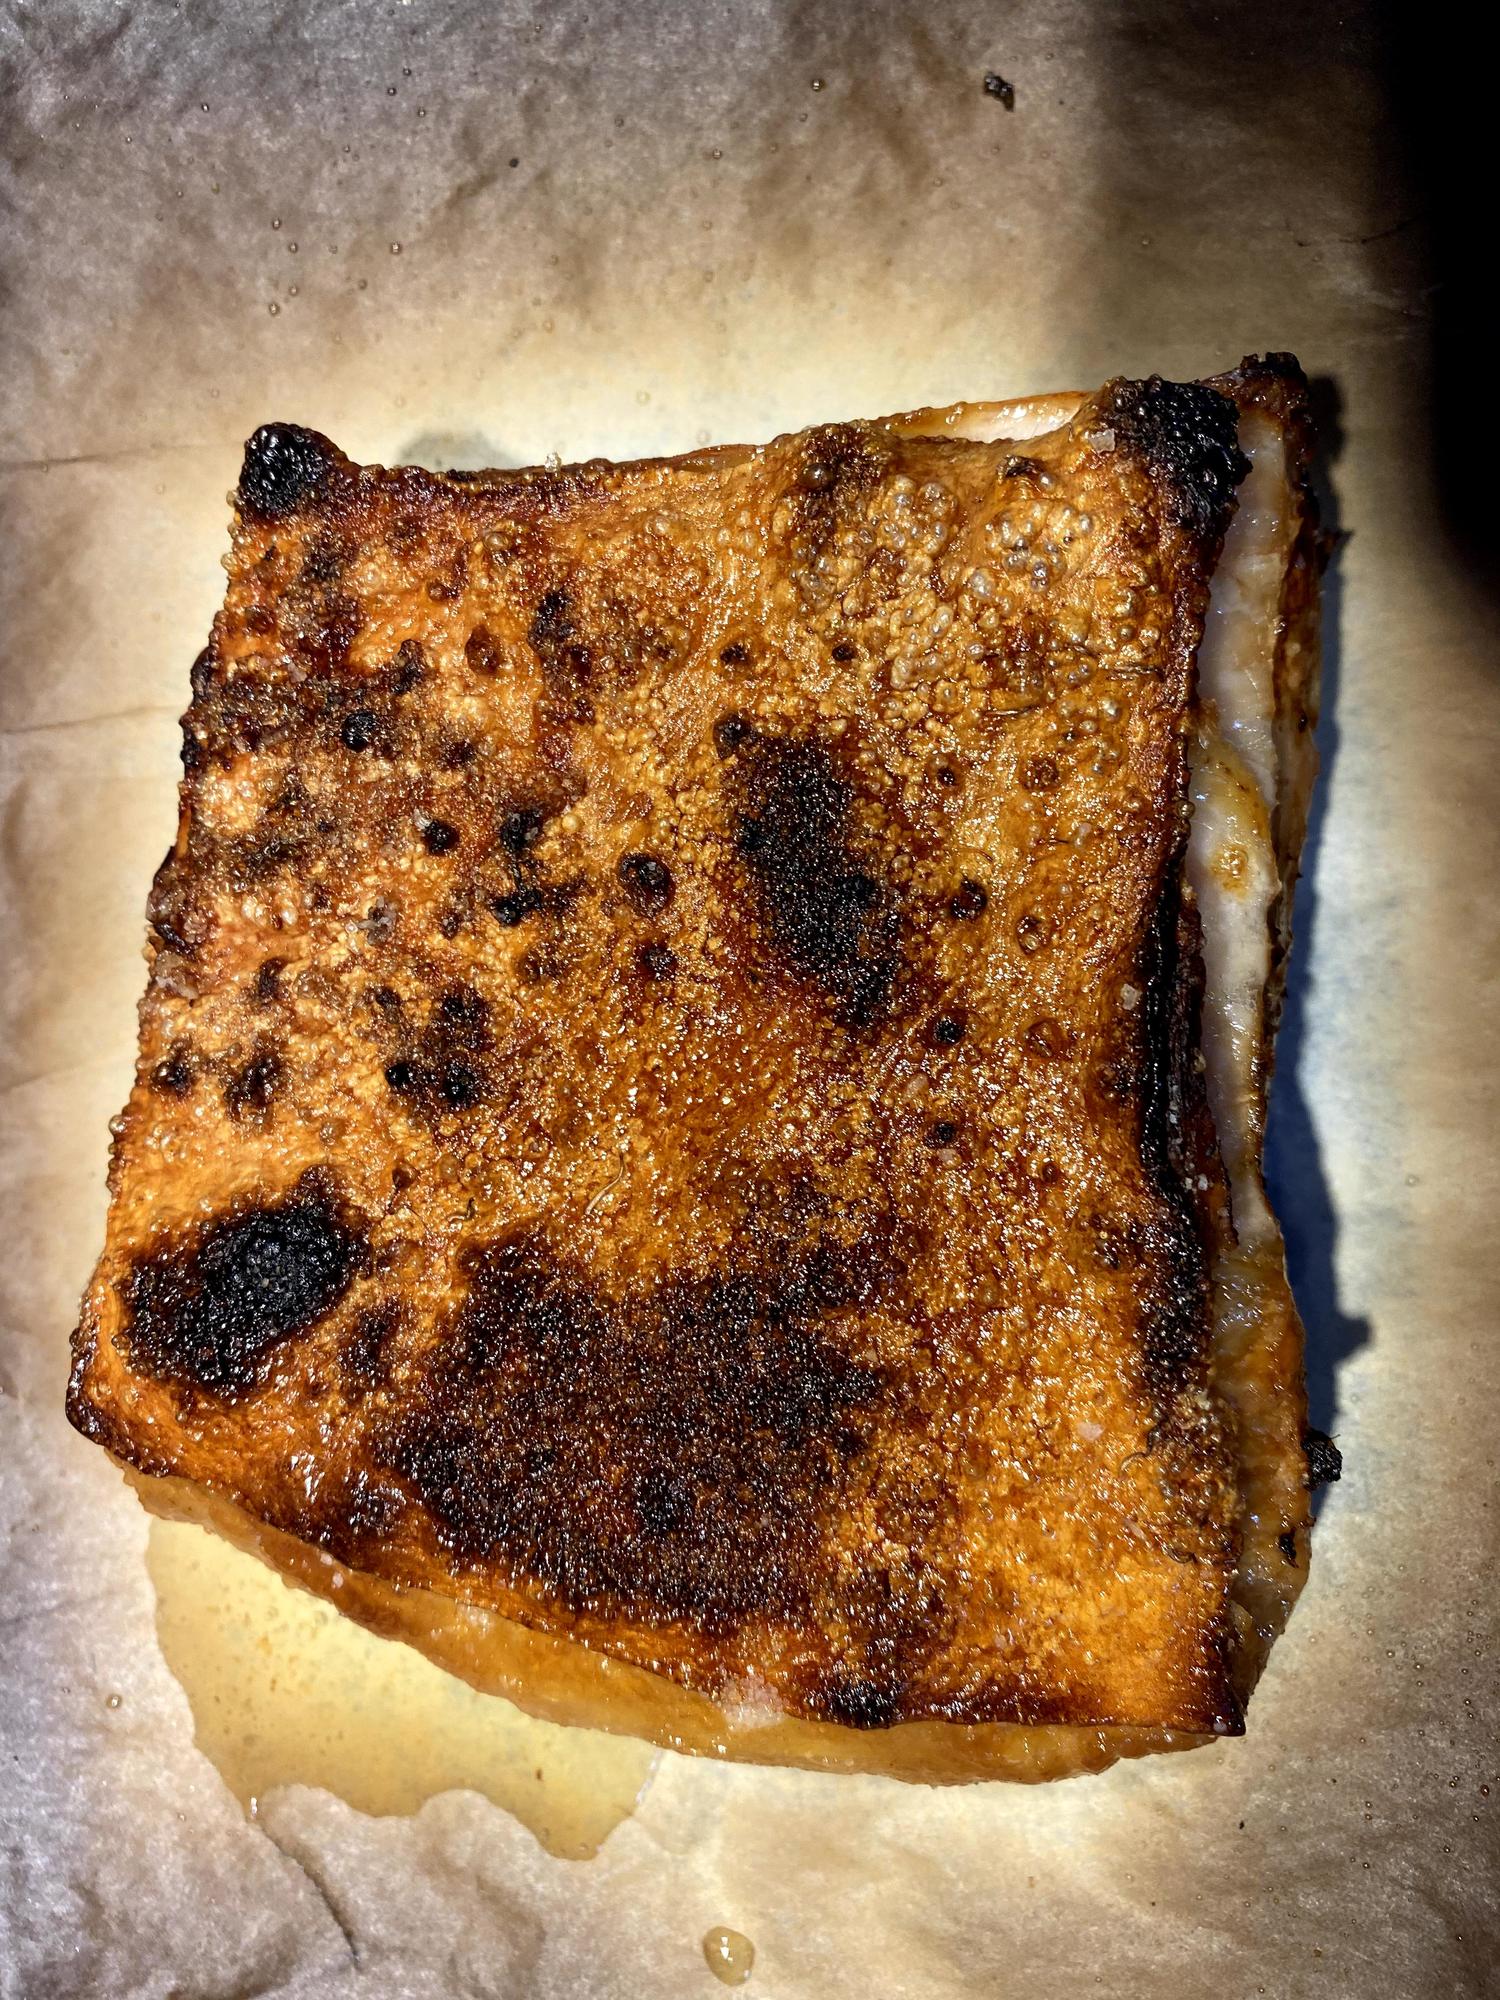
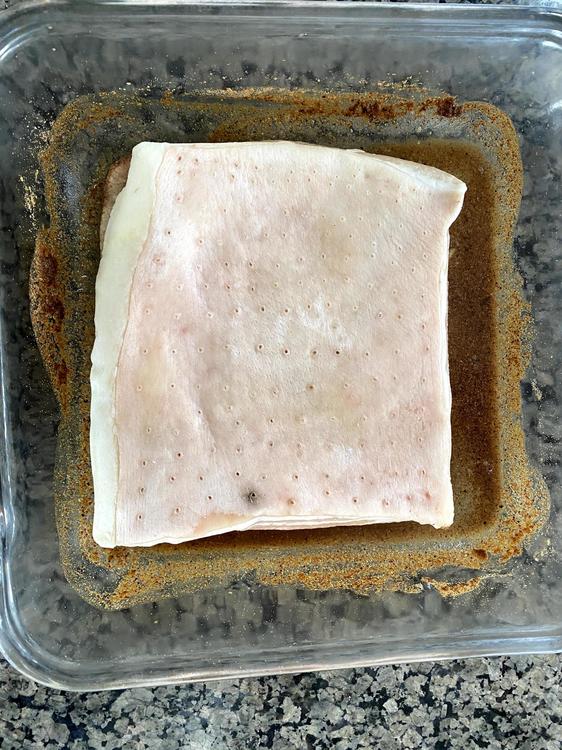
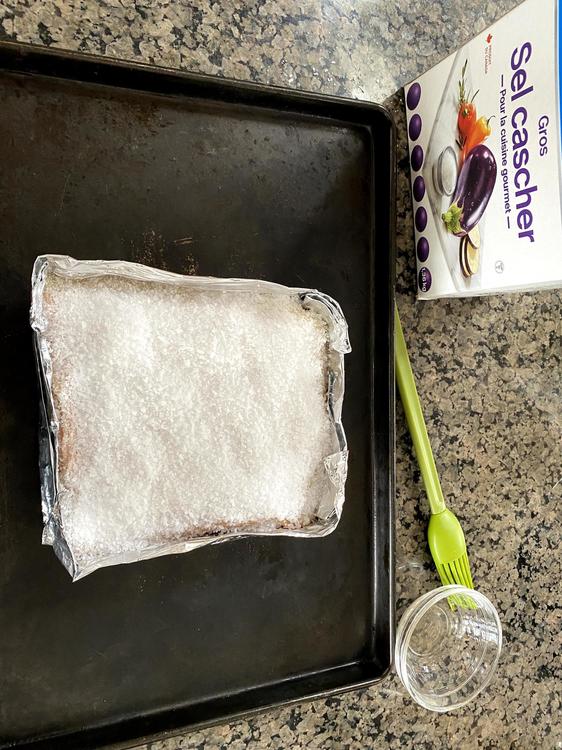
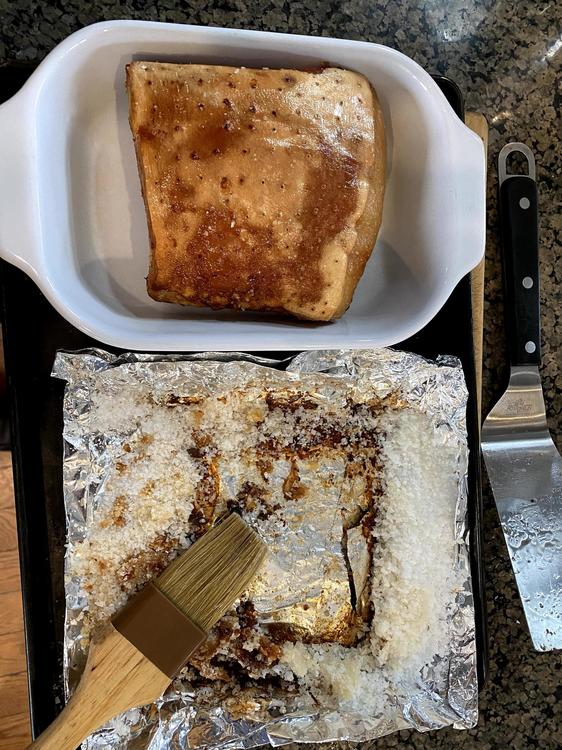
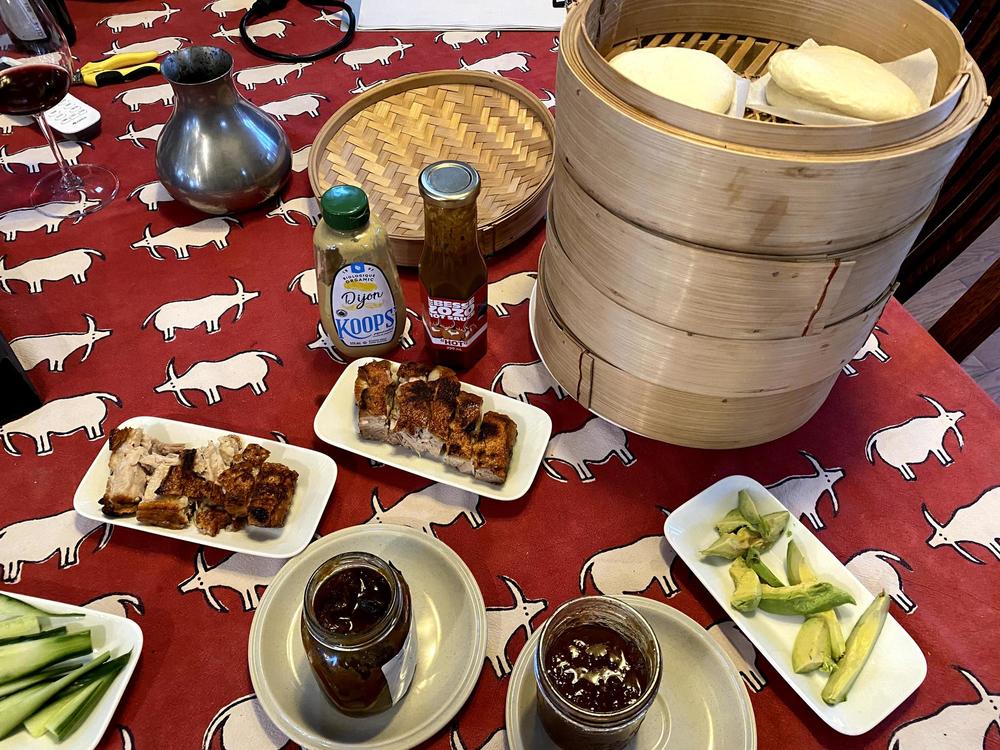
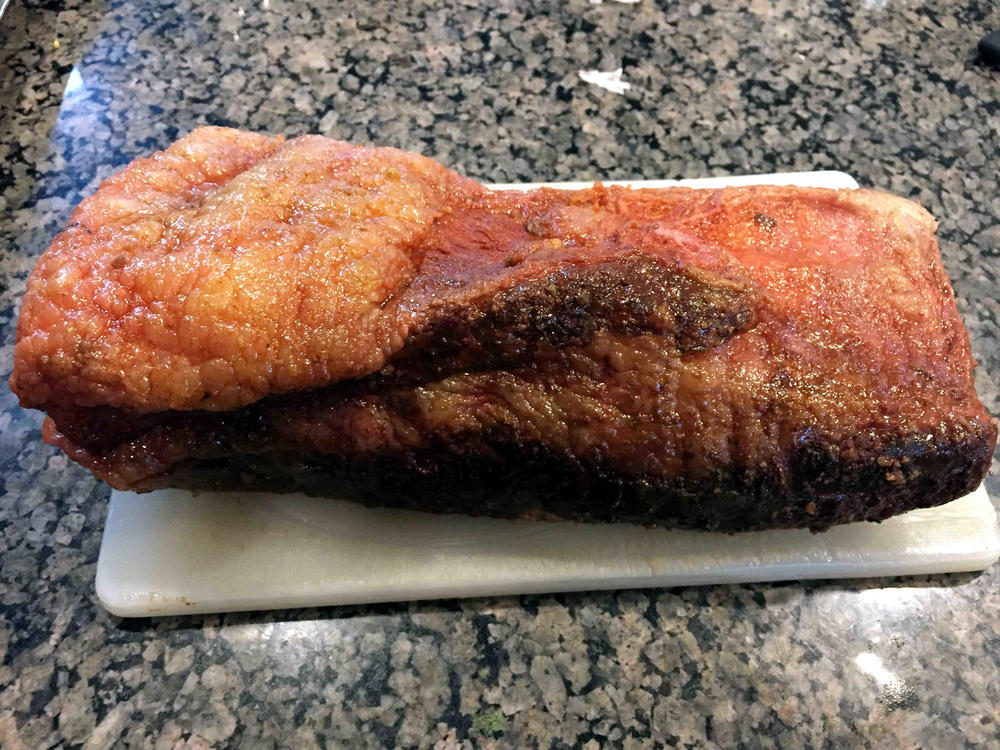
My wife and I were doing the annual freezer inventory when she came upon a too-familiar piece of pork belly. This time she tossed it at me, "Do something with this, will you?" (Her recollection of the interaction differs.) So I looked up this thread as well as looking for other ideas on the net. I decided to basically follow this recipe for crispy Chinese pork belly. The basic steps are as follows: Prick many holes in the skin without piercing the meat. This is not as easy as it sounds. Pork skin is tough! I ended up using my electric drill, which worked well. Cover the meaty side with sherry, salt and 5-spice powder. Leave to marinate, skin side up for up to 24 hr. I also brushed the skin with vodka, which seems to be a common practice. My pork belly sat in the fridge for 2 days because of scheduling problems, but the extra time doesn't seem to have done it any harm. Wrap in foil, leaving the top open with the sides built up above the level of the skin. Brush the skin with vinegar and cover in rock salt. I used coarse kosher salt. Bake one hour at 350. This thread suggested that it needed longer cooking at a lower temp or it would be tough. I opted for 3 hr. at 275, following @Margaret Pilgrim's suggestion above. Brush off salt. Place on a baking sheet and broil (at least 12" from the element) for around 30 min. You have to watch carefully, as with most things under the broiler. I caught mine just in time. Pix: Following stages 3 and 4 After step 5 Step 7 - (1) after brushing off the salt, but before going under the broiler and (2) following broiling Sliced and on the table with steamed buns and some (mostly non traditional) accompaniments. It was difficult to slice through the crispy crackling without smashing the tender meat underneath. The crackling was crisp, though perhaps not as deep as I expected. The meat was very tender. It was heavenly, and I will certainly make it again. Next time we'll invite people over (after the Covid crisis subsides), so that we don't devour it all ourselves. lves.


-
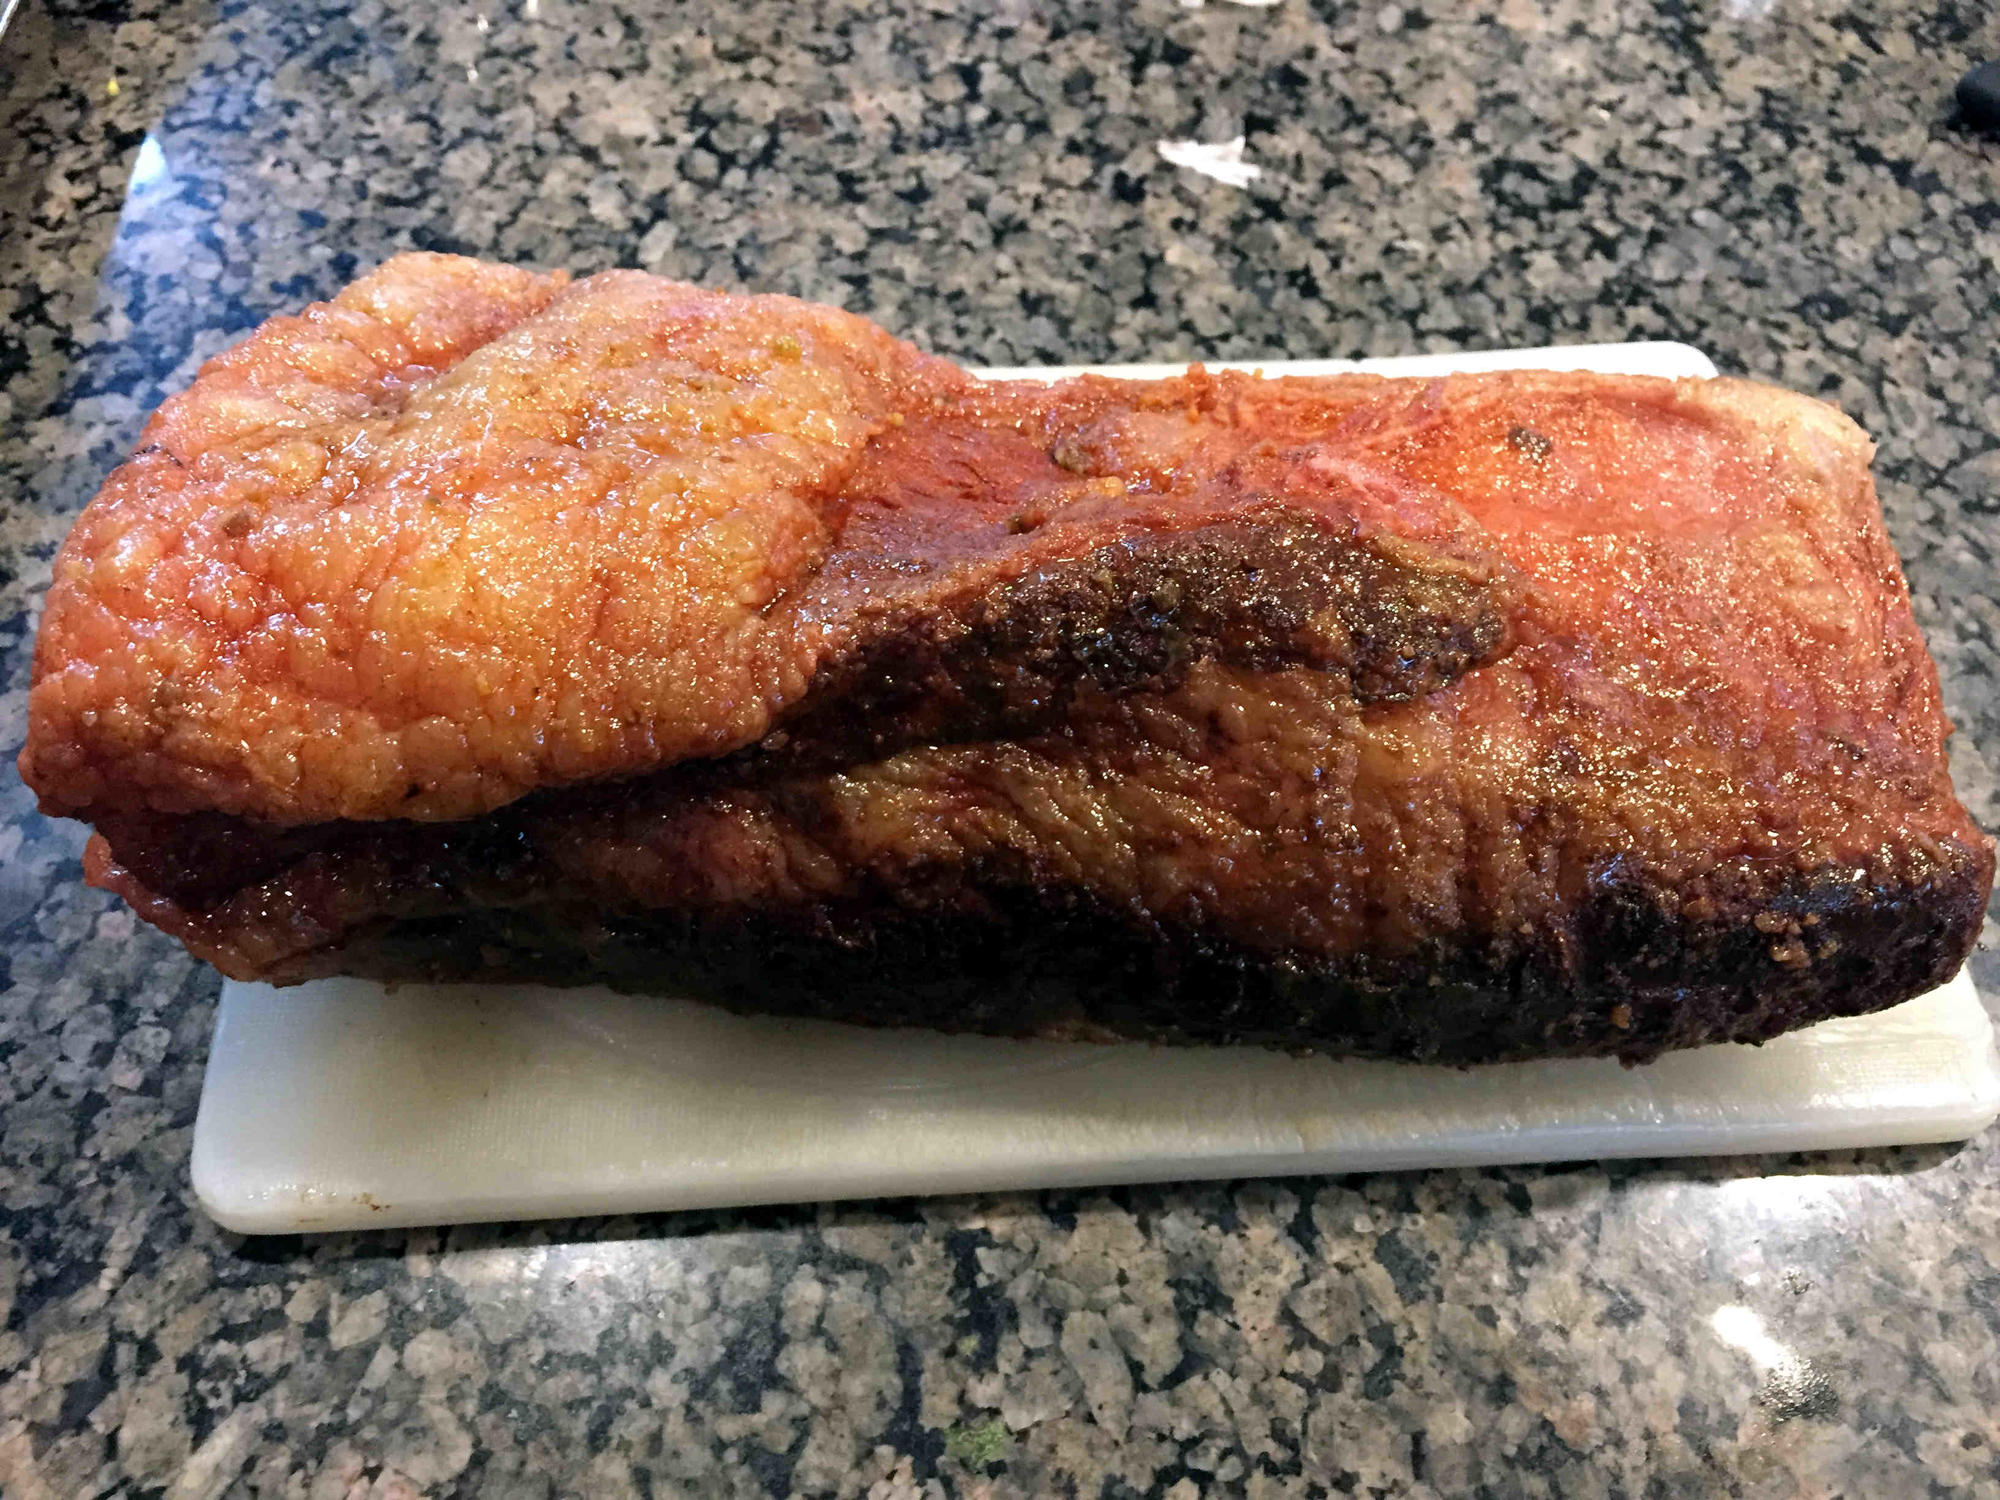
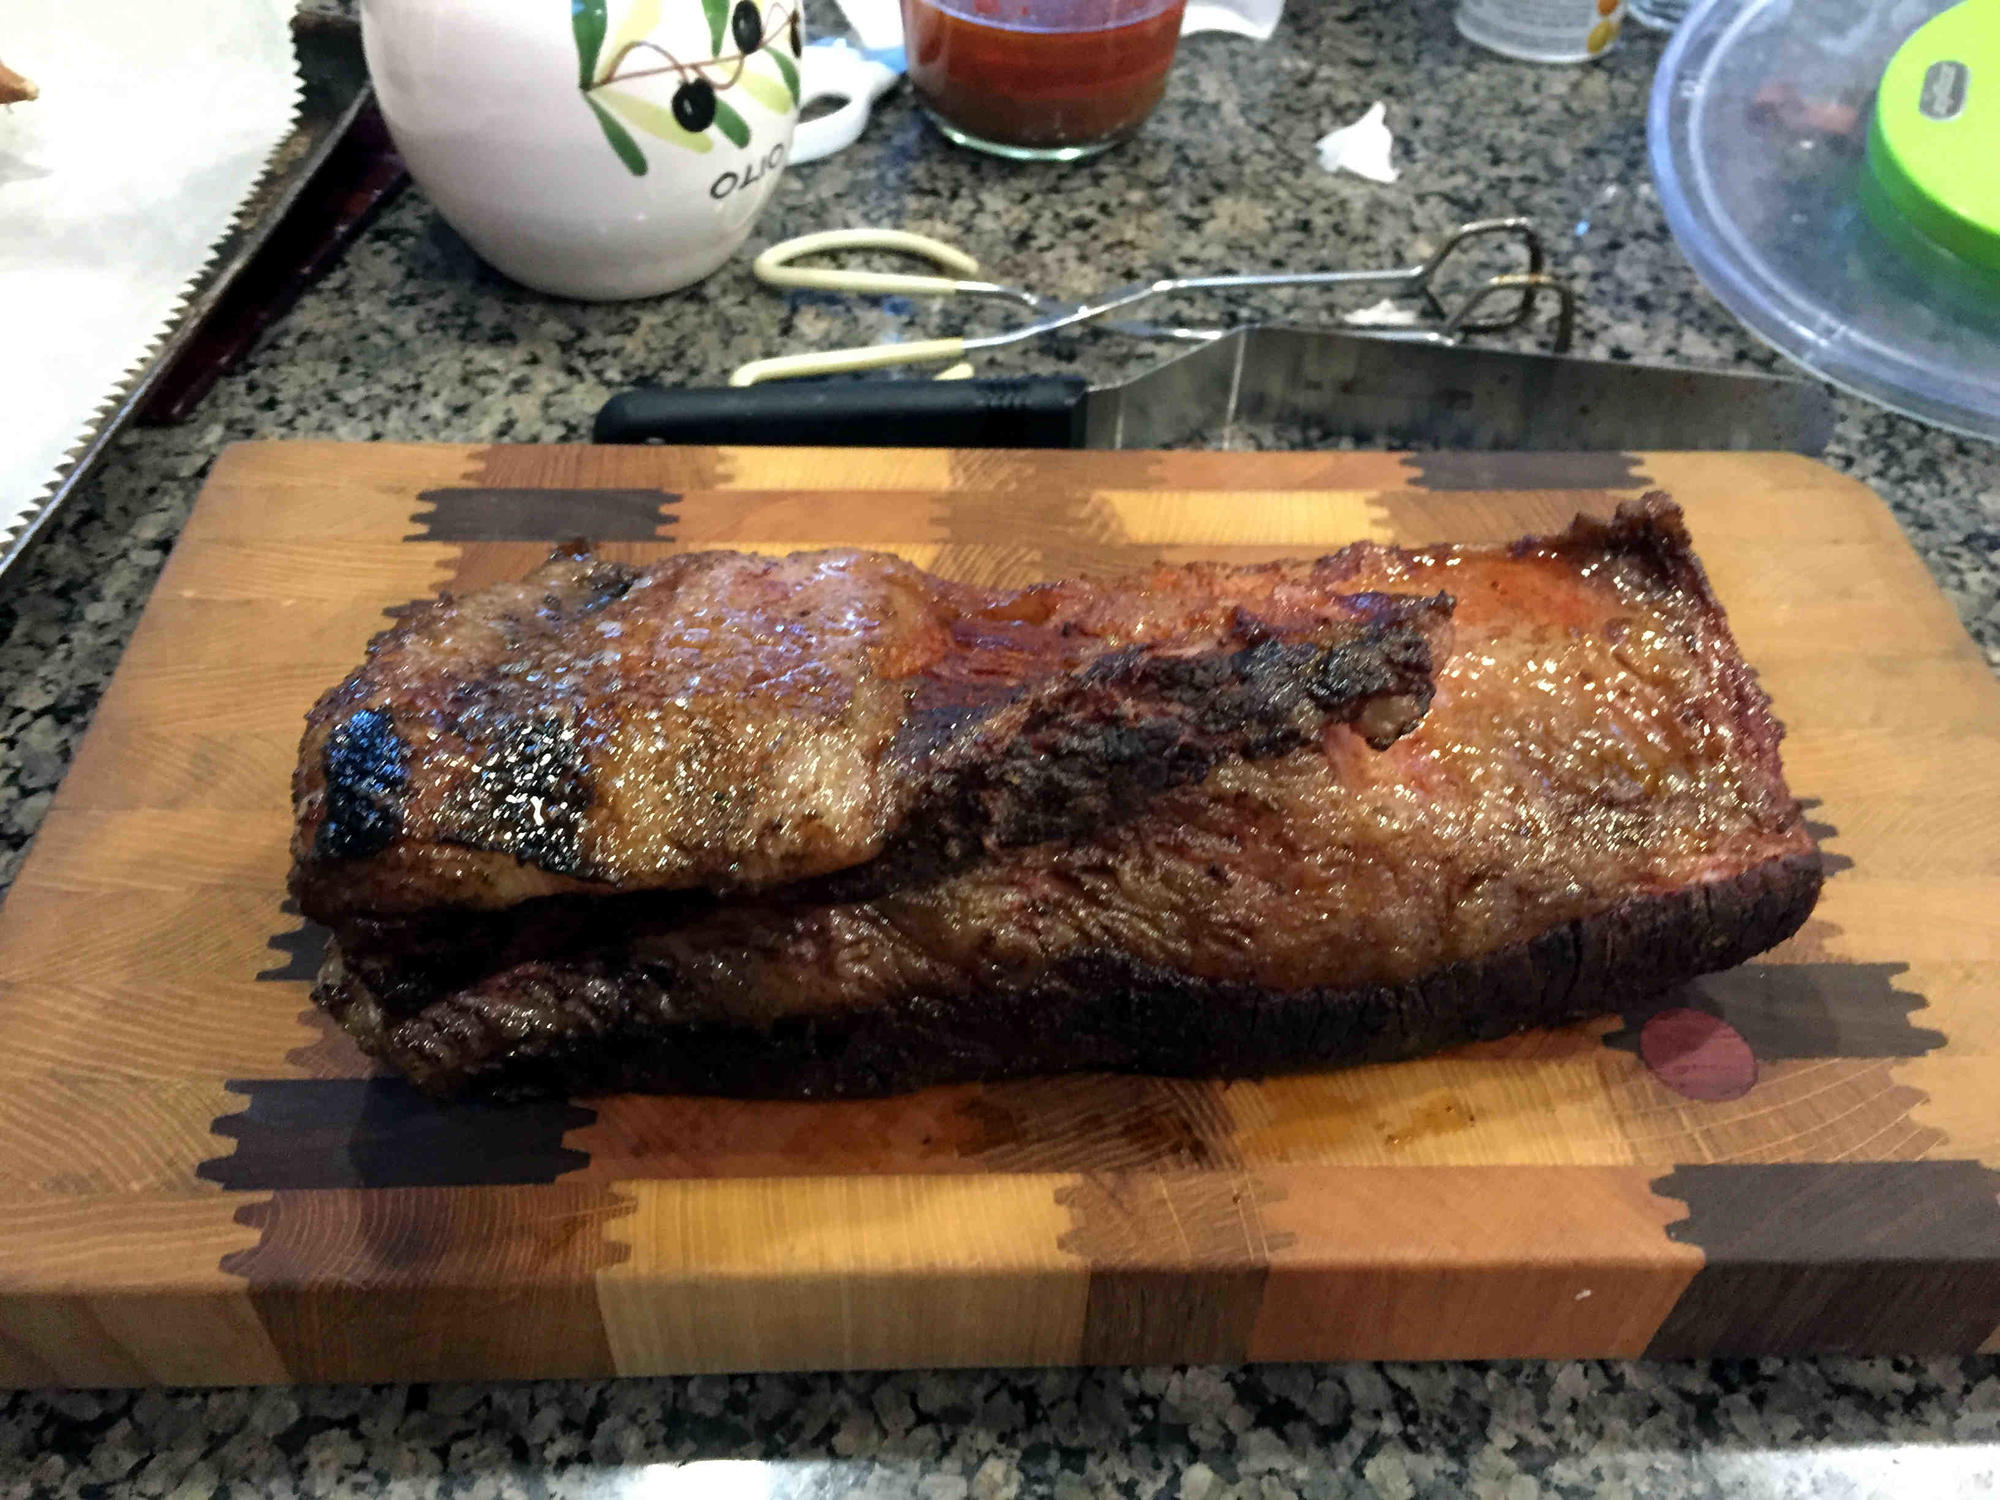
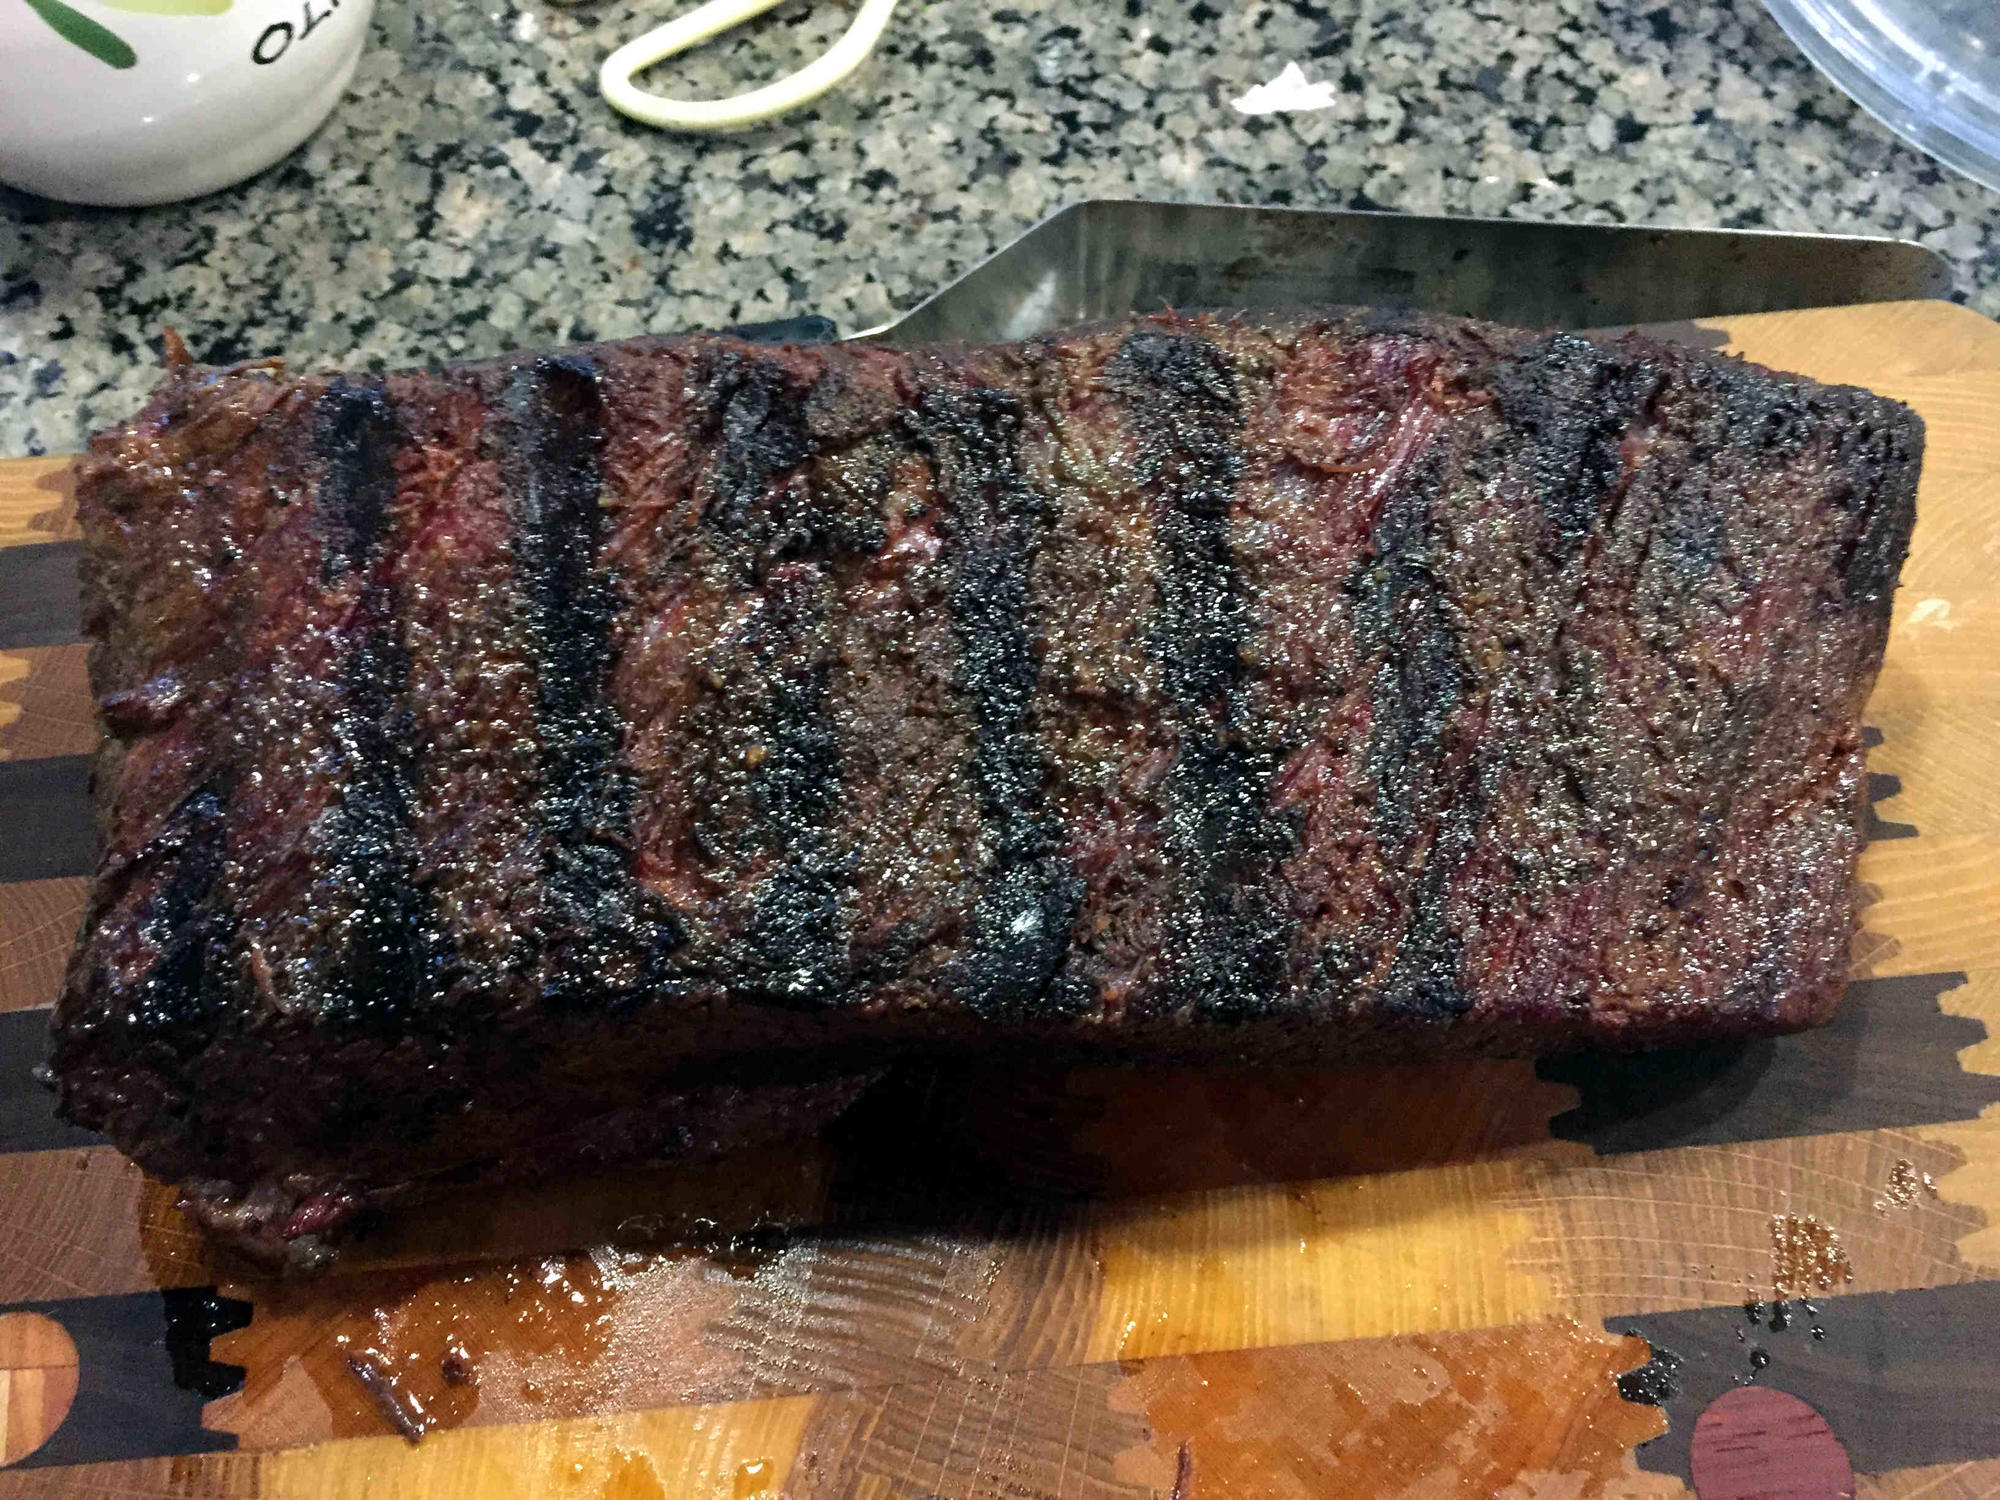
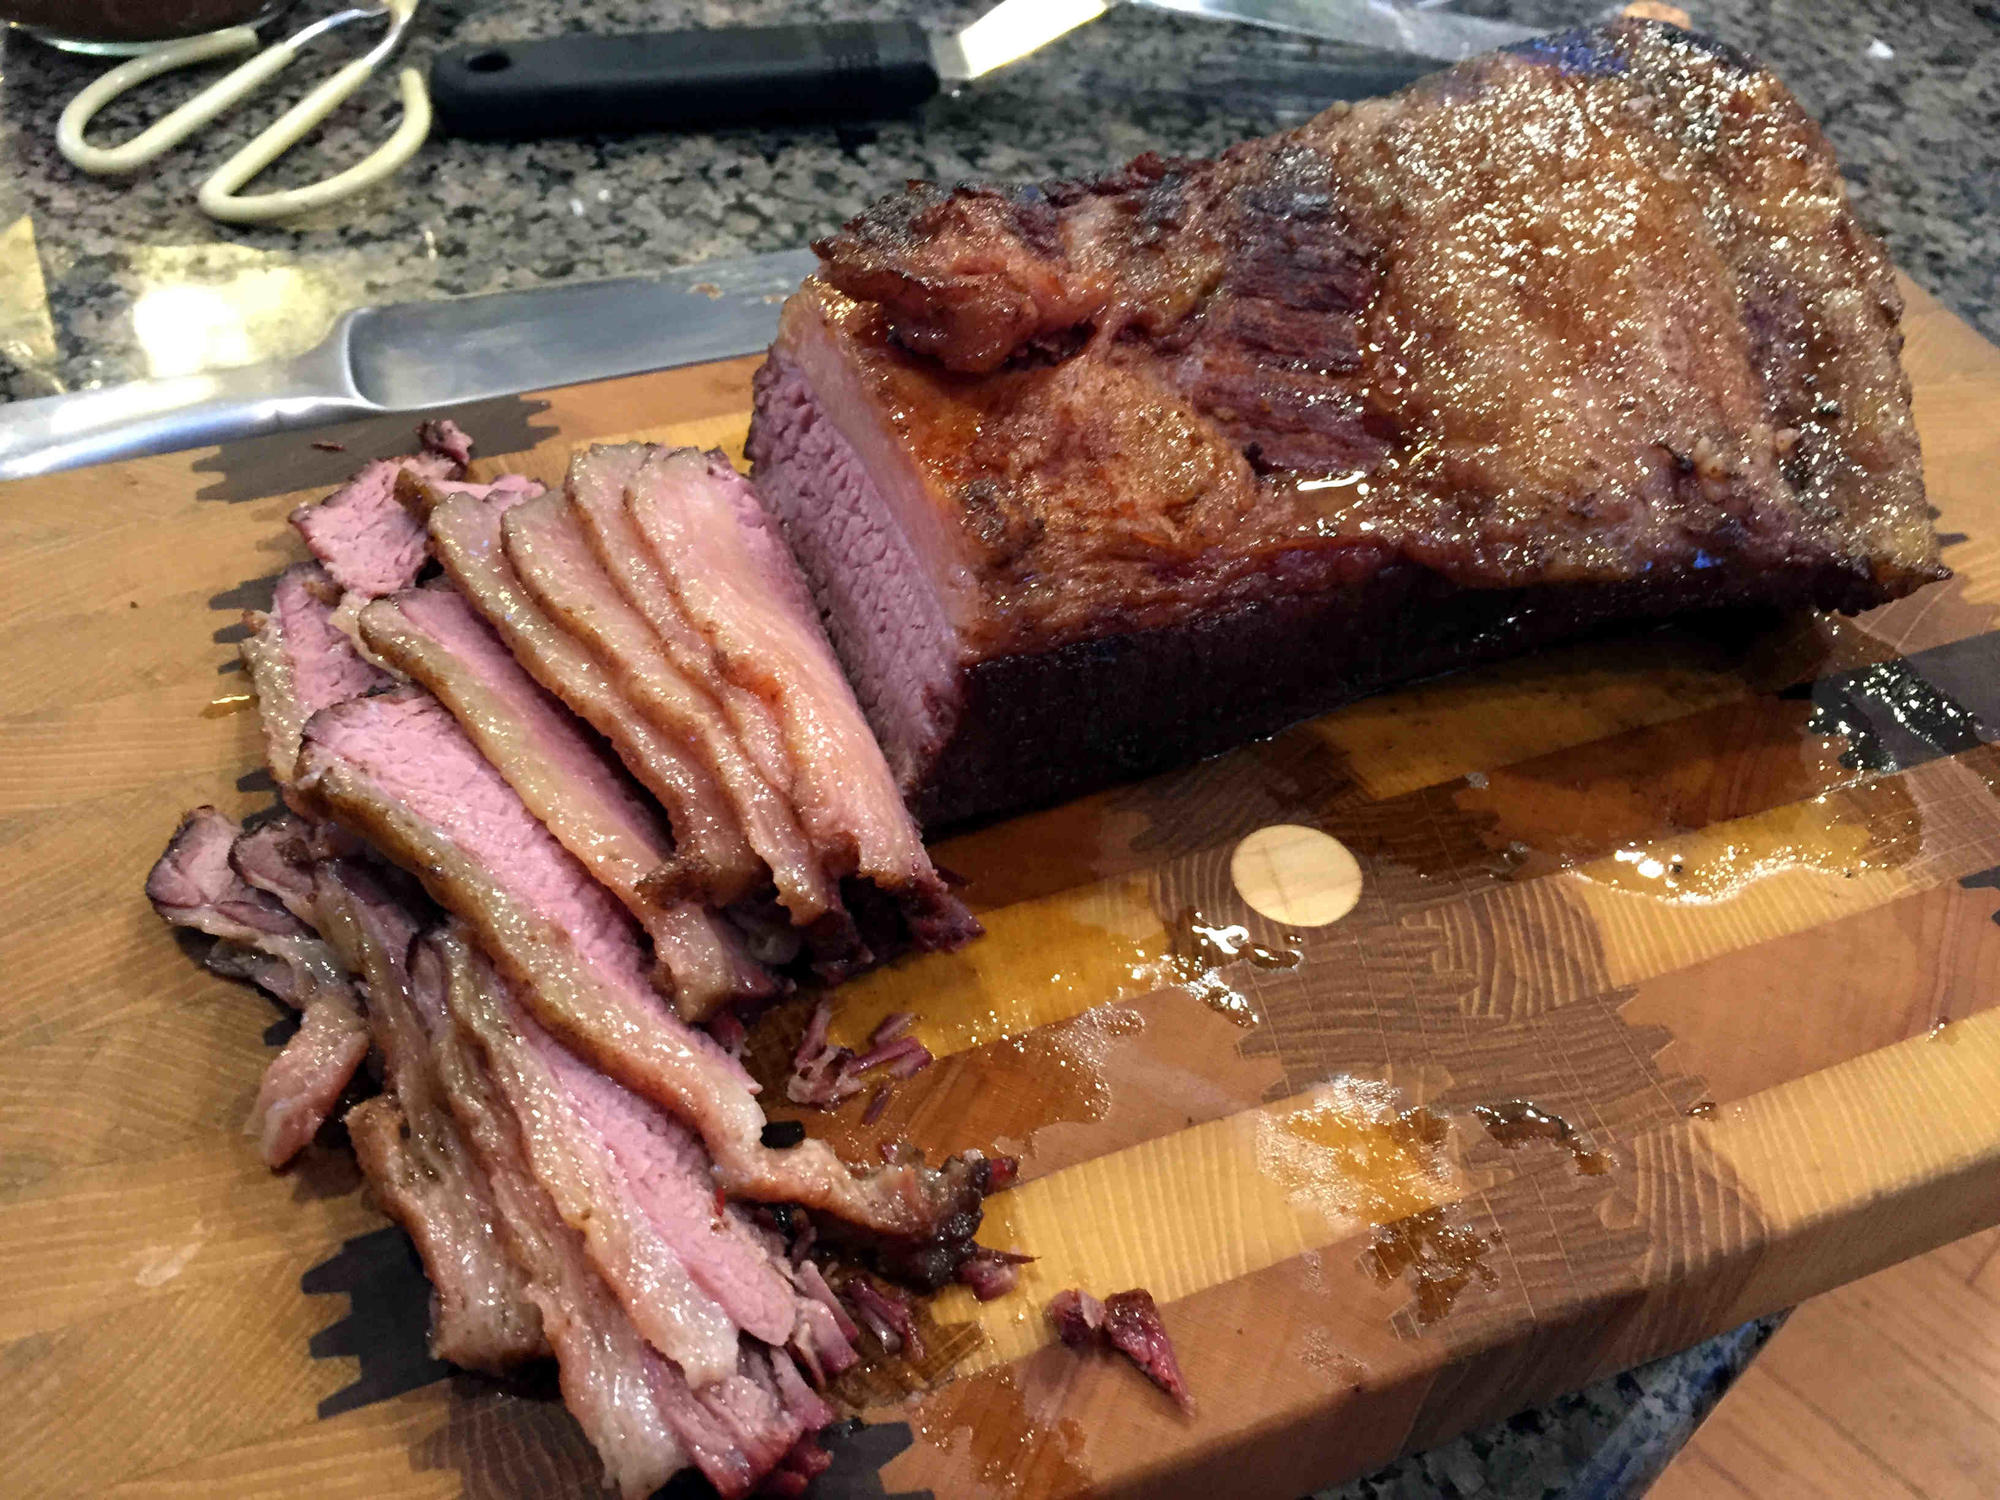
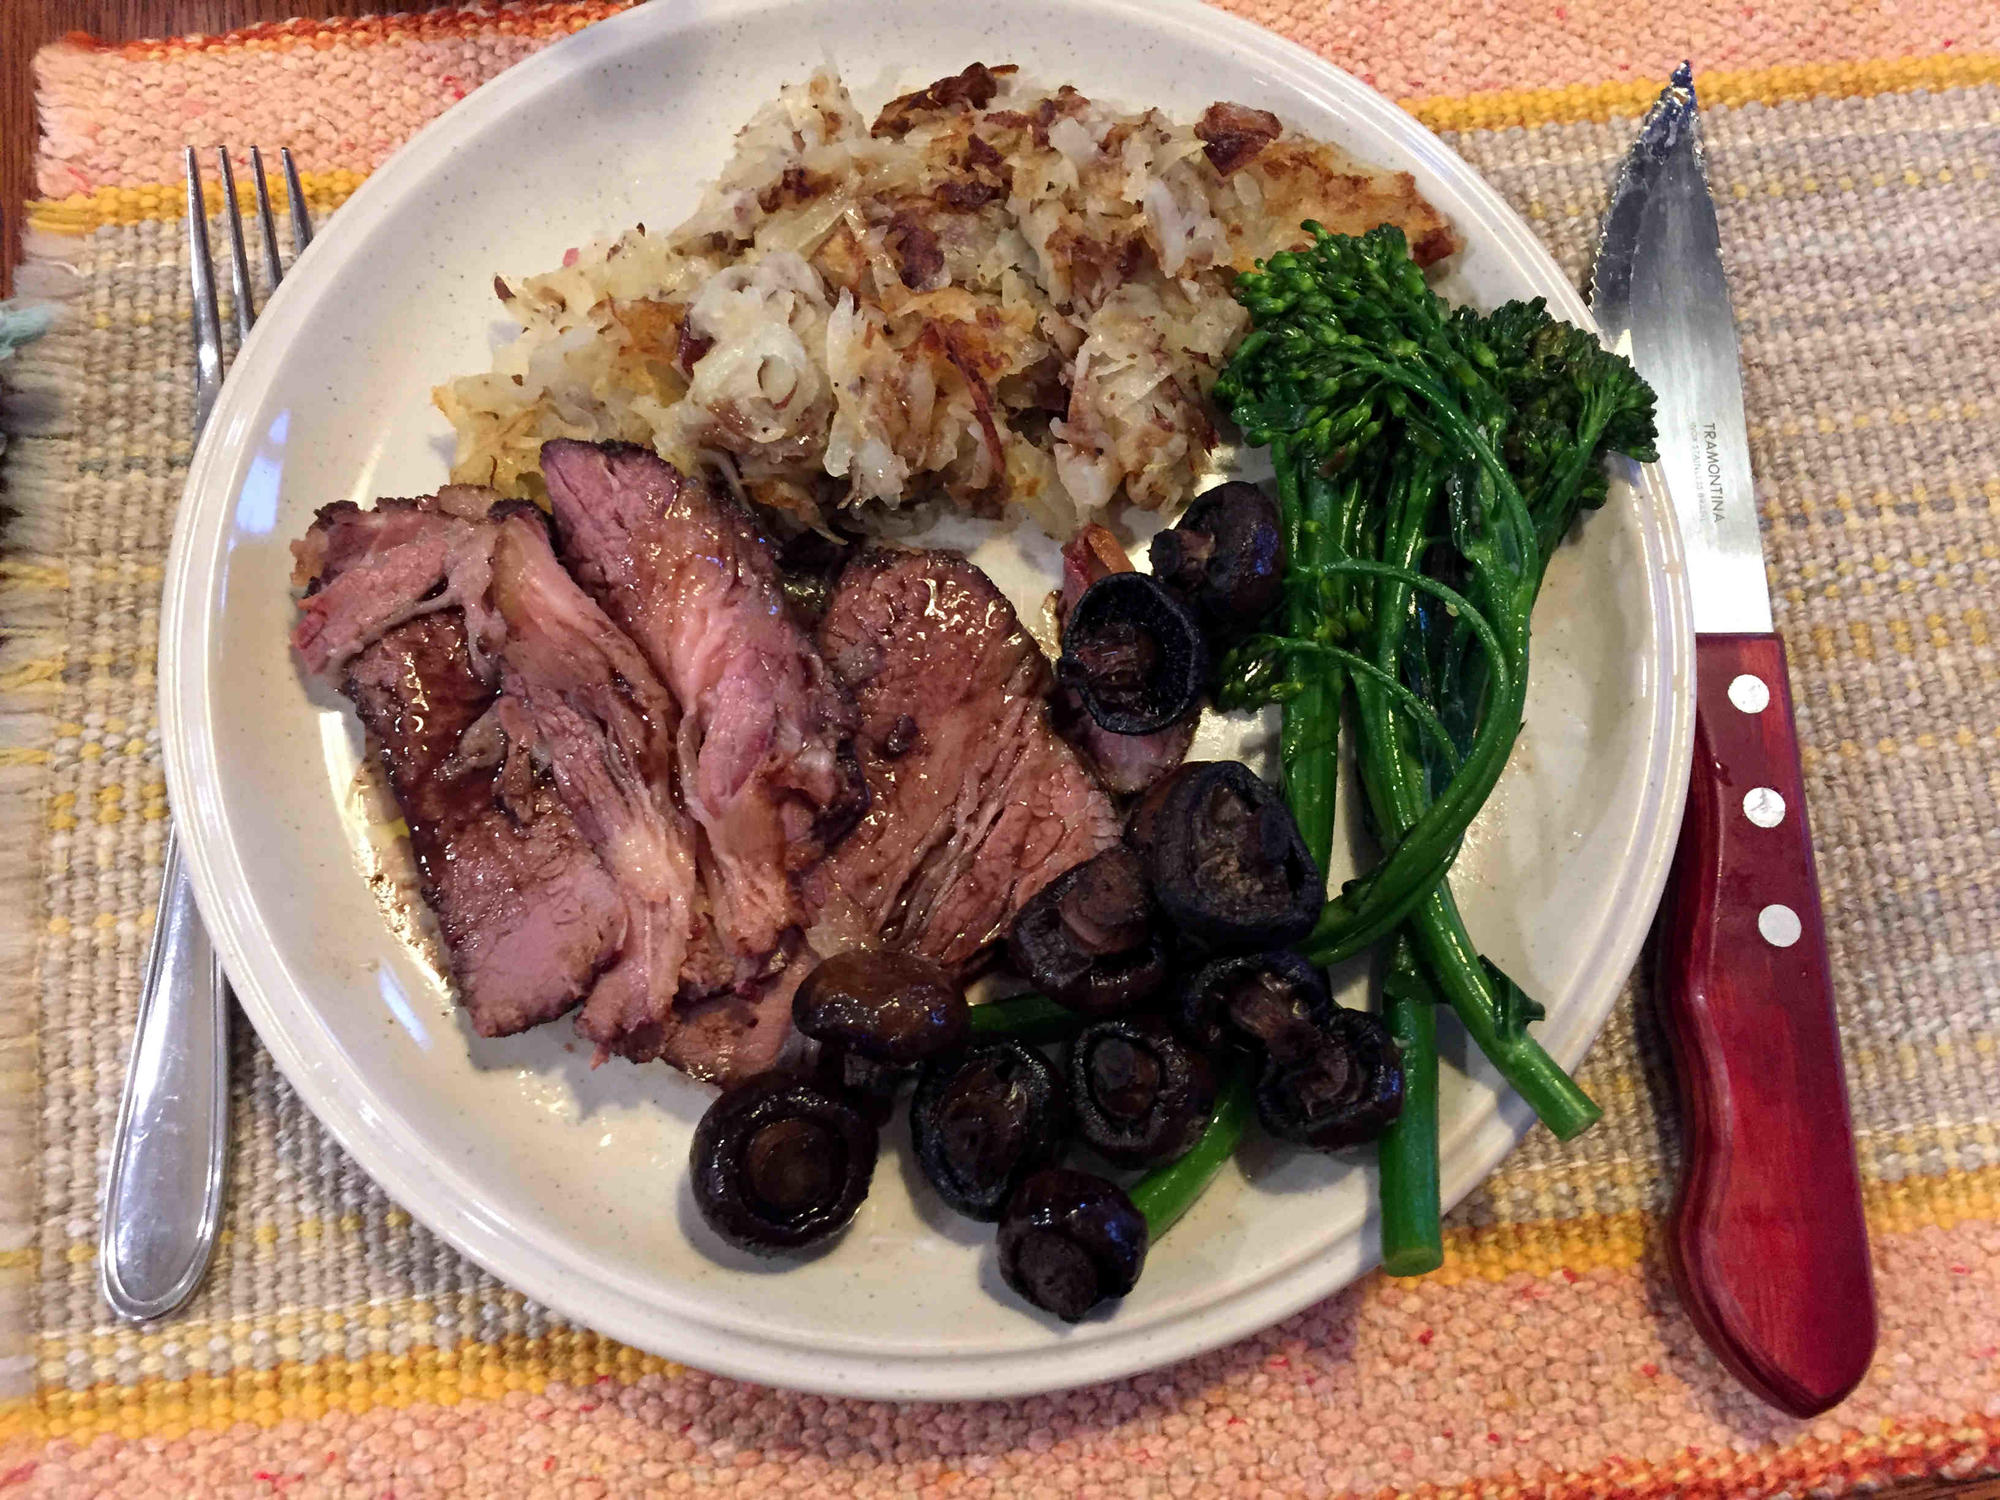
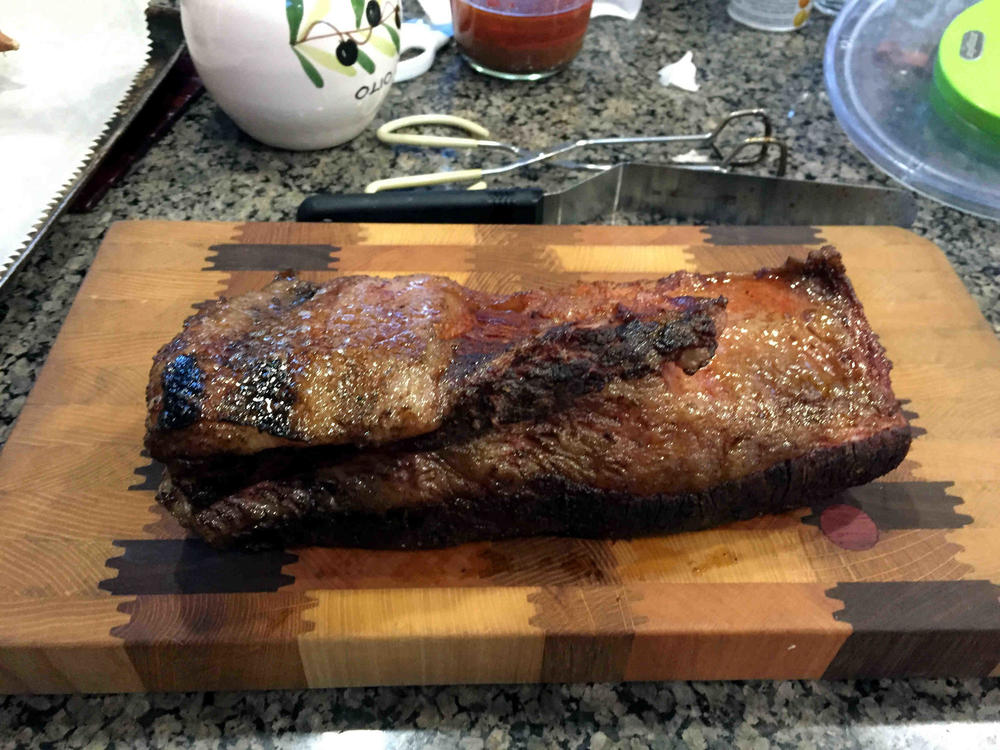
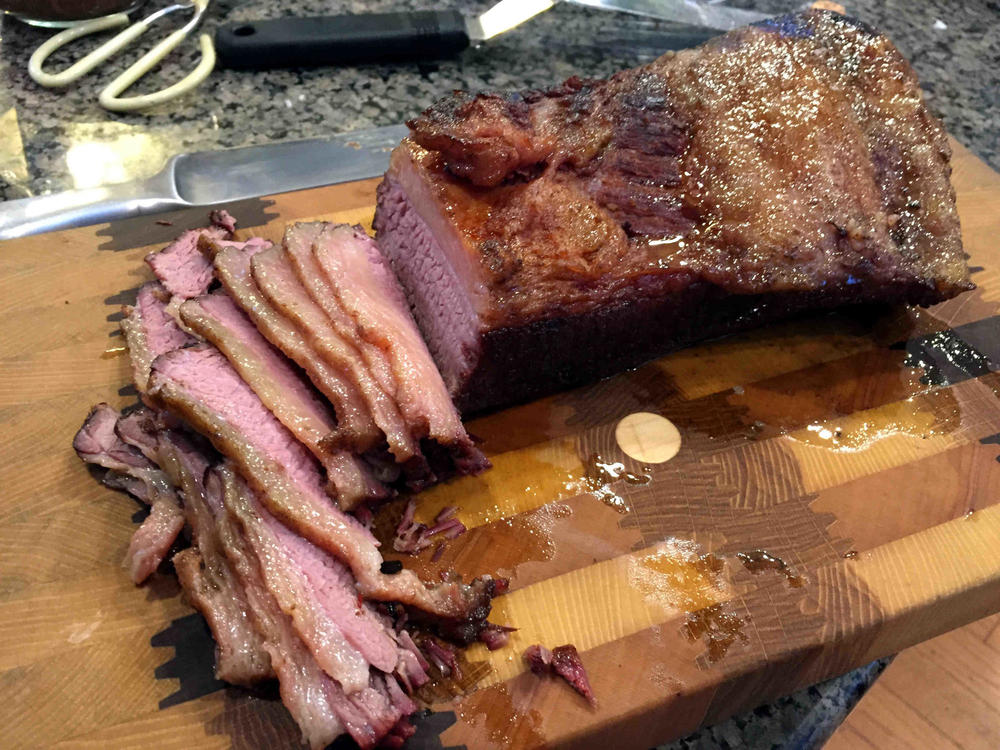
Brisket. Mainly following this recipe. I didn't start until after dinner one night, so it went into the spa @133 F after 10 p.m. I wasn't sure whether I would smoke it afterwards, but in the end I decided not to; so it was in the water for 66 hr. total. The recipe says 48 is enough & I think that's probably true. After half an hour rest in the bag it came out & looked like this: Then I grilled it on high for 5 min (BBQ lid open) on the meaty side side & a minute or so on the fatty side (Yes, there was a fire). The recipe says longer, but everything else was close to ready, and we were hungry. I sliced it thin. It was very tender - not falling apart, but I would have liked it a bit firmer. I was aiming for a flank steak texture. I might try 131 next time, and no more than 48 hr. The fat was delicious


-
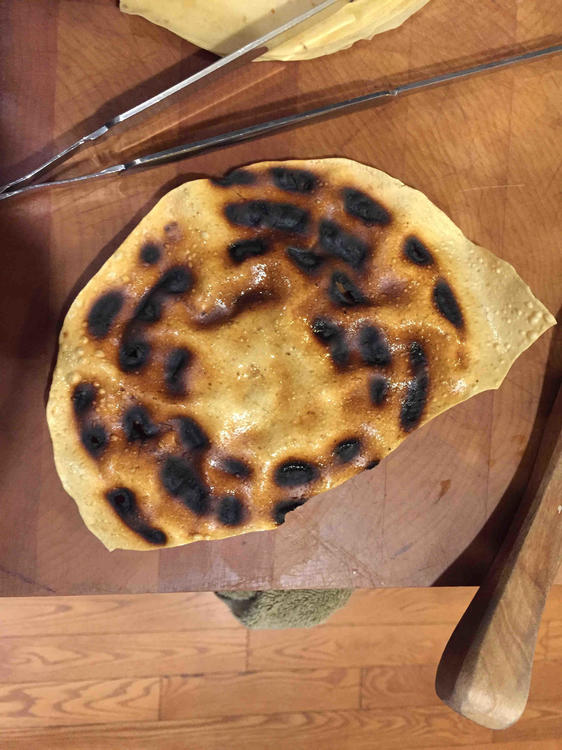
Don't cook pappadums in your air fryer! They are light and if the air circulates from below, it blows them up onto the element.
-

Roasted eggplant/aubergine
KootenayCook replied to a topic in Middle East & Africa: Cooking & Baking
No, not at all, as I drained off all the liquid. I also forgot to mention in my original post that I was meticulous about getting the cooked pulp out without any ash or burnt bits of skin. So the acrid flavour wasn't through contamination. @kayb Thanks for the suggestion. Will try that. I actually put the eggplant in the glowing coals, which is what I've done with the bbq and had good results. Our fireplace has a grate - I can make sure all the ash is down below and the coals are not touching the eggplant; so no need for a special contraption. I'm thinking it might be the type of wood & will try it again with maple, when the pile in my woodshed gets down that far. -
I like to make roasted eggplant/aubergine for baba gahanouj, bharta (etc.) on coals that impart a wonderful smoky flavour. I've had good success doing it in a barbecue (actually a Big Green Egg). So, now that it's winter, I thought "why not try it in the fireplace, after the fire has burnt down to glowing coals?" I cut a few slits in the eggplant so that it wouldn't explode, did NOT wrap it in foil, thinking that would just seal out the smoky flavour, and popped it into the fireplace (with glass doors) for 15 min. It came out looking good, perhaps a little under-cooked, but basically OK. The taste was TERRIBLE - very strong flavour of fire place ash. I only had a couple of bites, despite my Methodist ancestors looking disapprovingly over my shoulder, because it really was bad. So has anyone else tried this? I'd like to make it work. Should the eggplant be wrapped in foil? Should I wait until the coals have died down further? Does it depend on the type of wood? This was mainly aspen - crappy firewood at best, but it was free (Methodist ancestors won this time.).
-
The gourds are snake gourds, I think. I don't know what the little green things are. My wife and I lived in Sri Lanka in the early seventies, when the country was economically depressed, and no foreign products were available. We were students and living on a shoestring. We did splurge on a jar of Polish cherries at Xmas. They weren't very good, but they seemed like something special. I remember going to the market one day and seeing a barrow piled high with huge green things, not quite the size of unhusked coconuts, but getting there. I asked the vendor what they were, and received the unintelligible reply "bataprut". Not knowing what that meant or what to do with them I passed them by. Years later we were talking about local fruits to a friend in India & we were surprised to learn that avocados were grown there. We LOVE avocados. Our friend told us that they have them for dessert with cream and they called them "Butter Fruit".
-
I would say the one above is betel nuts. Cf. http://www.specialtyproduce.com/produce/Betel_Nut_10564.php
-
Dissertation Help - Cooking Website Features
KootenayCook replied to a topic in Food Traditions & Culture
Done, but I'm not sure my answers will be helpful. I never have a membership with any cooking sites (Egullet excepted!). I use the net to find recipe ideas for ingredients that I found at the market or have on hand (e.g., I would google "chicken, mushrooms recipe," or "lamb leg recipe"), or occasionally to find recipes for something I want to make (e.g., I would google "chicken confit"). I do like to see what the finished recipe looks like and to see the ingredients and method quickly, and the rest I don't care about much. I definitely don't have time (or patience) for videos. Often I combine ideas from different sites or substitute ingredients or change the method slightly. (This drives my sister crazy.) Anyway, if you get enough people responding, I'm sure it will all come out in the wash. Good luck with the dissertation! -
The article Anna linked to suggests buying a second, different coloured, gasket, using one for savoury, the other for sweet.
-
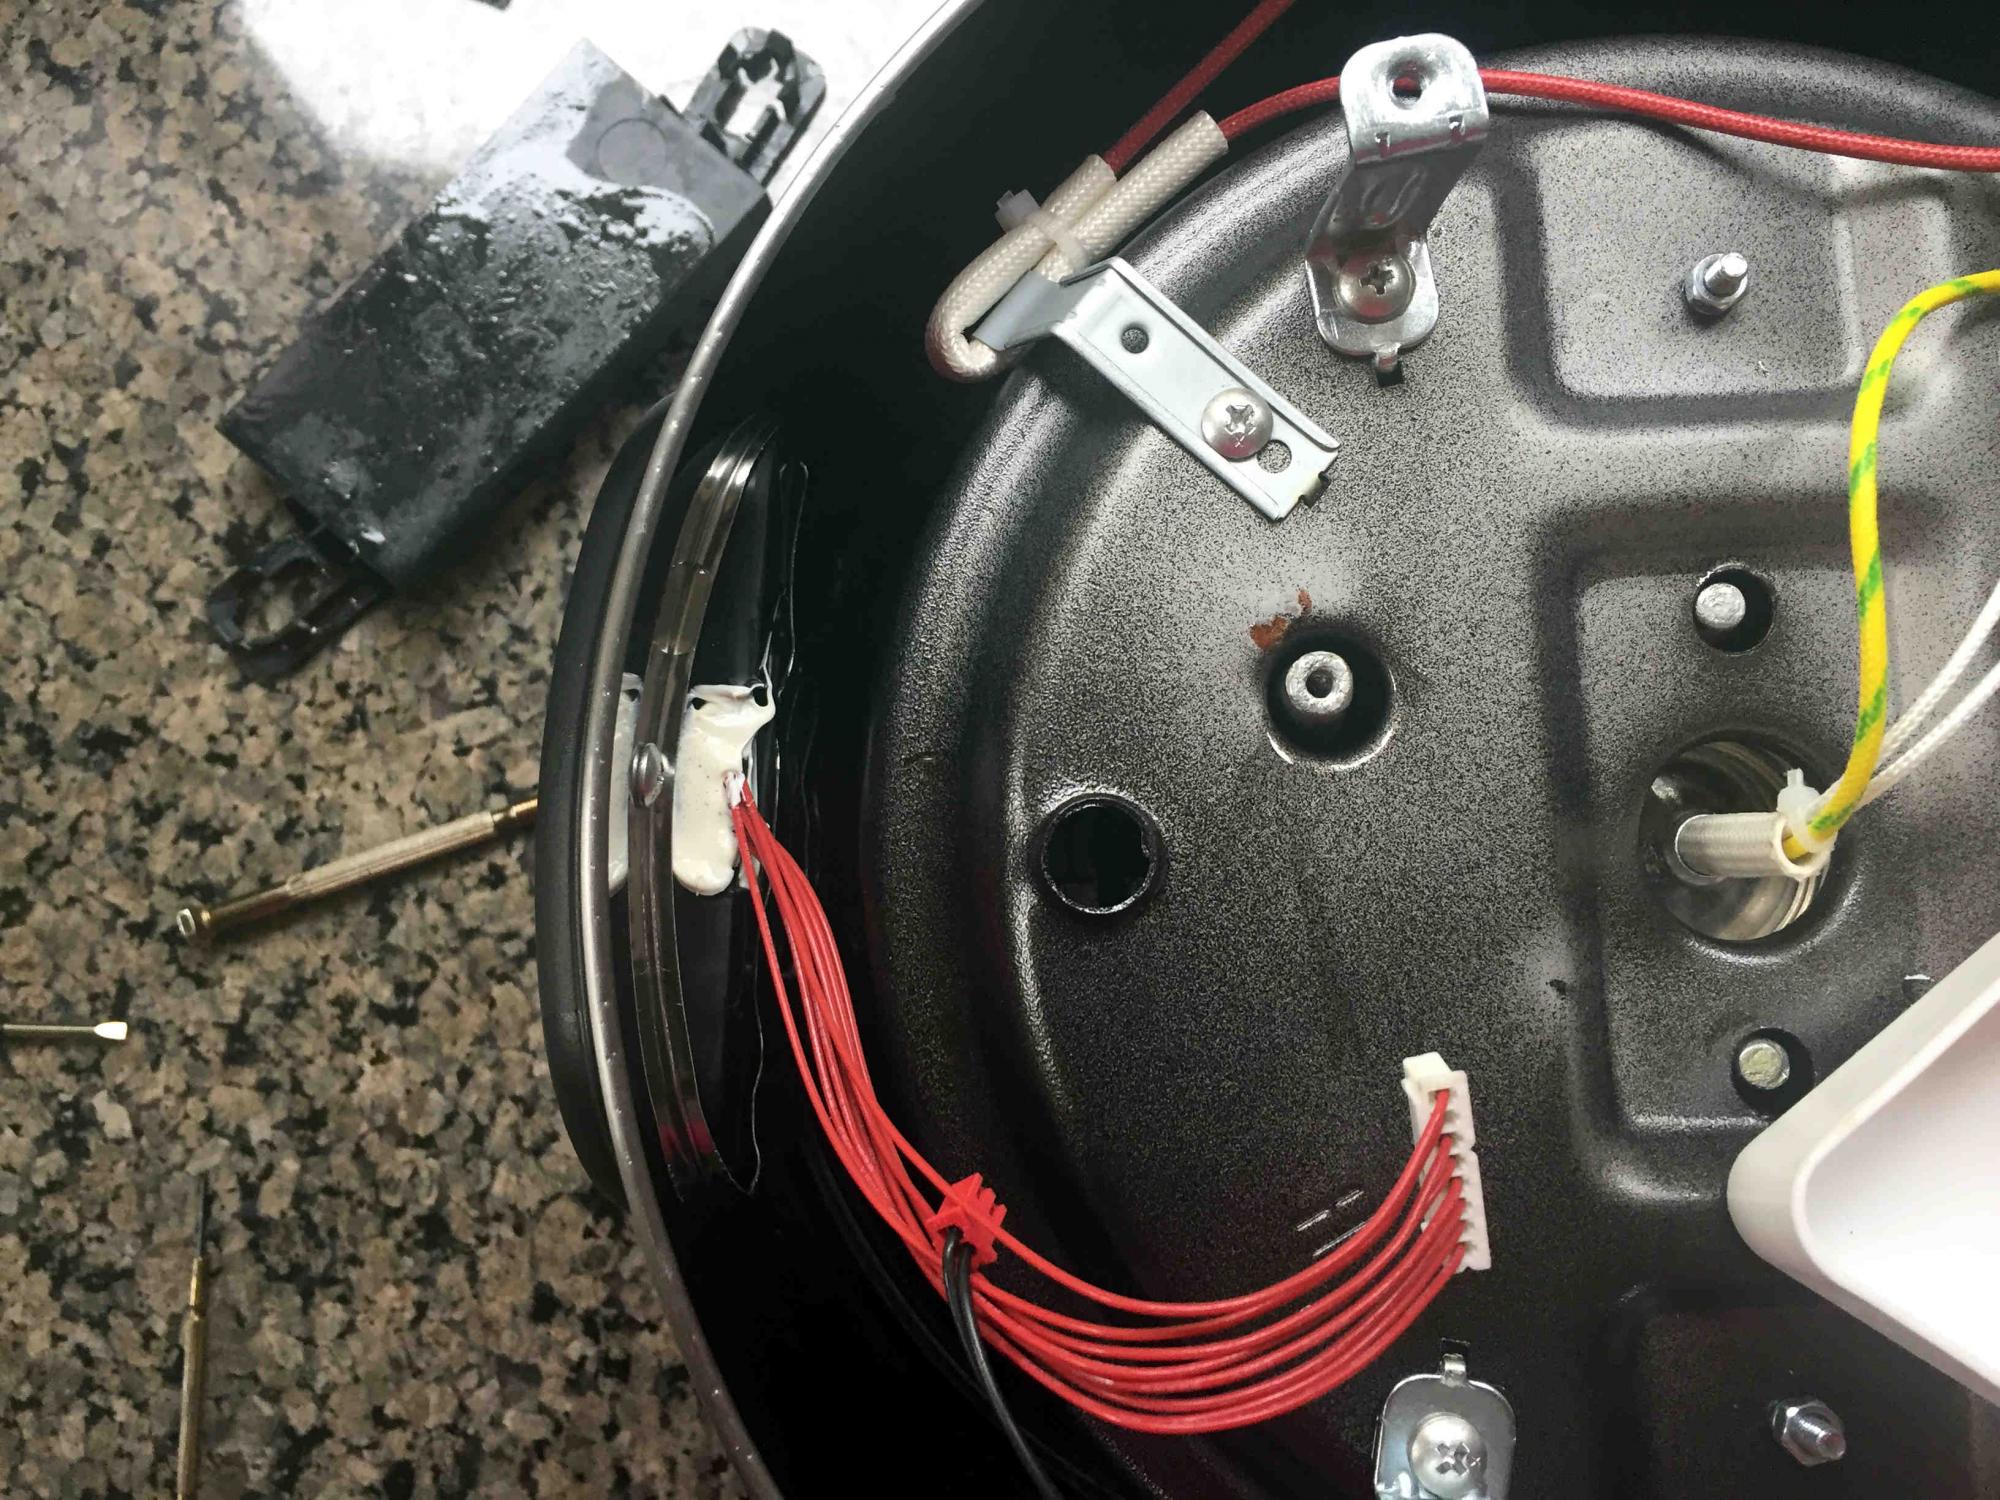
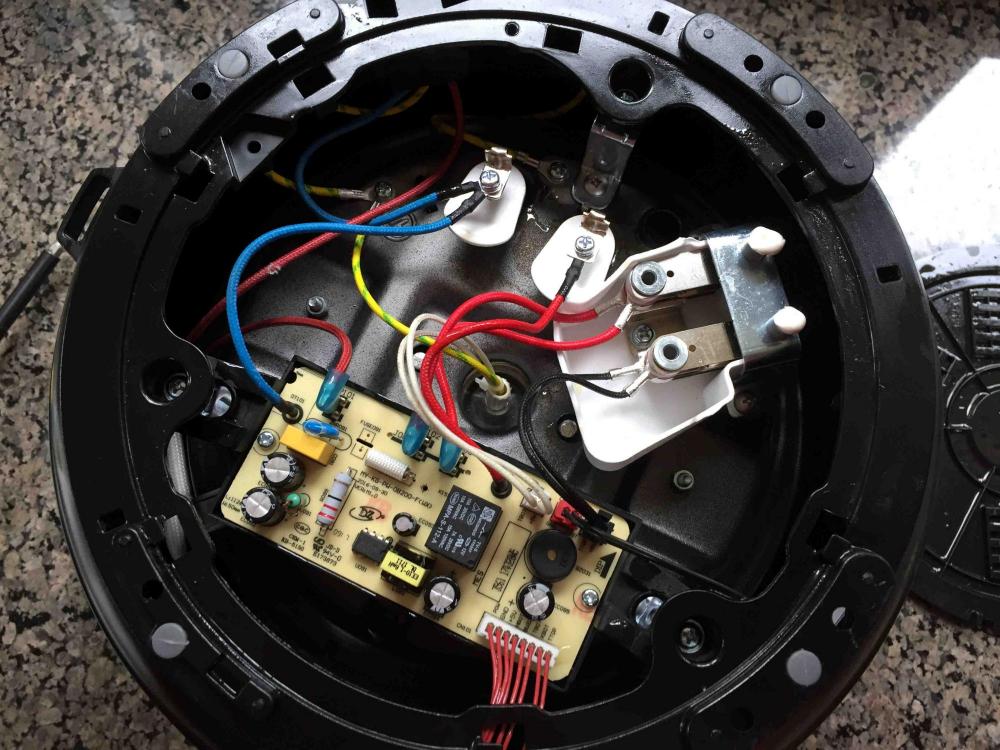
The drainage holes are large and any water would drain out immediately and would be impossible to miss. The control board is protected from liquid draining out by its plastic base; so it should not have been damaged, and the IP should have been OK.
-
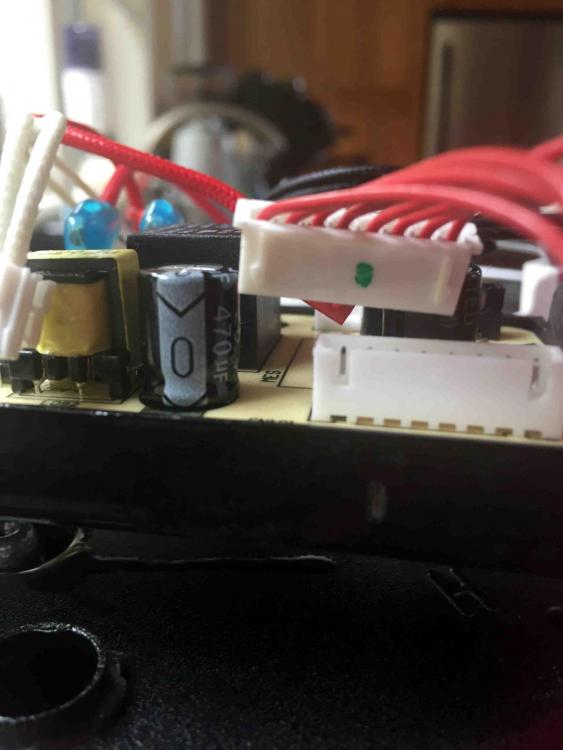
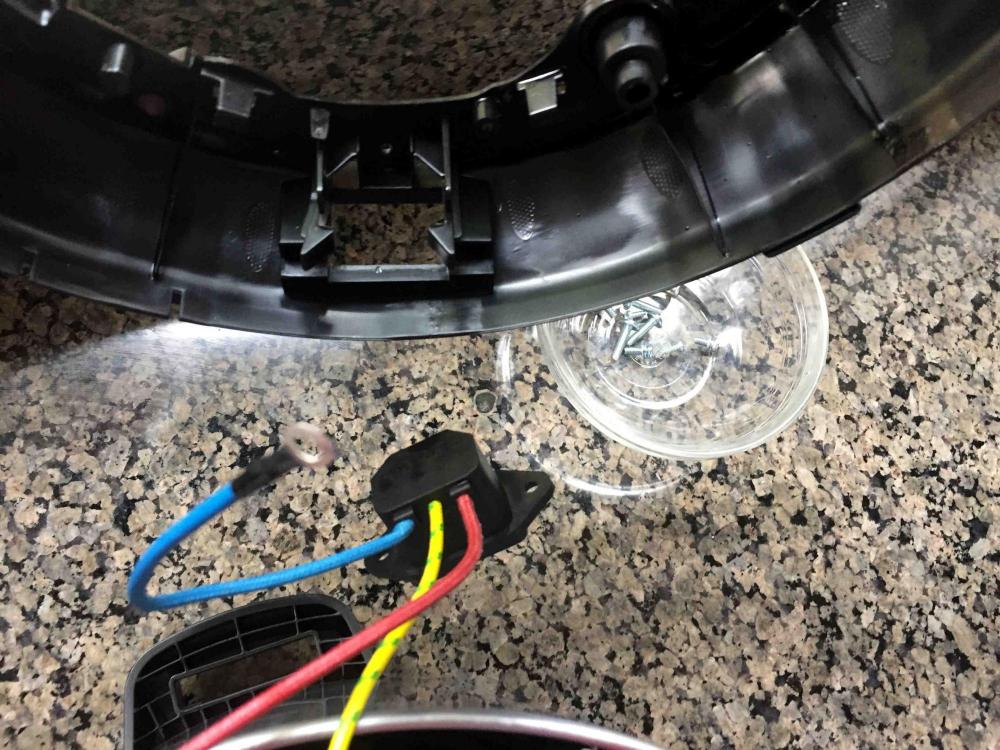
I was making onion confit the other day. After slow-cooking the onions in duck fat and duck stock for 14 hr., I wanted to reduce the liquid before finishing the onions off in the oven. So I got out a bowl and a sieve and took the inner container out of the IP to make it easier to pour. Then I got distracted talking to my wife, not that I'm blaming her. The next thing I noticed was liquid all over the counter: I had put the sieve on the IP and strained the onions into it. (Fortunately, it was cool and unplugged). Now, the IP documentation warns against immersing the IP in liquid. "The housing has electronic components and should never be immerse [sic] in water.Doing so will damage Instant Pot permanently. The housing can only be wiped clean." (http://instantpot.com/portfolio-item/after-purchase/#toggle-id-20). I was therefore wary about just plugging the IP in again, but didn't want to just throw it away. So I had to investigate. Removing the bottom plate was easy (one screw to undo), and inside it actually looked pretty good. The control board was clean and there were just a few splashes of grease here and there. The inner pot has two drainage holes; one is just visible at about 1:30 in this pic and the other is below the control board and not really visible in this pic. The back of the control board is protected by a plastic base. But I wanted to check the back of the board, and to do that I had to remove a few screws and connectors: Most of the connectors have little flanges that hold them in their sockets. Getting them to release required a lot of probing with a very small screw-driver, accompanied by a fair amount of swearing. Below is the multi-pin connector, which was the hardest to remove. Once that was off, the control board could be removed without disconnecting any more wires (which had proved recalcitrant, in any case). The back of the control board was clean, as was the inside of its plastic base, which I removed next. The back of it was coated in duck fat. Finally, I removed the plastic ring around the base of the IP. It housed the socket for one end of the power cord, but this snapped out easily. All the plastic pieces I had removed got a good wash in hot soapy water. I cleaned up the rest of the hardware as best I could with paper towels and cotton swabs. Then I put it all back together (thanking myself for having taken that initial pic). I replaced the inner pot, added some water and ran the "sauté" function for a couple of minutes until the water started to steam. Then I turned it off, put on the lid and ran a "soup" function with pressure for 5 min. There was a bit of smoke that I attributed to residual duck fat (It smelled culinary.), and which only lasted 15 sec. or so. Huge sigh of relief. Having gone through all this, I think it was probably not absolutely necessary, but there might have been a bit more smoke and smell. It was worth doing for the peace of mind, though. And the onion confit turned out fine.


-
Thanks, rotuts. I will have to try this!
-
My recipe is similar to Kerry's but with a few differences. 2-1/3 lt. water per kg of oranges (that's about 4-1/4 c. per pound, about the same as Kerry's recipe)Remove some of the excess pith from the peel before cutting.Boil the excess pith along with the seeds and other innards in some of the water (no bag), about 2 hr.Boil the cut peel in the juice & rest of the water until tender, about 2 hr.Soak both overnight in the fridge to extract pectin. (Kerry soaks first & then boils - I wonder if there's a difference.)Next day. Strain the pith/seeds: don't squeeze or you'll get cloudy marmalade. Add to the peel/water/juice. (I don't add lemon unless I'm making orange-lemon marmalade, but that's a different recipe.)Measure liquid/peel and add 1 kg sugar per litre. (= 0.55 pound per cup, about the same as Kerry's ratio of 1 c. sugar to 1 c fruit/liquid)Boil rapidly to setting pointTip: When boiling, don't leave unattended for too long because when it's nearly ready, the peel sinks and will burn on the bottom of the pan. (Modified from Allison Burt, Preserves & Pickles. 1973 Hong Kong: Mandarin Publishers)
-
Interesting Christmas Gifts Received 2014
KootenayCook replied to a topic in Food Traditions & Culture
Of course! But you have to make us some poffertjes -
Interesting Christmas Gifts Received 2014
KootenayCook replied to a topic in Food Traditions & Culture
I noticed on the video that the bot sometimes fails to turn a ball & you have to help it along - so that means you have to watch it. Might as well be spending the time turning the balls - I have to say I couldn't do that for long though. But the people who run the takoyaki stalls in Japan do it all day! HNY to you too! -
Interesting Christmas Gifts Received 2014
KootenayCook replied to a topic in Food Traditions & Culture
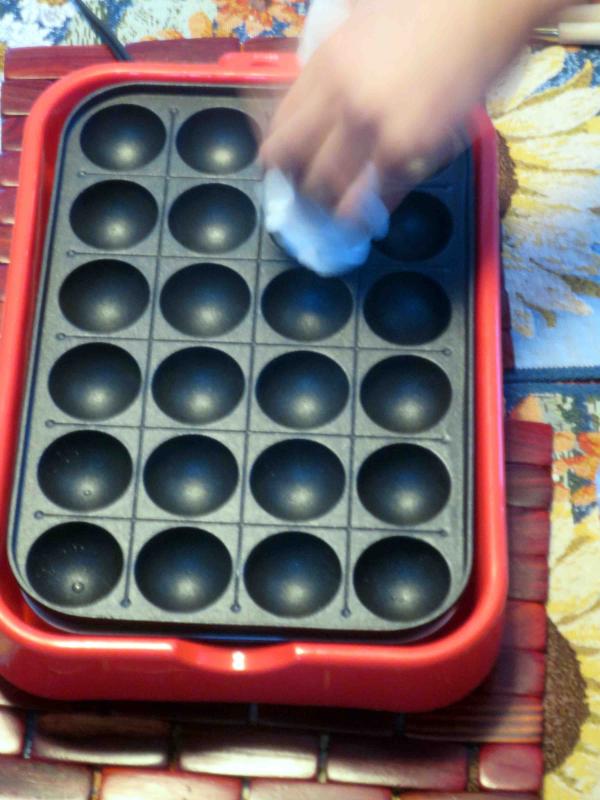
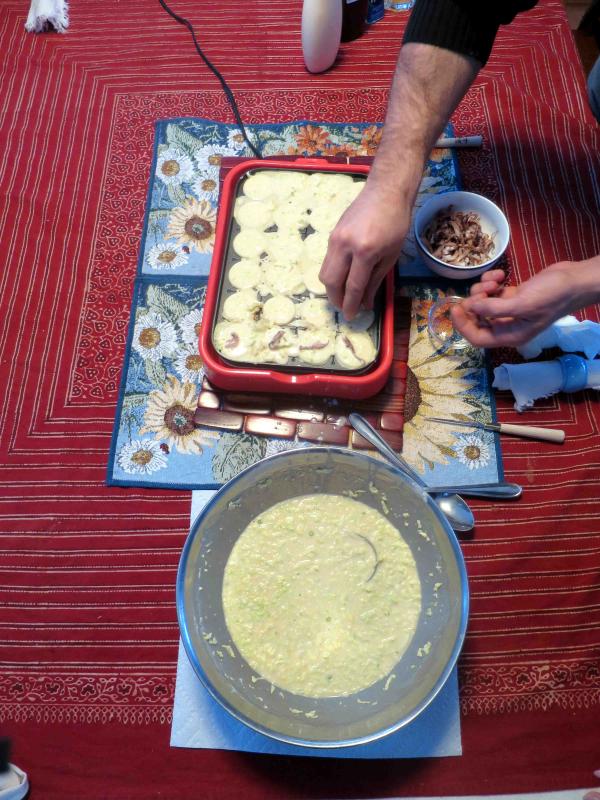
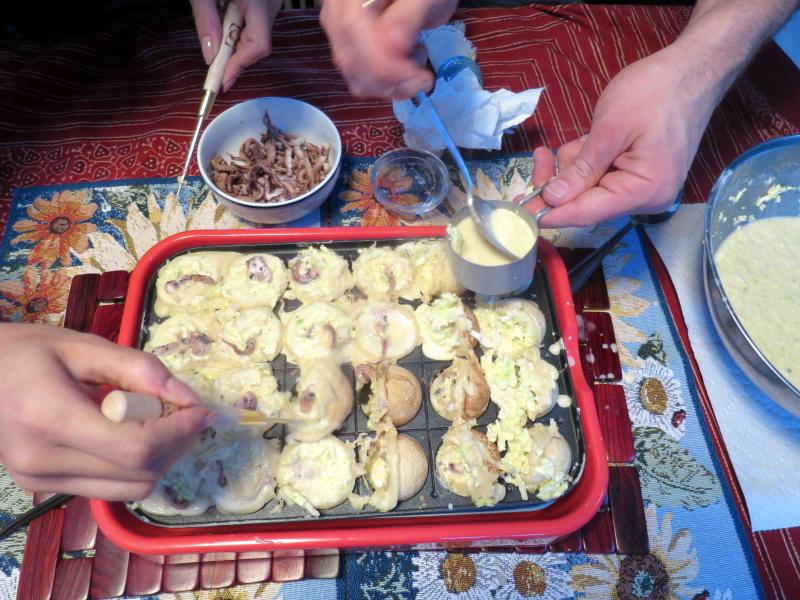
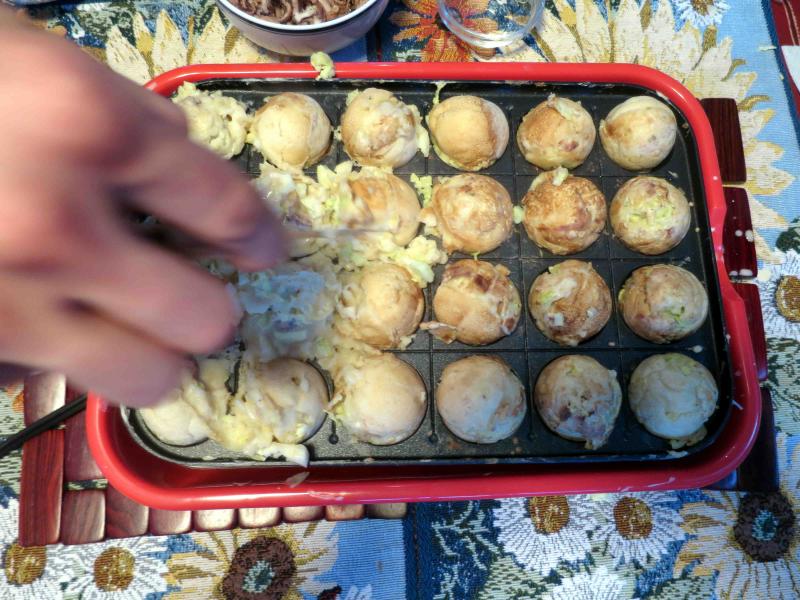
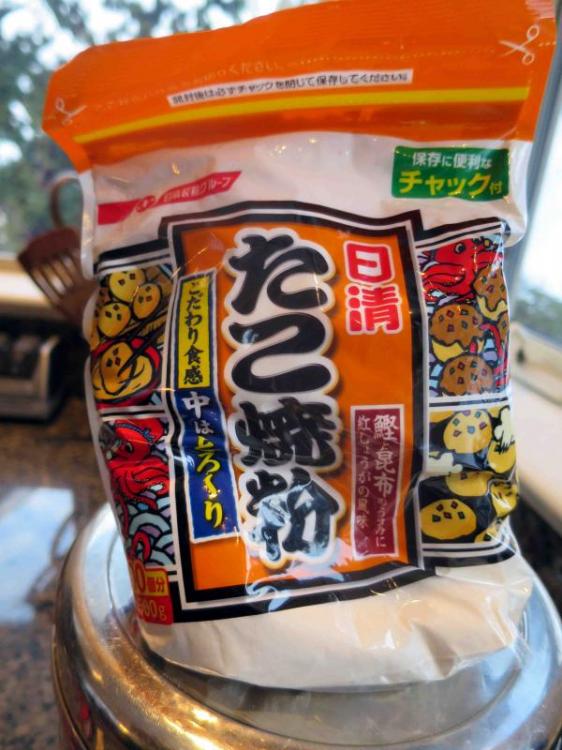
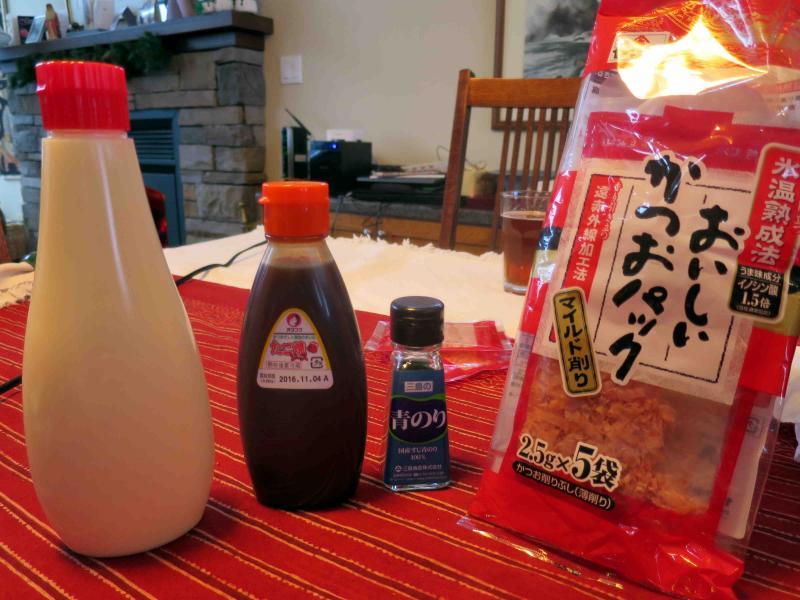
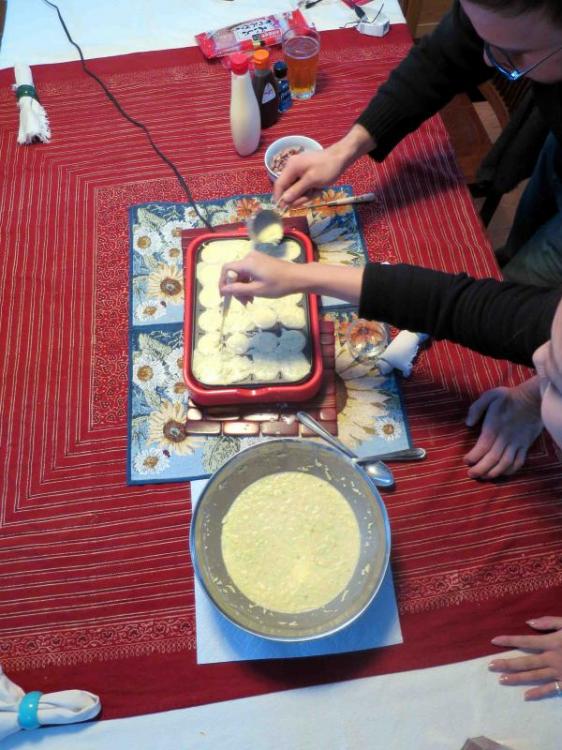
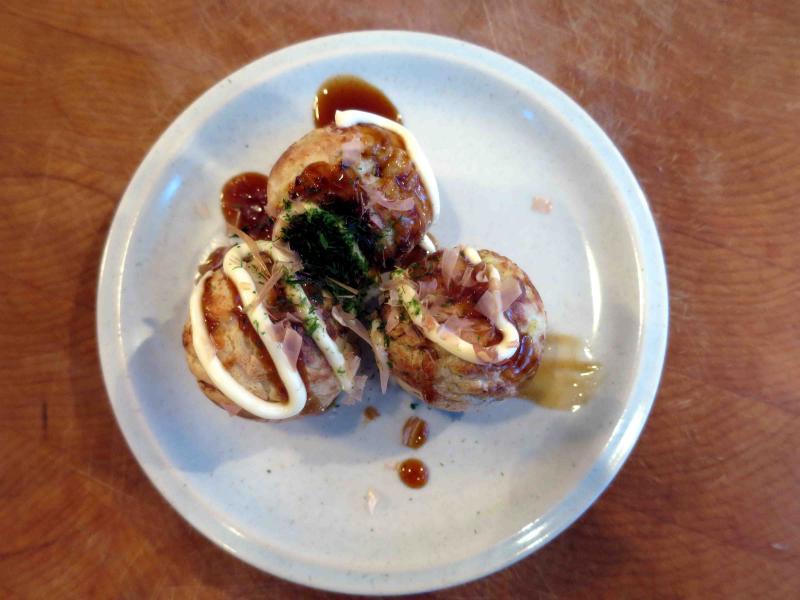
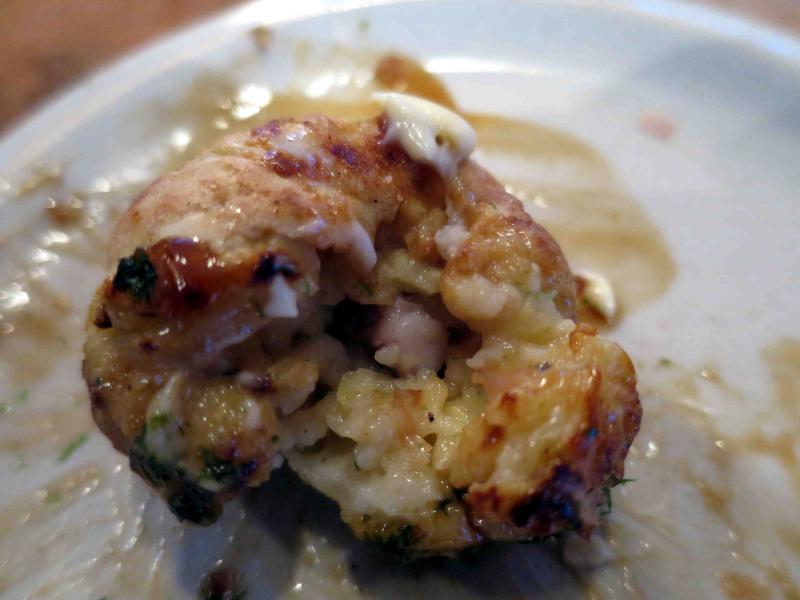
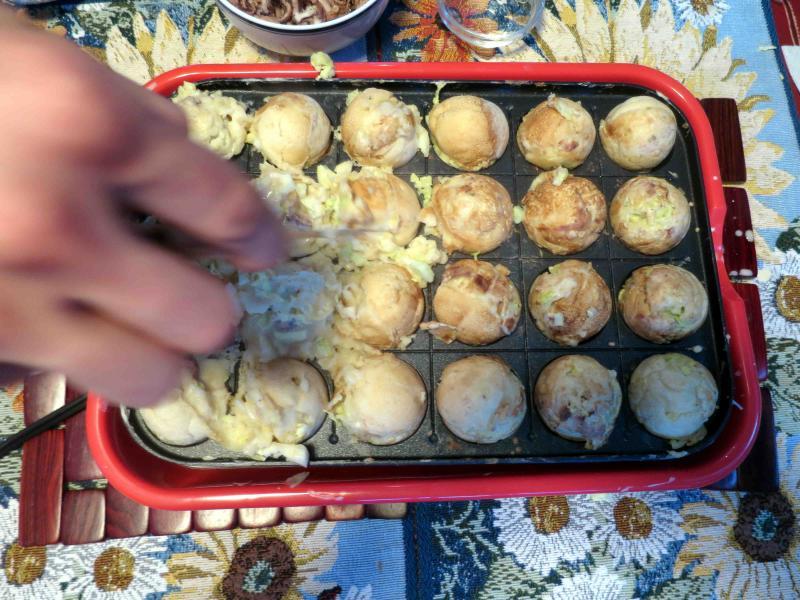
So, I am OKC's brother. The kids are off skiing; so I can finally get to my computer (in the guest room) and add some info. My son & his gf made takoyaki for lunch yesterday. The cooker they gave us is not the "fully automatic" version shown in the video, but a fully manual version, basically just a teflon-coated plate with hemispherical depressions in it heated by an electric element underneath: Along with it, they gave us Takoyaki mix: and condiments (L to R, mayonnaise, takoyaki sauce, nori flakes & bonito flakes). Beer in the background is an obligatory accompaniment. The first step was to wipe some oil onto the pan Next, they poured batter into the depressions (just caught the tail end of this), and used a spike to move the spillover batter into the depressions and separate the balls: (They gave us a couple of spikes too - I just didn't get a pic of them, but you can see one off the top right corner of the cooker. (One could use a satay stick or a metal skewer.) The batter is quite runny. They added cabbage to it. Then a piece of cooked octopus (tentacles only) was added to each ball. We had found some frozen baby octopodes at the supermarket & I sv'd them for 2.5 hr @ 185. As the balls cooked on the bottom, the spike was used to separate them from the plate and then to flip them on their side (this was quite tricky at first); then more batter was added to the depression. Eventually the balls could be rotated again. The rotation of the balls continued for 5 - 10 more minutes to help them cook evenly, until a spike inserted into the centre of a ball came out clean. The balls also had to be moved from one depression to another, as the balls on the outside edges were cooking more slowly. Once they were done, they were dressed with the condiments mentioned above. They were still quite gooey inside. Very tasty! People who had had them before, said they were authentic, though the sv'd baby octopus was softer than the boiled mature octopus tentacles normally used.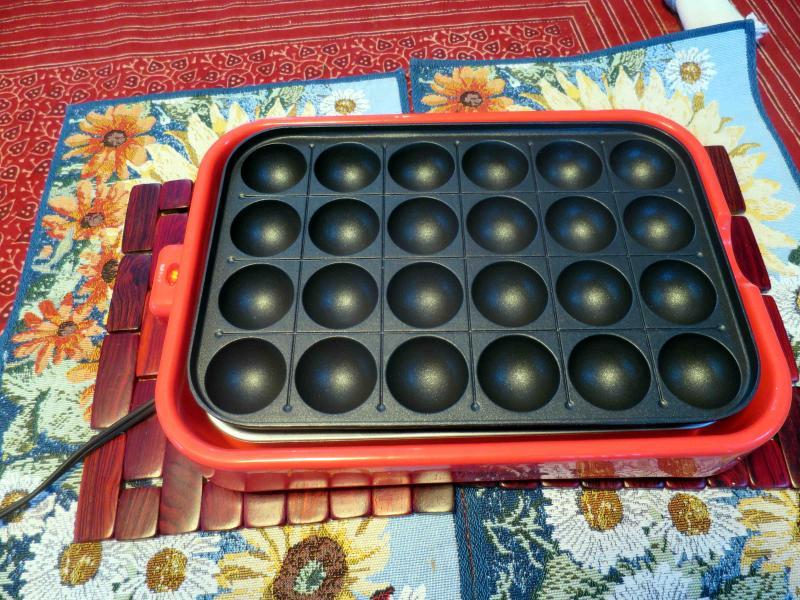


-
I'd be afraid that the high heat required for searing would burn the glaze.
-
LOL. THANKS for this!
-
Garlic: Tips and Troubleshooting, Selecting, Storing, Recipes, Safety
KootenayCook replied to a topic in Cooking
You have a Kuhn Rikon pressure cooker though, don't you? That should get up to a pressure of 1 bar/15psi (above atmospheric pressure), at which the boiling point of water will be 250F (according to this guide). (Actually this article says K R pressure tops out at 17.4 psi - also see the pressure-cooker discussion here). But then how long do you have to process them? MC@H recipe for confit garlic (p 126) says 2 hours at 1 bar in 16oz/500ml jars. USDA Home Canning Guide Ch 4 doesn't deal specifically with garlic, but the longest processing time it specifies for any vegetable in 16oz containers is 75 min. So, if you followed the MC@H method, you should have safely destroyed all the c. botulinum spores. This means you shouldn't have to worry about botulinum spores germinating at fridge temperatures, because there shouldn't be any spores left to germinate. This is obviously a serious issue, so please weigh in, anyone, if this analysis seems wrong. (I made a lot of confit garlic too, but didn't freeze it as you did: I still have a couple of sealed jars in the fridge.)