Matthew Hayday
-
Posts
15 -
Joined
-
Last visited
Content Type
Profiles
Forums
Store
Help Articles
Everything posted by Matthew Hayday
-
Report: eGullet Chocolate and Confectionery Workshop 2018
Matthew Hayday replied to a topic in Pastry & Baking
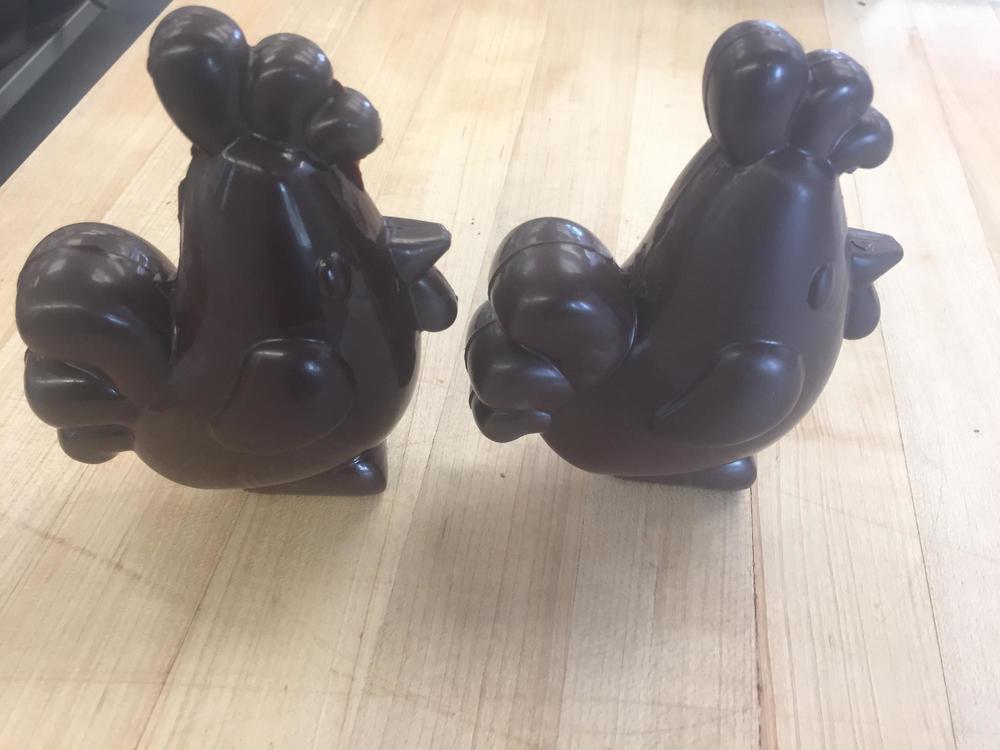
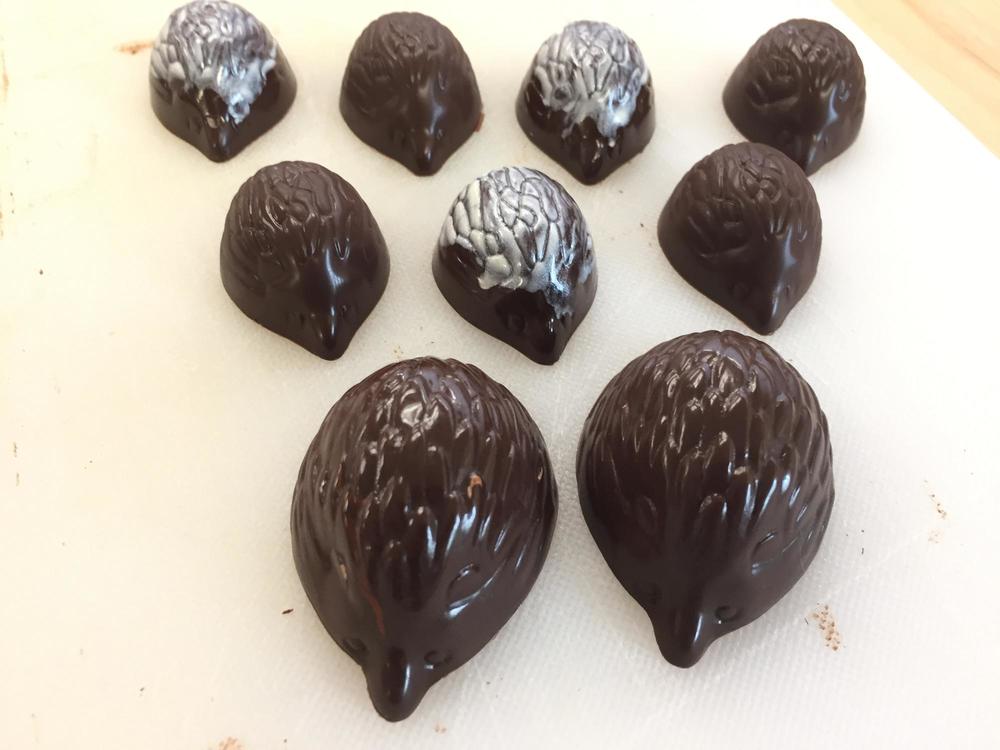
Thanks to many helpful people, I learned how to use my 3D magnetic chicken mould (key tips included pre-painting to avoid bubbles, filling one side completely with chocolate before closing the mould and becoming a human rotator machine, and shortening the amount of fridge time for the mould to about 20-30 mins). I also learned about working with hand painted transfer sheets (white backing is key, or I could use lighter coloured cocoa butter for dark chocolates). This is was my fifth chocolate workshop, and I am always blown away by how friendly everyone is, and how generous they are with their expertise. Kerry and Rodney are also saints for agreeing to do so much work to put this event on so many times! By the way, @mkayahara is really enjoying the samples of your work that I brought home for him - he very much missed joining us this year.
-
I can bring my Wybauws (#2, 3 and 4), and I'll have my Greweling as well.
-
I just realized that I hadn't RSVP'd here yet. I'm planning on coming, and will be in for the dinner (but not the master classes, although I'll happily sample the outcomes on the Friday night if anyone is sharing!). I think it's just me this year, as I doubt that @mkayahara will be able to get that weekend off (we'll just be back from a vacation).
-
I'm tentatively interested, but the timing is always an issue for me around the teaching term, so I'll have to keep an eye on the dates. I wouldn't be coming to the Master's class - I'm still very much an amateur.
-
Report: eG Chocolate and Confectionery Workshop 2013
Matthew Hayday replied to a topic in Pastry & Baking
Aluminum? I probably grabbed them - next time you are through have a look at my collection and grab the ones that are yours. Yup, aluminum. I wouldn't be surprised if they had ended up with your array. Thanks again! -
Report: eG Chocolate and Confectionery Workshop 2013
Matthew Hayday replied to a topic in Pastry & Baking
Thanks Kerry for all of your work this weekend - we had a great time!! Alas, upon returning home, Matthew Kayahara and I discovered that four of our caramel rulers appear to have not made it back to Guelph with us - two 16" 1/2 inch ones, and one each of a 12" 1/2 inch and a 12" 1/4 inch. I'm pretty sure we loaned them out to someone today (although with my head bent over a ganache, I'm not totally certain who), so if they turn up in your luggage, please let me or Matt K know! -
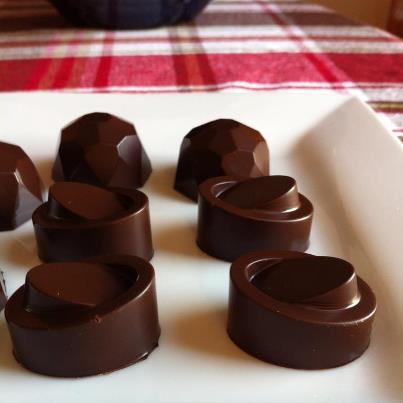
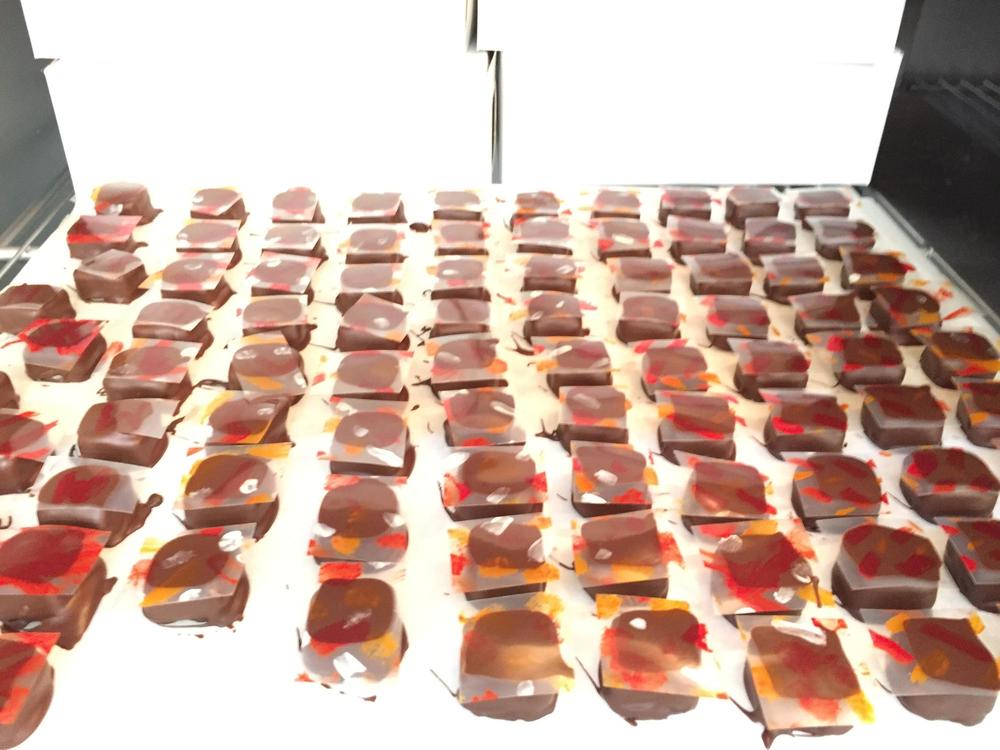
I did a riff on Greweling's lemon mint ganache recipe to make key lime ganache centres for chocolates. I substituted key lime juice for the lemon juice, and the peel of 4 key limes for the lemon peel. I removed the finely chopped mint, and instead added 6 lime leaves to the cream during the infusion process. Then, I strained out the leaves and the peel after the infusion was complete. The resulting ganache came out beautifully and I used some of it for centres for moulded chocolates (seen in the picture) and slabbed the rest for hand-dipped chocolates. The texture and flavour on the ganache were both excellent. The key lime flavour holds up well against the dark chocolate, and the lime leaves (which I normally use for Thai cooking) add a nice note of complexity.

-
PLANNING: 2013 Candy and Confection Workshop, April 27-28
Matthew Hayday replied to a topic in Pastry & Baking
mkayahara and I are still "yes"es. -
PLANNING: 2013 Candy and Confection Workshop, April 27-28
Matthew Hayday replied to a topic in Pastry & Baking
Kerry, Might it be possible for you to request the room that we had back in 2009, which I think was the pastry room, if memory serves? As much fun as it is to do chocolate work while wearing a parka under my apron... I'd also strongly recommend that people who are able to bring along some basic utensils - spoons, spatulas, knives, etc. The Niagara facility is great for bowls and hot plates, but not so good when it comes to basic stirring and cutting implements. -
Kerry, if I wanted to make a fruity flowing caramel (like raspberry, for instance) how much puree should I add, and at what point in the cooking process? I'd probably start by replacing a lot of the cream by puree. Three years ago at the chocolate conference in Niagara, Kerry gave us the following recipe, which works really well for me in bonbons (indeed, I made another batch just yesterday): 200 grams sugar 20 grams glucose 200 grams passion fruit puree 160 grams white chocolate 30 grams cocoa butter 60 grams butter Caramelize sugar with glucose until browned. Deglaze with puree. Stir well to dissolve the hardened puree (I do this over medium-low heat). Add chocolate and cocoa butter and allow to melt. Cool slightly (to below 130 degrees works) then add butter. I'm not sure whether the amount of puree would have to vary with fruit type. I tried a blackberry puree at Christmas, and it created a much firmer centre - possibly because of the pectin content?
-
PLANNING: 2013 Candy and Confection Workshop, April 27-28
Matthew Hayday replied to a topic in Pastry & Baking
mkayahara and I are in. Perfect timing - right at the end of the exam period for me, which also happily coincides with the very beginning of my sabbatical! -
Thanks for posting all of these fabulous pictures! It looks like it was a great success, and I'm sorry that we had to miss it this year (those darned students insisting that I teach instead...) So, Niagara 2013??
-
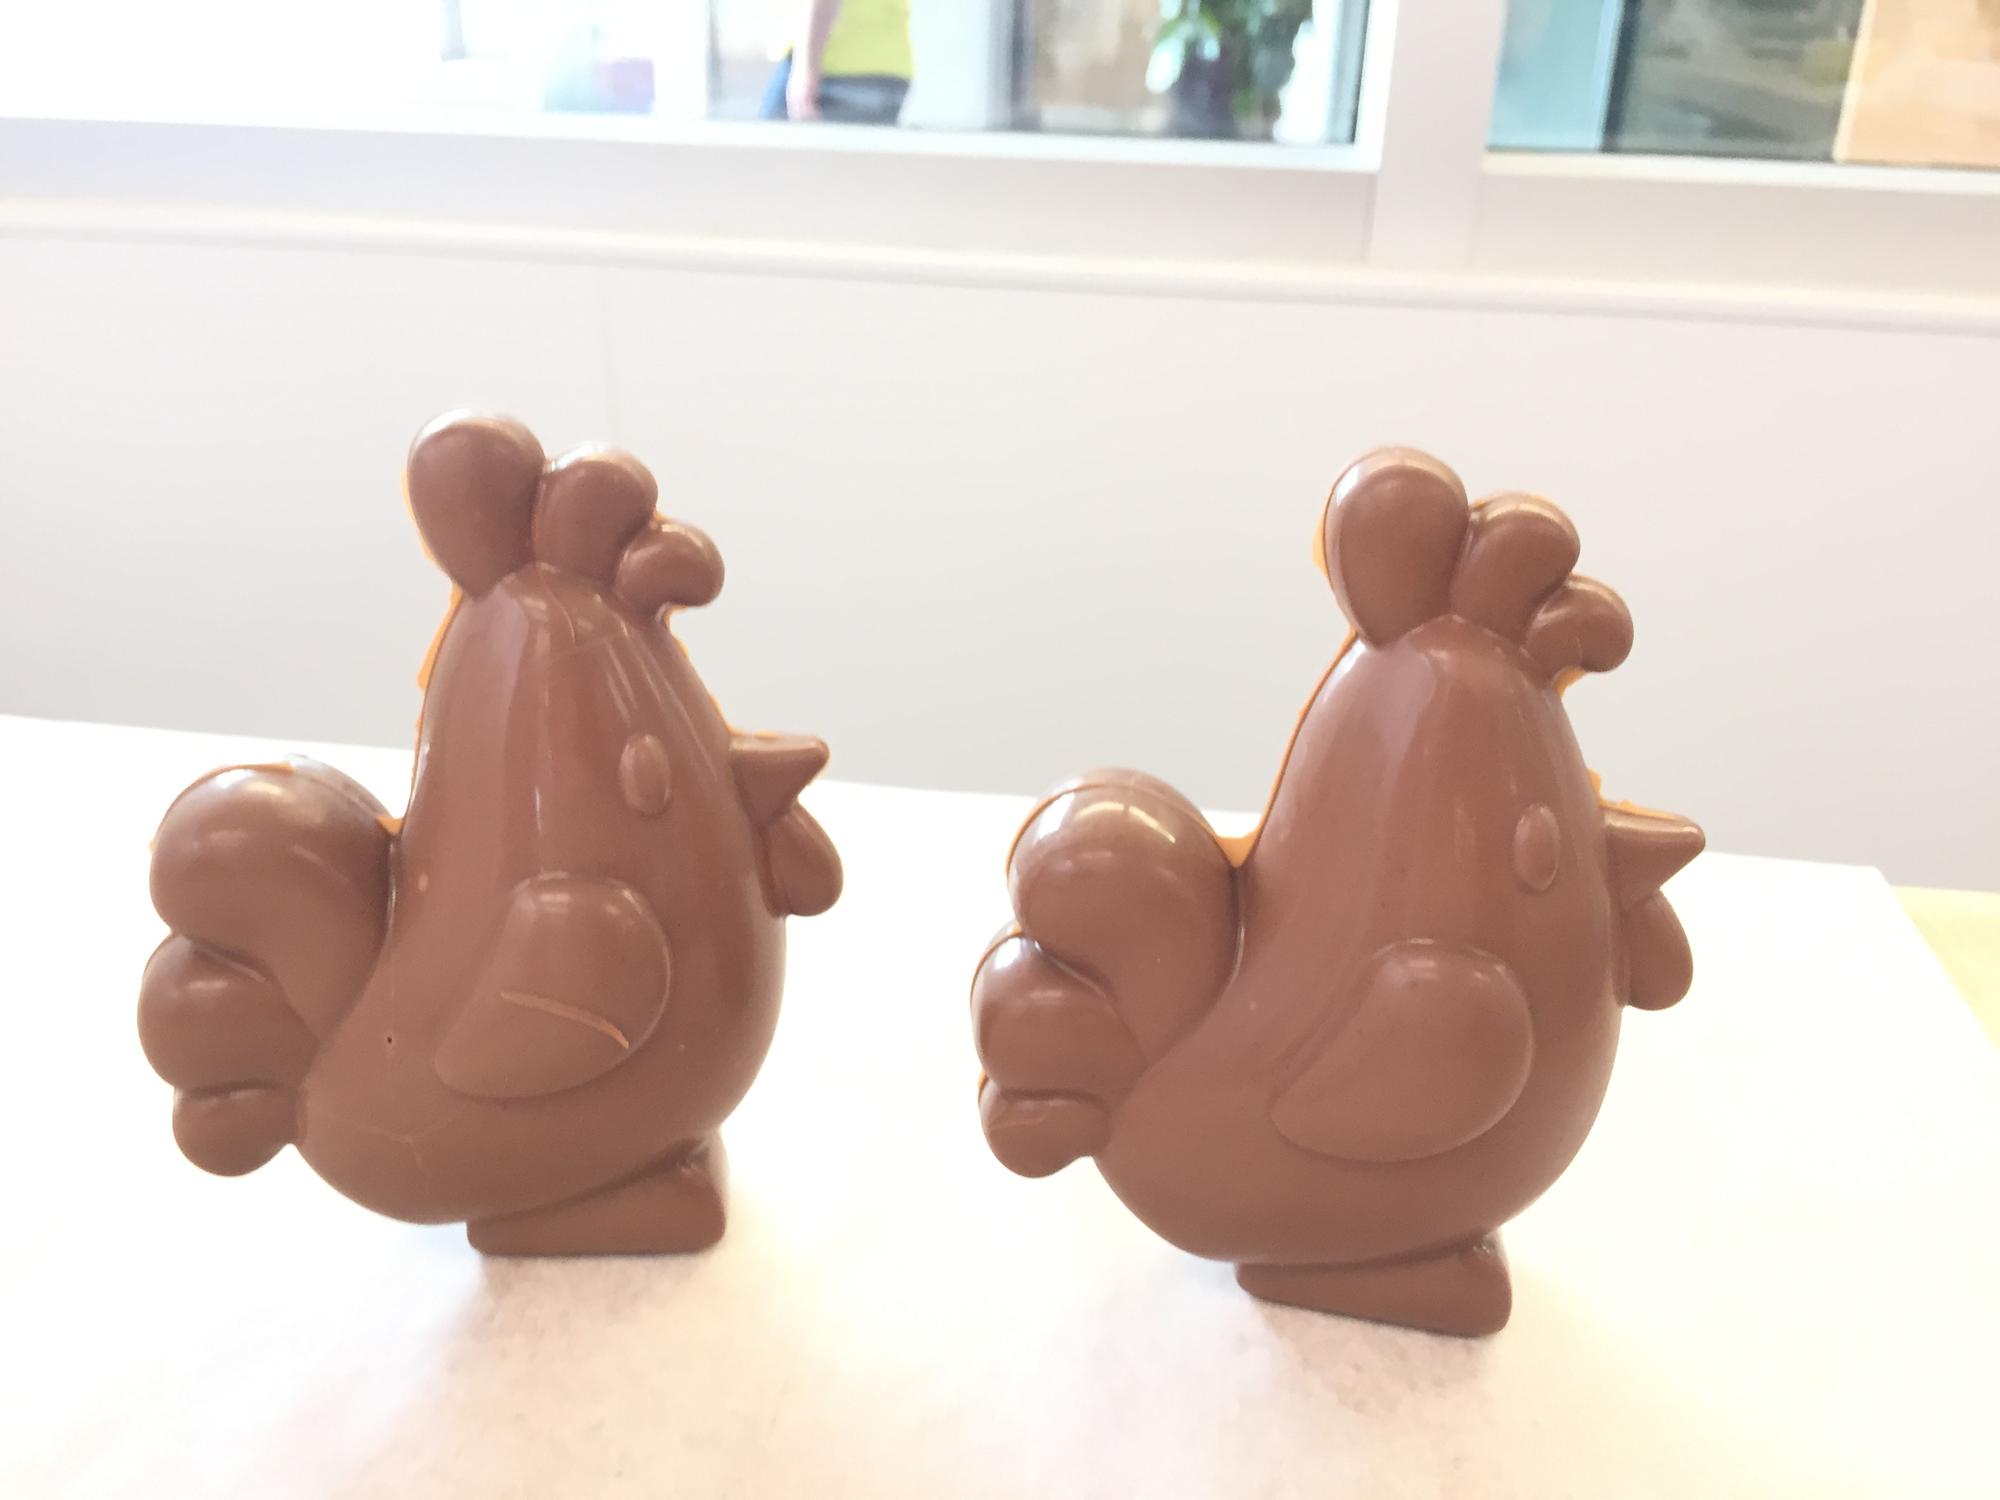
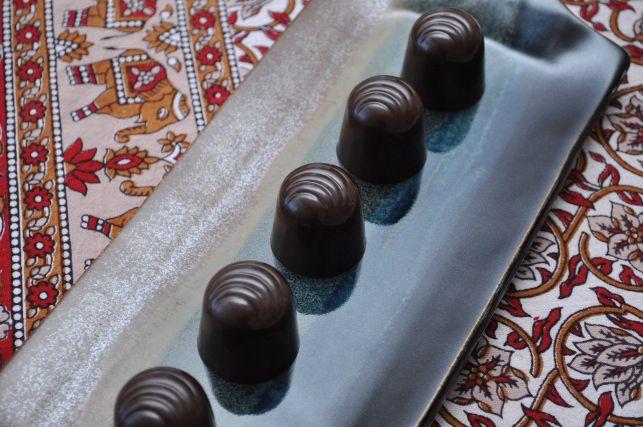
Today I made moulded bonbons, using Greweling's hazelnut gianduja recipe for the filling. We used the Vitamix to grind the heck out of the hazelnuts and incorporate the icing sugar and milk chocolate. The result was a wonderfully smooth texture, and it tempered nicely on the slab. The Vitamix really heats up as it goes though, so this is something to keep an eye on. Close-up of a finished bonbon. This was my first use of a new set of moulds (from Chocolate World) that I got for Christmas, and which are eventually destined for cherry cordial use. They are really big, though, which is great for being able to fit a full cherry and fondant, but less good in terms of how much chocolate is needed to fill the moulds, and how much filling is then needed. I did up a partial batch of gianduja (about 650g total finished weight) and needed every last gram of it to fill 24 moulds. A row of finished chocolates. I'm really happy with the end result, but given the size, I think these are more in the category of dessert for a day, rather than snack-size treats. Neko, our Japanese good-luck cat, serving as an indicator as the chocolate size, and also indicating a desire for a slightly larger chocolate!


-
As shown in this post, I just used regular Jif when I made them: it's not a problem at all, though Jif's ingredient list is none too exotic. Thanks Chris. I was reading over your great series of PBJ posts yesterday night - after my slab had started setting up - and saw the picture. I just wasn't sure if Jif made an all-natural brand (especially as we don't get Jif in Canada, as far as I can tell). I normally use a regular Kraft brand, which has the benefit of not needing to be refridgerated once open, and I'd prefer to go that route in the future.
-
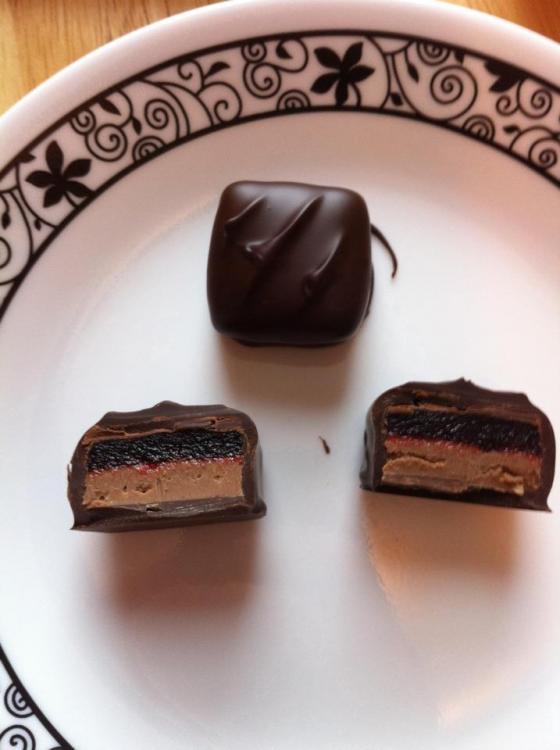
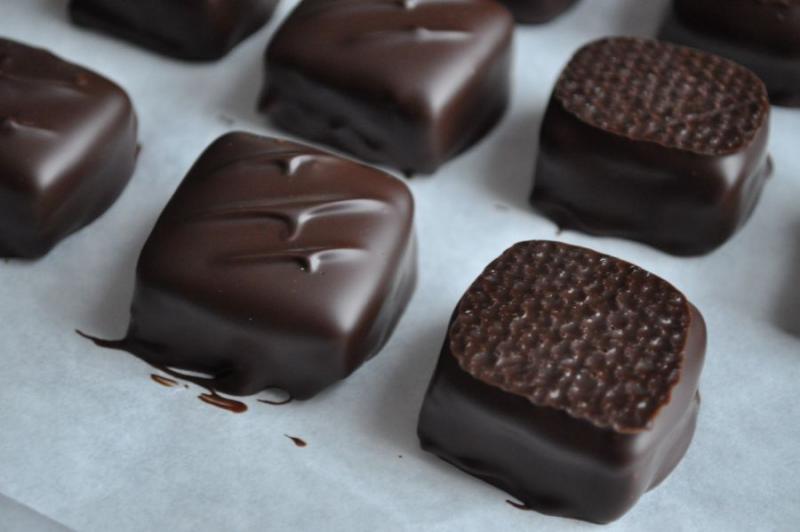
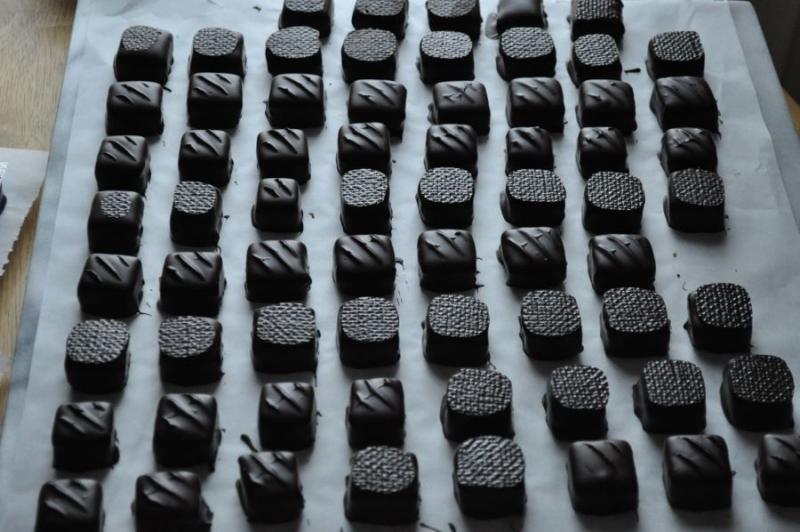
I made the PBJs this weekend. I had a bit of trouble with the jelly layer because for some reason the temperature rose rather erratically (up to 214, then down to 204, then up and down for over 10 minutes) and then it very rapidly rose to 223, catching me by surprise. I'm much more comfortable with chocolate work than candy, and issues like this are the reason. As a result, the jelly layer is a little bit firmer than might be ideal, but it's still quite acceptable, and it made the centres very easy to dip. The peanut butter gianduja was a delight, and set up nice and firm. I used one of the natural ones (Kraft makes a 100% peanuts version) on the advice of my partner, who cautioned that the stabilizers in a number of the commercial brands might be a problem. Had anyone tried to use the ones with additives, and did it make a difference? I also attempted using texture sheets for the first time on a number of the chocolates, and I'm pleased with the overall results, although some of the sheets seem to have trapped some tiny air bubbles. The final product is delicious! Close-up of the finished chocolates (Photo credit: mkayahara) An array of PBJs (Photo credit: mkayahara) In cross-section (My less skilled photography)