

pbear
-
Posts
621 -
Joined
-
Last visited
Content Type
Profiles
Forums
Store
Help Articles
Posts posted by pbear
-
-
If anyone's interested, the mention of patents in Deryn's Star Chef's link made me curious. These are the ones I found (there may be others). US 20070031574 (Han, Song & Eom); US 8187654 (same); US 20110129580 (Ko, Ko & Ko); US 2011029380 (same); EU KR20090055090 (Kim, Kim & Kim). Most interesting for present purposes is the last one, which is surprisingly similar to the method Kerry is testing.
-
 2
2
-
-
Was looking into this last night also and noticed a lot of fluttering over just what's happening during the process. From what I can tell, it's an enzymatic reaction. This counts as fermentation. At least that's my understanding and Merriam-Webster thinks so also.
For another interesting thread on the topic, see stackexchange.com. And here's the commercial machine.
-
2
-
-
10 hours ago, Porthos said:
I was not pleased woth the outcome. Not mushy exactly, but losing the resistance and texture of beef. Flavor was just ok but I don't think I seasoned it very well.
That's why we do trials. It takes a little time to dial in what works for you and sometimes the answer is conventional. For example, I don't like low temp steak, nor seafood cooked to pasteurization. Both of those I cook conventionally.
ETA: I do like seafood cooked very low temp, but that generally only can be done safely with stuff that's been frozen to kill parasites.
-
Frankly, I don't think there's much difference in the outcome at those temps (and I use 131ºF for beef). And, yeah, bumping the temp a few degrees is prudent if you've got immune system issues to deal with. EnriqueB has argued for years here (sorry, no link handy) that there aren't as many studies at the lower temp as we'd like.
ETA: Here's a post by EB I particularly had in mind, which links to various earlier discussions of the lower limit issue.
ETA2: I use 131º for short cooks of beef. For long cooks, I don't go below 135º, in part because of this issue.
-
FWIW, haven't done top sirloin (to my recollection) but do bottom (tri-tip) from time-to-time. That I routinely cook 8 hours, as I find it benefits from some collagen reduction. I think top would be okay at six.
No idea about your general question, btw. Decided fairly early on that I was better off working out times to my own preference.
-
2
-
-
8 hours ago, HungryChris said:
And how would you like it presented?
HC
Surely how the meal is "plated for service" is the host's responsibility.
")
-
2
-
-
"Well, you know, which salt you use depends on the dish."
-
6
-
-
I also can report having successfully dried and revived a starter. Stored in the fridge rather than the freezer.
-
Jo, as it happens I was fiddling with cooking burgers in stainless steel last week (normally use cast iron). What I found worked for cleaning was to just cover the bottom with water (about 1/2 c) and add a splash of vinegar (about 1 tbsp); heat on low until steaming; turn off and let sit a few minutes. Easy peasy.
BTW, I didn't have any trouble getting medium burgers (pink middles), but I might be settling for less crust than you're trying to achieve. Try medium heat and flipping every two minutes.
-
I'm quite certain jmac means to reduce to the volume of the lemon juice, i.e., in your case, from 1-1/2 c to 1/2 c. Personally, I'd use concentrate rather than a reduction, as I think the flavor is better, but I suppose that's a point over which reasonable cooks could differ.
ETA: I almost said the first time that orange and lemon makes more sense to me than orange and lime, but decided that wasn't the question asked. Looking at the canonical lemon curd thread I notice a similar recommendation from another source, so I'll throw it out there.
-
No experience with pectin for baking, but some for jam. Looks to me like the recipe requires a low sugar pectin and you used regular.
For others, based on the Google translation, the insert calls for:
240g raspberry puree (or frozen or fresh raspberries mixed and chinoisées)
pectin 5g NH
caster sugar 50g
250g fresh raspberries
Mix 5 g pectin NH with 50g sugar powder. Add sugar mixture / pectin raspberry puree 240g , all in a small saucepan. Mix well with a magical spoon or a small whip, and bring everything to a boil for one minute (at this point, if you want to have an idea of the final consistency, just pour a drop on something cold well) . Pour the insert in a circle set to 16cm (Seal the circle with aluminum foil!) Add 250g fresh raspberries and reserve in the freezer for at least two hours (you can keep a few raspberries for decoration).
BTW, Paul, those CP Kelco booklets are awesome. Have saved copies.
-
1
-
-
Hey Shelby. FWIW, what I do for that sort of bread is use whole wheat pastry flour (finely milled), subbing out part of it with gluten. So, for example, my basic sandwich loaf uses 450 g bread flour (1 lb). For whole wheat, I'll use 420 g WWPF plus 30 g gluten, which as I measure them come in at about 3-1/2 c and 4 tbsp, respectively. For scaling purposes, I call both together "the flour." The flavor and texture of this mix is excellent, albeit a bit light for color. The latter can be boosted if desired by adding a little kitchen bouquet (1 tsp, 6 g).
-
2
-
-
As my mother likes to say, they're not the boss because they're infallible. No, essays doesn't sound academic. It sounds literary.
OTOH, as you obviously realize, probably not worth mounting the ramparts over.
-
Story in today's NYT on Kimball's next venture.
-
1
-
-
Just looked this up out of curiosity. For anyone who doesn't have the book, Rose's ricotta loaf is based on 500 g flour, with 250 g ricotta, 100 g butter, two eggs and 118 g water. So the hydration would depend on how thoroughly drained the ricotta. At 50% solids, the dough would come in at about 60% hydration. A dryer ricotta, of course, would bring that down.
ETA: On review, I realize that calculation is wrong. It's actually 65%, estimating the butter to have 12 g water and the eggs 36 g each (74% of 49 g net). Sorry, don't know what I did wrong the first time. Also, at least according to this site, commercial ricotta runs 70 to 74% water, which would explain why the recipe worked fine for Rose.
-
1
-
-
If it helps, I find lentils run about 200 g per cup. Which would say their "glass" is 6.4 fluid ounces.
You can confirm or disconfirm this by the method John suggests.
-
1
-
-
Don't normally post in this thread cuz my stuff isn't generally very interesting. Competent but ordinary. Thought today's loaf might be an exception. This is a recipe I worked up last year when I found myself with excess rye starter from experiments with different methods. On a lark, decided to try 100% rye, just winging it on instinct as I didn't really care how it came out. To my surprise, it came out quite well, earning a slot in my permanent recipe collection. When I went to write it up, did another run trying an idea Mick (bethesdabakers) mentioned a while back, doing it as a one-off starter, which eliminates the care-and-feeding issue. That also worked well, though in subsequent batches I occasionally had a starter never get going on the yeast side, for which I ended up building a back-up plan into the recipe. By the way, I notice there was discussion of pumpernickel about a week ago. FWIW, that's included in the recipe as a variation. I will mention that, based on my research, I think Bob's Red Mill is right (and King Arthur is wrong), so I sub out most of the flour with rye meal.
Anyhoo, here are a few show-and-tell pictures with my Flintsones-era digital camera. For reference, the pan is 2.5 inches deep, so the rise is about half-an-inch. Not bad for a 100% rye, comparable density to anything I can buy. And the flavor is fantastic
.
.jpg.284af1dabf4745de43fa3d012756ec04.jpg)
.jpg.742d20e699348de948000c19b4f0a89b.jpg)
.jpg.7200628fb59efa76b85fa92e7b9a0fb6.jpg)
If anyone is interested, here is a pdf of the recipe: Rye Bread (100% rye flour).pdf. This is excerpted from my personal cookbook; not published, just something I share with family and friends. Because of the intended audience, be aware there's a bit of psychology in the write-up. One of the questions I usually get is, "Do I have to go through all that?" For which I've learned it's easier to say, "Of course not, but it won't be as good." Hence the cheater version, the point of which is to demonstrate why it's worth going to the trouble of building the starter.
-
10
-
-
You're being hyperbolic. It's not a difficult technique to do correctly. And if one waits until the oil is smoking to start cooking, they're doing it incorrectly.
-
1
-
-
By the way, discussion today with a friend raised an issue I’d like to clarify. The above is a reconstruction. AFAICT, no recipe for the original dish survives. So, succotash derives from an Algonquian word, msickquatash, which is variously translated as cooked corn or cracked corn, but generally understood to mean a dish of starchy corn with beans. Most sources agree the corn was treated with wood ash to remove hulls and that the beans would have been something like cranberry beans as limas didn’t grow that far north. Other than this, no one agrees on anything and I’ve been unable to locate a primary source giving a detailed description, much less a recipe.
So, I imagined myself working up the recipe had I lived there at the time, for which this article about native American horticulture gave me a good frame of reference. Then I translated that concept recipe to modern terms, as I’m not trying to feed a homesick Wompanoag (the tribe which introduced the dish to the Pilgrims). In particular, where the original probably included foraged vegetables and/or herbs, I went with the conventional modern base of onion, carrot and celery. Also, where the original apparently generally was flavored with venison or fish, I went with plain pork shoulder. Or, of course, the meat can be omitted for a vegetarian dish. In fact, it probably was often prepared that way of necessity, as this was one of the ways they got through lean winter months. And I added salt, which may not have been typical, plus black pepper and bay leaf, which certainly would have been unknown. Finally, where this probably was prepared in a single clay pot, I cooked the hominy and beans separately so I could be sure neither overcooked.
This turned out to be one of the more interesting new recipes I’ve tried in a while. Perhaps most surprising is that I can’t think of a way to improve it. Really wants to be a simple combination of hominy and beans, with only the lightest touch of supporting flavors.
-
2
-
-
Had some leftover hominy from Rancho Gordo, and also some beans, so decided to tackle a recipe which has been on my to do list for a while, to wit, Algonquian succotash, i.e., the dish which inspired the one we know by the name. Really pleased with the result, so thought I’d share. Didn’t try for a literal reproduction, which probably isn’t possible anyway, but rather for something which hits my palate the same way the original hit theirs. This picture doesn’t do the dish justice, but it’s the only digital camera I have.
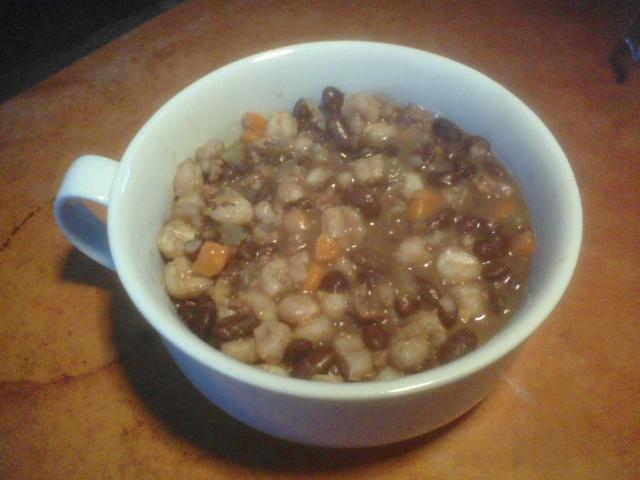
Don’t think exact proportions matter, but here’s what I did. Cover 1/2 lb dry prepared hominy (225 g) with water and soak overnight; bring to a simmer and cook until it blossoms like a flower, 2 to 3 hours. Meanwhile, combine 1/2 lb dried beans (225 g) with 4 c water (960 g) and soak overnight; bring to a simmer and cook until tender, about 1‑1/2 hours. Chop 1 med onion (170 g), 1 med carrot (140 g, 100 g net) and 1 stalk celery (50 g net); saute in 2 tbsp vegetable oil (27 g) until just tender, about 10 minutes. Add saute mixture to beans; also add hominy (drained), 1/4 lb pork shoulder (113 g) diced small (may be omitted), 1 tsp salt (6 g), 1/2 tsp black pepper (1.25 g) and 1 sm bay leaf (0.12 g); simmer covered one hour.
Note: For this batch, I used San Franciscano beans, as that’s what I had on hand. Almost any bean may be used, except I’d avoid light colored ones, for the dish benefits a lot aesthetically from a visual contrast between them and the hominy. Also, that’s how I did the beans this time, one of several methods I use, but another would work just as well.
-
6
-
-
A pound of cheese for 12 ounces pasta and still not "cheesy" enough? Yikes! Anyhoo, sodium citrate is only going to help if you're having a problem with the sauce breaking or being gritty. What you might do instead is a modernist M&C incorporating the flavors from Ruhlman's recipe but losing the bechamel.
-
2
-
-
Umm, from the article, "After about 20 minutes, the liquid has reduced and the rice sticks flat to the pan. Navarro doesn't have to taste it to know it's done. She plucks the pan out of the fire and leaves it to rest."
-
Alas, my experiment was not successful. Seemed to be going well for three generations, then activity fell off noticeably with each subsequent division till now I have what I call a hospice starter, alive but just barely. Don't know what went wrong, but don't think it was competing flora, as the starter neither smells nor tastes sour. Rather, I think I wasn't getting doubling of the yeast, perhaps because of insufficient incubation and/or fermentable starch (temp was okay for sure). Anyhoo, I no longer try to revive hospice starters, instead pitching and starting over. Except I was only doing the experiment out of curiosity - don't have any trouble making bread the regular way - so I'm gonna let this go.
Good luck, Barney, in your endeavors.
-
1
-
-
Barney, a few tips. If you want to go the sourdough route without it being too sour, you'll get better results if you buy the starter. Sourdoughs Int'l (sourdo.com) has several mild ones. A starter you develop in your own kitchen (for free) may or may not be mild, but probably not.
If you stick with commercial yeast, you have to chill between incubations because otherwise the bacteria will take over. Not even daily use will prevent this; in fact, most sourdough starters are pared back and rebuilt daily. By incubation I mean the period at warm temp when you're letting the yeast reproduce. For my experiment, I'm using four hours. Don't think I would consider going more than six. Bear in mind you just need the yeast to double.
As for coordination with your recipe, my strategy is to size the starter to make that easy. For example, I'm going to be using this starter in a simple sandwich white based on 450 g flour (1 lb, about 3.4 c by the stir-scoop-and-sweep method) and 300 g water (1-1/4 c). I prefer starters with a 2:1 ratio by weight, so I set up this one with 240 g water (1 c) and 120 g flour (just under a cup), plus 1 tsp dry yeast. Ran four hours, stirring down halfway through and again at the end, then chilled. Next day, discarded half and replenished with 120 g water and 60 g flour (no more yeast). Lather, rinse, repeat.
When I go to bake, the half I've been discarding is what will go into the bread. I know that's 120 g water and 60 g flour (scant 6 tbsp by volume), so I'll adjust the other quantities accordingly. For your bread machine recipe, you might need a slightly larger starter, but the principles remain the same.
Hope that helps.
ETA: I'm doing the pare-and-rebuild thing for two reasons. First, I'm curious whether this is a viable long term strategy. Second, I'm trying to develop a mild bacterial culture. If this works, not yet tested, the discards could have been used to bake all along, but I don't have the time, nor the need for that much bread.
Black Garlic
in Cooking
Posted · Edited by pbear
update (log)
Conversely, I don't think it's possible to get Maillard reactions at that low a temp and almost certain it's not possible to get caramelization. For reference, McGee gives 250ºF/120ºC as the lower limit for the former and 330ºF/165ºC for the latter (OF&C, 2d ed at p.779). Even fructose has a lower limit for caramelization of 220ºC/105ºC (id. at p.656).
I've tried to find a scientific article on the process, as opposed to hunches by foodies, and so far been unsuccessful.
ETA: Finally found one. Comprehensive NMR Analysis of Compositional Changes of Black Garlic during Thermal Processing, J. Agric. Food Chem., 2015, 63 (2), pp 683–691, Liang, et al. (2014). Full text available in pdf and html at this page. Main focus is on what happens, i.e., the specific amino acid and sugar changes. As for how, says "may have been caused [in part] by ... Maillard reactions" (pdf at p.6), but doesn't seem to have been a point they considered particularly important.